

Running out of counter space again? Staring at cabinets so crammed you’re afraid to open them? You’re not imagining it—small kitchens are frustrating. Every inch matters when you’re trying to cook, store groceries, and keep things from looking like a disaster zone. But here’s the thing: size isn’t your real problem. It’s how you’re using the space you have.
Small kitchen organization isn’t about buying more stuff or doing a complete renovation. It’s about working smarter with what you’ve got. The tiniest kitchens can function like dream spaces when you know which tricks actually deliver results. These 17 ideas will show you exactly how to reclaim your counters, maximize your cabinets, and finally stop playing Tetris with your pots and pans.
1. Install a Pegboard Wall for Instant Vertical Storage
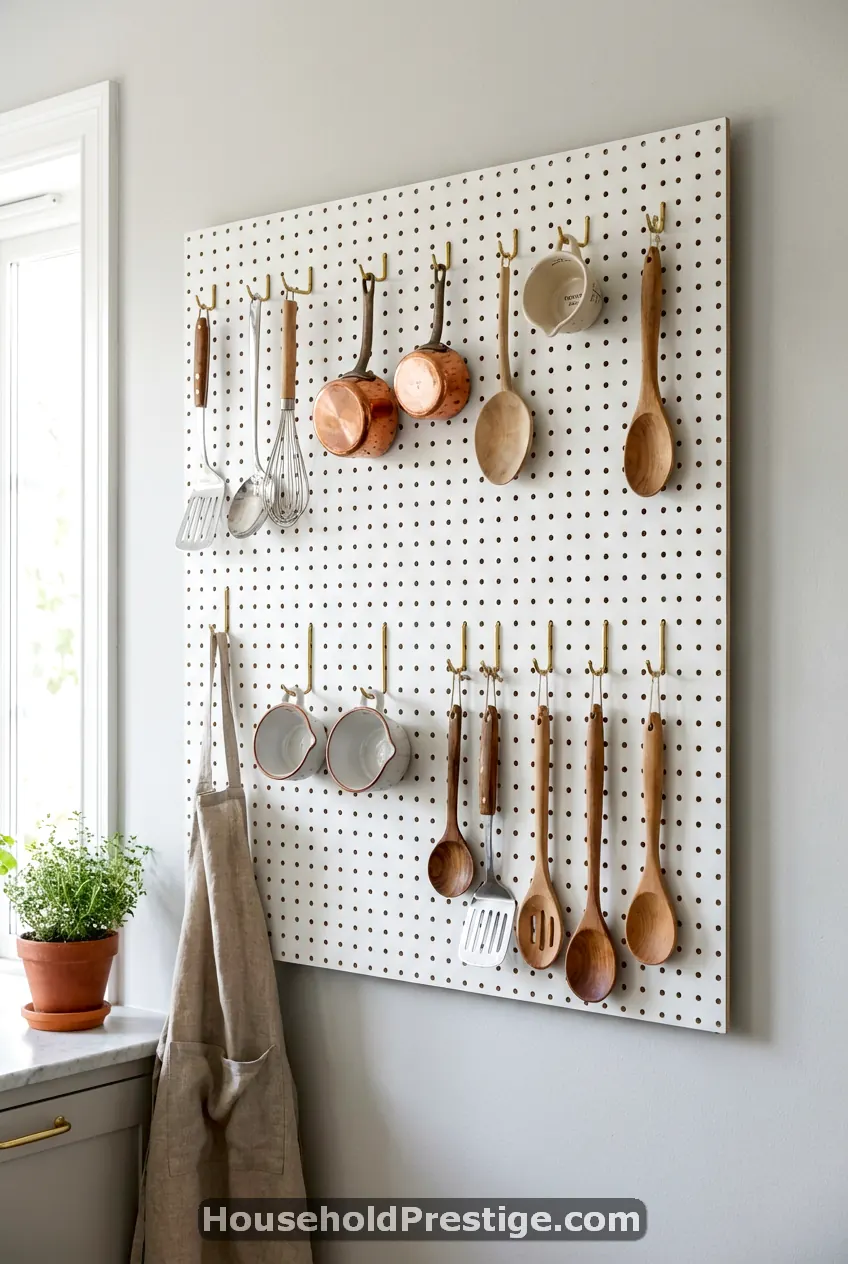
Most people waste their wall space. A pegboard changes that immediately. Mount one above your counter or stove, and suddenly you’ve got customizable storage for utensils, pots, measuring cups, and even small shelves.
The beauty of the pegboard is its flexibility. You can rearrange hooks and holders whenever your needs change. No drilling new holes, no commitment. Grab a 24×32-inch pegboard from any hardware store (usually under $15), paint it to match your kitchen, and use S-hooks or pegboard accessories to hang everything from whisks to cutting boards.
Pro tip: Use a level during installation so your pegboard doesn’t look crooked. Mount it into studs if you’re hanging heavier cast iron pans. For lighter items, drywall anchors work fine.
This setup typically frees up 1-2 full drawers’ worth of space. Your most-used tools stay visible and accessible instead of buried in the back of a drawer.
2. Use Tension Rods to Create Dividers in Deep Cabinets
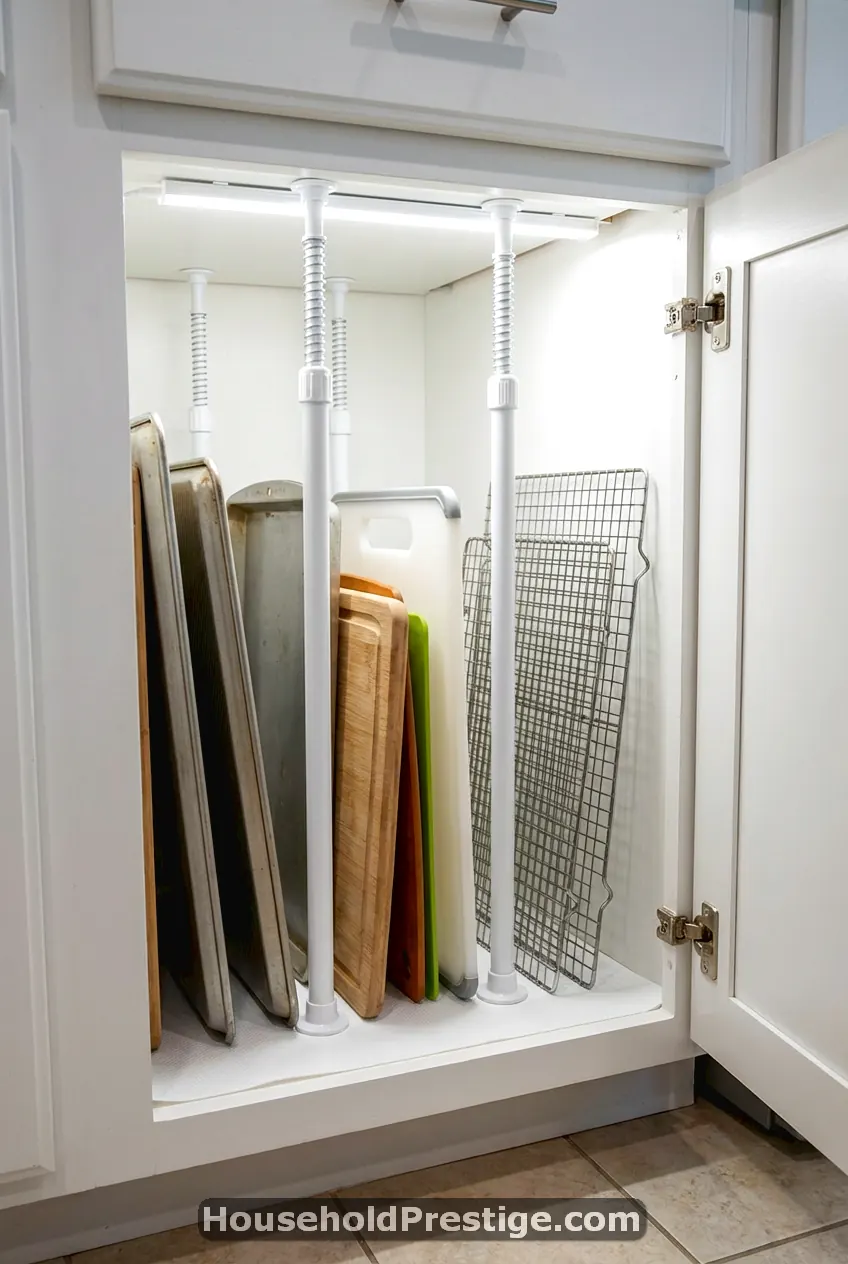
Deep cabinets are black holes. You shove baking sheets and cutting boards in there, and they collapse into a useless pile. Tension rods fix this in about 30 seconds.
Buy 2-3 spring-loaded tension rods (the kind you use for shower curtains) and install them vertically inside your cabinet. They create slots that hold baking sheets, cutting boards, cooling racks, and serving platters upright. No more avalanches when you grab one item.
This works especially well in cabinets next to your stove or oven. You can size tension rods to fit any cabinet width—most are adjustable from 16 to 28 inches. Cost: about $8 for a two-pack.
Make sure the rods press firmly against both cabinet walls so they don’t slip when you slide items in and out.
3. Magnetic Knife Strip Doubles as Multi-Tool Holder
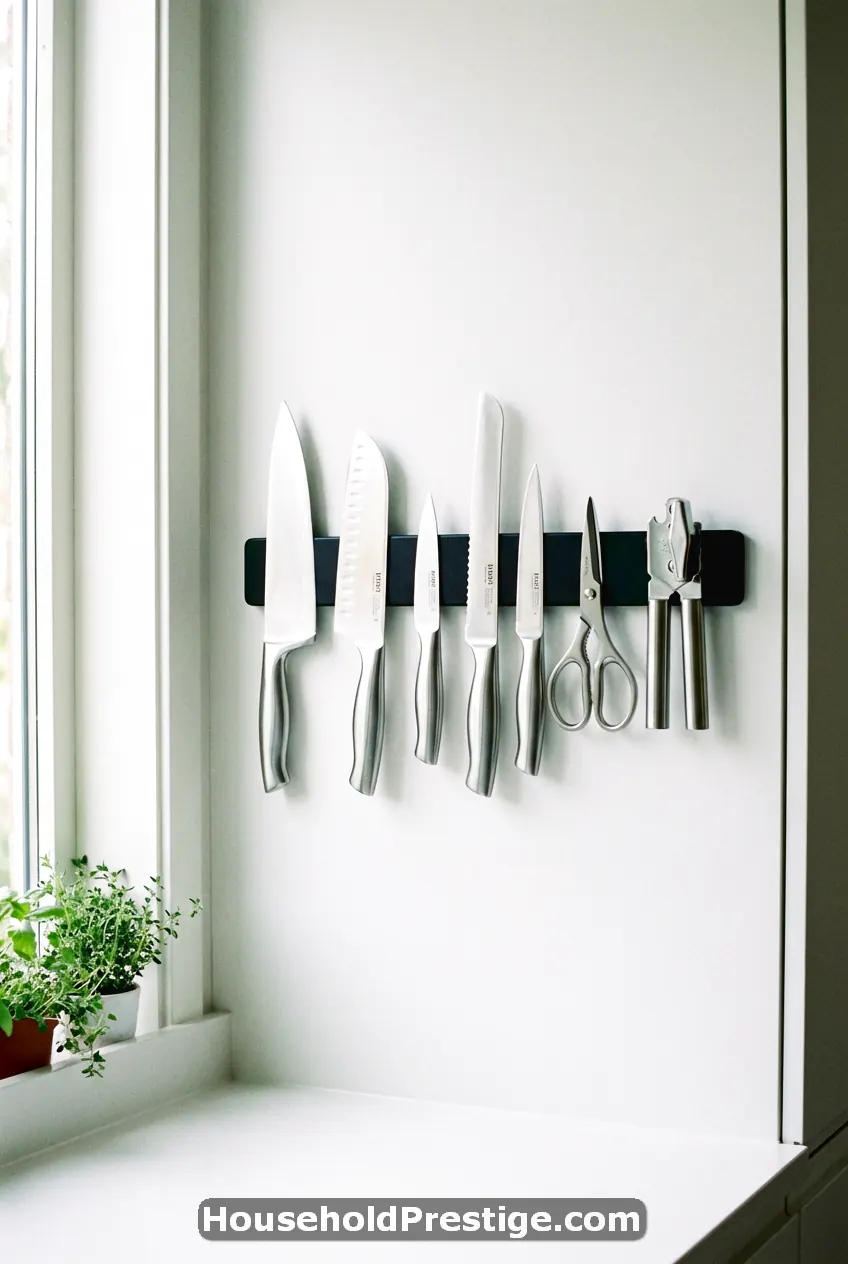
Knife blocks eat up precious counter space. A magnetic knife strip mounted on your wall holds knives flat and takes up zero horizontal space. But don’t stop at knives.
Metal kitchen tools—scissors, can openers, vegetable peelers, even some measuring spoons—will stick to that same strip. An 18-inch magnetic bar can hold 8-10 knives plus several other metal tools. That’s an entire drawer’s worth of storage moved to a 1.5-inch strip of wall space.
Mount it within arm’s reach of your cutting board area. Make sure it’s high enough that kids can’t reach sharp blades, but low enough that you’re not stretching.
Material matters: Get a strong neodymium magnet strip (around $20-30), not the weak ones. Cheap magnetic strips let heavy chefs’ knives slide down over time.
4. Over-the-Sink Cutting Board with Integrated Colander
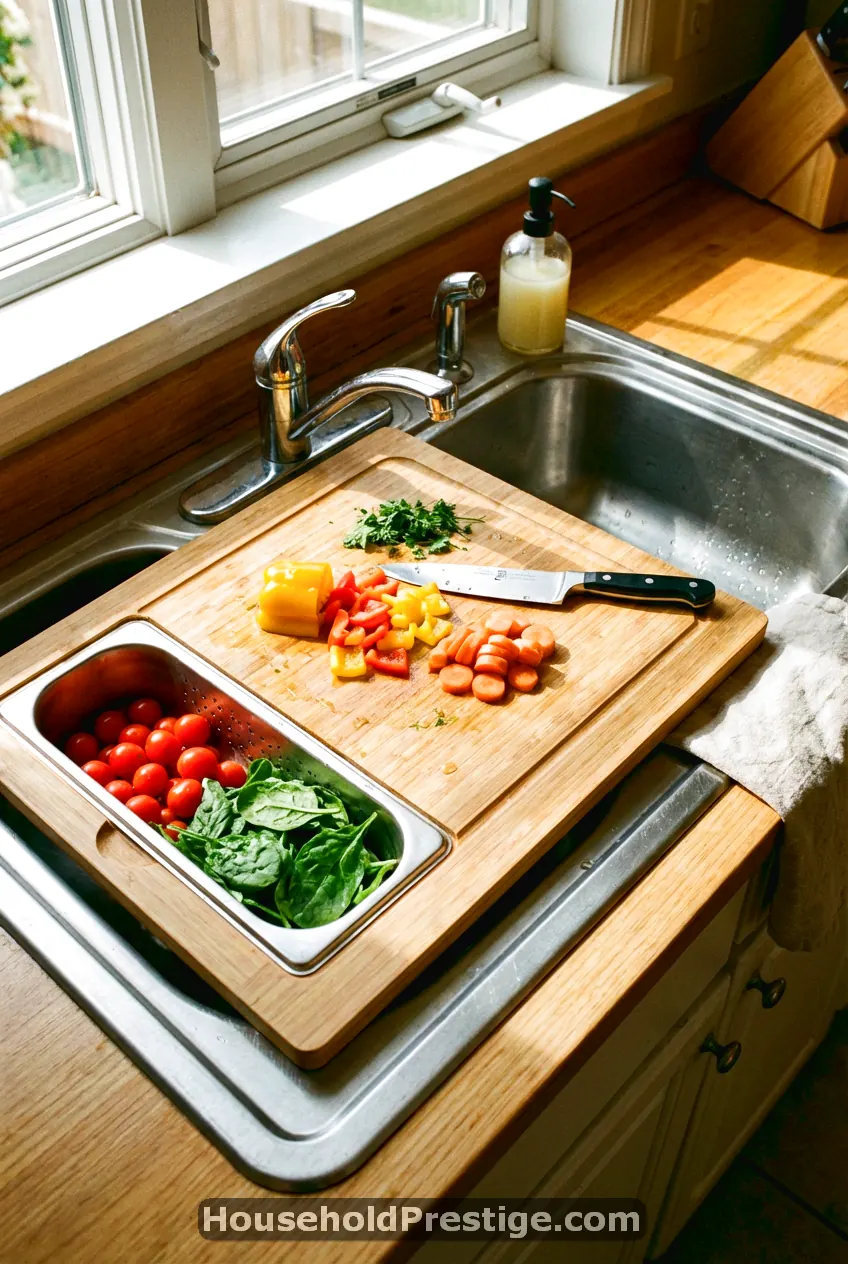
Your sink is wasted space when you’re not washing dishes. An over-the-sink cutting board sits on top of your sink, instantly giving you more prep surface. The smart versions have a built-in colander section, so you can chop vegetables and rinse them without moving to a different spot.
These boards typically measure 15-20 inches long and 8-12 inches wide. They rest on the rim of your sink using rubber grips so they don’t slip. When you’re done, rinse it and hang it on a cabinet door hook. Zero storage space needed.
This is especially clutch in kitchens with only 12-18 inches of counter space. You’re literally creating a workspace out of thin air. Prices range from $25-45 depending on the material. Bamboo versions hold up best against moisture.
5. Stackable Clear Storage Containers for Pantry Items
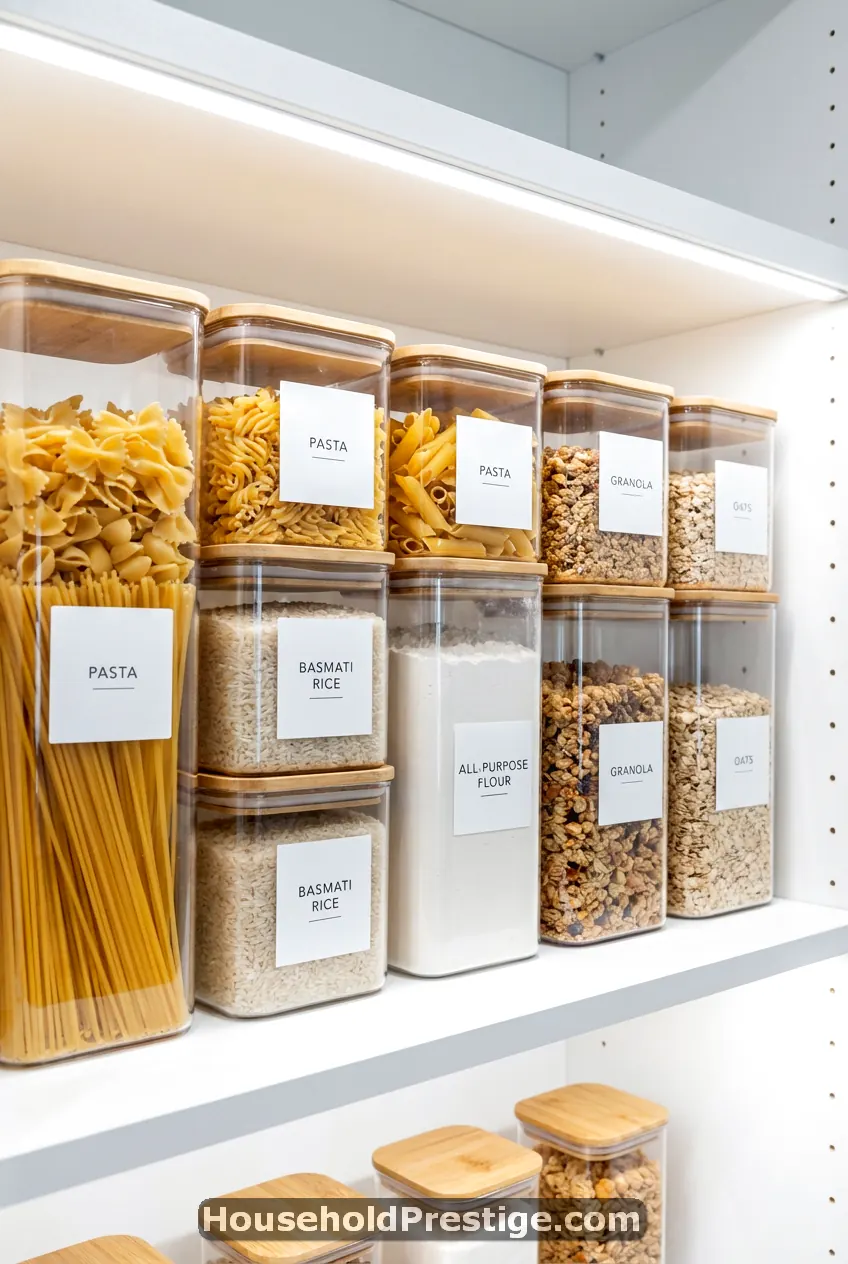
Cardboard boxes and half-open bags create chaos. Transferring dry goods into clear, stackable containers makes everything visible and doubles your usable shelf space.
Here’s why this works: uniform containers stack securely. Random boxes and bags don’t. A set of 8-12 airtight containers (varying sizes from 0.5L to 3L) can store flour, sugar, rice, pasta, cereals, snacks, and coffee.
What to buy: Look for BPA-free plastic or glass containers with airtight lids. Square or rectangular shapes use space more efficiently than round ones. Label them with a chalkboard marker or simple labels.
The math: A typical small pantry has 24-30 inches of shelf width. You can fit about 6-8 medium containers per shelf when stacked two high. That organizes 12-16 pantry items in the space that used to hold maybe 6 messy boxes.
Bonus: You’ll actually see when you’re running low on something instead of buying duplicate items.
6. Pull-Out Cabinet Organizers Under the Sink
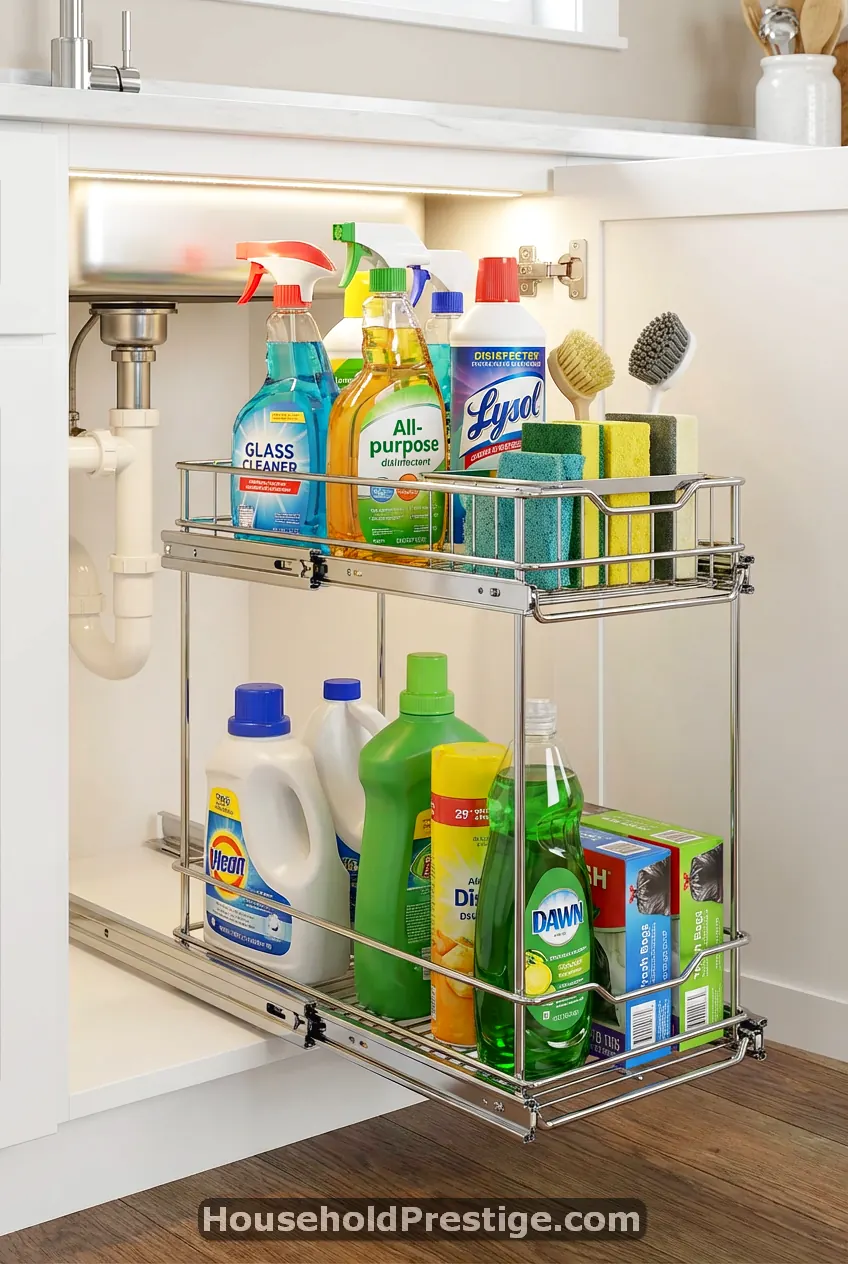
The cabinet under your sink is usually a nightmare of cleaning supplies, trash bags, and random bottles. A pull-out drawer system transforms that space into accessible, organized storage.
These organizers are metal or plastic sliding drawers that install in about 15 minutes with a screwdriver. They pull out fully so you can see everything—no more reaching blindly into the back of a dark cabinet.
Sizing matters: Measure your cabinet interior width and depth before buying. Most under-sink organizers come in standard sizes: 11-inch, 15-inch, or 20-inch widths. The two-tier versions (around $35-50) work best because they separate cleaning products (top tier) from trash bags and extras (bottom tier).
If you have a garbage disposal or complex plumbing, look for organizers with adjustable shelves that work around pipes.
This single upgrade typically saves you 5-10 minutes per week of digging around for supplies. It sounds small, but that’s 8+ hours per year.
7. Lazy Susan Turntables in Corner Cabinets
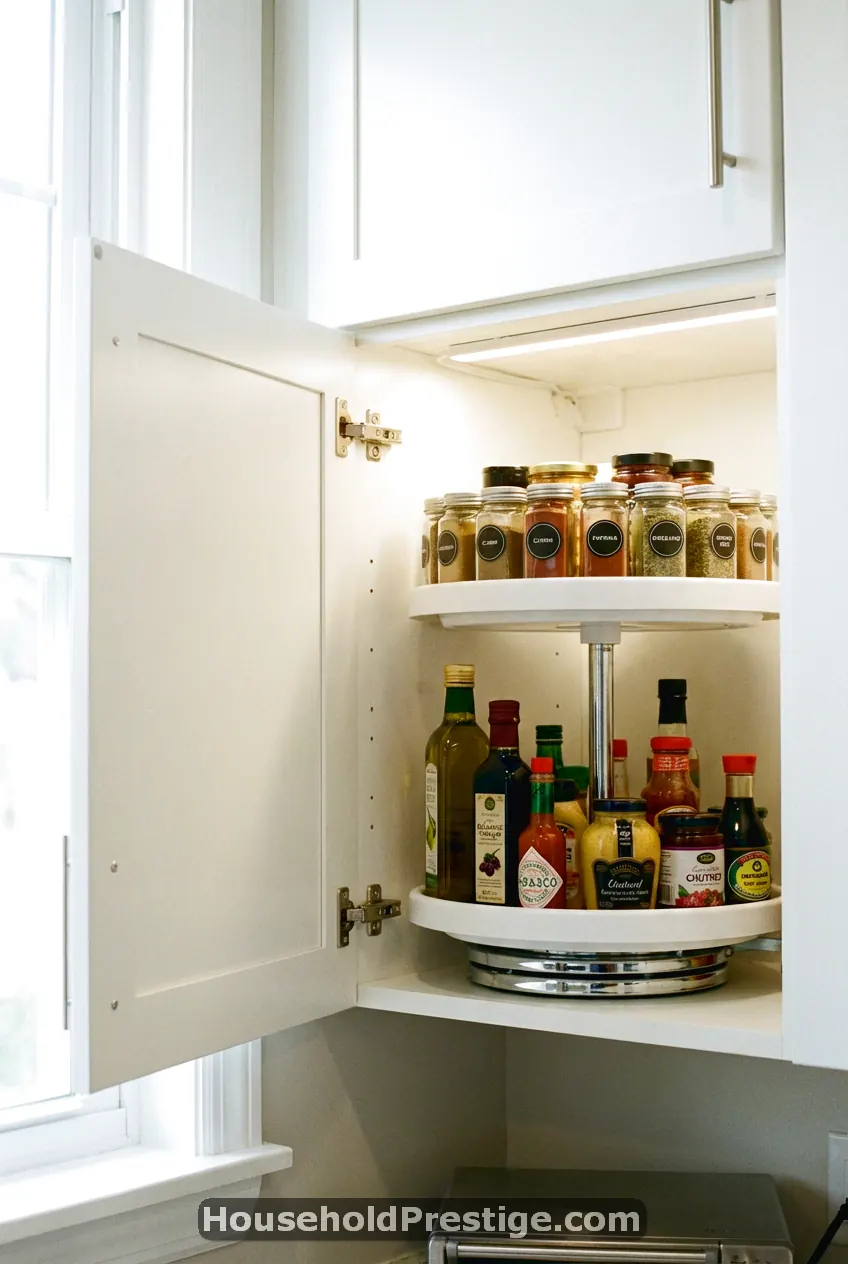
Corner cabinets are space killers. You can’t reach 60% of what’s in there without getting on your hands and knees. Lazy Susan turntables solve this with one simple rotation.
A 10-12-inch turntable fits in most corner cabinets and makes everything accessible with a spin. Use them for spices, oils, condiments, canned goods, or baking supplies. No more buying duplicate vanilla extract because you forgot you had one buried in the back.
Two-tier Lazy Susans are even better—they double your storage in the same footprint. A good two-tier model costs $20-30 and holds 24-30 items depending on size.
Installation: Zero installation needed. Just place it in the cabinet. For stability, use non-slip shelf liner underneath so it doesn’t slide around when you spin it.
If you have multiple deep corner cabinets, put one in each. The time you save not digging through those corners pays for itself in reduced frustration alone.
8. Hanging Basket System Under Cabinets

Look up. The space between your countertop and upper cabinets is usually empty air. Hanging wire baskets use that dead zone for storage.
These baskets attach to the underside of your upper cabinets using small screws or adhesive strips. Each basket hangs down about 6-8 inches and can hold produce, snacks, coffee pods, or kitchen linens. A set of 3 baskets (around $25-35) adds significant storage without touching your counter.
Best uses:
- Basket 1: Onions, garlic, potatoes (anything that doesn’t need refrigeration)
- Basket 2: Snack items like granola bars, nuts, or bread
- Basket 3: Kitchen towels, pot holders, or coffee filters
Make sure they hang at a height where you won’t bang your head. About 16-18 inches above the counter works for most people.
The visual bonus: this creates a cute farmhouse-style aesthetic while actually being functional.
9. Drawer Divider Inserts for Utensils and Tools
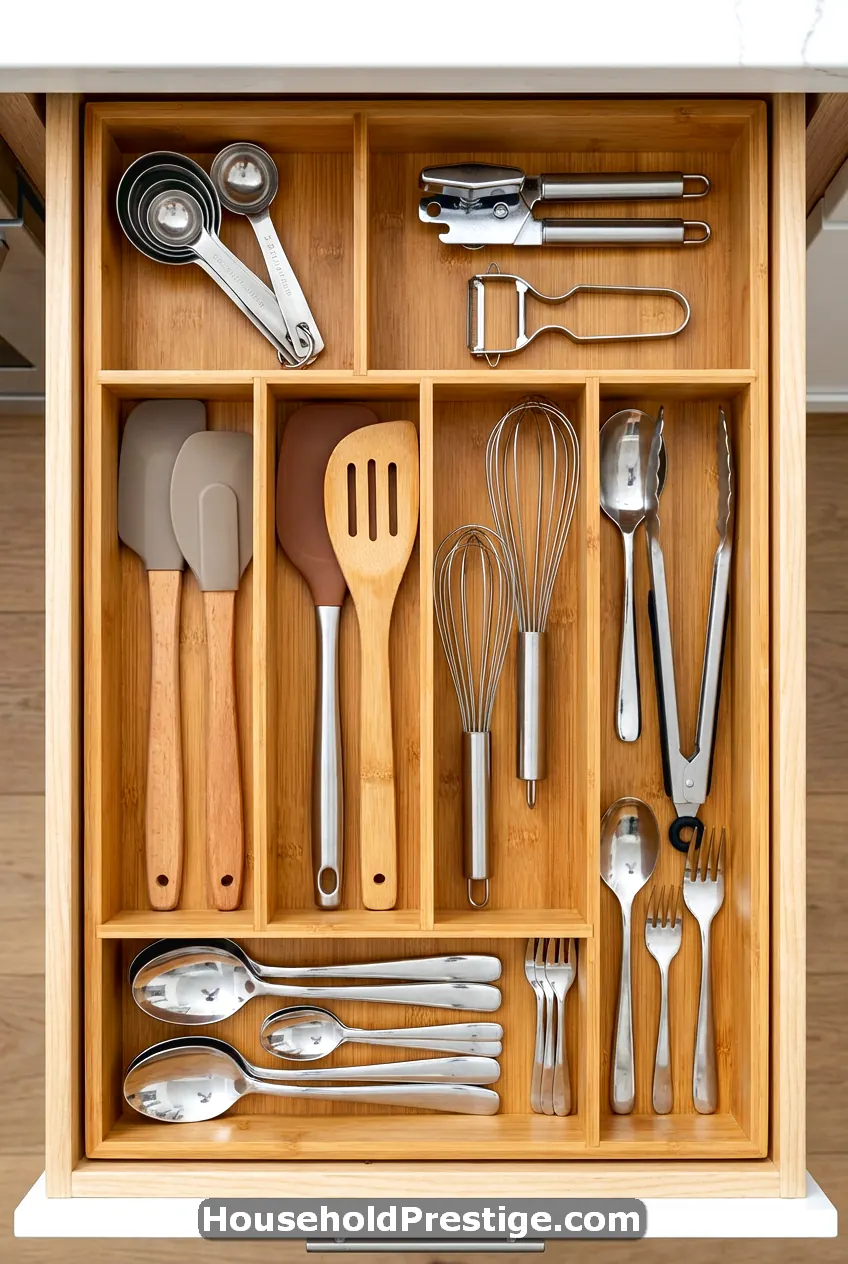
Junk drawers are productivity killers. You waste 30 seconds every time you hunt for a can opener. Adjustable drawer dividers fix this by giving every item a designated spot.
Spring-loaded bamboo dividers (about $15-20 for a set) expand to fit any drawer width from 12-20 inches. You create custom compartments for whisks, spatulas, peelers, measuring spoons, and other tools.
The psychology: When everything has a home, you put it back there. Your kitchen stays organized with zero extra effort.
Sizing strategy: Use 2-3 inch wide sections for small tools (peelers, can openers), 4-5 inch sections for spatulas and serving spoons, and dedicate one larger section (6+ inches) for weird bulky stuff like the pizza cutter.
This setup works in any drawer at least 3 inches deep. It takes 5 minutes to install and saves you hours of digging over time.
10. Slide-Out Spice Rack Between Fridge and Counter
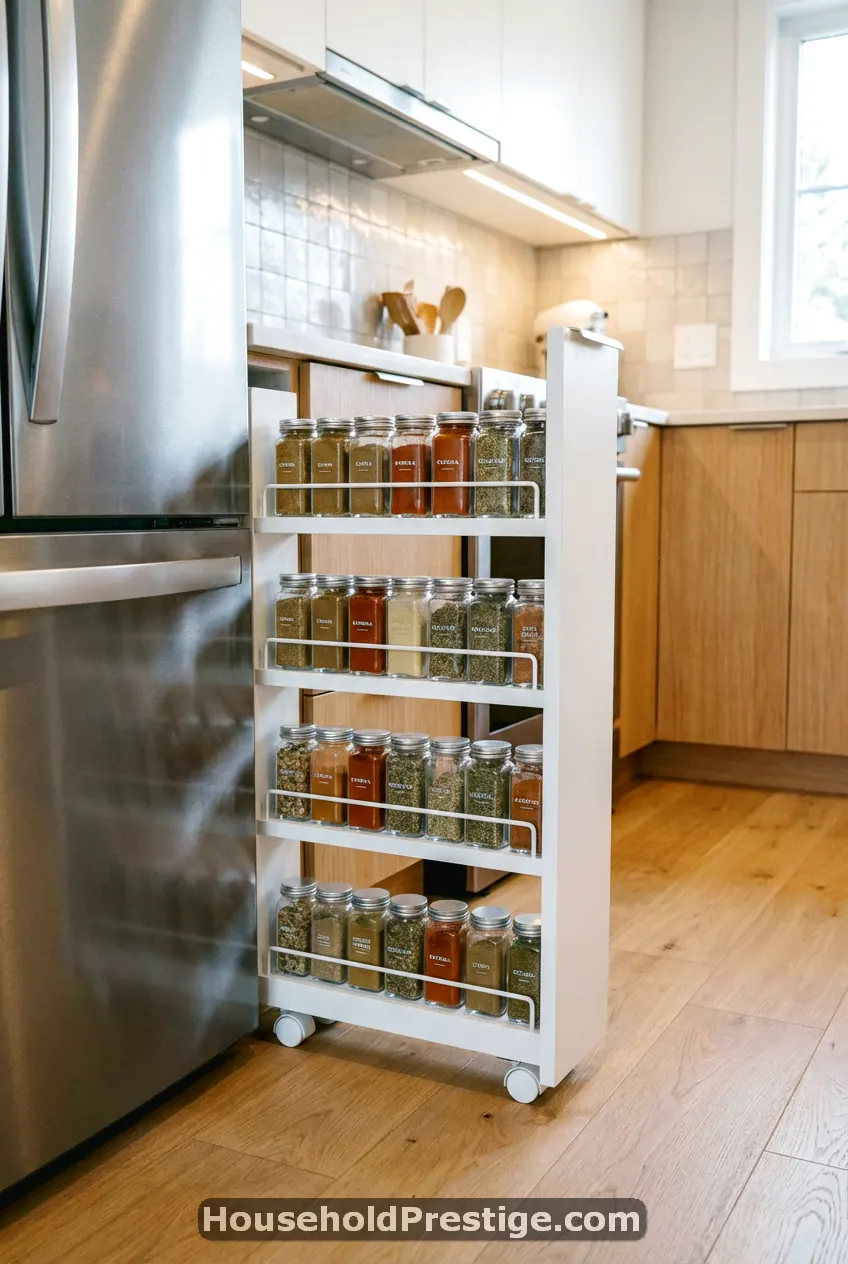
That narrow gap between your fridge and counter—usually 3-6 inches wide—is wasted space. A slide-out spice rack on wheels turns it into prime storage.
These slim rolling carts are 3-4 inches wide, 10-18 inches deep, and about 30 inches tall. They have 3-4 shelves and slide out when you need access. You can fit 40-60 spice jars in a space that was doing nothing.
Installation: Literally none. Just slide it in. Most have wheels and a pull handle.
Cost: $30-60, depending on height and material (plastic vs. metal frame).
This works especially well if you cook regularly and need quick access to many spices. Instead of digging through a cabinet, you pull out the rack, grab what you need, and push it back in. Takes 3 seconds.
11. Adhesive Hooks Inside Cabinet Doors
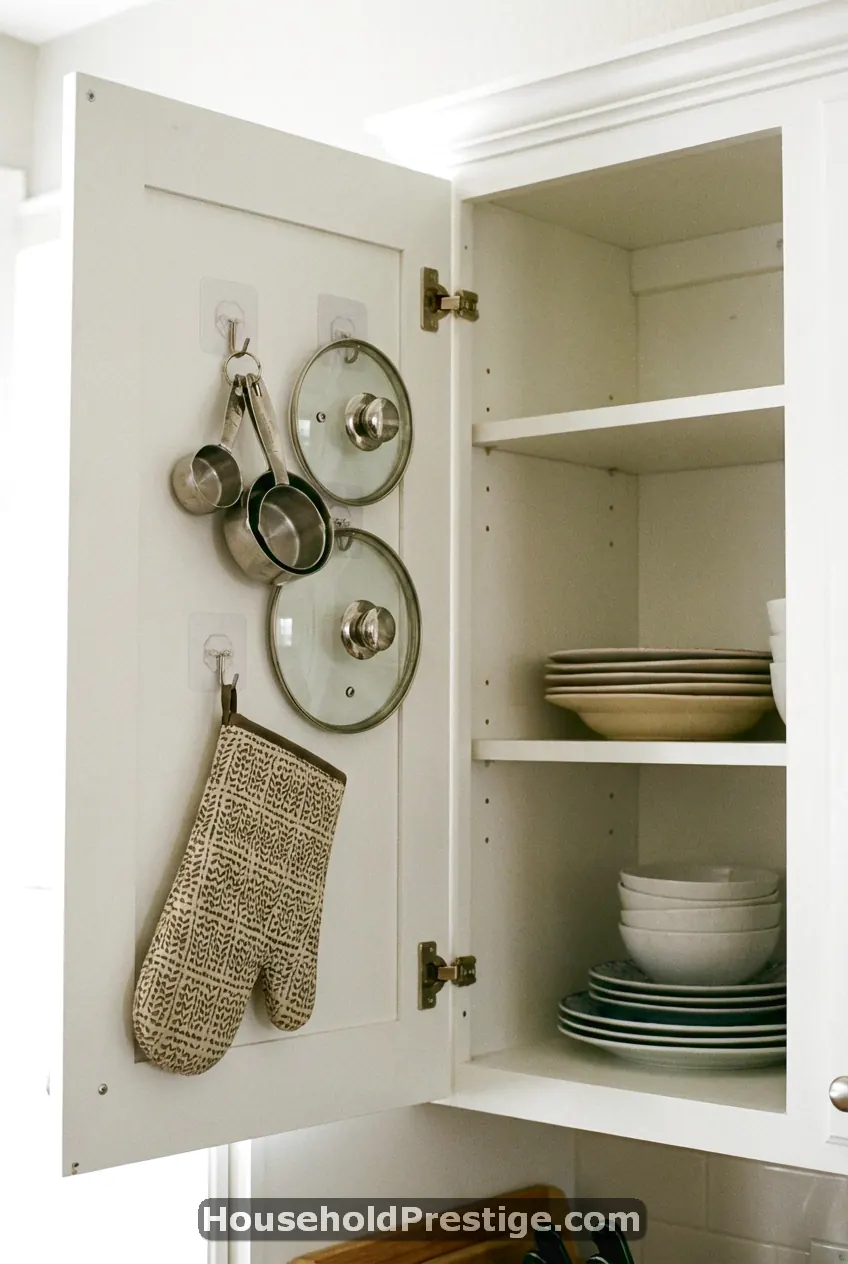
The inside of cabinet doors is usually blank space. Command hooks or adhesive hooks turn those surfaces into instant storage.
What to hang:
- Measuring cups and spoons on small hooks
- Pot lids on larger hooks (saves massive drawer/cabinet space)
- Oven mitts and dish towels
- Trash bags (hook the box itself)
- Aluminum foil and plastic wrap boxes
Each cabinet door can hold 2-4 items, depending on size. If you have 6 cabinet doors, that’s 12-24 items moved out of drawers and shelves.
Hook selection: Use adhesive hooks rated for the weight you’re hanging. Measuring cups need small hooks. Cast iron lids need heavy-duty ones. 3M Command hooks hold up to 7.5 lbs per hook and remove cleanly when you move.
Installation time: 30 seconds per hook. No tools needed.
12. Tiered Shelf Risers for Canned Goods and Plates
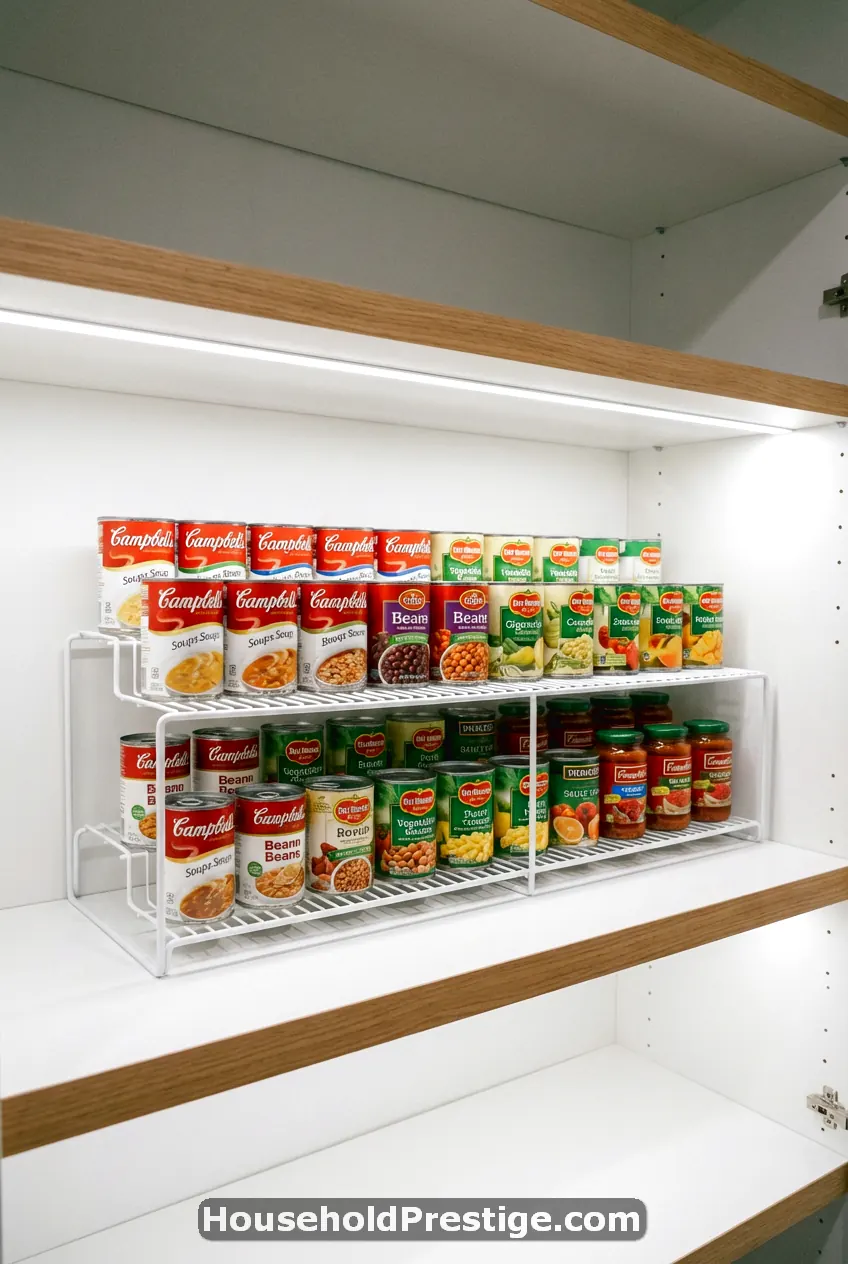
Stacking things directly on shelves wastes vertical space. You can’t see what’s in back, and you can’t access lower items without moving everything above them. Tiered shelf risers create stadium-style levels.
These are basically stepped platforms that sit on your existing shelves. A two-tier riser lets you stack canned goods or plates in a way where everything remains visible and accessible.
Dimensions: Most are 10-15 inches wide, 8-10 inches deep, and create a 3-5 inch elevation. You can fit 12-18 cans on a two-tier riser versus maybe 6-8 stacked normally.
Material options: Metal versions ($15-20) are sturdier for heavier items like canned goods. Plastic versions ($8-12) work fine for lighter stuff like spice jars or mugs.
Use these in pantry cabinets for canned goods or in upper cabinets for dishes. The visual clarity alone is worth it—you’ll stop buying duplicate items because you can see your entire inventory at a glance.
13. Over-the-Door Organizer for Pantry Items

The back of your pantry door is real estate you’re ignoring. An over-the-door organizer with clear pockets or wire baskets adds 12-20 pockets of storage without any installation.
These organizers hang on standard doors using hooks at the top. Each pocket is about 4-6 inches deep—perfect for snack bags, seasoning packets, tea bags, small boxed items, or even cleaning supplies.
What fits:
- Top rows: Lighter items like tea, hot chocolate packets, seasoning mixes
- Middle rows: Snack bags, granola bars, individual servings
- Bottom rows: Heavier items like soup packets, instant noodles
Capacity: A full-size door organizer holds about 24 pockets. That’s 24 items moved out of your already-cramped cabinets.
Cost: $15-30, depending on pocket count and material. Clear vinyl pockets let you see contents; fabric pockets look nicer, but you can’t see through them.
Make sure it clears your door frame and doesn’t prevent the door from closing fully. Measure before buying.
14. Nesting Mixing Bowls and Measuring Cups
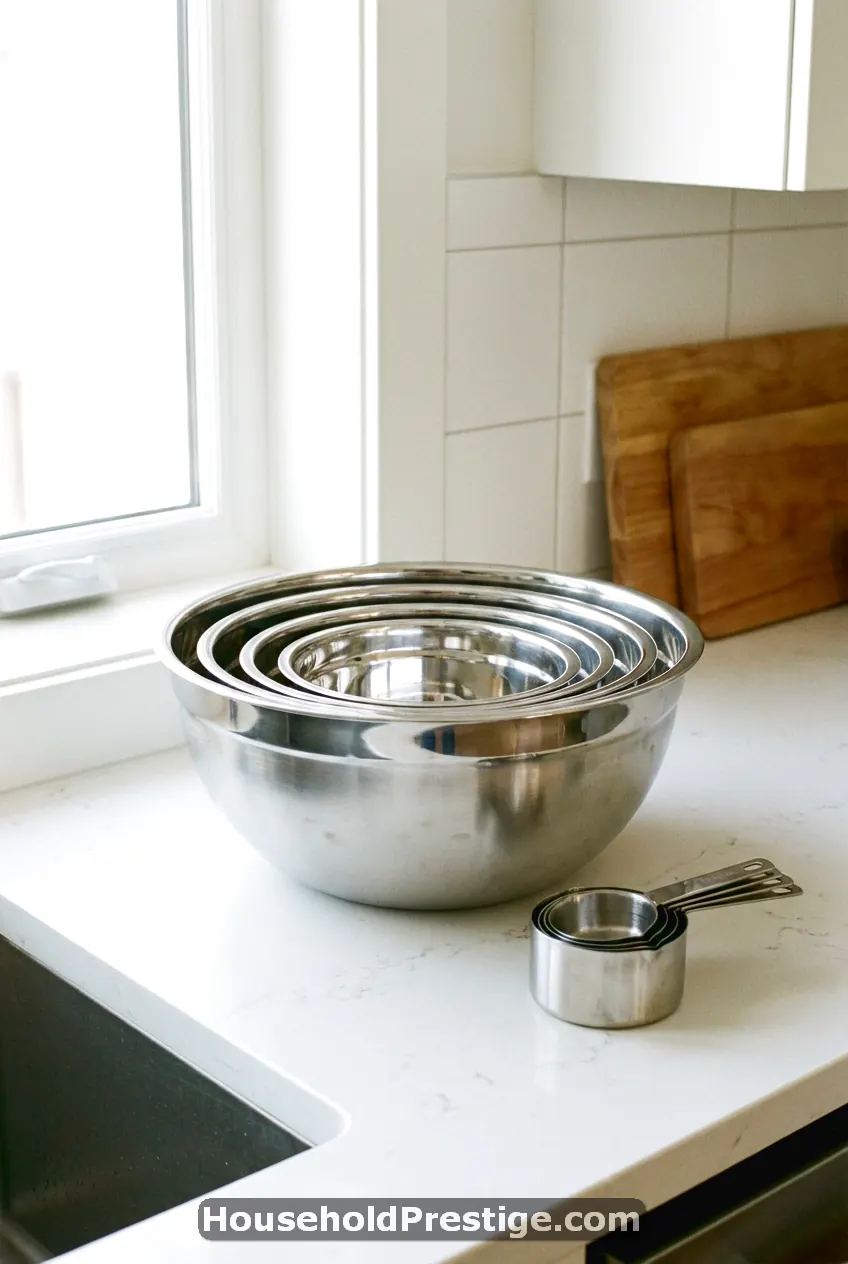
Storage-smart cookware matters. Non-nesting bowls and measuring cups waste space. Switching to nesting versions cuts your storage needs by 60-70%.
A set of 5 nesting stainless steel mixing bowls (1-5 quarts) stacks into the space of one large bowl. Same with nesting measuring cups and spoons—a full set fits in the drawer space of a single cup.
What to look for:
- Bowls with steep sides nest more tightly than shallow ones
- Measuring cups with flat handles stack better than bulky grip handles
- Stainless steel lasts longer than plastic
Space savings: Five separate bowls take up about 250 cubic inches of cabinet space. Five nesting bowls take up about 90 cubic inches. That’s 160 cubic inches freed up—enough for a small appliance or three stacks of plates.
Cost: About $25-40 for a quality nesting bowl set, $10-15 for measuring cup/spoon sets.
This seems obvious, but most people keep their mismatched collection from college instead of upgrading to space-efficient versions.
15. Magnetic Spice Jars on Fridge or Metal Board
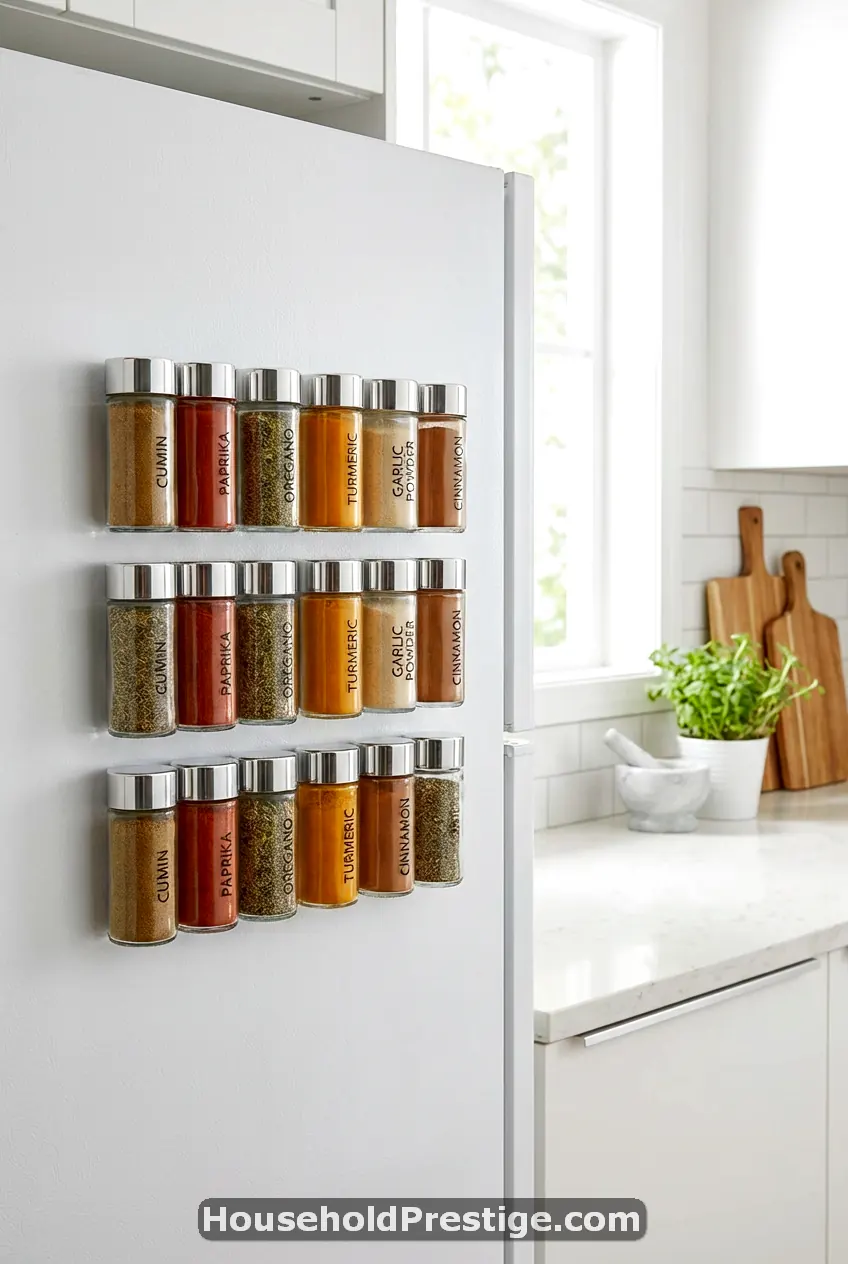
Traditional spice racks take up shelf or counter space. Magnetic spice jars stick to your fridge, vent hood, or a metal board, using vertical space instead.
Buy 12-24 small glass jars with magnetic lids (usually $25-40 for a set of 12). Fill them with your most-used spices. Stick them on your fridge in alphabetical order or by cuisine type.
Benefits:
- Zero counter or shelf space used
- Spices stay visible and organized
- Easier to find what you need while cooking
- Creates a visually interesting design element
Sizing: Most magnetic spice jars hold 2-3 ounces—enough for frequently used spices. Transfer from bulk containers and refill as needed.
Alternative: If your fridge is covered in artwork or photos, mount a metal sheet on the wall near your stove and use that as your magnetic spice display.
Label the lids with a label maker or chalkboard stickers so you don’t have to guess what’s inside each jar.
16. Collapsible Colanders and Measuring Tools
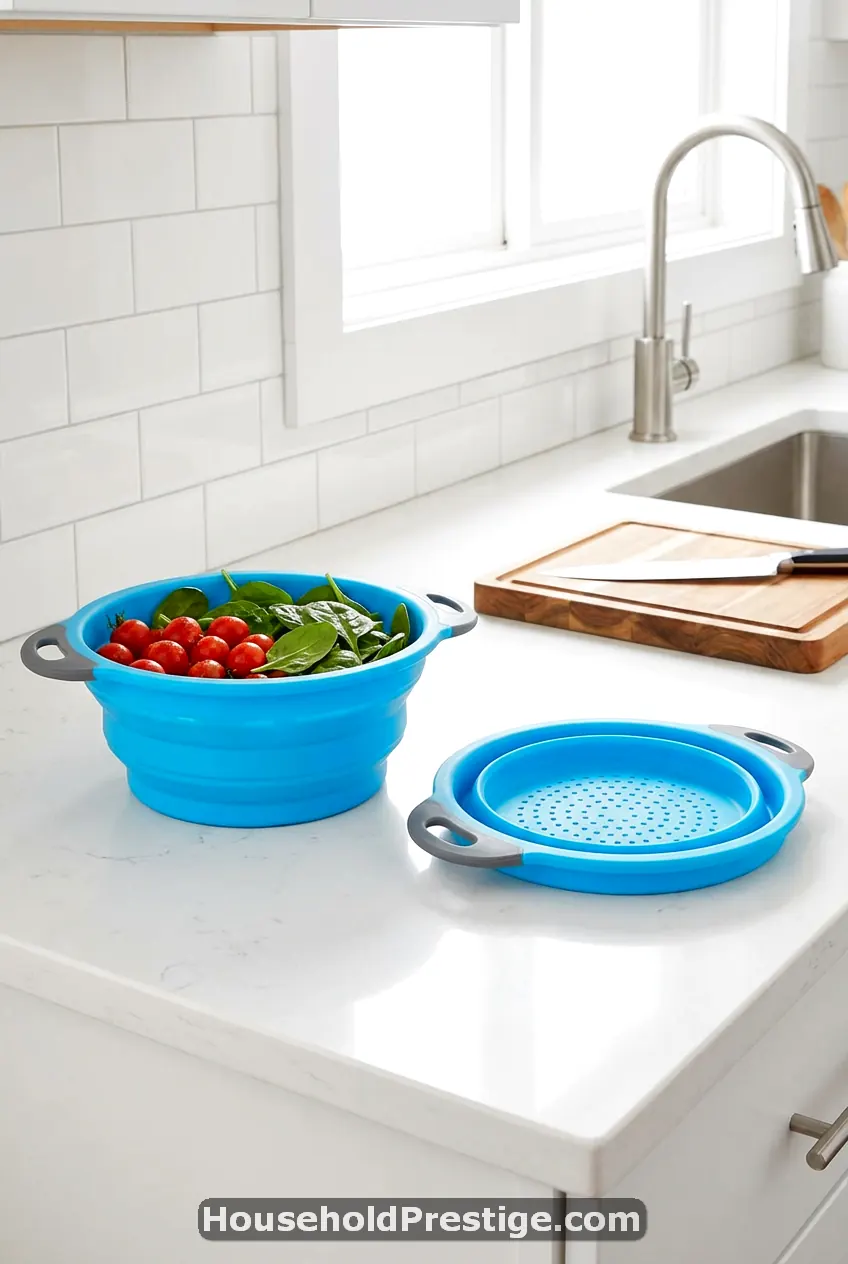
Some tools you need but don’t use daily. Collapsible versions store flat and free up significant space.
Collapsible colanders fold from 8-9 inches tall to about 2 inches flat. When you need to drain pasta, pop it open. When you’re done, collapse it and slide it into a 2-inch gap between your pots or hang it on a cabinet hook.
Collapsible measuring cups work the same way—the cups nest into each other and flatten to about 1 inch thick.
Space savings math: A standard colander takes up about 300 cubic inches of cabinet space. A collapsible one takes up about 100 cubic inches when stored. That’s 200 cubic inches freed per item.
Quality matters: Cheap silicone collapsible tools sometimes don’t hold their shape well. Look for ones with reinforced rims that lock into place when expanded.
Cost: $12-18 per item. Worth it if cabinet space is your main constraint.
17. Rolling Cart for Flexible Extra Counter Space
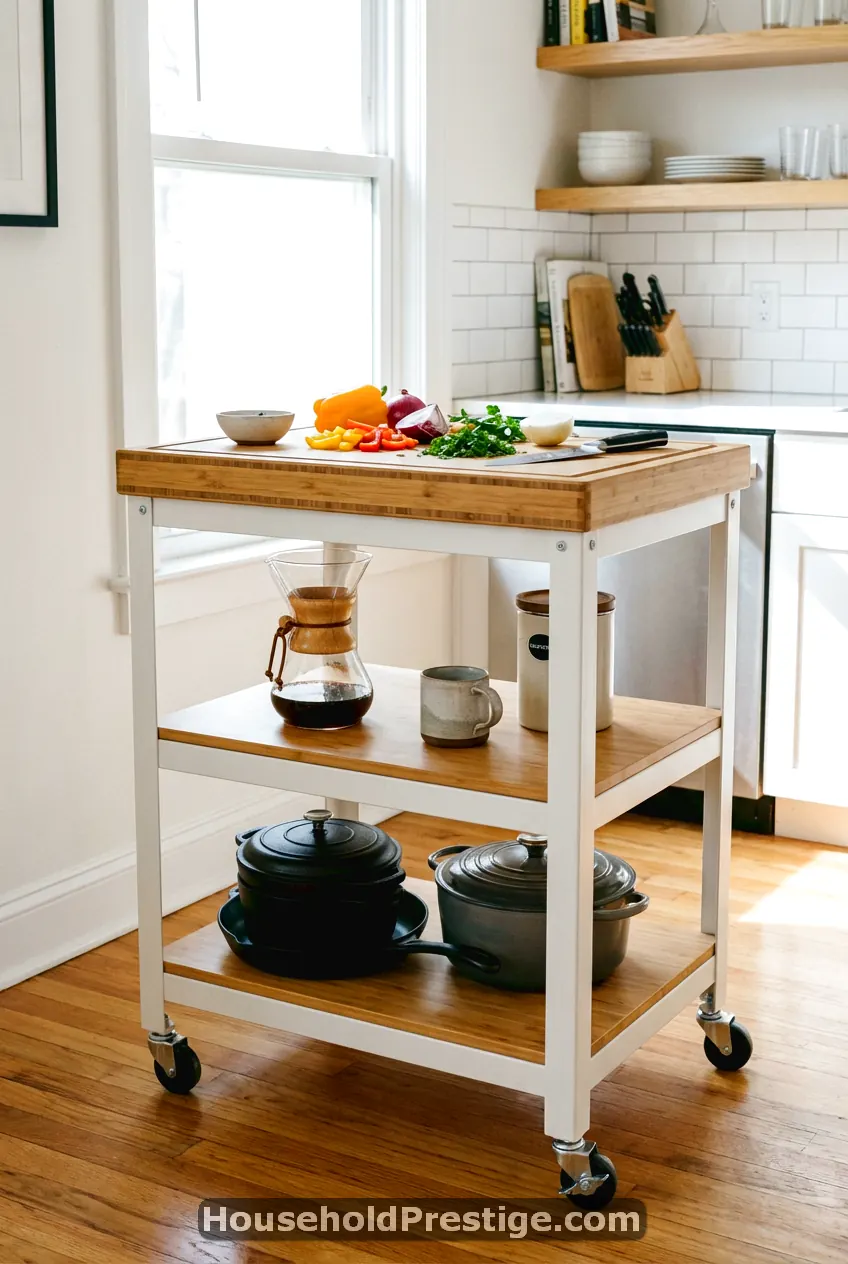
When you truly don’t have enough counter space, a rolling kitchen cart becomes your movable prep station. Wheel it where you need it, then tuck it away when you’re done.
What makes a good cart:
- Sturdy construction (avoid wobbly wheels)
- At least two shelves (preferably three)
- Dimensions that fit your available space (measure first)
- Counter-height top surface (36 inches) for comfortable prep work
- Locking wheels so it stays put when you’re using it
Uses:
- Top shelf: Extra prep surface while cooking
- Middle shelf: Small appliances you use occasionally (toaster, blender)
- Bottom shelf: Pots, pans, or dry goods
Sizes: Small carts (18×12 inches) fit in tight spaces but offer limited storage. Medium carts (24×18 inches) are the sweet spot for most small kitchens.
Cost: $40-120 depending on material and size. Wood and metal versions look better than plastic and hold more weight.
Storage hack: When not in use, roll it next to your fridge or into a pantry. It should fit through standard doorways if you measure correctly.
This is especially valuable if you meal prep, bake, or host occasionally. The extra surface makes those tasks possible instead of frustrating.
How to Choose What Works for Your Space
Not every idea fits every kitchen. Here’s how to decide which ones to implement:
Start with your biggest frustration. If you constantly dig through a mess under your sink, fix that first. If spices are your problem, tackle that. Solve the pain point that slows you down every single day.
Measure before you buy anything. Seriously. The number one reason organization products fail is wrong sizing. Grab a tape measure and check cabinet dimensions, gap widths, and door clearances.
Prioritize vertical space. Small kitchens have limited horizontal space but usually plenty of vertical space. Pegboards, magnetic strips, hanging baskets, and wall-mounted solutions give you storage without sacrificing counter or floor space.
Think in zones. Group solutions by function. Cooking zone (utensils, spices, oils near stove), prep zone (cutting boards, knives, mixing bowls), and storage zone (pantry items, dry goods). This reduces movement and makes cooking more efficient.
Budget smart. You don’t need to buy everything at once. Start with the highest-impact, lowest-cost items: tension rods ($8), adhesive hooks ($10), drawer dividers ($15). Save expensive items like pull-out organizers or rolling carts for later, once you’ve proven the system works.
Your small kitchen isn’t the problem. The problem is treating it like a big kitchen that happens to be cramped. These 17 ideas work because they’re designed for tight spaces from the start. Pick 3-5 that address your specific pain points, implement them this weekend, and watch your kitchen go from frustrating to functional. You don’t need more space. You just need smarter systems.