

I’ve lived through three tiny bathroom transformations (including one nightmare rental where the toilet literally touched the sink), and the difference between “cramped disaster” and “surprisingly fine” comes down to 3-4 strategic choices. You don’t need to rip out tile or move plumbing. You need to know which small changes create space and which ones accidentally steal it.
Here are 17 that actually work – most under $50, several that take less than 30 minutes, and all tested in genuinely small bathroom decor ideas where every inch matters.
1. Vertical Wood Slat Panel (Instant Height Hack)
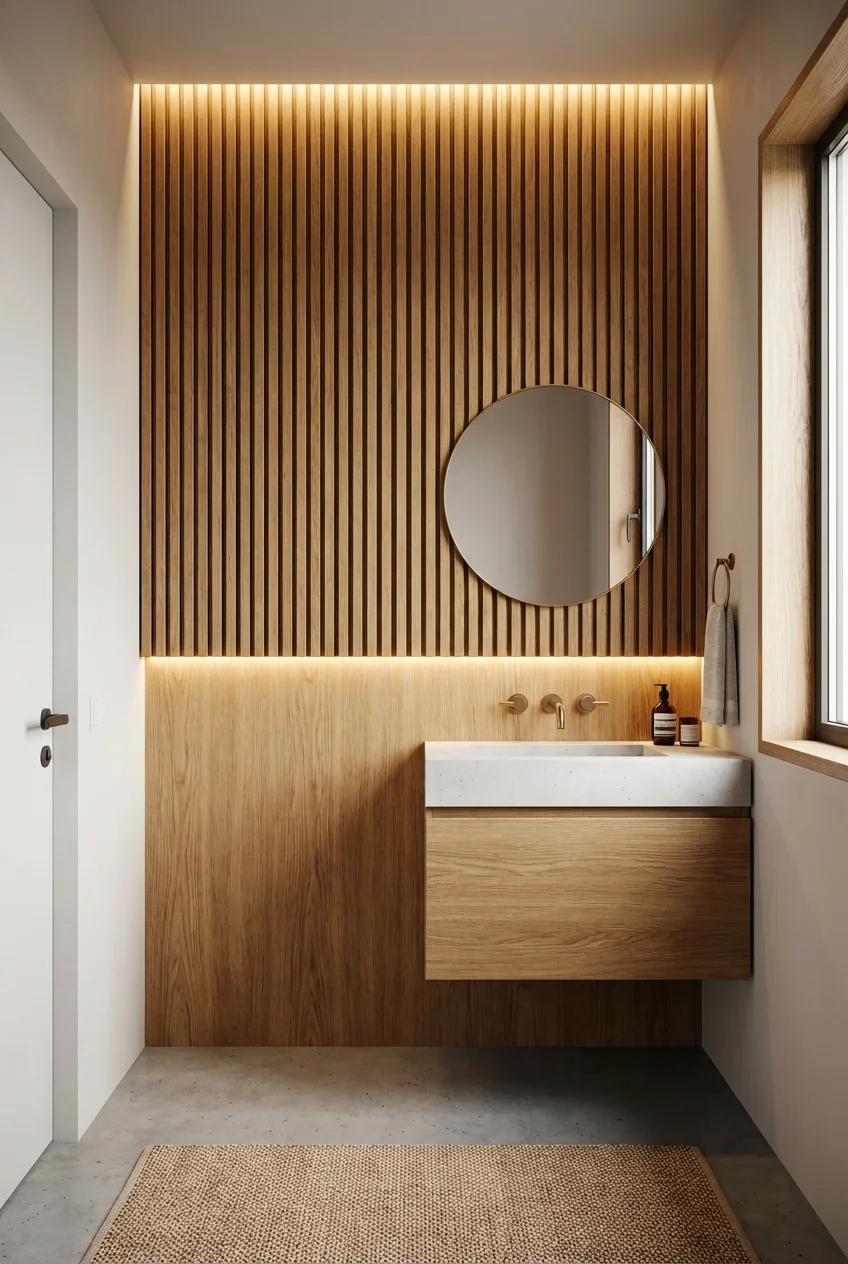
Run wood slats vertically on one accent wall. Your 7-foot ceiling suddenly reads as 9 feet.
The slats create unbroken vertical lines that pull the eye upward, and unlike paint tricks or wallpaper, they add actual dimensional interest. Install them floor-to-ceiling behind the toilet or vanity—anywhere your eye hits when you walk in. Cost runs $30-45 for a 4×8 accent wall using furring strips from Home Depot.
2. Oversized Round Mirror (The 32-Inch Rule)
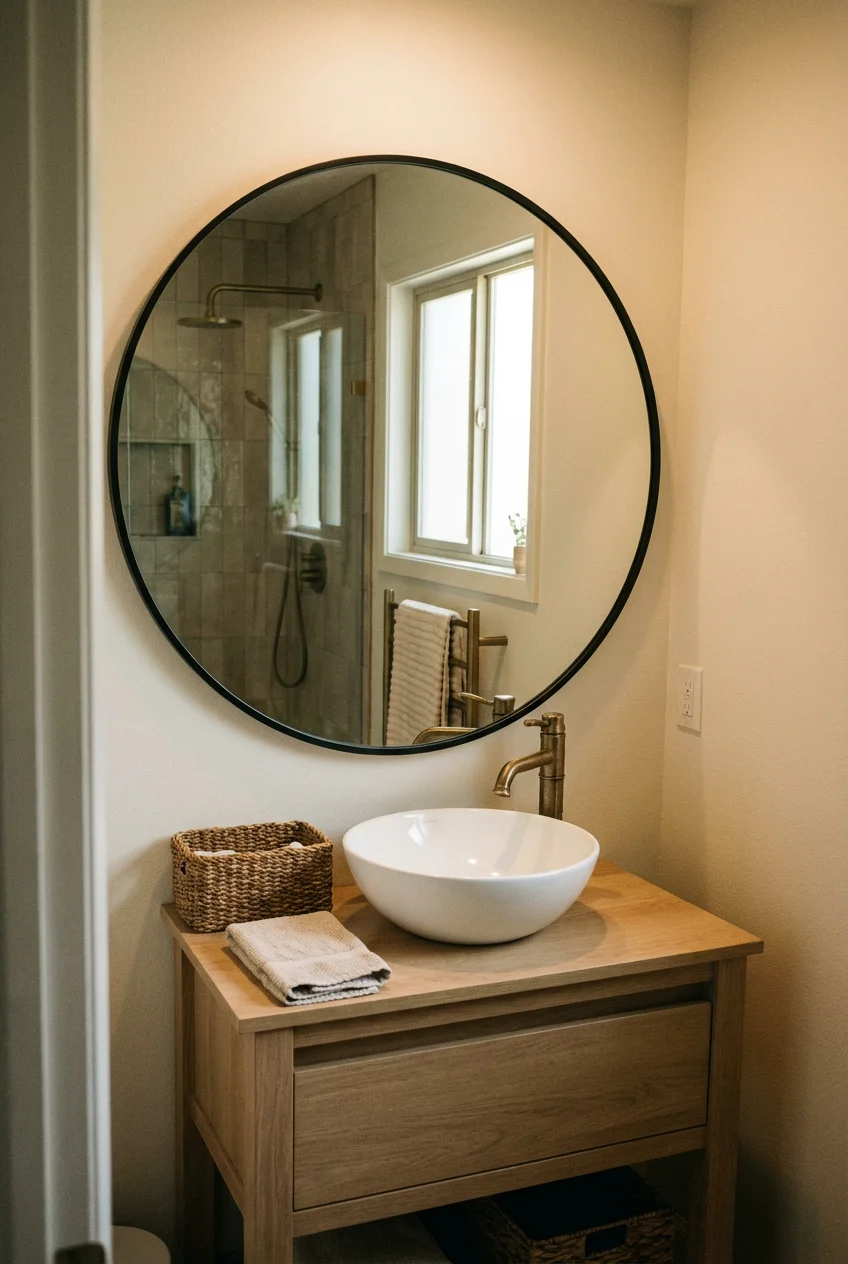
Go bigger than feels comfortable. Minimum 32 inches in diameter.
Standard 24-inch mirrors are bathroom decor’s biggest mistake in small spaces. They shrink your walls. A 32-36 inch round mirror does three things: reflects more light (making the room genuinely brighter), creates the illusion of depth by showing more of the opposite wall, and acts as a focal point that distracts from the tight quarters. West Elm’s Metal Frame Round Mirror is $149, but Target’s Project 62 version at $50 does the same job.
3. Recessed Shelving Between Studs
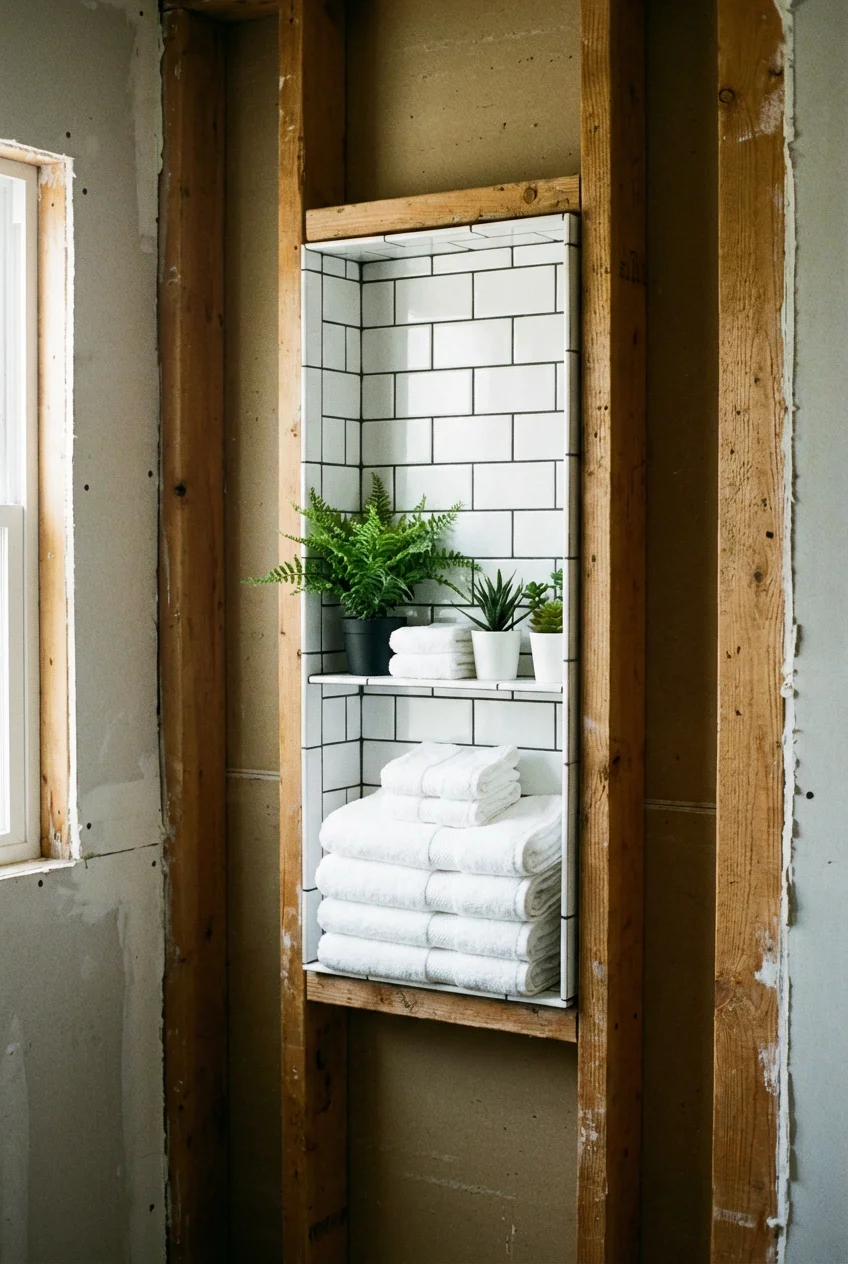
Why It Works: Your walls have 14.5 inches of dead space between every stud. Use it.
Recessed shelving doesn’t eat into your floor space or stick out awkwardly. It’s a storage that lives inside your wall. Best placement: shower wall for toiletries, or above the toilet for towels and decor.
Dimensions & Installation:
Step-by-Step Process:
- Locate studs using a stud finder – they’re typically 16 inches apart
- Cut opening between two studs using a drywall saw (12″W x 24″H is standard)
- Frame the opening with 2×4 lumber for the top, bottom, and sides
- Install backing board (¼” plywood or cement board for wet areas)
- Waterproof if in the shower using RedGard membrane ($28/gallon covers 3 niches)
- Tile interior to match your shower or use contrasting subway tile
- Add glass shelves cut to size at hardware store ($8-12 per shelf)
Materials & Costs:
- Lumber for framing: $12
- Cement board: $8
- RedGard waterproofing: $10 (portion of a gallon)
- Tile: $15-25 (depending on choice)
- Glass shelves: $8 each x 2 = $16
- Total: $61-71 (slightly over $50 but includes two shelves)
Pro Move:
Install a recessed outlet inside the niche if it’s above your vanity. Hides your electric toothbrush charger and keeps counters clear. Electrician charges $75-125 for this add-on.
Common Mistakes:
- Cutting into a stud (you can’t remove structural support)
- Skipping waterproofing in shower niches (leads to mold within 6 months)
- Making the niche too shallow (minimum 3.5 inches deep or items fall out)
4. Floating Vanity With Visible Floor
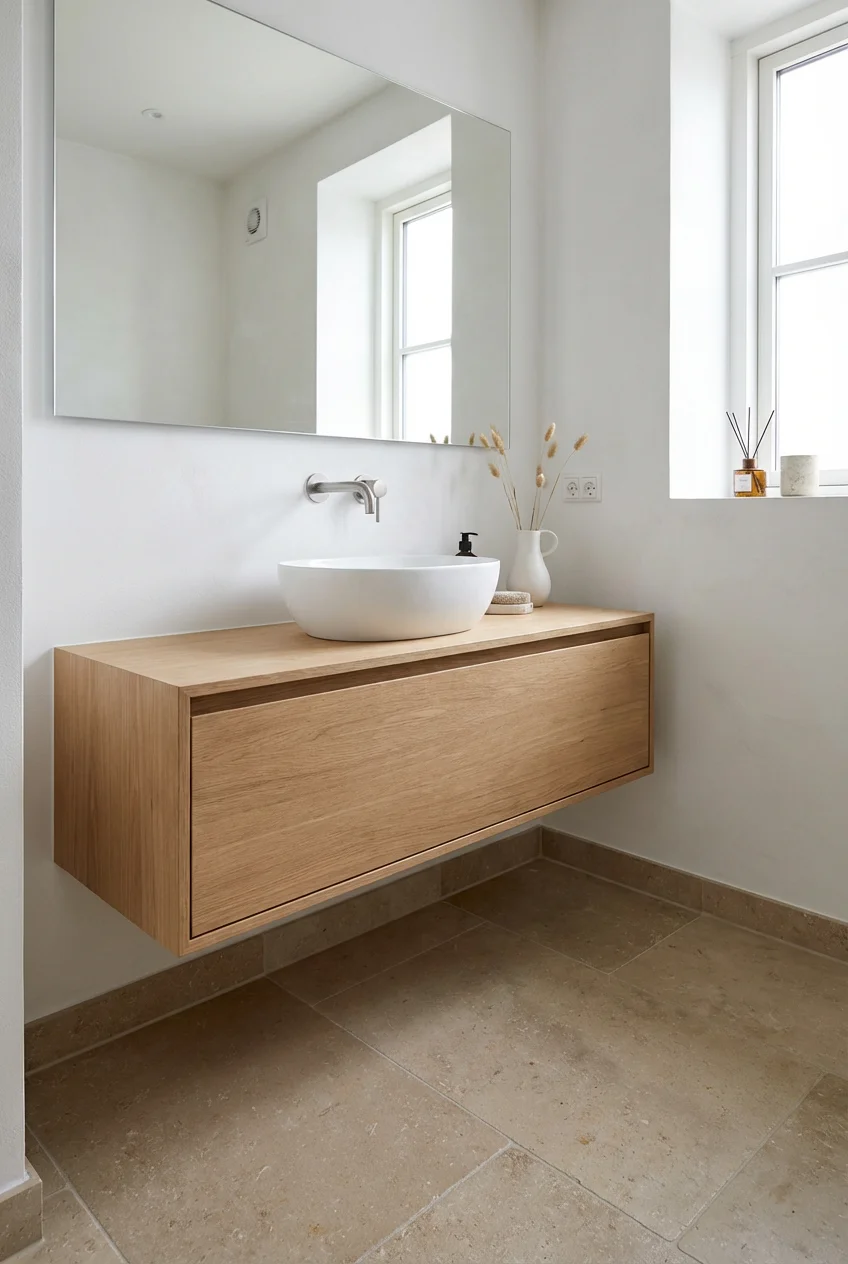
The floor shouldn’t stop at your vanity base. That visual break makes the room feel 30% smaller.
Wall-mounted vanities reveal continuous flooring, which tricks your brain into perceiving more square footage. The shadow gap underneath adds depth. IKEA’s Godmorgon wall cabinet starts at $79 (add your own countertop), or go with a pre-made floating vanity for $150-200.
5. All-White Grout (Not What You Think)
Use white grout even with dark tile.
Dark grout creates a grid pattern that chops up your walls into individual squares. White grout (or grout matching your lightest tile color) softens those lines so your eye reads the surface as one cohesive plane instead of 200 separate tiles. The difference is subtle but measurable—your bathroom will feel about 20% more spacious.
6. Single Statement Wallpaper Wall
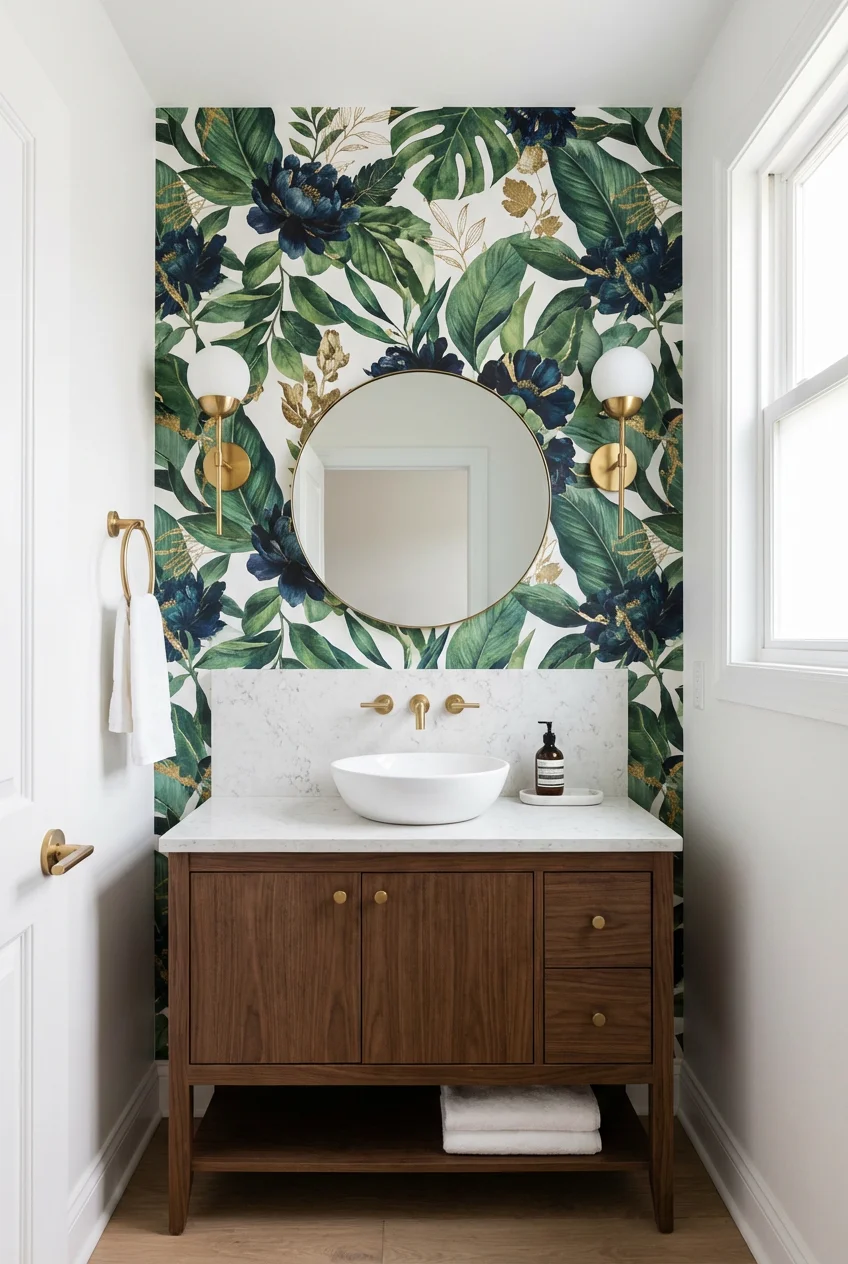
Pick one wall. Go bold. Keep the rest white.
This contradicts every “make it bigger” article that screams “all white everything,” but here’s why it works: a single statement wall creates a focal point that draws attention away from the room’s actual dimensions. Your brain focuses on the pattern, not the perimeter.
The catch: Scale matters. Small, busy patterns make tiny rooms feel chaotic. Choose large-scale prints—oversized florals, abstract geometrics, or modern murals where a single pattern repeat is 12+ inches. Spoonflower’s peel-and-stick wallpaper runs $30-35 per roll (covers 24 square feet). One wall = one roll.
7. Glass Shower Door (Not Curtain)
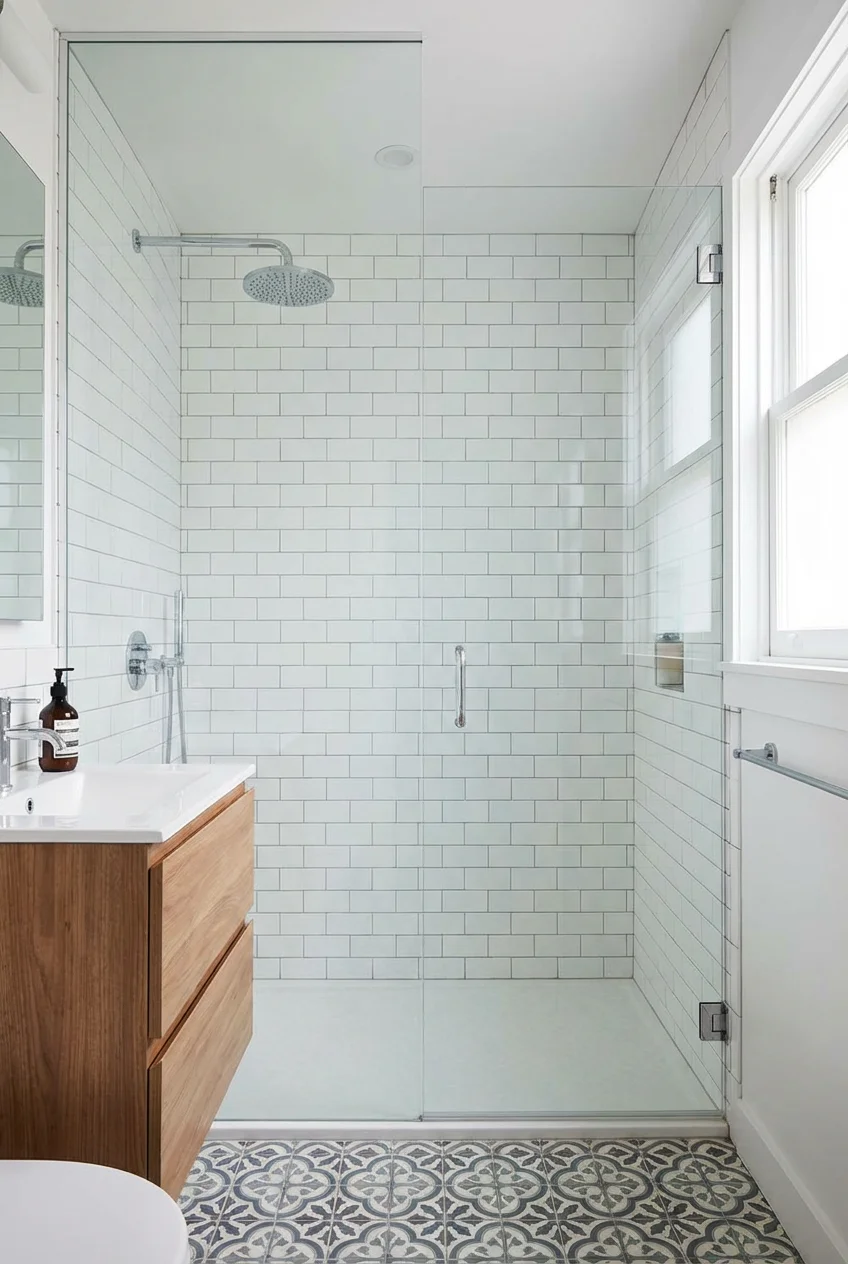
Shower curtains are visual walls. Glass is invisible square footage.
Even in a 5-foot bathroom, replacing a curtain with a clear glass door makes the shower zone part of your usable space visually. You see the back wall instead of a fabric barrier. DreamLine’s Infinity-Z 48-inch sliding door is $200 (installation takes 2-3 hours), but renters can use a tension-rod-mounted glass panel from Amazon for $85.
8. Pegboard Storage Wall
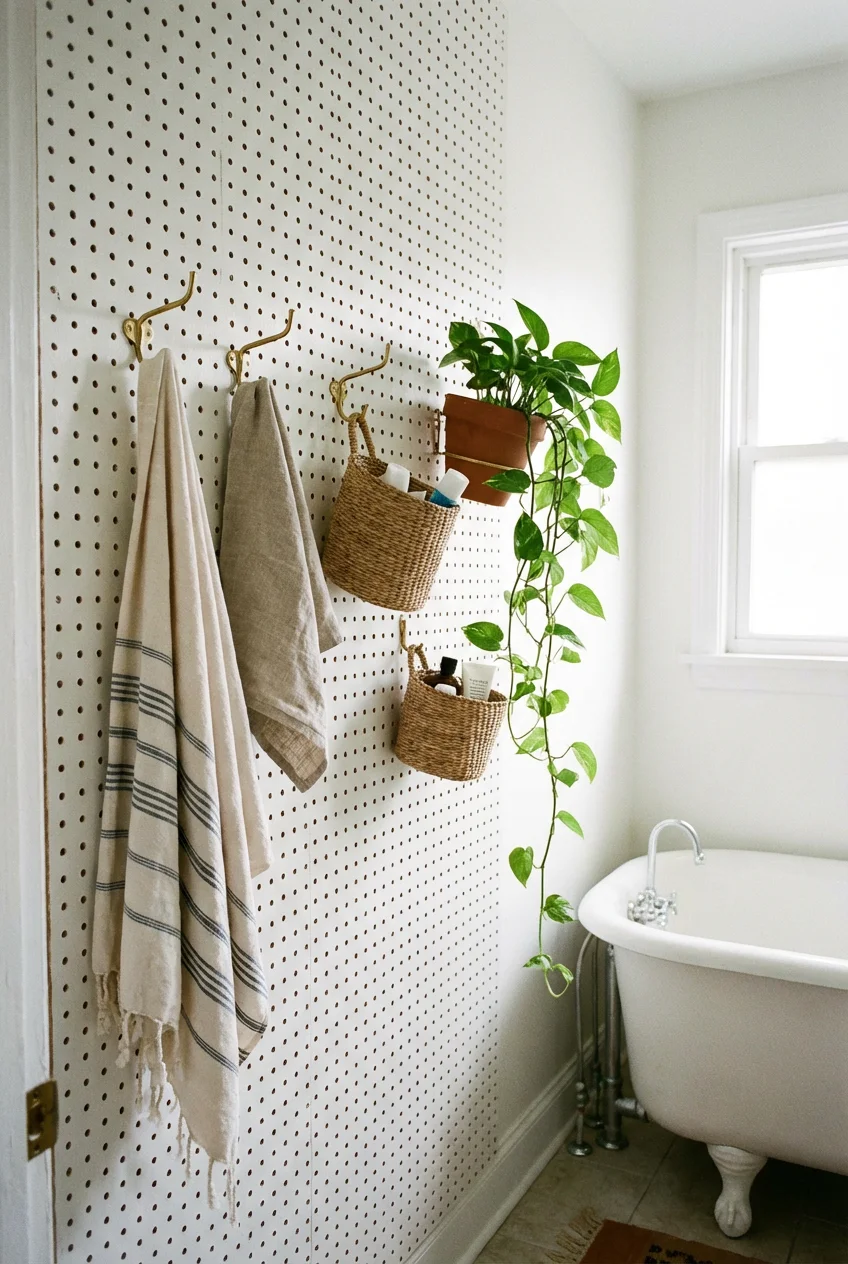
Mount a painted pegboard on any empty wall. Add brass hooks. Done.
Pegboard turns vertical surfaces into customizable storage without permanent holes. Move hooks as your needs change. Paint it to match your walls (white or your accent color) so it doesn’t read as garage storage. Hardware stores sell 2’x4′ pegboard panels for $12-18. Add 10-15 brass S-hooks ($12 on Amazon) to hold hand towels, washcloths, small baskets, or even a hanging plant.
9. Undermount Sink (Not Vessel)
Skip the vessel sink trend in small bathrooms.
Vessel sinks sit on top of your counter, eating up 4-6 inches of vertical space and making your vanity area feel crowded. Undermount sinks install beneath the counter, giving you a continuous surface that’s easier to wipe down and looks less cluttered. Kraus undermount ceramic sinks start at $48.
10. Thin-Profile Toilet (The 2-Inch Solution)
Standard toilets project 28-30 inches from the wall. Compact models hit 25-26 inches. That’s 2-4 inches of walking space you didn’t have.
Doesn’t sound like much until you’re squeezing past to reach the shower. Kohler’s Persuade Curv ($249, just over budget but worth mentioning) and American Standard’s Cadet 3 Compact ($189) both save those critical inches without sacrificing comfort. Installation is identical to standard toilets.
11. LED Strip Lighting Under Vanity
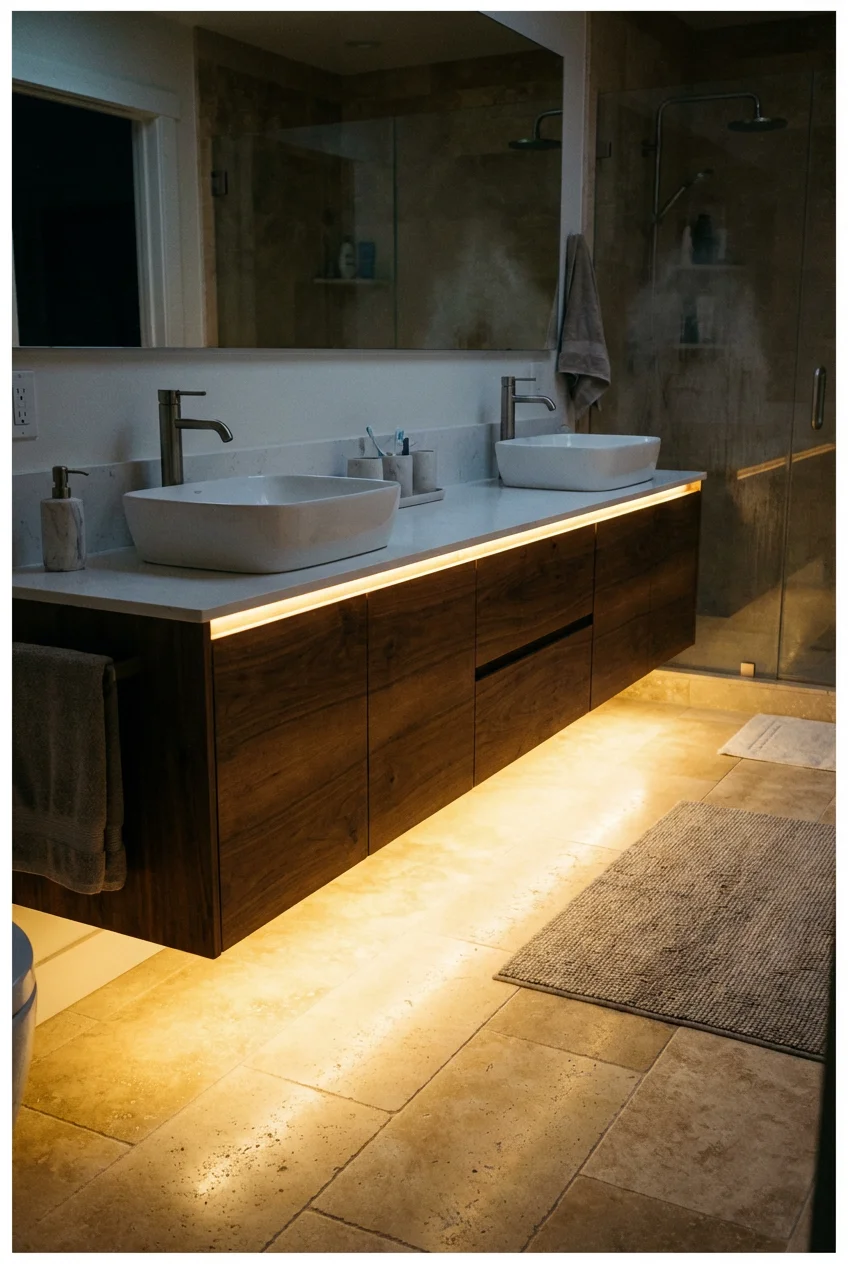
Add LED strips under your floating vanity. Creates ambient lighting that makes the vanity appear to float.
This isn’t about function (though it helps at 3 am). It’s about perception. The soft glow underneath separates the vanity from the floor plane, adding visual layers and depth. Philips Hue Lightstrip Plus ($45) or generic warm white LED strips ($15) both work. Stick them to the underside, plug in, done. Takes 10 minutes.
12. Corner Shelving (The Dead Zone)
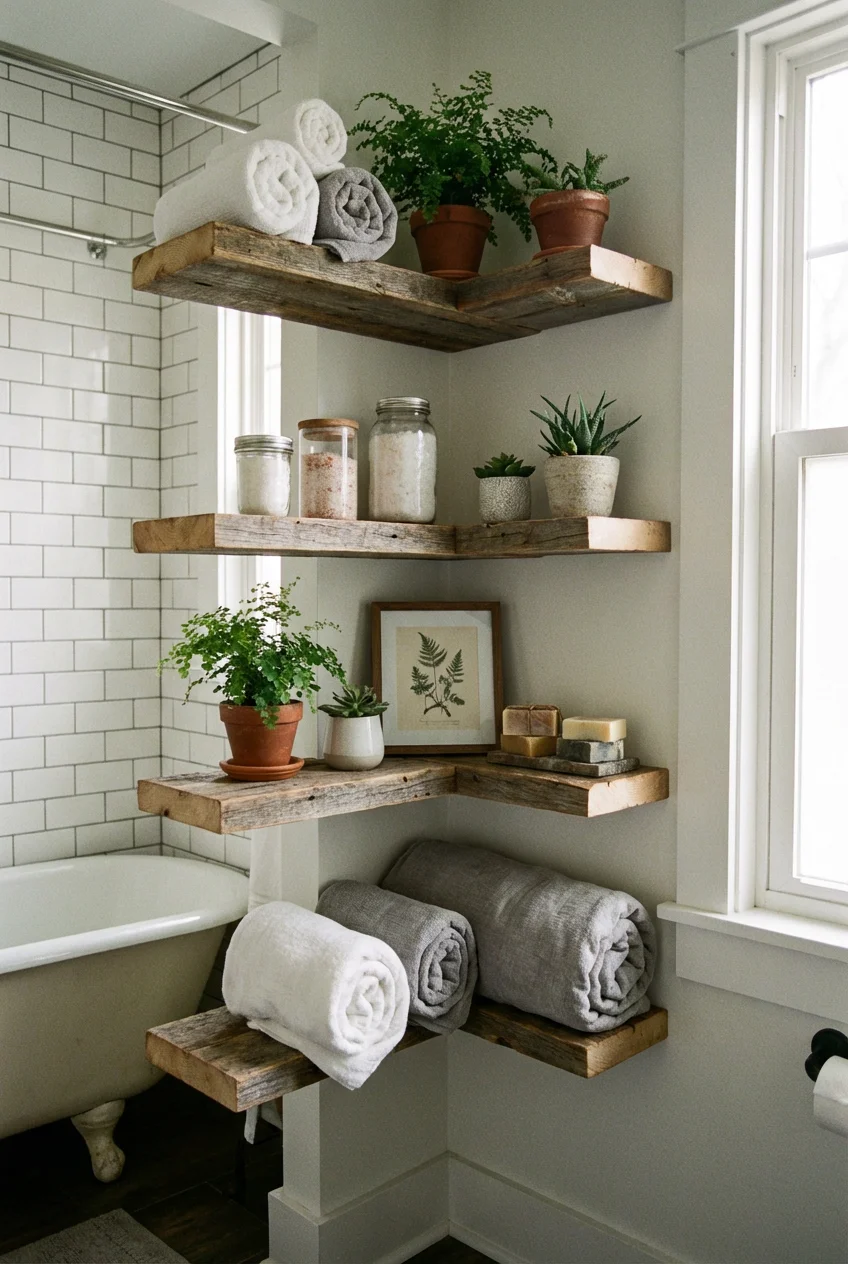
Before You Start: Why Corners Get Ignored
Corners are spatial black holes. Too small for furniture, too awkward for art, they just… sit there. But in a 40-square-foot bathroom, those dead zones represent 8-10% of your wall space.
The Fix: Floating Corner Shelves (Staggered Installation)
What You Need:
- 3 corner floating shelves (8-10 inch radius, $12-15 each on Amazon)
- Level
- Drill with masonry bit (for tile) or standard bit (for drywall)
- Wall anchors rated for 20+ pounds
Installation Pattern:
- First shelf: Install 48 inches from the floor (eye level when standing)
- Second shelf: 14 inches above first (62″ from floor)
- Third shelf: 12 inches below first (36″ from floor)
This staggered “up-down-up” pattern creates visual interest and lets you actually use all three shelves without items blocking each other.
What Goes Where:
- Top shelf (62″): Decorative items (small plant, candle, art object)
- Middle shelf (48″): Daily-use items (hand soap refill, cotton rounds in glass jar)
- Bottom shelf (36″): Rolled hand towels (the rolled presentation matters—it looks intentional, not messy)
Cost Breakdown:
- 3 corner shelves: $36-45
- Wall anchors: $5
- Total: $41-50
Installation Note:
If you’re mounting to tile, use a carbide-tipped masonry bit and go slow. Cracked tile can’t be fixed cheaply. Start with a small pilot hole, then enlarge. Takes 5 minutes per shelf once you’ve done the first one.
When It’s Not Worth It:
If your bathroom has shower doors or a pocket door that swings into corners, shelves will block the arc. Test with painter’s tape first.
13. Monochromatic Color Scheme (True Single-Hue)

Pick one color. Use five different shades of that one color across everything.
This isn’t “all white” (though white works). It’s sage green walls + deeper sage towels + pale sage shower curtain + medium sage bath mat. The eye tracks horizontally across a unified color field instead of bouncing between contrasts, which makes the room feel wider.
The trick is varying the intensity (light to dark) rather than changing hues entirely. Paint samples at hardware stores show 5-6 shades of every color for $3 each.
14. Towel Hooks Instead Of Bars
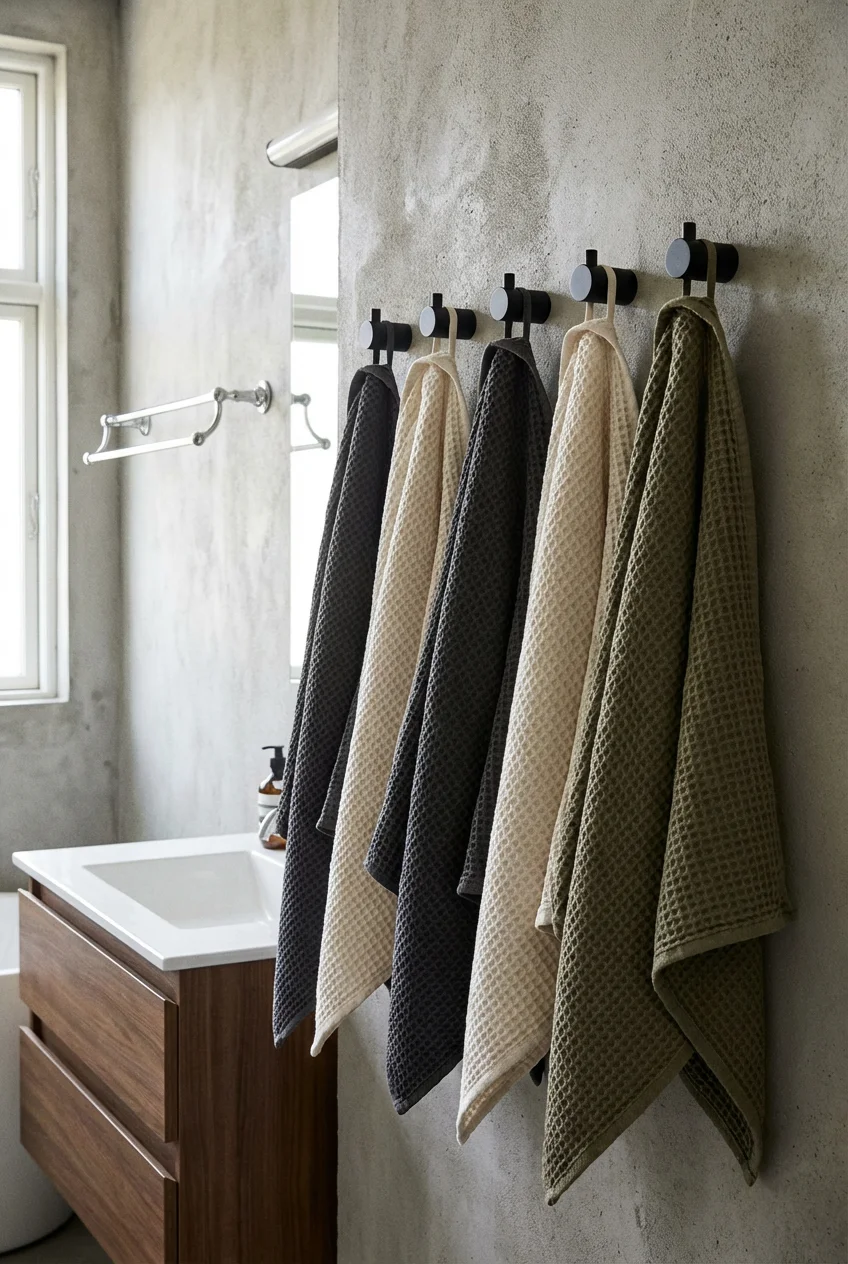
Towel bars project 6-8 inches from the walls. Hooks project 2-3 inches. Use hooks.
You gain 4-5 inches of clearance, which matters when you’re brushing your teeth or opening drawers beneath. Matte black or brass wall hooks come in packs of 5-8 for $20-25. Mount them in a horizontal line above the toilet or along any empty wall section.
15. Frameless Wall-Mounted Shelf With Hidden Bracket
Mount floating shelves with hidden brackets so they appear to emerge from the wall with no visible support.
Standard shelves show L-brackets underneath, which add visual clutter. True floating shelves use interior rod brackets that slide into the shelf itself—nothing visible. The clean horizontal line makes your wall feel wider. IKEA’s Lack wall shelf ($10-15) does this, or buy any wood plank and pair it with blind shelf supports ($12 for two on Amazon).
16. Ladder Towel Rack (The Lean)

A leaning ladder rack gives you 4-5 towel rungs without mounting anything to walls.
Perfect for renters or anyone with tile they can’t drill into. The lean-angle (about 75-80 degrees) means it only takes up 8-10 inches of floor space at the base while reaching 5-6 feet high. Natural wood or matte black versions run $25-40 at Target or World Market.
17. Swap Bulbs To 5000K Daylight
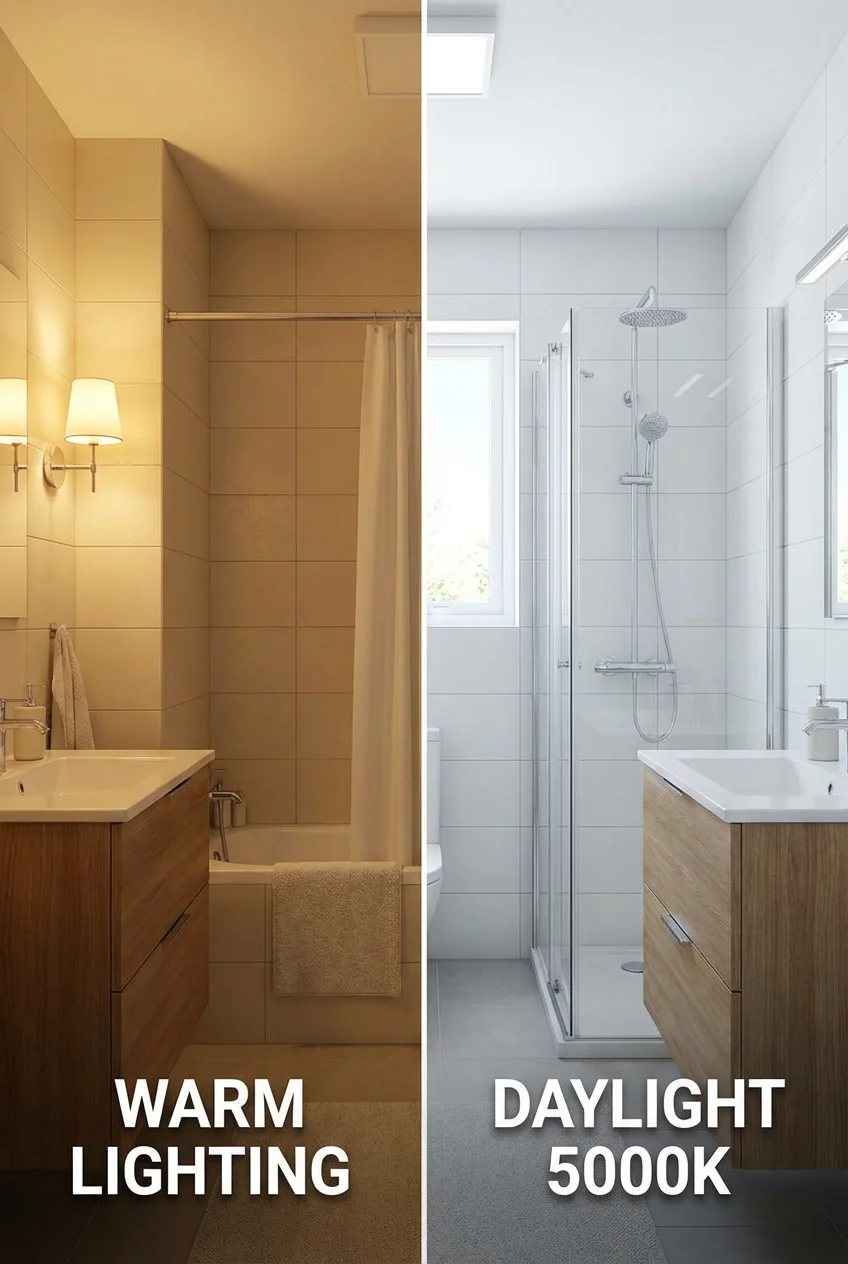
Replace your warm yellow bulbs (2700K-3000K) with daylight bulbs (5000K).
Warm light reads as cozy, but in a small bathroom, it creates shadows that emphasize corners and tight spaces. Daylight bulbs (5000K-6500K) mimic natural outdoor light, which your brain associates with open space. It’s the difference between “cramped cave” and “bright, clean room.” LED daylight bulbs cost $8-12 for a 4-pack at any hardware store. Swap them into your vanity fixture and overhead light.
Conclusion
Your bathroom doesn’t need a gut renovation to feel 40% bigger. It needs 3-4 of these strategic moves working together.
Start with what’s annoying you most right now. Too cluttered? Hit #3, #12, and #14 for storage. Feels dark and cramped? Try #2, #7, and #17 for light and openness. Actually want to tackle a weekend project? Build #3’s recessed shelving and install #11’s LED strips in one afternoon.
The difference between a bathroom that makes you grimace and one that makes you think “this is fine, actually” isn’t budget or square footage. It’s knowing which details create space and which ones steal it. Now you know.
FAQ Section
Q: What colors make a small bathroom look bigger?
White, soft grays, and pale neutrals reflect the most light and create visual continuity. But if you want color, use a monochromatic scheme (all shades of one color) rather than multiple competing hues. Sage green, soft blue, or warm beige in 3-4 different intensities works better than a white-plus-accent-color approach because it eliminates visual breaks.
Q: Should I use large or small tiles in a small bathroom?
Large-format tiles (12×24 inches or bigger) with minimal grout lines make small bathrooms feel more spacious. Small tiles (subway, penny, hexagon) create a busy visual grid that emphasizes the room’s compact size. Exception: Small bathrooms with high ceilings can handle smaller tiles on one accent wall.
Q: How do you maximize storage in a tiny bathroom?
Think vertical and hidden. Use wall-mounted shelves above the toilet, recessed niches between studs, corner floating shelves, and under-sink organizers. Avoid floor-standing storage units that eat into walking space. Hooks mounted high on walls (60+ inches) can hold baskets or hanging organizers without cluttering sight lines.
Q: Can wallpaper make a small bathroom look bigger?
Yes, if you use it strategically: one accent wall with a large-scale pattern (not small, busy prints) creates a focal point that distracts from room dimensions. Keep other walls light and simple. Horizontal stripe wallpaper makes walls feel wider, and vertical stripes make ceilings feel higher. Avoid all-over bold patterns in spaces under 50 square feet.
Q: What’s the best lighting for small bathrooms?
Layer three types: bright overhead lighting (5000K daylight LEDs), task lighting at the mirror (sconces or a backlit mirror), and ambient lighting (LED strips under a floating vanity). The key is avoiding harsh shadows in corners, which emphasize tight spaces. Dimmers let you adjust between functional brightness and softer evening light.