

You’re staring at a sink full of dishes, a fridge full of wilted vegetables, and a clock that says dinner should’ve been ready twenty minutes ago. Meanwhile, your cutting board looks like a crime scene, and you’ve somehow managed to dirty every pot you own for a simple pasta dish.
Sound familiar? Most home cooks waste 40% of their kitchen time on inefficient prep work, storage mistakes, and tools that work against them instead of for them. Not because they’re bad cooks, but because nobody ever taught them the shortcuts that professional chefs use in restaurant kitchens every single day.
These 23 kitchen hacks will change how you handle food prep, storage, and cooking. No fancy equipment required – just smarter ways to use what you already own. By the end of this, you’ll wonder how you ever cooked without them.
1. Freeze Leftover Wine in Ice Cube Trays
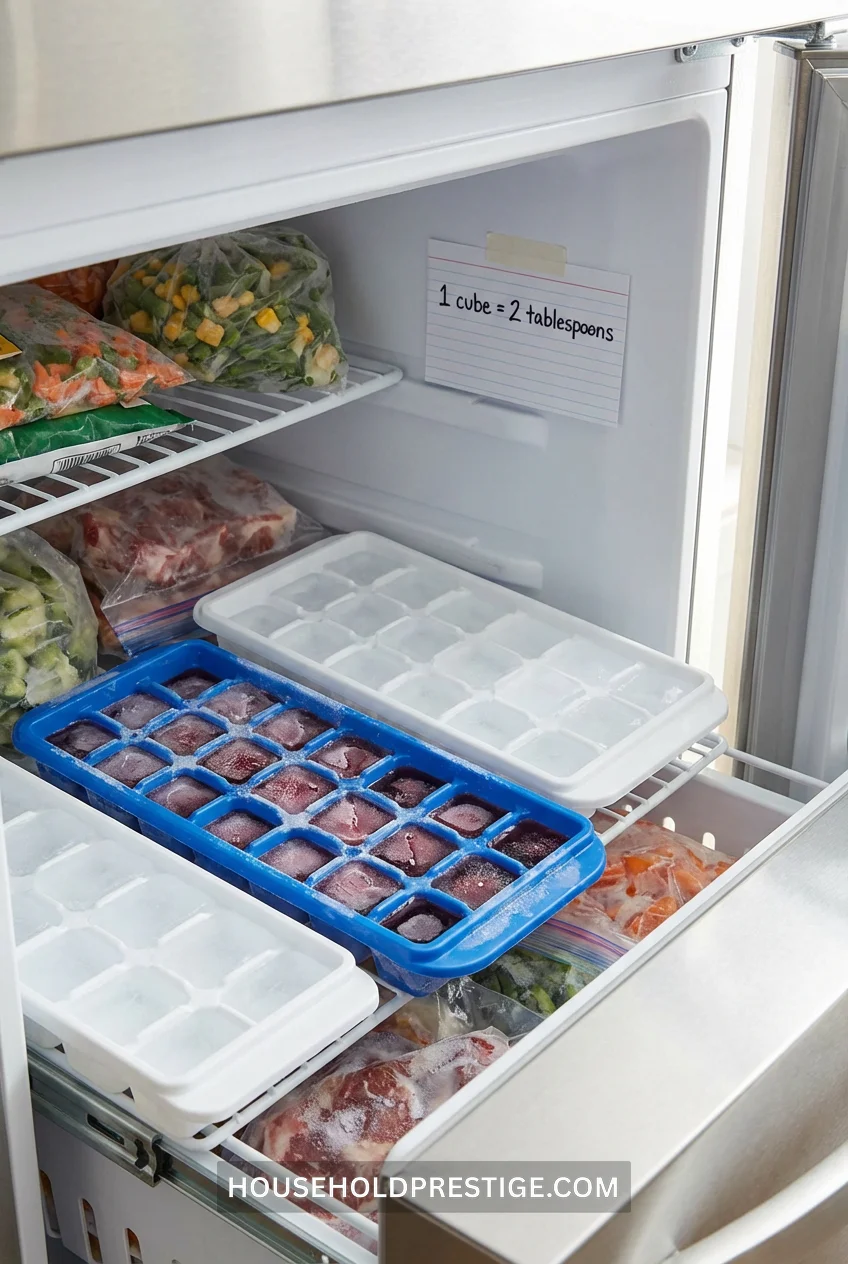
Got half a bottle of wine that’s about to turn? Stop pouring it down the drain. Freeze it in ice cube trays—one cube equals roughly 2 tablespoons, perfect for deglazing pans or adding to sauces without opening a fresh bottle.
2. Use a Potato Peeler for Soft Cheeses
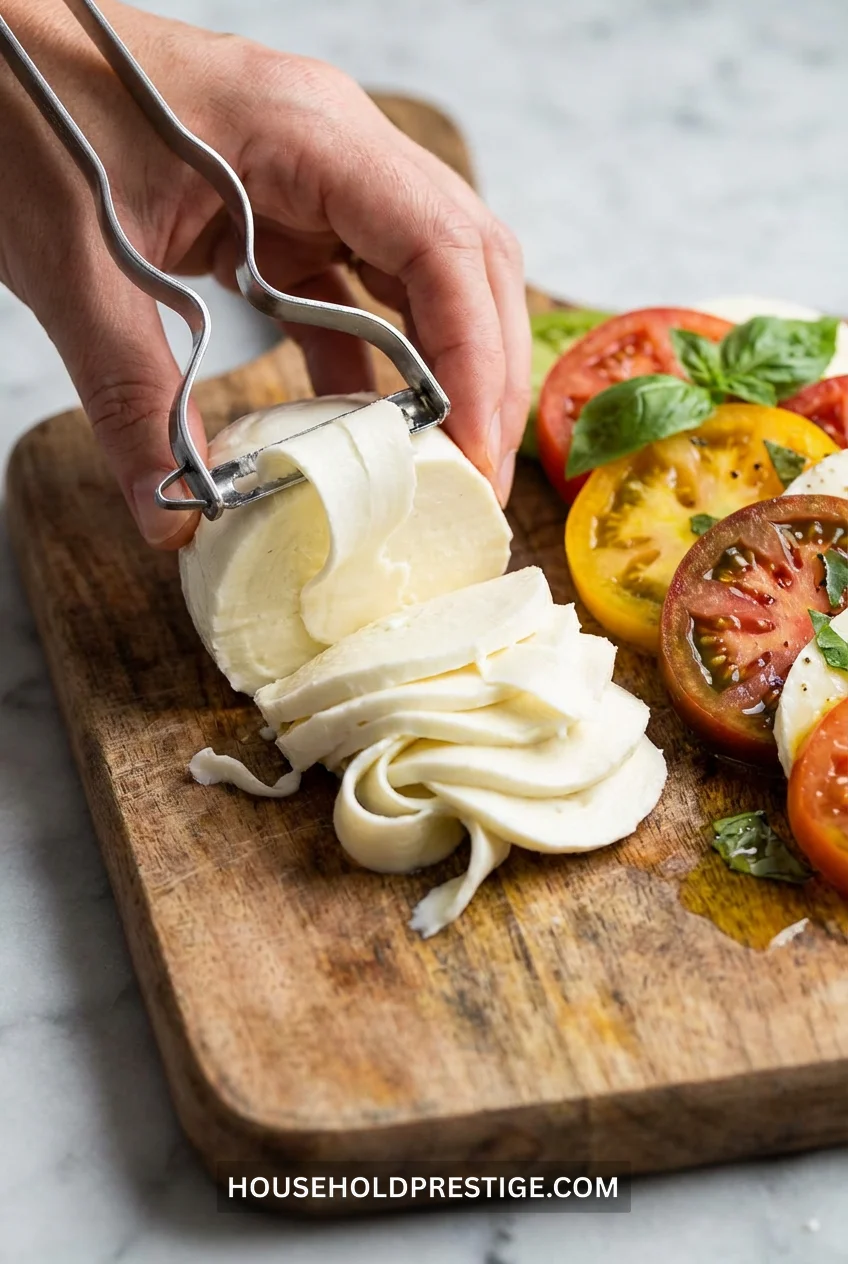
Your cheese grater hates soft cheeses as much as you do. Forget the sticky mess—run a vegetable peeler along the block instead. Works for mozzarella, gouda, or any cheese that usually clogs up the grater holes.
3. The Sheet Pan Method for Perfectly Even Cooking (And Why Your Oven Is Lying to You)
Why This Matters
Your oven doesn’t heat evenly. The back is usually 25-50°F hotter than the front, the top rack chars faster than the bottom, and that dial? It’s measuring one tiny spot in the oven cavity, not where your food actually sits.
The Fix: Strategic Sheet Pan Placement
Materials needed:
- 2 half-sheet pans (13×18 inches) – Nordic Ware commercial grade runs $15-20
- Parchment paper or silicone baking mats
- Instant-read thermometer (optional but helpful)
Step-by-step process:
- Test your oven’s hot spots. Place 6-8 slices of white bread across a sheet pan in a cold oven. Set to 350°F and bake for 10 minutes without opening the door. The bread will brown unevenly, showing you exactly where the hot zones are.
- Position for protein, center for baking. Proteins (chicken, fish, steaks) go on the middle rack, pushed toward the back third, where heat is strongest. Baked goods (cookies, cakes) go dead center for even heat distribution.
- Rotate halfway, but only once. Opening the oven drops the temp 50°F instantly. At the halfway mark—not before, not after—rotate your pan 180° in one smooth motion. Close the door fast.
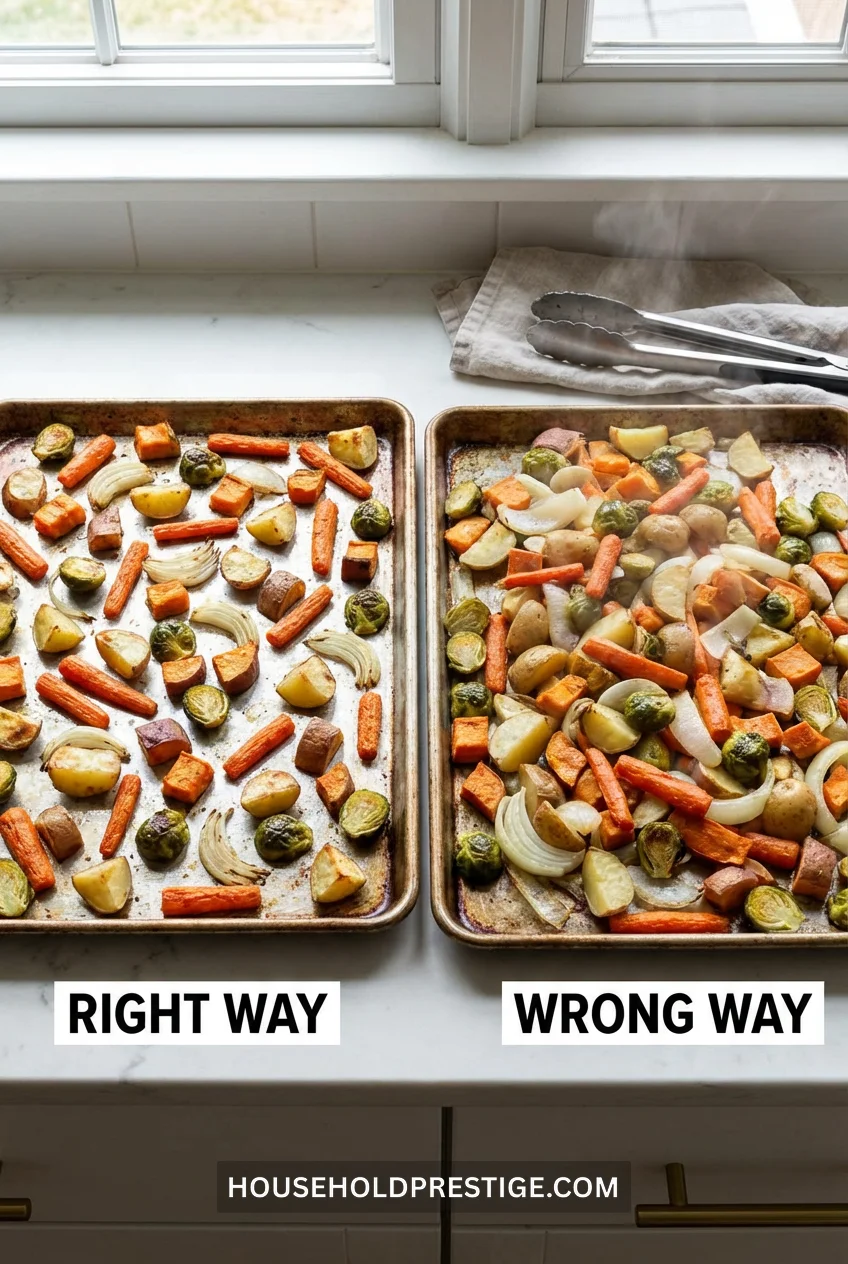
- Use the “one-inch rule” for vegetables. Cut everything to roughly one-inch pieces. Smaller burns, larger steams. Spread in a single layer with visible pan between each piece. Crowding = steaming = soggy vegetables.
- Double-pan for insurance. Stack two sheet pans together (no food between them). The air gap insulates the bottom layer, preventing burnt bottoms on delicate items like cookies or thin fish fillets.
Cost Reality
Nordic Ware commercial half-sheets: $15-20 each (buy two) Parchment paper roll: $6-8 (lasts 100+ uses) Total investment: $35-50 for years of perfectly cooked food
The Catch
This doesn’t fix a broken oven. If your temp swings more than 25°F or your heating element cycles on and off constantly, you need a repair, not a hack.
Installation Note
Nothing to install. But do this: put an oven thermometer ($7, any hardware store) on your middle rack. Wait until your oven says it’s preheated, then check the thermometer. If they disagree by more than 25°F, your oven needs calibration.
What Actually Works (And What’s a Waste of Time)
Works: The two-pan trick. Rotating at the halfway point. Cutting everything the same size.
Doesn’t work: Opening the oven constantly to check on things. That’s how you turn 25-minute roasted vegetables into 40-minute steamed mush.
Pro tip: Dark metal pans absorb more heat than shiny ones. If your sheet pans are dark and well-seasoned, reduce oven temp by 25°F to compensate.
4. Store Fresh Herbs Like Flowers
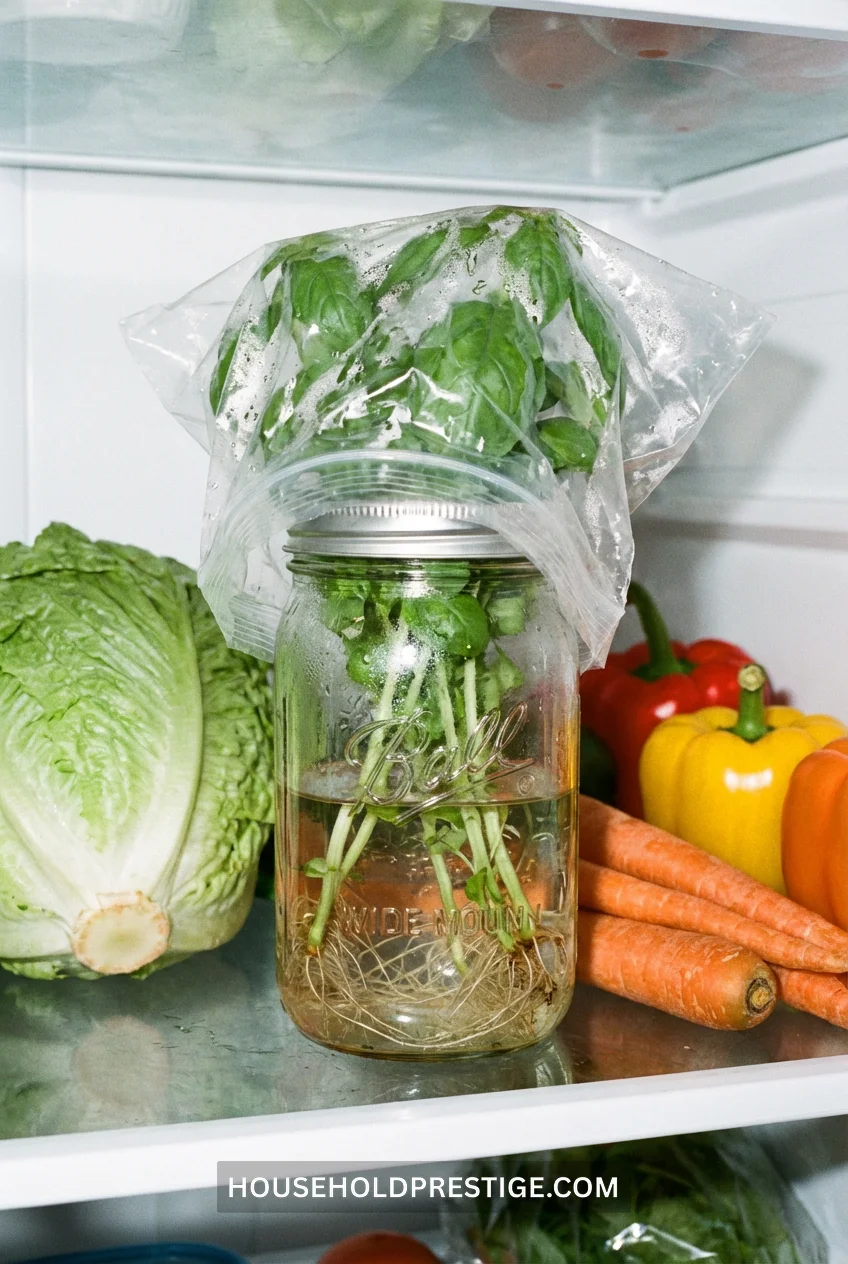
Treat basil, cilantro, and parsley like a bouquet. Trim the stems, stick them in a jar with an inch of water, cover loosely with a plastic bag, and refrigerate. They’ll last 2 weeks instead of 2 days.
5. Microwave Your Citrus Before Juicing
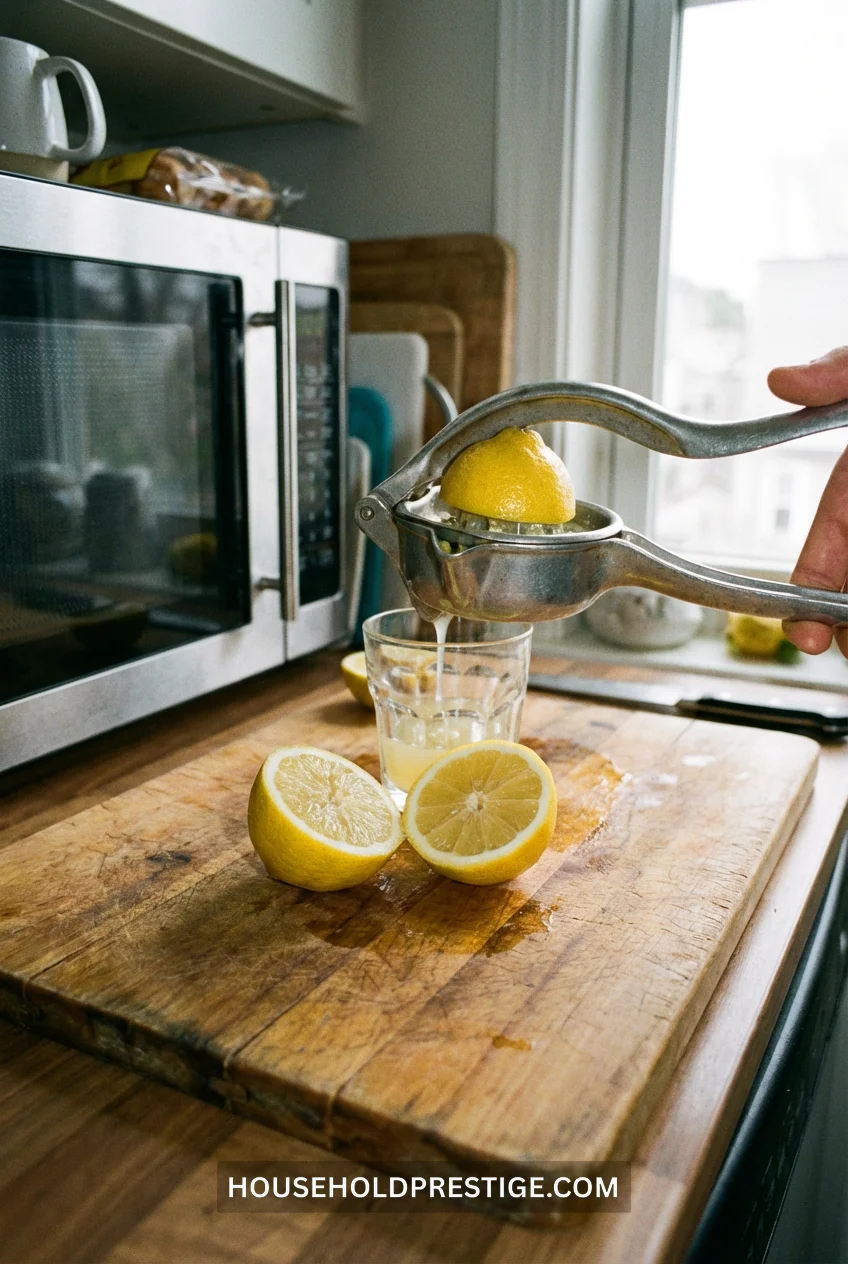
Roll your lemon on the counter while pressing down firmly, then microwave for 15 seconds. The heat breaks down the internal membranes, and you’ll get 30-40% more juice per fruit. Works for limes, oranges, and grapefruits, too.
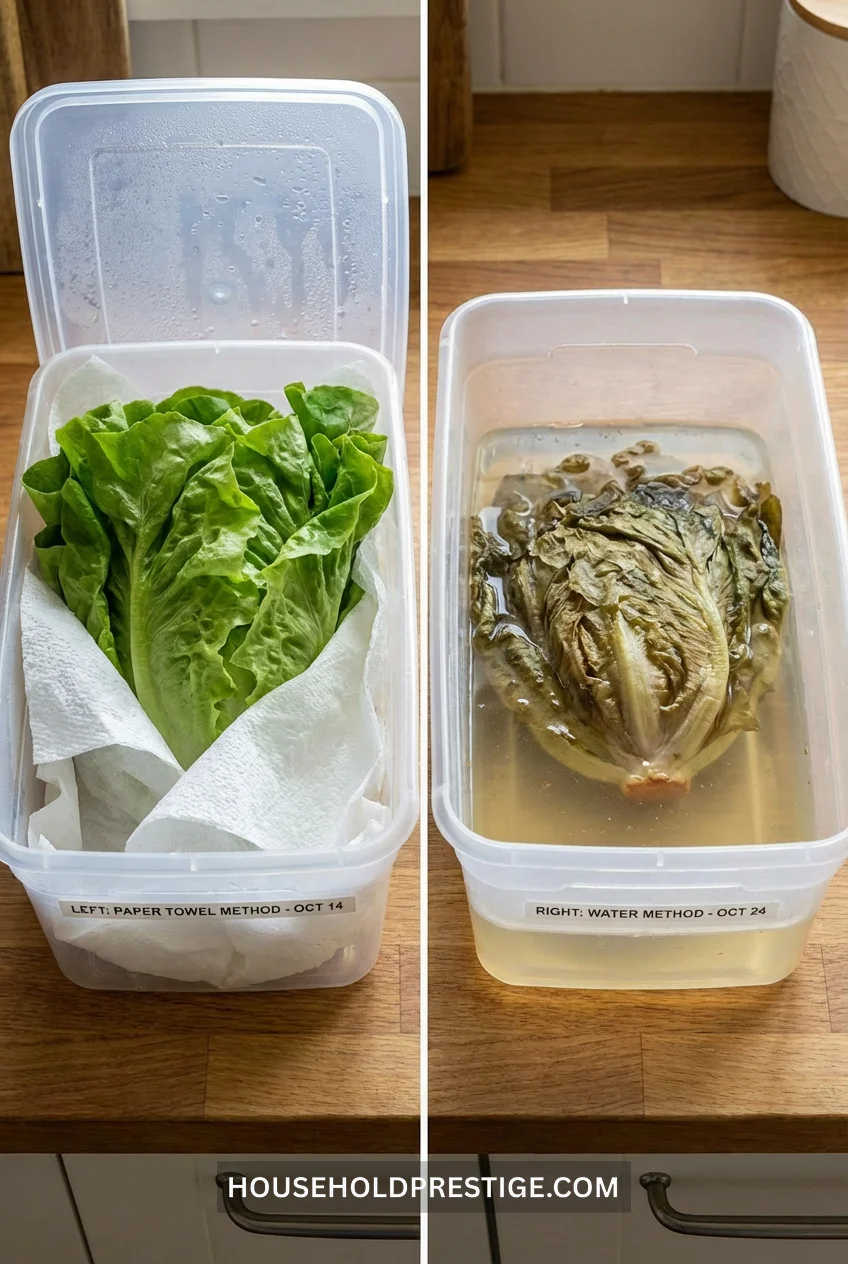
6. The Damp Paper Towel Method vs. The Airtight Container: What Actually Keeps Lettuce Fresh?
| Method | Cost | Shelf Life | Effort Level | Why It Works/Fails |
|---|---|---|---|---|
| Damp paper towel + airtight container | $0 (you have these) | 7-10 days | Low (2 minutes) | Maintains humidity without drowning leaves. Paper towel absorbs excess moisture that causes rot. |
| Store in water (like flowers) | $0 | 3-5 days | Medium (requires daily water changes) | Hydrates leaves but creates bacterial breeding ground. Roots are gone—lettuce can’t drink water efficiently like herbs can. |
| Plastic bag in crisper | $0 | 3-4 days | None | Traps ethylene gas that speeds decay. No moisture regulation. |
| Salad spinner storage | $15-25 (OXO model) | 5-7 days | Low | Better than a bag, but not as effective as damp towel method. Doesn’t regulate humidity. |
| Commercial containers (e.g., Rubbermaid FreshWorks) | $12-18 per container | 7-12 days | Low | Built-in vents regulate airflow. Carbon filter absorbs ethylene gas. Works but expensive for marginal improvement. |
The reality check: The damp paper towel method wins on all fronts unless you’re storing massive quantities. Change the towel every 3-4 days when it feels dry. That’s it.
7. Spray Measuring Cups with Cooking Oil Before Honey
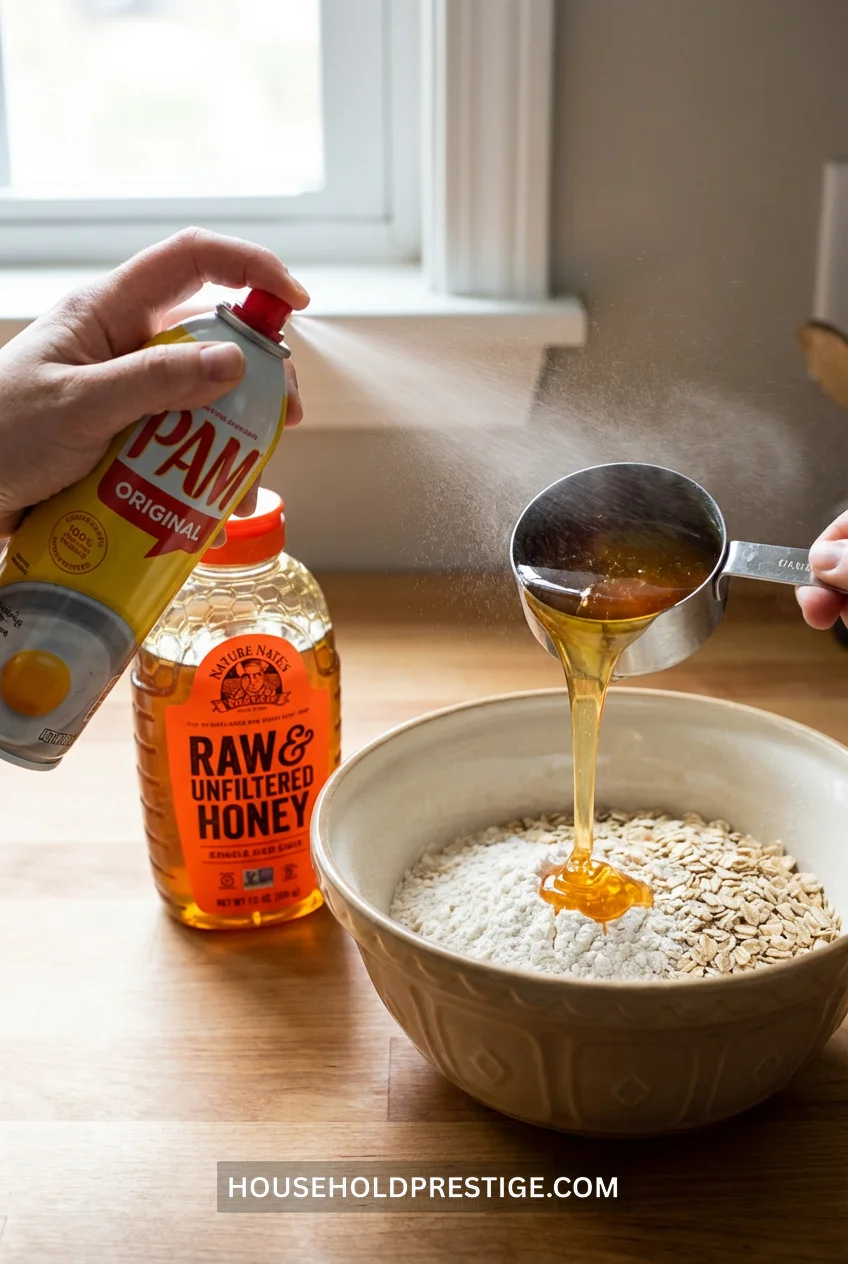
Sticky ingredients like honey, molasses, or peanut butter cling to measuring cups. A quick spray of cooking oil first and everything slides right out.
8. Use Dental Floss to Slice Soft Foods
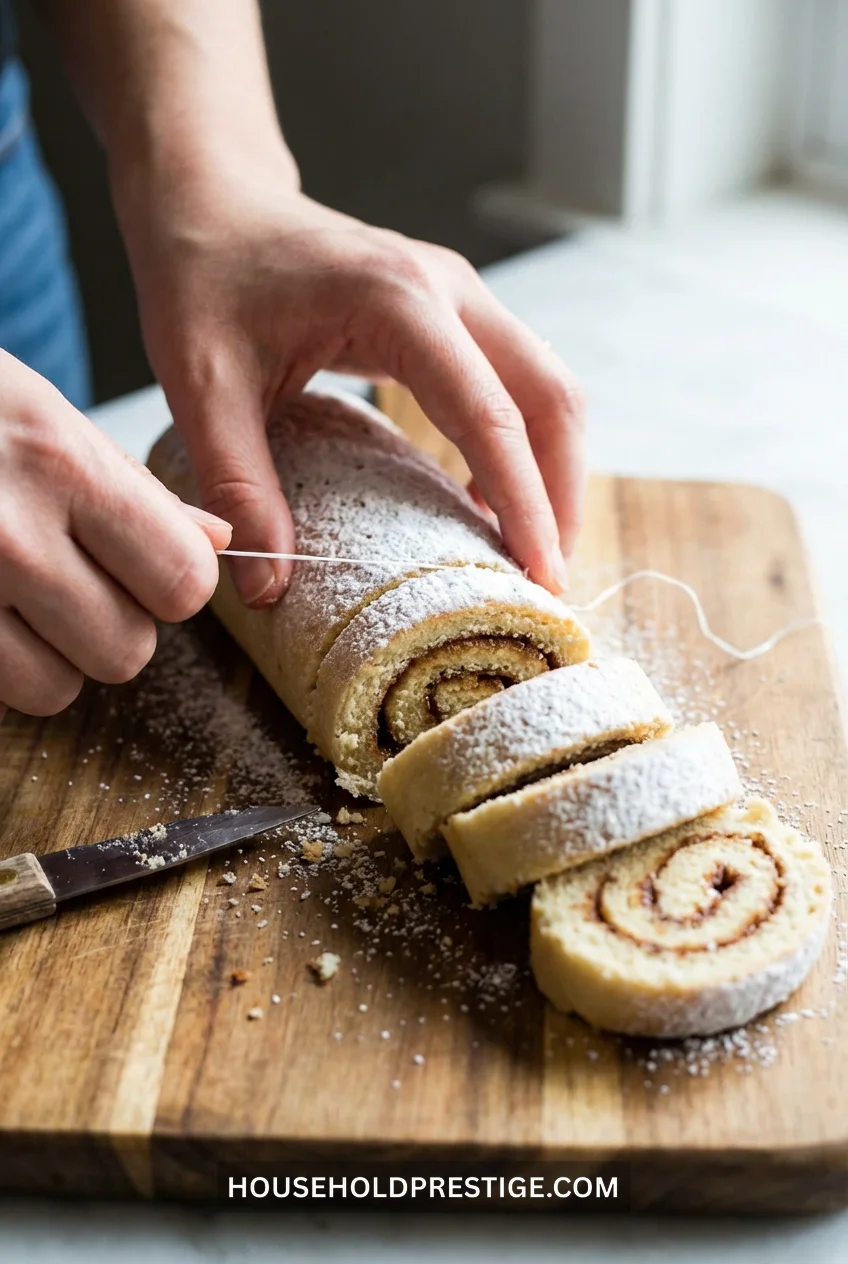
Cheese logs, cinnamon rolls, soft goat cheese—they all squash under a knife. Pull a length of unflavored dental floss taut, press down through the food, and you’ll get clean, even slices without compression. Just make sure it’s unflavored. Nobody wants minty cheese.
9. The Cardboard Box Lid Trick for Fresh Berries
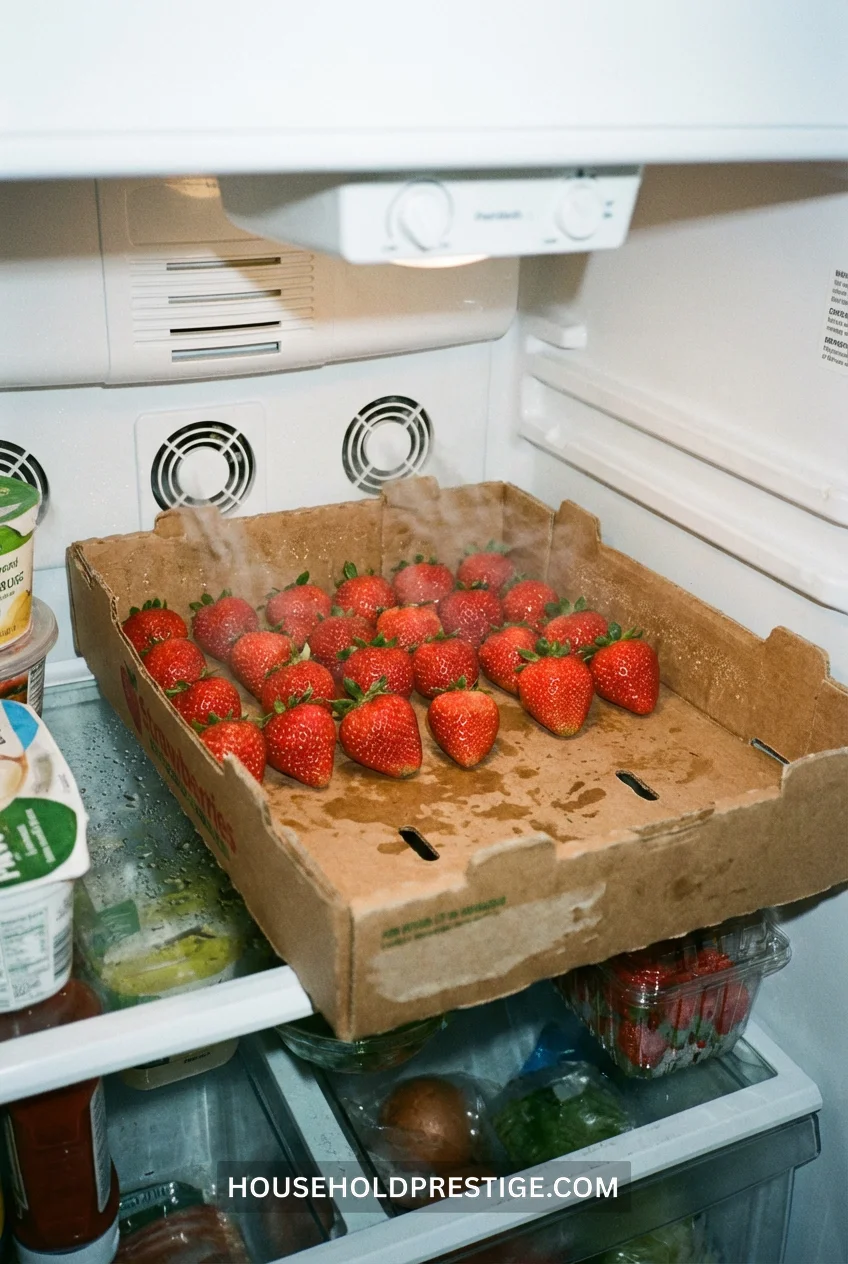
Stop storing berries in their plastic clamshells, where they turn moldy in 48 hours. Transfer them to a shallow container lined with paper towels—an egg carton works perfectly. Single layer, not touching, uncovered in the fridge. They’ll last a week.
10. Salt Your Cutting Board Before Chopping Onions
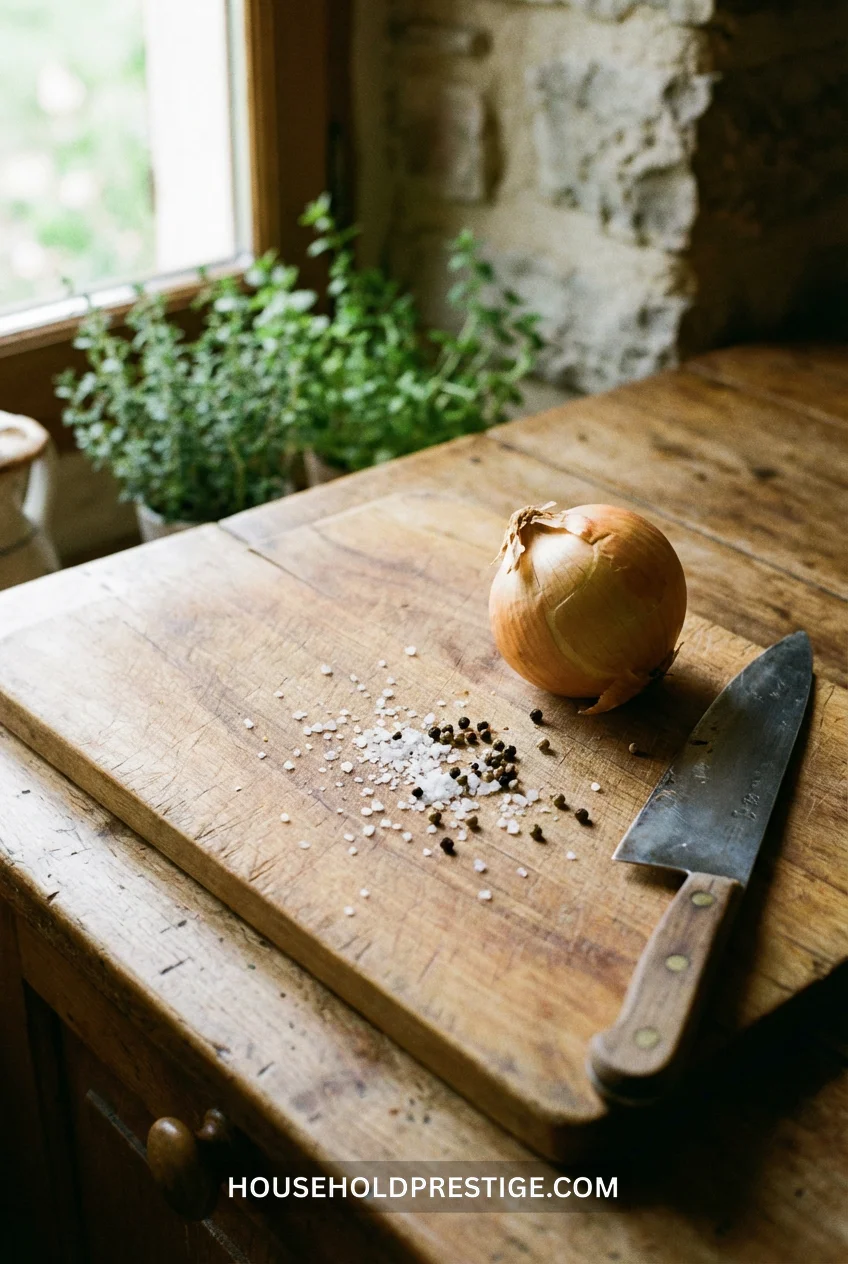
Sprinkle coarse salt across your cutting board before slicing onions. The salt crystals absorb the sulfuric compounds that make you cry, acting like a million tiny sponges. Not a perfect solution, but it cuts the tears by about 60%.
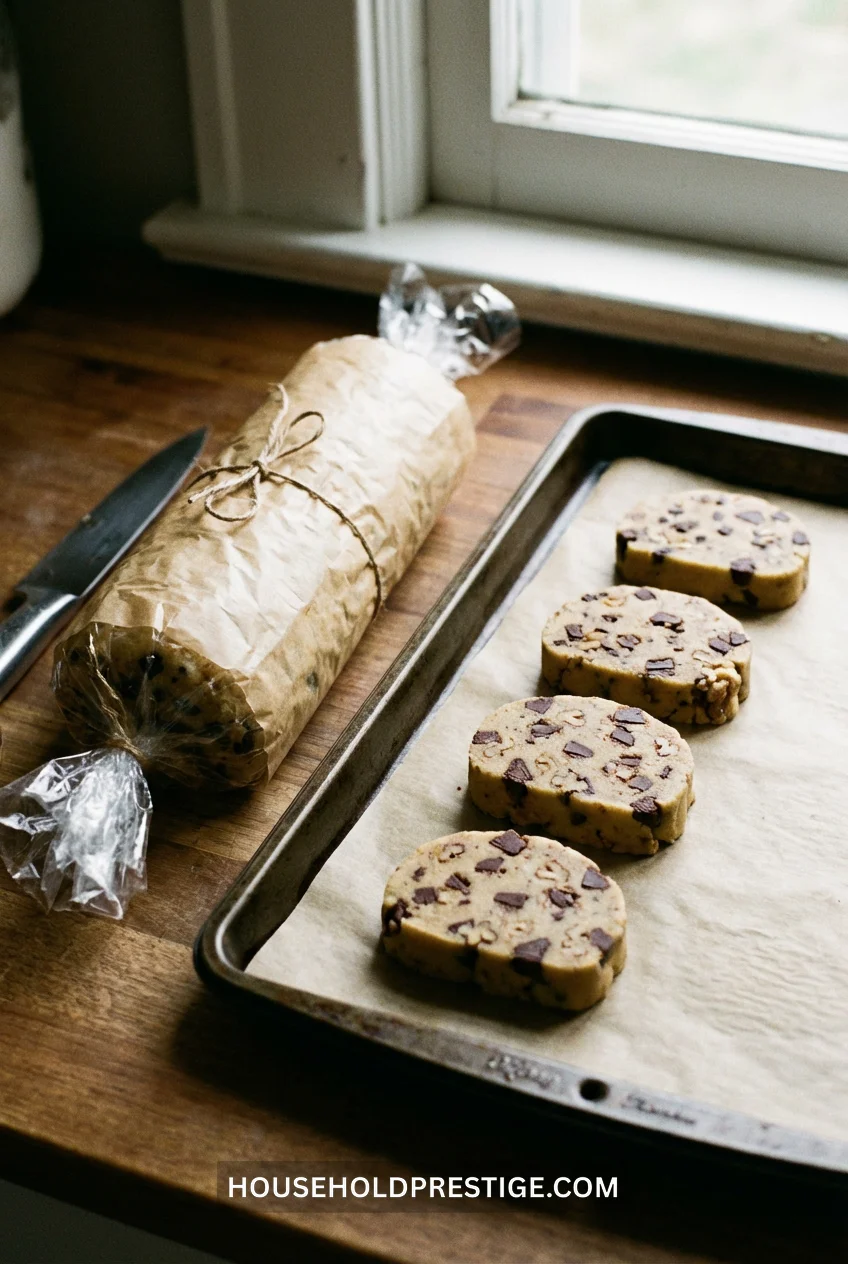
11. Freeze Cookie Dough in a Log, Slice as Needed
The Setup
Make a double or triple batch of your favorite cookie dough. Roll it into a log about 2 inches in diameter, wrap tightly in plastic wrap, then wrap again in parchment paper. Label with the date and freeze flat for up to 3 months.
When You Want Cookies
Pull the log from the freezer. Let it sit on the counter for 5 minutes—just enough to make slicing easier without fully thawing. Slice 1/4-inch rounds with a sharp knife (frozen dough dulls blades fast, so use your second-best knife, not your expensive one). Place on a parchment-lined sheet pan with 2 inches between each round.
Baking Adjustments
Frozen dough takes 2-3 minutes longer than fresh dough. Start checking at the recipe’s minimum time. The edges should be set and just starting to brown while the centers still look slightly underbaked. They’ll finish cooking on the hot pan after you pull them from the oven.
Pro Move
Score the plastic wrap every inch before freezing. When you want exactly six cookies, you’ll know where to cut without guessing or wasting dough.
12. Use a Bundt Pan as a Roasting Rack
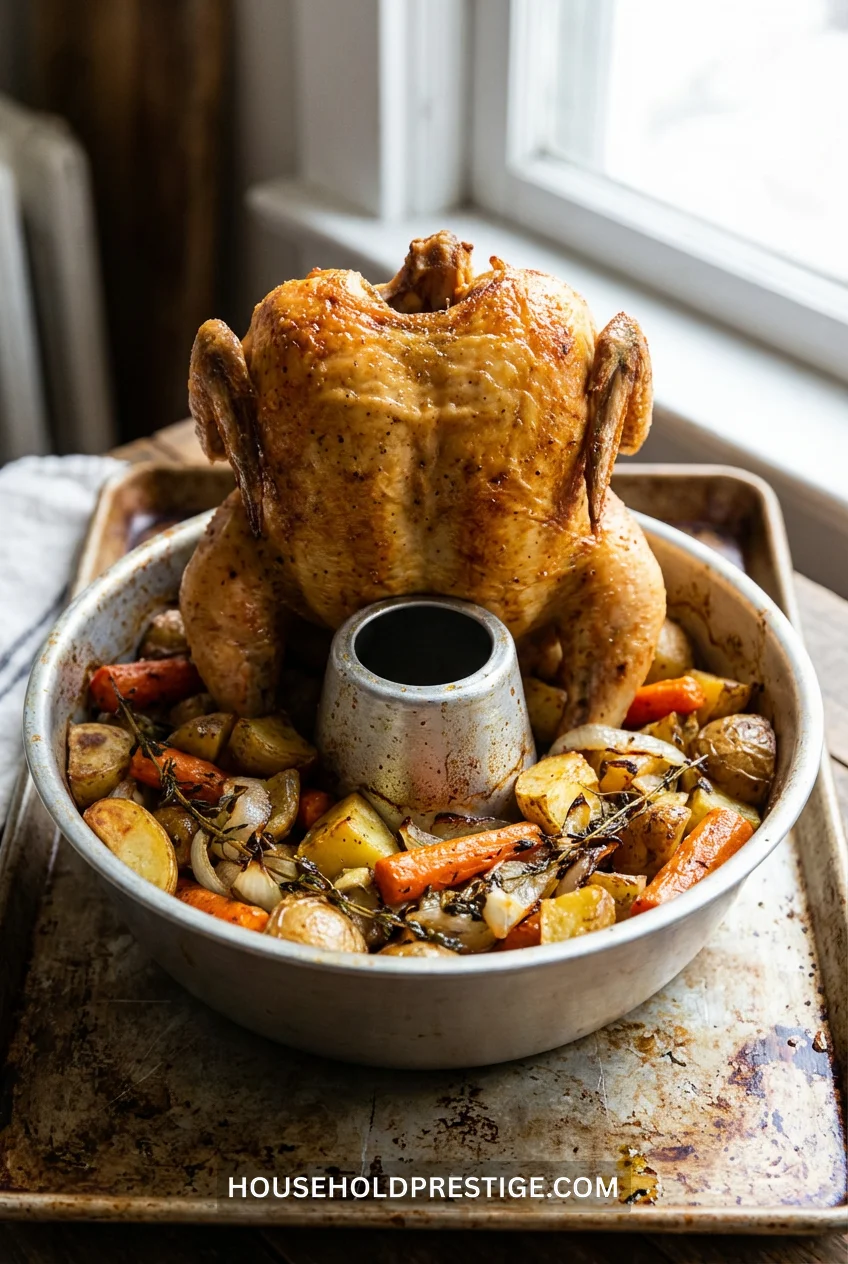
Turn your bundt pan upside down, stick a whole chicken on the center tube, and roast. The heat circulates all around the bird while the drippings collect in the ring below where you can toss in potatoes or vegetables. Everything cooks evenly and you’ve created a self-basting system.
13. The Coffee Filter Trick Everyone Misses
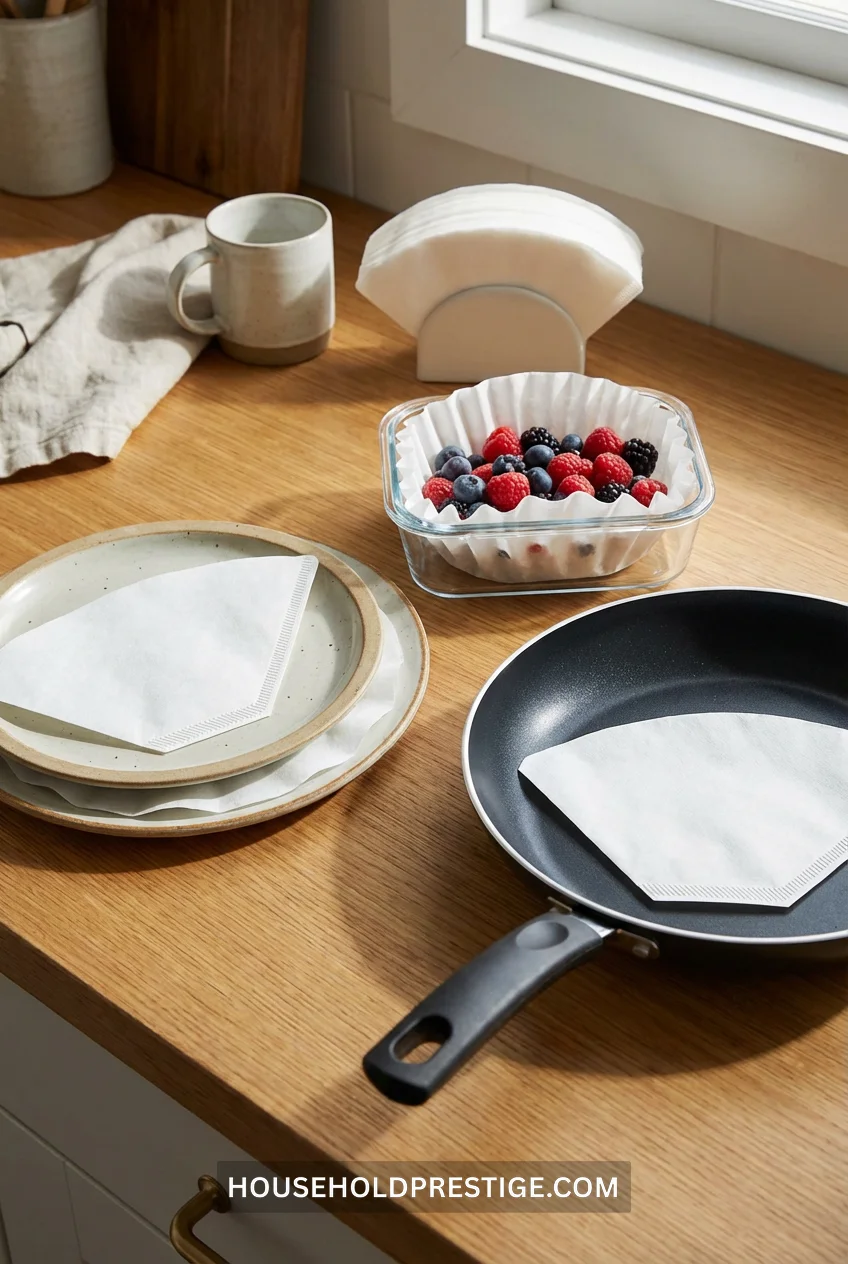
Coffee filters aren’t just for coffee. Stick them between stacked plates to prevent scratches. Use them to line containers for delicate items like fresh berries or soft cheeses. Put them between nonstick pans when storing to protect the coating. They’re lint-free, absorbent, and dirt cheap.
14. Vacuum Seal Without a Vacuum Sealer: The Water Displacement Method
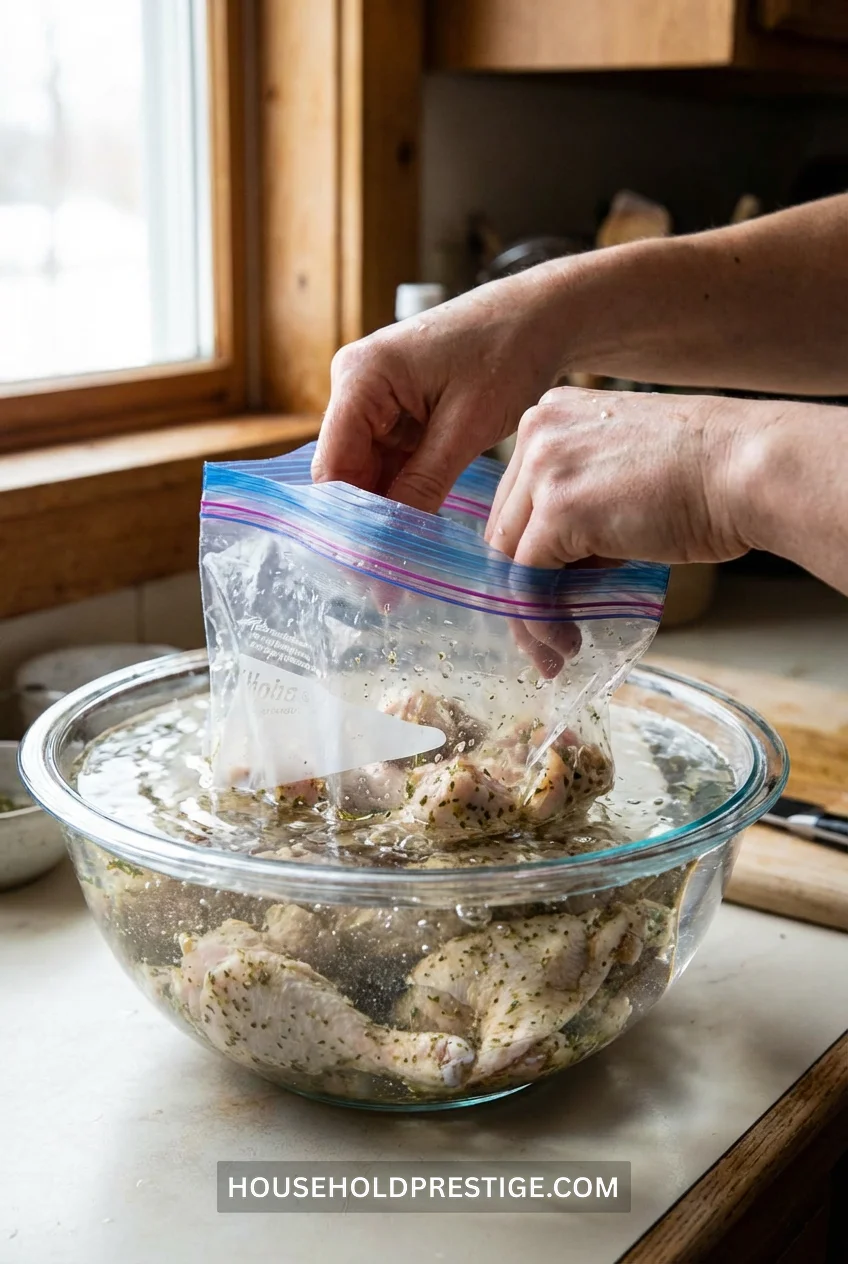
How It Works
Fill a large bowl or your sink with cold water. Place your food in a freezer-grade zip-top bag, leaving the seal open. Slowly lower the bag into the water, keeping the open end above the waterline. The water pressure pushes all the air out of the bag. Just before the water reaches the seal, zip it closed.
Why This Beats Regular Storage
- Prevents freezer burn: No air = no ice crystals forming on your food
- Faster marinating: Liquid coats every surface when there’s no air pocket
- Better sous vide: Bag stays submerged instead of floating
- Portion control: Press flat, freeze, and you can stack bags like files
Cost Reality
Freezer bags: $4-7 per box (50-80 bags) Commercial vacuum sealer: $50-200 Bags for vacuum sealer: $20-30 per roll
You’ll spend $200-300 on a vacuum sealer system. The water method is free and works for 90% of home cooking needs.
When This Doesn’t Work
Large bone-in cuts (the bones puncture the bag), anything with sharp edges, or long-term storage beyond 3-4 months. For those, splurge on the vacuum sealer.
Pro Tip
Double-bag meats that go in the freezer for more than a month. Use one bag for the water displacement method, seal it, then put that entire bag inside a second bag and seal normally. The extra layer costs pennies and prevents leaks.
15. Store Ground Coffee in the Freezer
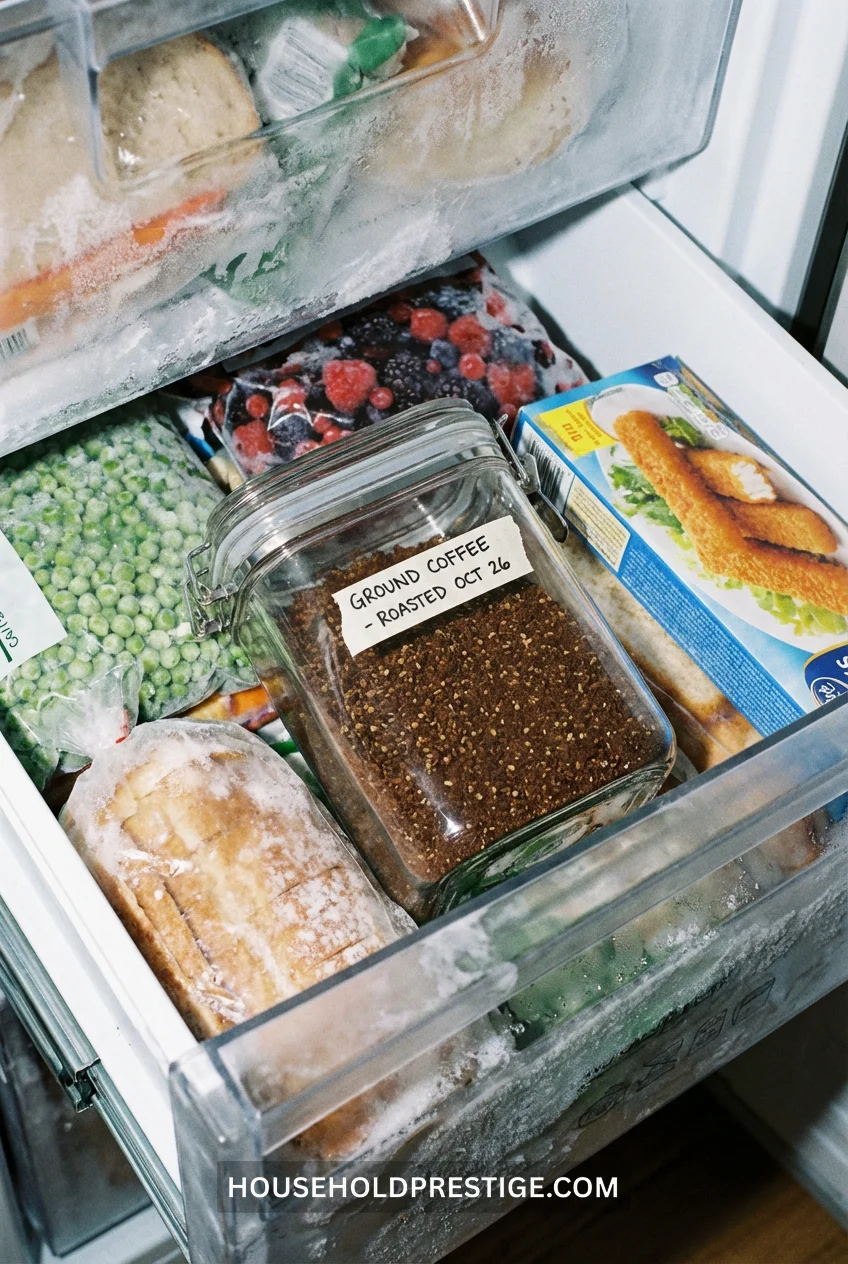
Ground coffee goes stale in 2 weeks on your counter. In an airtight container in the freezer? Three months, easy. The cold temperature slows oxidation without affecting flavor. Just scoop what you need straight from the freezer—no thawing required.
16. The Aluminum Foil Ball for Cleaning Cast Iron
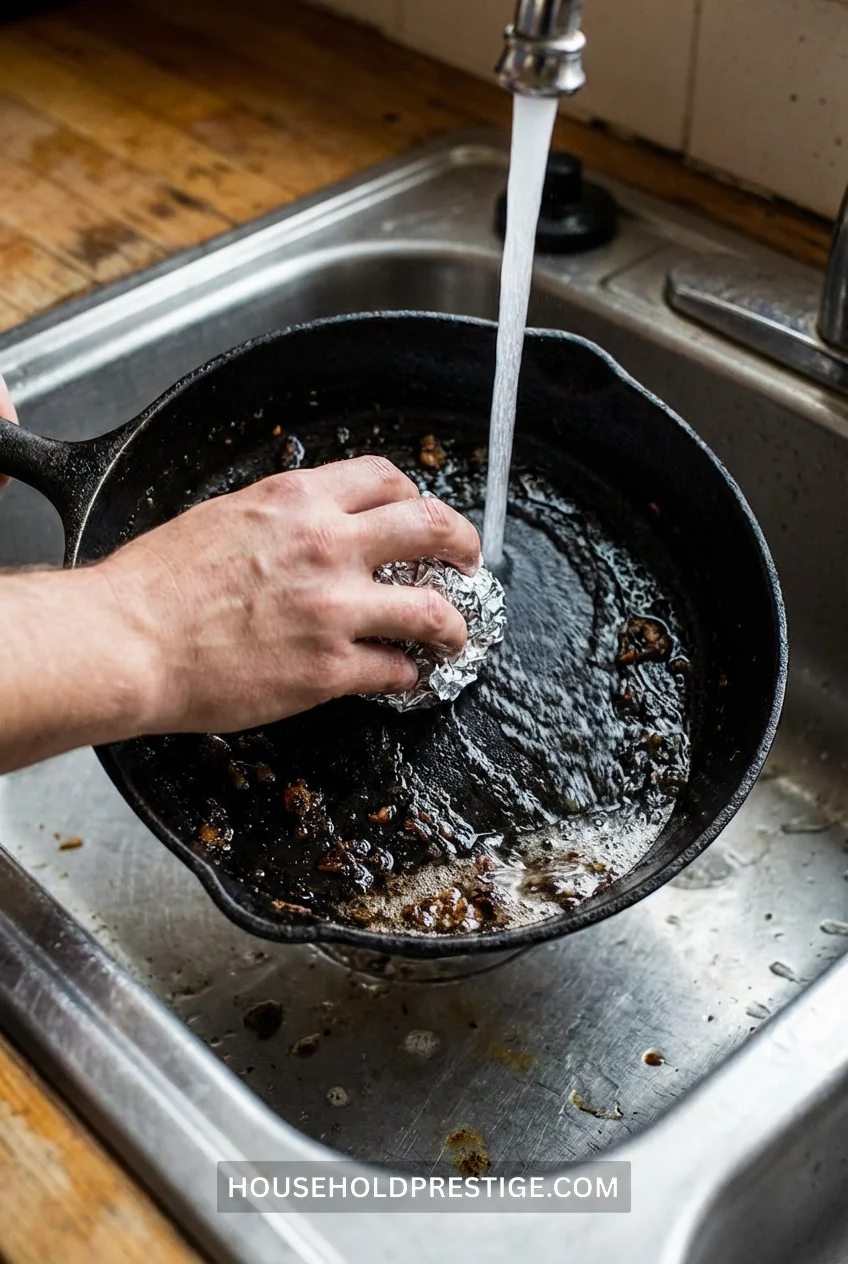
Stuck-on food in your cast iron skillet? Wad up a sheet of aluminum foil into a ball and scrub under hot water. The foil is abrasive enough to remove burnt-on bits but won’t strip your seasoning like steel wool. Rinse, dry on the stove over low heat for 2 minutes, and you’re done.
17. Batch-Cook Aromatics in the Instant Pot (The Hack That Changes Everything)
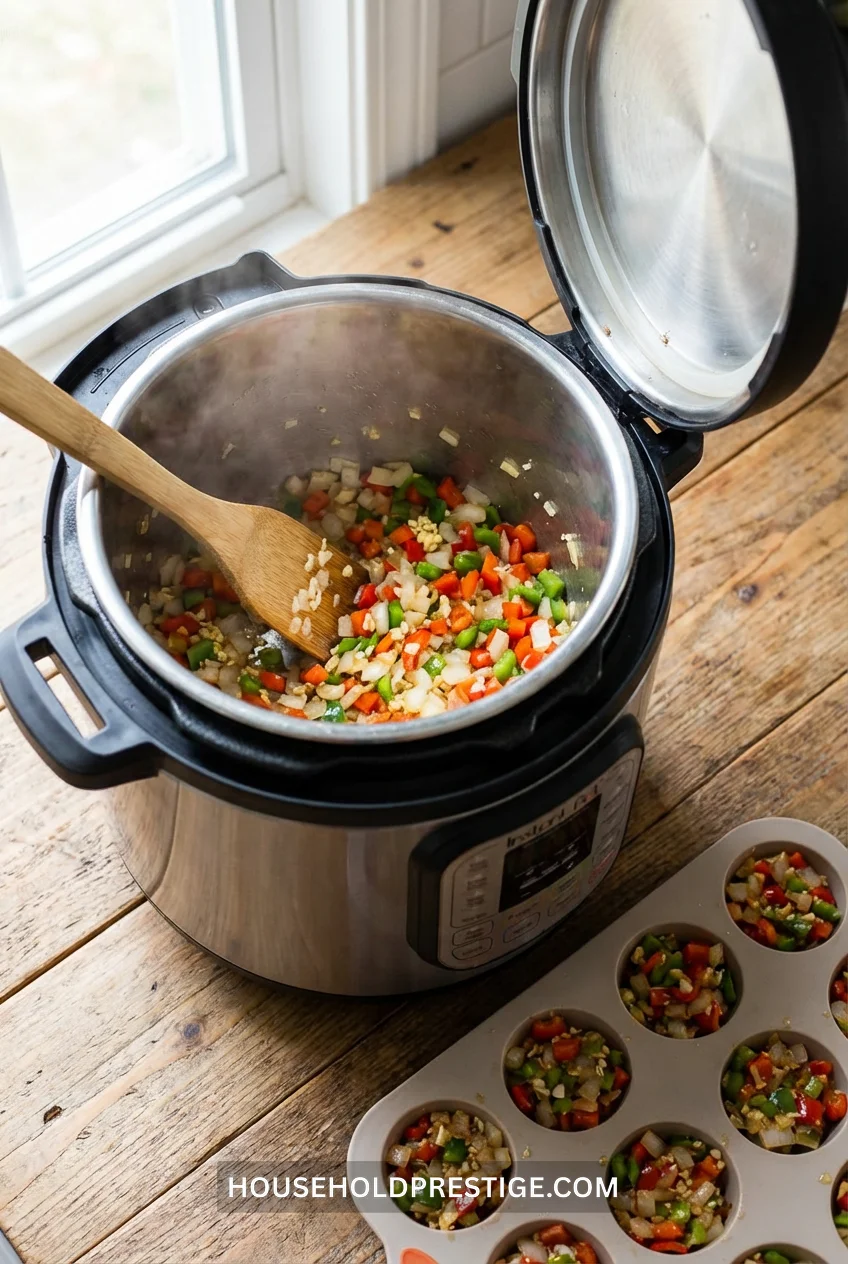
Why This Is The One That Changes Everything
You’re not going to meal prep every Sunday. But if you batch-cook aromatics—onions, garlic, celery, bell peppers—once a week, every dinner becomes a 15-minute operation instead of 45 minutes.
The Process (Takes 20 Minutes Total)
What you need:
- 3 pounds yellow onions
- 2 heads garlic
- 2 bell peppers (any color)
- 2 celery stalks
- Instant Pot (6 or 8-quart)
- 2 tablespoons neutral oil
- Silicone muffin tin or ice cube trays
Step 1: Rough prep (10 minutes) Dice everything roughly—don’t waste time on perfect uniform cuts. The Instant Pot will break it down anyway. Peel garlic cloves and smash them with the flat of your knife. Doesn’t matter if they’re crushed or whole.
Step 2: Sauté mode (8 minutes) Hit “Sauté” on high. Add oil. When it shimmers, dump everything in at once. Stir every 2 minutes. Don’t walk away—this is where the flavor builds. When the onions turn translucent and everything smells like you’re cooking in a Italian grandmother’s kitchen (about 7-8 minutes), you’re done.
Step 3: Cool and portion (2 minutes) Kill the heat. Let it cool for 10 minutes (or speed it up by stirring constantly). Spoon into a silicone muffin tin—about 1/3 cup per well, which is a standard “base” for soups, stews, stir-fries, pasta sauces, everything.
Step 4: Freeze and store Pop the muffin tin in the freezer for 2-3 hours. Once solid, transfer the pucks to a freezer bag. Label with date. They’re good for 6 months.
How to Use Them
Cooking anything? Grab one or two pucks. Drop them straight into your pan, pot, or skillet—no thawing needed. Within 90 seconds, they’ll melt and you’ve got the foundation of flavor without touching a knife.
Stir-fry? One puck, one minute.
Pasta sauce? Two pucks, 30 seconds.
Soup base? Three pucks, done.
Cost Breakdown
3 pounds onions: $2-3 2 heads garlic: $1-2 2 bell peppers: $2-4 2 celery stalks: $0.50-1 Total cost: $5.50-10 for a week’s worth of aromatics
Compare that to buying pre-cut mirepoix at the store ($4-6 per 10-ounce package that gives you maybe two meals).
Common Mistakes People Make
Mistake 1: Cutting everything uniformly. You’re wasting time. The sauté function doesn’t care if your onion pieces are 1/4-inch or 1/2-inch. It’s all breaking down anyway.
Mistake 2: Skipping the garlic because “it burns easily.” It doesn’t burn in the Instant Pot if you’re stirring. Add it.
Mistake 3: Not labeling the bag with the date. Six months from now, you’ll find mystery pucks in your freezer and have no idea if they’re still good. They are, but you won’t trust them. Label everything.
What Professional Chefs Know That You Don’t
Every restaurant kitchen has a container of pre-cooked aromatics. It’s called “mise en place” and it’s why restaurants can push out dishes in 8 minutes while you’re standing at your stove for 40. You just leveled up to restaurant speed.
This is the hack busy cooks love because it eliminates the most time-consuming, tedious part of cooking—the part where you’re crying over onions and your garlic is burning while you’re still trying to dice celery. Now? You skip all of it and start with flavor.
18. Use a Potato Masher for Ground Meat
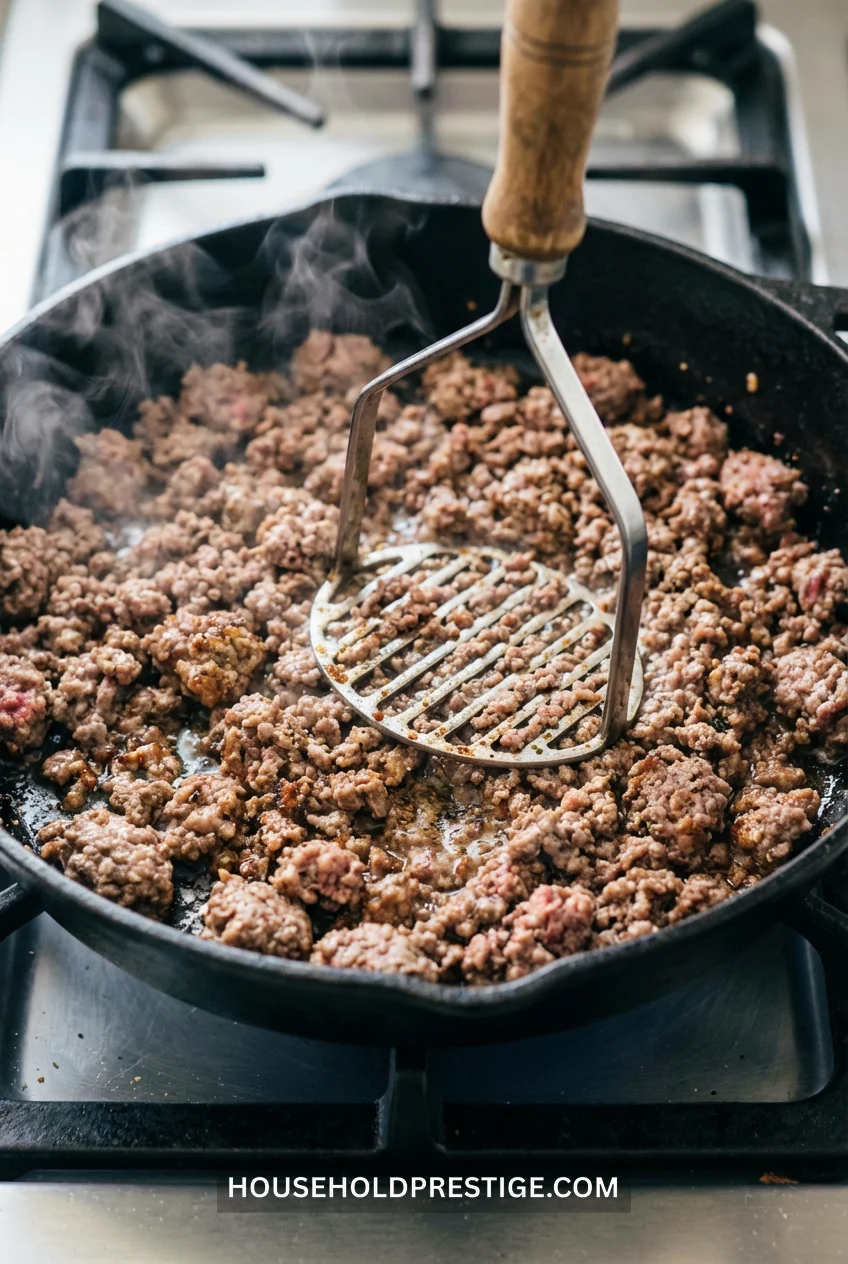
Tired of chunky ground beef that won’t brown evenly? Use a potato masher to break it up as it cooks. Pounding it against the pan creates uniform, fine crumbles that cook faster and absorb seasoning better. Works for turkey, chicken, pork, and any ground meat.
19. The Paper Bag Method for Ripening Fruit
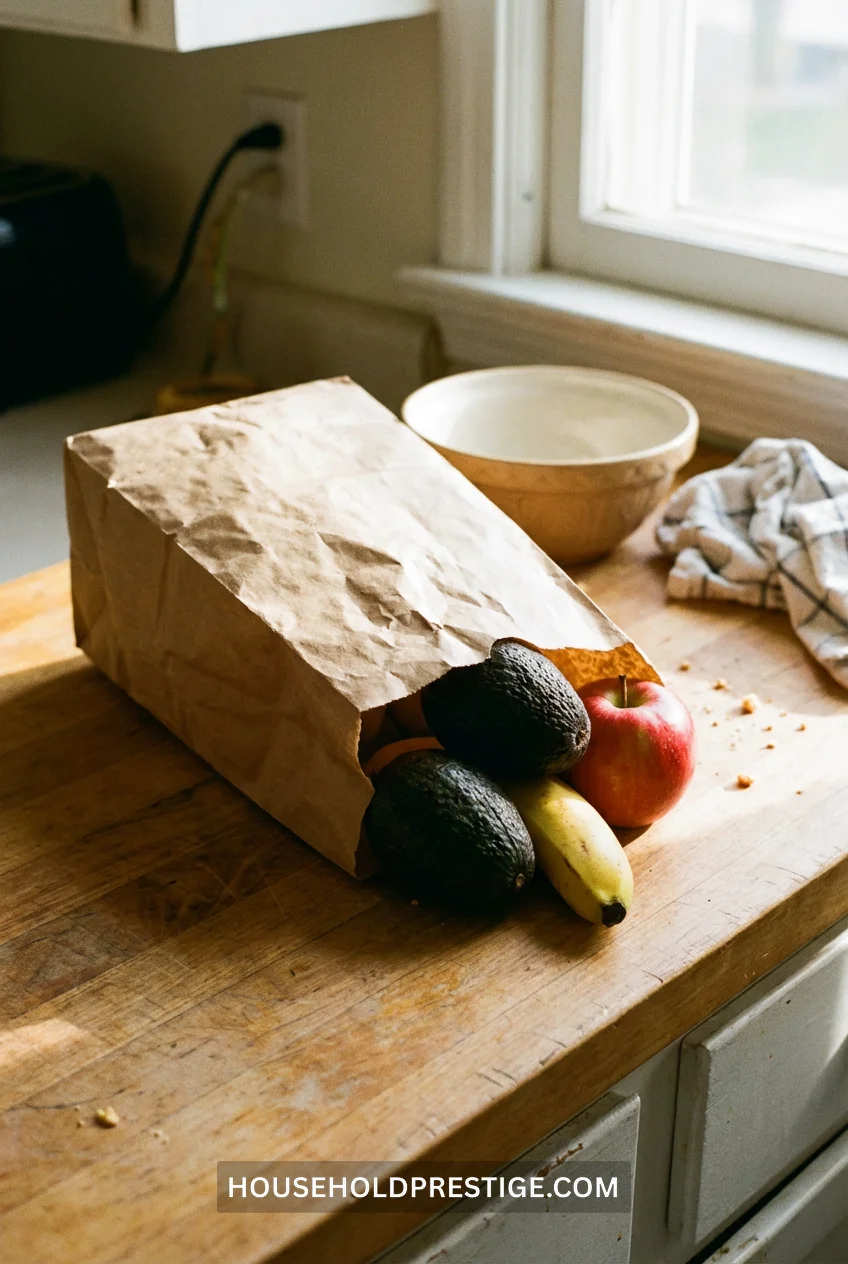
Avocados hard as rocks? Tomatoes stubbornly green? Put them in a paper bag with a banana or an apple. These fruits emit ethylene gas that speeds ripening, and the bag traps it. Check daily. Most fruits ripen in 24-48 hours instead of 4-5 days.
20. Pre-Salt Your Proteins 45 Minutes Before Cooking
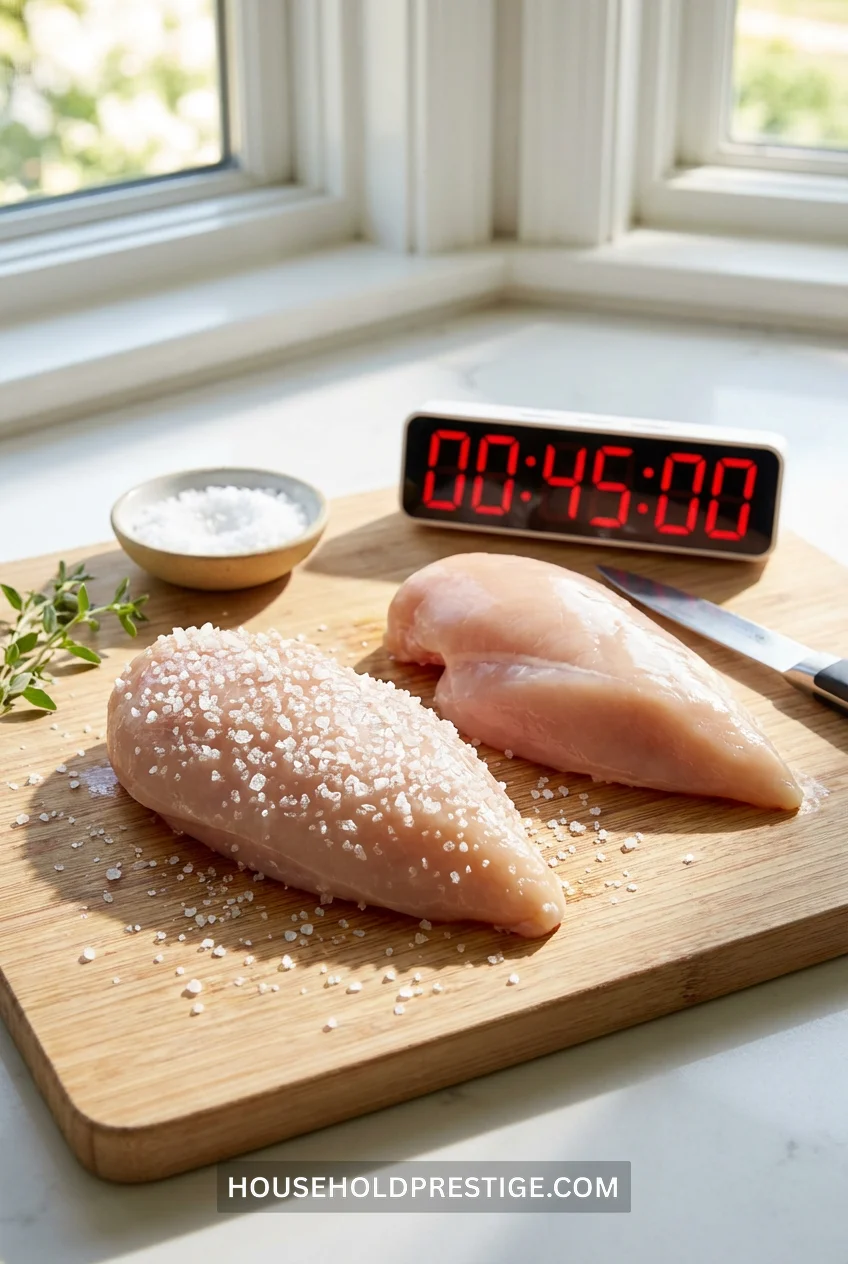
Salt your chicken, steak, or pork chops 45 minutes before cooking—not right before. The salt initially draws moisture out (that’s the wet surface you see after 5 minutes), but then the meat reabsorbs it along with the salt, seasoning the interior and tenderizing the muscle fibers. The result? Juicier meat with deeper flavor penetration.
For thick cuts (over 1.5 inches), give it 2-3 hours. For fish, 15 minutes max—it’s more delicate.
21. The Pillowcase Spin Cycle for Salad Greens
When Your Salad Spinner Isn’t Big Enough
Hosting a party? Got 3 heads of lettuce to wash and dry? Your salad spinner is useless. Here’s what restaurants do: wash your greens in the sink, shake off excess water, load them into a clean pillowcase (preferably one you don’t care about), tie the top shut, and throw it in the washing machine on the spin cycle only—no water, no detergent, just spin.
The Physics
The centrifugal force is identical to a salad spinner but scaled up massively. Two minutes later, you’ve got bone-dry lettuce for a crowd without standing at the counter pumping a spinner lid 400 times.
Important Notes
- Clean pillowcase only. Fabric softener residue will transfer to your greens.
- Spin cycle only. Do not add water. Do not add soap. Just spin.
- Check after 1 minute. Most greens are dry in 60-90 seconds. Delicate lettuces can bruise if you over-spin.
When This Backfires
Forgot to tie the pillowcase shut, and your lettuce turns into washing machine confetti. Ask me how I know.
22. Freeze Ginger and Grate It Frozen
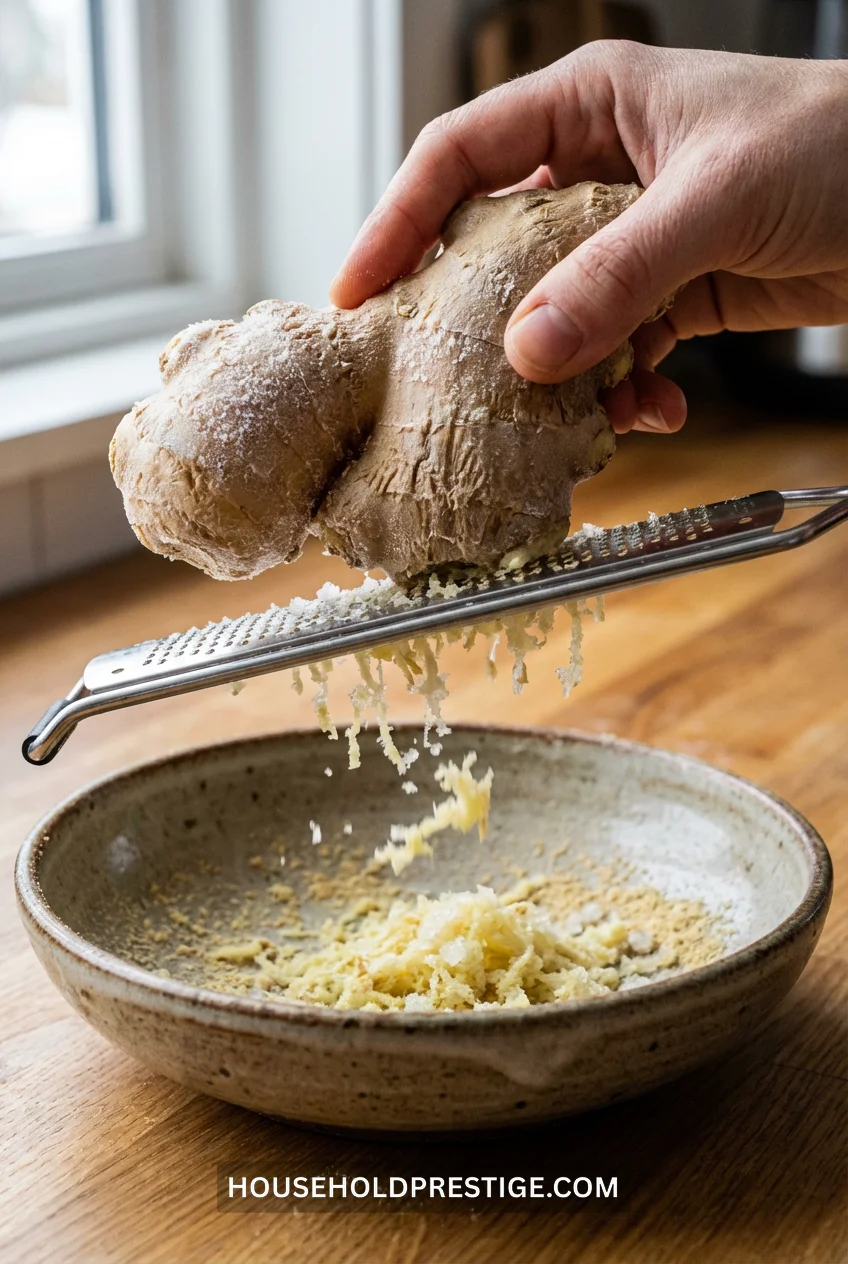
Fresh ginger goes moldy before you use the whole root. Freeze it whole in a freezer bag. When you need some, pull it out and grate it frozen on a microplane. The frozen ginger grates into a fine, fluffy snow that melts instantly into your dish—easier than peeling and mincing, with zero waste.
23. The Mason Jar Salad Layer Order (That Actually Stays Fresh)
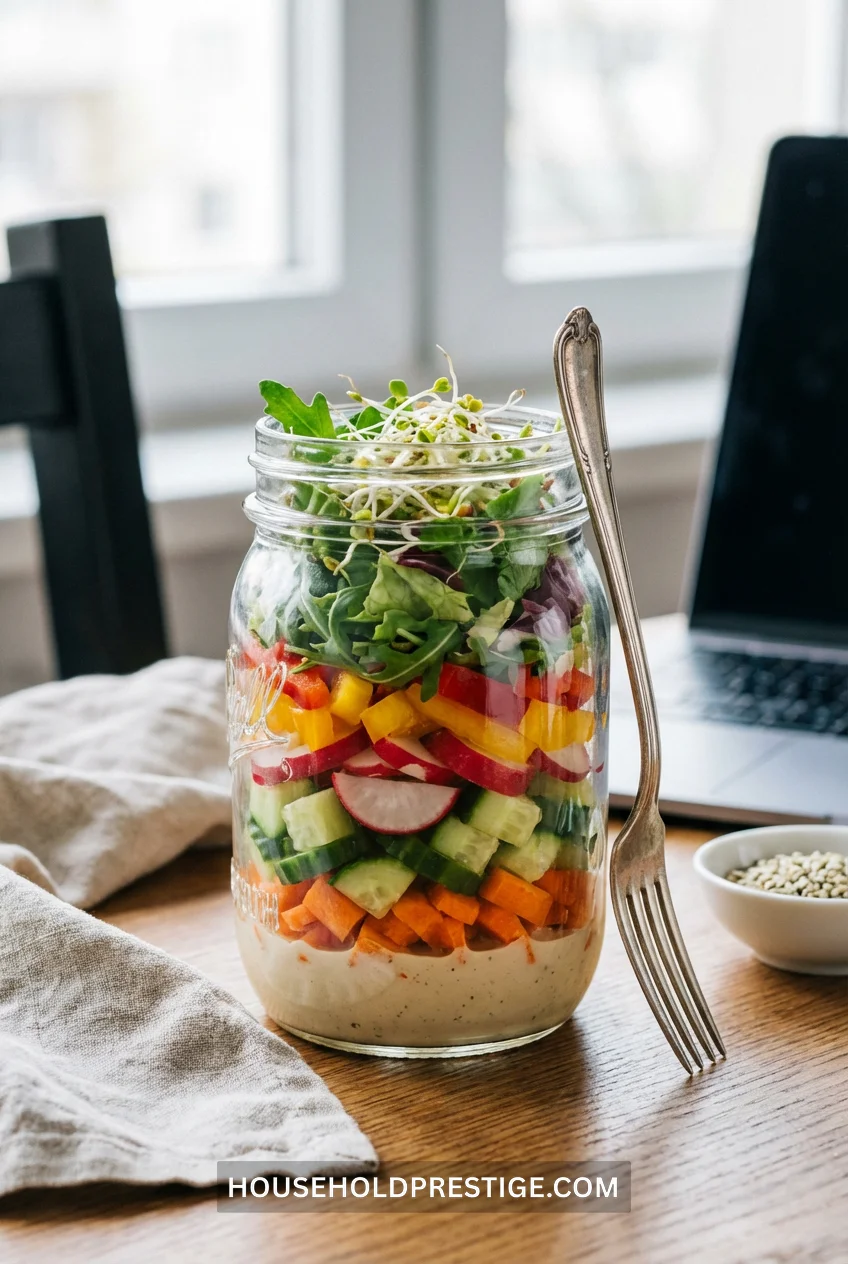
The Order Matters (Get This Wrong and You’ve Got Soggy Lettuce)
Bottom layer (liquid barrier): Dressing. Always. This stays at the bottom and keeps everything else from getting soggy.
Second layer (sturdy vegetables): Cherry tomatoes, cucumbers, bell peppers, carrots—anything with low water content that won’t wilt. These can touch the dressing without consequence.
Third layer (proteins and grains): Grilled chicken, hard-boiled eggs, quinoa, chickpeas. They form a protective barrier between the wet bottom and the delicate top.
Fourth layer (cheese and nuts): Feta, shredded cheese, sunflower seeds, almonds. They stay dry here.
Top layer (greens): Lettuce, spinach, arugula—anything delicate goes on top, as far from the dressing as possible.
When You’re Ready to Eat
Shake it hard. The dressing at the bottom coats everything evenly. Or dump it into a bowl and toss.
Shelf Life
4-5 days in the fridge if you follow the order. Try to shortcut by putting greens on the bottom? You’ve got 24 hours max before you’re eating wilted garbage.
The Container Matters
Wide-mouth quart-size mason jars ($12 for a 12-pack) work best. Regular-mouth jars make it harder to get the salad out without mangling it. Plastic containers don’t seal well enough—dressing leaks, air gets in, and greens wilt faster.
Conclusion
You just saved yourself 5-10 hours a week in the kitchen. Not by cooking less, but by working smarter—using the same tools you already own, just differently.
The batch-cooked aromatics alone (Hack #17) will change how you approach weeknight dinners. The vacuum-seal method (Hack #14) means your freezer is now a meal planning asset instead of a graveyard for mystery meat. And that mason jar salad trick (Hack #23)? You’re about to eat lunch like a functional adult instead of surviving on vending machine snacks.
Start with three of these. The ones that solve your specific pain points. Master those, then add more. Your future self—the one who’s not standing at the stove at 8 p.m., wondering why dinner is taking so long—will thank you.
FAQ
Q: How long do batch-cooked aromatics last in the freezer?
A: Six months if stored in an airtight freezer bag or container. The flavor degrades slightly after that, but they’re still perfectly safe to use.
Q: Can I use the water displacement method for raw meat?
A: Yes, but double-bag it. Raw meat can have sharp bones or edges that puncture bags. Use one bag for the water displacement seal, then place that entire sealed bag inside a second bag and seal normally for extra protection.
Q: Will freezing fresh herbs in water really work?
A: Only for herbs you’ll use in cooked dishes (soups, stews, sauces). The texture changes when frozen, so they won’t work for fresh garnishes. Chop herbs, pack them into ice cube trays, cover with water or olive oil, freeze, then pop them into freezer bags.
Q: What’s the best way to organize a freezer full of these hacks?
A: Label everything with the date and contents using a Sharpie. Use clear freezer bags so you can see what’s inside. Store flat items (like vacuum-sealed meats) upright like files in a drawer—they take up less space, and you can see everything at a glance instead of digging through piles.
Q: Can I batch-cook aromatics without an Instant Pot?
A: Absolutely. Use a large skillet or Dutch oven over medium heat. It takes about 15-20 minutes of active stirring instead of the Instant Pot’s 8 minutes, but the result is identical. Just make sure your pan is large enough to hold 3 pounds of chopped vegetables without crowding.