

Your monstera’s sprawling across the carpet again. Your succulents are fighting for windowsill real estate. And that gorgeous fiddle leaf fig? She’s stuck in a corner because there’s literally nowhere else to put her.
Sound familiar?
The problem isn’t that you have too many plants (there’s no such thing). The problem is you’re thinking horizontally when you need to think vertically. Plant stands turn dead floor space into a living gallery. They protect your floors from water damage. They give each plant the light it actually needs instead of whatever’s leftover.
I’ve built 12 different plant stands over the past two years—some brilliant, some disasters. What I’ve learned: you don’t need a woodshop or a fat wallet. You need creativity, basic tools, and about an afternoon. These 19 ideas range from “done in 20 minutes” to “weekend project,” but every single one will make your space feel more intentional and your plants happier.
Let’s get into it.
1. The Vintage Ladder Stand
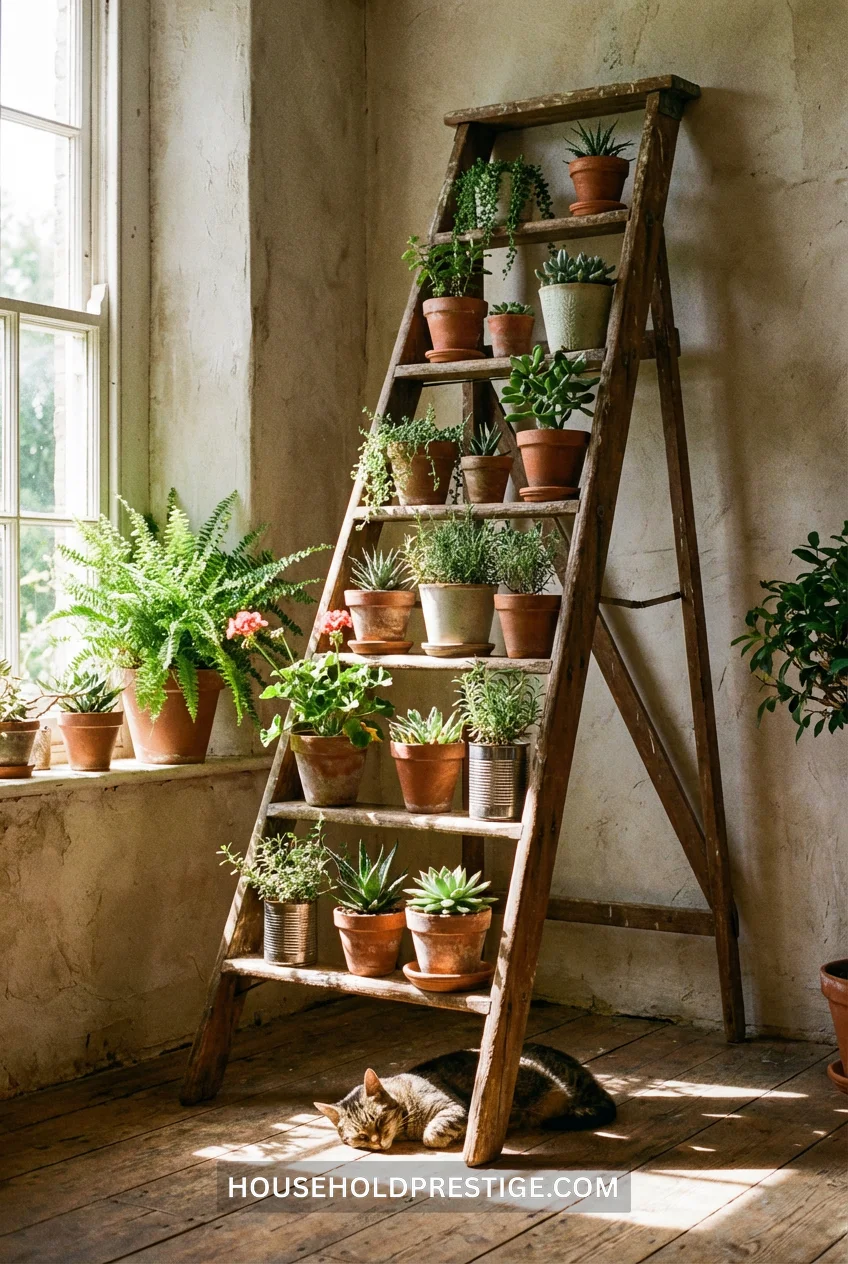
Raid your garage or hit up a yard sale. One old wooden ladder = instant vertical garden.
Lean it against the wall. Put plants on the rungs. Done. The weathered wood adds character you can’t buy, and the height variation happens naturally. Cost: $0-15 if you find one secondhand.
2. Tiered Corner Advantage
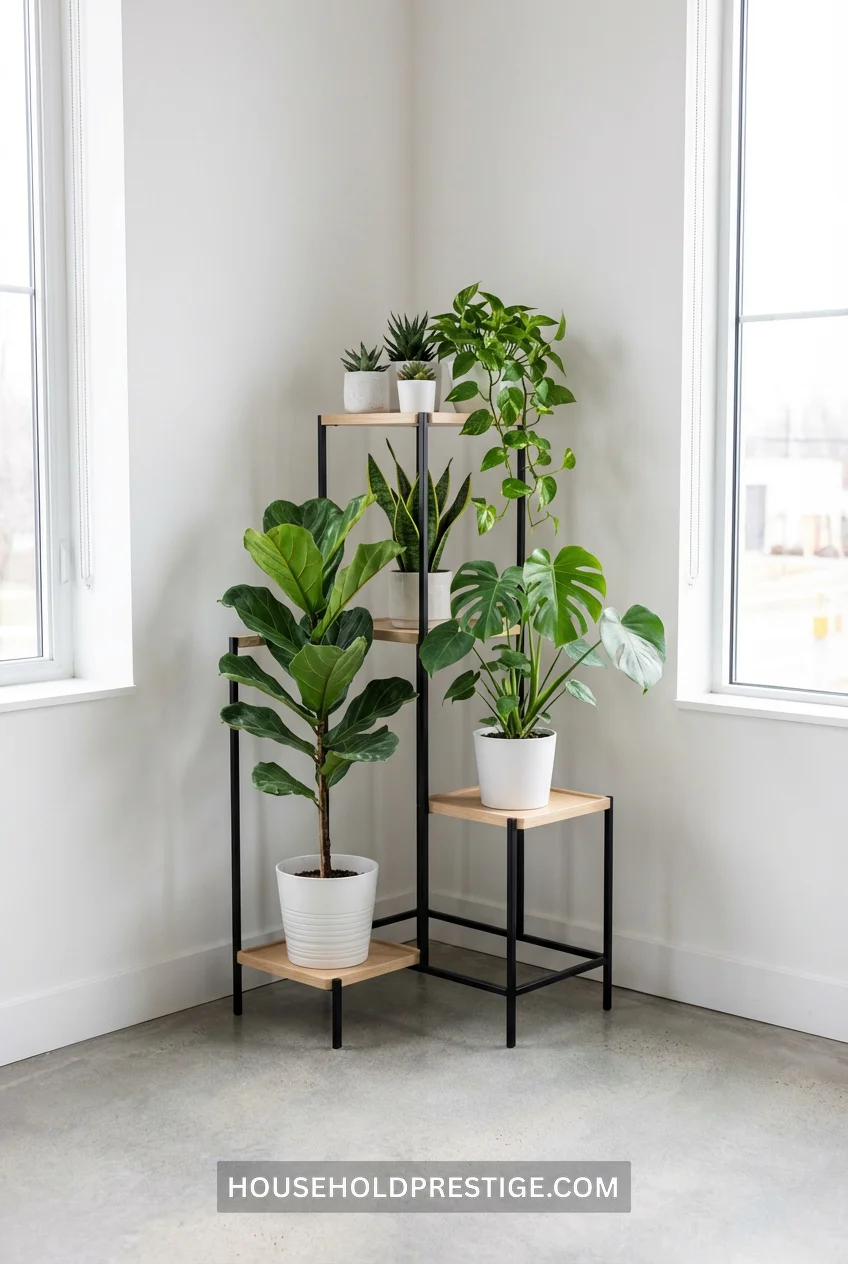
Corners eat up square footage without giving anything back. Until you put a tiered stand there.
Build three shelves at different heights—12 inches, 24 inches, 36 inches off the ground. Corners naturally hide the stand’s structure while showcasing the plants. You’re using the same floor space but tripling your display area. The height variation keeps it visually interesting instead of that “garden center display” vibe.
Pro tip: Stain each tier a slightly different shade. Creates depth without looking mismatched.
Best for: Small apartments where every inch counts. Also works brilliantly in bathrooms for humidity-loving plants.
3. Macrame Hanging Conversion
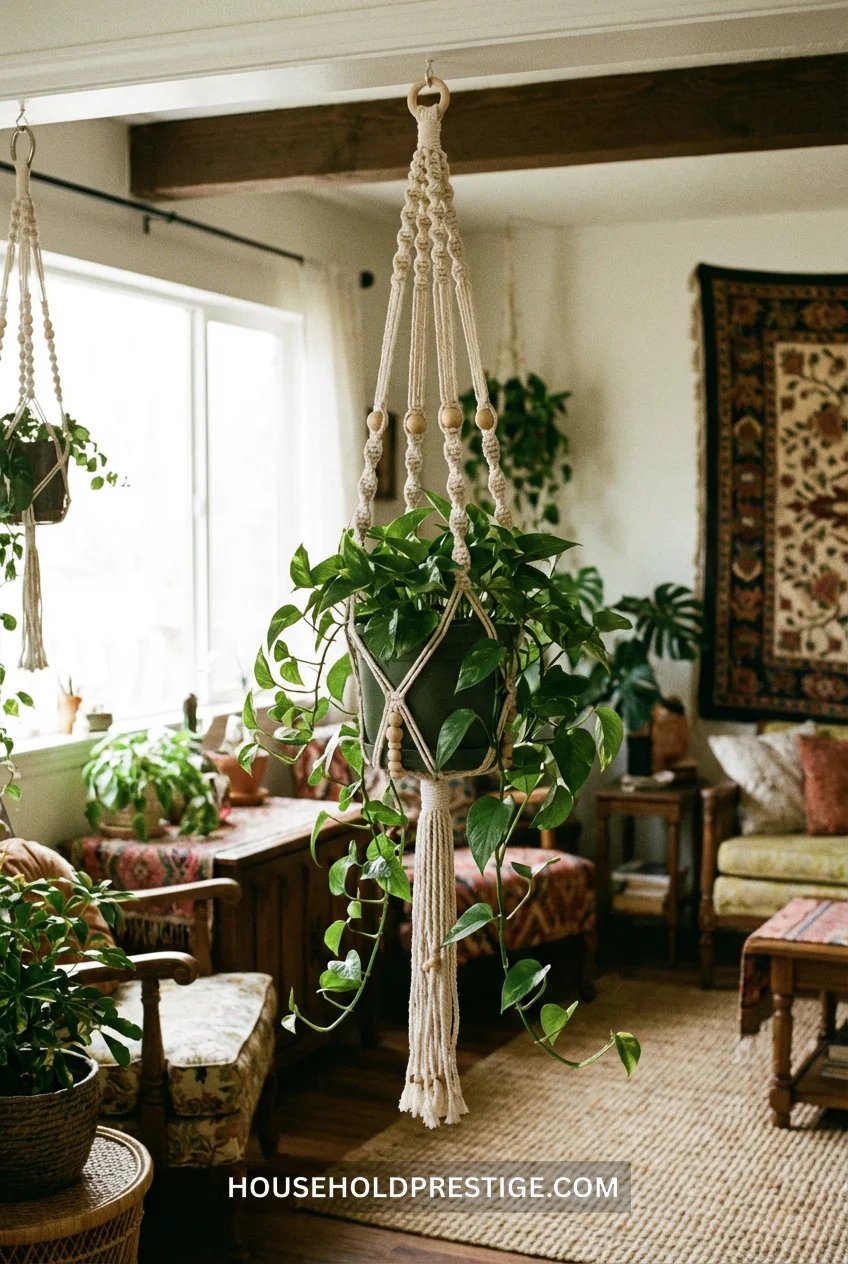
Not technically a stand, but it solves the same problem. Ceiling hooks + macrame hanger + trailing plant = floor space saved.
Pothos, string of pearls, philodendrons—anything that cascades looks incredible suspended. And you’re using vertical real estate that’s otherwise wasted.
4. The Mid-Century Wooden Stand (Complete Build Guide)
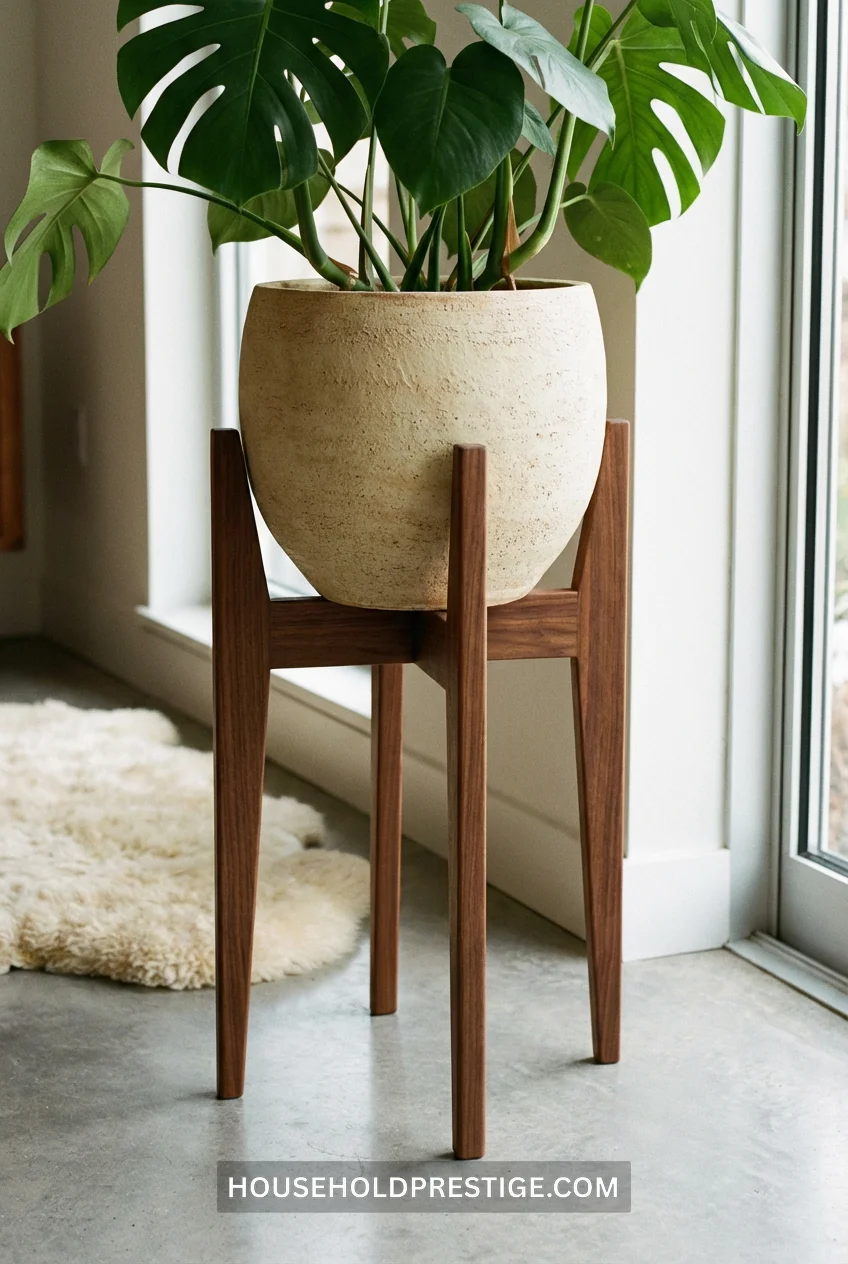
This is the one I get asked about constantly. Tapered legs, clean lines, room for one statement plant. It looks expensive, but it costs about $35 to build.
Why This Design Works
Mid-century stands have that Goldilocks quality—formal enough for a living room, casual enough for a bedroom. The elevated design (18-24 inches tall) puts plants at the perfect height for conversation areas without blocking sightlines. And those angled legs? They distribute weight better than straight legs, so your 40-pound fiddle leaf fig isn’t going anywhere.
Exact Dimensions & Materials
What you need:
- Four 2×2 hardwood boards (oak or poplar), each 20 inches long for legs
- One 12×12-inch board, ¾-inch thick for the top platform
- Wood glue (Titebond III, $7)
- Eight 2½-inch wood screws
- Sandpaper: 120-grit and 220-grit
- Wood stain (Minwax Dark Walnut, $8) or paint
- Polyurethane sealer (optional but recommended for water protection)
Total cost breakdown:
- Lumber: $18-25, depending on wood choice
- Hardware and finish: $12-15
- Grand total: $30-40
Step-By-Step Construction
Step 1: Cut the leg angles. Mark a 7-degree angle on each leg top (where it meets the platform). This creates that signature midcentury splay. Use a miter saw or have the hardware store cut it—most will do it free with purchase.
Step 2: Sand everything now. Trust me on this. Sanding assembled pieces is miserable. Hit all surfaces with 120-grit first, then 220-grit for a smooth finish. Wipe clean with a damp cloth.
Step 3: Stain or paint (before assembly). Apply stain with a foam brush following the grain. Let dry 24 hours. Apply a second coat if you want a deeper color. Or skip stain and use paint for a modern pop of color.
Step 4: Attach legs to the platform. Flip the platform upside down. Mark where each leg goes—4 inches in from each corner. Apply wood glue to leg tops. Screw through the platform into each leg (pre-drill holes to prevent splitting). You want those screws going at least 1½ inches into the leg.
Step 5: Add cross braces (critical for stability). Cut two small pieces of wood (10 inches each) to connect the legs diagonally underneath. This prevents wobbling when you water plants. Glue and screw in place.
Step 6: Seal it. If this stand’s going anywhere near water (and it is), brush on polyurethane. Two coats. Drying time: 4-6 hours between coats.
Step 7: Let cure, then display. Wait 48 hours before putting a plant on it. Seriously. Fresh polyurethane under a heavy pot can leave permanent indents.
Common Mistakes to Avoid
Don’t skip the cross braces. I learned this the hard way. Without them, the stand rocks like a wobbly table. Two minutes of extra work prevent a crashed plant.
Don’t use pine. It’s cheap but soft. A heavy pot will dent it within weeks. Spend the extra $8 for hardwood.
Don’t over-tighten screws. You’ll split the wood. Snug is enough.
Pro Move: Add a Drainage Saucer Lip
Route a shallow circle (⅜-inch deep, 10-inch diameter) into the top platform before assembly. Creates a built-in catch for drainage saucers. Prevents that “saucer slides off when you water” chaos. Requires a router, but elevates this from DIY to custom furniture.
When It’s Worth It
Perfect for: Fiddle leaf figs, rubber plants, large monstera, anything 15+ pounds in a 10-12 inch pot.
Not great for: Collections of small plants (use tiered stands instead) or trailing plants (they hide the beautiful stand).
Build time: 3 hours first time, 90 minutes once you’ve made one before.
5. Industrial Pipe & Wood Stand
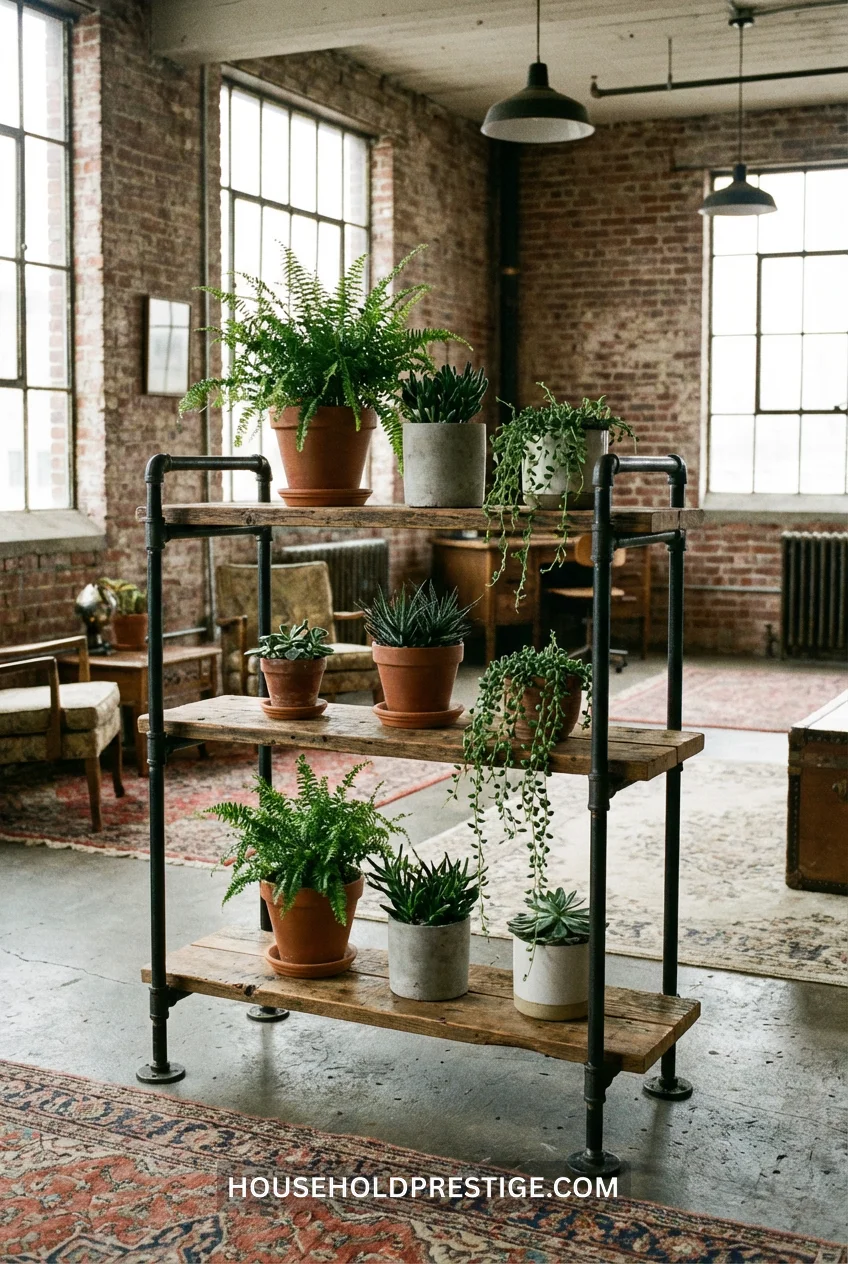
Home Depot sells pre-threaded black iron pipes in every size imaginable. Combine them with wood planks, and you’ve got that exposed-brick-loft look.
Three tiers work best – bottom tier at 8 inches, middle at 18 inches, top at 28 inches. The pipes screw together (no welding), and the weight of the wood keeps everything stable. Bonus: looks like you paid $300 at West Elm.
Cost reality: About $45 in pipes, $20 in wood. Still cheaper than store-bought and way sturdier.
Time investment: Two hours, including trips to the hardware store.
6. Repurposed Chair Plant Throne
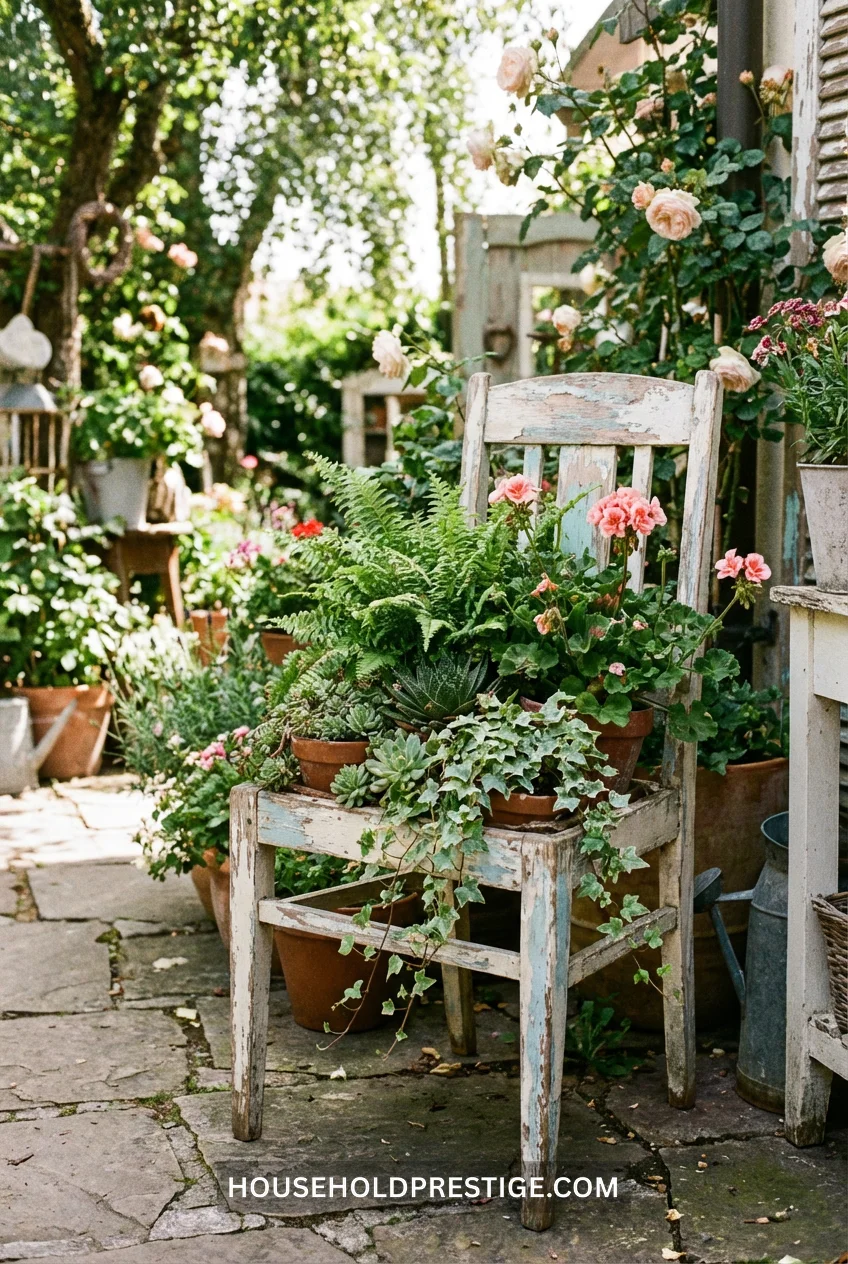
Remove the chair seat. Paint the frame. Put a plant where someone’s butt used to go.
It’s quirky, it’s thrifted, and it works brilliantly for porches or patios. The chair back frames the plant like artwork.
7. Wall-Mounted Floating Shelves
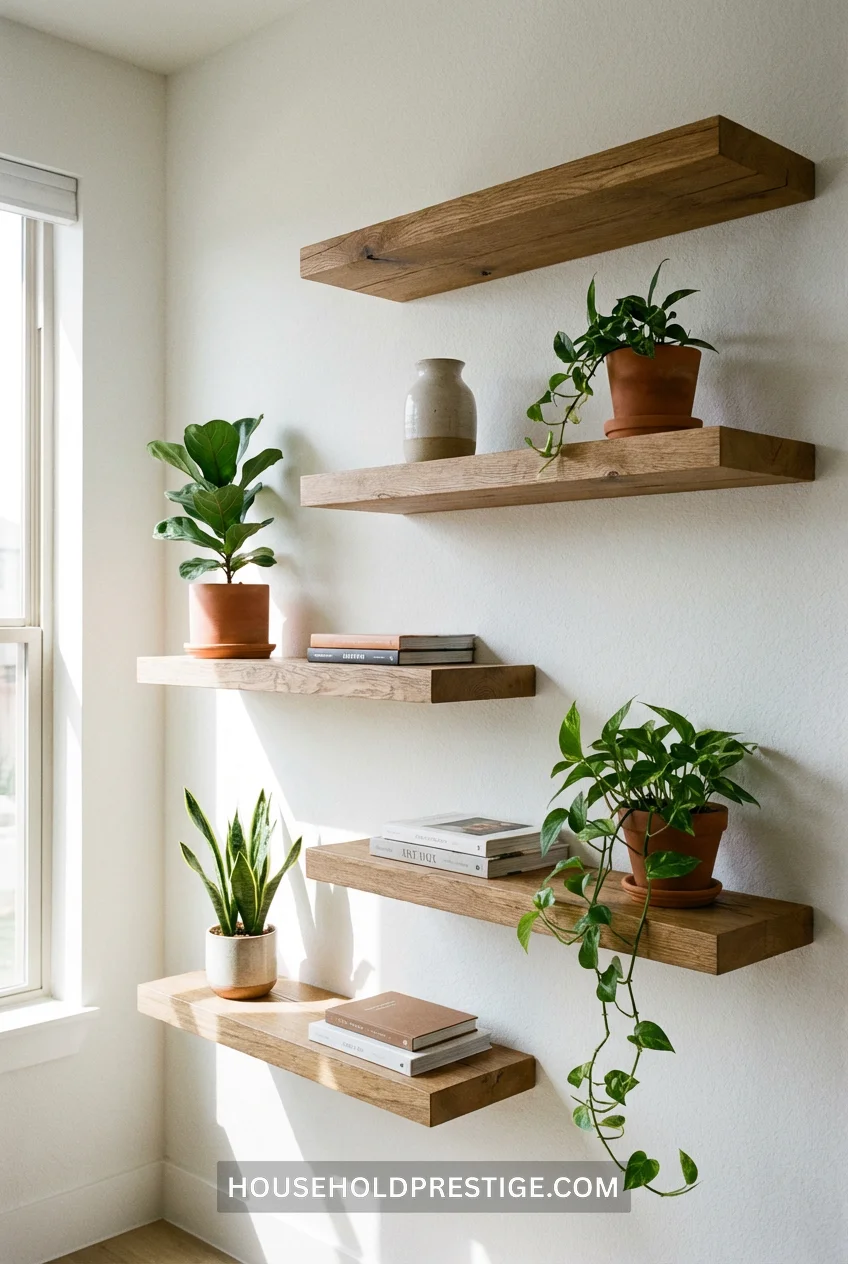
When floor space is a fantasy, go up.
Install 8-inch deep floating shelves at varied heights—don’t line them up like a ladder. Stagger them. Creates visual movement and lets each plant get proper light.
Installation note: Use heavy-duty wall anchors rated for 30+ pounds. Those cheap plastic ones will rip out of drywall when you water a plant. Ask me how I know.
Best candidates: Succulents, small cacti, pothos cuttings in glass jars, air plants. Anything under 5 pounds.
The catch: You’ll need to water carefully or take plants down to water. Drippy succulents + carpet = bad news. I keep a towel underneath during watering week.
8. The Vintage Stool Disaster (And How to Avoid It)
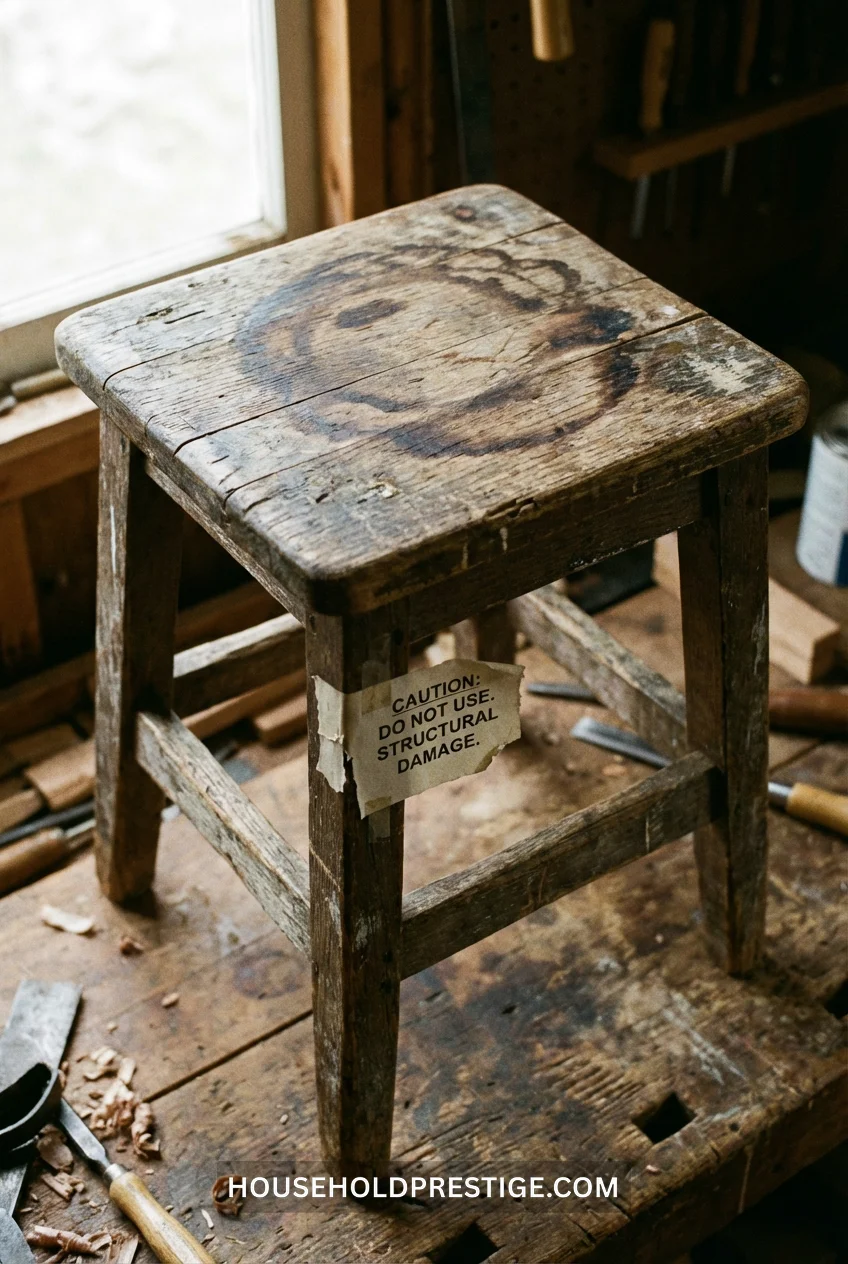
I found the perfect three-legged milking stool at an estate sale. Rustic. Charming. Fifty years old if it was a day.
Put my favorite snake plant on it. Watered generously. Walked away feeling like a design genius.
Three weeks later, the wood had warped so badly the plant tilted. Water had seeped into untreated wood, swelling the grain. The stool went from farmhouse-chic to firewood.
What I should have done: Sealed it first. Two coats of polyurethane on the top surface. Would’ve taken 30 minutes and saved a $40 stool.
The real lesson: Vintage furniture is gorgeous for plants, but only if it’s been properly sealed against moisture. Test it first—put a wet paper towel on the surface for 10 minutes. If it darkens or raises the grain, seal it before using.
Alternative approach: Use vintage stools for plants that barely need water. Succulents, cacti, ZZ plants—anything you water monthly instead of weekly.
9. Bamboo Stake Tripod
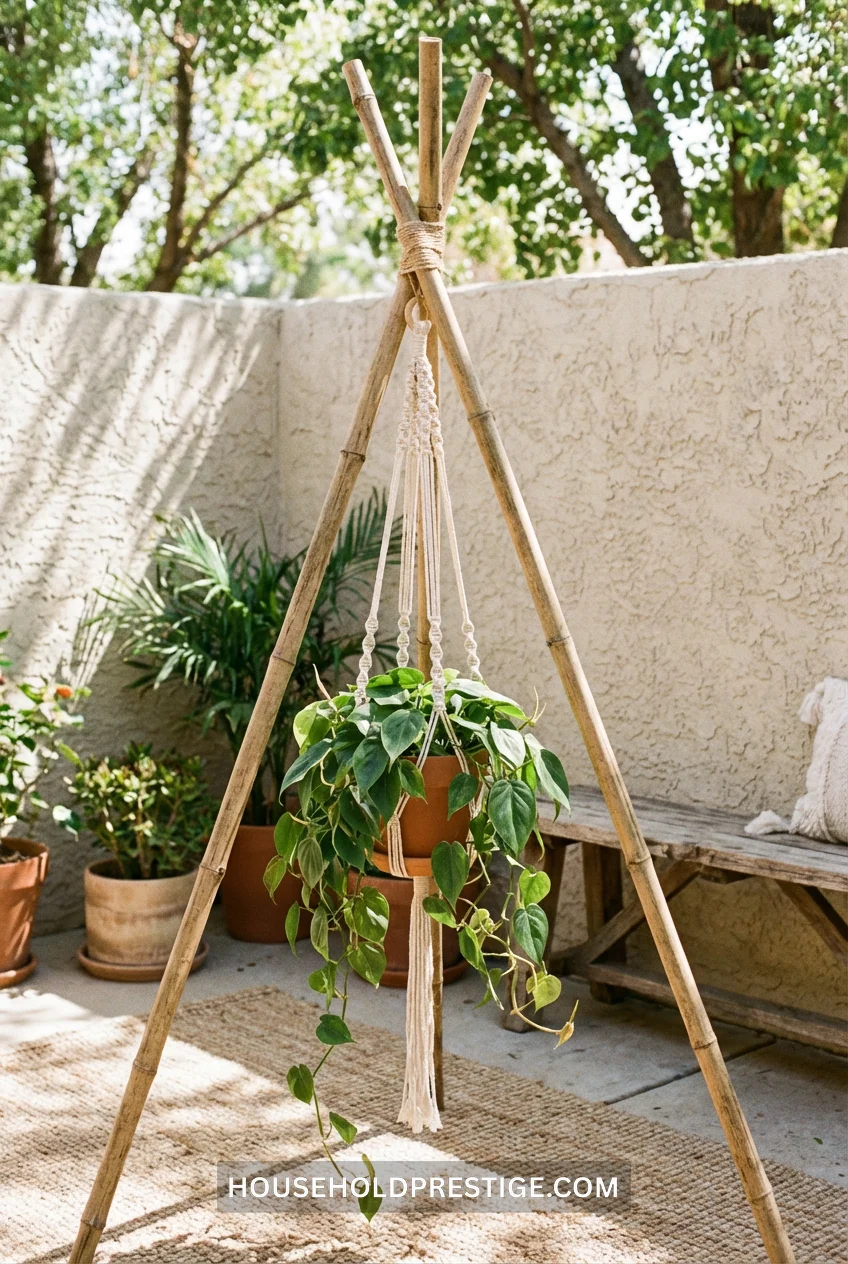
Three bamboo stakes. Twine to lash the tops together. Hang a plant from the center. Total time: 8 minutes. Total cost: $6.
10. Wooden Crate Tower
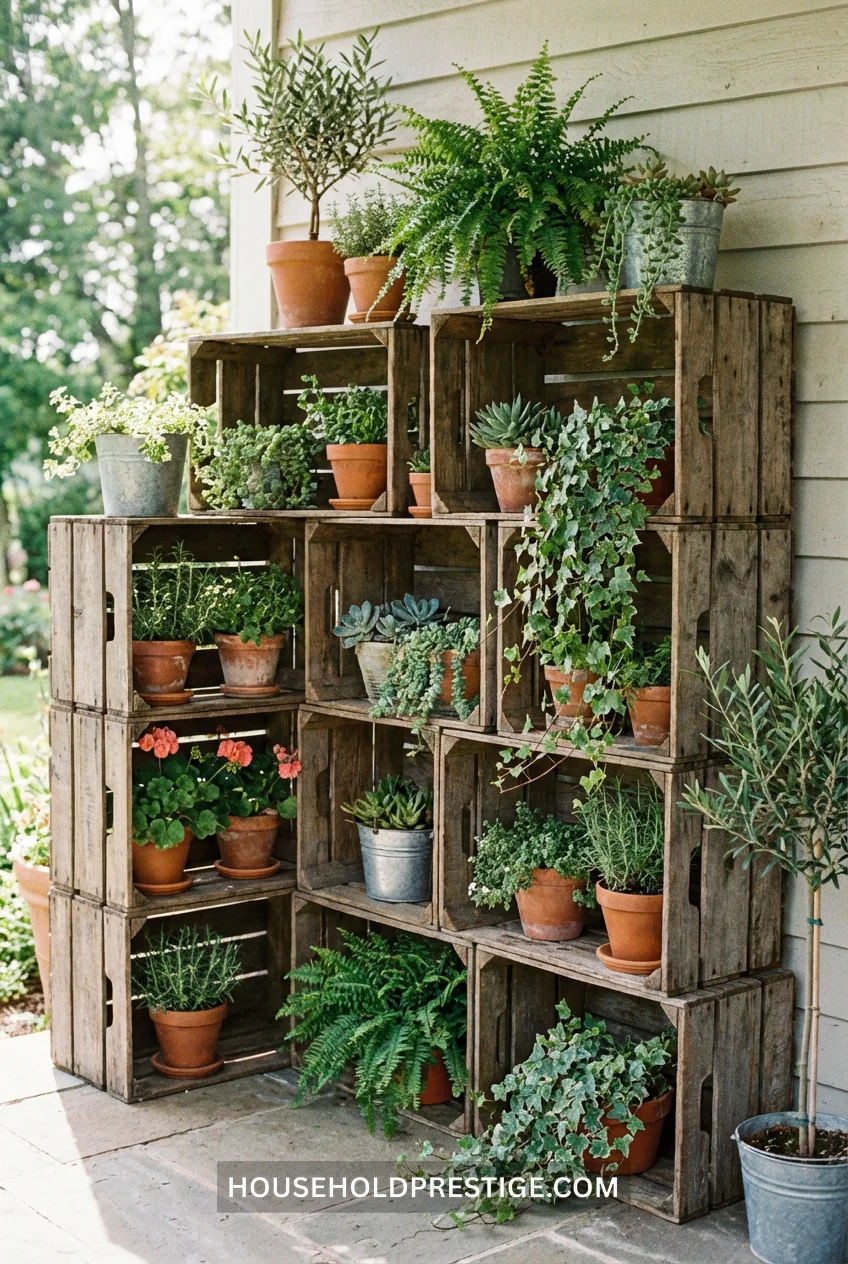
Stack vintage wooden crates in alternating directions—horizontal, vertical, horizontal. The gaps create natural cubby holes for plants at different levels.
Secure them with L-brackets on the inside (invisible once stacked) or heavy-duty velcro strips if you’re renting. Three crates give you 6-8 plant spots ,depending on pot sizes.
Where to source: Craft stores sell new ones for $12-18 each. Or check behind grocery stores—produce crates get tossed constantly and are free.
11. Material Comparison: What Actually Matters

| Material | Cost | Durability | Weight Capacity | Water Resistance | Best For |
|---|---|---|---|---|---|
| Solid Wood (Oak, Walnut) | $30-60 | 10+ years if sealed | 40-60 lbs | Poor (needs sealing) | Statement pieces, heavy plants, living rooms |
| Pine/Softwood | $15-25 | 3-5 years | 20-30 lbs | Very poor | Lightweight plants, temporary setups |
| Metal (Iron pipe, steel) | $40-80 | 15+ years | 60-100 lbs | Excellent (can rust) | Industrial style, outdoor use, heavy collections |
| Bamboo | $20-35 | 5-7 years | 25-35 lbs | Good naturally | Boho aesthetic, moderate-weight plants |
| Plastic/Resin | $10-30 | 2-4 years | 15-25 lbs | Excellent | Outdoor patios, renters, and budget builds |
The truth nobody tells you: Expensive doesn’t mean better. I’ve had a $15 IKEA metal stand outlast a $90 “artisan” wooden stand that wasn’t properly sealed. Match the material to your actual needs—don’t buy wood for a humid bathroom or plastic for a formal living room.
12. Wire Basket Wall-Mount
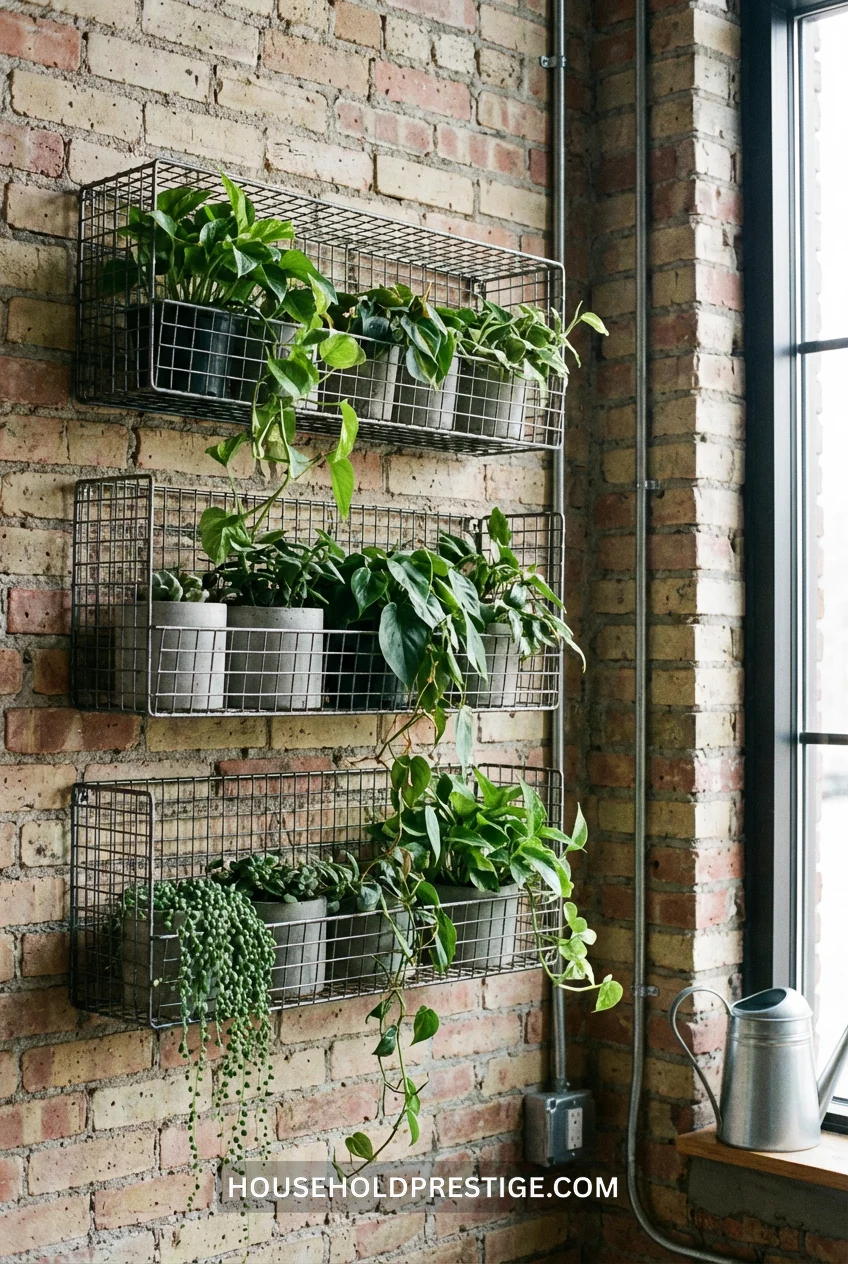
Those wire baskets meant for mail or magazines? Mount them sideways on the wall. Drop in small pots. Instant vertical garden.
The open wire design means drainage water can evaporate instead of pooling. Smart for bathrooms or kitchens where humidity’s already high.
Mounting hack: Use Command strips rated for 5 pounds if you’re renting. They hold better than you’d think, and you won’t lose your security deposit.
Plant picks: Pothos, philodendron, string of hearts—anything that trails and doesn’t mind slightly drier soil (since drainage is more aggressive).
13. Rolling Bar Cart Conversion
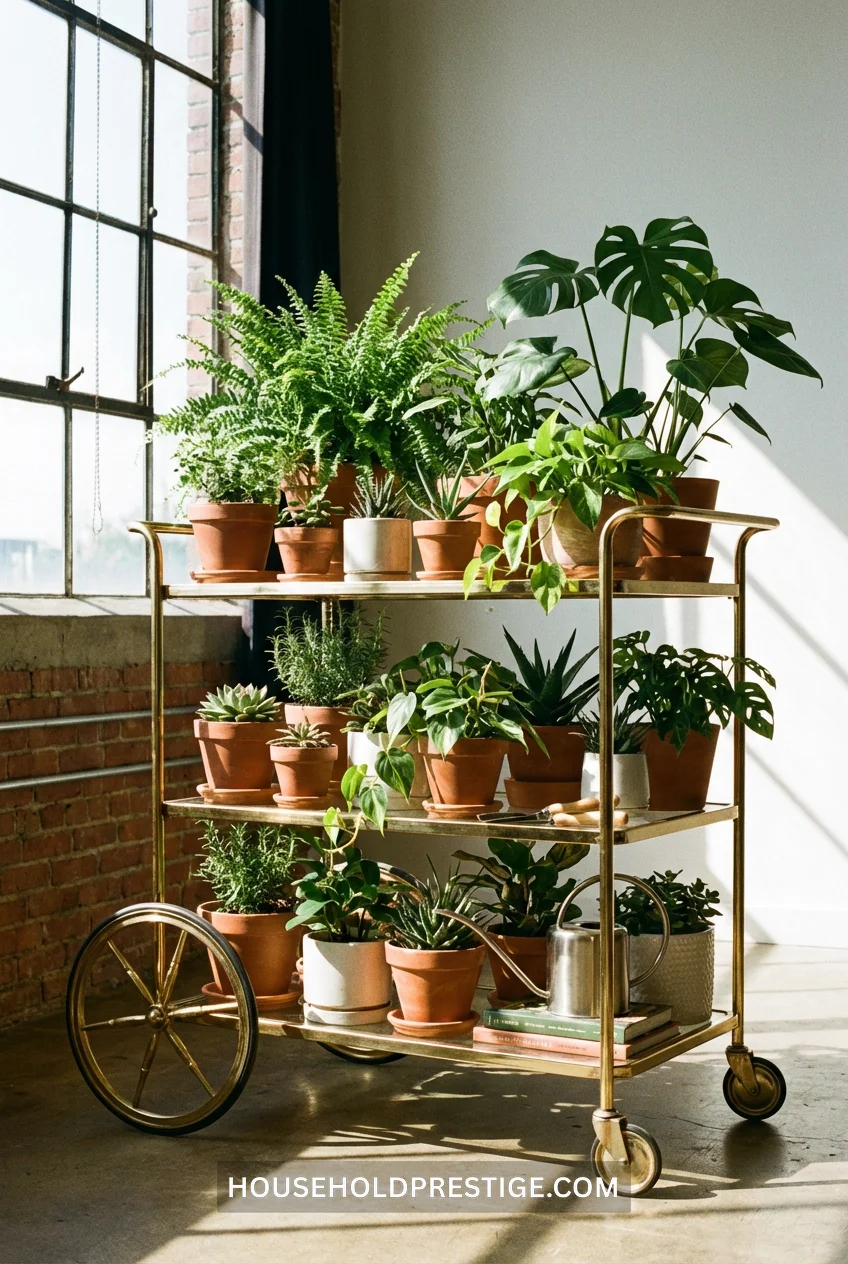
Bar carts are having a moment, which means thrift stores are full of them.
The genius part? Wheels. Roll your plants to the window when they need sun. Roll them away from cold drafts in winter. Move them when you’re vacuuming.
Two or three tiers give you room for 6-10 plants depending on pot size. The metal construction handles water spills without damage.
14. Pallet Stand (Free Materials, Maximum Impact)
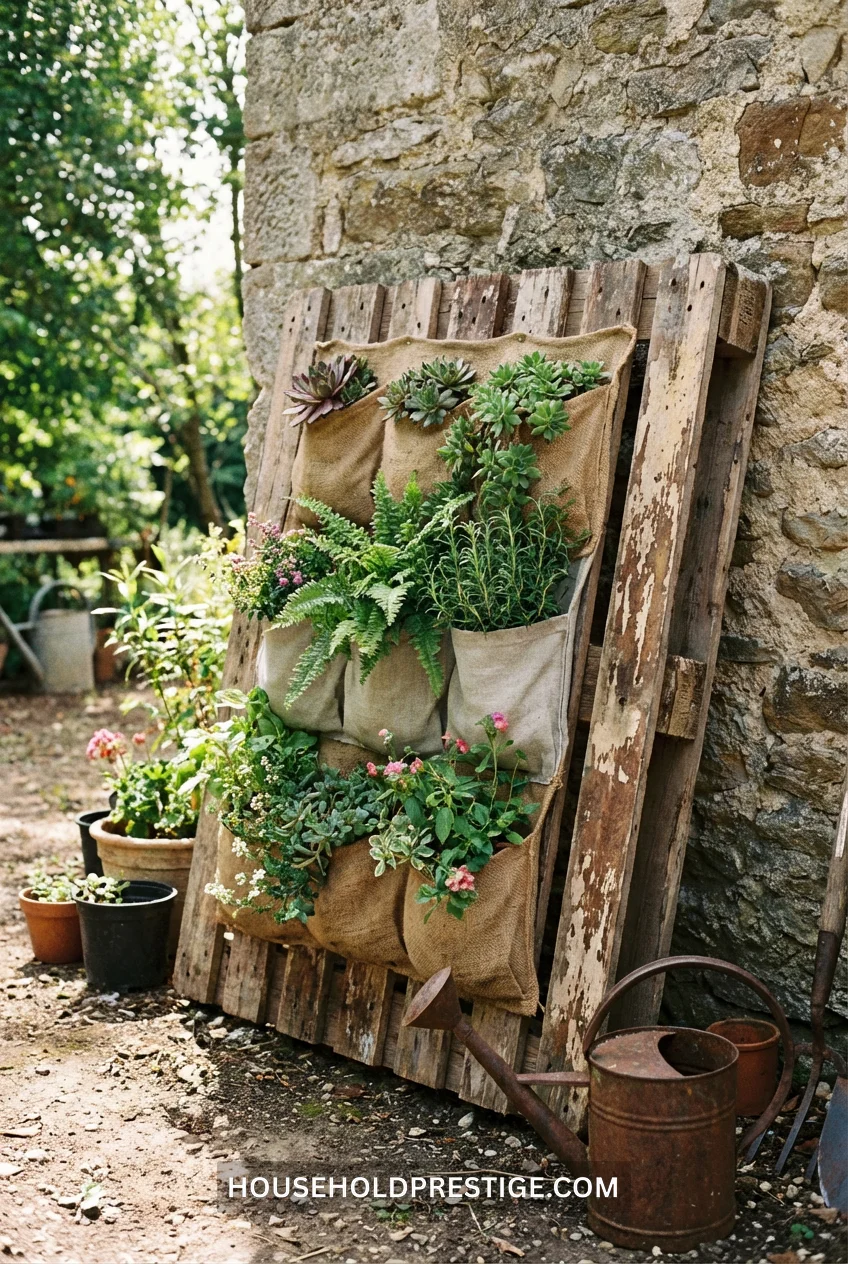
Pallets are everywhere and usually free. Stand one vertically, add backing boards to create pockets, mand ount it to the wall. You’ve got a living wall for $0.
Construction steps:
- Find a pallet (hardware stores, warehouses, Craigslist free section)
- Sand it thoroughly—you don’t want splinters
- Attach thin boards across the back of each opening to create shallow pockets
- Line pockets with landscape fabric to hold soil
- Mount the whole thing to the wall using heavy lag bolts
- Plant directly into the pockets or insert small pots
The reality check: This works best for succulents and herbs that don’t need deep root space. Don’t try it with a fiddle leaf fig.
Watering logistics: Water lightly. The vertical orientation means excess water runs down to the lower plants. Either water individually with a bottle or install a drip line at the top.
Build time: 4-5 hours including drying time for stain/seal.
Perfect for: Outdoor walls, covered patios, herb gardens near the kitchen door.
15. Concrete Block Brutalist
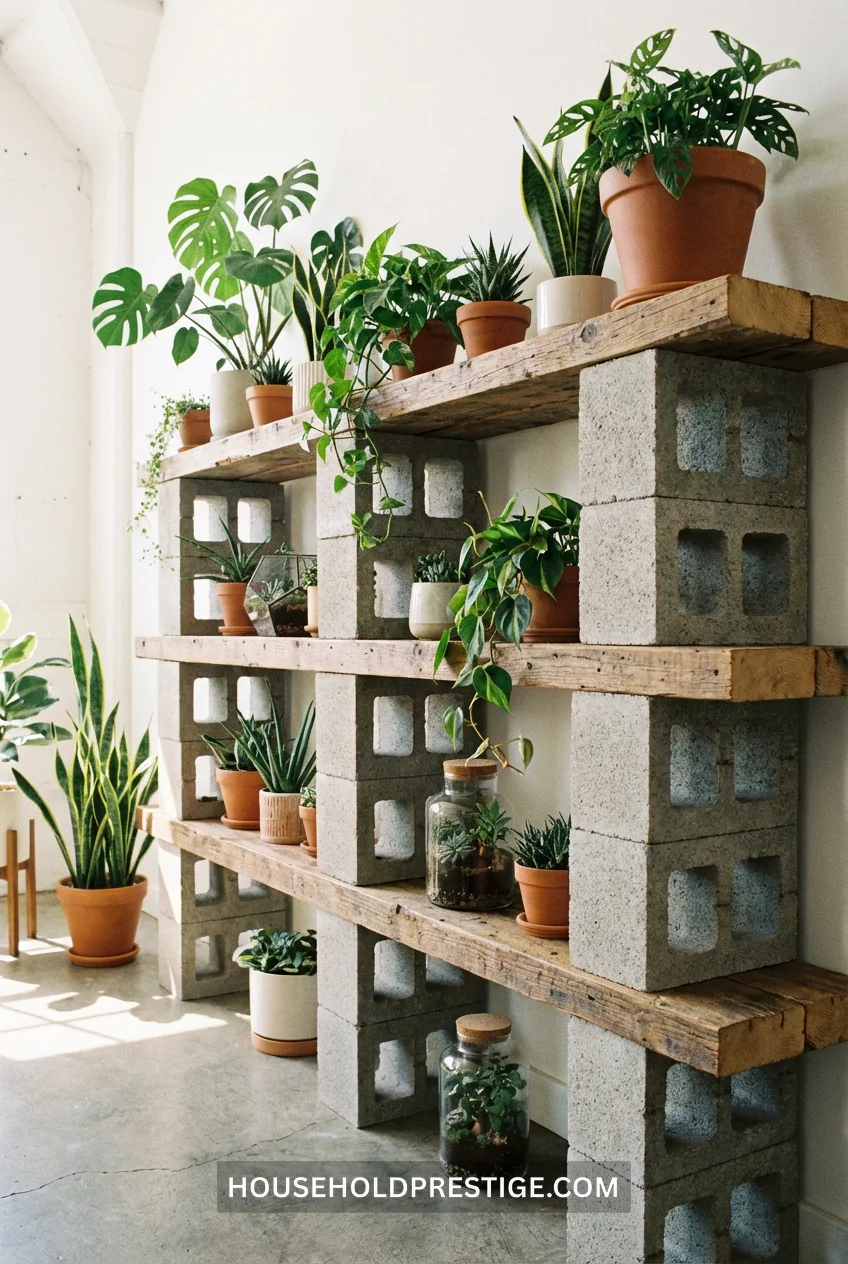
Stack concrete blocks. Insert wood planks. Done. The holes in the blocks can hold smaller pots, and the planks create tiers. Cost: $3 per block, $8 for wood.
16. Driftwood & Branch Stand
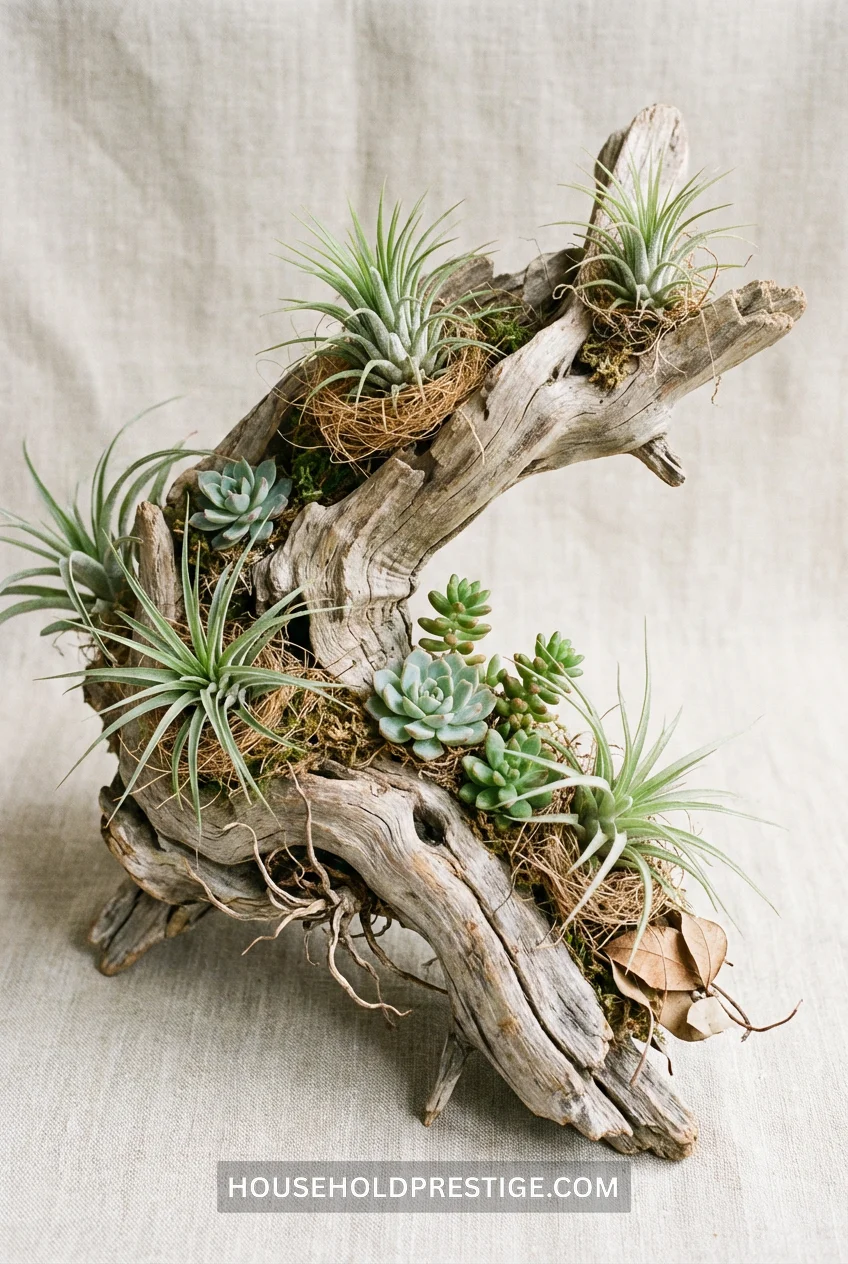
Beach trip = free materials. Find a thick branch or driftwood piece with interesting angles. Secure it vertically to a base (concrete-filled bucket works). Attach small pots or air plants to the branches with wire or twine.
It’s sculptural. It’s free. And it brings the outside in.
Pro tip: Bake driftwood at 200°F for 2 hours before bringing it inside. Kills any bugs or mold hiding in the wood. Your future self will thank you.
Stability matters: The base needs to be heavy. A 3-foot branch needs at least 10 pounds of counterweight or it’ll tip when you brush past it. Concrete, sand, or rocks work.
Best plants: Air plants (no soil needed), small orchids, tillandsia—anything that naturally grows on trees in the wild. You’re mimicking their native habitat.
17. Tension Rod Window Garden
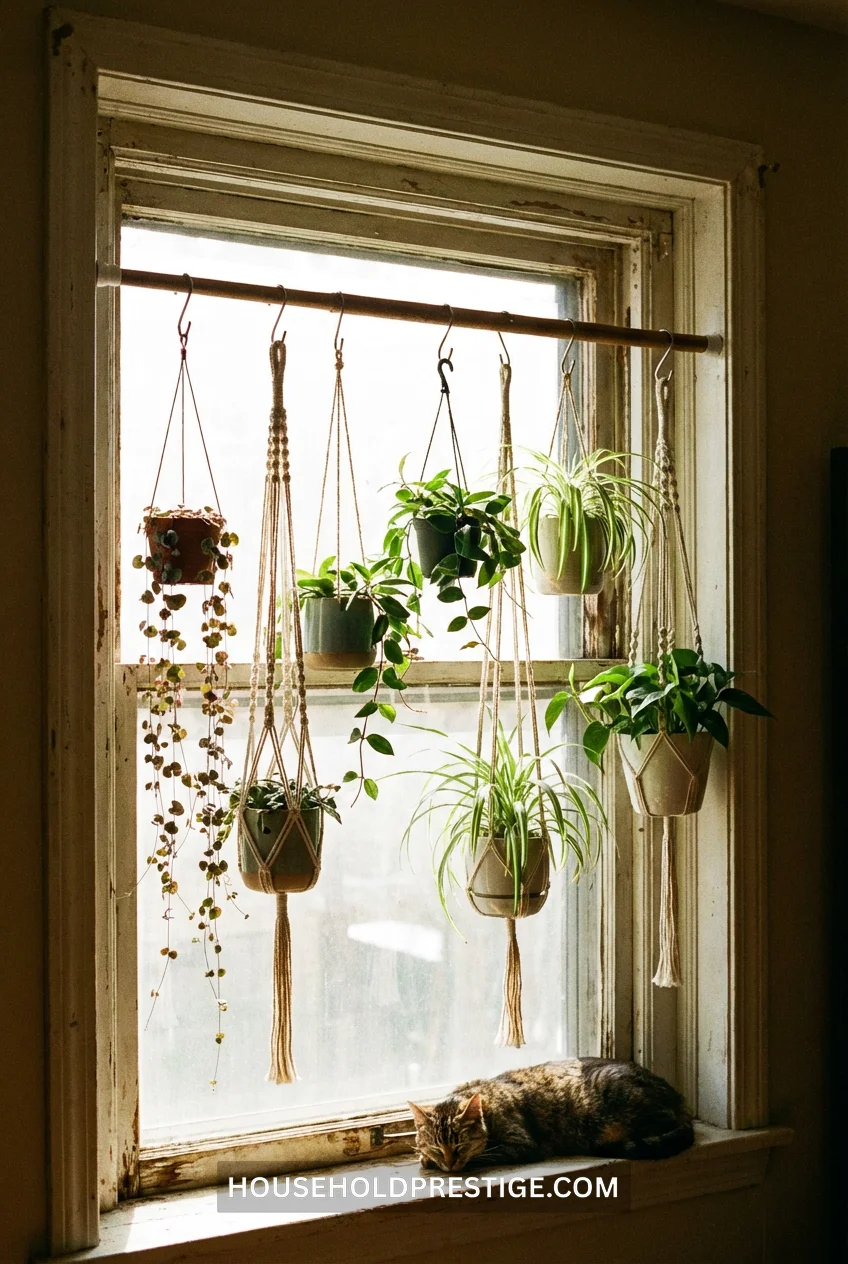
Tension rods aren’t just for shower curtains. Install one in a window frame. Hang plants with S-hooks at varying heights. Every plant gets direct light, and you’re using zero floor space.
18. The Bookshelf Transformation
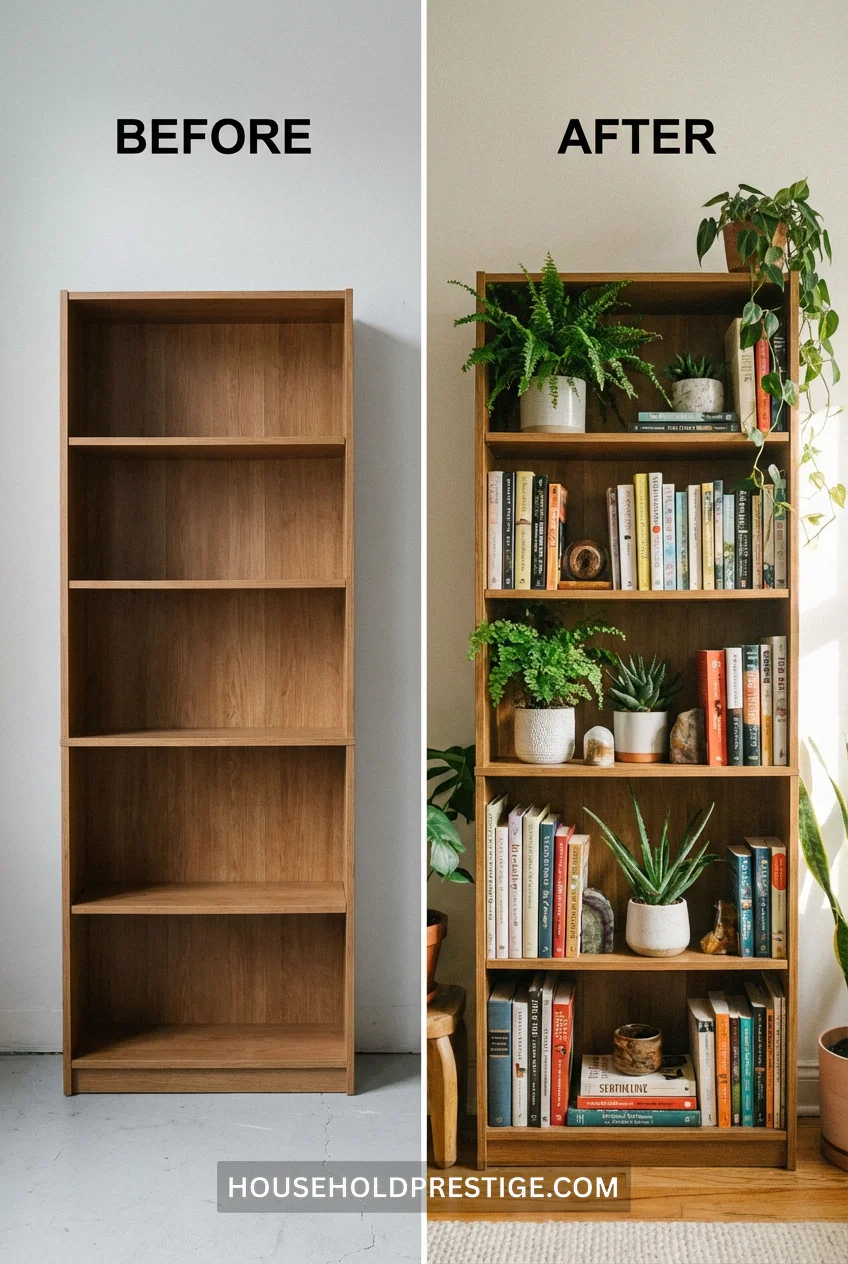
Before: I had a cheap Target bookshelf holding random paperbacks I’d never read again. It looked cluttered. It looked like a college dorm.
What I changed: Removed half the books. Added plants on every other shelf. Staggered heights—trailing pothos on top shelves, upright snake plants on middle shelves, small succulents scattered between remaining books.
After: The same bookshelf suddenly looked intentional. The mix of greenery and books created texture. The vertical variation made the ceiling feel higher. And I didn’t buy a single new piece of furniture.
The formula: 60% plants, 40% books/objects. Remove anything that doesn’t serve a purpose. Let trailing plants cascade over the shelf edges—it softens the hard lines.
Unexpected benefit: The plants filtered the dust that used to collect on book spines. Watering was easy because I could pull pots forward without dismantling anything.
Cost: $0. Just rearranging what I already owned.
Time: 45 minutes, including moving books to the donation pile.
Works best if: You have a bookshelf in a spot with decent light. North-facing windows won’t cut it for most plants.
19. Copper Pipe Minimalist Stand
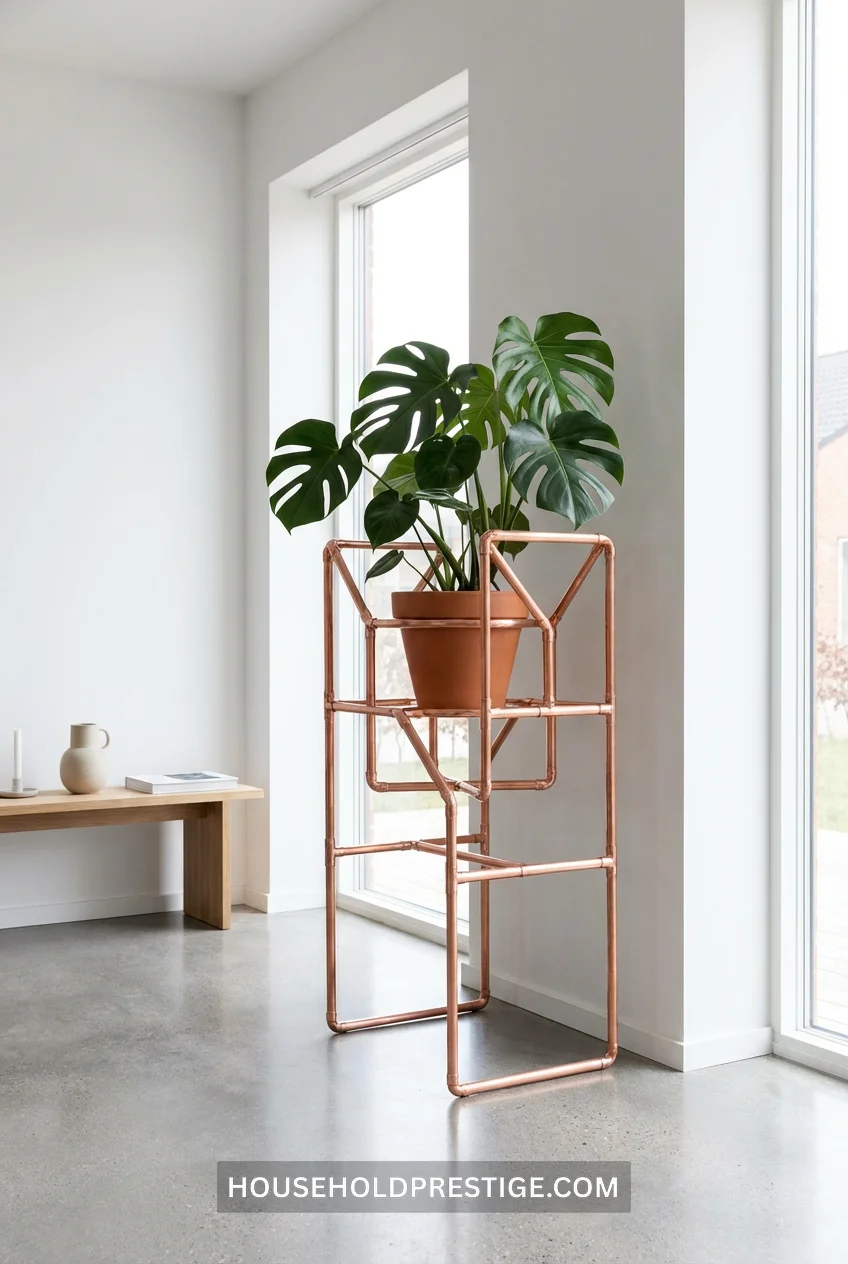
Copper pipe ages beautifully—it develops that green patina over time. Build a simple geometric frame (square or hexagon) with four legs. The copper catches light differently than black iron, giving you that warm metallic glow.
Design tip: Keep it simple. Copper shows every joint, so complicated designs expose sloppy assembly. A basic square frame with cross-braces looks clean and modern.
Cost: Copper costs more than iron—expect $35-50 in materials. But it’s a long-term piece that looks better with age.
Finishing options: Leave it raw to patina naturally, or spray with clear coat to keep the bright copper color. I prefer natural aging—the green tones complement plant colors.
Conclusion
You don’t need a Pinterest-perfect home to give your plants the display they deserve. You need an afternoon, basic materials, and the willingness to try something.
Start with one stand. See how it changes your space. Then build another. Your plants will thank you by actually thriving instead of just surviving on the floor.
Which one are you building first?
FAQ
What’s the best height for a plant stand?
Depends on the room and plant type. For conversation areas (living rooms), 18-24 inches puts plants at eye level when seated. For corners or hallways, go taller—30-36 inches creates vertical interest without blocking walkways. Floor plants in low pots benefit from 8-12 inch stands just to lift them off the ground.
How do I protect floors from water damage?
Always use a drainage saucer, even if the stand has a built-in platform. For extra protection, put felt pads under the stand legs and cork coasters under the saucers. If you’re paranoid (or renting), put a waterproof mat under the entire stand.
Can I use these stands outdoors?
Wood stands need to be sealed with exterior-grade polyurethane or marine varnish. Metal stands will rust without powder coating or rust-resistant paint. Plastic/resin stands work great outdoors with no modification. If you’re in a wet climate, stick with metal or plastic for outdoor use.
What tools do I actually need for DIY stands?
For most builds: drill/driver, saw (circular or miter), sandpaper, measuring tape, level, and pencil. That’s it. Fancy tools like routers or table saws make things easier but aren’t required. Many hardware stores will cut wood to your measurements for free.
How much weight can a DIY plant stand hold?
Depends entirely on construction. Properly braced wooden stands with 2×2 or thicker legs can handle 40-60 pounds. Metal pipe stands can handle 60-100 pounds. Avoid putting anything over 30 pounds on stands made from 1×2 boards or thin materials—they’ll wobble or crack under heavy ceramic pots.