

Your bedroom floor shouldn’t be your backup wardrobe.
Yet here you are, clothes draped over chairs, jeans piled on that corner ottoman you swore would “help,” drawers so stuffed they won’t close all the way. You own 47 shirts but wear the same six because they’re the only ones you can actually locate without excavating.
The math doesn’t work. Your wardrobe has the same square footage it did last year, but somehow you’ve accumulated three more shopping bags’ worth of clothes and zero additional storage. Something’s got to give.
Here’s what nobody mentions about wardrobe organization: it’s not about buying more bins. You don’t need another set of matching hangers or a Pinterest-perfect color-coded system that collapses the minute you’re running late. You need strategies that work with how you actually get dressed-half-awake, pressed for time, wanting to see everything you own at a glance.
These 21 wardrobe organization ideas focus on one thing: maximizing what you already have. No custom built-ins required. No contractor. Just smart repositioning, clever vertical thinking, and a few $15-or-less tools that punch way above their price point.
Stick around. Your mornings are about to get a whole lot smoother.
1. Flip Every Hanger Backward for the 6-Month Purge Test
Turn all your hangers backward today. Every single one. When you wear something, flip it forward. Six months from now, anything still backward goes.
This isn’t about guilt. It’s about data. You’ll be shocked at how many “favorites” you never actually touch.
2. Install a Tension Rod 12 Inches Below Your Main Rod
Add a second hanging level in 3 minutes. Tension rods cost $8 at Target. Mount it 12 inches below your existing rod to double your hanging space for shorter items like folded pants, skirts, or tank tops.
Works best in sections where you don’t need floor-to-ceiling length—think anywhere you currently hang shirts or blouses.
3. The File-Fold Method: Stand T-Shirts Upright Like Files in a Drawer
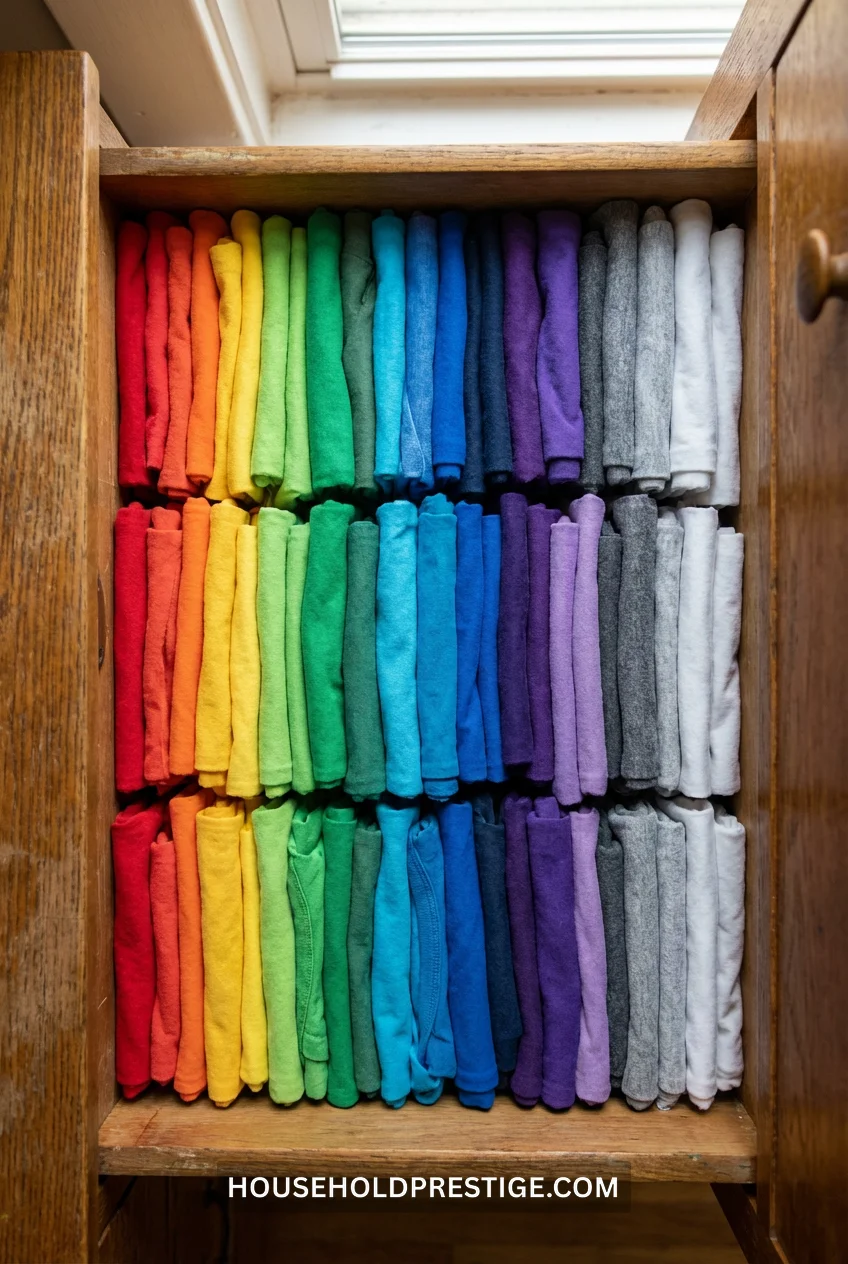
Stacking shirts is a trap. You pull one from the middle, and the whole tower collapses.
File-folding stands each shirt on its end. You see every single option at once. No excavation required. Here’s the basic method: lay the shirt face-down, fold both sides toward the center (forming a rectangle), fold in half, then in thirds. It should stand on its own.
Bonus: this works for leggings, jeans, and pajama pants, too.
4. Mount Adhesive Hooks Inside Cabinet Doors for Bags and Scarves
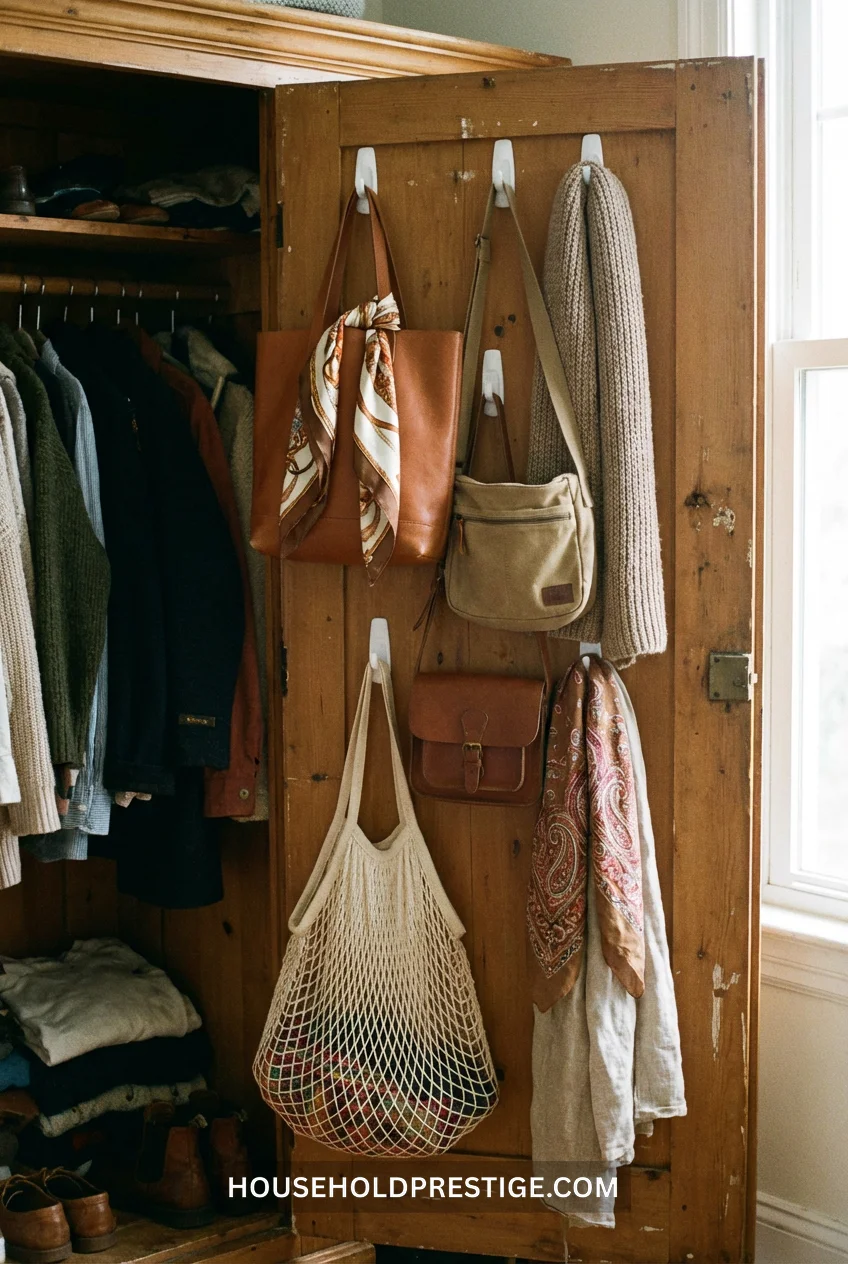
That dead space on the inside of your wardrobe doors? Pure wasted potential. Stick 3M Command hooks (the kind that hold 3-5 pounds) vertically down each door. Hang purses, crossbody bags, scarves, belts—anything that currently lives in a tangled heap.
Cost: $12 for a 6-pack. Installation time: 90 seconds per hook.
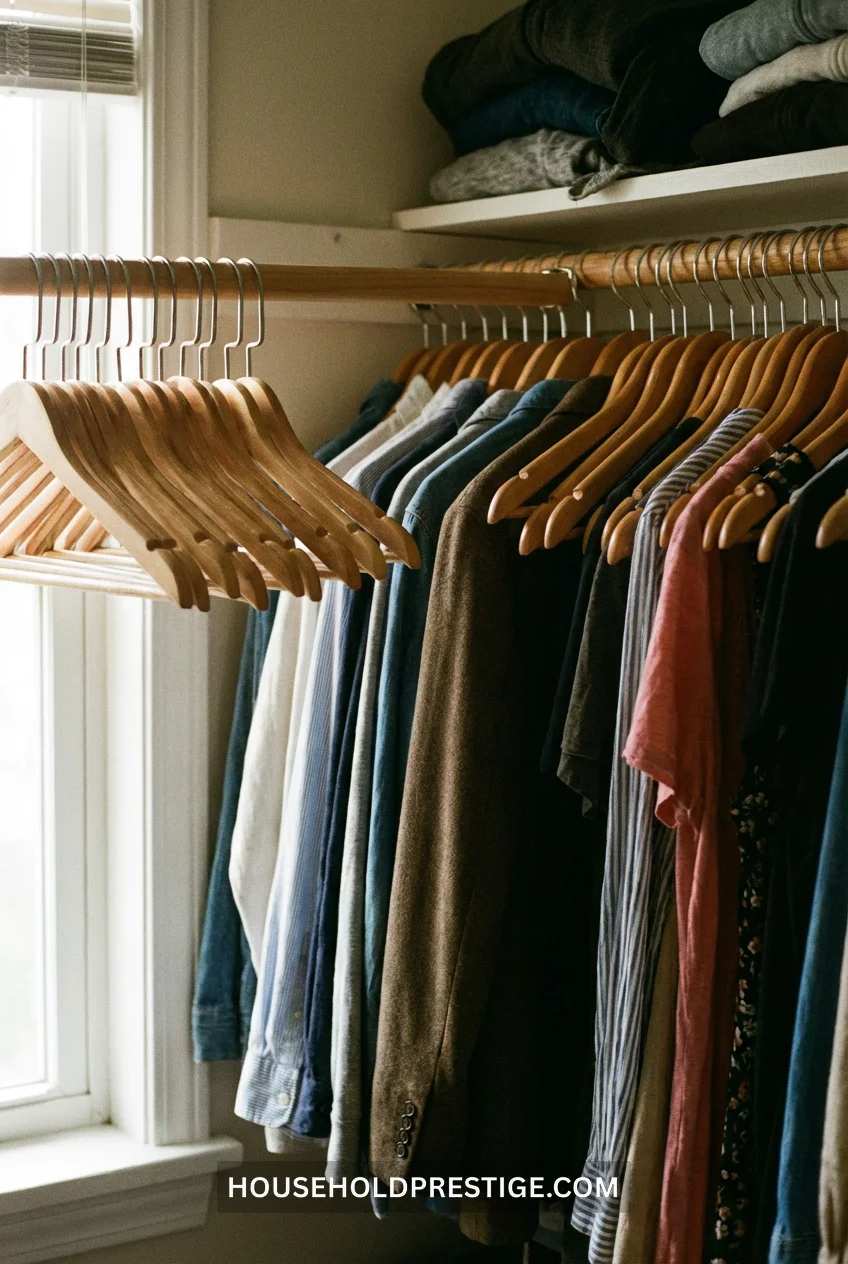
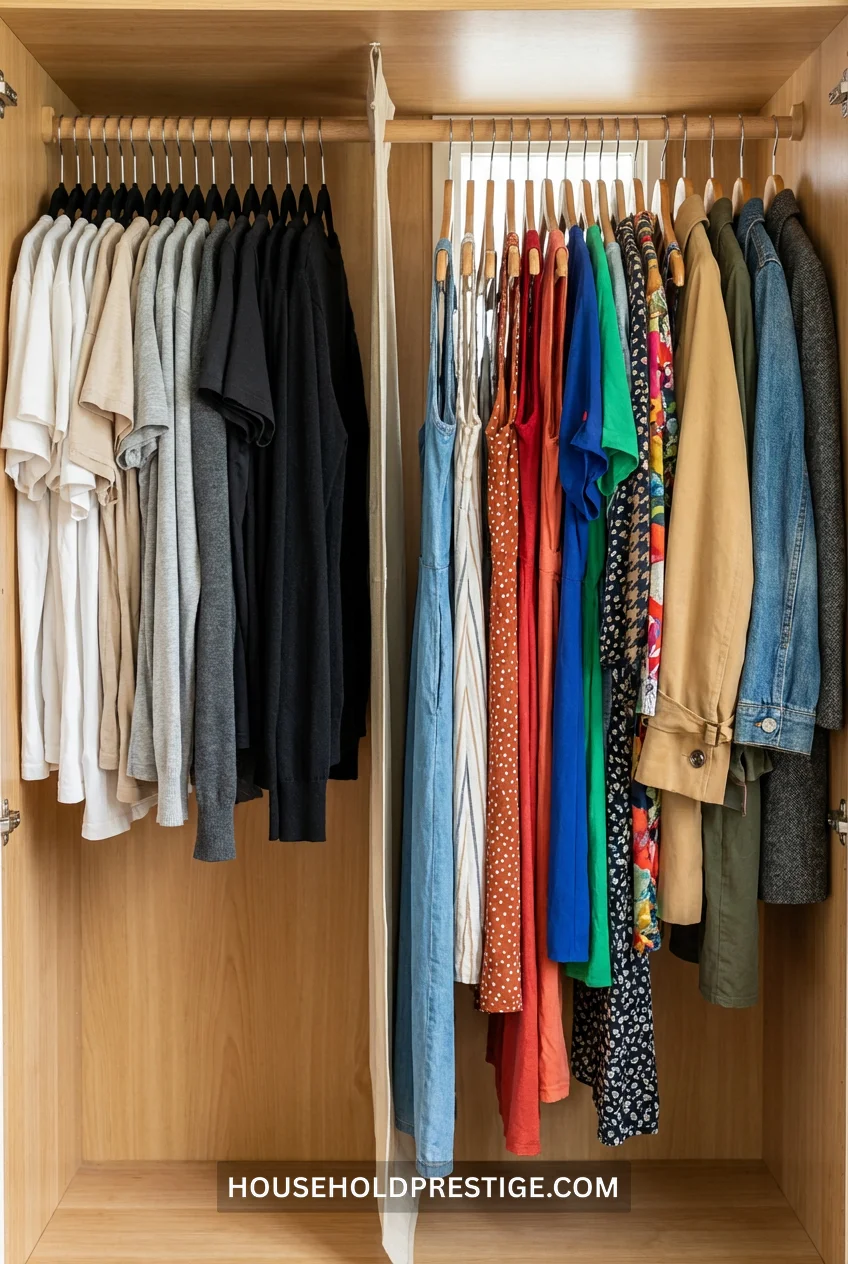
5. Swap Wooden Hangers for Slim Velvet Ones and Gain 30% More Rod Space
Wooden hangers eat space. They’re 0.5 inches thick. Velvet hangers are 0.2 inches. Doesn’t sound like much until you multiply it by 60 hangers—you just reclaimed 18 inches of rod length.
Plus, velvet grips prevent slippery camisoles and silky blouses from sliding off. Amazon sells 50-packs for $25.
6. The Ultimate Drawer Divider System: Fabric Bins Cut to Size for Zero Dead Space
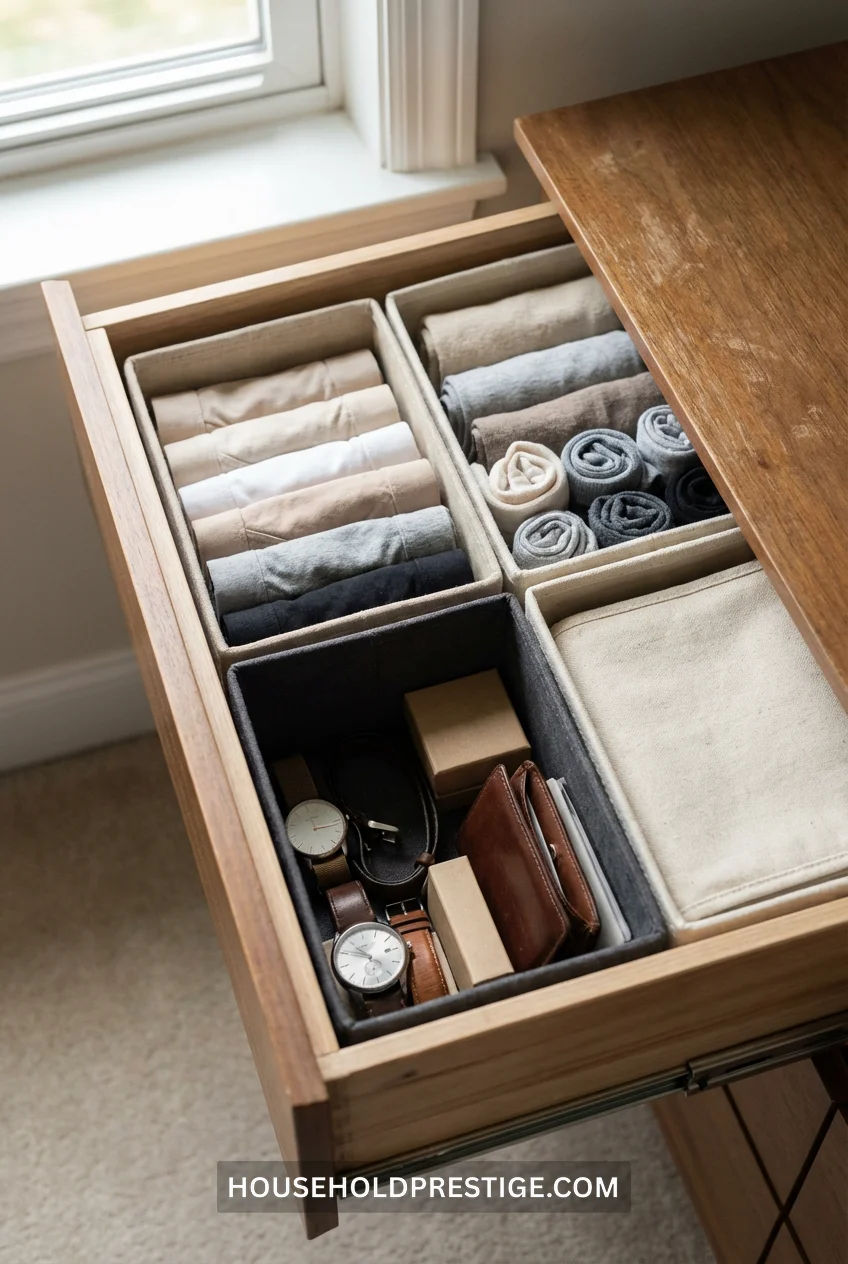
Most drawer dividers waste space because they don’t fit your exact drawer dimensions. Here’s the fix: buy collapsible fabric storage boxes and cut them to size.
Why This Works
Your dresser drawers aren’t standard sizes. A 16-inch wide drawer divided by 4-inch plastic dividers leaves awkward 0.5-inch gaps where socks disappear forever. Fabric bins flex. You can trim them with scissors. They conform.
Step-by-Step Setup
- Measure your drawer interior: width, depth, height
- Sketch a layout on paper—decide what goes where (underwear, socks, bras, accessories)
- Order fabric bins in neutral colors (beige, gray, black) that roughly match your measurements
- Place bins in drawer and test fit
- Use scissors to trim any bins that are too tall or too wide by 1-2 inches
- Fold and tuck trimmed edges under for clean finish
- Arrange bins to eliminate gaps—they should touch edge-to-edge
Materials & Costs
- 6-pack fabric storage cubes (Amazon): $18
- Fabric scissors (if you don’t own): $7
- Total investment: $25
- Time required: 20 minutes for 3 drawers
Pro Move
Use one tall bin (6 inches high) for bulky items like sports bras, and low bins (2-3 inches) for flat items like underwear. This creates visual clarity—you can see everything without digging.
Common Mistakes to Avoid
Don’t buy rigid plastic dividers before measuring. They won’t adjust. Don’t skip the trim step—even 0.5 inches too wide means the bin won’t sit flush. Don’t mix too many colors—stick to 2 tones max or it looks chaotic rather than organized.
When It’s Worth It
If you currently dump socks and underwear in loose piles, this transformation takes 30 seconds off your morning routine. Multiply that by 365 days, and you’ve saved 3 hours a year just getting dressed. Plus, you’ll stop buying duplicate black socks because you can actually see what you own.
7. Hang Purses from Shower Curtain Rings on a Rod or Belt Rack
Purse storage stumps everyone. Stack them, and they collapse. Shelf them, and you forget what you own.
Loop shower curtain rings through purse handles and hang them on a closet rod or wall-mounted belt rack. Each bag hangs separately, straps don’t tangle, and you can grab what you need in 2 seconds.
12 rings cost $6 at Walmart.
8. Use Binder Clips on Hangers to Hang Boots Upside Down
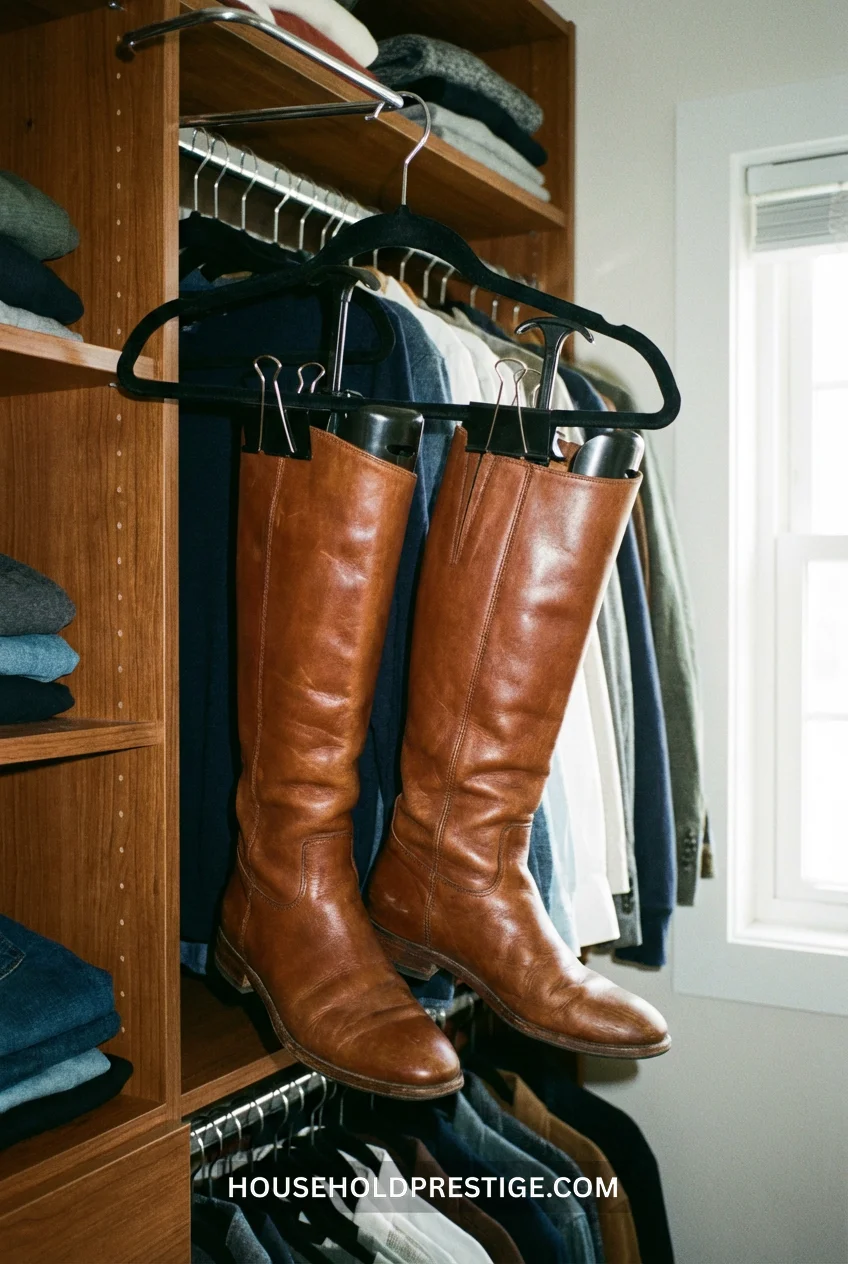
Boots flop over. They crease. They take up absurd amounts of floor space.
Clip 2-inch binder clips to the top cuff of each boot, then hang the clips from hangers. Your boots hang straight, retain their shape, and free up 80% of your closet floor.
Works for knee-high, over-the-knee, and ankle boots.
9. Triple Your Shelf Space with Stackable Wire Shelf Dividers
Wire shelf dividers slide onto existing shelves and create vertical sections. Instead of one 14-inch-tall shelf where you stack 6 sweaters (and the bottom 3 are impossible to reach), you get 3 separate 4.5-inch compartments.
Pull what you need without collapsing the stack. Lynk brand on Amazon, $20 for a 2-pack.
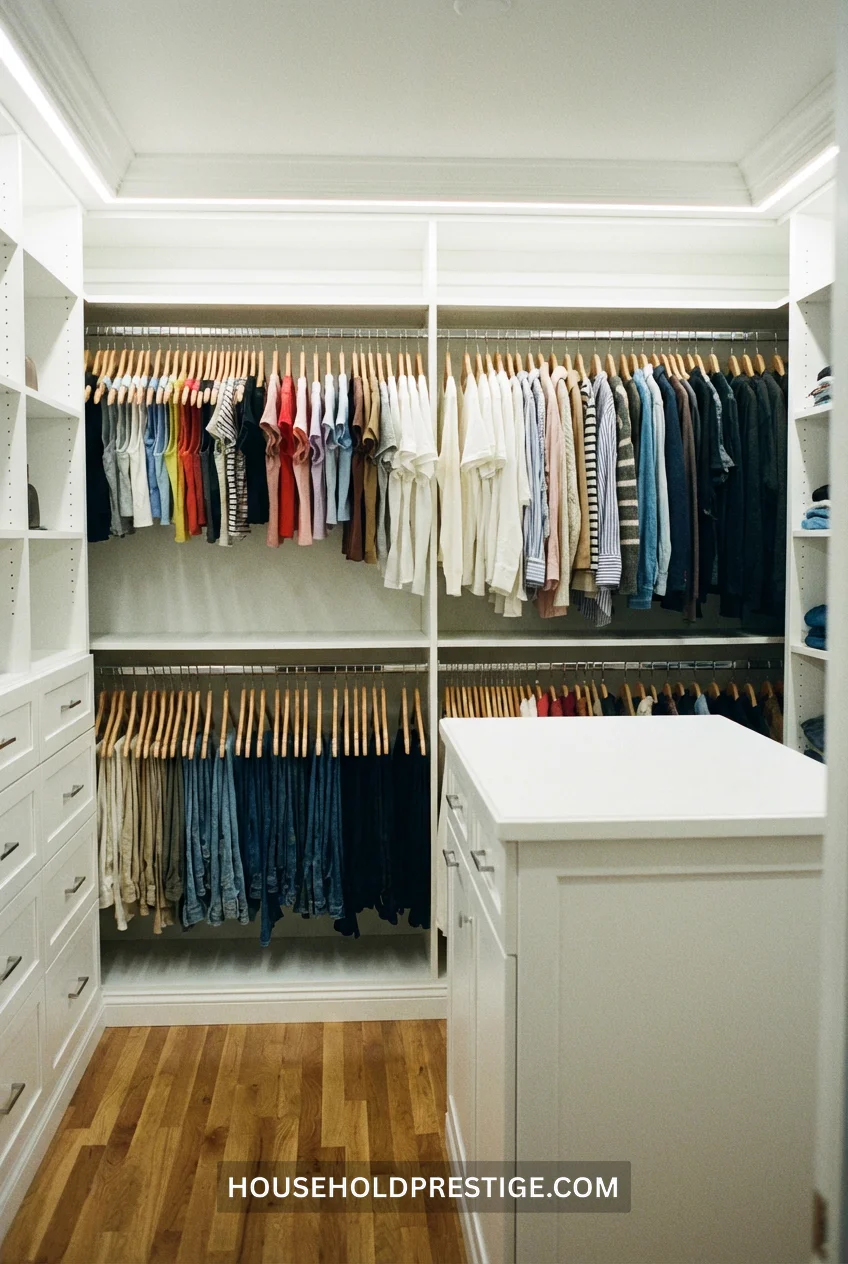
10. The 80/20 Capsule Sort: Front-Load Your 20% Most-Worn Items
You wear 20% of your wardrobe 80% of the time. Stop treating every shirt equally.
Dedicate the prime real estate—eye-level, front-center—to your most-worn 10-15 pieces. Jeans that fit perfectly. The black tee you reach for every week. Your go-to blazer. Push everything else to the sides or upper shelves.
This reorganization takes 15 minutes and cuts your getting-dressed time in half.
11. Add a Rolling Cart for Tomorrow’s Outfit Staging Zone
Park a 3-tier rolling cart next to your wardrobe. Stage tomorrow’s complete outfit the night before—shirt, pants, shoes, accessories, bag. Everything in one place.
Mornings stop being a scramble. You’re not pulling 4 different things from 4 different locations while trying to remember where you put that necklace.
IKEA Råskog cart: $35. Also useful for laundry sorting, seasonal swap-outs, or storing out-of-season shoes.
12. Vacuum-Seal Out-of-Season Clothes and Reclaim 75% of Shelf Space
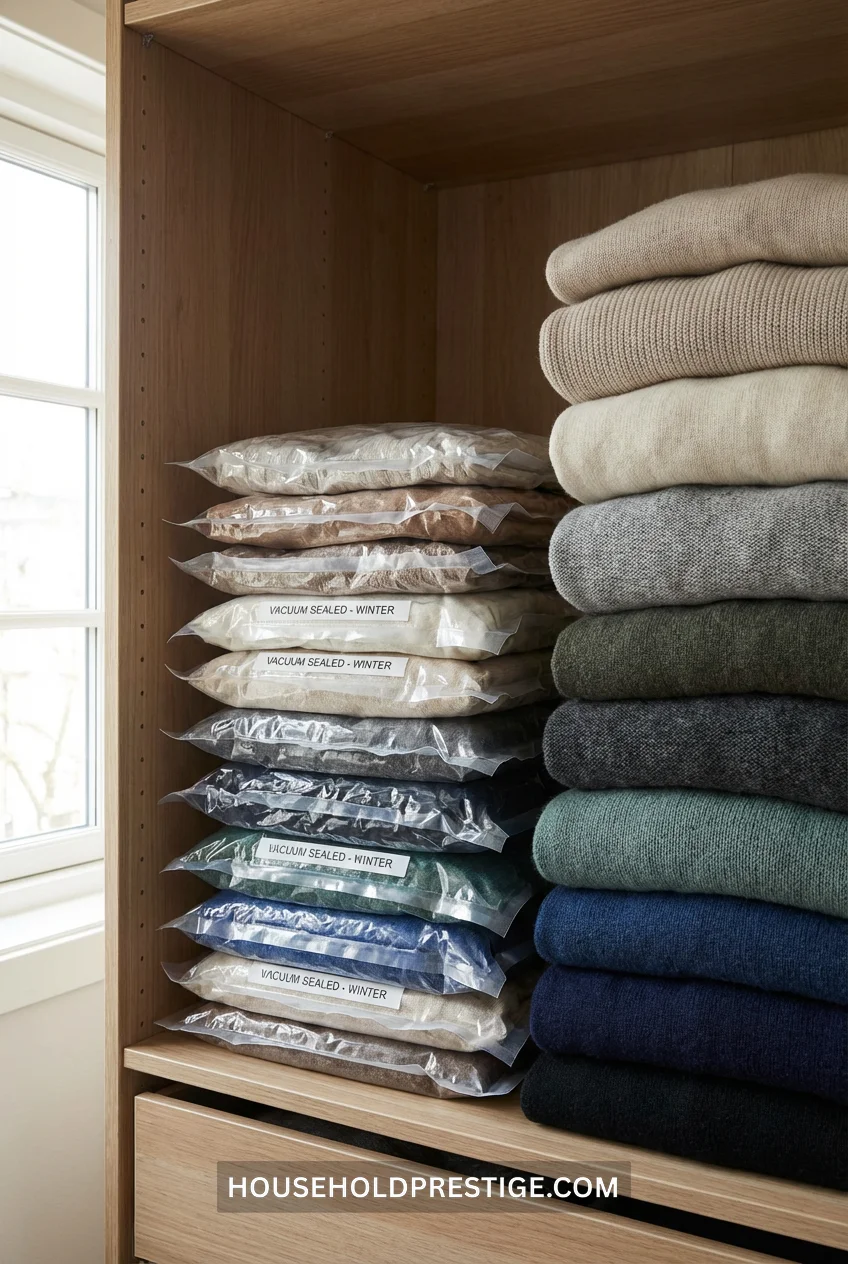
Winter coats in July. Summer dresses in January. Why are they hogging prime wardrobe real estate?
Vacuum-seal bags compress bulky off-season clothes to 25% of their original volume. A 12-inch stack of sweaters compresses to 3 inches. You can stack 4 seasons worth of clothes on one shelf.
Amazon Basics vacuum bags, 6-pack: $22. Works with any vacuum hose attachment.
13. Screw S-Hooks Under Shelves for Hanging Necklaces and Hats
That underside of your shelf? Completely unused. Screw in a row of S-hooks every 4 inches. Hang necklaces so they don’t tangle. Hang baseball caps by their curved bills. Hang your collection of reusable shopping bags.
12 S-hooks cost $8. Installation: 10 minutes with a screwdriver.
14. Install Shelf Risers to Create Dual Levels for Shoes or Bags
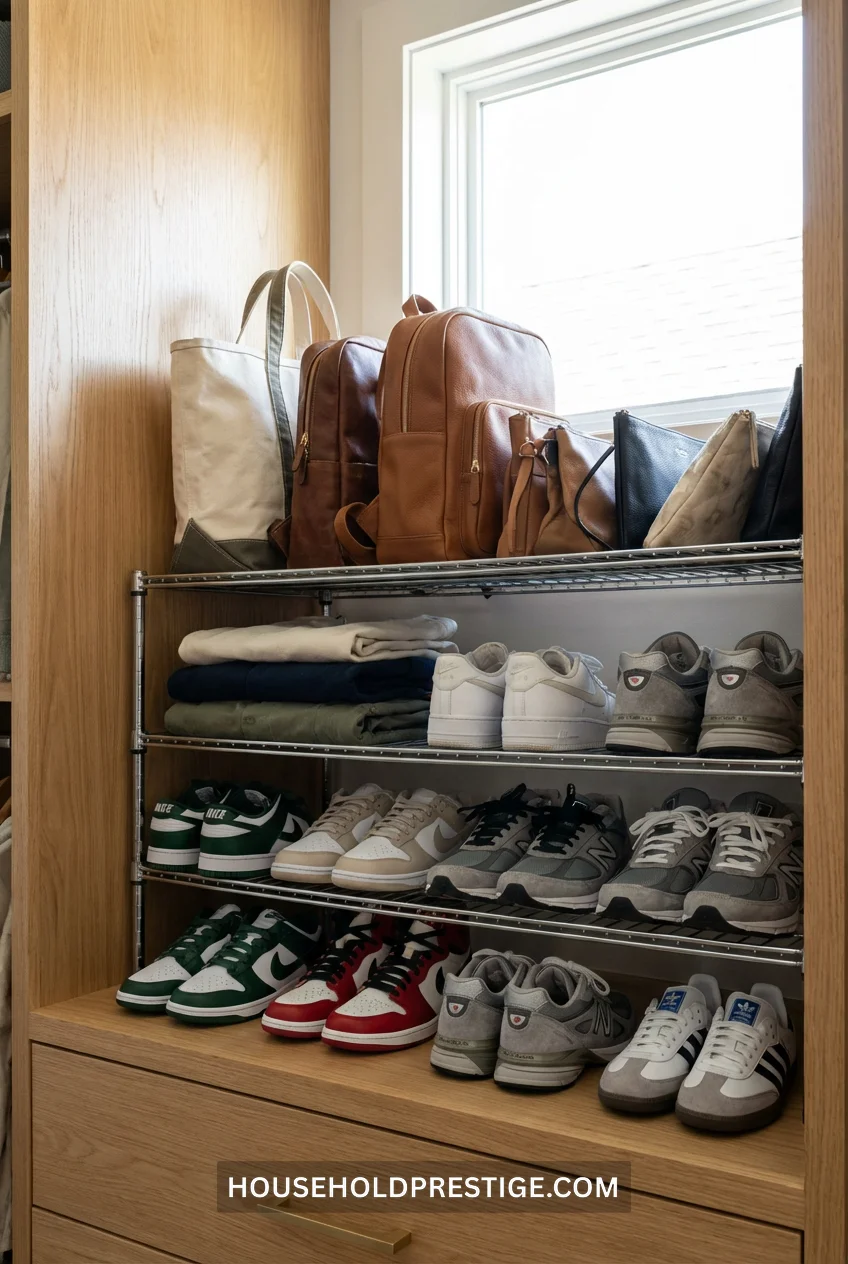
One shelf holds 6 pairs of shoes if you line them up. That same shelf holds 12 pairs if you add shelf risers that create a second level 6 inches above the first.
Works for shoes, handbags, folded jeans, or sweaters. Adjustable metal risers cost $16 for a 2-pack and expand from 12 to 18 inches wide.
15. The Complete Closet Rod Doubler Installation for Maximum Hanging Capacity
If you’re serious about doubling your hanging space, a closet rod doubler beats DIY tension rods in stability and capacity.
Why Closet Rod Doublers Outperform Tension Rods
Tension rods wobble under heavy loads. They slip. They work for lightweight items but fail when you hang 15 pairs of jeans. Closet rod doublers bolt directly to your existing rod and support up to 50 pounds per tier.
You’re building a permanent second level that handles the same weight as your original rod.
What You Need
- Closet rod doubler bracket system (Amazon, $28-35 for 2 brackets)
- Measuring tape
- Pencil
- Drill with 1/4-inch bit (if brackets require mounting holes)
- 10 minutes
- A second person (optional but helpful for alignment)
Installation Instructions
- Empty the section. Remove all clothes from the area where you’ll install the doubler.
- Determine placement. You need two zones: an upper zone for short items (shirts, folded pants) and a lower zone for slightly longer items (skirts, shorts, or additional tops). Measure 36-42 inches from the floor to your existing rod. The doubler will hang 12-18 inches below it.
- Attach the first bracket. Slide the doubler bracket onto your existing closet rod. Most systems use a simple hook-and-tighten mechanism—no drilling required. Position it 12 inches from the left wall.
- Attach the second bracket. Slide it onto the same rod, 12 inches from the right wall. If your closet span is longer than 48 inches, add a third bracket in the center for stability.
- Insert the new rod. Thread the included secondary rod through the hanging loops on both brackets. Ensure it’s level—use a bubble level app on your phone if you don’t have a physical level.
- Tighten all connections. Double-check that brackets are secure and the lower rod doesn’t wobble.
- Load test. Hang 5-10 heavy items on the new lower rod to confirm stability before fully loading.
Dimensions to Get Right
- Upper rod to lower rod: 12-18 inches (adjust based on your longest shirt length)
- Lower rod to floor: 20-30 inches (must clear shoes stored below if applicable)
- Bracket spacing: No more than 48 inches between supports to prevent sagging
Cost Breakdown
Basic system (2 brackets + rod): $28
Premium system (3 brackets, reinforced rod): $45
Optional: Extra support bar for spans over 5 feet: $12
Total: $28-45 for a permanent doubling of hanging capacity.
Pro Tips
- Install the doubler in the section where you hang the most short items—not where coats or dresses go.
- Use the upper rod for items you wear most often (easier to reach without bending).
- Dedicate the lower rod to seasonal items or less-frequently-worn pieces.
- If you have slanted ceilings or odd closet shapes, adjustable-height doublers exist but cost $10-15 more.
Common Mistakes to Avoid
Overloading one side creates imbalance. Distribute weight evenly across both brackets. Don’t install in a section where your longest hanging items are—this works for SHORT item zones only. Don’t skip the level check—a 2-degree tilt looks sloppy and causes hangers to slide to one end.
When It’s Worth It
If you currently have 3+ feet of vertical dead space between your rod and the floor, this pays for itself immediately. A doubler turns a 4-foot-wide section into 8 feet of usable hanging space. For small closets, this is the single highest-ROI upgrade you can make.
16. Label Shelf Edges with a Label Maker to Maintain Organization Long-Term
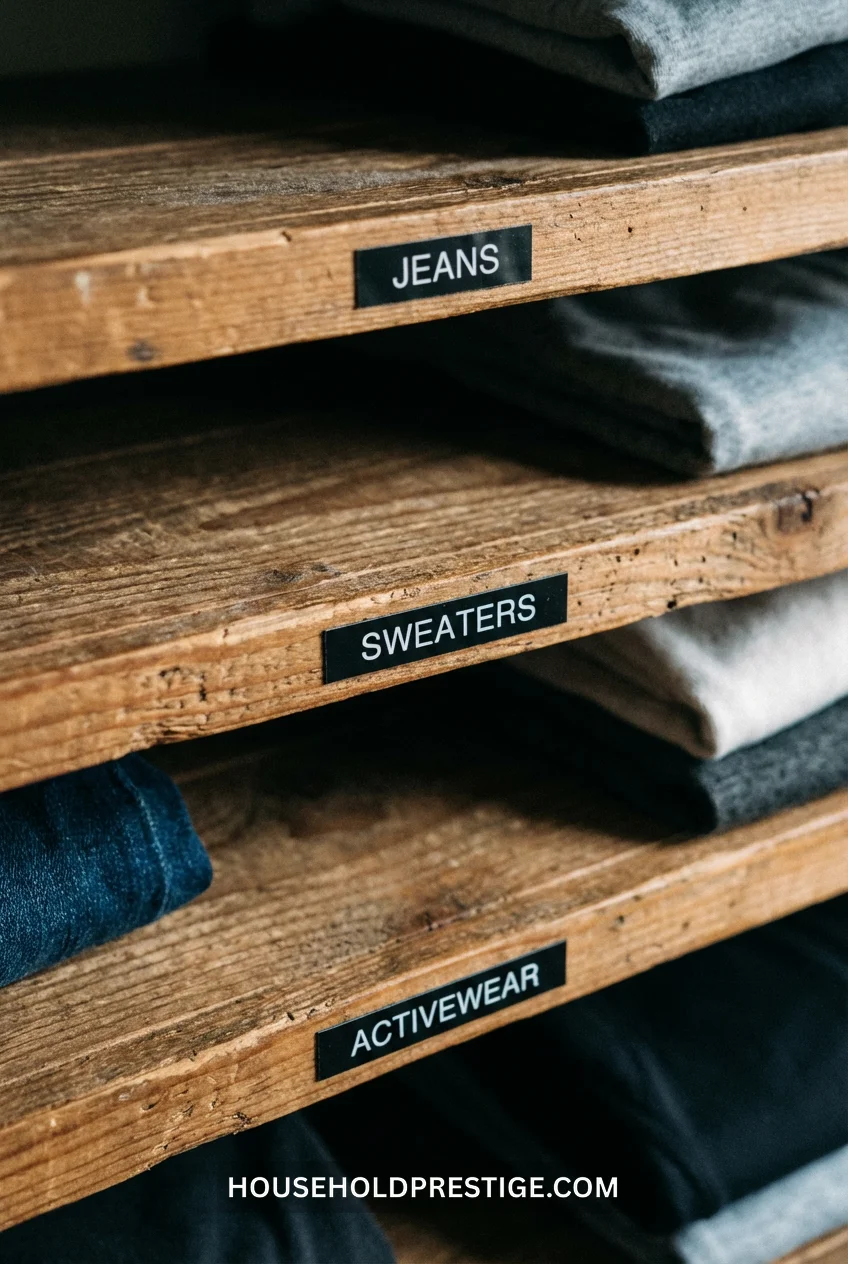
Systems fail because you forget where things go. Then you improvise. Then chaos returns.
Label every shelf. “Jeans.” “T-Shirts.” “Workout Gear.” Your brain stops making decisions. You just follow the label.
Brother P-Touch label maker: $25. Refill tape: $8. One-time investment that makes reorganization permanent.
17. Swap Bulky Plastic Bins for Slim Canvas Bins That Actually Fit Shelves
Plastic storage bins lie. The label says “fits standard shelves,” but they’re 15.5 inches wide and your shelf is 15 inches. They don’t stack flush. They waste the 2 inches of vertical space above them because the lid creates a bulge.
Canvas bins with reinforced sides compress slightly to fit snug. They’re 1-2 inches shorter, allowing you to stack another tier above. No wasted vertical inches.
Target Brightroom bins: $15 for a 2-pack.
18. Store Jeans Folded in Half and Filed Vertically, Not Stacked

Stacked jeans are a disaster. You want the pair on the bottom. You pull. The whole stack topples. Now you’ve got 8 pairs on the floor.
Fold each pair in half lengthwise, then loosely roll or fold into thirds. Stand them upright in a drawer, file-style. You can see the wash, the fit, the rise—all at a glance.
This also works in deep bins on shelves if you don’t have drawer space.
19. Use Clear Acrylic Dividers for Handbag Shelf Organization
Handbags collapse when stacked. They hide inside each other. You can’t see what you own.
Clear acrylic shelf dividers (the kind used for organizing bakeware) create individual slots. Each bag gets its own 4-6 inch wide space. Bags stand upright. You can see every single option without moving anything.
$18 for a set of 4 dividers on Amazon.
20. Install LED Motion-Sensor Strip Lights to See Dark Closet Corners
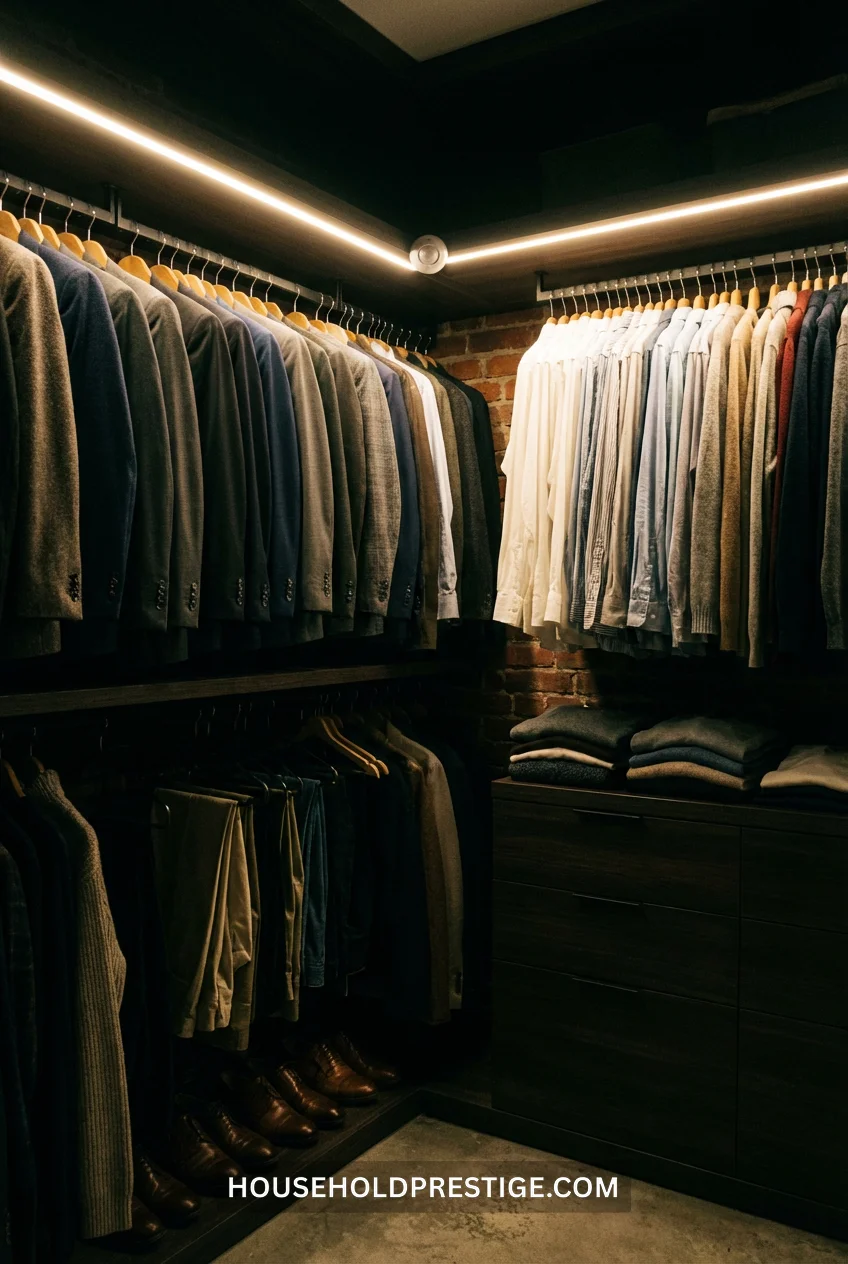
Your closet has one overhead bulb. The corners stay dark. You squint at navy vs. black pants and guess wrong until you’re outside in daylight.
Battery-powered LED strip lights with motion sensors stick to any surface. Walk in, they turn on. Walk out, they shut off after 30 seconds. No wiring. No electrician.
20-inch strips, 2-pack: $16. Battery life: 6-8 months.
21. Create a Donation Box That Lives Permanently in Your Closet
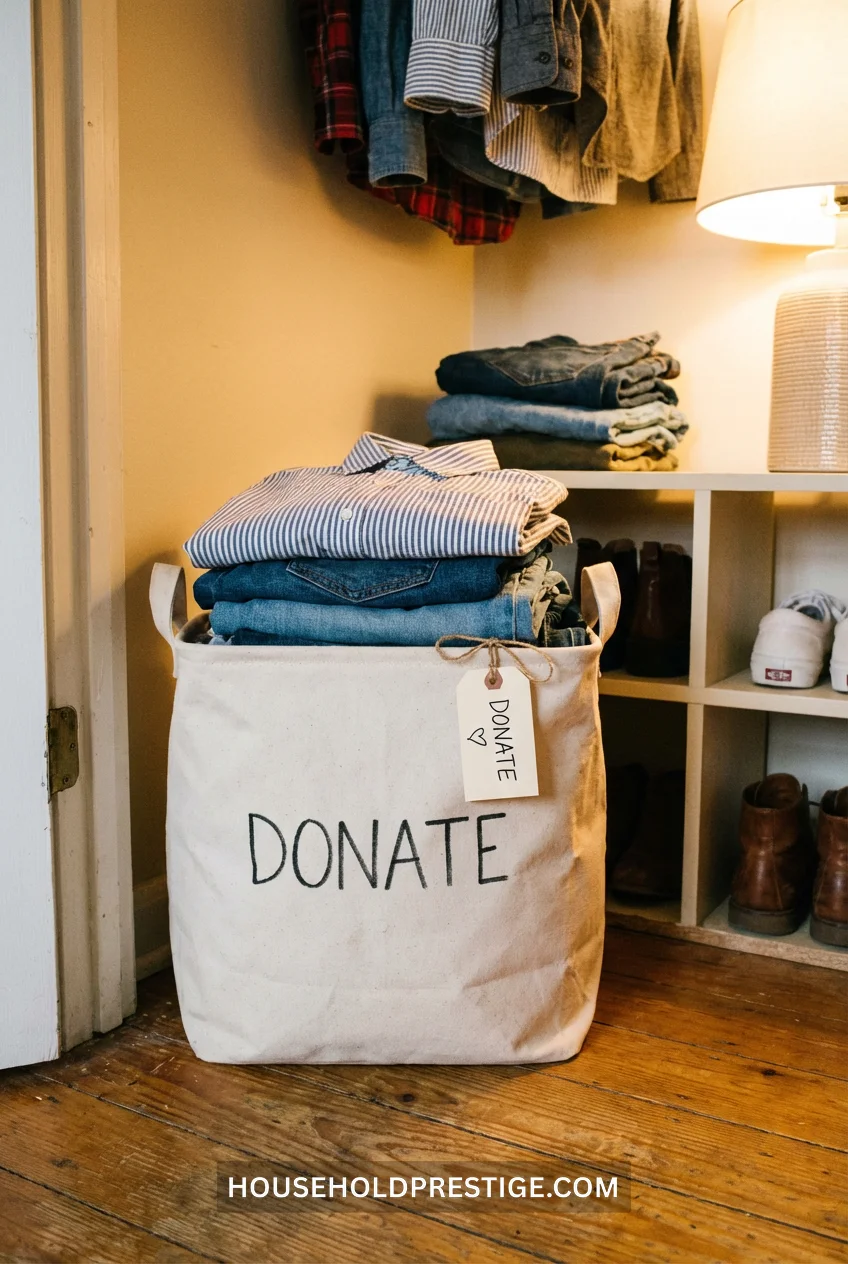
The reason you never purge is the friction. You’d have to find a box, fill it, remember where the donation center is, drive there.
Keep a labeled donation box on your closet floor permanently. Anytime something doesn’t fit, doesn’t get worn, or just isn’t you anymore—toss it in. When the box is full, you make one trip. Done.
This removes the decision paralysis. There’s no big purge day where you agonize over 50 items at once. It’s one item, one decision, continuous flow.
Collapsible canvas bin: $12 at Target. The ROI is sanity.
Conclusion
You don’t need a bigger closet. You need these 21 tweaks that work with what you’ve already got—smarter hanging, vertical thinking, and an end to the pile-and-pray method that’s been failing you for years.
Pick 3 of these ideas. Not 21. Just 3. Install them this weekend. You’ll notice the difference Monday morning when you’re not frantically digging through a chair-pile looking for that one shirt.
Your wardrobe has enough space. You just weren’t using it right.
FAQ Section
How often should I reorganize my wardrobe?
Reorganize seasonally (4 times a year) when you swap out-of-season clothes. Do a light reset monthly—refold, rehang anything that’s slipped back into chaos. The permanent systems (shelf dividers, drawer bins, labeled shelves) shouldn’t need constant adjustment once they’re set up correctly.
What’s the fastest way to declutter a wardrobe when you’re short on time?
The backward hanger trick. Turn all hangers backward today. Flip them forward only when you wear the item. After 3 months, anything still backward gets donated. No deliberation. No “maybe I’ll wear this someday.” The data doesn’t lie—if you haven’t reached for it in 90 days, you won’t.
Can I use these wardrobe organization ideas in a small apartment closet?
These strategies work best in small spaces because they maximize vertical inches. Closet rod doublers, file-folding in drawers, and vacuum-sealing off-season clothes are all designed for situations where you can’t just “get a bigger closet.” Start with ideas #2 (tension rod), #5 (slim hangers), and #12 (vacuum bags)—those three alone will reclaim 40% more usable space.
What’s the best way to organize clothes by category vs. color?
Organize by category first (all jeans together, all t-shirts together), then sort within each category by color if you want. Never lead with color—you’ll split similar items across different sections and forget you own them. Exception: if you have 30+ basic t-shirts in the same style, color-coding makes sense. For most people, category beats color every time.
How do I maintain wardrobe organization long-term without it falling apart?
Two rules: (1) Everything needs an exact home with a label, and (2) keep a permanent donation box in your closet. The minute you break the “one thing comes in, one thing goes out” rule, chaos returns. Systems fail when there’s decision friction—labels eliminate that. The donation box eliminates the “I’ll deal with it later” pile.