

I’m on my knees in front of the lower cabinet, one arm buried to the shoulder, trying to pull out a saucepan without bringing the whole stack down. The lid slides off and clangs across the floor. Again.
If that’s your morning, these small kitchen storage ideas are for you. Every one works in a rental, needs no drill, and costs roughly $5 to $80, with most ideas under $40. You’ll get the problem each idea solves, the space it frees, a rough price, and the catch to watch for. Pick two or three, and your kitchen will feel bigger by tonight.
Inside Your Cabinets and Drawers
Most of the wasted space in a tiny kitchen hides behind closed doors. You have height you don’t use and depth you can’t reach. These eight fixes go after both.
1. Add a Shelf Riser to Every Cabinet Shelf
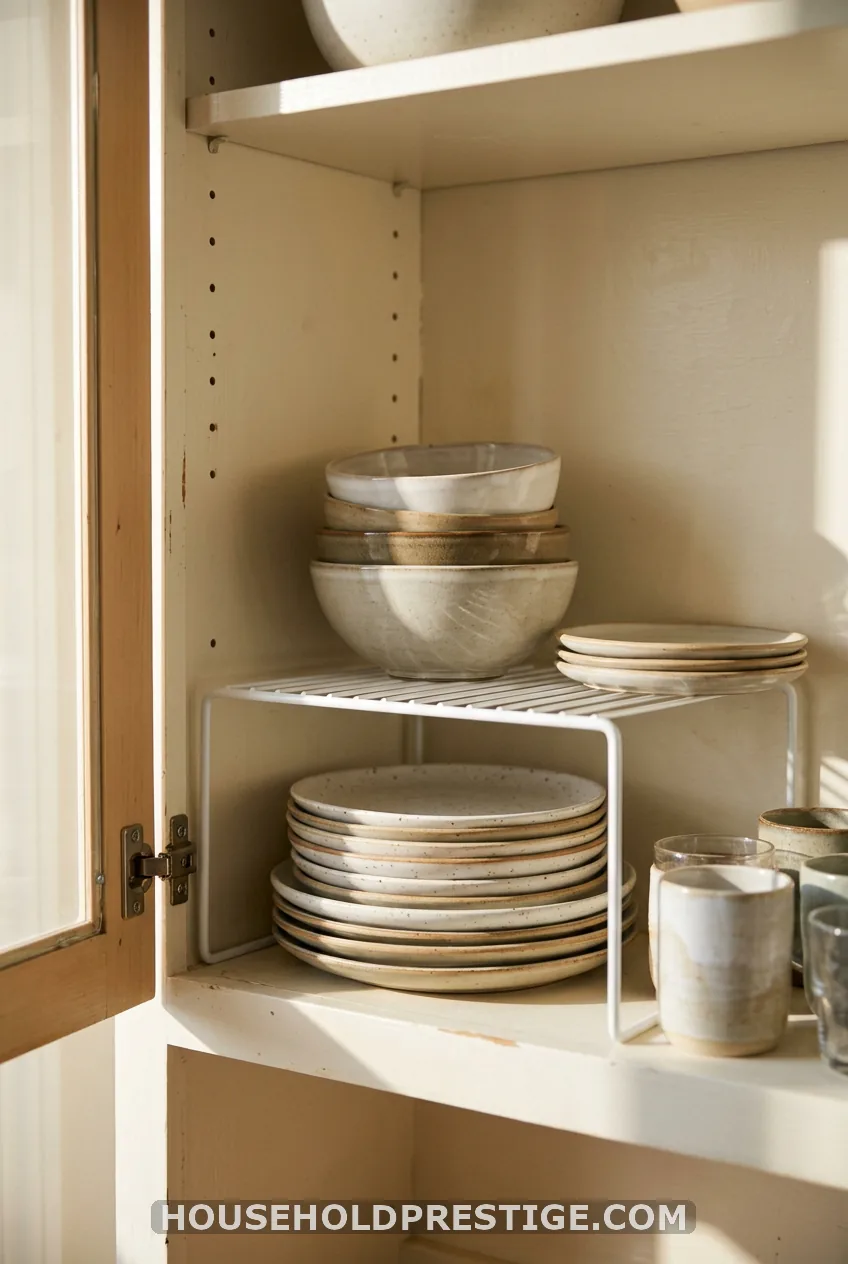
The problem: Your shelf is 14 inches tall and your plates are 4 inches tall. That’s 10 inches of air you pay rent on.
A riser creates a second level. Plates go underneath. Bowls, mugs, or glasses go on top. One shelf becomes two, and you stop digging.
What you need
- A measuring tape
- One riser per shelf, $8 to $20 each (IKEA’s VARIERA is a common one, but any sturdy wire or bamboo riser works)
- Five minutes
How to do it
- Measure the clear height of the shelf from surface to the shelf above. Write it down.
- Measure the height of your tallest stack, such as dinner plates.
- Subtract. You need at least 5 inches left for the riser plus whatever sits on top.
- Buy a riser that fits the width of the shelf with a little wiggle room.
- Put the heavy, everyday stuff on the floor of the shelf. Put the light, grab-and-go stuff on the riser.
The mistake to avoid
Do not put your heaviest cookware on a riser. Most are rated for 15 to 25 pounds, and a cast iron skillet eats that fast. Keep it low.
2. Divide Your Drawers With an Expandable Tray
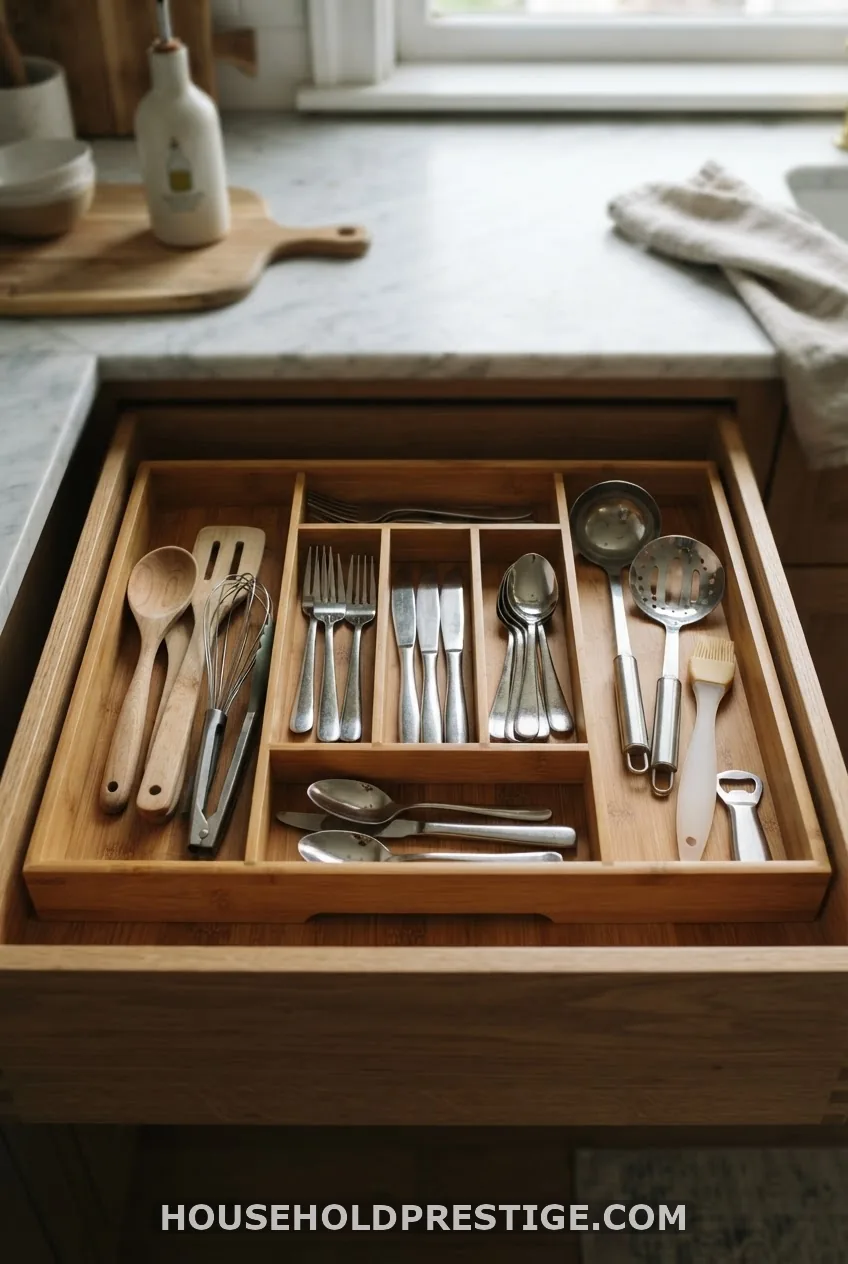
The problem: One messy drawer holds your forks, your whisk, and a garlic press that always jams the slide.
An expandable bamboo or plastic tray ($10 to $20) stretches to fit most drawer widths. Every tool gets a fixed slot. You can find the can opener without looking.
Measure your drawer width and depth first. A drawer under 3 inches deep needs a low tray, or the drawer won’t close.
3. Store Pot Lids Upright in a Lid Rack
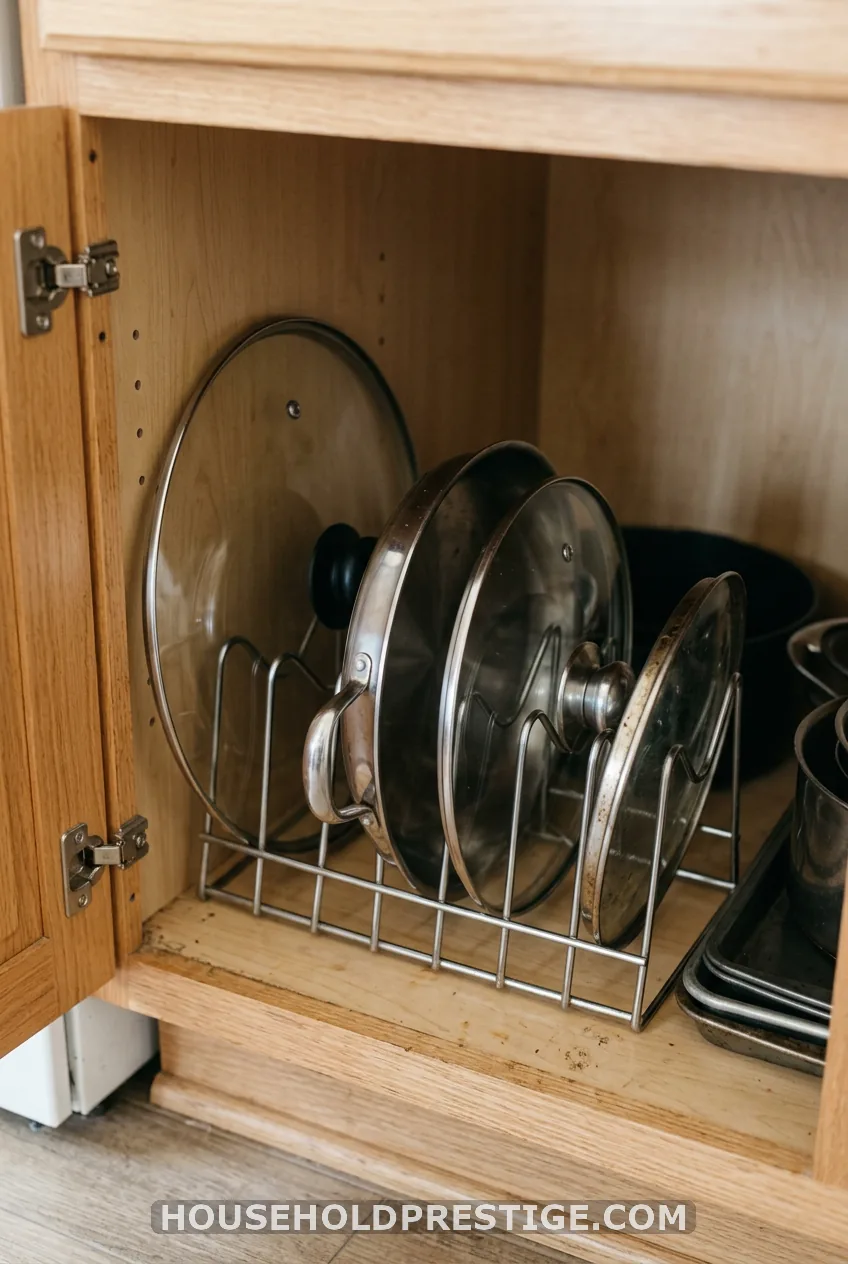
Lids stack badly. Always have. A $10 to $18 rack holds them on edge so you pull one without moving the rest.
On a budget? A $5 desktop file organizer does the same job. It also holds baking sheets and cutting boards on their edges.
4. Stack Pans With an Organizer, or Hang Them
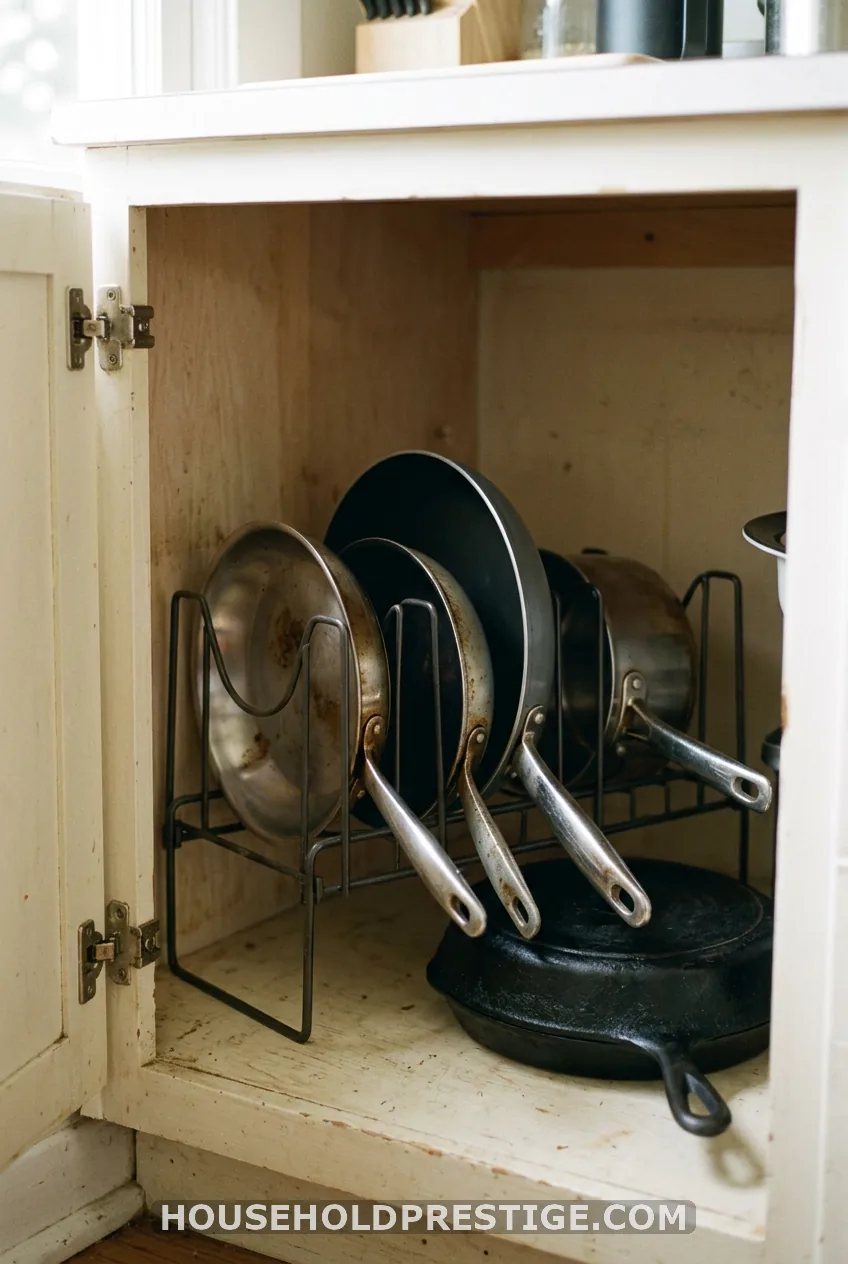
Pans stacked like pancakes are a bad idea. You lift three to reach the one on the bottom, and you scratch the nonstick coating on every one.
An extendable shelf divider or pan rack ($15 to $25) turns them on edge. Keep the heaviest pan on the cabinet floor, not on a shelf or riser. If you have a free wall, hang the skillets instead (see idea 11) and the whole cabinet opens up.
For a pressure cooker, give the big one the floor of the cabinet. Store its lid and gasket on a hook or in the lid rack, so the pot body can nest with a smaller pot.
5. Add a Tiered Spice Rack
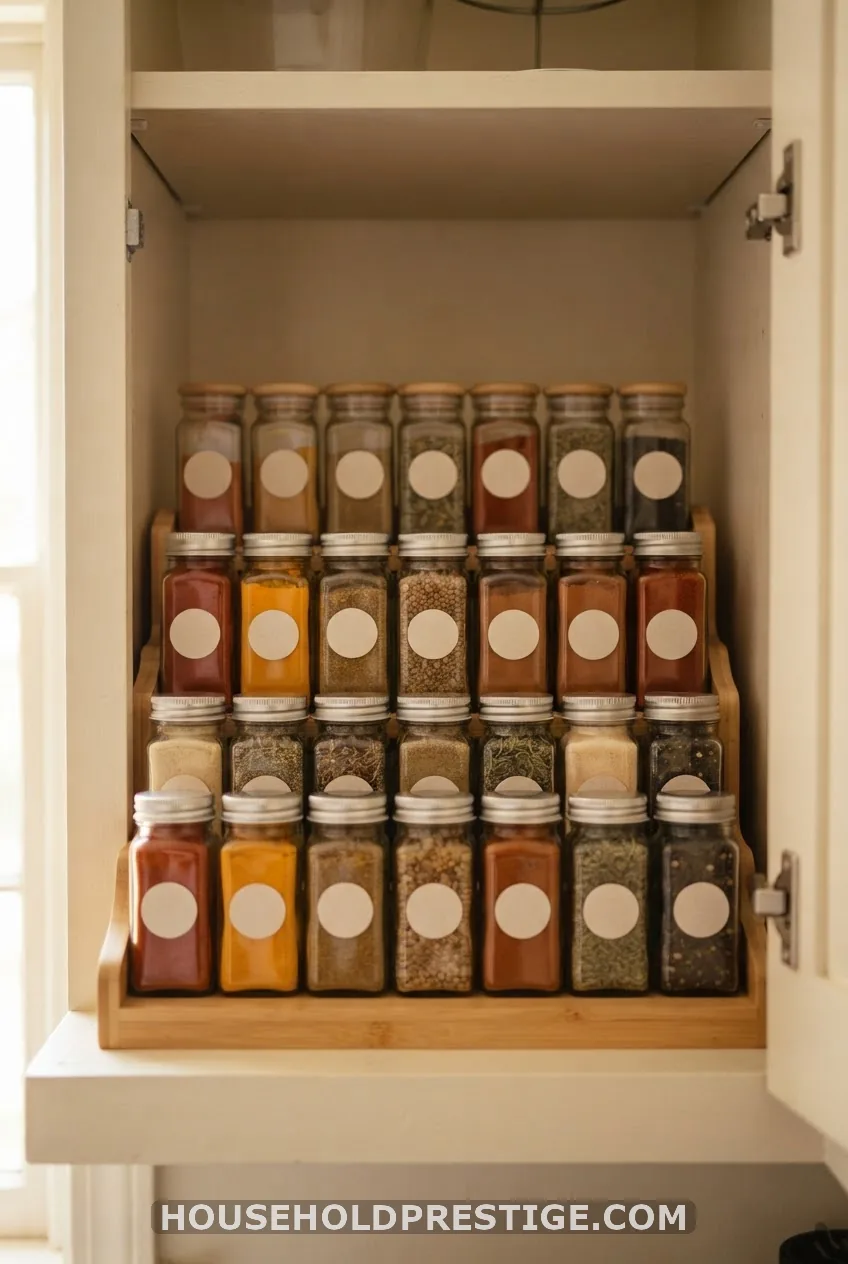
A tiered riser ($10 to $20) lets you see every jar in one glance. That’s the real win. You stop buying a third jar of cumin because the first two hid behind the paprika.
If you cook Indian food, a masala dabba (the round steel spice box with a lid and small bowls) is already a tiered system in one piece. Keep it on a riser at the front of a shelf, and decant refills into small jars behind it.
No cabinet space at all? Put spices in a shallow drawer with angled inserts, labels facing up.
6. Put a Lazy Susan in the Deep Cabinet
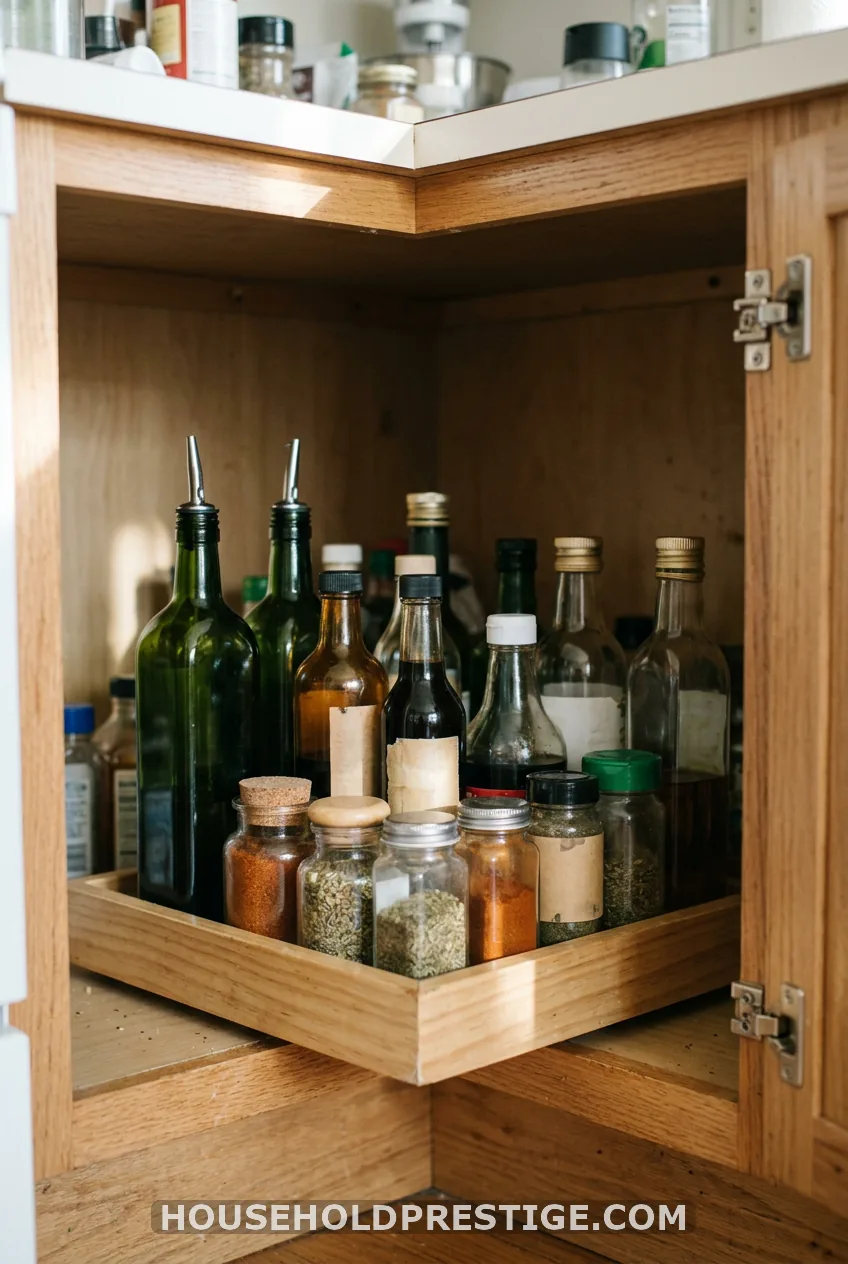
Deep and corner cabinets swallow things whole. A turntable ($8 to $18) spins the back to the front. Use it for oils, vinegars, sauces, and honey. Choose a square one if you can, because round ones leave dead corners.
7. Decant Dry Goods Into Stackable Clear Containers
The myth: “Bags are fine, they’re already packaged.”
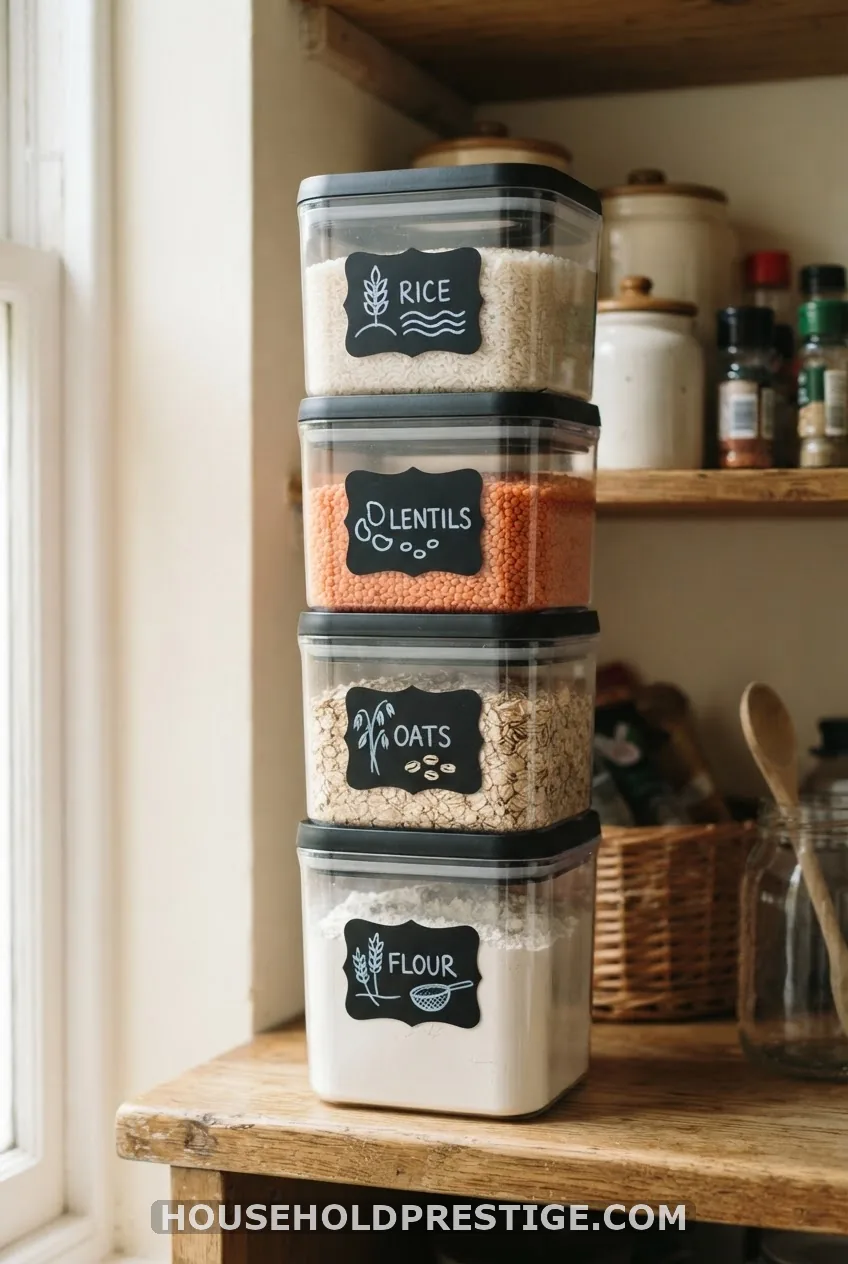
The reality: Bags slump, tear, and take up odd, wasted space. Square containers stack into a tight block, and you can see what’s low before you run out.
A set of four to six airtight containers runs $20 to $40. Use a chalk marker or masking tape to write the contents and the date you filled it.
For atta, rice, and dal in big quantities, buy one 5 to 10 pound square container with a scoop. Keep it on the lowest shelf so you lift it as little as possible.
Round jars look pretty, but square ones waste less shelf. If you love Mason or Ball jars, use them on the wall shelf where looks matter.
8. Group Like With Like in Baskets and Bins
A cautionary tale. Early on I bought four deep bins for a lower cabinet. They looked great. Then a bag of pasta slid to the back of one, and I found it six months later, next to a very sad box of crackers.
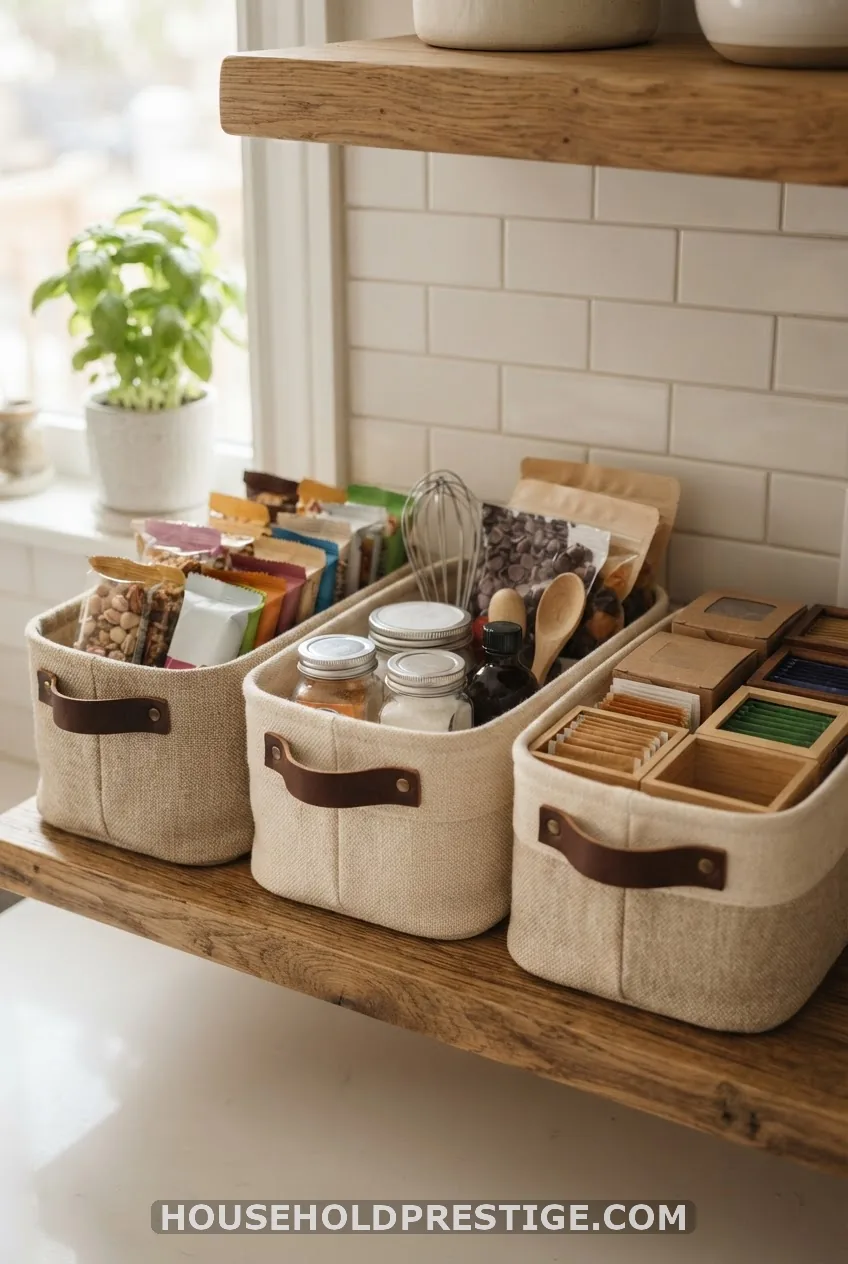
The lesson: deep bins hide food until it expires. Buy shallow, wide bins with handles ($5 to $15 each) so you see the contents from above.
No pantry? Use one bin for each category: snacks, baking, breakfast, tea. One category per bin, no exceptions. When a bin is full, that’s your cue to stop buying, not to add a bin.
Doors, Walls, and Hooks
Walls, and the backs of doors, are free real estate. Everything here is adhesive or leaning, so your deposit stays safe.
9. Put the Inside of Your Cabinet Doors to Work
Self-adhesive hooks ($5 to $8 for a pack, such as 3M Command) hold measuring cups, spoons, a sieve, and oven mitts. A slim door rack handles foil, wrap, and lids.
Keep it light. Check the weight limit on the package, and stay under it. Before you stick anything, close the door slowly and check that the items clear the shelf inside. Hooks that clip a shelf edge will stop the door from closing, or worse, rip off the adhesive.
10. Clip an Under-Shelf Basket Below a Wall Cabinet
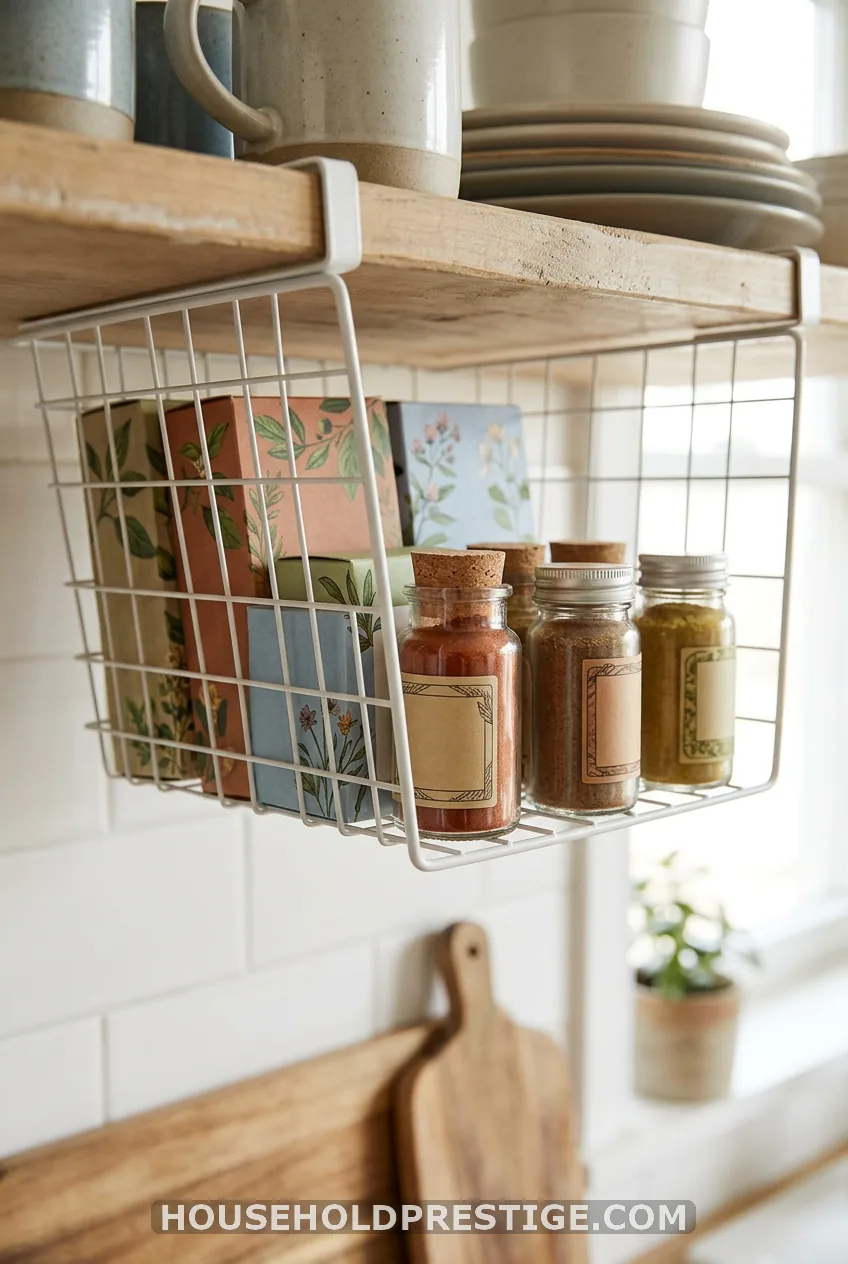
A slide-on basket ($8 to $15) hooks onto the edge of a shelf. No tools. It adds a drawer-sized spot for tea, napkins, foil, or spice jars, and you can see inside at a glance.
Check the gap first. You need about 5 to 6 inches under the shelf, or the basket will block the shelf below.
11. Hang Pots, Mugs, and Tools From a Wall Rail
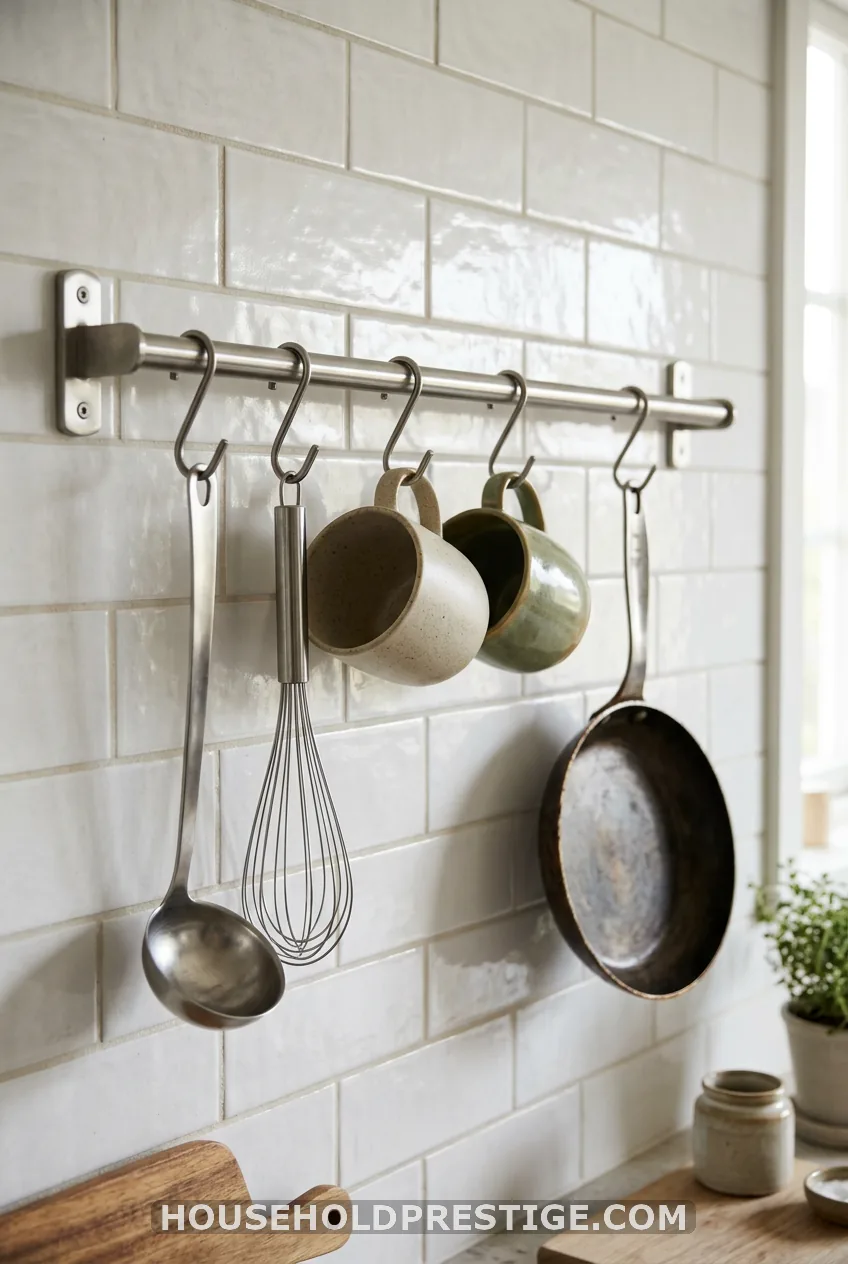
A rail with S-hooks ($10 to $25) puts utensils, mugs, and a skillet on the wall. It empties a drawer and a cabinet shelf at once. Best spots are the backsplash strip and the side of a tall cabinet.
Renters have three no-drill options:
- Adhesive rail or hooks. Fine for light tools and mugs. Respect the weight rating.
- Adhesive magnetic strip. Holds knives, metal spice tins, and scissors. Wipe the wall clean first.
- A leaning pegboard. Prop a 2 by 3 foot pegboard on the counter against the wall. It’s flexible, and you can reshuffle hooks when your needs change.
The adhesive options struggle with grease. Keep these away from the stove.
Dead Zones, Gaps, and Counters
Look for the gap beside the fridge, the space under the sink, and the sink itself. They all work harder than you think.
12. Double the Space Under the Sink
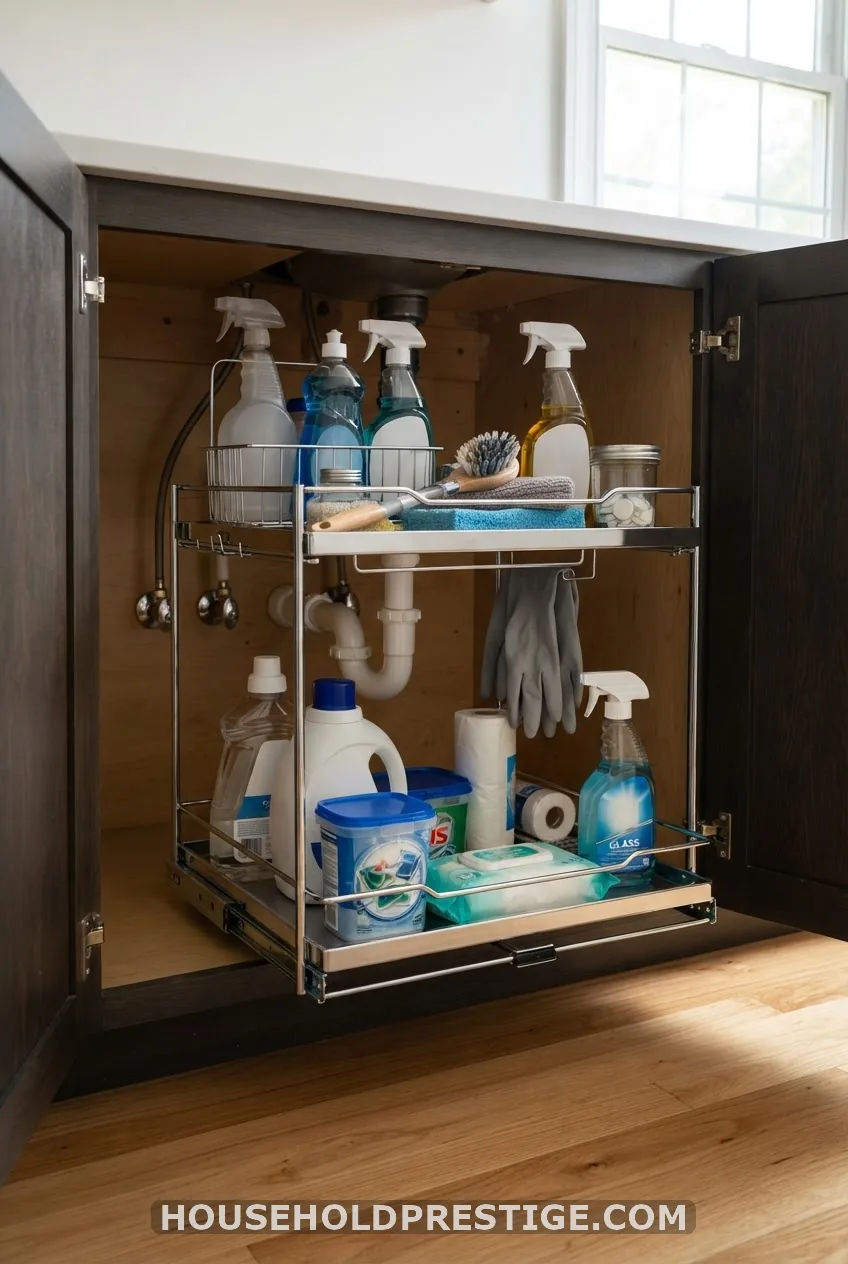
The pipes eat the middle of this cabinet, and loose bottles tip over. A two-tier organizer ($15 to $30) is built to wrap around the pipes. Put cleaning supplies in a caddy you can carry to the bathroom. Stick adhesive hooks on the door for gloves and a brush.
13. Park a Slim Trolley Beside the Fridge
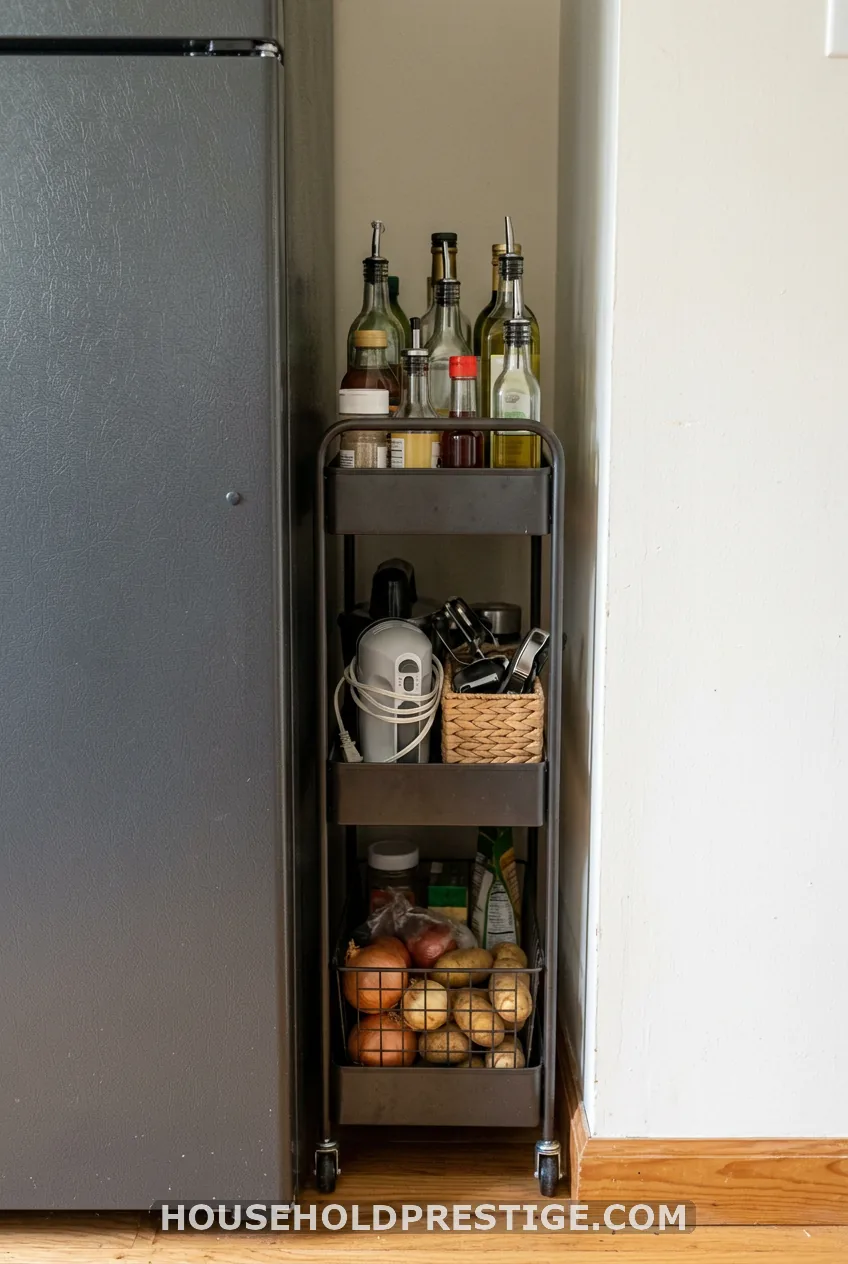
Measure the gap beside your fridge. If it’s 6 to 10 inches wide, a slim rolling trolley ($40 to $60; IKEA’s RÅSKOG is the one most people know) slides right in. Put daily items on it: oil, salt, a tea caddy. Roll it out as a prep surface when you cook.
Above the fridge is another dead zone. Put in baskets for backup pantry stock like canned tomatoes and spare rice. Store only things you don’t need weekly, because you’ll need a step stool.
Short on counter space? A freestanding wire shelving unit ($40 to $80) in a corner can become an appliance garage for the air fryer and mixer. Measure the height of the appliance plus 2 to 3 inches of clearance for heat and steam.
14. Cover the Sink With a Chopping Board
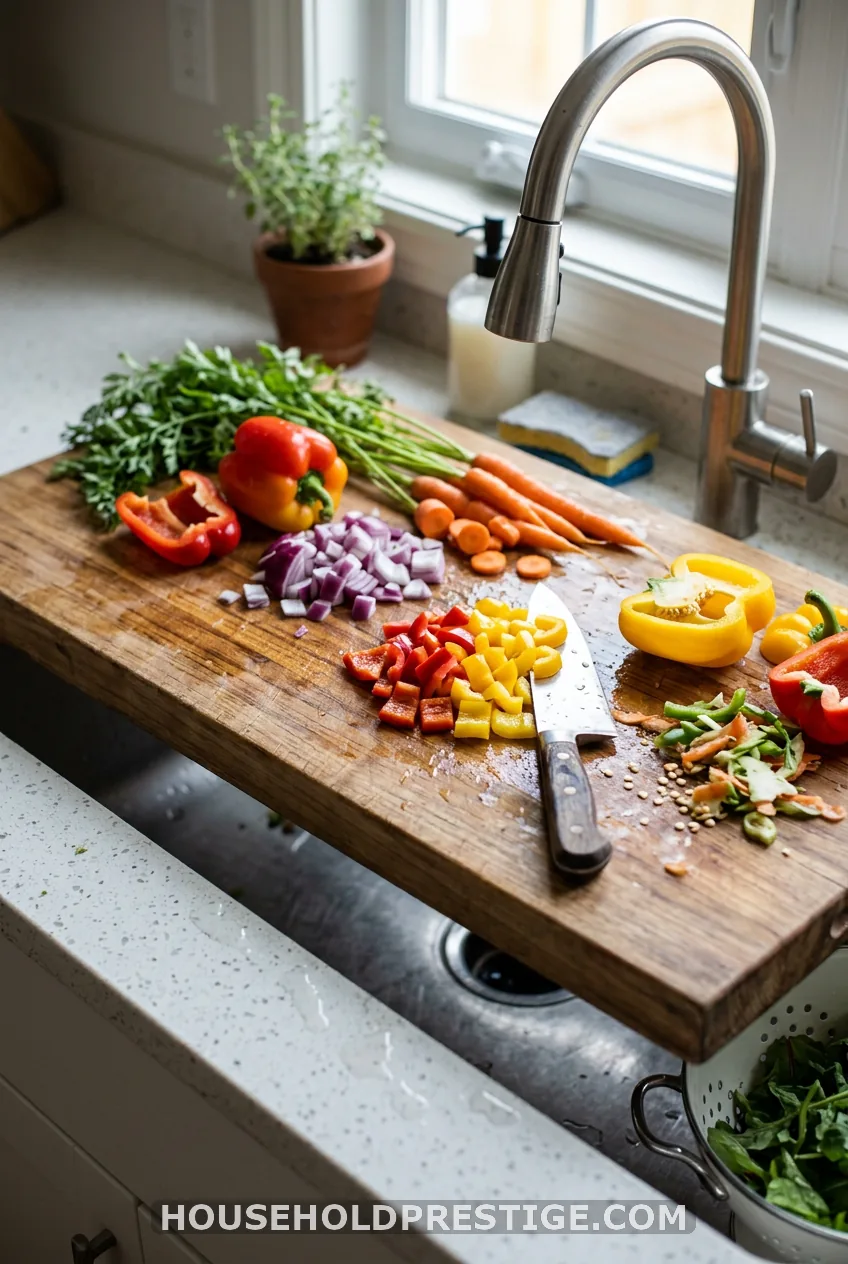
A board that spans the sink ($15 to $40) is instant prep space, right beside the drain for rinsing and peeling. Buy a custom-fit size, because a universal one wobbles.
In a galley kitchen with one clear wall, a wall-mounted drop-leaf table is the next step. That one needs screws, so it suits owners. Renters can try a pull-out board in a drawer slot.
How to Choose Where to Start
Don’t buy fourteen things. Do this instead.
- Fix the cabinet you curse at daily. That one goes first.
- Empty it and edit. Toss, donate, or move anything you haven’t used in a year. Do this before you buy a single organizer.
- Zone by how often you cook. Daily items at waist to shoulder height. Rare items up high.
- Spend your first $50 on vertical space. A riser, a rail, and hooks beat a stack of pretty bins.
Skip anything that steals more space than it saves. A bulky pull-out that eats three inches of a cabinet is a net loss in a kitchen under 100 square feet.
Then set a ten-minute reset once a month. Pull out what no longer belongs. A system survives only if the number of bins stays fixed.
What I’m Doing Next
Here’s my plan for this weekend. Saturday morning, I empty the saucepan cabinet and toss the three lids that match nothing. Then I put in a lid rack and one pan organizer, about $30 total.
Saturday afternoon, I stick two hooks inside the door and a rail by the stove. Sunday, I measure the gap by the fridge and put a trolley on my wish list. Do the same with your worst cabinet and see how it feels by Monday.
FAQ
What is the best storage idea for a really small kitchen with no pantry?
Go vertical. A wall rail, a shelf riser, and a slim trolley beside the fridge replace a pantry shelf for well under $100. Use bins to group snacks, baking, and tea, so nothing gets lost.
How do I add kitchen storage without drilling holes as a renter?
Use Command-style hooks, adhesive magnetic strips, tension rods, over-the-door racks, and freestanding wire shelving. Keep adhesives for light items like mugs and utensils. Heavy things like cast iron belong on a shelf or a freestanding unit.
How do I store pots and pans in a tiny kitchen?
Hang them from a wall rail if you have a clear wall. Otherwise, stand them on edge in a pan organizer with the heaviest on the cabinet floor. Keep lids in a separate upright rack.
What should I buy first for small kitchen storage?
Buy for your biggest daily annoyance. For most people that’s a shelf riser, a pack of adhesive hooks, and one set of clear stackable containers. That’s about $35 to $70 total.
How do I keep small kitchen storage from turning into clutter again?
Give every category one fixed container and do a ten-minute reset each month. If a bin overflows, remove items instead of adding another bin.