

The last plate slid into its groove with a soft clunk, and I stepped back with a dish towel over my shoulder. Three rows of white ironstone. Zero cabinet space used. My plate rack wall had gone from bare paint to the first thing guests noticed.
That is what a good rack does. It stores dishes you use every day and works as decor at the same time. Below are 15 plate rack wall ideas, each with a rack type, what to display and how high to hang it. After the list, you get styling rules, mounting basics and buying tips so you can build the wall, not just save it.
Why a Plate Rack Wall Works Before You Hang Anything
A wall rack frees up a cabinet shelf and a stretch of counter. It also adds color and texture where a flat wall had none. Your everyday plates become the art.
There are three rack families. Grooved wooden shelf racks hold plates upright in a channel. Spindle or peg racks use vertical dowels to keep plates from tipping. Metal wall racks, often powder-coated steel, give a lighter, more modern look.
The best walls are above the sink, at the end of a cabinet run, in a breakfast nook or in a butler’s pantry. Skip any wall right behind a hob or radiator, since heat and grease are hard on wood.
Keep the weight honest. A dinner plate runs about 1.5 to 2 pounds, so a row of five is roughly 8 to 10 pounds. Most racks are 2 to 4 inches deep, which is plenty for plates and tight for chunky platters.
1. Narrow Vertical Rack Beside the Fridge
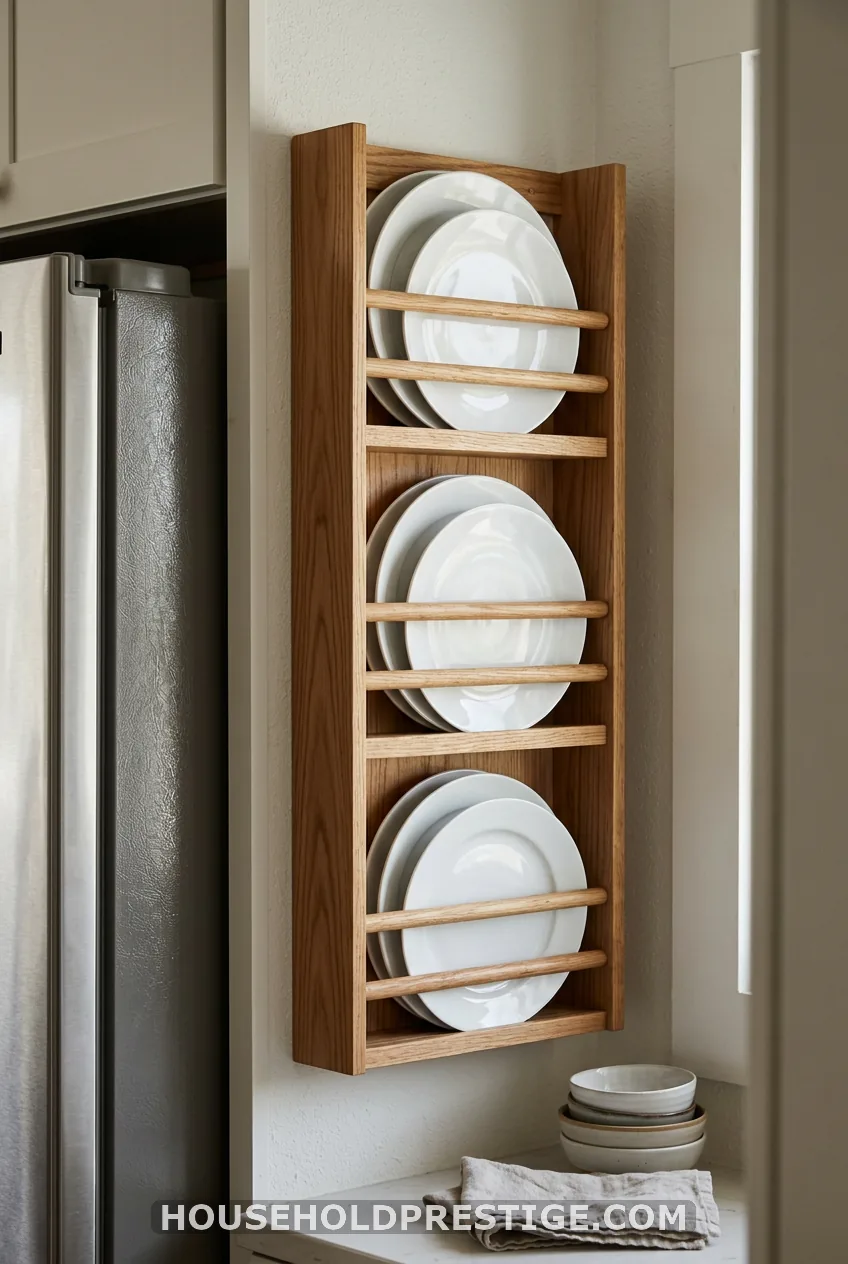
The gap beside a fridge is usually wasted. A vertical rack about 12 inches wide and 36 to 40 inches tall fits it well. Hang the bottom row 18 inches above the nearest counter and fill it with salad plates or small dinner plates.
A narrow rack holds fewer plates, so choose one color story and stay with it. It looks tidy because it has to.
Cost reality:
Slim wooden racks run about $40 to $90 at mass-market stores. Handmade versions cost more, but you can ask for the exact width.
2. Over-the-Sink Rack That Dries and Displays
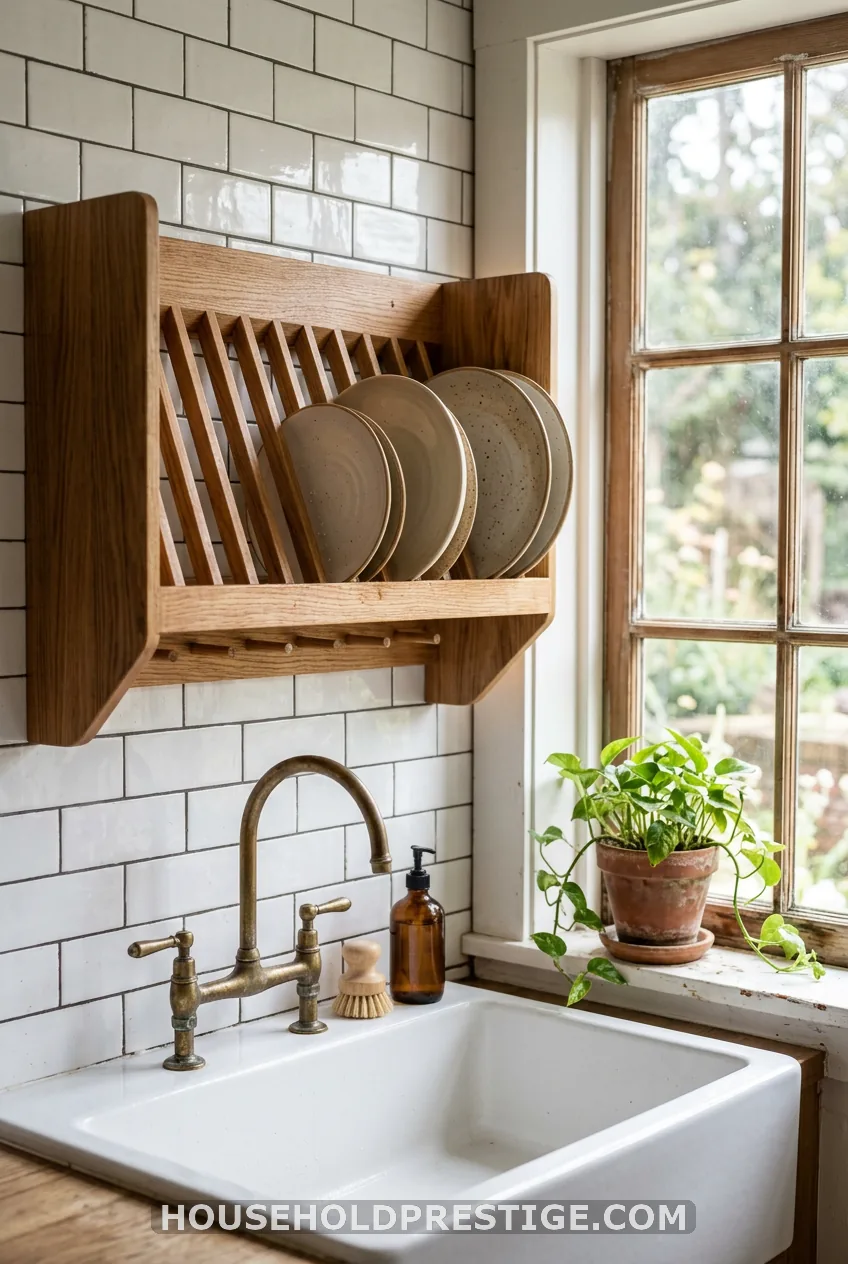
I learned this one the hard way. My first sink rack was raw pine, and I loaded it with wet plates every night. Within a month the grooves turned gray and the wood swelled.
A rack over the sink needs real protection. Pick a rack sealed with marine varnish or polyurethane, or choose powder-coated metal. Hang it high enough that water never splashes the lowest row, about 18 inches above the faucet height is a good start. Keep it for plates that drip a little, and wipe the grooves dry once a week.
Budget note:
A can of water-based polyurethane costs about $15 and takes two coats. Do it before you hang the rack, not after.
3. Single-Shelf Rack Above a Cabinet
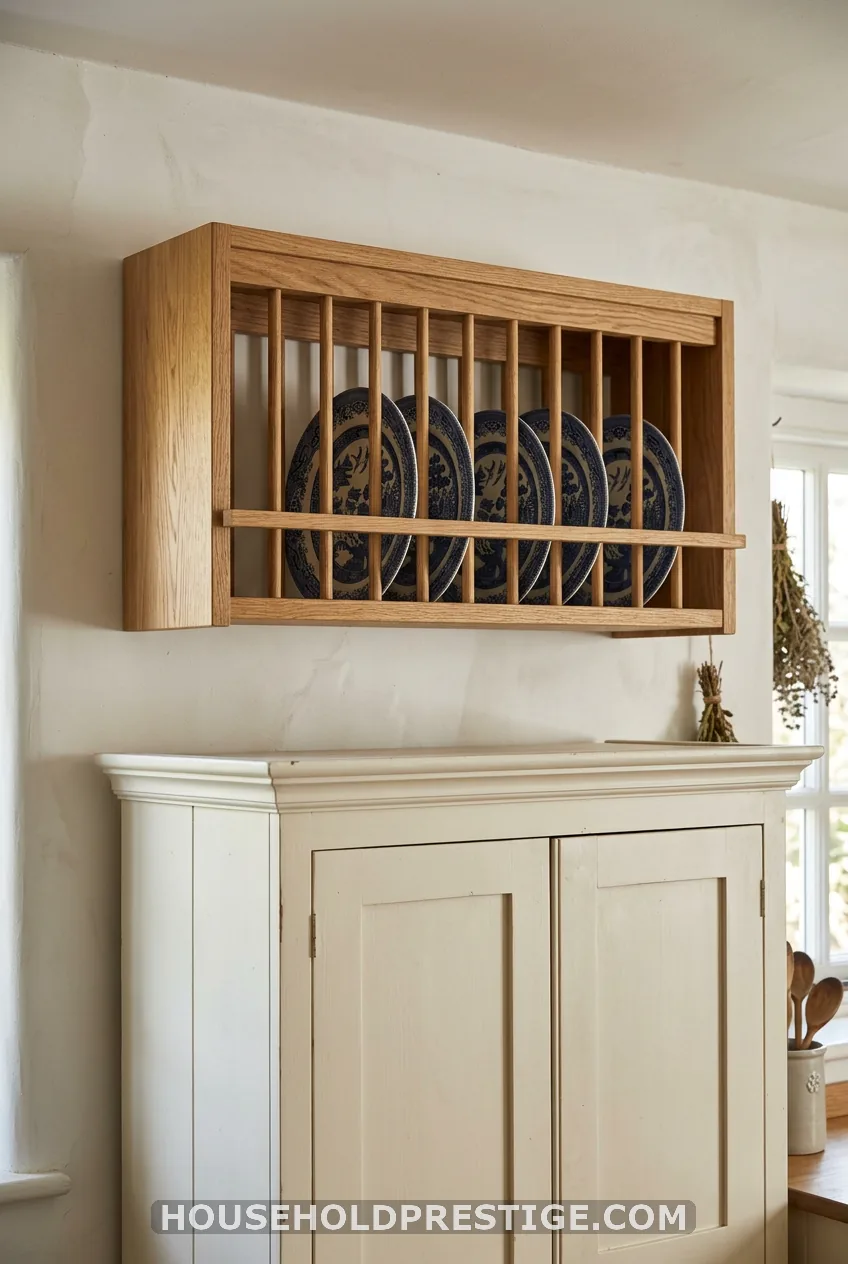
Use the dead wall above a tall cabinet. One shelf, one row of five plates. Pick plates that match the room, and leave a few inches of wall above them so they don’t touch the ceiling.
4. Corner Stack Beside a Window
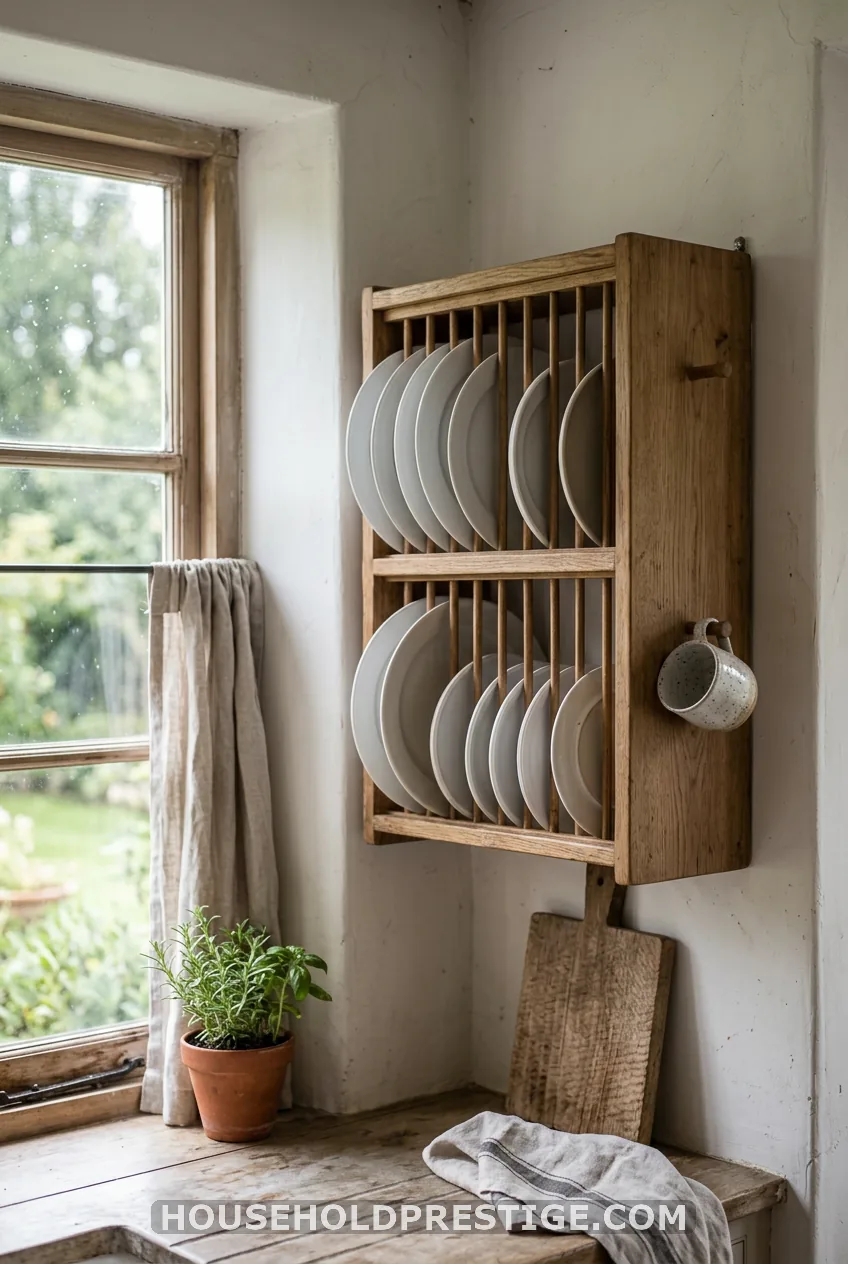
A window with a bare strip of wall beside it is a perfect spot. Mount a two-tier rack about 14 to 16 inches wide so it hugs the corner. The light from the window makes glazed plates glow.
Check the swing of the window first. Hang the rack so a lifted sash or a curtain never knocks a plate loose. Put your lightest plates on the top tier, and keep one cup hook on the side for a mug.
5. Three-Row Wooden Rack With White Ironstone
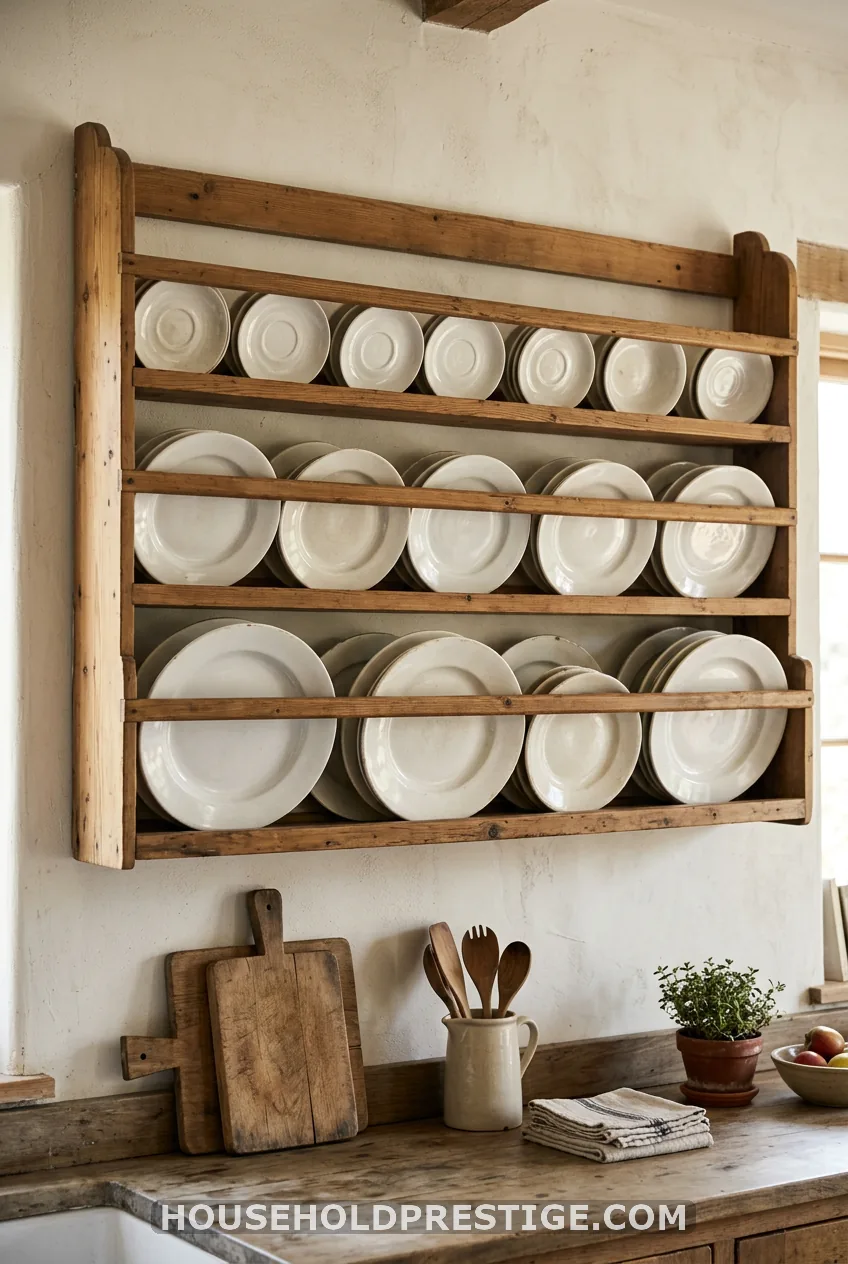
A big three-row rack, roughly 40 inches wide, 32 inches tall and 2.5 inches deep, holds about 15 plates at five per row. Fill it with plain white ironstone and the wall feels calm and rich at once.
Mount it so the bottom row sits 18 to 20 inches above the counter. With a counter about 36 inches high, the bottom row lands around 54 to 56 inches from the floor. The top of the rack then reaches about 86 inches, so check your ceiling height first. Anchor it into two studs, because a full rack can weigh 25 to 30 pounds.
Cost reality:
A rack this size from a woodworker on Etsy often runs $150 to $300, and custom sizes can take a few weeks. Mass-market versions cost less but usually have shallower grooves.
6. Spindle Peg Rack for a Cottage Kitchen
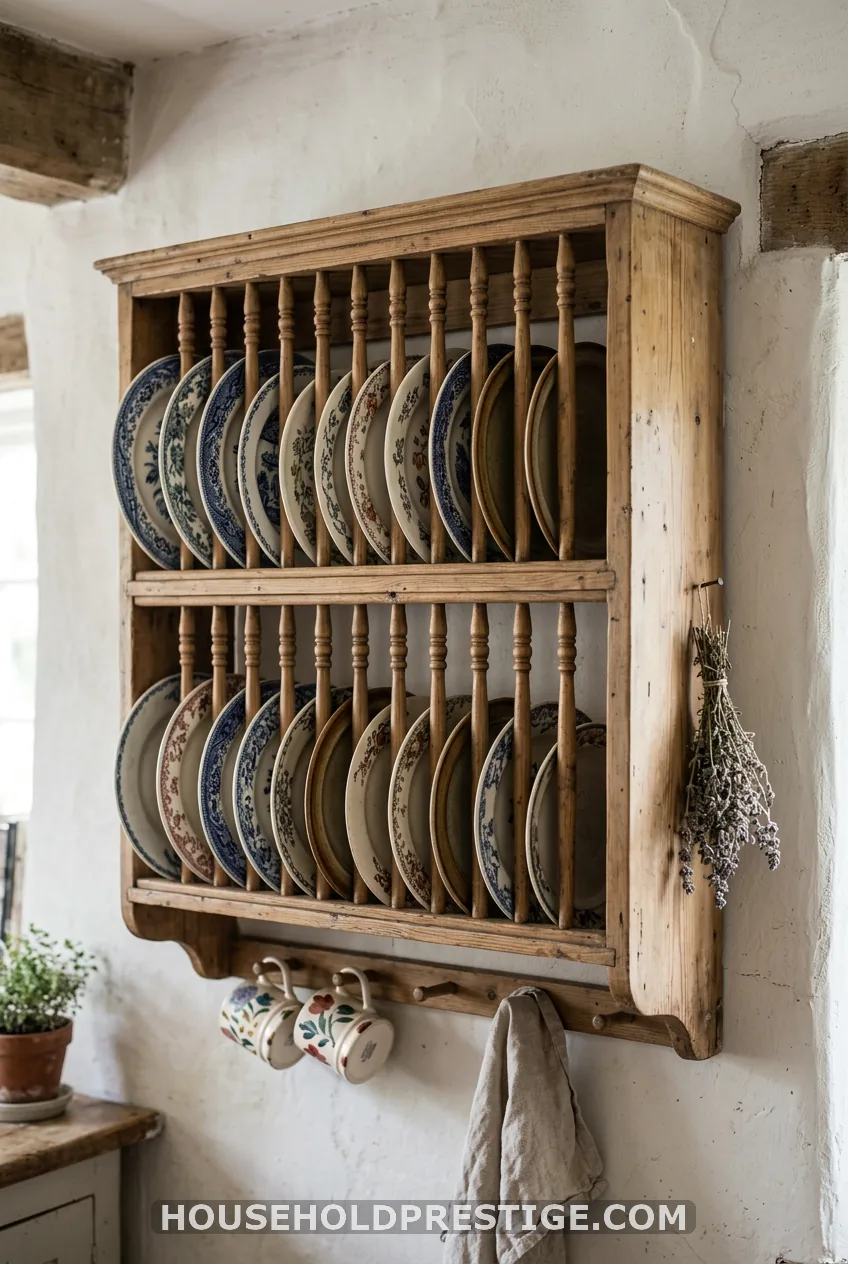
Spindle racks have that old English cottage feel. Vertical dowels keep plates from sliding forward, and the open design lets air move around each plate. They suit patterned plates, since every plate shows its full face.
Plates sit upright against the back rail. Check that the spindles are spaced about 1 inch apart or less, so a plate rim can’t slip through. Pair the rack with a Shaker peg rail below it for tea towels.
7. Painted Rack in Chalky White or Sage
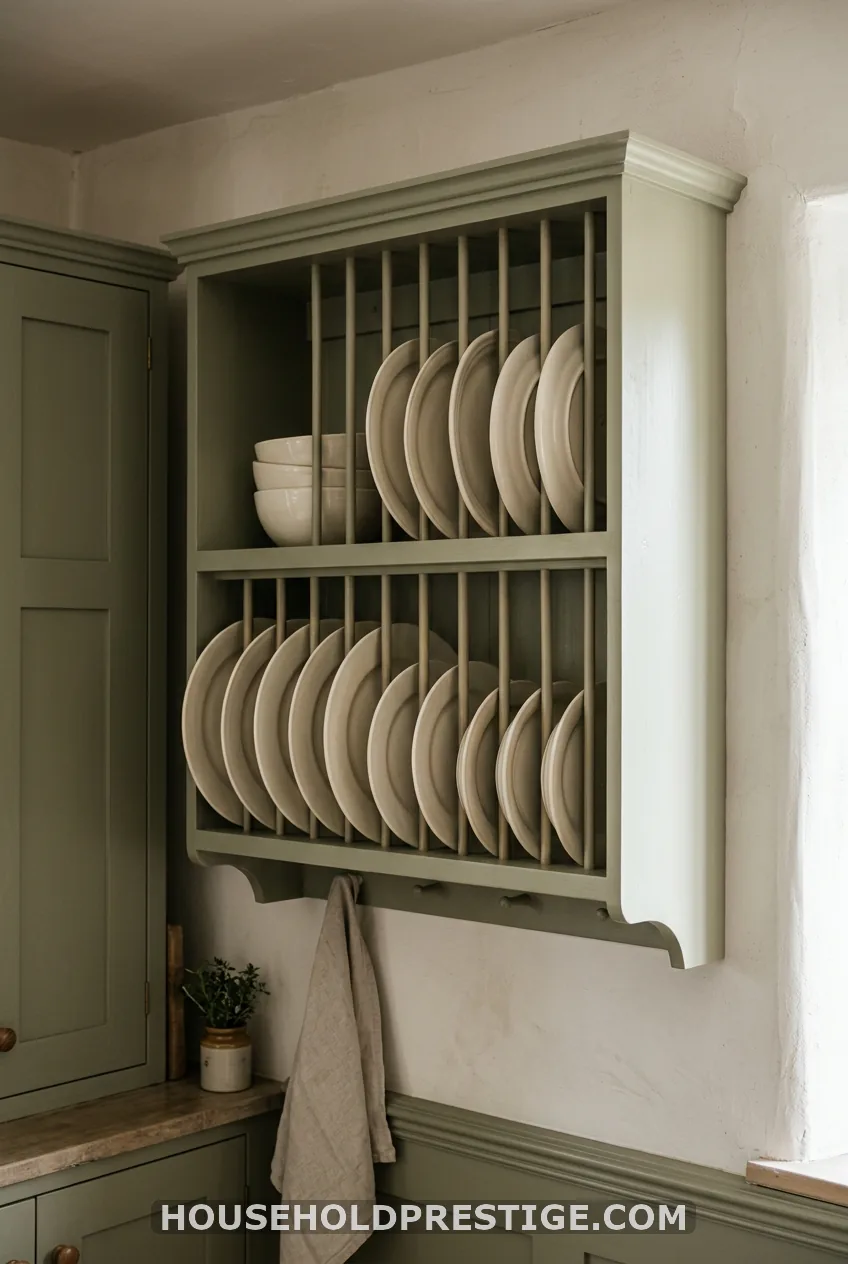
Paint the rack the same color as your cabinets and it melts into the wall. Chalk paint grips raw wood well. Seal it with a clear wax or water-based topcoat.
8. Dark Walnut Rack Against Pale Walls
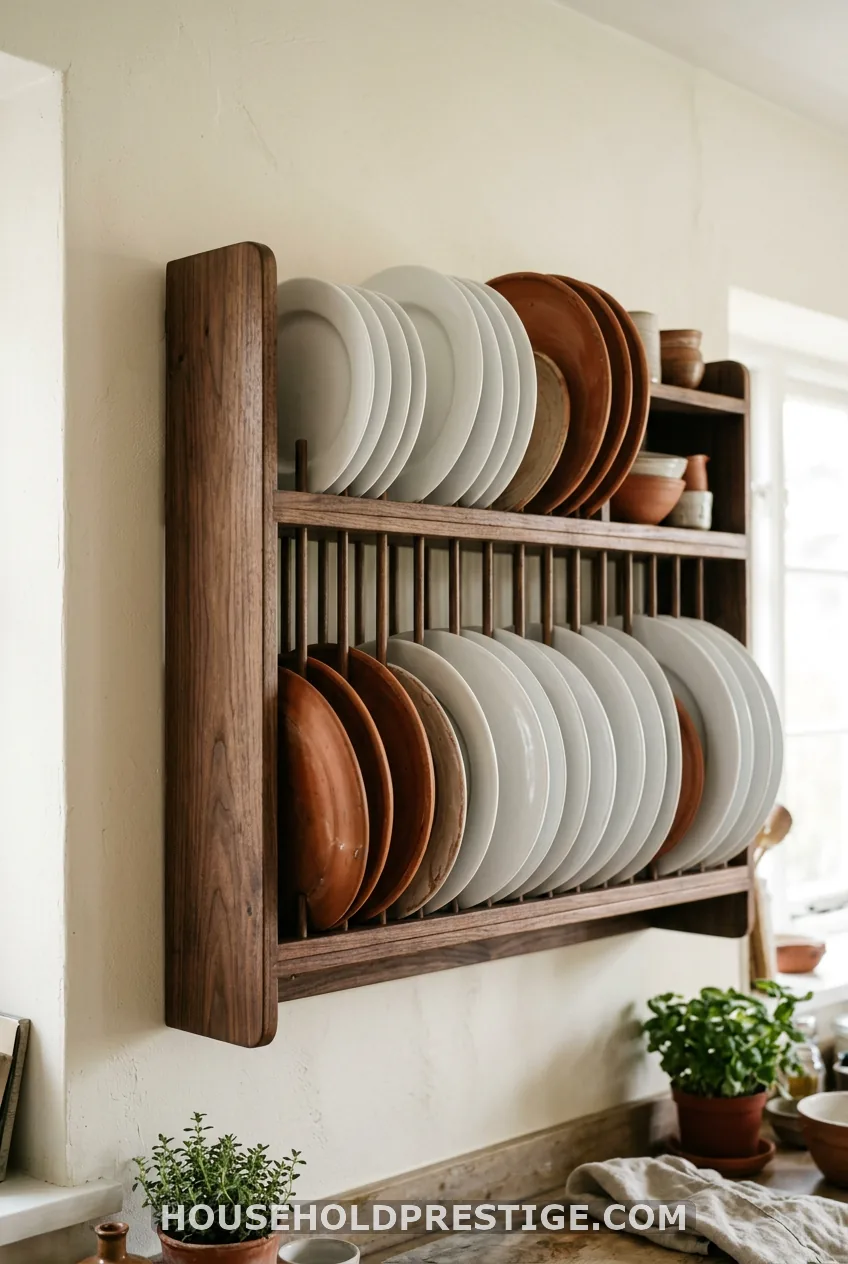
What most people think: a dark rack makes a small kitchen feel heavy. The reality: a dark rack on a pale wall adds contrast, and the plates pop against it.
The trick is size. Keep a dark rack to one row or two, and keep the wall around it empty. A three-row walnut rack in a tiny room does feel heavy. A single walnut shelf with five white plates reads as a clean line.
Waxed walnut also hides fingerprints and small splashes better than white paint does. That matters near a cooking zone.
9. Built-In Rack Between Upper Cabinets
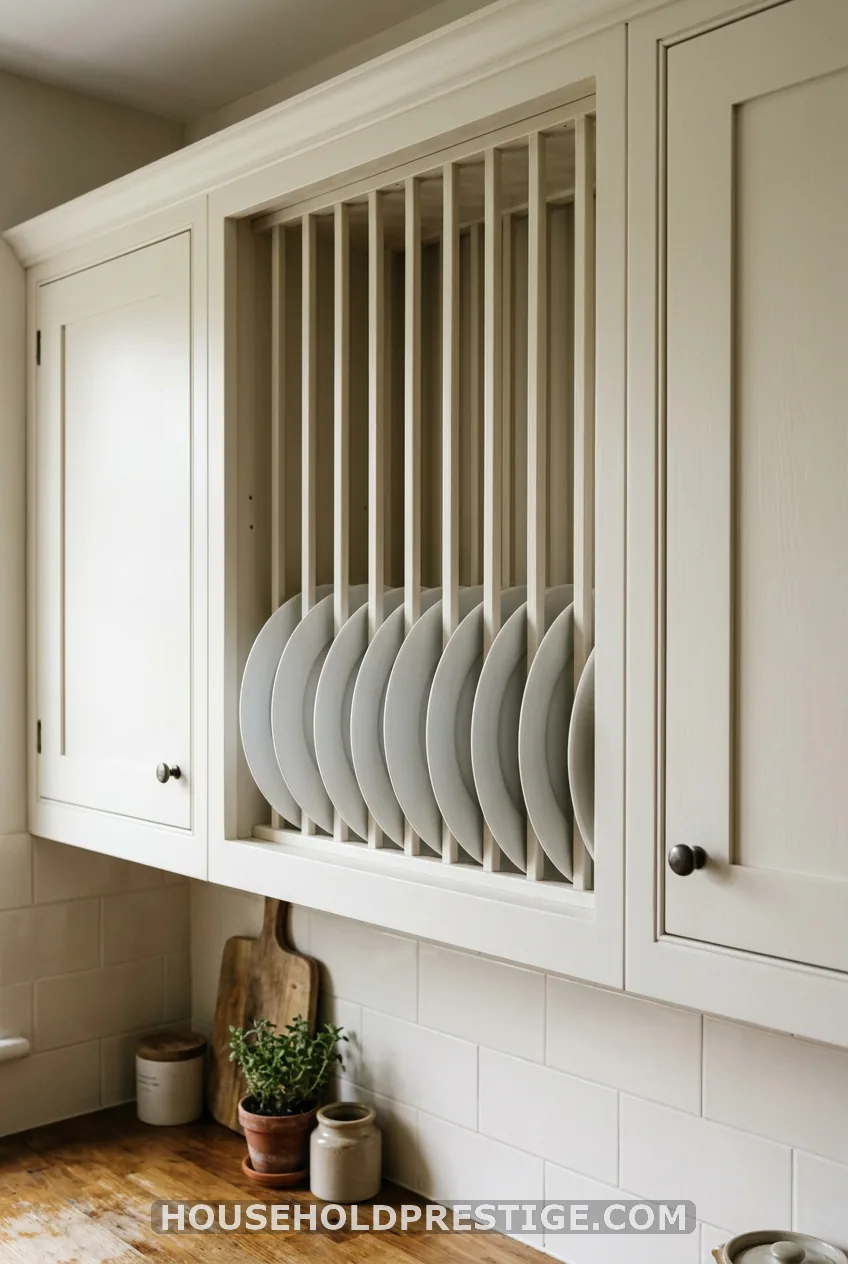
Built-ins look like they were always there. The gap between two upper cabinets is often 12 to 18 inches wide, and a carpenter can fit a slatted rack into it. Standard upper cabinets are about 12 inches deep, so plates sit flush with the doors.
Ask for a 1/2 inch lip on each shelf and a solid back panel. You can also paint the inside of the niche a darker shade so the plates stand out.
Cost reality:
Expect $200 to $600 for a carpenter to build and fit a custom slatted rack, depending on your region and the wood.
10. Wall Cabinet With a Glazed or Open Front
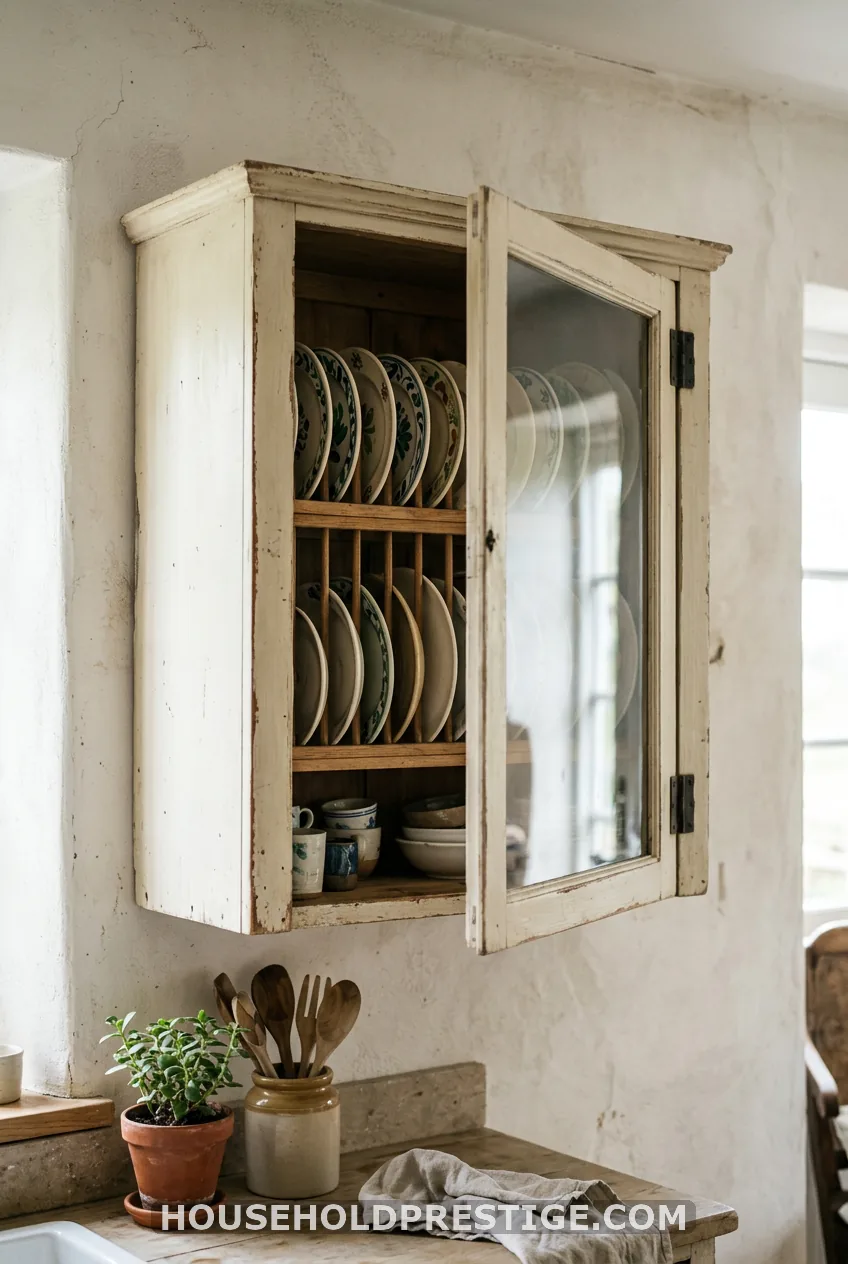
A cabinet with a rack inside gives you display and dust protection. Glazed doors show off the plates while keeping grease off them. This works well beside a hob, where an open rack would collect splatter.
Choose a cabinet at least 6 inches deep inside and measure your largest dinner plate first. Most dinner plates are 10 to 11 inches across, so the rack inside needs 11 inches of height, not 10.
11. Open Plate Shelf Instead of Upper Doors
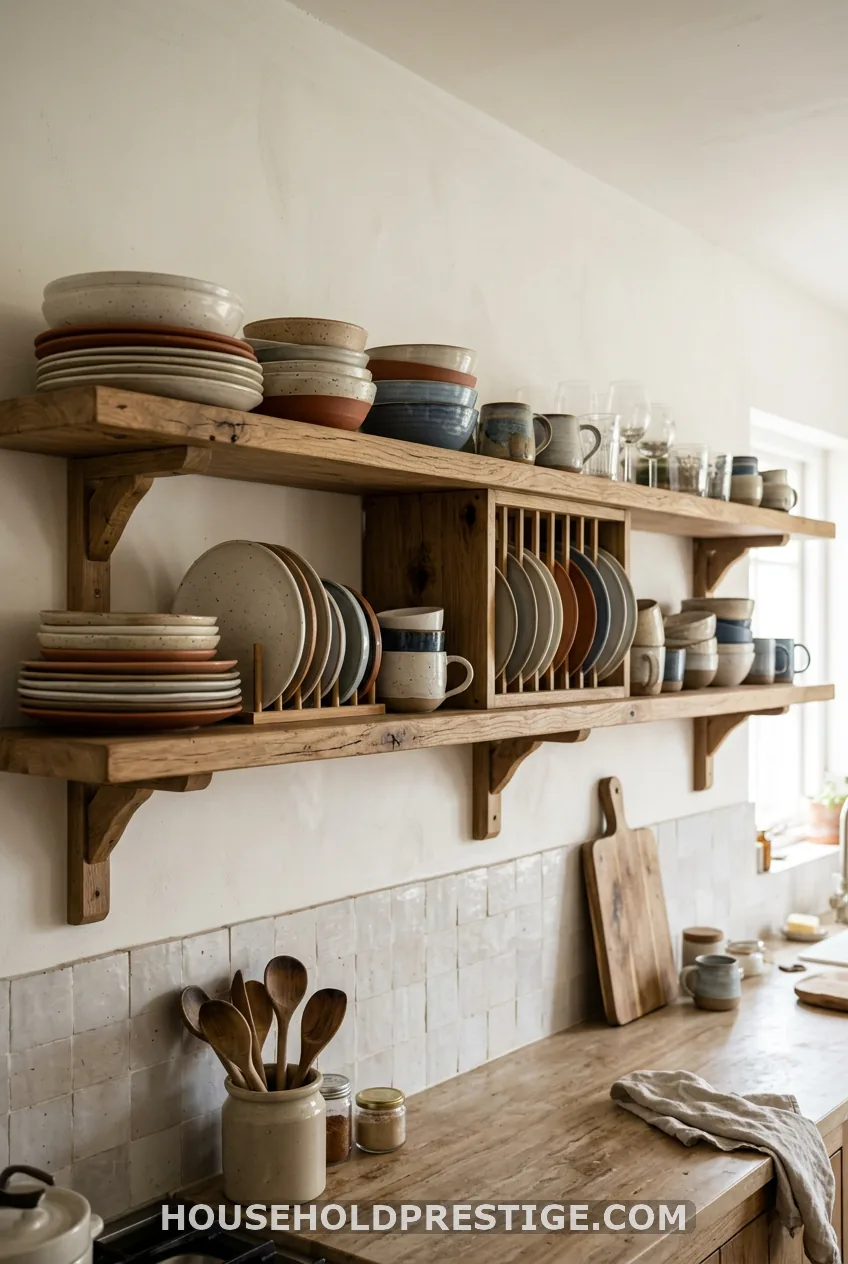
Take off a run of upper doors and add one long shelf with a plate groove. You get an unfitted kitchen look for the price of timber. Keep to 5 to 7 plates per section.
12. Cutting Board and Plate Rack Combo
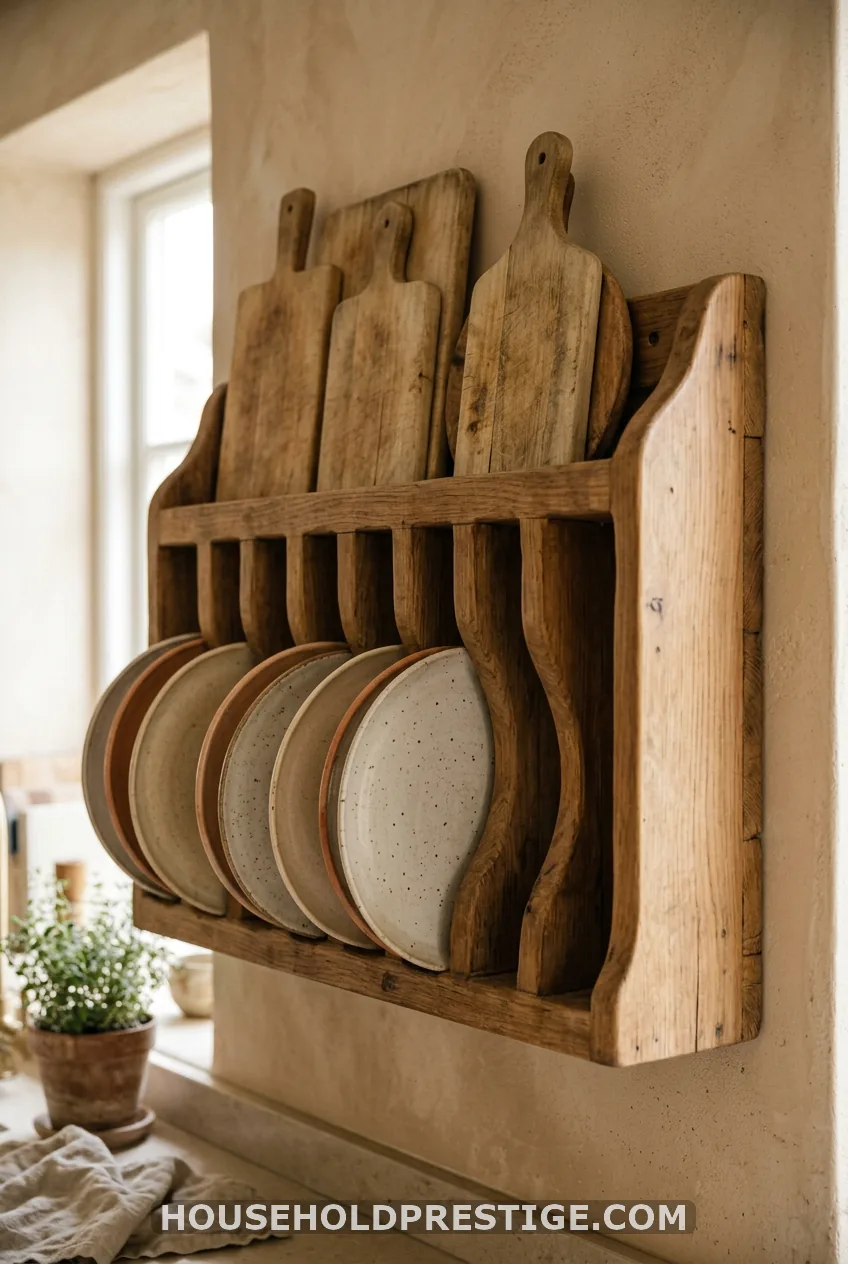
Boards and plates share a rack better than you’d think. Choose a rack with grooves at least 1/2 inch deep and a shelf depth near 3 inches. Slide the boards in at the back or on the bottom row, then lean the plates in front.
Heavy boards go low. A thick maple board can weigh 5 pounds or more, so it should never sit on the top row. Line the groove with a strip of felt or cork so the boards don’t slip or scratch the wood.
Thin bamboo boards behind white plates also add warm tones. Hang a leather-strap board for a touch of contrast.
13. Platter Ledge for Oversized Pieces
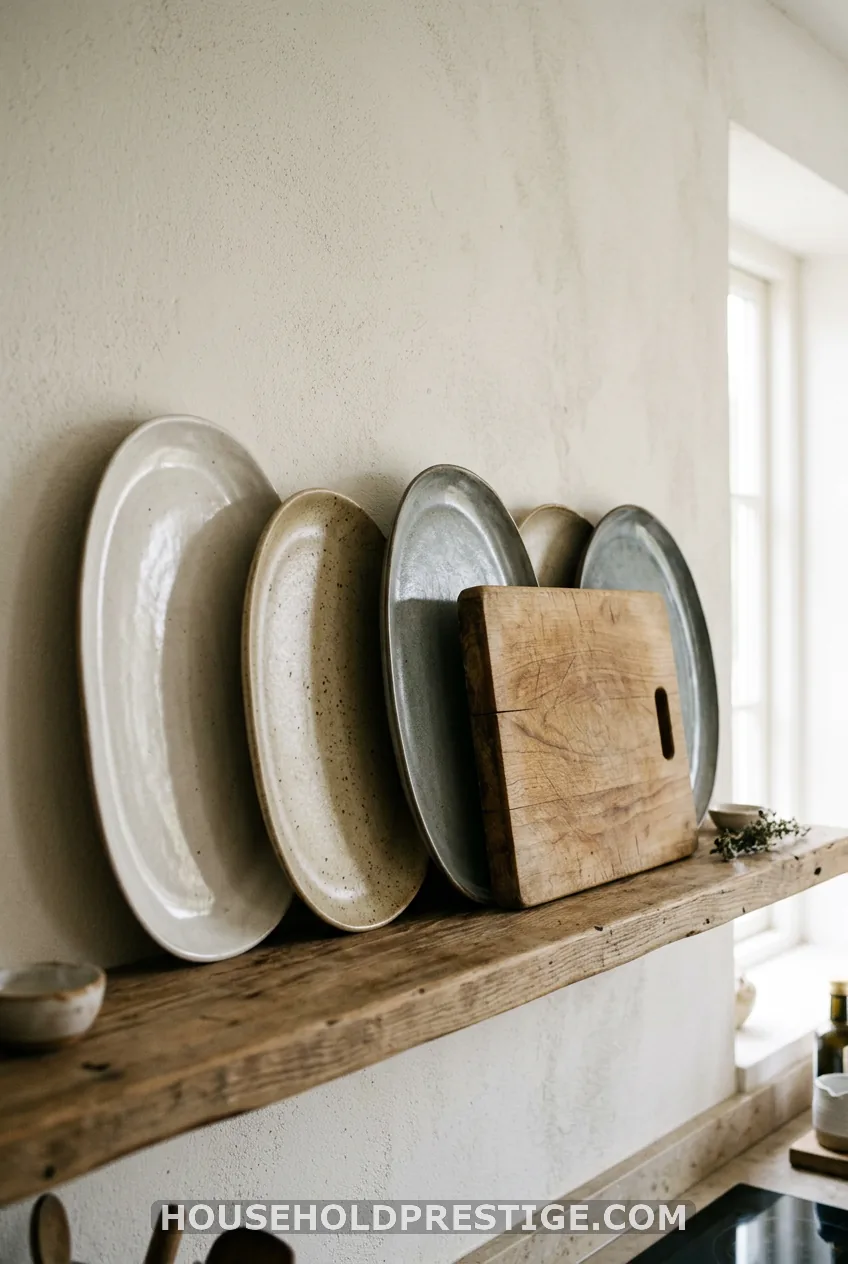
Big oval platters don’t fit in standard grooves. A deep picture ledge, about 4 inches deep and 36 to 48 inches long, handles them. Lean the largest platter at the back, add a smaller tray in front and finish with a chopping board at one end.
Put this ledge low, about 18 inches above the counter, so the heavy pieces stay near where you use them. A ledge with a 1 inch lip stops platters from sliding.
14. DIY Plate Rack From a Picture Ledge and Dowels
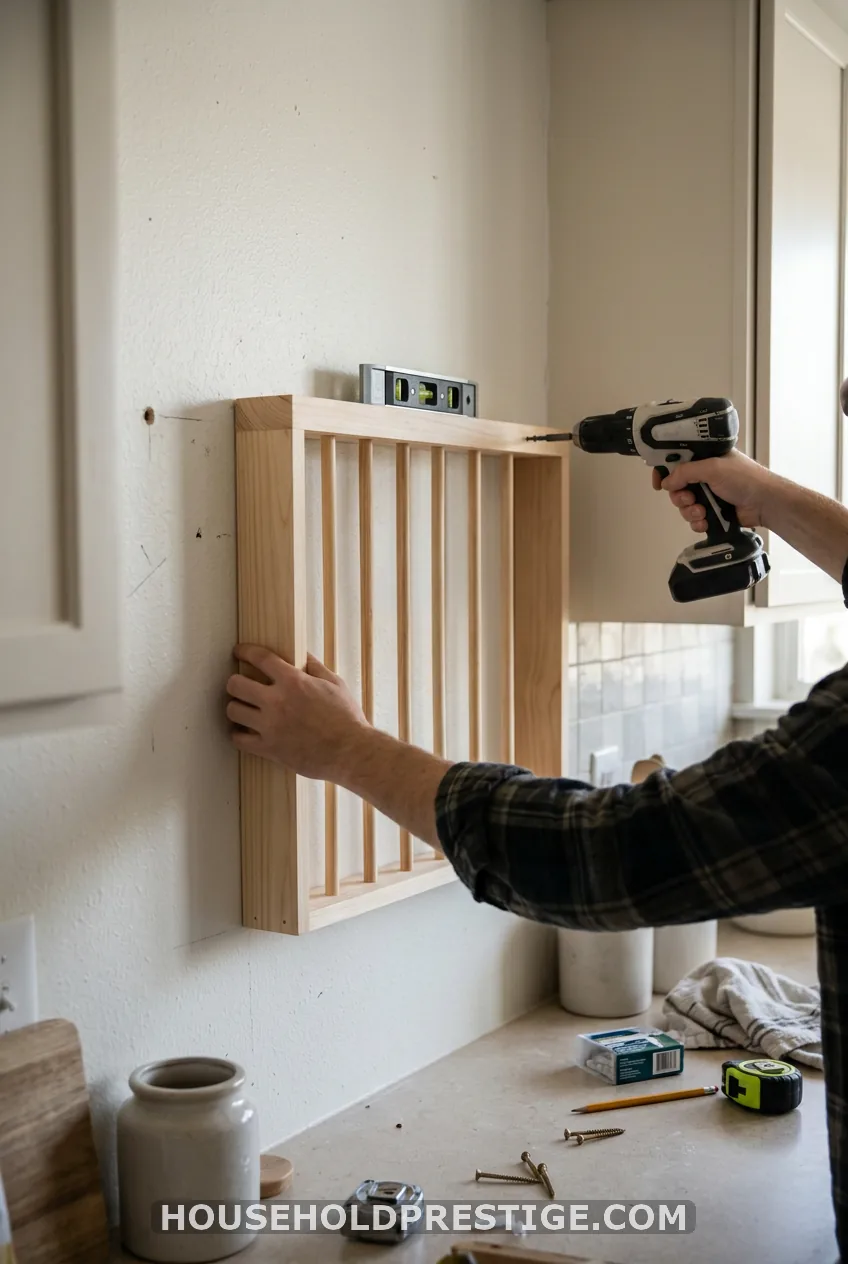
This is the build I’d tell a friend to try first. It takes about two hours and costs roughly $25 to $45. You end up with a rack sized to your wall.
Materials:
- One 36-inch pine board, 1×4, for the shelf
- One 1×2 strip, 36 inches, for the front lip
- Six 3/8 inch wooden dowels, 6 inches long
- Wood glue and 1 1/4 inch wood screws
- Two L-brackets rated to at least 25 pounds each
- Sandpaper, stain or paint, and a clear topcoat
- A stud finder, a level and a drill
Steps:
- Sand the board and strip until smooth, then paint or stain them.
- Glue and screw the 1×2 lip to the front edge of the 1×4 so it stands up about 3/4 inch.
- Mark the wall with a level, 18 inches above the counter.
- Find the studs and fix the brackets into them.
- Rest the shelf on the brackets and screw up through the bottom.
- For a spindle look, drill six holes along the shelf and glue the dowels in.
The common mistake is skipping the studs. A shelf loaded with plates will pull out of bare drywall. If the studs don’t fall where you need them, use a French cleat or heavy toggle bolts instead.
Budget note:
Pine from a home center costs around $10 to $15 per board. Brackets are the part to pay for, so skip the lightest ones.
15. Renter-Friendly Plate Rack Wall
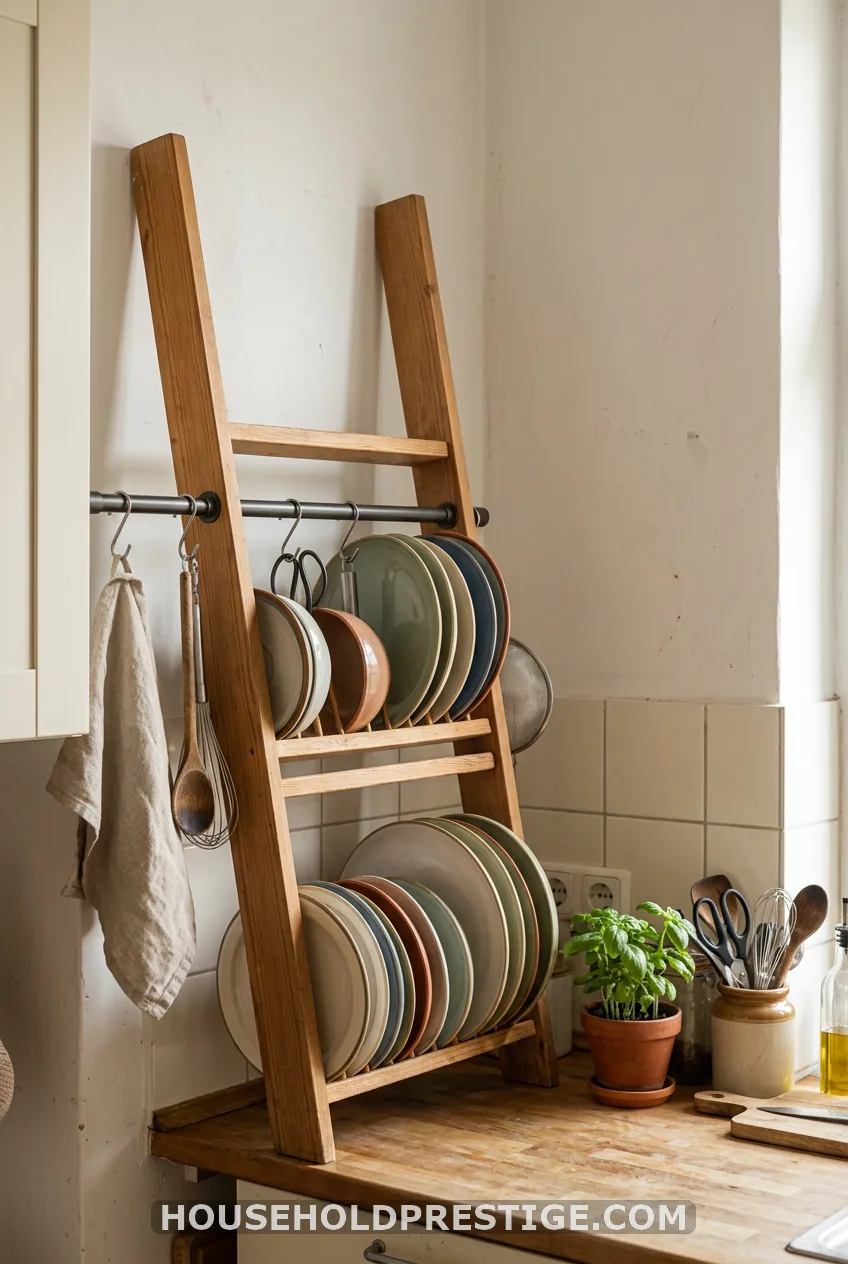
You can build the look without a drill. A leaning ladder rack stands on the floor or counter and rests against the wall. It holds plates on its rungs and needs no holes.
Other options for light loads:
- Damage-free adhesive hooks for a few small plates on plate hangers, within the weight limit on the packaging
- A tension rod between two cabinets, for a rail that holds lightweight tin plates or mugs
- A short picture ledge on strong adhesive strips, for very light plates only
Skip adhesive strips for heavy dinner plates. They look fine until they don’t, and ceramic doesn’t survive a drop onto a counter.
How to Style a Plate Rack Wall So It Looks Collected
Group plates in odd numbers. Three, five or seven per row looks natural, and even rows look stiff.
Mix pattern with plain. Put one transferware plate in each row of solids, and let it be the focal point. Blue-and-white transferware, Fiestaware in one or two colors, or warm terracotta all work if you stick to one color story.
Plates can lean, be propped or sit in a groove. Grooves are the safest. If plates slide forward, add a strip of cork or felt to the groove, which gives grip.
Leave some wall bare. One small artwork or a single mug hook next to the rack acts like punctuation at the end of a sentence. Fill every gap and the wall looks crowded.
Measuring and Mounting: Heights, Depths and Hardware
Measure the wall from counter to ceiling first. Subtract 18 inches for the lowest row clearance, and keep the top row at or below 60 to 66 inches from the floor. Anything higher is hard to reach and dust.
For hardware, find the studs with a stud finder. A rack fixed into two studs typically carries 20 to 40 pounds. If the studs miss, use a French cleat that spans them, or heavy toggle bolts for drywall.
Plaster walls can crack when drilled, so pre-drill slowly. Renters can use a ladder rack instead.
Near a sink or hob, seal wood with polyurethane or choose metal. Keep the rack away from direct steam.
What to Look For When You Buy or Build
Check groove depth first. For plates, 1/2 inch is a good minimum. Boards and platters need deeper grooves and a shelf of 3 to 4 inches.
Look at row spacing too. About 12 inches between rows suits dinner plates, which are 10 to 11 inches across.
Finish matters. Painted racks blend into the wall, stained ones add warmth, waxed wood looks old, and powder-coated steel handles damp best.
Price tiers help you decide:
- Big-box and mass-market racks from places like IKEA, Wayfair or Target: about $40 to $120
- Handcrafted racks from small woodworkers such as Apple Tree Wood Crafts or Etsy sellers: about $150 to $300, with custom sizes taking longer
- Upcycled or DIY racks: about $20 to $50
Care, Rotation and Seasonal Swaps
Dust wooden racks with a dry microfiber cloth. Wipe plates face-out every couple of weeks, because kitchen air leaves a thin film.
Antique or crazed plates need care. Use a padded ledge or a groove lined with felt, and keep them out of reach of steam. Never stack plates rim to rim.
Swap in seasonal plates without taking the rack down. Put red and green plates in December and pastel ones in spring. Move heavy platters to the lower rows and lighter plates to the top.
FAQ
How high should a plate rack wall be hung?
Keep the lowest row at least 18 inches above the counter. The top row should sit no higher than about 60 to 66 inches from the floor, so you can reach and dust it.
How much weight can a wall plate rack hold?
A wooden rack anchored into two studs typically holds 20 to 40 pounds. That covers a full row of dinner plates or a few platters. Use studs, a French cleat or toggle bolts, not adhesive strips.
What is the difference between a plate rack and a plate shelf?
A plate rack has grooved or lipped rows that hold plates upright. A plate shelf or picture ledge is a flat ledge where plates lean against the wall. Racks hold plates more securely.
Can I display cutting boards in a plate rack?
Yes, if the grooves are deep enough. Put heavy boards at the back or on the bottom row and lighter plates in front. A strip of felt or cork in the groove keeps them steady.
Do plate racks damage plates?
Not if plates sit in a groove or on a padded ledge. Line wooden grooves with felt or cork and avoid stacking plates rim to rim, which can chip them.
Your Wall, One Plate at a Time
Back to that soft clunk of the last plate settling into its groove. That is the moment a bare wall turns into a plate rack wall you made yourself. Pick one idea from the 15 above, measure your wall, find the studs and hang the first row. Start with five plates, and add more when the wall asks for them.