

A 12-inch pot full of damp soil and a healthy fern can top 20 pounds. That is why the wobbly stand you bought online keeps tipping, and why a good DIY plant stand matters more than a pretty one. Build it right and the weight stops being a worry.
This list sorts 15 builds by time, cost, skill level, and where they work best. You will find a Dollar Tree stack for renters, a pallet build for patios, a rolling base for heavy pots, and a railing shelf for tiny balconies. Pick one, grab your tape measure, and get those plants off the floor.
Quick Picks: Find Your Plant Stand in 30 Seconds
Scan this table first. Then jump to the idea that fits your space.
| Idea | Best for | Skill | Time | Cost |
|---|---|---|---|---|
| 1. Dollar Tree tiered stand | Renters, small plants | Beginner | 20 min | $5-$10 |
| 2. 2×4 single-shelf stand | One large pot | Beginner | 1 hr | $10-$15 |
| 3. Pallet tiered stand | Patios | Intermediate | 2-3 hrs | $0-$20 |
| 4. Corner ladder shelf | Tight corners | Intermediate | 1-2 hrs | $15-$25 |
| 5. 3-tier tower | Many plants | Intermediate | 2 hrs | $25-$35 |
| 6. Rolling stand | Heavy pots | Beginner | 30 min | $15-$25 |
| 7. Hairpin-leg stand | Modern rooms | Beginner | 15-30 min | $25-$40 |
| 8. Upcycled stool | Vintage look | Beginner | 30-45 min | $5-$15 |
| 9. PVC pipe stand | Light, outdoor use | Beginner | 1 hr | $15-$25 |
| 10. Block and plank | No-tool balcony | Beginner | 10 min | $15-$20 |
| 11. Stacked crates | Rustic tiers | Beginner | 30 min | $20-$30 |
| 12. Folding A-frame | Seasonal storage | Intermediate | 2 hrs | $20-$30 |
| 13. Tabletop mini stand | Succulents, desks | Beginner | 20 min | Under $5 |
| 14. Tall slim corner stand | Narrow corners | Intermediate | 1-2 hrs | $20-$30 |
| 15. Balcony railing stand | No floor space | Intermediate | 30-45 min | $20-$35 |
Cheapest builds are 1, 8, 10, and 13. No-drill picks for renters are 1, 6, 8, 10, and 13. Heavy-plant picks are 6, 10, and 11.
1. Dollar Tree Tiered Plant Stand (Under $10)
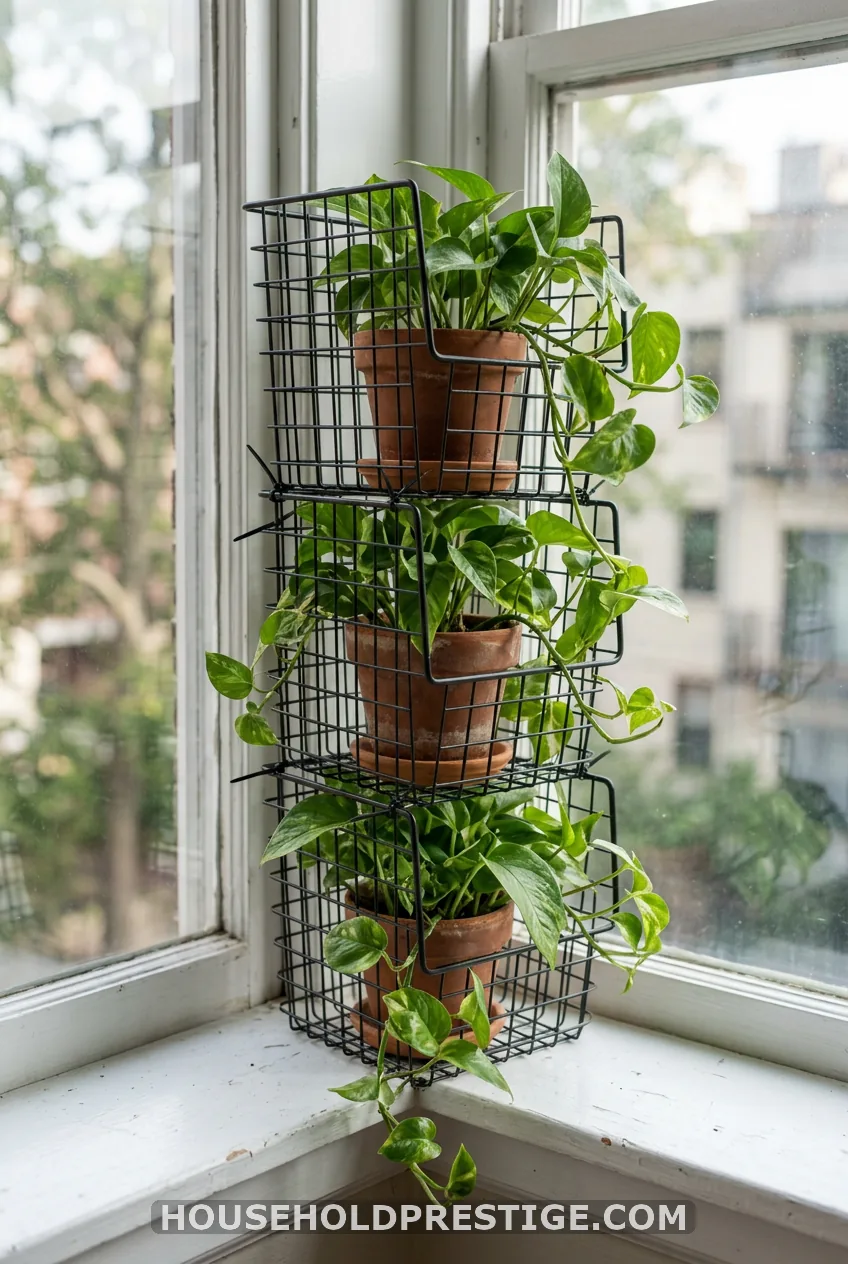
This one is for renters and dorm dwellers. You need no drill, no saw, and no skills.
Buy three wire storage baskets, a pack of zip ties, and a can of spray paint. Paint the baskets outside, let them dry for an hour, then flip them upside down and stack them. Pull a zip tie through each corner where the wires meet. Trim the tails with scissors.
Total time is about 20 minutes. Cost runs $5 to $10. Stick to small terracotta pots, about 4 to 5 inches wide. Wire baskets will sag under anything heavier.
2. Simple 2×4 Single-Shelf Plant Stand
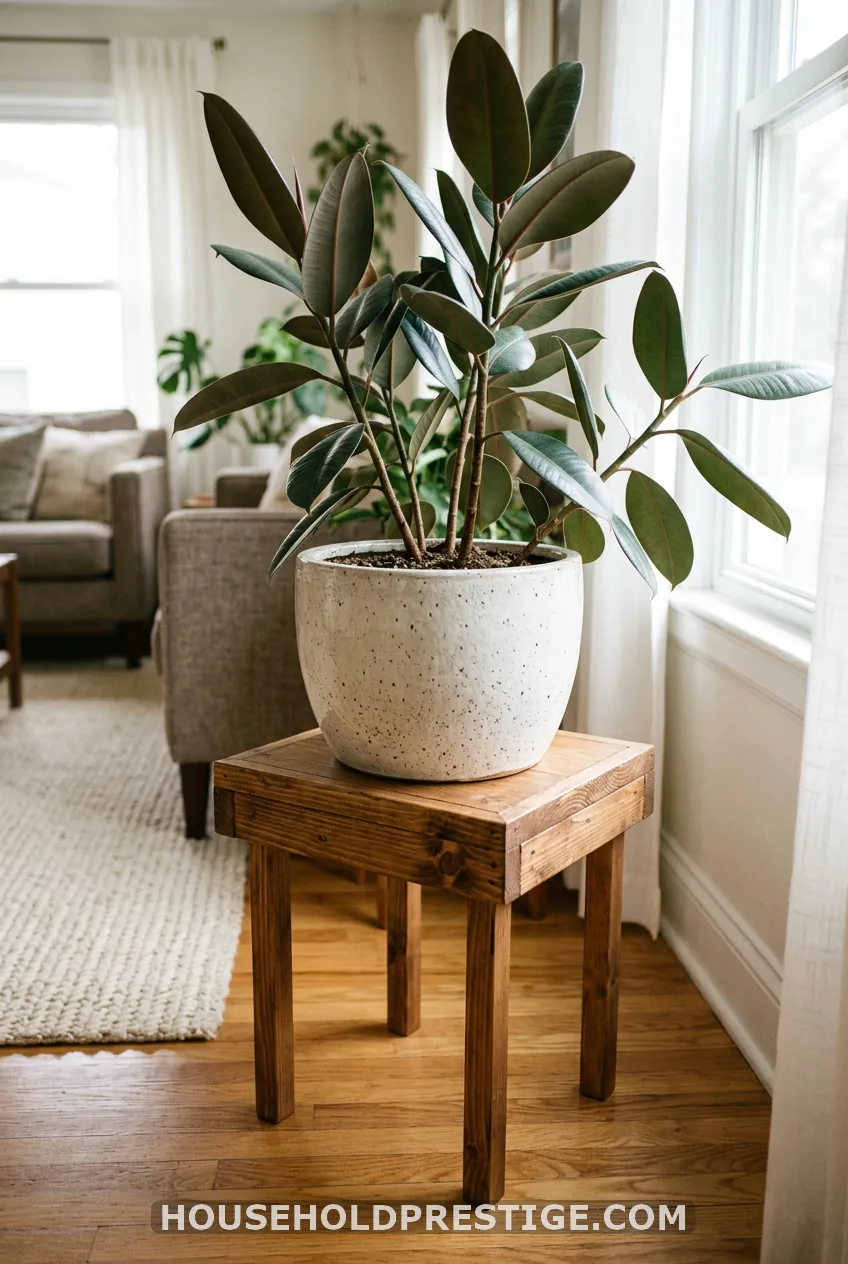
Here is a good first wood project. It takes one hour and costs $10 to $15.
Cut three 2×4 pieces to 12 inches for the top. Lay them side by side to make a surface about 10.5 inches wide. Cut four 2×2 legs to 18 inches. Glue and screw two cleats under the top, then attach the legs with 1-1/4 inch screws.
Sand to 120 grit, then stain. Your tools are a saw, drill, sander, and tape measure. It holds a 10-inch pot with room to spare.
3. Pallet Wood Tiered Outdoor Plant Stand
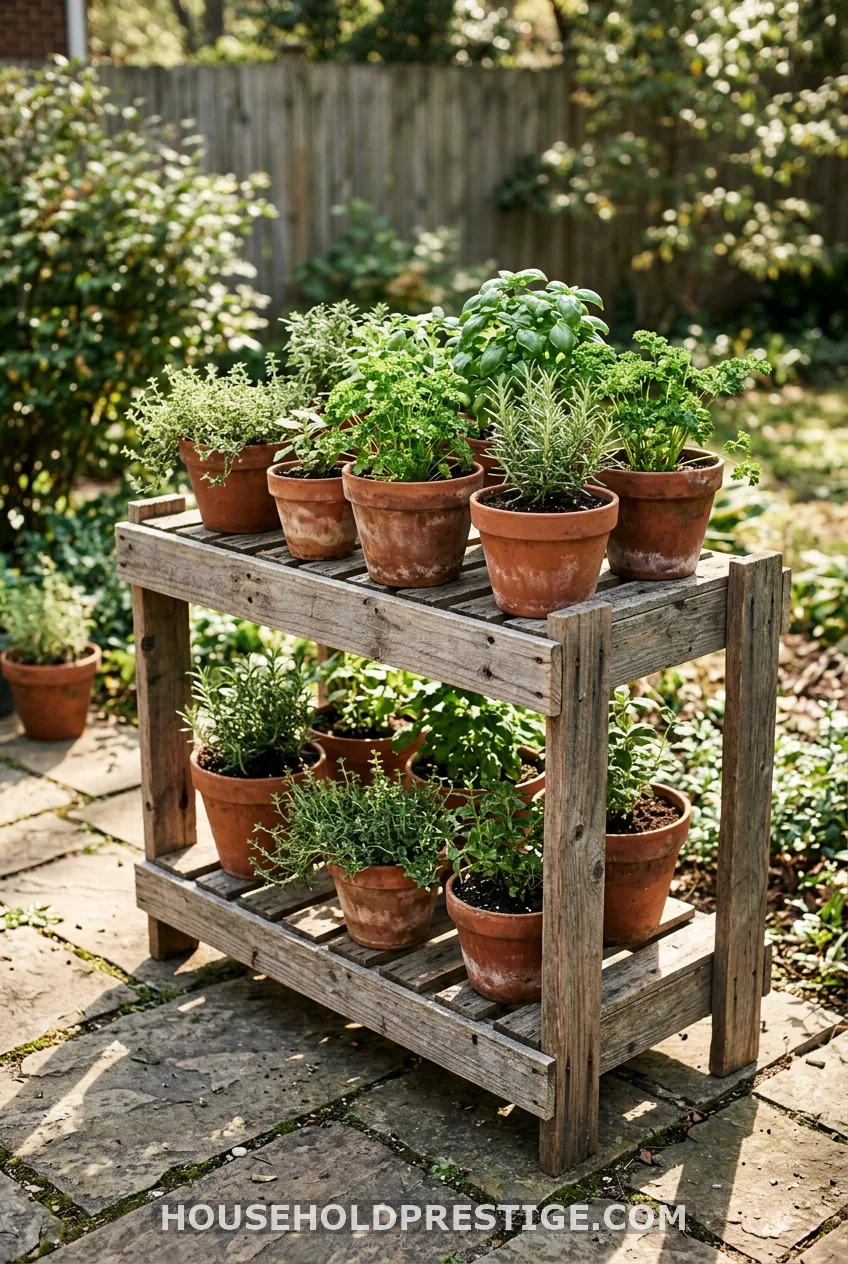
I learned this one the hard way. My first pallet came from behind a hardware store, and it smelled sharply chemical when I cut it. I stopped, tossed it, and found out why.
Look for the “HT” stamp. That means heat-treated. Skip any pallet stamped “MB,” which marks methyl bromide treatment, and skip anything stained or oily. Wear safety glasses and a dust mask when you cut.
Pry the boards off with a pry bar. Cut slats to about 24 inches. Build two slatted shelves on four posts, sand every edge, and seal with exterior wood sealer. Expect 2 to 3 hours and $0 to $20 for screws and sealer.
4. Corner Ladder Plant Shelf
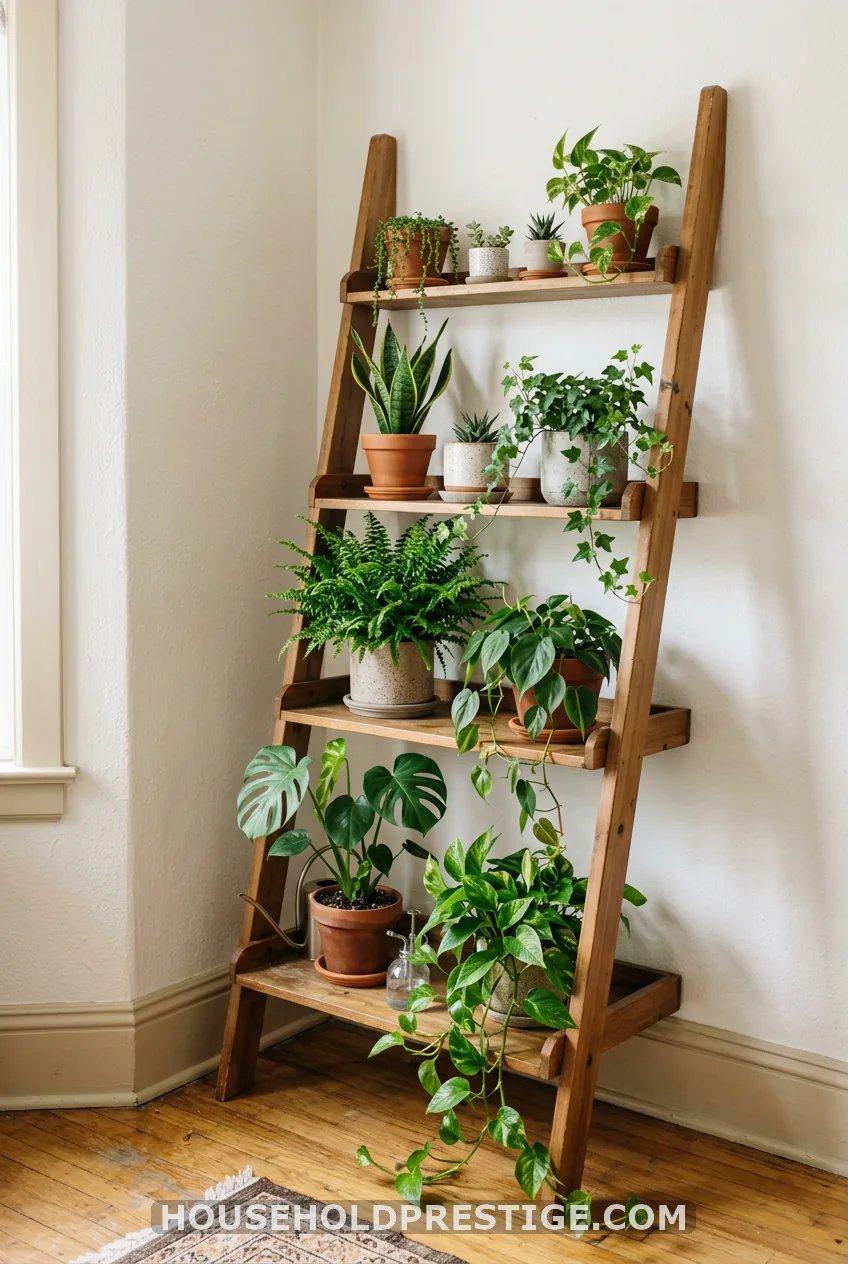
A ladder shelf puts a lot of plants in a small footprint. It leans against the wall at a slight angle, so each shelf steps back.
Use 1×3 boards for the two side rails, about 48 inches long. Cut the top ends at an angle so they sit flush on the wall. Screw four 1×3 shelves between the rails, spaced about 11 inches apart. Check each shelf with a level.
Always anchor it to a stud with a wall anchor and a small bracket. Budget 1 to 2 hours and $15 to $25. Stain it before you assemble to reach the tight spots.
5. 3-Tier Wood Plant Stand Tower
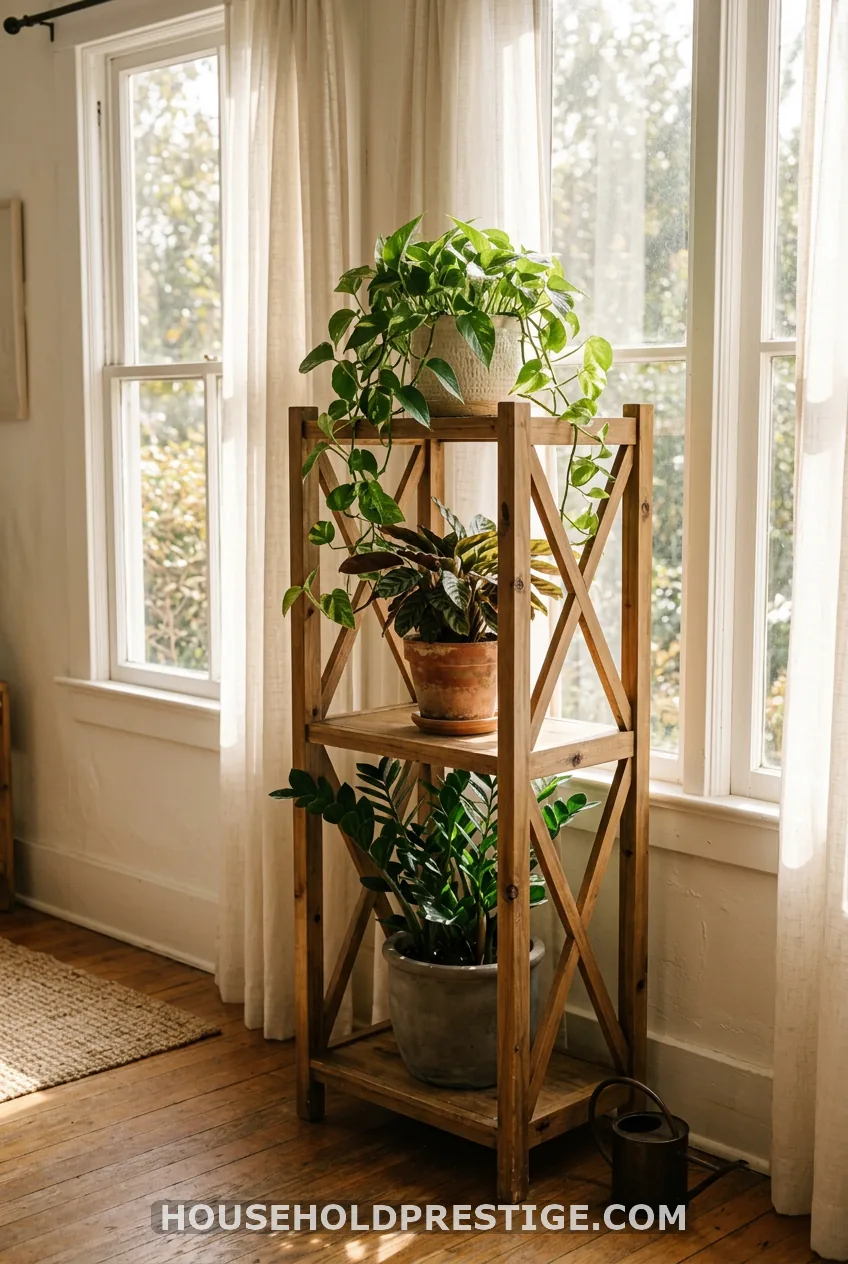
This is the build to pick when you own more plants than floor space. It stands 36 inches tall and holds three medium pots. Here is the full plan.
Materials ($25-$35):
- Four 1×2 legs, cut to 36 inches
- Six 1×6 boards, cut to 14 inches (two per shelf)
- Two 1×2 cross-braces, cut to 12 inches
- Wood glue and 1-1/4 inch screws
- Sandpaper, stain, and polyurethane
Steps:
- Sand every piece before you assemble. It is much harder afterward.
- Lay two 1×6 boards edge to edge for each shelf. That gives you about 11 inches of depth.
- Mark shelf heights on the legs at 6, 18, and 30 inches from the floor.
- Glue and screw each shelf to the legs, starting with the bottom one.
- Screw a cross-brace between the back legs near the bottom.
- Stain, then seal with two coats of polyurethane, sanding lightly between coats.
The common mistake is skipping the cross-brace. Without it, the tower racks sideways the first time a pet bumps it. A Kreg jig gives you hidden pocket holes, but plain screws work fine.
Put the heaviest pot on the bottom shelf. Total time is about 2 hours, plus drying.
6. Rolling Plant Stand with Casters
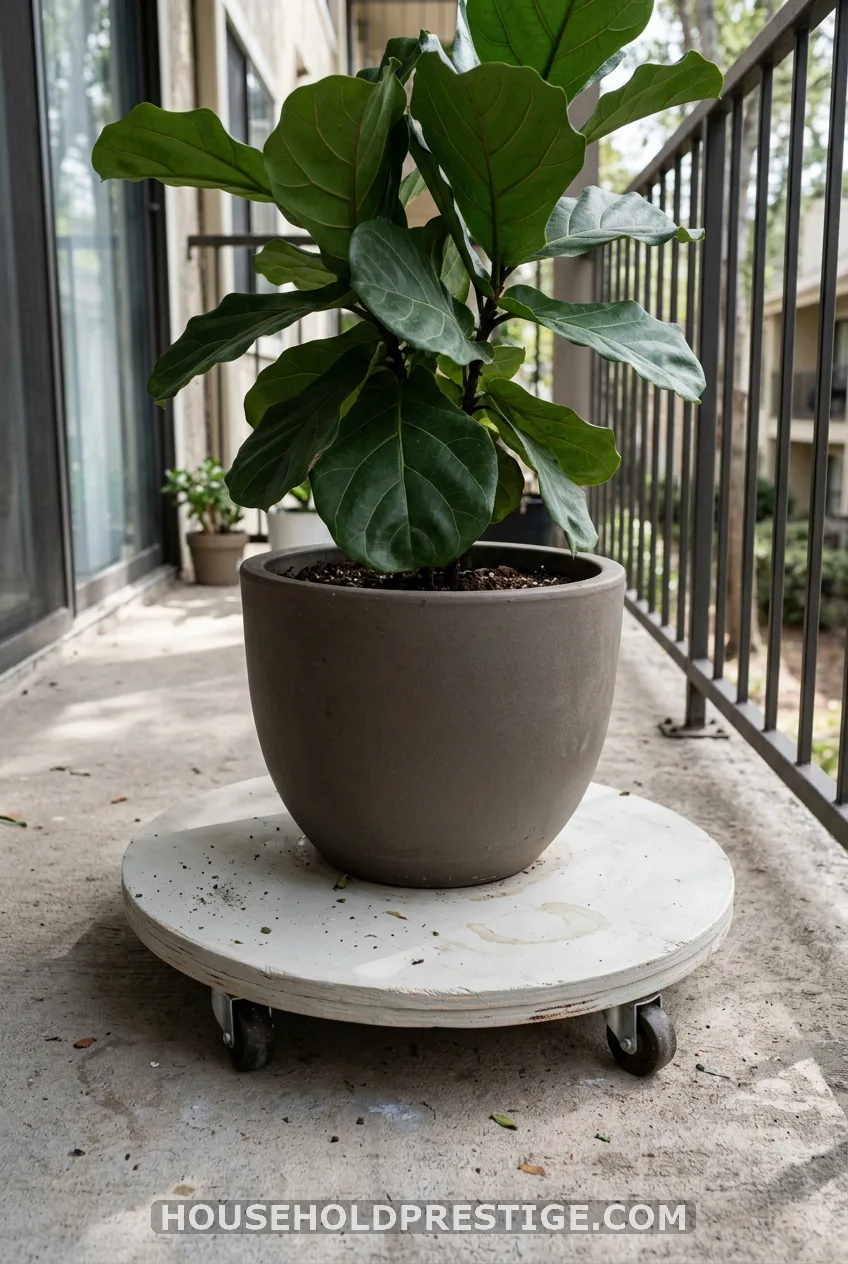
Cut a 14-inch plywood circle or square. Screw one caster into each corner, paint it, and you are done in 30 minutes. Cost is $15 to $25.
Check the caster rating. Four casters rated at 50 pounds each give you a sturdy margin. Choose locking wheels outdoors and felt or rubber ones indoors to protect floors.
7. Modern Hairpin-Leg Plant Stand
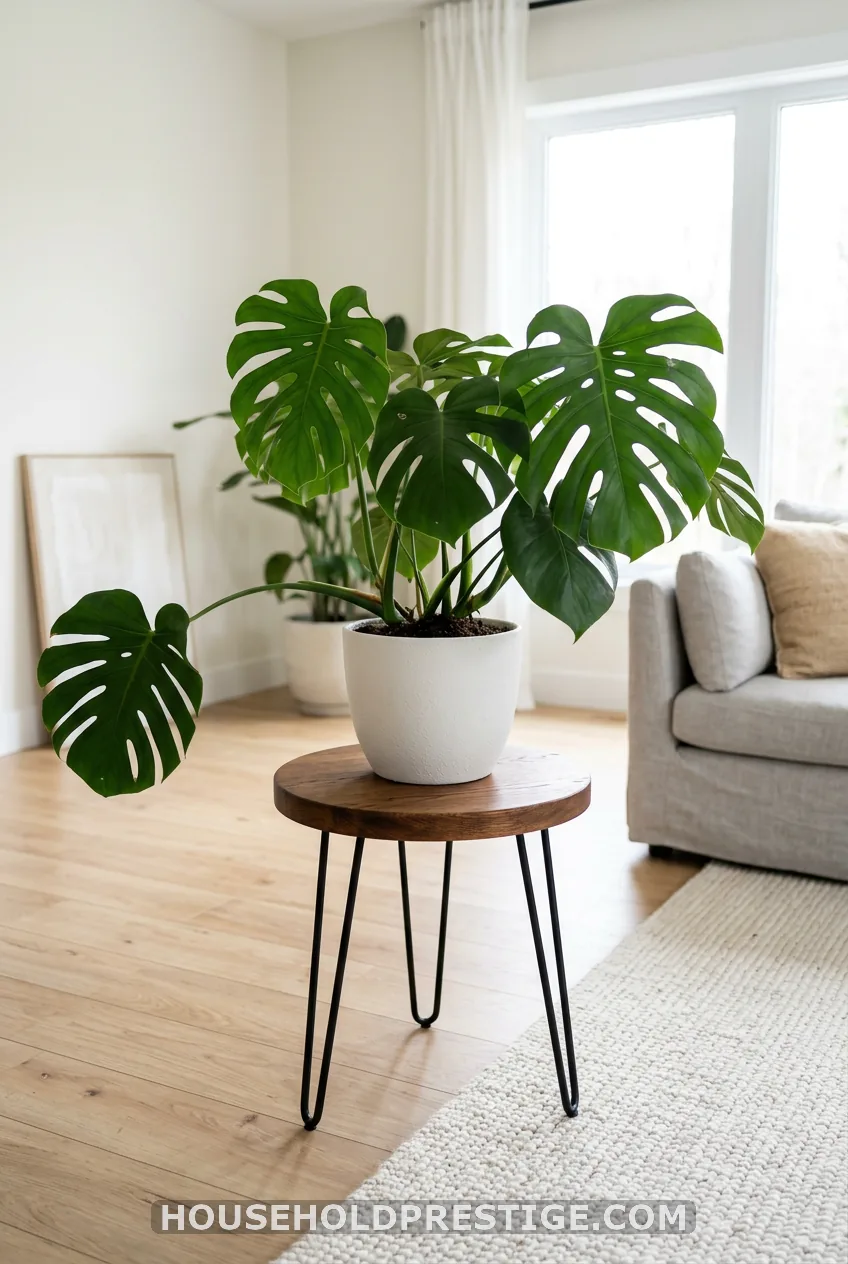
Buy a round wood board, about 12 inches across, and four hairpin legs. Stain the board first. Then screw the legs on with the included screws, using a screwdriver or drill.
It takes 15 to 30 minutes and costs $25 to $40. Pick legs 16 to 20 inches tall for a statement plant.
8. Upcycled Stool or Chair Plant Stand
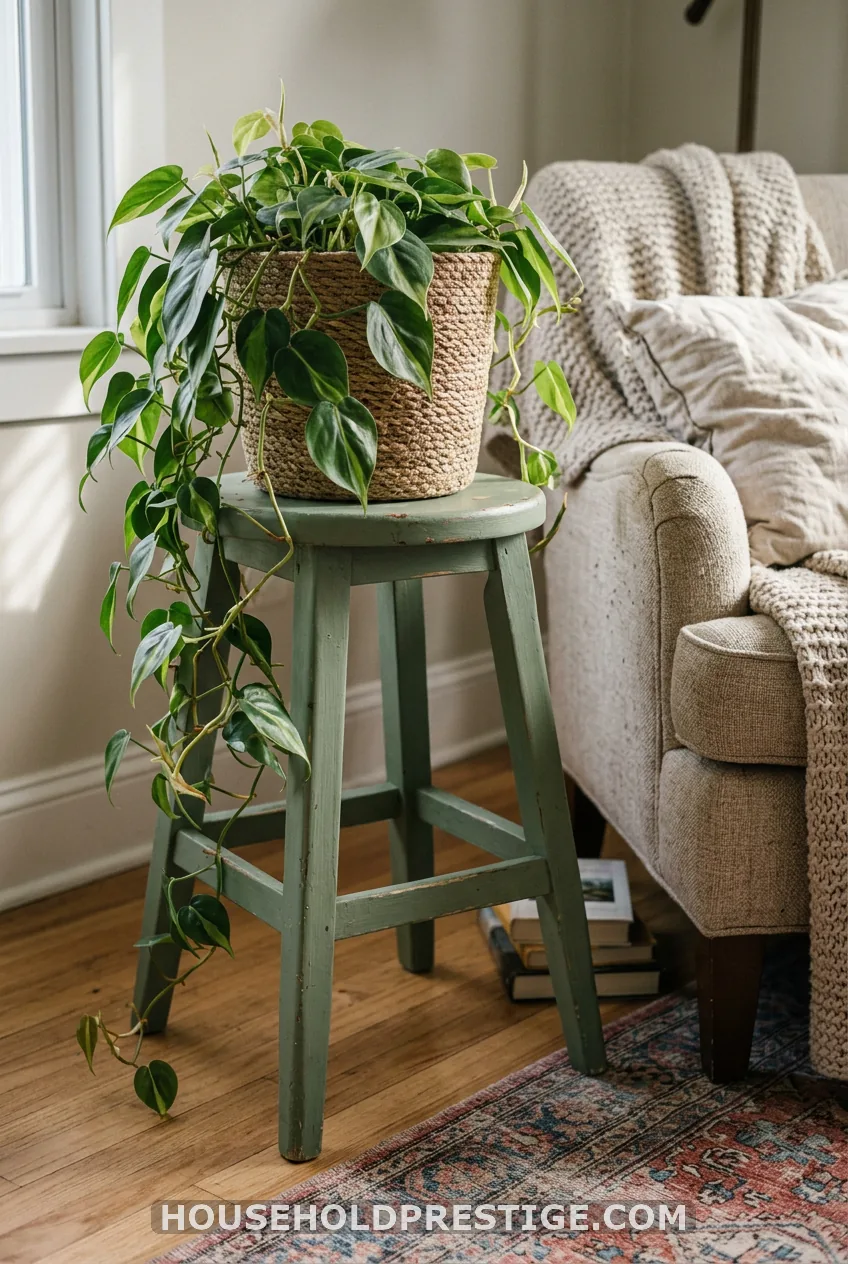
Thrift stores sell old wooden stools for $5 to $10. That is your antique-look plant stand, ready to rescue.
Wipe it down. Sand away the old finish, spray paint it, and add a clear sealer. Give a wobbly stool a shot of wood glue in the joints and clamp it overnight.
If the stool has a padded seat, pull the fabric and foam off and reinforce the board underneath. Total time is 30 to 45 minutes of work. Cost is $5 to $15.
9. PVC Pipe Plant Stand
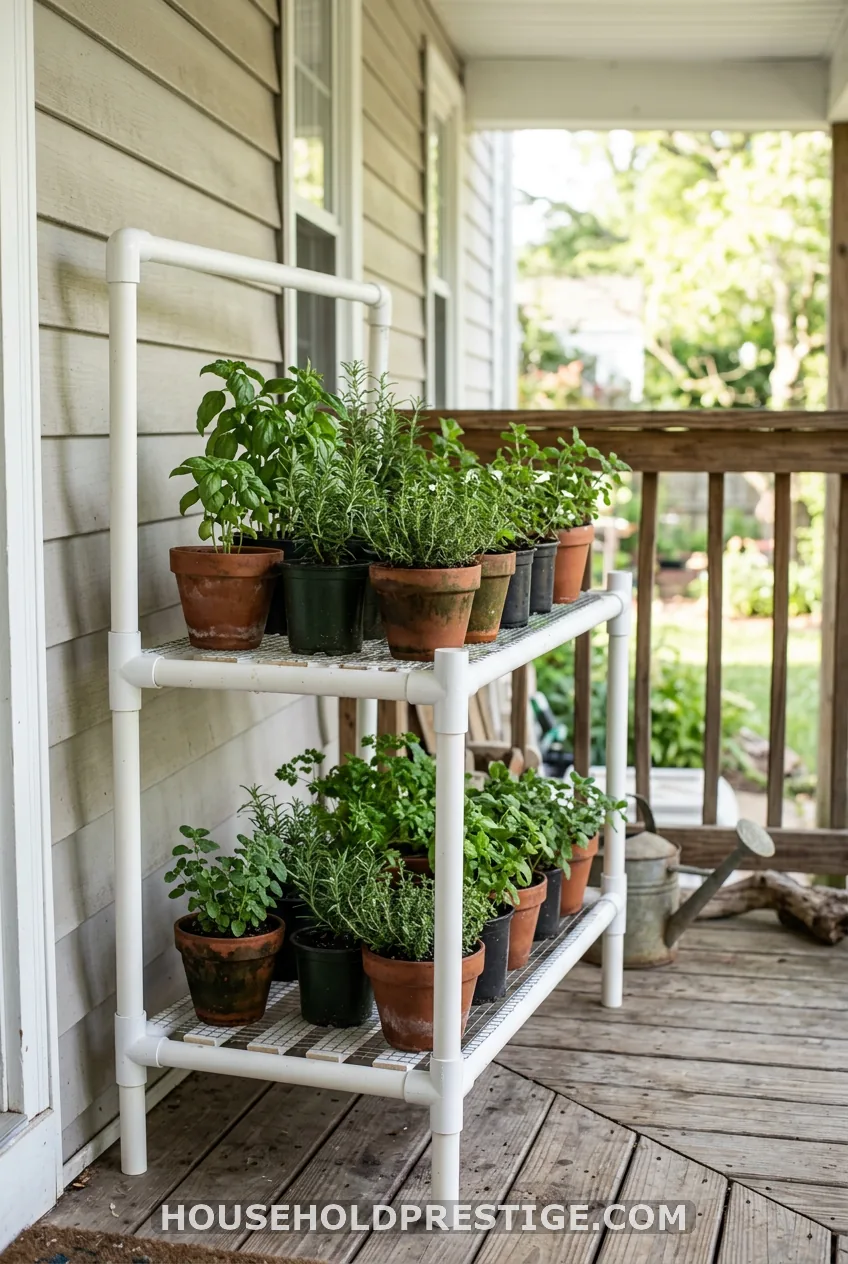
PVC is light, cheap, and rot-proof. That makes it good for porches and shaded patios.
Cut pipe with a PVC saw, dry-fit the pieces with fittings, then glue them with PVC cement. Work outside or by an open window, since the fumes are strong. Add a wood top if you want a solid shelf.
Use spray paint made to bond with plastic. Regular paint flakes off. Plan on one hour and $15 to $25.
Keep this stand for light pots under about 10 pounds. PVC bends under a heavy load.
10. Concrete Block & Wood Plank Stand
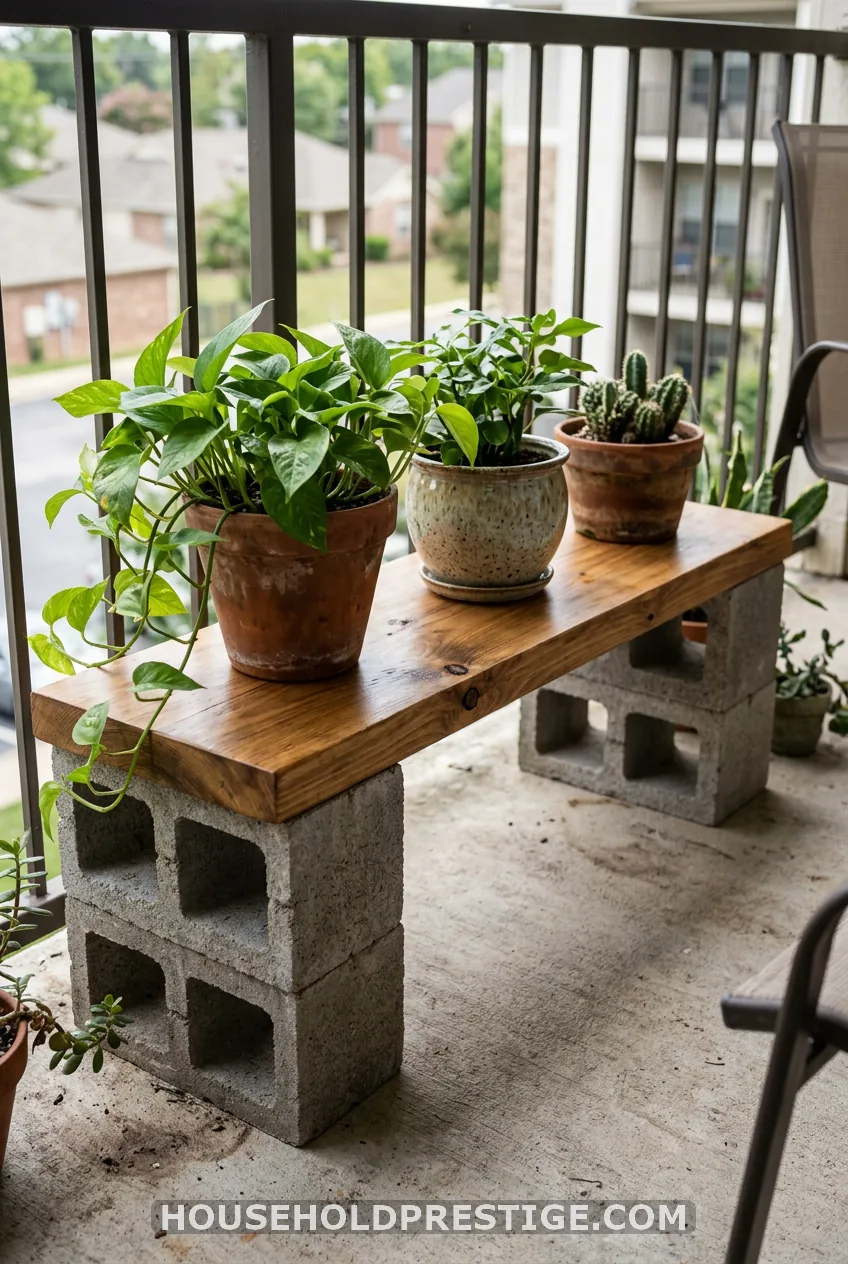
What most people think: Concrete blocks look too industrial for a pretty plant display.
Reality: Add a sealed cedar plank and a row of terracotta pots, and it reads as a clean modern bench. Set the blocks on their sides so the holes face out. Slide the plank across and seal the wood.
Done in 10 minutes for $15 to $20, no tools. It is also very stable for heavy pots.
11. Stacked Wooden Crate Plant Stand
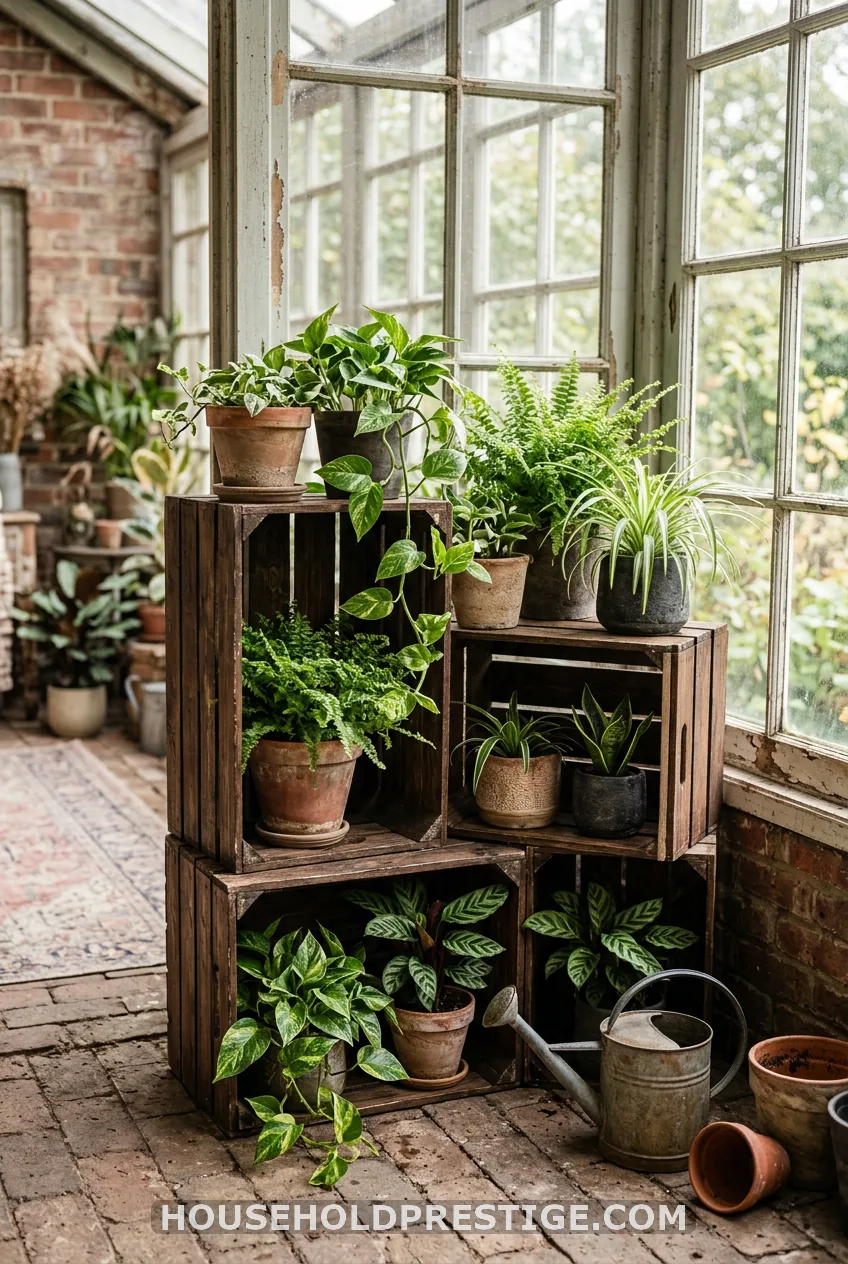
Before: three mismatched crates in a garage. After: a rustic tiered display that now lives in my sunroom.
Stack two or three crates in a staggered pattern. Screw them together through the sides with wood screws. Paint or stain the whole thing before you stack so you can reach every corner.
Add casters to the bottom crate if you want to roll it toward the sun. It takes 30 minutes and $20 to $30. Sand the rough edges well to avoid splinters.
12. Folding A-Frame Plant Stand
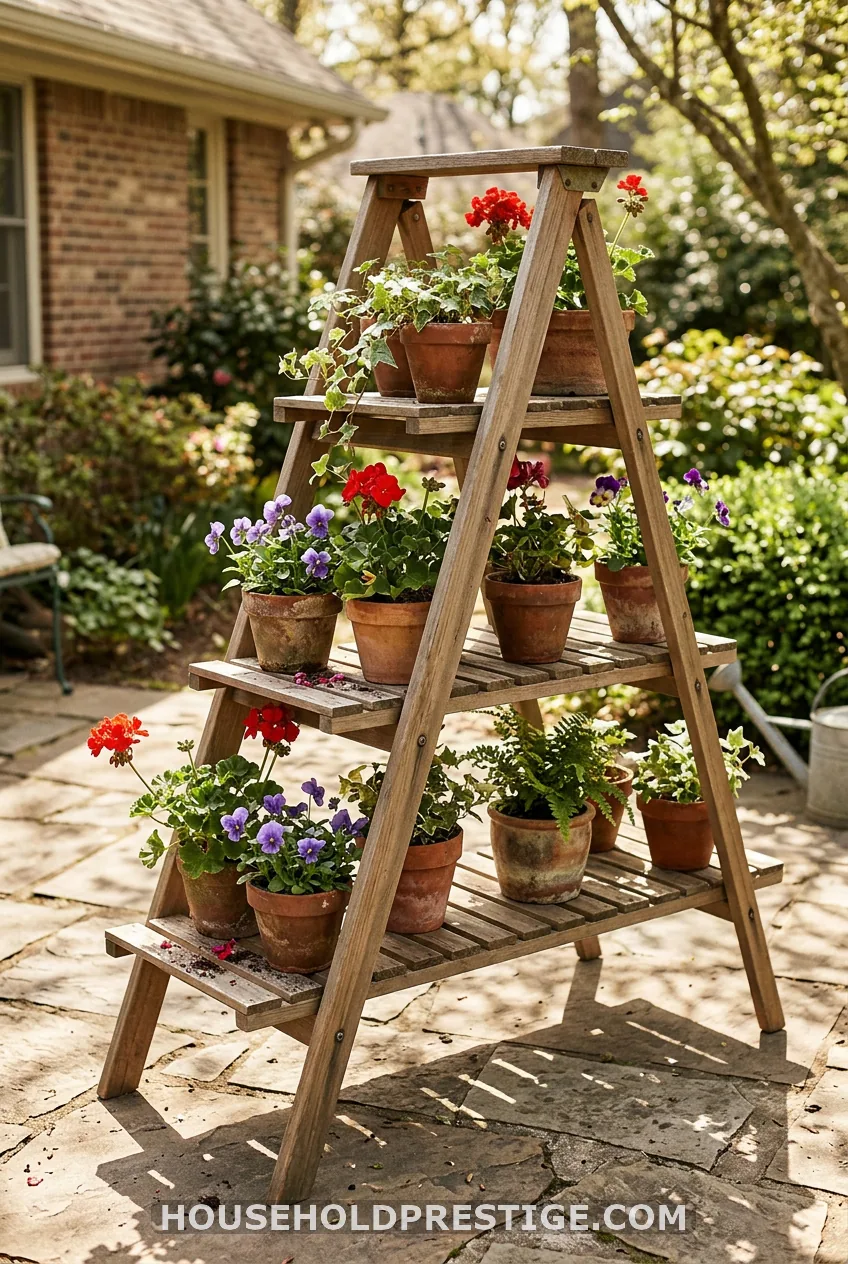
This stand folds flat for winter storage. That makes it great for seasonal patio plants.
Cut four 1×3 legs at 36 inches and shelf slats at 14 inches. Join the two leg pairs with bolts, washers, and wing nuts so they pivot. Fix the shelves to one side so they fold with the frame.
Use a locking bolt or a hinged chain so the legs cannot spread when open. Plan on 2 hours and $20 to $30. Stain for outdoor use.
13. Tabletop Mini Plant Stand (Ice Cream Stick or Dowel)
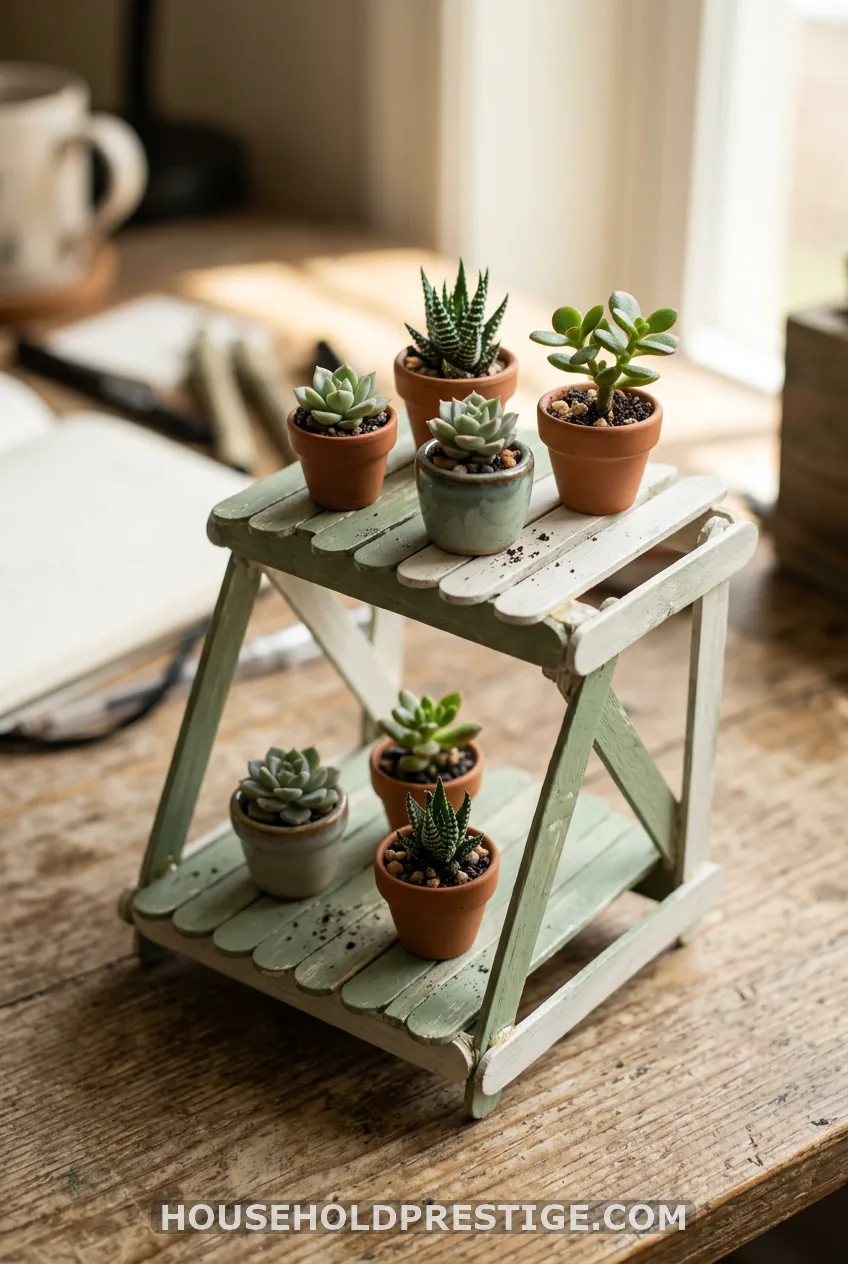
Glue craft sticks into two small platforms. Connect them with four short dowels. Paint it white or leave it natural.
Takes 20 minutes with a glue gun. Hot glue can burn skin, so let it cool before you handle the pieces. Keep the glue gun away from children, and have an adult do the gluing.
Costs under $5. Hold it to succulents in pots under 3 inches.
14. Tall Slim Corner Plant Stand
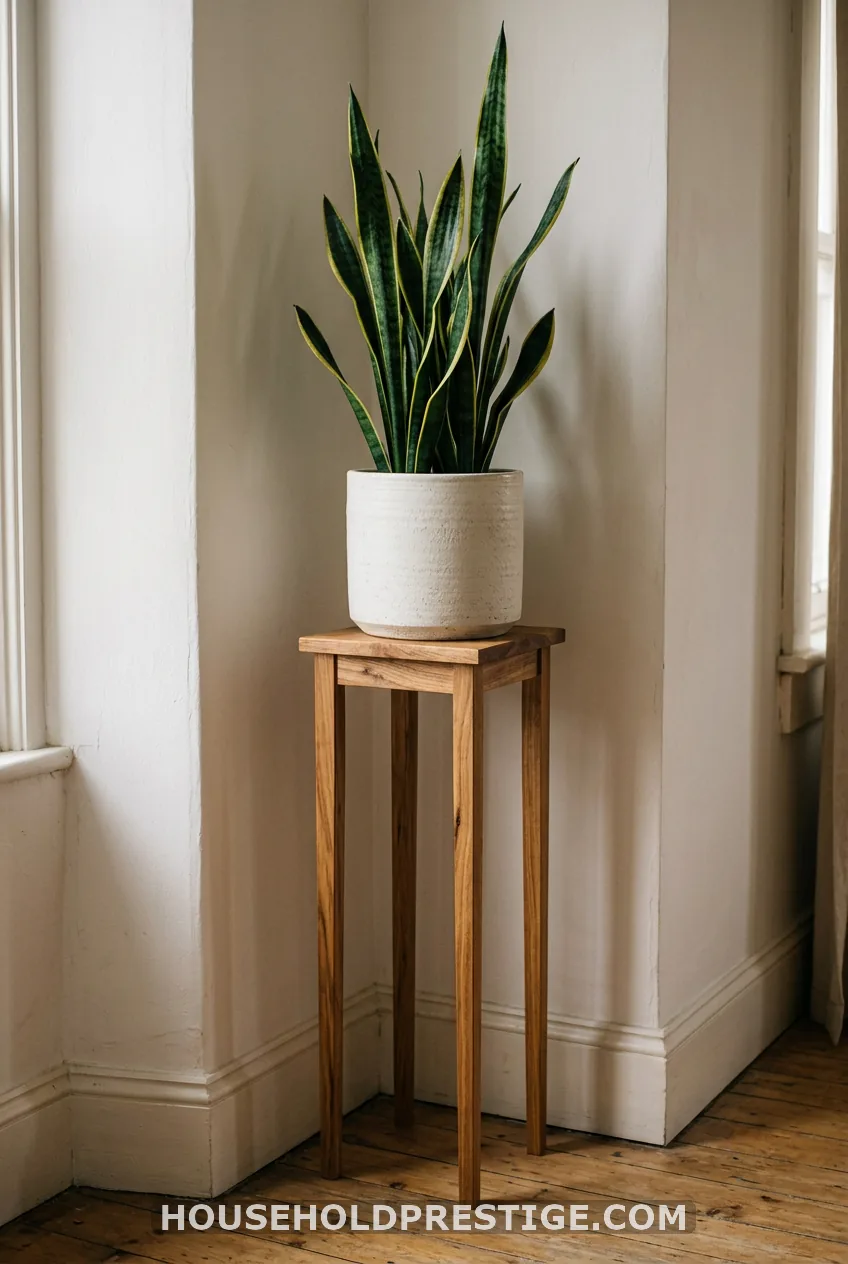
Narrow corners need height, not width. This stand keeps its footprint under 12 inches while lifting a tall plant to eye level.
Build a frame from 1×2 boards, about 30 inches tall, with a 1×12 top cut to 10 inches square. Add base feet for stability. Check the legs with a level, then anchor the top to the wall with a small bracket.
The wall anchor matters. A tall, narrow stand with a heavy pot can tip easily around kids or pets. Plan on 1 to 2 hours and $20 to $30.
15. Balcony Railing Plant Stand (No Floor Space)
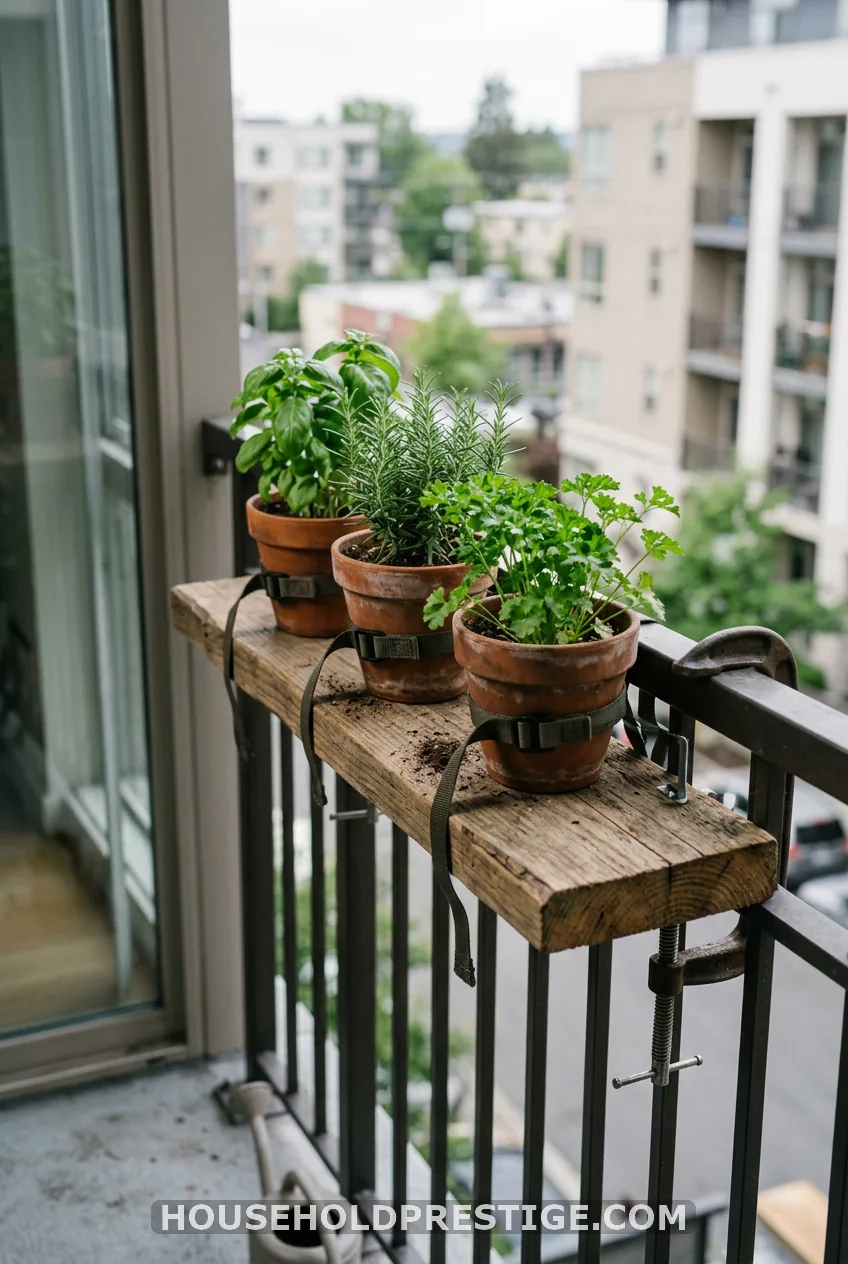
When the floor is full, use the railing. Cut a shelf board to match your railing width. Attach adjustable railing clamps or hooks with exterior screws, then seal the wood.
Before you build, check two things. Confirm the railing can carry the weight, and read your building rules on railing planters. Keep pots light, under about 8 pounds each, and secure them with a strap or a lip on the shelf so wind cannot knock them off.
It takes 30 to 45 minutes and costs $20 to $35. Use a level and a drill.
How to Choose the Right DIY Plant Stand
Start with the pot. Measure its base diameter and guess its weight. The shelf should be 1 to 2 inches wider than the base.
Match the wood to the spot. Pine works indoors but needs sealer anywhere damp. Cedar and heat-treated pallet wood hold up better outside.
Tall stands need wall anchors. Heavy pots need a wide base, cross-bracing, and glue plus screws. Renters should stick to ideas 1, 6, 8, 10, and 13, which need no drilling into walls or floors.
On a balcony, think about wind. Low and heavy beats tall and light every time.
Tools, Materials, and Finishing Checklist
You do not need a full workshop. Most builds use this basic kit:
- Tape measure and pencil
- Saw (a miter saw is quicker, a hand saw works)
- Drill and a bit set
- Random orbital sander or sanding block
- Level
- Safety glasses
For joints, use wood glue plus screws. A Kreg jig is optional for hidden pocket holes.
For finishing, sand to 120 to 150 grit. Wipe off the dust, apply Minwax stain, then seal with polyurethane. Outdoors, use exterior screws and a weatherproof sealer, and set a saucer under each pot so water does not pool on the wood. Stick felt pads under the legs to protect floors.
Which Stand Is Going in Your Corner First?
Plants look better lifted, and a stand that fits your space costs less than most store-bought ones. Start with a 20-minute build if you are new, then work up to the tower or the A-frame. Save this list so you can come back when the next plant arrives.
So which corner of your home is getting its glow-up first?
FAQ
What is the easiest DIY plant stand for beginners?
The Dollar Tree basket stand and the concrete block and plank stand are the easiest. Neither needs drilling, and both take under 20 minutes.
How much does a DIY plant stand cost?
Most builds run $0 to $40. Pallet, Dollar Tree, thrifted stool, and craft stick stands are the cheapest at $0 to $15.
What wood is best for a DIY plant stand?
Pine is a fine choice indoors. For a balcony or patio, use cedar or heat-treated pallet wood, and seal it either way.
How do I make a plant stand sturdy for heavy pots?
Use a wide base, cross-bracing, and wood glue plus screws. Anchor tall stands to the wall, and choose casters rated well above the pot’s weight.