

You open the cabinet, and three containers fall out. Your spice rack is a disaster zone where cumin hides behind expired paprika from 2019. The drawer under your sink? A black hole of grocery bags and mystery cleaning products you bought once and forgot about.
Small kitchen problems aren’t abouta lack of stuff. They’re about vertical space you’re ignoring, corners you’re wasting, and the fact that standard cabinets were designed for people who apparently only own five plates.
I’ve tested these clever kitchen storage hacks in a 70-square-foot rental kitchen with zero counter space and landlord-approved modifications only. If they work here, they’ll work anywhere.
Run Your Lazy Susan Backward
Most people put their Lazy Susan on the bottom shelf and call it done. Flip that thinking.
Mount a Lazy Susan on the top shelf of your upper cabinets—the space you can’t reach without a step stool. Now your protein powder, rarely-used blender attachments, and holiday cookie cutters spin into view instead of requiring an archaeological dig.
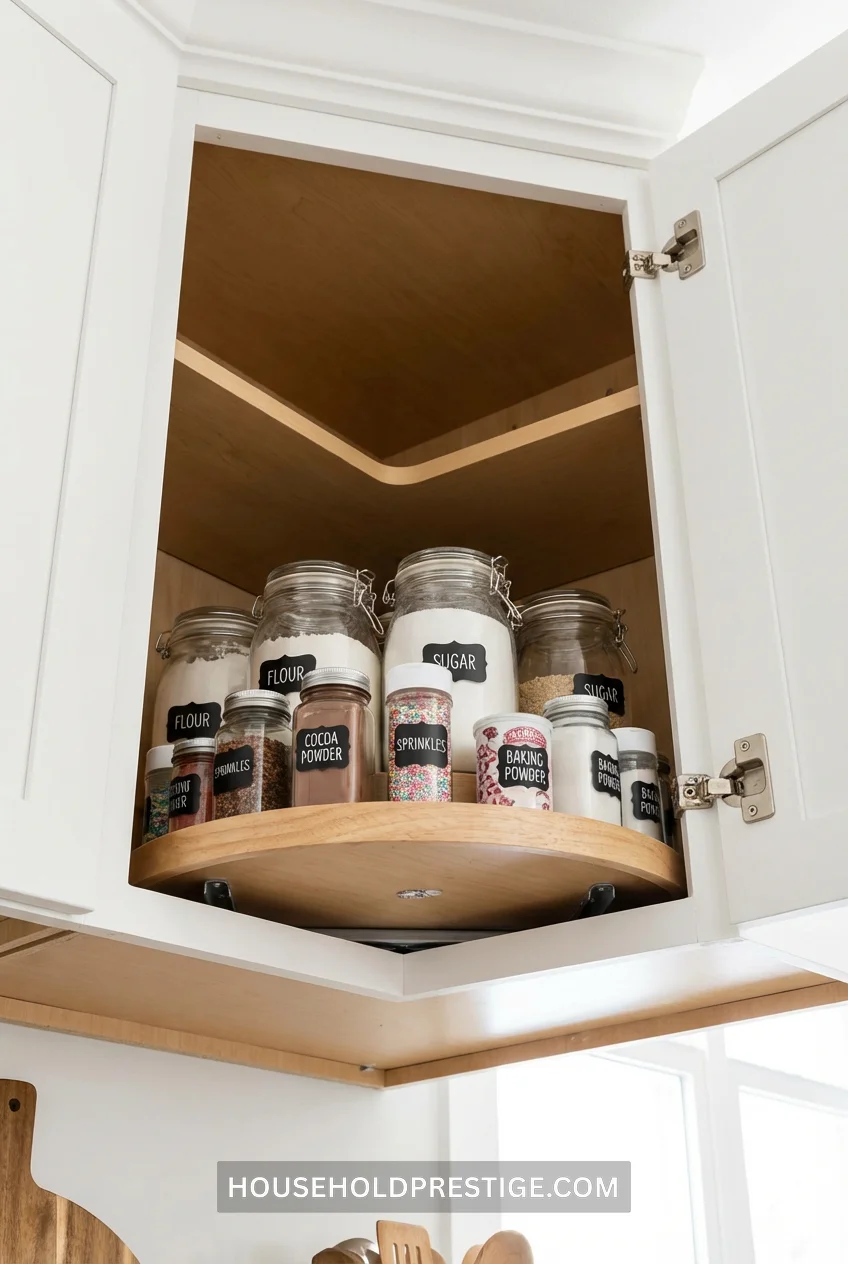
Cost: $12-18 for a 10-inch turntable from Amazon. Installation time: 3 minutes with Command strips rated for 5+ pounds.
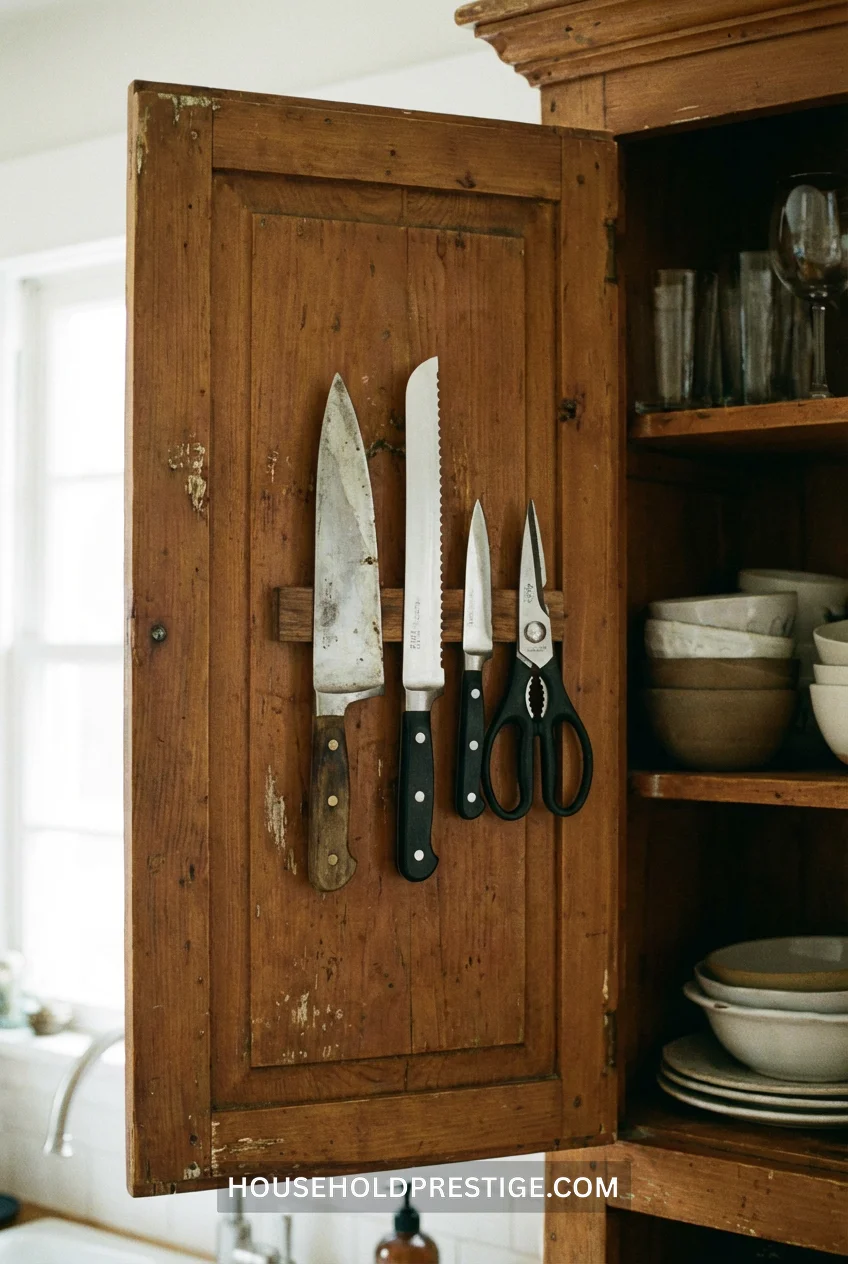
The Magnetic Knife Strip Hack Nobody Uses Correctly
You’ve seen magnetic knife strips on walls. But here’s what actually works: mount them inside cabinet doors.
Why It Works
Cabinet doors are wasted real estate. A 12-inch magnetic strip holds your everyday knives, kitchen shears, and that weird zester you use twice a month but can’t find when you need it.
Step-by-Step Installation
- Measure the inside of your cabinet door—aim for at least 2 inches of clearance from the door edge
- Mark mounting holes with a pencil
- Pre-drill pilot holes (prevents wood splitting)
- Screw in the magnetic strip using the included hardware
- Test with your heaviest knife—if it slides off, add a second strip below it
Materials & Costs
- Magnetic knife strip (12-18 inches): $15-25
- Drill with 1/8″ bit: You probably own this
- Level: $8 if you don’t have one
- Total time: 15 minutes, including measuring twice
Pro Move
Mount two strips parallel, 6 inches apart. The top holds knives, the bottom catches metal measuring spoons, whisks, and anything else with a ferrous metal component.
Common Mistakes to Avoid
- Mounting too close to hinges (blocks the door from opening fully)
- Using strips shorter than 12 inches (wastes the space)
- Putting heavy cleavers on adhesive-mounted strips (they fall, always use screws for knives)
Pegboard Installed Horizontally Creates Drawer Dividers You Can Actually Rearrange
The Problem With Traditional Drawer Organizers
They’re permanent. You buy the wrong size, or your needs change, and you’re stuck with plastic dividers that don’t fit your new set of spatulas.
The Horizontal Pegboard Solution
Cut a sheet of pegboard to fit your drawer dimensions. Lay it flat inside. Use pegs to create custom compartments that move when you need them to move.
Exact Dimensions
For a standard 18″ x 22″ kitchen drawer:
- Pegboard sheet: Cut to 17.5″ x 21.5″ (allows 1/4″ breathing room)
- Peg height: 2-inch pegs for shallow drawers, 4-inch pegs for deep drawers
- Spacing: Place pegs every 3-4 holes to prevent items from shifting
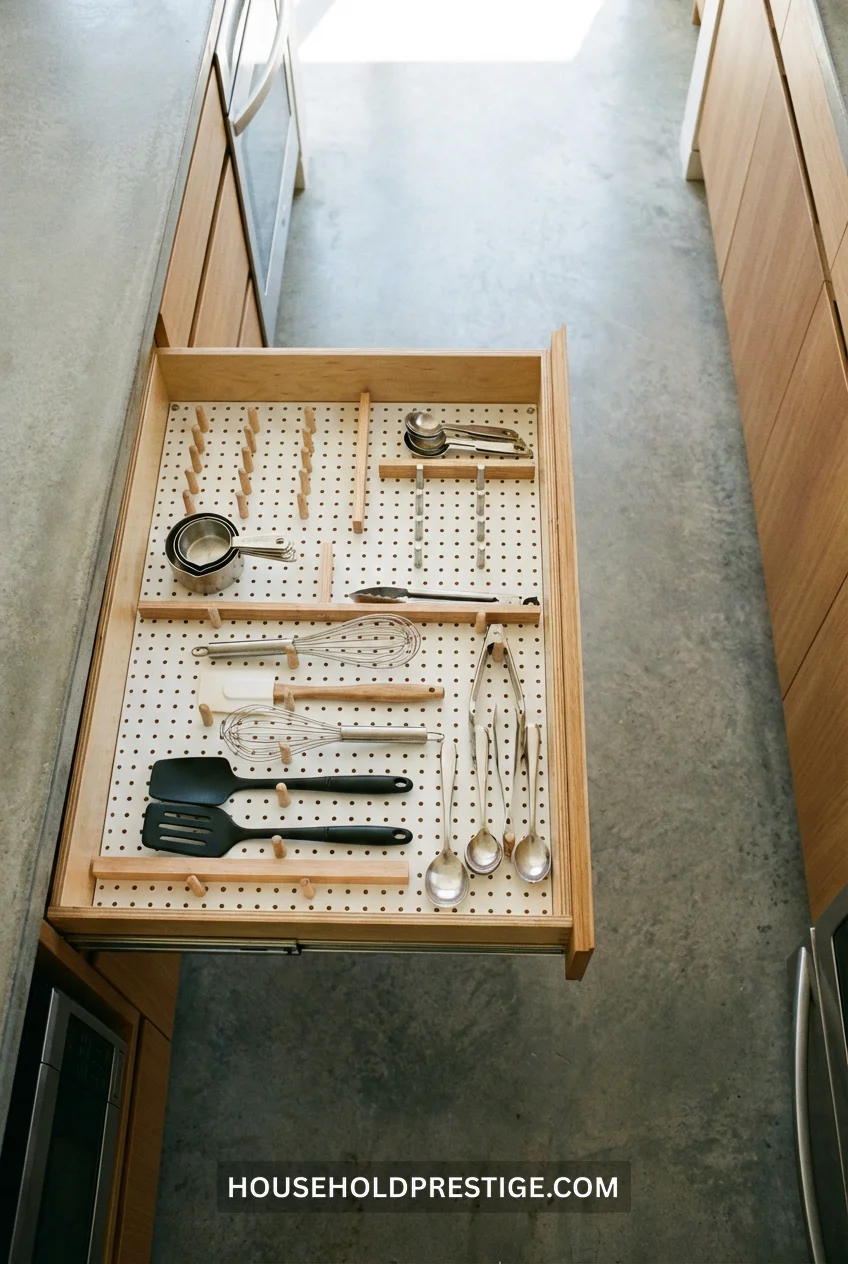
What Actually Goes Where
- Front left quadrant: Daily utensils (spatulas, spoons, tongs)
- Back row: Specialty tools (garlic press, can opener, wine key)
- Right side: Measuring cups and spoons on individual pegs
- Center: Adjustable section for whatever doesn’t fit elsewhere
Materials List
- 1/4″ pegboard sheet: $12 at Home Depot (buy the white, not raw brown—looks intentional)
- 40-pack of 2″ pegs: $8
- Utility knife or handsaw: Cut to size in-store for free if you ask nicely
- Sandpaper (120-grit): $3 to smooth cut edges
Installation Note
Don’t glue the pegboard down. Let it sit loose in the drawer. Makes it easier to pull out and clean when you inevitably spill flour in there.
Cost Reality
Total investment: $23. Lasts forever. Beats $40 bamboo organizers that fit exactly one drawer configuration and nothing else.
The 3-Tier Hanging Basket Trick That Doubles Cabinet Space
You know those hanging fruit baskets people put on countertops? Hang one inside your cabinet instead.
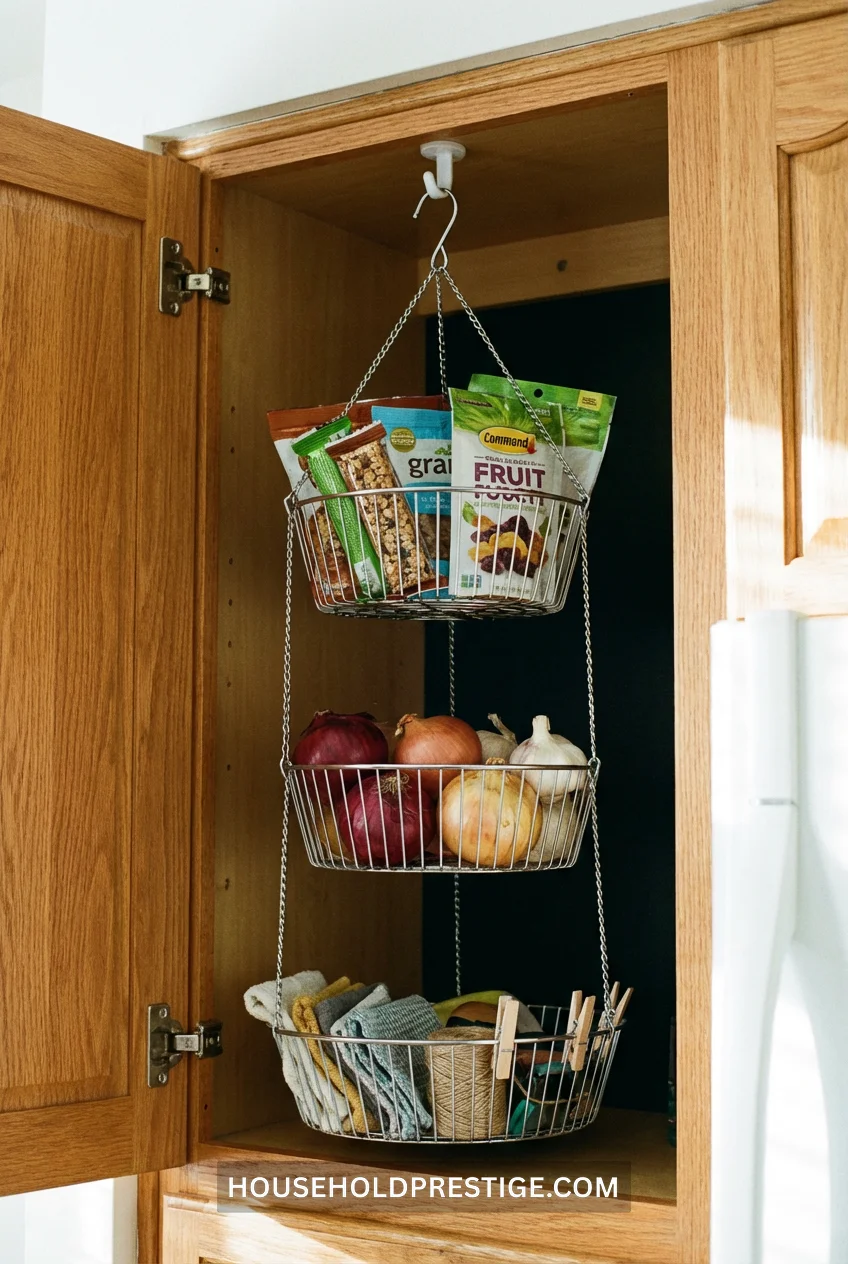
Loop it over a Command hook rated for 3 pounds. Fill the bottom basket with onions and potatoes. Middle gets snack bags. Top holds garlic and ginger.
Zero counter space used. Entire cabinet shelf freed up for actual plates. Game over.
Install a Pullout Shelf in Your Deepest Cabinet—But Not the Way You Think
What Most People Do Wrong
They buy expensive pullout shelf kits for $60-80 that require drilling into cabinet sides. Then they realize their cabinet has a center support beam that blocks the tracks.
What Actually Works: The Sliding Drawer Method
Buy two wire sliding drawer organizers meant for closets. The kind that slides on ball bearings. Position them side-by-side in your deep cabinet.
Why This Beats Traditional Pullouts
- No permanent installation – they sit on the existing shelf
- Work around obstacles – center supports? Just leave a gap between the two drawers
- Stack vertically – you can put another shelf on top and repeat
- Cost: $25 per drawer vs $80 for traditional pullout hardware
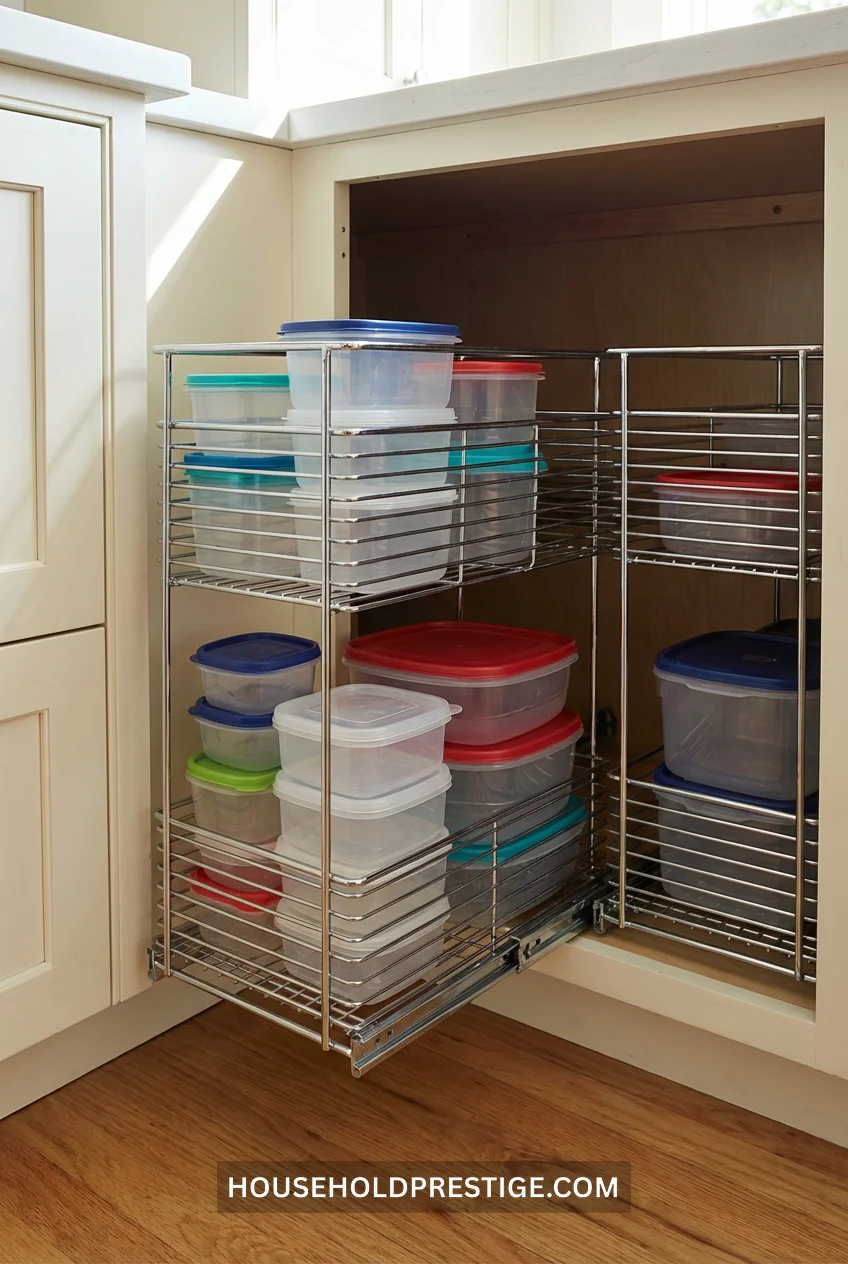
Specific Product Recommendation
InterDesign Linus Pullout Drawer (14″ x 10″ x 3.5″). Buy two. They fit perfectly in standard 24″ base cabinets with 2 inches to spare.
Before/After Results
Before: You had to unstack six pots to reach the one you needed. After: You slide out the drawer and grab it.
When It’s Worth It
If your cabinet is deeper than 18 inches, this pays for itself in sanity within a week. If it’s shallower, stick with a simple Lazy Susan instead.
Adhesive Hooks on Cabinet Sides = Instant Mug Storage
Stick 4-6 adhesive hooks on the side panel of your upper cabinet (the part facing the room, not another cabinet). Hang mugs by their handles.
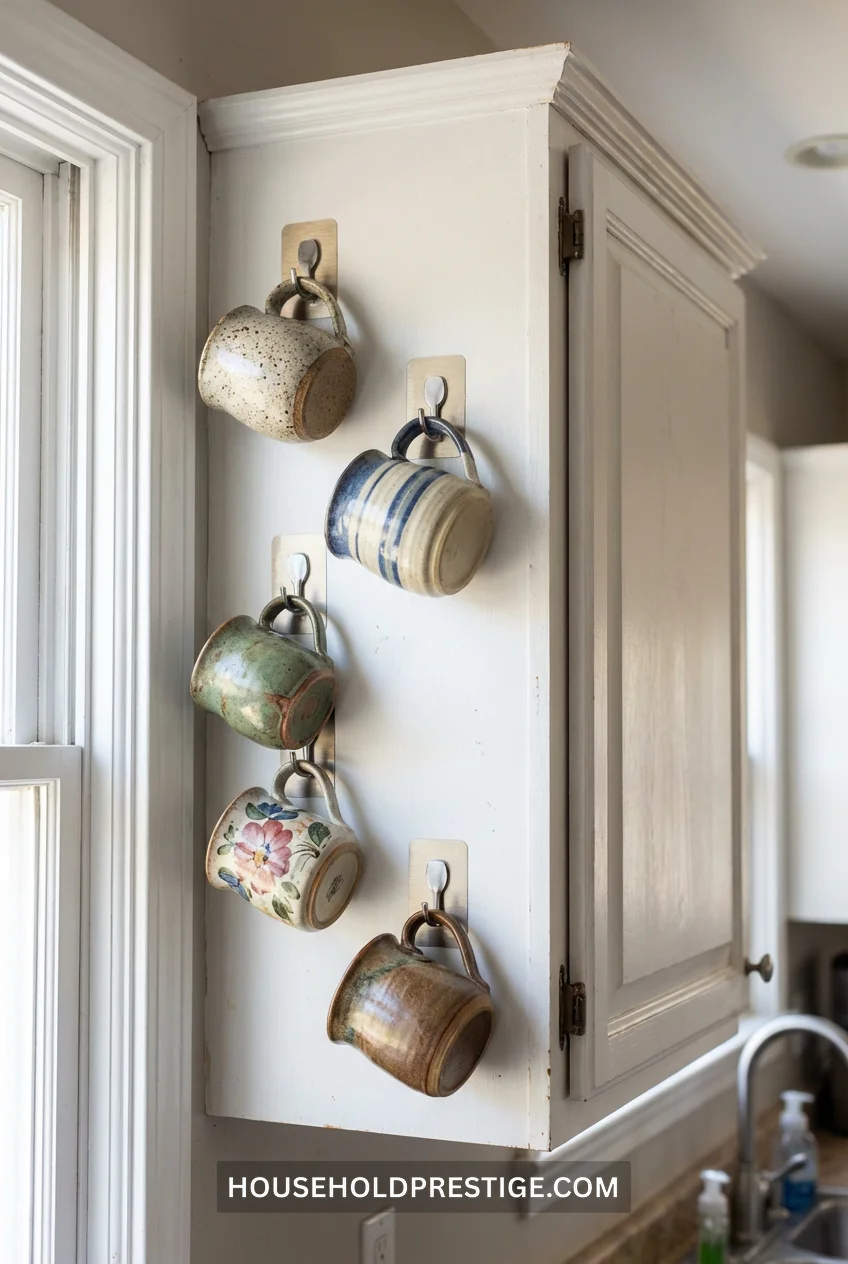
Holds six mugs in space that was doing absolutely nothing. Costs $8. Takes 90 seconds.
The Drawer Pegboard Lid Organizer (Because Lids Are Kitchen Chaos)
The Tupperware Lid Problem
You have seventeen containers. You have forty-three lids. None of them match. They’re all jammed in a drawer, creating an avalanche every time you open it.
The Fix: Vertical Pegboard Storage
- Cut the pegboard to fit the back 2/3 of your deepest drawer
- Prop it at a 70-degree angle using a wooden dowel as a brace
- Insert pegs horizontally through the pegboard
- Slide lids between pegs vertically
Exact Setup
- Pegboard size: Cut to 20″ wide x 12″ tall for standard drawer
- Angle: 70 degrees from horizontal (closer to vertical than flat)
- Dowel brace: 1″ diameter wooden dowel cut to 18″ length, glued to drawer bottom
- Peg spacing: Every 2 holes = 4 inches apart = perfect for standard lids
What Fits
- Small lids (4-6″): 8-10 lids per section
- Medium lids (6-9″): 5-6 lids per section
- Large lids (9″+): 3-4 lids per section
- Oddball shapes: The front 1/3 of the drawer remains flat for irregular items
Pro Tip
Label each peg section with a Sharpie: “Small Round,” “Medium Square,” “Large Rectangle.” Sounds excessive. Saves you 30 seconds every single time you need a lid. That’s 182.5 minutes per year if you cook daily.
Cost Breakdown
- Pegboard scrap: $5 (or free from the piece you already cut for the utensil drawer)
- 1″ dowel (6 feet): $4 (you’ll have extra for other projects)
- 20-pack of 3″ horizontal pegs: $6
- Wood glue: You own this
- Total: $15
Over-the-Cabinet-Door Organizers That Don’t Suck
Most over-door organizers are flimsy garbage that fall off when you sneeze. The ones that work have these specs: metal construction, at least 3 hooks, weight capacity of over 10 pounds.
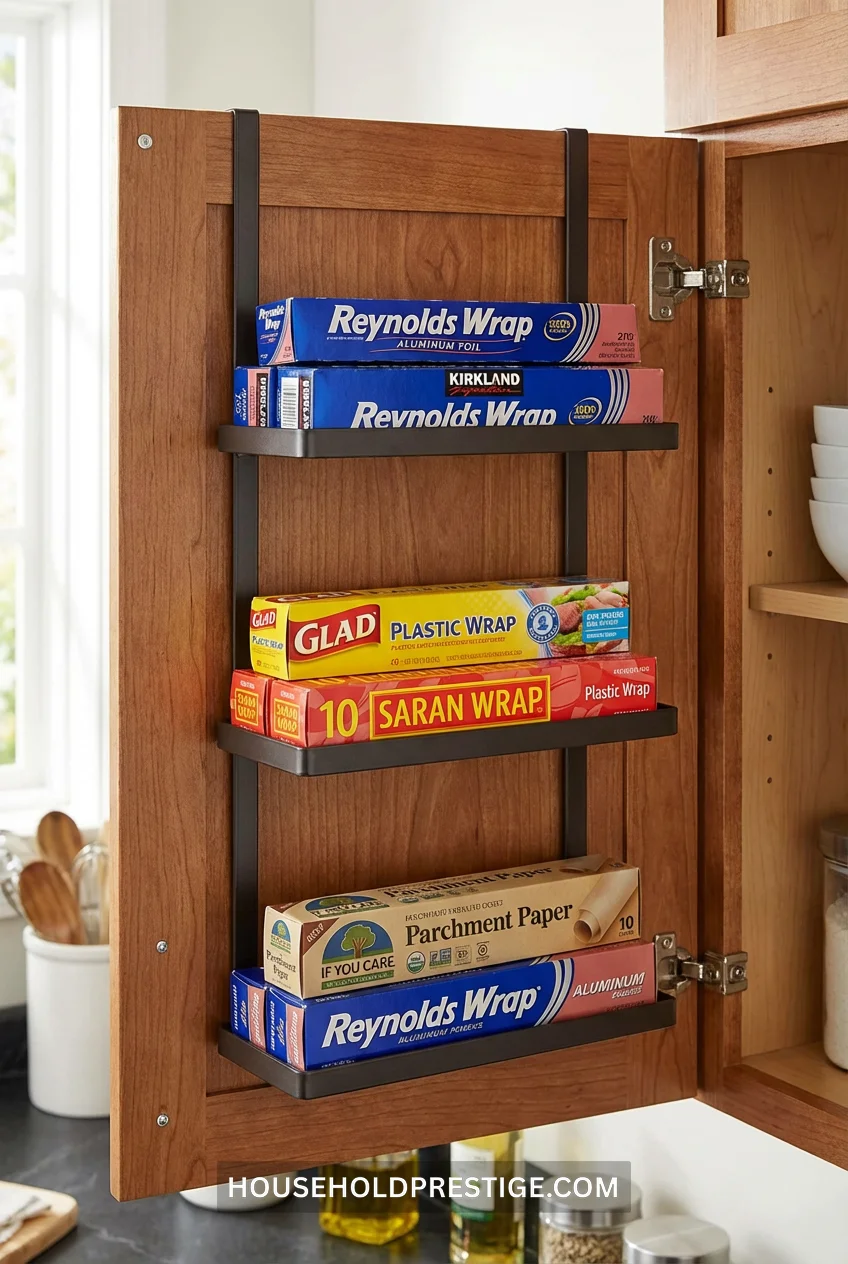
Mount it on the inside of your under-sink cabinet door. Store aluminum foil, plastic wrap, sandwich bags—anything flat that usually creates drawer chaos.
Brand that actually works: SimpleHouseware Over Door Organizer, $16 on Amazon, holds 12+ pounds without budging.
The Spice Drawer Riser That Uses Science
Why Stacking Spices Doesn’t Work
You can’t read labels when bottles are stacked. You end up buying duplicate cumin because you forgot you already own three jars hiding in the back.
Stadium-Style Spice Risers
Create 3-4 tiers using acrylic shelf risers, each 2 inches taller than the one in front of it. Spices sit like bleacher seats—every label visible, every jar accessible.
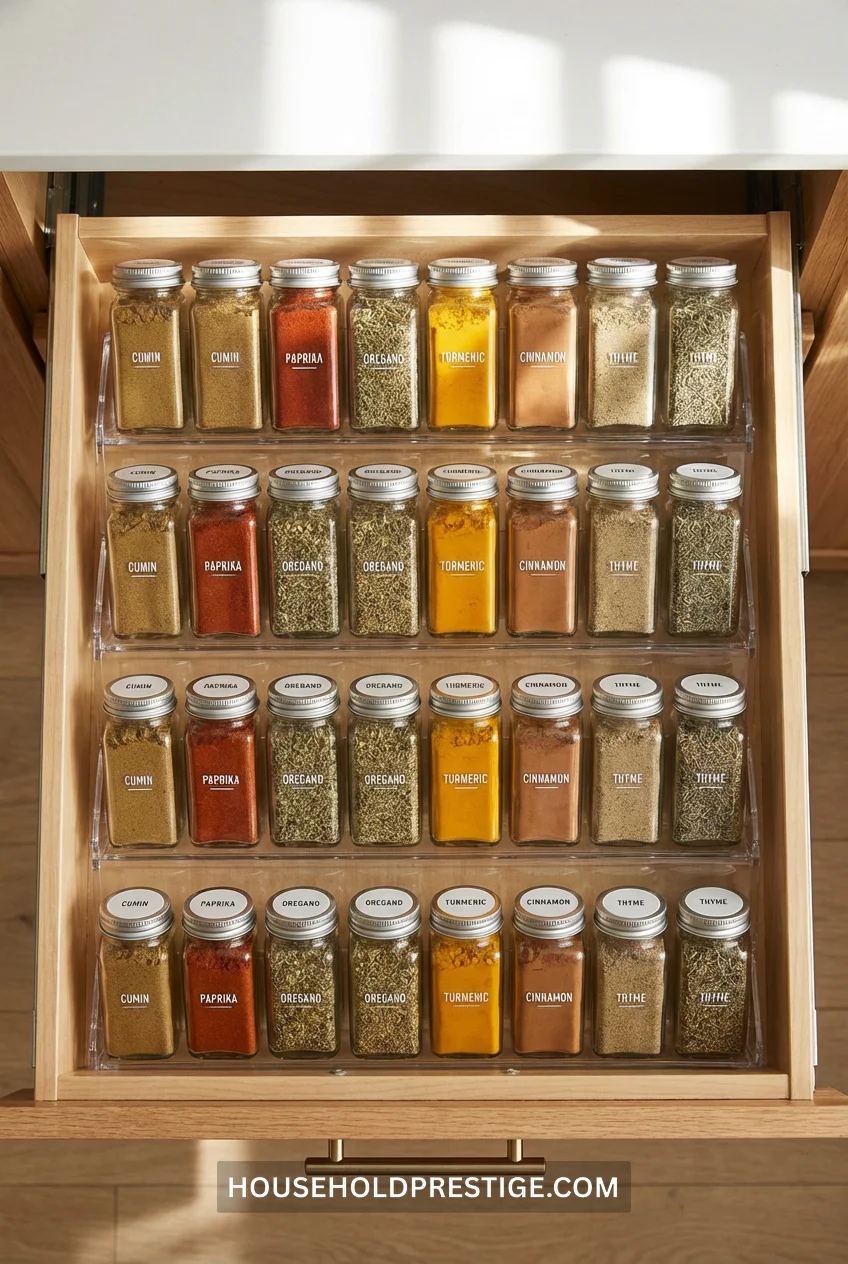
The Math
Standard drawer depth: 18 inches
- Tier 1 (front): 2″ riser height, holds 8-10 jars
- Tier 2: 4″ riser height, holds 8-10 jars
- Tier 3: 6″ riser height, holds 8-10 jars
- Tier 4 (back): 8″ riser height, holds 6-8 jars (reduced because of the angle)
Total capacity: 30-38 spice jars in a single drawer, all visible.
Product Reality
YouCopia Spice Steps ($20): Comes pre-configured with 4 tiers, fits standard drawers, dishwasher-safe. Cheaper than buying individual risers and hoping they work.
Installation
You literally just put it in the drawer. That’s it.
Corner Cabinet Lazy Susan—But Add This Modification
Standard Lazy Susans waste the corners. Add corner shelves that extend beyond the turntable’s edge.
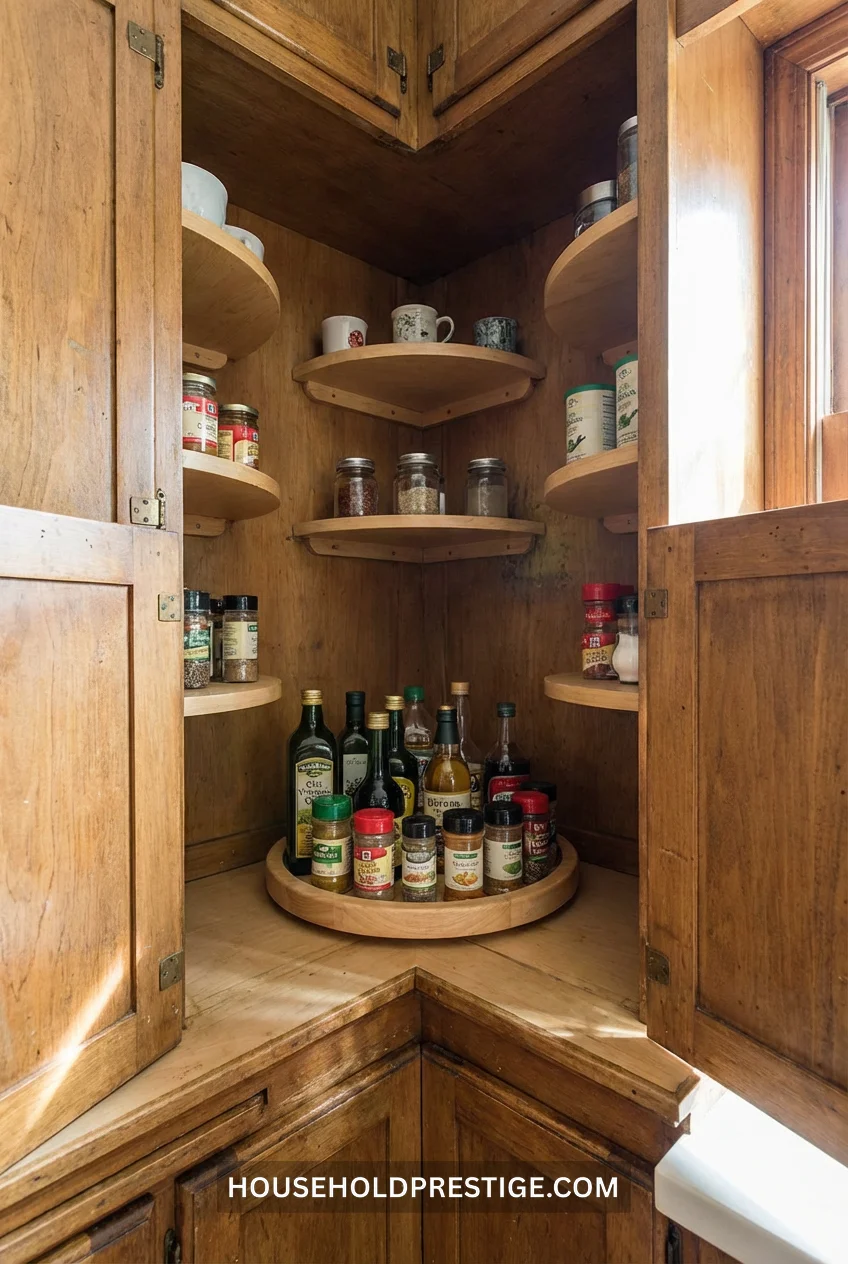
Those dead corner spaces? Perfect for storing tall olive oil bottles that won’t fit on the spinning part.
Materials: Two 8-inch corner shelves ($12 for a 2-pack), mounted with L-brackets. Adds 30% more usable space to the same cabinet.
The Toe-Kick Drawer Installation
That 4-inch gap at the bottom of your cabinets (the toe-kick)? That’s buildable space.
Toe-kick drawers slide out from that gap. They’re shallow (3-4 inches deep) but run the full width of your cabinet base.
What Fits
- Baking sheets (stored vertically)
- Cutting boards
- Serving platters
- Cookie sheets
- Anything flat and awkwardly shaped
Cost Reality
DIY toe-kick drawer kit: $45-65, depending on width. Professional installation: $150-250 Hidden storage you didn’t know existed: Priceless
When It’s Worth It
If you rent: Probably not (requires screwing into cabinet base). If you own: Absolutely, especially if you’re already renovating. If you bake often: This is non-negotiable—suddenly you have a home for every pan.
Magnetic Spice Jars on the Fridge Side Panel
Transfer spices into small magnetic tins. Stick them on the side of your refrigerator (the part facing the counter, not the front).
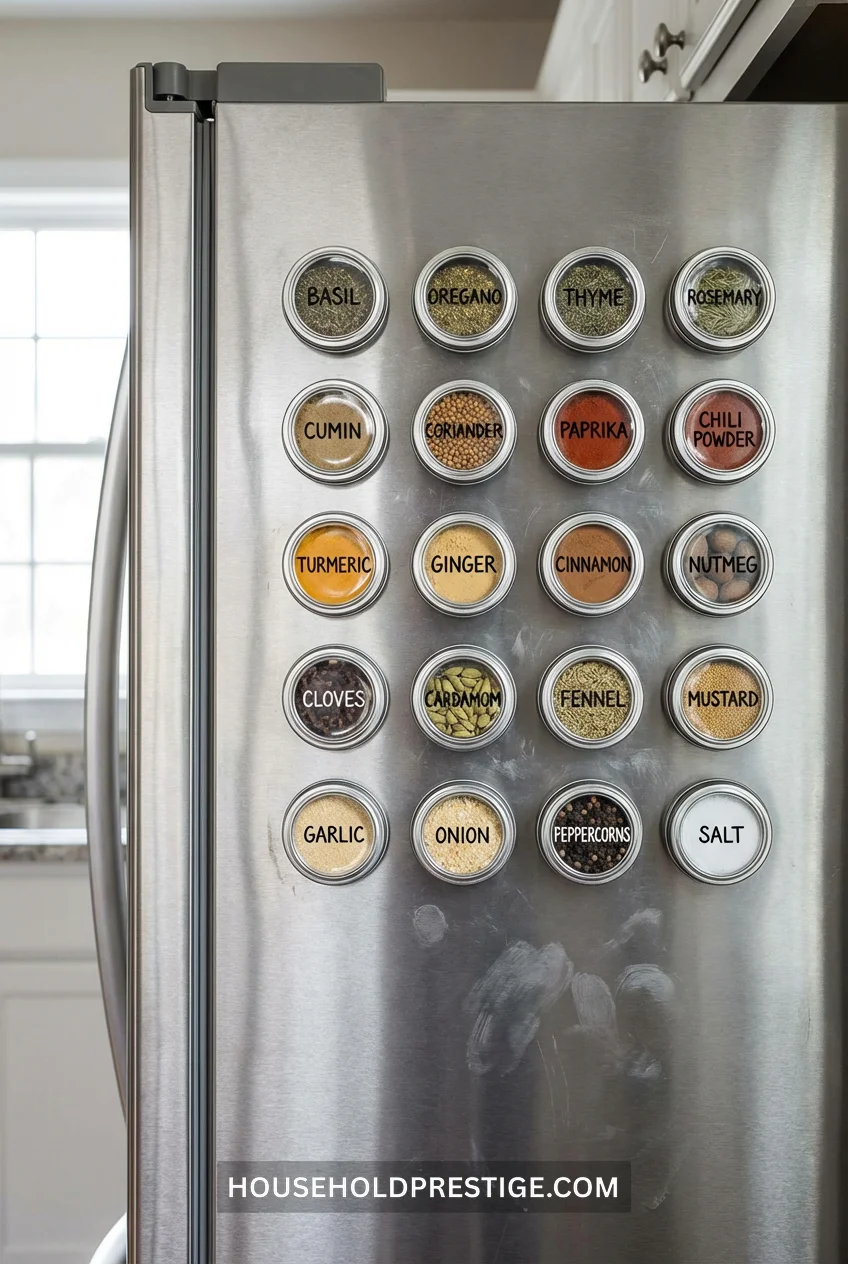
Frees up an entire cabinet shelf. Costs about $30 for a 24-tin set on Amazon. Labels included because you’re not going to remember which tin holds coriander vs cumin just by looking.
The “Box Grater on a Hook” Revelation
Your box grater takes up a massive footprint in a drawer or cabinet. Hang it on a hook inside a cabinet door instead.
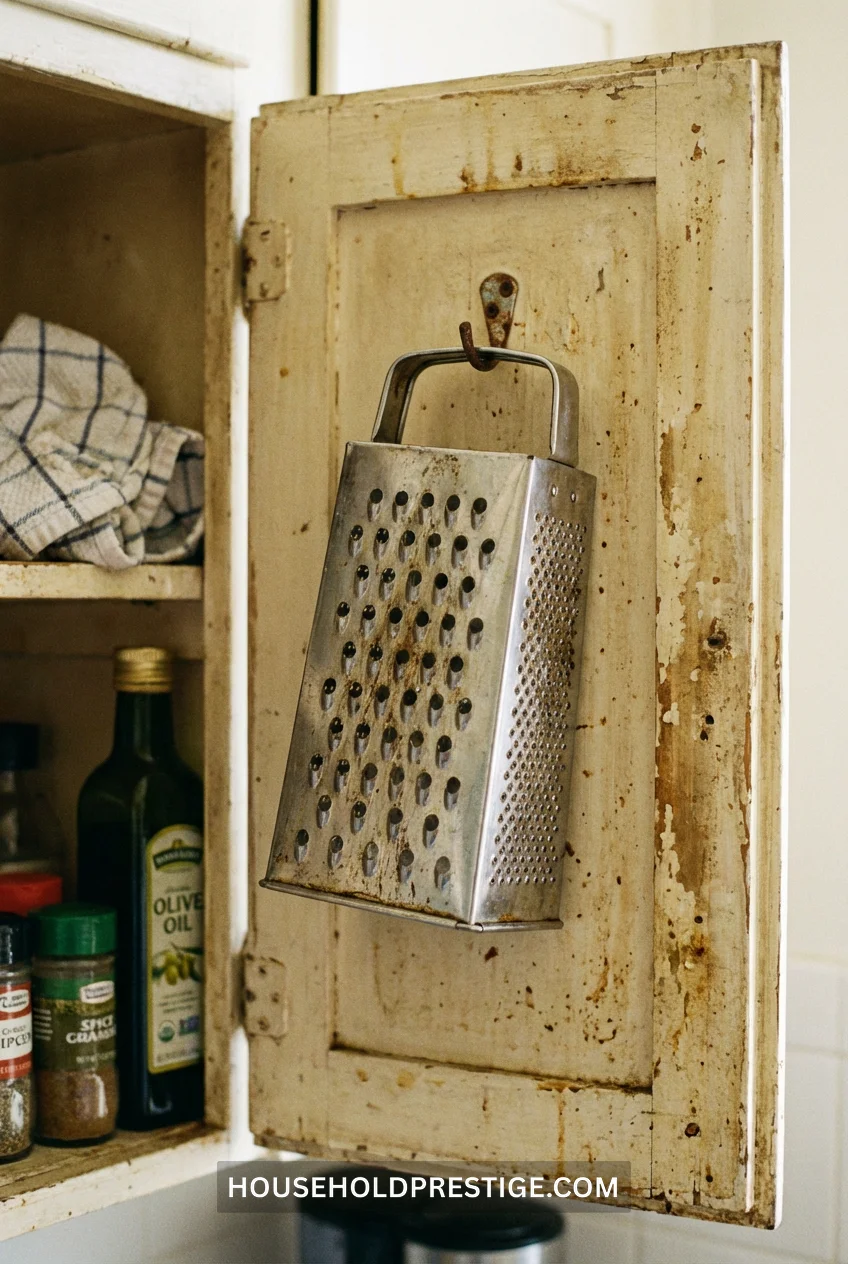
One adhesive hook. One second to hang. Entire drawer space reclaimed.
Same concept works for: colanders, measuring cups with handles, oven mitts (if they have loops).
Pull-Down Spice Rack Installed Under Upper Cabinets
This is for people who’ve exhausted every other option and still have no space.
Pull-down spice racks mount to the underside of your upper cabinets. They swing down when you need them, hide when you don’t.
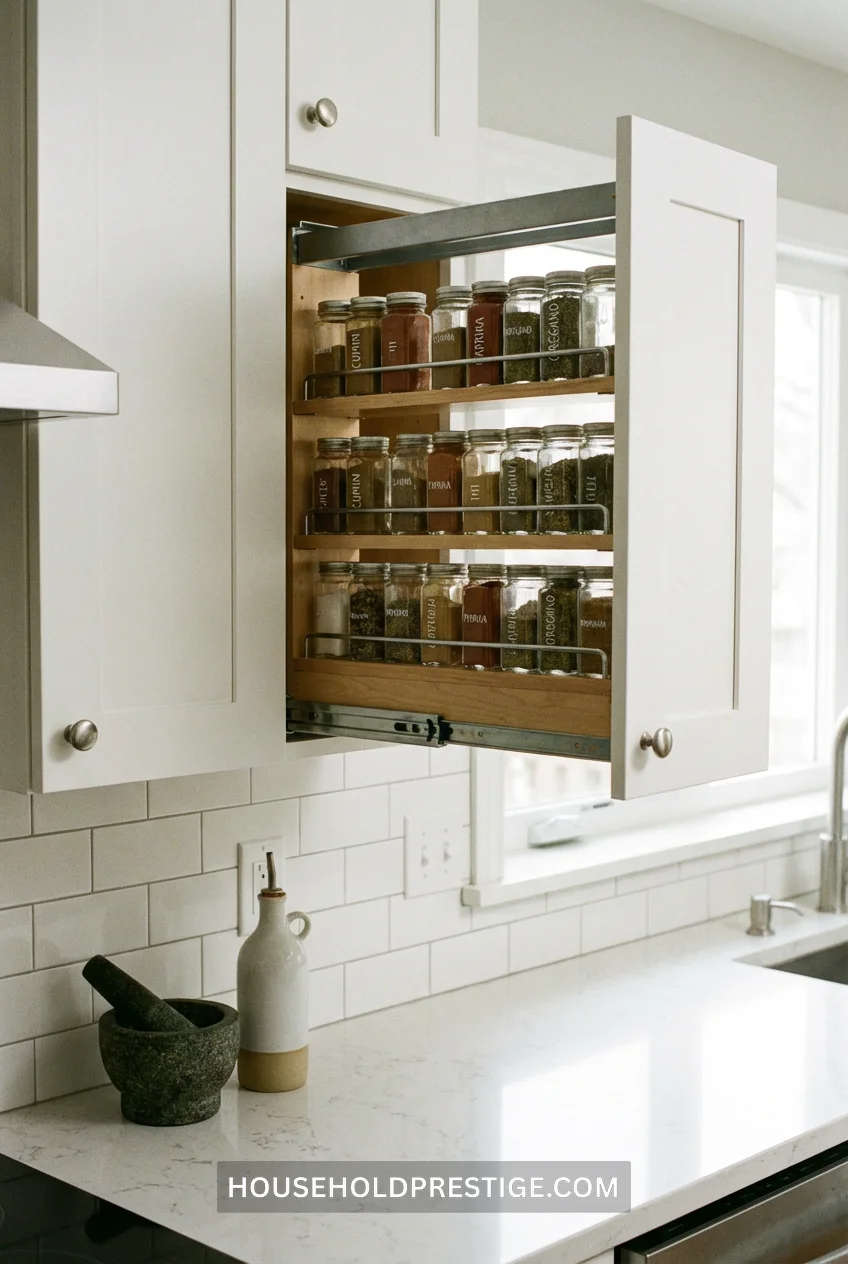
Cost: $35-50, depending on size. Installation: 20 minutes with a drill. Capacity: 20-30 spice jars
The Catch
You need at least 3 inches of clearance between your upper cabinet and countertop for this to work. Measure first. If your backsplash is too tall, this won’t fit.
Conclusion
Your kitchen doesn’t need to be bigger. It needs to use vertical space, corners, and cabinet doors that currently do nothing.
The projects that made the biggest difference in my 70-square-foot kitchen: magnetic knife strips inside cabinet doors (reclaimed an entire drawer), pegboard drawer dividers (ended utensil chaos), and toe-kick drawers for baking sheets (solved my most annoying storage problem).
Start with whatever irritates you most. Can’t find your spatula? Pegboard. Are spices a disaster? Stadium risers. Pots stacked ten deep? Sliding drawer organizers.
Small fixes compound. Three of these hacks eliminate 80% of your kitchen frustration. All of them together? You’ll forget you ever had a small kitchen.
FAQ
Q: Which clever kitchen storage solution works best for renters who can’t drill holes?
A: Adhesive solutions dominate: Command hooks for mugs and utensils (holds 5+ pounds per hook), tension rods under the sink for spray bottles, magnetic knife strips with industrial-strength adhesive backing, and over-door organizers that require zero installation. The magnetic spice jar setup on your fridge side panel is completely reversible and holds 24+ jars. If you can’t drill, prioritize vertical space using stackable organizers and Lazy Susans—both sit on existing shelves with no modifications required.
Q: How do I organize a kitchen with almost no counter space?
A: Move everything off the counter and into vertical storage. Install magnetic knife strips inside cabinet doors, hang a 3-tier wire basket inside a cabinet for produce, use the fridge side panel for magnetic spice tins, and add adhesive hooks to cabinet sides for mugs and utensils. The toe-kick drawer solution (if you own one) creates a dedicated space for baking sheets and cutting boards that otherwise pile on counters. Counter space isn’t storage—treat it like an empty workspace and relocate items to walls, doors, and vertical risers.
Q: What’s the cheapest way to add more storage without buying new cabinets?
A: Tension rods ($7) under the sink, adhesive hooks ($8 for a 6-pack), and a basic Lazy Susan ($12) give you three functional upgrades for under $30. The pegboard drawer divider system costs $23 and beats $40+ bamboo organizers. Magnetic knife strips run $15-25 and eliminate an entire drawer’s worth of clutter. The average cost across all solutions listed: $18 per project. Most kitchens see dramatic improvement with 3-4 solutions totaling under $75.
Q: How can I store spices so I can actually see and reach everything?
A: Stadium-style spice risers in a drawer beat every other method. The 4-tier acrylic riser system ($20) fits 30-38 jars in a single drawer with every label visible from above—no digging, no duplicates, no mystery jars expiring in the back. Alternative: magnetic spice tins on your fridge side panel if drawer space doesn’t exist. Skip turntables and tiered cabinet shelves unless you enjoy playing spice Jenga every time you cook.
Q: What storage hacks work specifically for small apartment kitchens?
A: Horizontal pegboard in drawers (rearrangeable dividers beat fixed organizers), over-door organizers on cabinet interiors (uses vertical space landlords won’t notice), magnetic solutions on fridge panels (instant storage without tools), and Lazy Susans on top shelves (makes unreachable spaces functional). Avoid permanent installations like toe-kick drawers or pull-down spice racks that require drilling into structures you don’t own. The most impactful combo: magnetic knife strip inside cabinet door + 3-tier hanging basket inside cabinet + tension rod under sink = three problems solved, zero security deposit lost.