

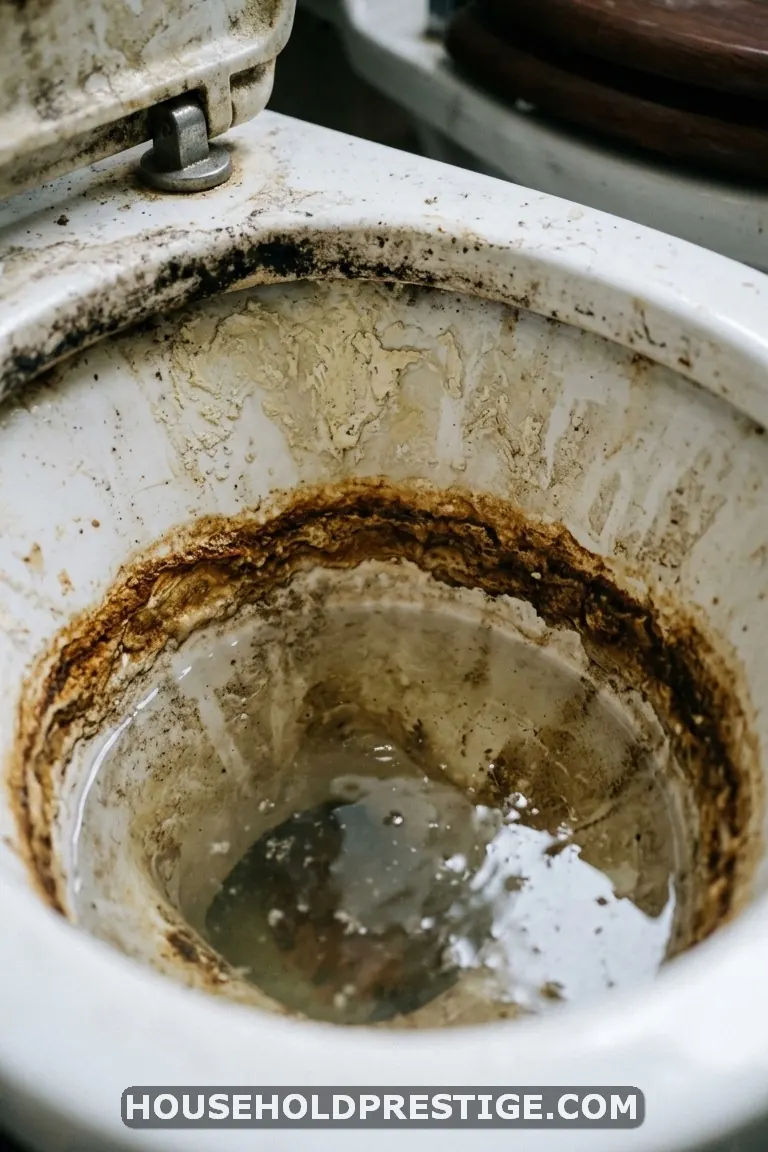
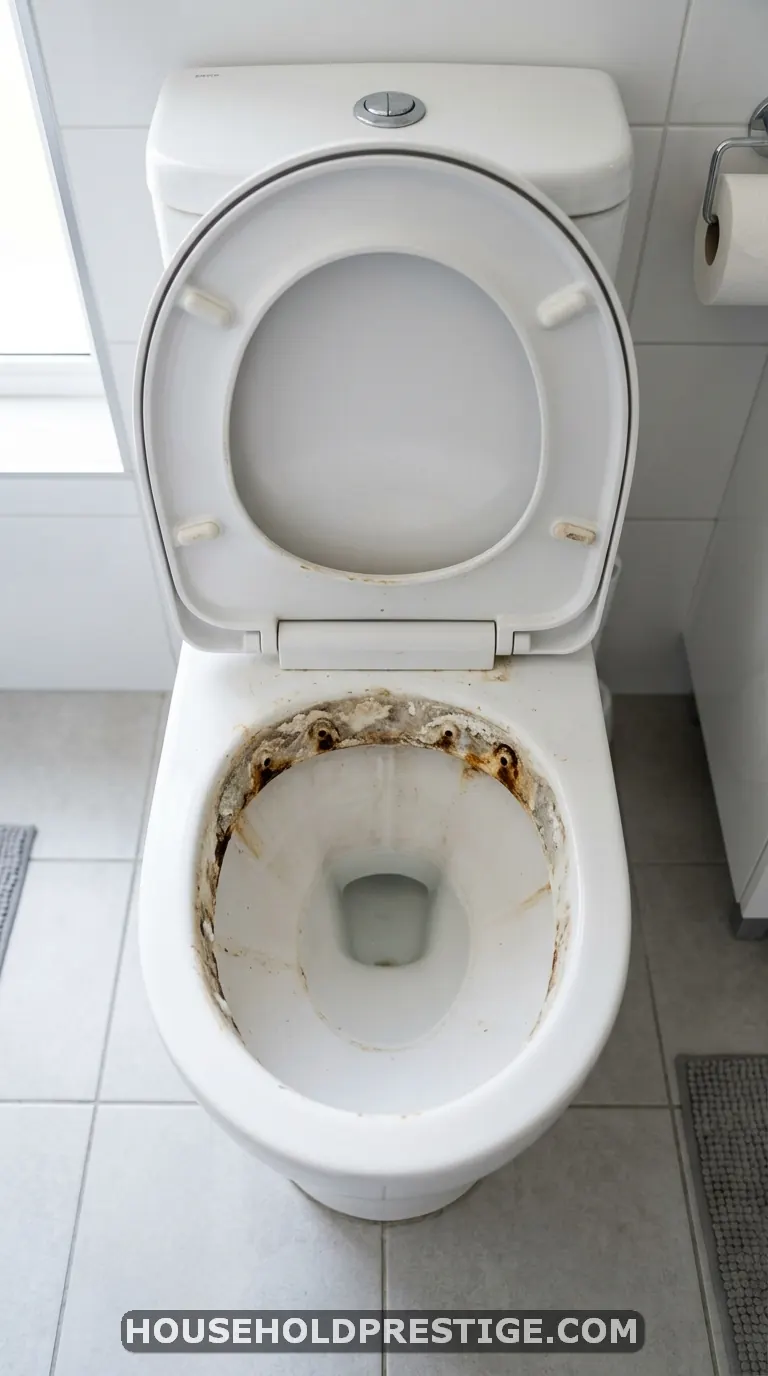
Let me be real with you for a second. That brown ring at the waterline? Those rust-colored streaks crawling down the porcelain? They don’t mean your bathroom is dirty. They mean your water is hard, your minerals are stubborn, and your toilet bowl cleaner from the grocery store was never built to handle it.
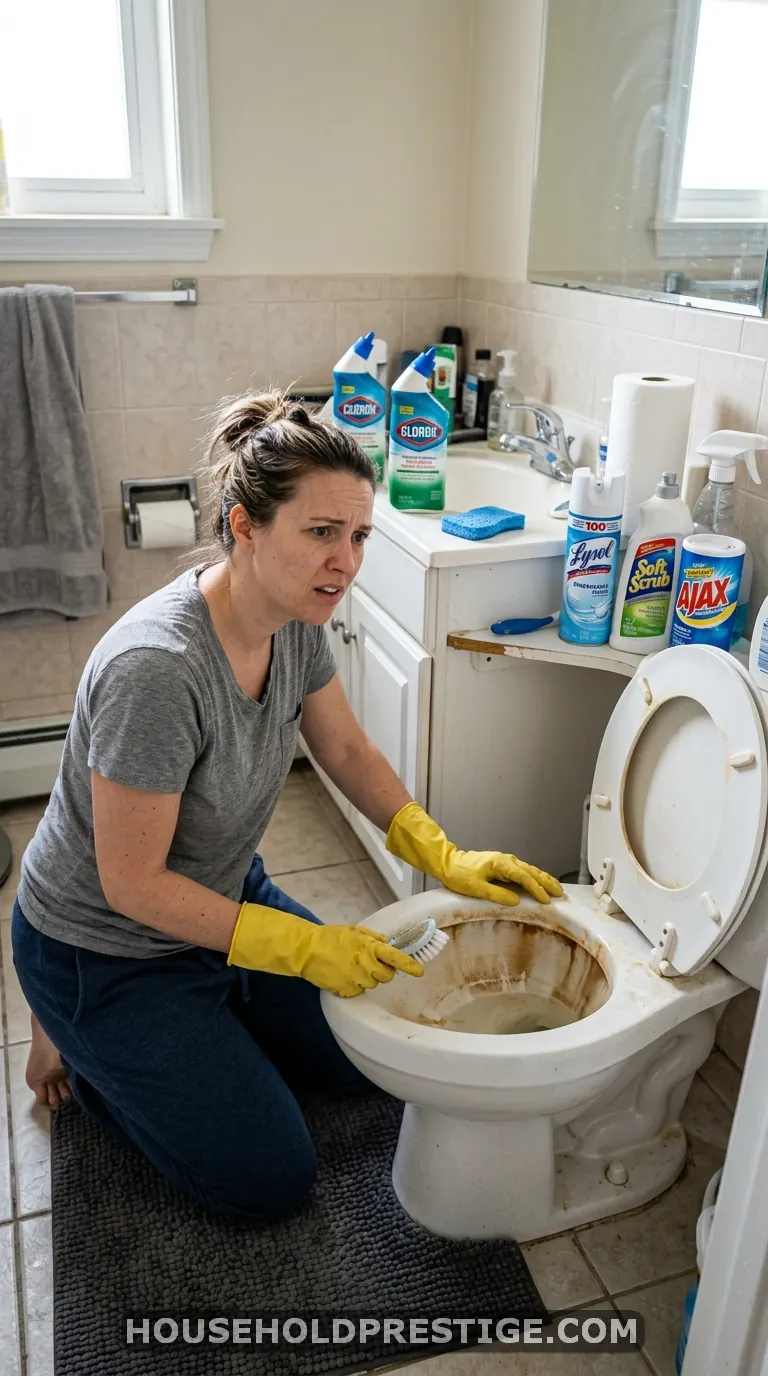
I spent an embarrassing amount of time scrubbing my toilet with a brush and blue gel before I figured out how to clean toilet bowl stains the right way. Spoiler: the brush was never the answer. The answer was chemistry — and it’s sitting in your pantry right now.
This guide walks you through every type of toilet bowl stain, what causes it, and the exact step-by-step methods to remove it without fumes that burn your eyes or products that cost $15 a bottle. By the end, you’ll know which household ingredients dissolve which stains, how long to let them sit, and how to stop stains from coming back.
What Causes Toilet Bowl Stains (And Why Scrubbing Alone Fails)
Before you grab anything from under the sink, you need to know what you’re dealing with. Different stains need different treatments. Using the wrong method wastes your time and can even set the stain deeper.
Hard water stains look white, chalky, or light brown. They form when minerals like calcium and magnesium in your water evaporate and leave crusty deposits behind. These are the most common toilet bowl stains in the U.S., and they’re especially bad if you’re on well water.
Rust stains are orange or reddish-brown. Old iron pipes are usually the culprit. The iron oxidizes when it hits water and air, then clings to porcelain like it owns the place.
Brown or black rings at the waterline? That’s often a mix of mineral buildup and mold or bacteria feeding on it. Humid bathrooms speed this up.
Yellow stains under the rim come from urine buildup and calcium deposits working together over time.
Here’s why scrubbing fails: these stains aren’t sitting on the surface. They’re bonded to the porcelain at a molecular level. You need an acid to dissolve that bond first. Then the stain lifts off on its own.
What You’ll Need
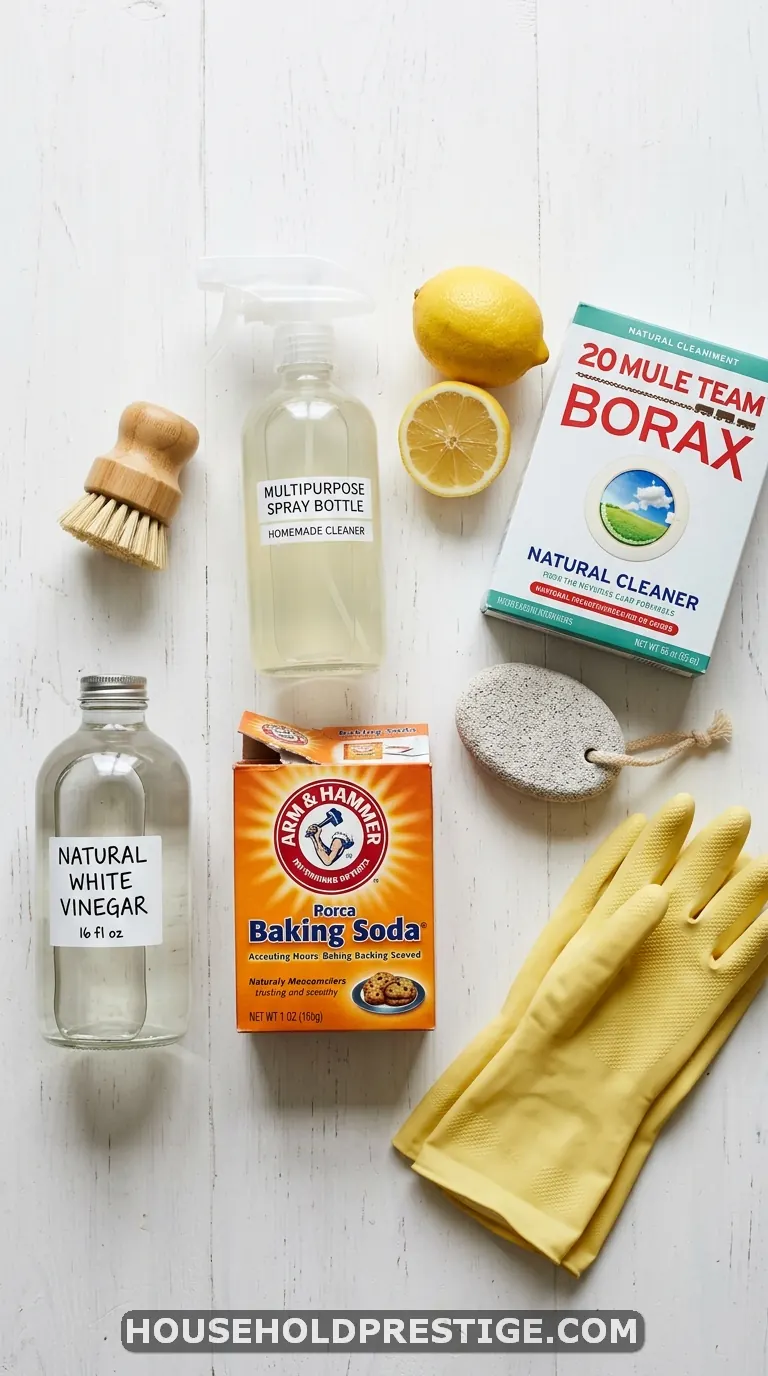
You don’t need specialty products. Most of these are already in your kitchen or cost under $5 at any grocery store.
For hard water and mineral stains: white distilled vinegar (at least 5% acidity), baking soda, borax (20 Mule Team brand, about $4.50 at Walmart)
For rust stains: citric acid powder or fresh lemons, Bar Keepers Friend powder ($2.50 at Target), cream of tartar
For brown/black rings: borax + vinegar combo, hydrogen peroxide (3% concentration), a pumice stone made for porcelain (Pumie brand, around $5 — do NOT use a regular pumice stone meant for feet, it will scratch)
Tools: rubber gloves, a toilet brush with stiff bristles, an old spray bottle, a measuring cup, and a timer on your phone
One thing you will not need: bleach. Bleach whitens the stain temporarily but doesn’t dissolve the mineral deposit underneath. The stain comes right back within a week. Save your bleach for disinfecting after the stain is gone.
Method 1: The Vinegar Soak (Best for Hard Water and Mineral Buildup)
This is the method I use most often. It handles about 80% of toilet bowl stains with zero scrubbing.
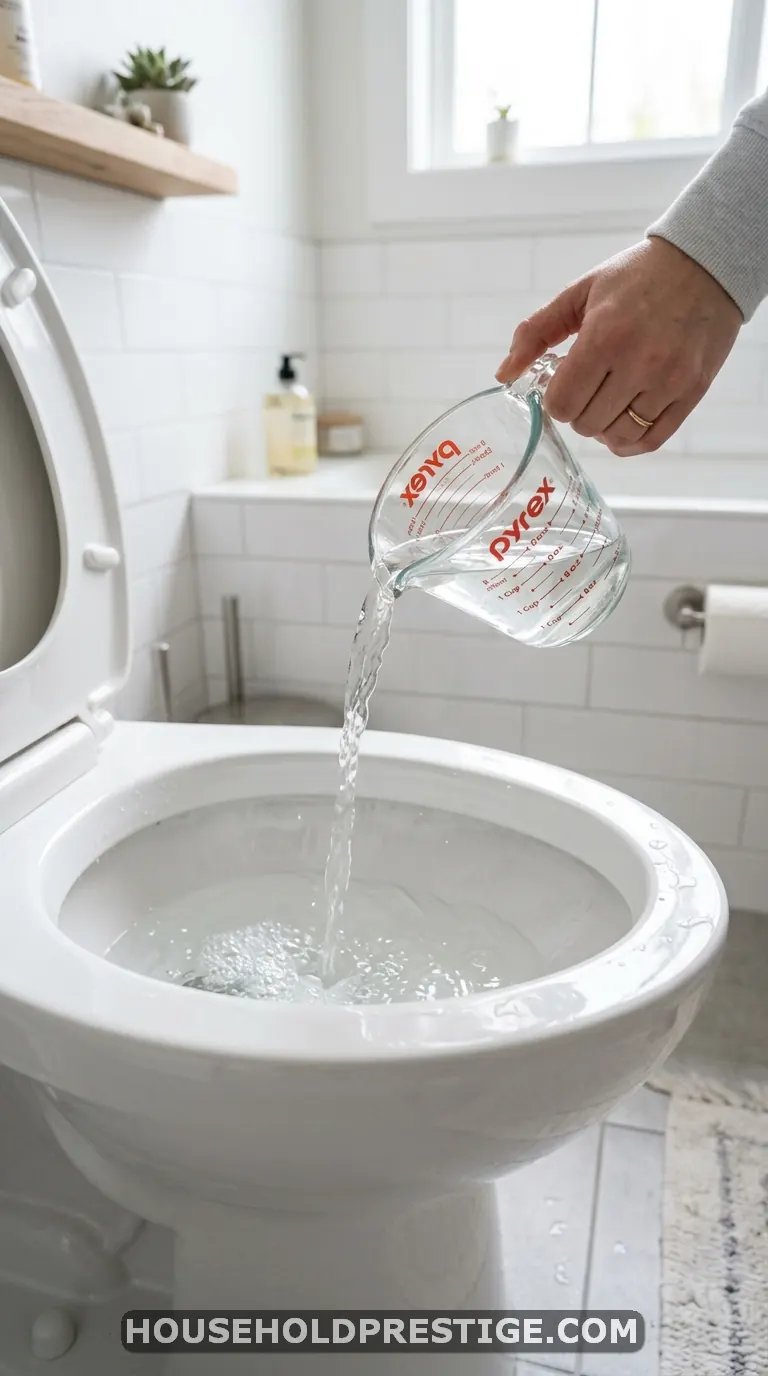
Step 1: Lower the Water Level
Flush the toilet, then immediately reach behind and turn the water supply valve clockwise until it stops. This prevents the tank from refilling. Now flush again. The bowl should be mostly empty, which means your cleaning solution makes direct contact with the stains instead of getting diluted.
If you can’t reach the valve, pour a large bucket of water quickly into the bowl. The force pushes water through the trap and lowers the level temporarily.
Step 2: Apply Vinegar Directly to the Stains
Pour 2-3 cups of undiluted white vinegar into the bowl. Make sure it coats the stained areas. For stains above the waterline, soak paper towels in vinegar and press them against the stains so they stick to the porcelain.
Step 3: Wait — This Is the Part People Skip
Set a timer for 3-4 hours. Overnight is better if the stains are severe. The acetic acid in vinegar needs time to break the calcium bonds. Fifteen minutes won’t do anything meaningful for stains that took months to build up.
I know waiting feels unproductive. It’s not. The vinegar is doing the work for you.
Step 4: Add Baking Soda and Scrub Lightly
Sprinkle 1 cup of baking soda into the bowl. It’ll fizz when it contacts the vinegar — that reaction helps lift loosened deposits. Now use your toilet brush. You should feel the difference immediately. The stains that felt cemented before will wipe away with light pressure.
Step 5: Turn the Water Back On and Flush
Turn the supply valve counterclockwise. Let the tank fill, then flush twice to rinse everything out.
What If the Stains Are Still There?
Repeat the soak. Stubborn hard water stains that have been building for years sometimes need 2-3 rounds. Each round weakens the deposit further. If three rounds don’t work, move to Method 2.
Method 2: The Borax Overnight Treatment (For Stubborn Brown Rings)
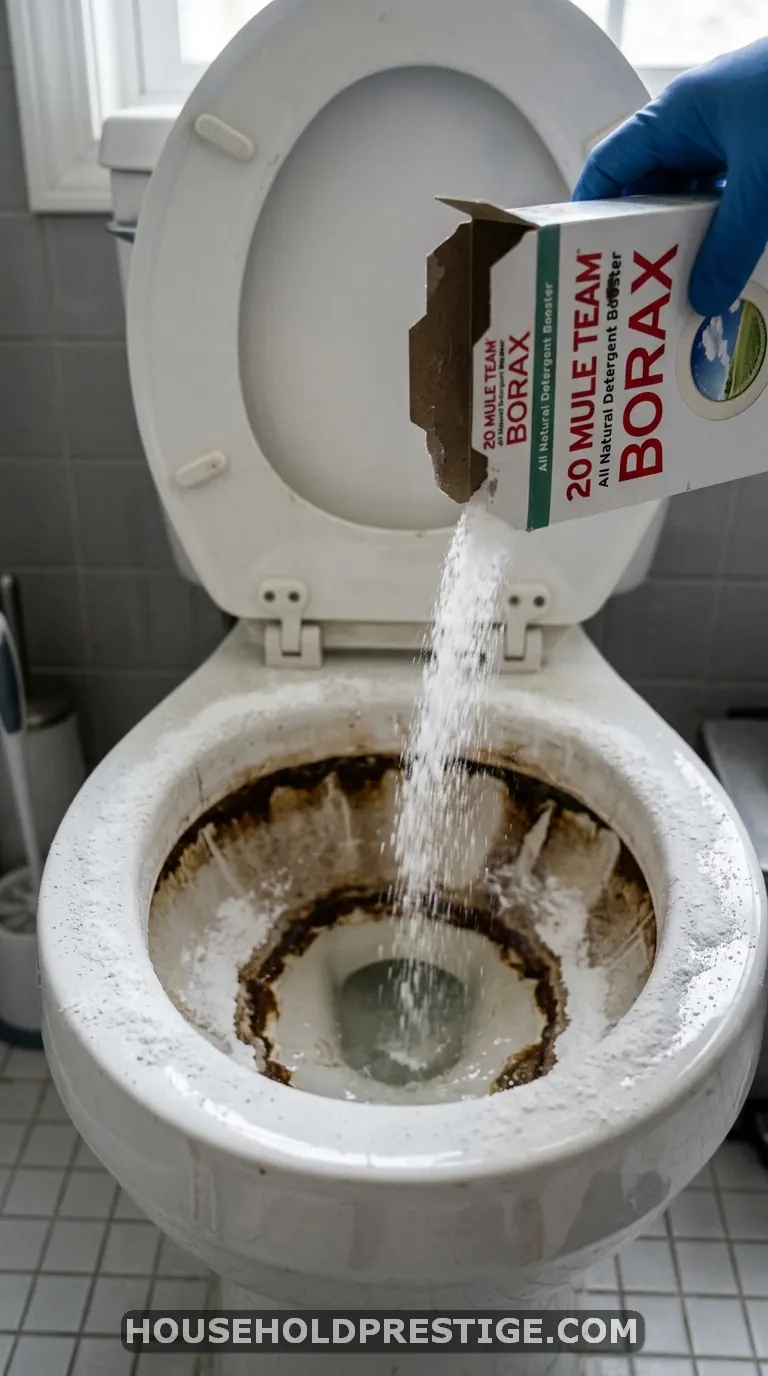
Borax is alkaline, which makes it different from the vinegar approach. It works particularly well on brown and black rings because it attacks both the mineral buildup and the organic matter (mold, bacteria) growing on it.
Step 1: Sprinkle 1/2 Cup of Borax Into the Bowl
Don’t flush first. You want the water level normal so the borax settles along the waterline where the ring is. Use a toilet brush to swish the borax around the bowl, paying extra attention to the ring.
Step 2: Add 1 Cup of Vinegar
Pour it slowly over the borax. The mixture will fizz and foam. Swish again with the brush to distribute it evenly.
Step 3: Leave It Overnight
Close the lid. Tell your household to use another bathroom. The mixture needs 8-12 hours to dissolve the ring. This is a patience game.
Step 4: Scrub and Flush in the Morning
The ring should come off with moderate brush pressure. Flush twice.
Pro Move
For the worst brown rings, make a paste with borax and lemon juice instead of vinegar. Apply the paste directly to the ring with a gloved hand, pressing it into the porcelain. The citric acid plus borax is a stronger combination than vinegar plus borax because citric acid has a lower pH.
Method 3: Citric Acid for Rust Stains
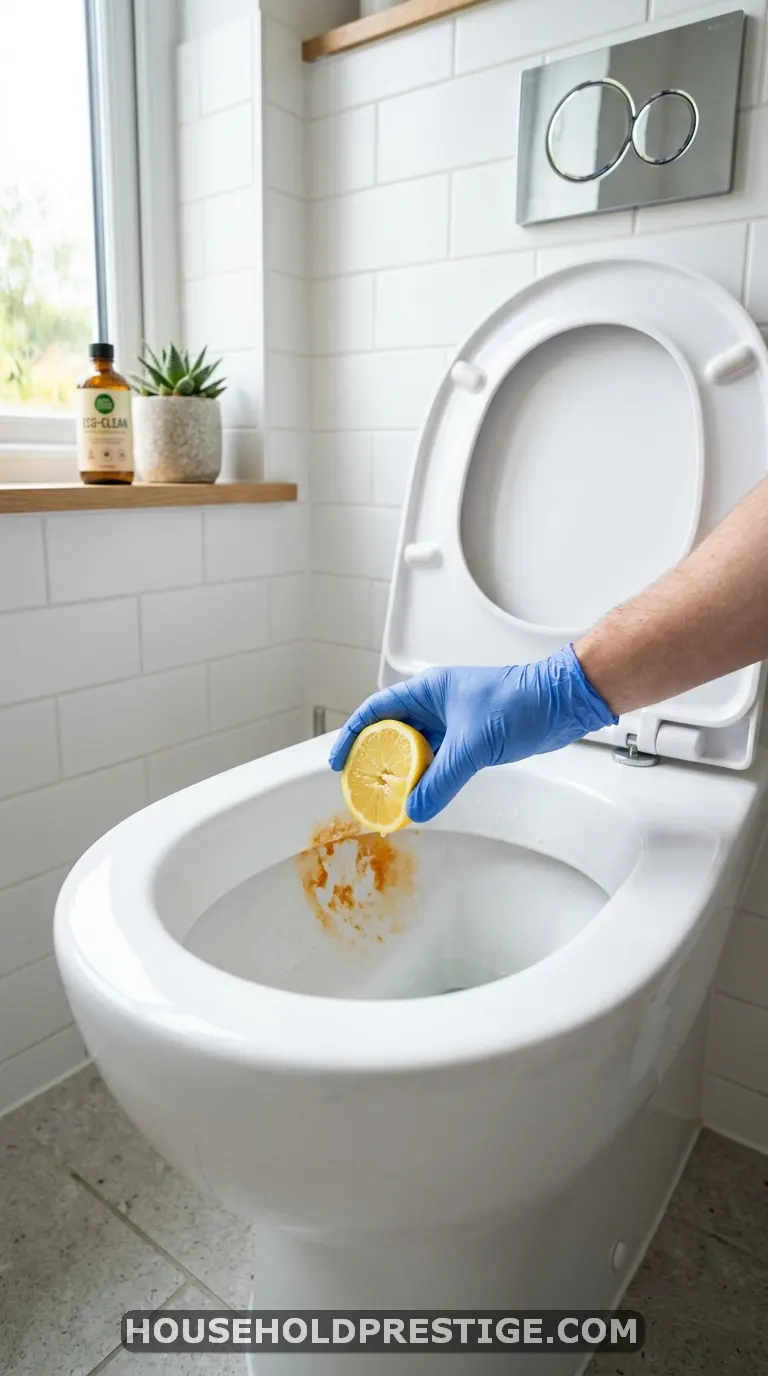
Rust stains don’t respond well to vinegar alone. You need citric acid, which is stronger and specifically bonds to iron oxide molecules.
Step 1: Make a Citric Acid Solution
Mix 3 tablespoons of citric acid powder (available at grocery stores near the canning supplies, about $4 for a 7.5 oz bag) with 1 cup of warm water. Stir until dissolved.
If you don’t have citric acid powder, squeeze 4-5 fresh lemons into a bowl. Bottled lemon juice works too, but fresh is more potent.
Step 2: Lower the Water and Apply
Use the valve trick from Method 1 to lower the water level. Pour or spray the citric acid solution directly onto the rust stains. For stains under the rim, use a spray bottle to get full coverage.
Step 3: Wait 1-2 Hours
Citric acid works faster than vinegar on rust. You’ll see the orange color start fading within 30 minutes. Give it the full 1-2 hours for complete removal.
Step 4: Scrub with Bar Keepers Friend for Remaining Traces
If any rust shadow remains, sprinkle Bar Keepers Friend powder on a damp toilet brush and scrub the area. Bar Keepers Friend contains oxalic acid, which is the single most effective compound against iron oxide stains. This one-two punch — citric acid soak followed by oxalic acid scrub — handles rust stains that nothing else can touch.
Flush twice when done.
Method 4: The Pumice Stone Technique (For Stains That Won’t Budge)
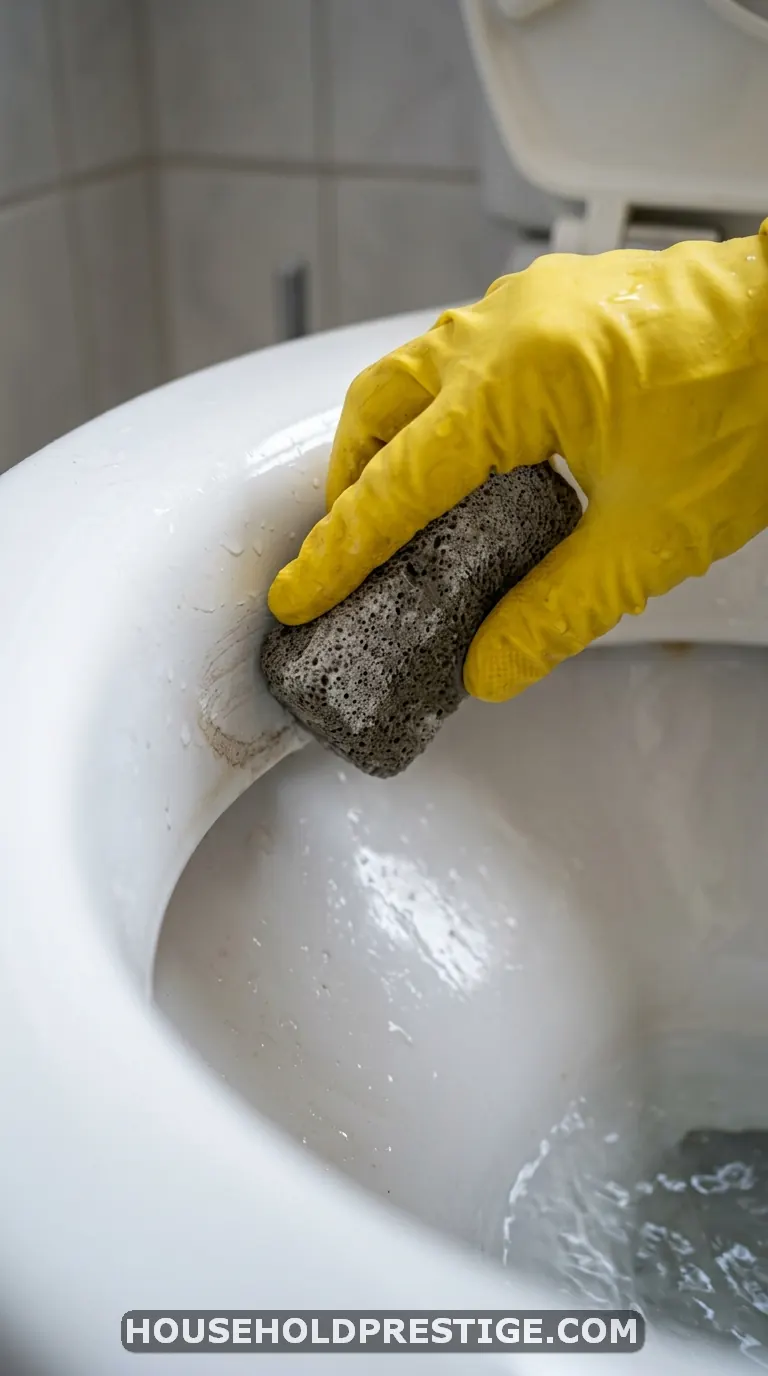
This is your last resort for stains that have survived every chemical approach. A pumice stone physically grinds away the deposit without scratching porcelain — but only if you do it correctly.
What You Need to Know First
Use ONLY a pumice stone rated for porcelain (Pumie Scouring Stick is the standard, about $5 at hardware stores). Regular pumice stones and those gray grill-cleaning bricks are too abrasive. They will scratch your toilet. And once porcelain is scratched, stains accumulate faster in those grooves permanently.
Step 1: Soak the Pumice Stone
Submerge the stone in warm water for 5 minutes before use. A dry pumice stone is too abrasive. The water acts as a lubricant between the stone and the porcelain.
Step 2: Scrub with Light, Even Pressure
Keep both the stone and the porcelain surface wet at all times. Use gentle, circular motions — you’re not trying to sand the stain off. The wet pumice is softer than porcelain but harder than mineral deposits, so it selectively removes the stain without touching the bowl surface.
Work in small sections. Rinse the stone frequently to clear the paste that builds up.
Step 3: Finish with Vinegar Rinse
After removing the deposits, pour 1 cup of vinegar into the bowl and swish with a brush. This dissolves any remaining microscopic mineral particles the pumice loosened. Flush.
How to Clean Under the Toilet Rim
The rim is where most people give up. You can’t see the stains easily, and a regular toilet brush barely reaches. But those rim jets get clogged with mineral deposits over time, which affects your flush power and creates a breeding ground for bacteria.
The Paper Towel + Vinegar Method
Soak paper towels in undiluted white vinegar. Wearing gloves, tuck them up under the rim so they press flat against the porcelain. Push them into every jet hole you can find (most toilets have 20-30 small holes under the rim).
Leave the paper towels for 2-3 hours. Remove them and scrub under the rim with an old toothbrush or a small brush designed for toilet rims (OXO makes one with an angled head for about $8).
For Severely Clogged Rim Jets
Straighten a wire coat hanger and poke it into each individual jet hole to break up the mineral clog. Follow with the vinegar paper towel treatment. You’ll notice a stronger flush immediately after clearing those jets — proof that the buildup was restricting water flow.
How to Stop Toilet Bowl Stains from Coming Back
Removing stains means nothing if they return in three weeks. Prevention takes 5 minutes per week and saves you from repeating these deep-clean methods.
Weekly Maintenance Routine
Every week, pour 1 cup of white vinegar into the bowl before bed. Let it sit overnight. Swish with a brush in the morning and flush. Total active effort: 45 seconds. This weekly acid bath prevents minerals from getting a foothold.
Monthly Deep Prevention
Once a month, sprinkle 1/2 cup borax into the bowl and let it sit for 30 minutes before scrubbing and flushing. This handles anything the weekly vinegar missed and keeps the rim jets clear.
Address the Root Cause
If stains come back aggressively no matter what you do, your water hardness level is the real problem. Buy a water hardness test strip kit ($8-12 on Amazon) and check your level. Anything above 7 grains per gallon (GPG) is considered hard water.
Options for hard water households include a whole-house water softener (ranges from $500 to $2,500 installed depending on capacity), an in-line toilet filter (about $30, attaches to the supply line behind the toilet), or a drop-in tank tablet made with citric acid that treats each flush. The tank tablet is the cheapest option at about $6 for a 3-month supply, but it only helps the toilet — it won’t fix hard water stains in your shower or sinks.
Troubleshooting: When Standard Methods Fail
“I’ve tried everything and the stain won’t budge”
If vinegar, borax, citric acid, and pumice all failed, the stain may have penetrated the porcelain glaze itself. This happens in toilets older than 15-20 years where the glaze has worn thin. At that point, no amount of cleaning removes the discoloration because it’s inside the material, not on top of it.
Your options: re-glaze the toilet (professional service, $200-350) or replace the bowl. A basic toilet from Home Depot or Lowe’s runs $100-200 and installs in about 2 hours. Sometimes replacing is cheaper than fighting a losing battle with a degraded glaze.
“The stain disappears but comes back within days”
This points to extremely hard water or corroding pipes actively depositing minerals. Test your water hardness. If it’s above 10 GPG, a water softener is the only long-term fix. Everything else is a band-aid.
“There’s a black ring I can’t identify”
Black stains that aren’t responding to borax might be manganese deposits rather than mold. Manganese is a mineral found in some water supplies that turns black when it oxidizes. The fix: use a product containing sodium hydrosulfite (sold as “Iron Out” at most hardware stores, around $7). Follow the label directions. Regular vinegar and borax won’t touch manganese.
What NOT to Use on Toilet Bowl Stains
A quick word on products and methods that waste your money or damage your toilet.
Bleach — whitens the stain temporarily but doesn’t dissolve mineral deposits. The stain returns within a week. Bleach also damages the rubber flapper inside your tank over time, which leads to a running toilet.
Abrasive powder cleansers (Comet, Ajax) — contain silica that scratches porcelain. Each scratch creates a groove where future stains build up faster. You’re making the problem worse.
Coca-Cola — yes, it contains phosphoric acid. No, leaving it in your toilet bowl overnight doesn’t work well enough to justify the sticky mess. The concentration is too low compared to dedicated acids like citric or acetic acid.
Denture tablets — mild cleaning tablets marketed as a toilet hack on social media. They contain sodium bicarbonate and citric acid, but in concentrations too weak for established stains. They’re fine for light maintenance on an already-clean toilet. That’s about it.
Wrapping Up
Toilet bowl stains are a chemistry problem, not an elbow grease problem. Match the right acid to the right stain type — vinegar for hard water, citric acid for rust, borax for brown rings — and let time do the heavy lifting.
The weekly vinegar pour is the single best habit you can build. Five minutes of prevention beats an hour of scrubbing every time.
Your toilet bowl doesn’t need expensive products or brute force. It needs the right approach and a little patience. You’ve got both now.
FAQ
Can I mix vinegar and baking soda at the same time to clean toilet bowl stains?
You can, but the fizzing reaction is mostly for show. The acid (vinegar) and base (baking soda) partially neutralize each other, which reduces cleaning power. The better approach is to soak with vinegar first for several hours, then add baking soda after to help lift the loosened deposits.
How long does vinegar need to sit in a toilet bowl to remove hard water stains?
For mild stains, 1-2 hours makes a noticeable difference. For heavy mineral buildup that’s been accumulating for months or years, you need a minimum of 4 hours — overnight is ideal. Shorter soak times are the number one reason people think vinegar doesn’t work on toilet stains.
Is it safe to use a pumice stone on a porcelain toilet bowl?
Yes, as long as you use a pumice stone specifically made for porcelain cleaning (like the Pumie brand scouring stick) and keep both the stone and porcelain wet during use. Wet pumice is softer than porcelain but harder than mineral deposits. Dry pumice or regular foot-care pumice stones can scratch the glaze.
Why do toilet bowl stains keep coming back after cleaning?
Recurring stains almost always point to hard water. Your water supply carries dissolved minerals that deposit fresh buildup with every flush. Testing your water hardness with a strip kit tells you how aggressive the problem is. A weekly vinegar soak prevents most recurrence, but water above 10 GPG hardness may need a softener for a permanent fix.
Does WD-40 remove toilet bowl stains?
WD-40 can loosen some surface-level stains because it contains petroleum-based solvents that break the bond between the deposit and porcelain. It doesn’t dissolve the mineral itself though. It’s a short-term cosmetic fix, not a real solution. It also leaves an oily residue in your bowl that attracts dirt. Stick with acid-based methods for lasting results.