

You know that sound. The slow gurgle. The water pooling around your ankles in the shower or sitting in the kitchen basin long after you pulled the plug. A clogged sink never picks a convenient time.
And here’s what most people do wrong — they reach straight for a bottle of chemical drain cleaner. Those products work fast, sure. But they also eat through older pipes, damage garbage disposals, and leave toxic residue you don’t want near your dishes or your skin. Knowing how to unclog a sink without those harsh chemicals saves your plumbing and your wallet.
This guide walks you through every reliable method, from the gentlest fix to the one that handles the stubborn, been-sitting-for-weeks kind of clog. You’ll know exactly which approach fits your situation, what tools to grab, and how long each one takes. By the end, you’ll handle most drain problems in under 30 minutes — without ever dialing a plumber.
What’s Causing the Clog (And Why It Matters)
Before you start pouring anything down that drain, take 10 seconds to figure out what you’re dealing with. The fix depends entirely on the type of clog.
Kitchen sinks clog from grease, food particles, and coffee grounds. That bacon grease you rinsed off last Tuesday? It solidified about six inches into your pipe and has been collecting debris ever since. Starchy foods like pasta and rice expand when wet, turning into a sticky paste inside the drain.
Bathroom sinks clog from hair, soap residue, and toothpaste buildup. Hair wraps around the drain stopper mechanism and creates a net that catches everything else flowing through. Over months, this forms a dense plug that water can barely squeeze past.
Why does the cause matter? Grease clogs respond well to hot water and dish soap methods. Hair clogs need physical removal first — no amount of baking soda dissolves a wad of hair. Matching your method to your clog saves time and frustration.
What You’ll Need Before You Start
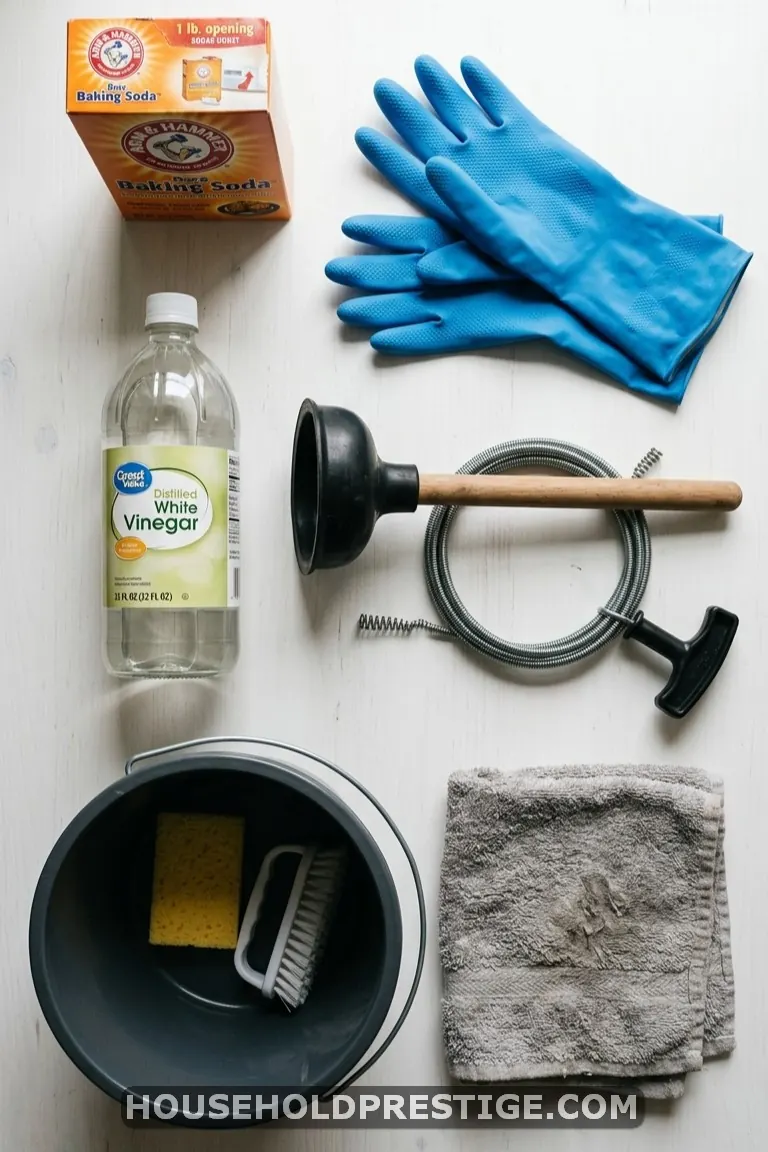
Gather your supplies before getting started. Nothing is worse than having a disassembled P-trap and realizing the wrench is in the garage.
For natural methods: Baking soda (½ cup), white vinegar (½ cup), boiling water, dish soap (a good squirt of Dawn works well), table salt. Total cost: under $3 with pantry staples.
For physical removal: Rubber gloves, a flat-head screwdriver or butter knife (to pop out the drain stopper), needle-nose pliers, flashlight, old towel.
For stubborn clogs: A sink plunger (flat-bottomed, not the toilet kind — that’s the flanged one), a drain snake or Zip-It tool ($3-5 at any hardware store), bucket, adjustable pliers, or a pipe wrench.
Got everything? Good. Let’s work through these methods from simplest to most involved.
Method 1: The Boiling Water Flush
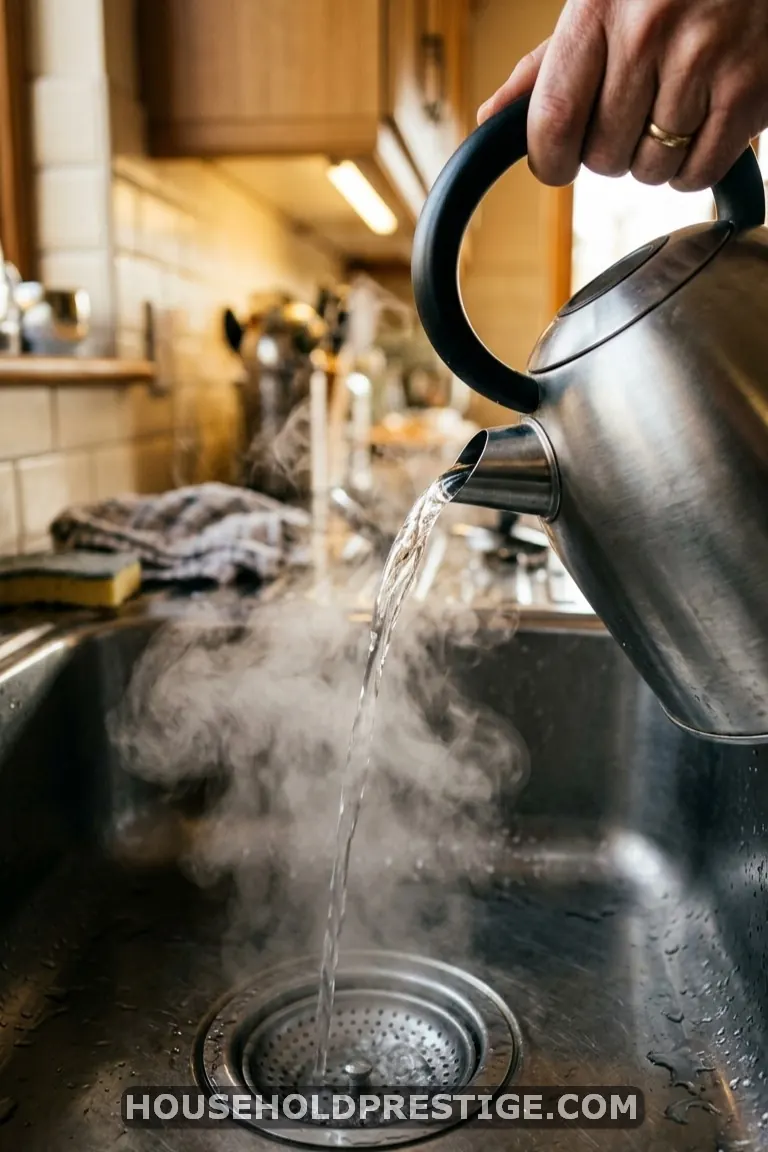
Start here. This fixes more clogs than people expect.
Boil a full kettle — roughly 6-8 cups of water. Remove any standing water from the sink first if you can. Pour the boiling water directly into the drain in two or three stages, pausing 3-5 seconds between each pour. The pauses let the heat work on the buildup before the next wave pushes debris further down.
Time required: 5 minutes. Best for: Grease-based kitchen clogs and mild soap buildup. Skip this if: You have PVC pipes (boiling water can soften the joints) or the sink has been fully blocked for more than a day.
For PVC pipes, use very hot tap water instead — still effective, just gentler on the connections.
If the water drains noticeably faster after this, repeat one more time to clear the remaining residue. Done in under 10 minutes, zero cost.
Method 2: Baking Soda and Vinegar

This is the method that built the natural cleaning internet, and for good reason. It handles moderate clogs with two ingredients you already own.
Step-by-Step Process
- Remove standing water. Scoop or sponge out as much as possible. The mixture needs direct contact with the clog to work.
- Pour ½ cup baking soda down the drain. Use a funnel or spoon to push it past the drain opening. You want it sitting on top of the blockage.
- Wait 5 minutes. Let the baking soda settle and absorb some of the grime.
- Pour ½ cup white vinegar on top. The fizzing reaction breaks apart soap scum, grease, and light organic buildup. Cover the drain with a wet cloth or plug to force the fizz downward instead of up.
- Wait 15-30 minutes. Longer is better for older clogs.
- Flush with boiling water (or very hot water for PVC pipes).
Why This Works
The sodium bicarbonate creates an alkaline environment that dissolves grease. Adding acetic acid (vinegar) produces carbon dioxide gas — those bubbles physically dislodge debris clinging to pipe walls. The final hot water flush carries everything away.
Time required: 20-35 minutes (mostly waiting). Cost: Under $1. Best for: Moderate clogs from grease, soap, and light organic matter.
For tougher clogs, swap the vinegar for ½ cup of salt mixed with the baking soda. Let the combination sit overnight, then flush with boiling water in the morning. Salt acts as a mild abrasive inside the pipe.
Method 3: The Dish Soap and Hot Water Technique
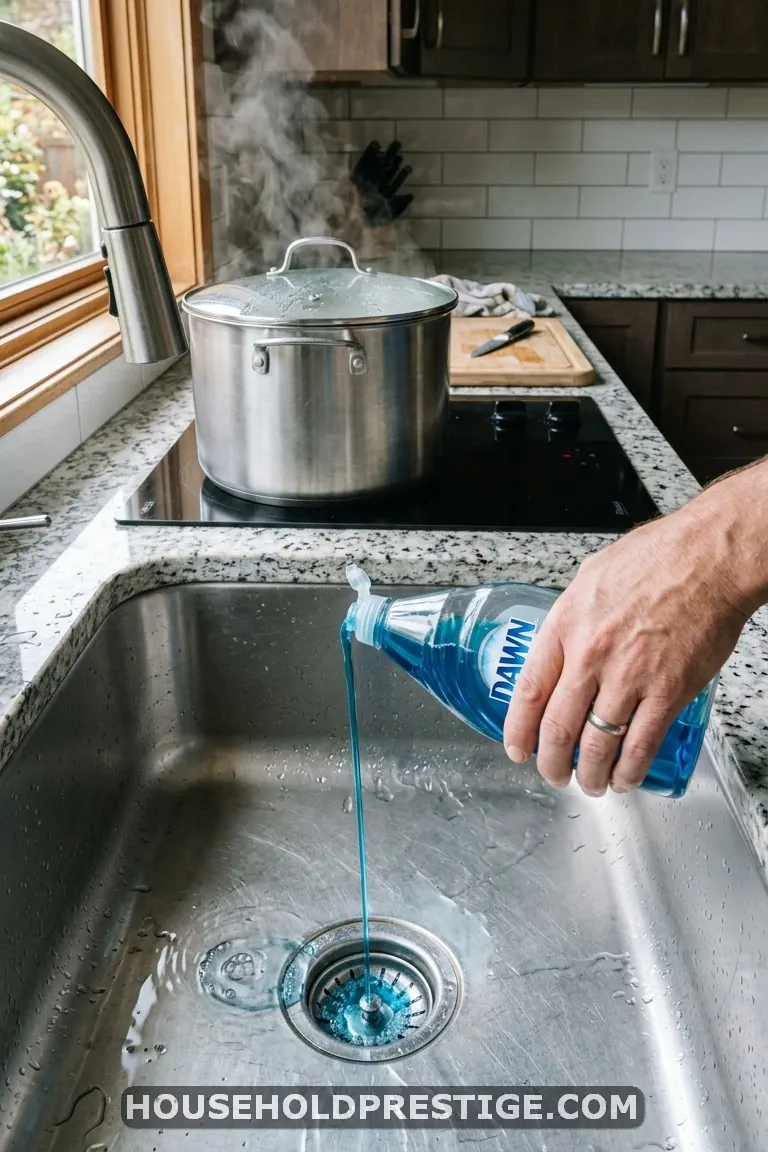
Underrated. If your kitchen sink drains slowly but hasn’t fully stopped, this one-minute method often clears it.
Squirt a generous tablespoon of liquid dish soap — Dawn Ultra is the go-to for grease — directly into the drain. Follow with a slow, steady stream of very hot water from the tap for 2-3 minutes.
Dish soap is a surfactant. It breaks the surface tension of grease and allows hot water to wash it through instead of just pushing it further down the pipe. The slow continuous flow creates sustained pressure without overwhelming the clog.
This method also works as weekly prevention. One squirt of soap and 60 seconds of hot water every Sunday keeps grease from accumulating.
Method 4: Physical Removal (When Natural Methods Aren’t Enough)
If the water still won’t budge after trying the methods above, the clog is mechanical — meaning something solid is physically blocking the pipe. Time to get your hands in there.
Clearing the Drain Stopper
Most bathroom sinks have a pop-up stopper that collects hair and gunk over time. Removing it takes about 30 seconds.
Twist the stopper counterclockwise and lift it straight up. Some models have a horizontal pivot rod underneath the sink that you’ll need to unscrew first (look for a small nut on the back of the drainpipe, right behind the sink).
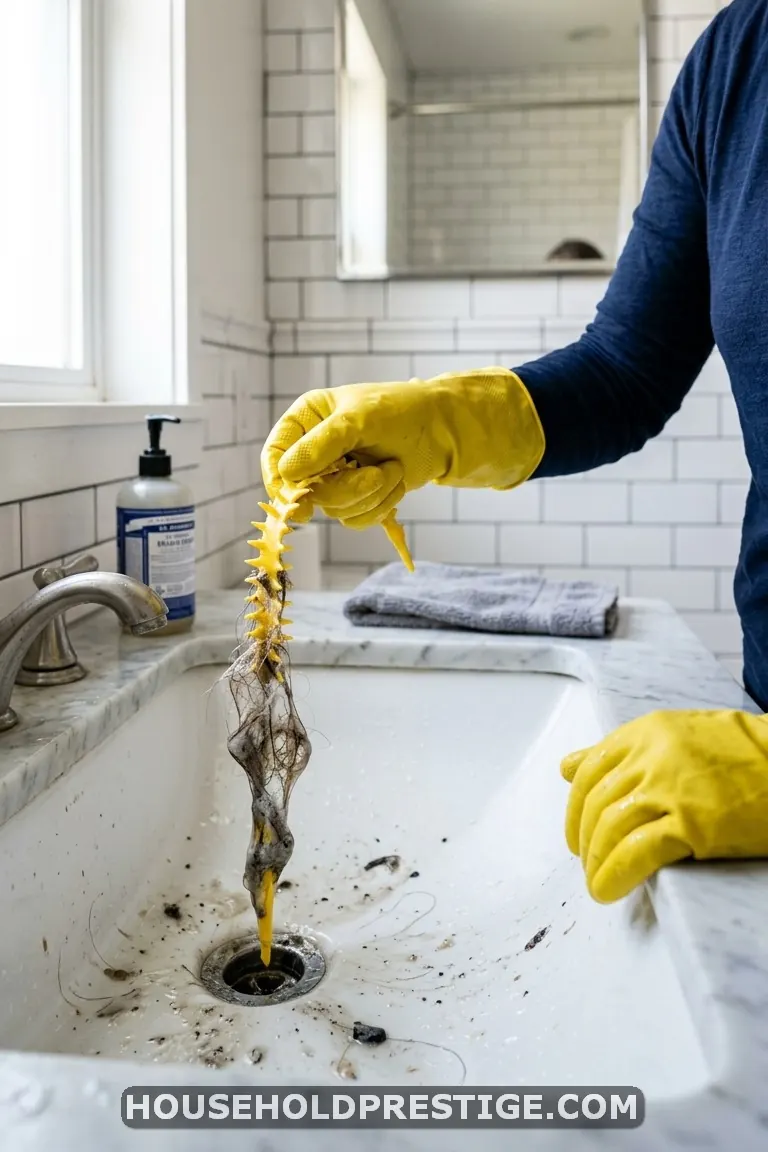
Once the stopper is out, you’ll probably see the problem immediately. A dense clump of hair, soap residue, and who-knows-what wrapped around the stopper base. Pull it off with gloved fingers or pliers. Rinse the stopper with hot water and dish soap before reinstalling.
Using a Drain Snake
A drain snake (also called a drain auger) reaches deeper than your fingers ever could. The Zip-It tool is $3 at Home Depot and handles most residential clogs. For something reusable, the FlexiSnake Drain Millipede ($7-10) has micro-hooks that grab hair effectively.
Feed the snake slowly into the drain. When you feel resistance, rotate the handle clockwise while pushing gently forward. The hook or coil grabs the clog material. Pull it back out slowly — and brace yourself, because what comes out is never pretty.
Run hot water for 2 minutes after snaking to flush loosened debris.
Time required: 10-20 minutes. Best for: Hair clogs, solid blockages, clogs that don’t respond to liquid methods.
Method 5: The Plunger Approach
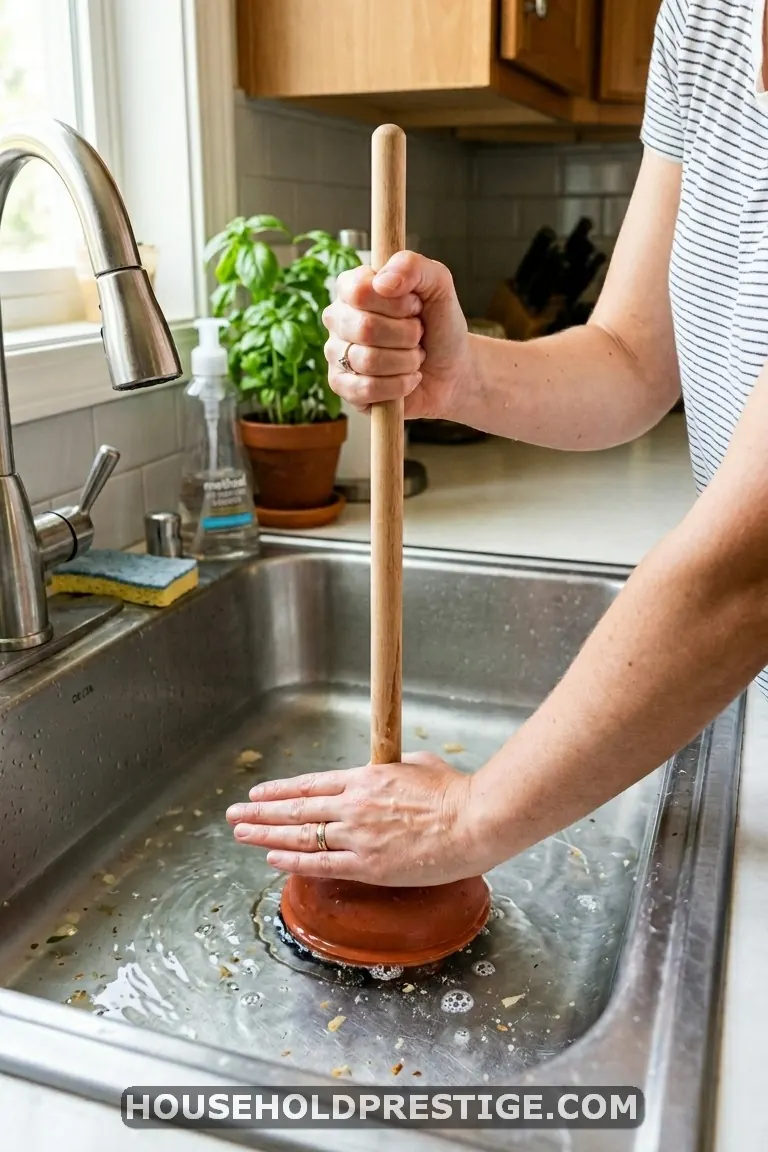
Most people own a plunger but use the wrong one on sinks — or use it incorrectly.
A sink plunger has a flat rubber cup. A toilet plunger has a flanged bottom that folds out. Using a toilet plunger on a sink wastes your effort because it can’t create a proper seal on the flat basin surface.
How to Plunge a Sink Correctly
- Add 2-3 inches of water to the sink. Water transmits force better than air. Without it, you’re just pushing air around.
- Block the overflow hole. That small opening near the top of your sink connects to the same drain. Stuff a wet rag in it, or have someone hold their hand over it. Without this step, every plunge just pushes air out the overflow instead of down the pipe.
- Place the plunger flat over the drain and press down to create a full seal.
- Pump 15-20 times with firm, consistent strokes. The pull-up motion matters as much as the push-down. You’re creating alternating pressure and suction that loosens the clog from both directions.
- Break the seal on the last upstroke. If you hear a whoosh and the water drains, you’ve cleared it. If not, repeat 2-3 more cycles.
For double kitchen sinks, clamp the second drain closed with a wet towel before plunging. Otherwise, pressure escapes through the other basin.
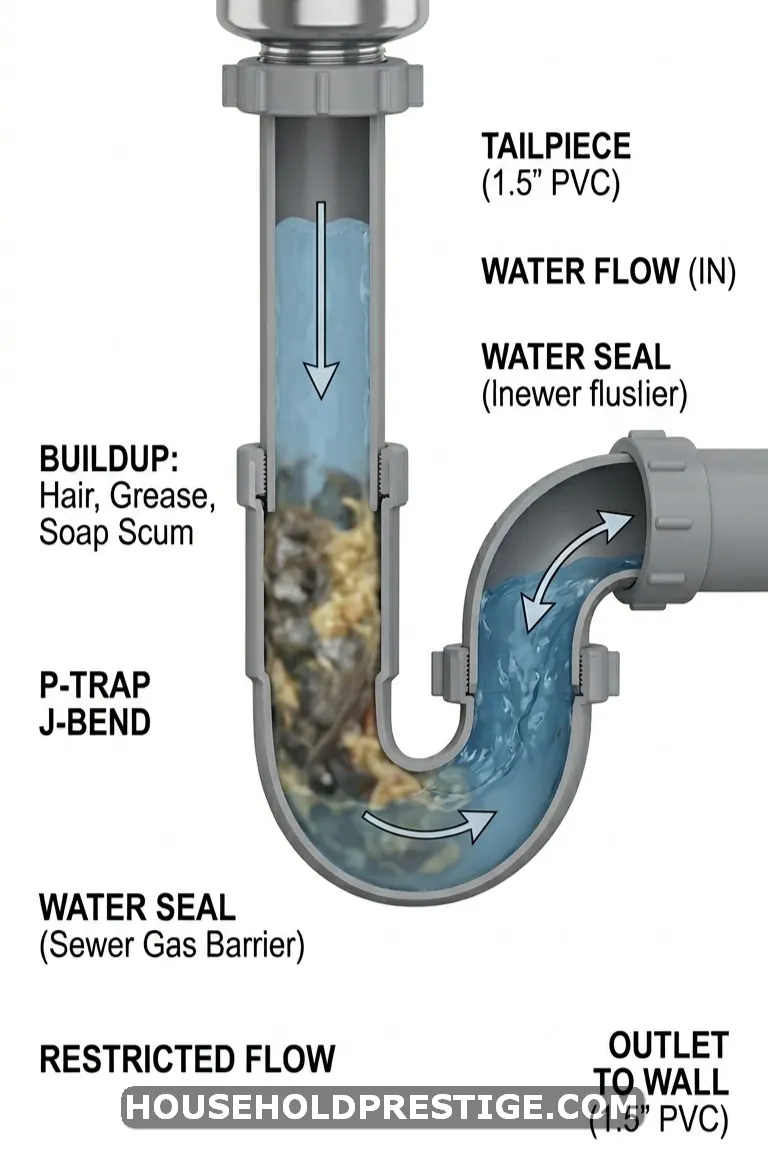
Method 6: Cleaning the P-Trap
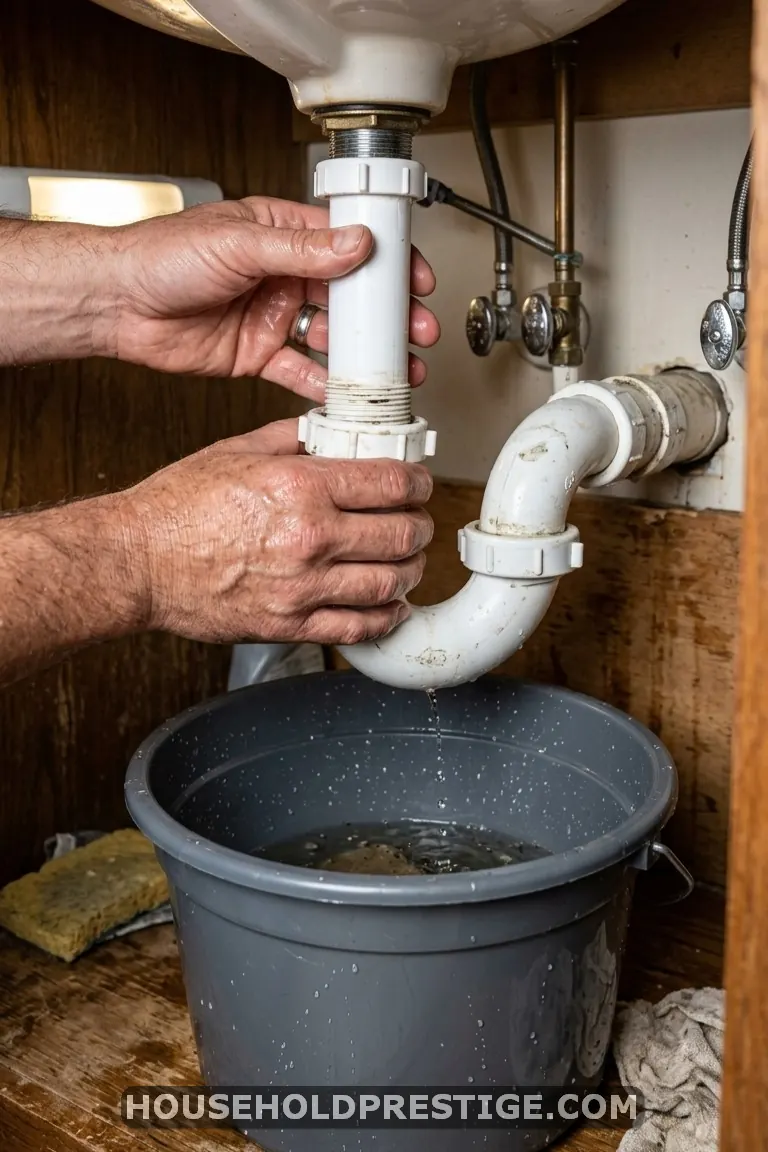
The P-trap is that curved pipe section under your sink shaped like a “U” or “P.” Gravity keeps water sitting in the curve, which blocks sewer gases from coming up through your drain. It also traps debris — and that’s often where stubborn clogs live.
This method sounds intimidating, but it’s a 15-minute job. No plumbing experience needed.
Step-by-Step P-Trap Removal
- Place a bucket directly under the P-trap to catch the water sitting inside.
- Loosen the two slip nuts on either end of the curved section. These are the large threaded rings. Most turn by hand. If they’re tight, use adjustable pliers with a cloth wrapped around the nut to avoid scratching.
- Slide the P-trap down and away. Water, sludge, and clog material will pour into the bucket. Not pleasant. Expect it.
- Clean the trap thoroughly with an old toothbrush, hot water, and dish soap. Check the pipe opening going into the wall (the stub-out) and the vertical piece coming down from the sink (the tailpiece) for additional buildup.
- Reinstall by hand-tightening the slip nuts. Snug plus a quarter turn with pliers is enough. Over-tightening cracks PVC fittings.
- Run water to check for leaks at both connections. Tighten slightly if you see drips.
Time required: 15-20 minutes. Best for: Clogs that survive every other method, mystery blockages, foul drain odors that won’t go away.
When to Call a Plumber (Know Your Limits)
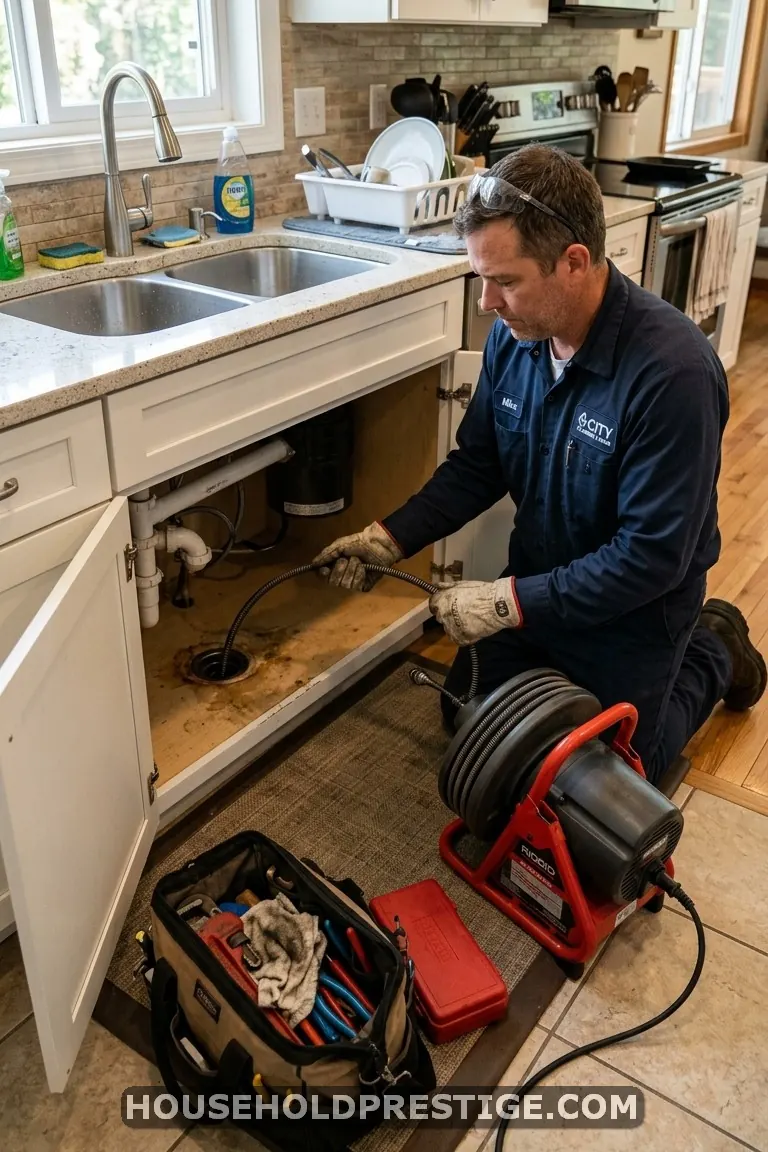
Not every clog is a DIY job. Call a professional if you notice any of these situations.
Multiple drains clogging at once. When your kitchen sink, bathroom sink, and shower all drain slowly at the same time, the blockage is in your main sewer line — not individual fixture drains. A motorized auger or hydro-jet is the fix, and those require professional equipment.
Water backs up into other fixtures. Running the kitchen sink fills the bathtub? That’s a main line problem. Don’t try to force it through with a plunger — you risk sewage backup.
Persistent foul smell after clearing the clog. If you’ve cleaned the P-trap and snaked the drain but the odor persists, there may be a cracked pipe or venting issue that needs camera inspection.
Recurring clogs in the same drain every few weeks despite proper maintenance. Tree roots infiltrating underground pipes cause this pattern. A plumber with a camera scope can diagnose it in minutes.
Average cost for a plumber to clear a single clogged drain: $150-$300. Main line clogs run $200-$600 depending on severity and access. Compared to the cost of water damage from a burst pipe or sewage backup ($3,000-$10,000+), calling early saves money.
How to Keep Your Sink From Clogging Again
Fixing a clog is satisfying. Preventing the next one is smarter.
Install a mesh drain strainer in every sink. A $2 silicone strainer catches hair, food scraps, and debris before they enter the pipe. Clean it after every use. This single habit prevents 80% of household drain clogs.
Never pour grease down the kitchen sink. Pour cooled grease into an old can or jar, let it solidify, then throw it in the trash. Wipe greasy pans with a paper towel before washing. Even small amounts of grease accumulate inside pipes over months.
Run hot water for 30 seconds after every use. This flushes soap residue and small particles through the pipe before they settle. Add a squirt of dish soap once a week for extra protection against grease buildup.
Monthly maintenance flush. Pour ½ cup baking soda followed by ½ cup vinegar down each drain. Wait 15 minutes, then flush with hot water. Two minutes of prevention per drain per month. That’s it.
Skip the garbage disposal for fibrous foods. Celery strings, onion skins, artichoke leaves, and corn husks wrap around disposal blades and create blockages downstream. Compost them or throw them in the trash instead.
Wrap-Up
A clogged sink is not a crisis. It’s a 30-minute problem with a $3 solution — as long as you match the right method to the right clog. Start with boiling water. Move to baking soda and vinegar. Go physical with a drain snake if those don’t work. And keep the P-trap cleaning in your back pocket for the worst-case scenarios.
The real win here is prevention. A mesh strainer and a weekly hot water flush keep your drains running clear for months at a time. Your future self — the one who doesn’t have a sink full of standing water at 7 AM on a Monday — will thank you.
Frequently Asked Questions
Can I use baking soda and vinegar to unclog a sink with standing water?
You can, but you need to remove most of the standing water first. The mixture needs direct contact with the clog to work. Scoop or sponge out the water until the drain opening is exposed, then pour the baking soda directly in. The vinegar fizz reaches the blockage more effectively when it isn’t diluted by a basin full of water.
How long does it take to unclog a sink without a plumber?
Most household clogs clear in 10-30 minutes using the methods in this guide. The boiling water method takes under 5 minutes. Baking soda and vinegar need 20-35 minutes of mostly passive wait time. Physical removal with a drain snake runs 10-20 minutes. Only P-trap cleaning pushes the timer past 15 minutes of hands-on work.
Is it safe to use boiling water on all sink types?
Boiling water is safe for metal pipes and porcelain sinks. If your home has PVC drain pipes (white or gray plastic — check under the sink), use very hot tap water instead. Sustained exposure to boiling temperatures can soften PVC joints and loosen connections over time. Hot tap water at 120-140°F still dissolves grease effectively without risking pipe damage.
Why does my sink keep clogging even after I clear it?
Recurring clogs usually mean one of three things: buildup deeper in the pipe that surface methods don’t reach, a partial blockage in the main line that slows drainage throughout the house, or a venting issue that prevents proper water flow. A drain snake reaching 15-25 feet can address deeper pipe buildup. If the problem persists monthly despite cleaning, a plumber with a camera scope can pinpoint the root cause.
What should I never put down my sink drain?
Grease and cooking oil top the list — they solidify inside pipes and trap everything else. Coffee grounds clump together and form dense blockages. Flour and starch expand when wet and create a paste. Eggshells don’t sharpen disposal blades (that’s a myth) — they break into gritty sand that accumulates in the P-trap. Rice and pasta swell even after cooking. And fibrous vegetables like celery and asparagus wrap around disposal blades and create downstream clogs.