

Your apartment has zero outdoor space. Your windows face north. You killed a succulent last month.
And yet – you keep scrolling past those lush indoor gardens on Pinterest, wondering if you’re somehow built differently than people who manage to keep cilantro alive past Tuesday.
Here’s what nobody mentions: most “indoor garden” content assumes you have south-facing windows, unlimited counter space, and the patience of a monastery gardener. Real indoor gardening? It’s about picking plants that want to survive your chaos.
These 18 indoor garden ideas work in actual apartments with actual limitations. Some take 10 minutes to set up. Others need a weekend and $40. All of them are designed for people who have better things to do than monitor soil moisture levels twice daily.
1. Windowsill Herb Trio (Basil, Mint, Parsley)
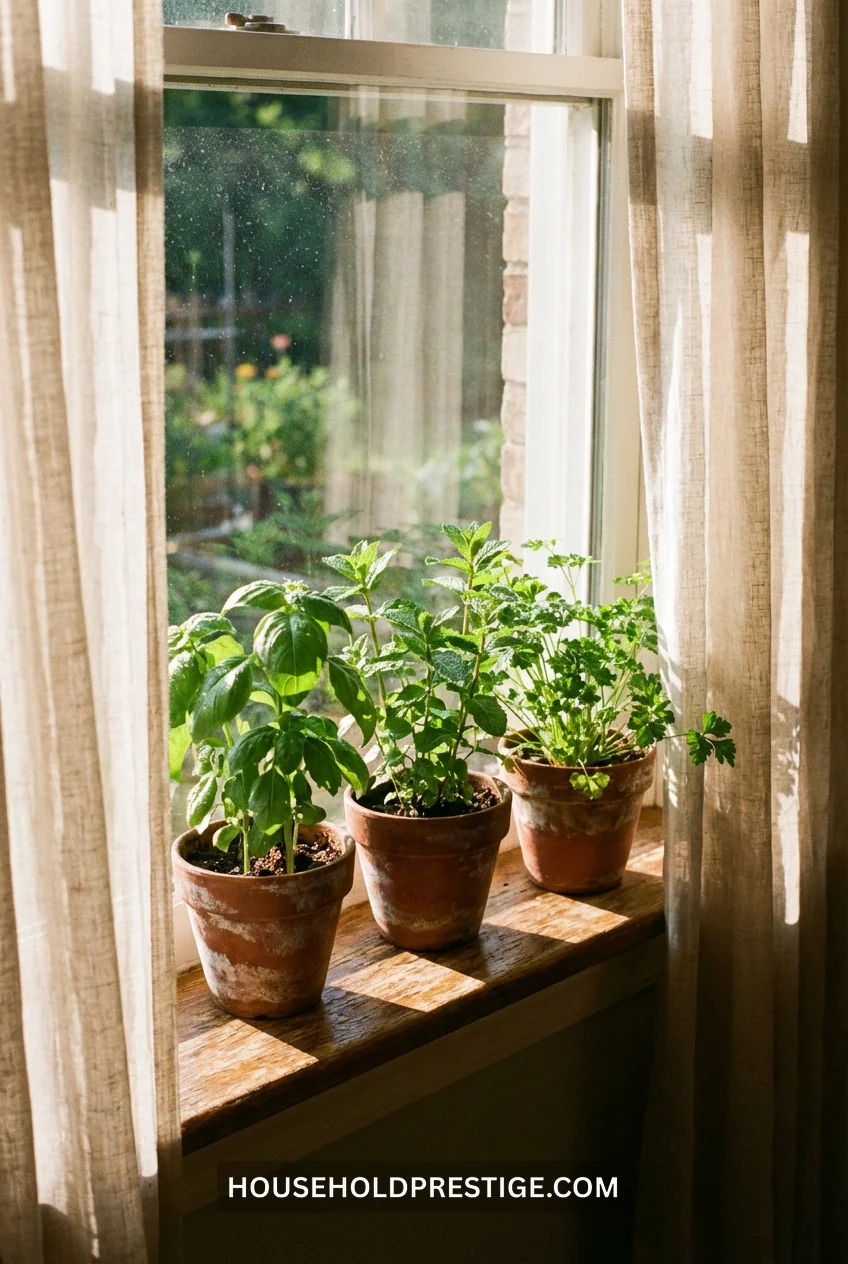
Start here. Three 4-inch pots, one bag of potting mix, $12 total at any hardware store. Basil wants sun and dies dramatically when thirsty (making it impossible to forget). Mint survives neglect and spreads like gossip. Parsley grows slow but steady, like that one friend who never flakes.
Water when the top inch feels dry. Harvest from the top to keep them bushy. You’ll have fresh herbs for cooking within three weeks.
2. The Self-Watering Lettuce Box
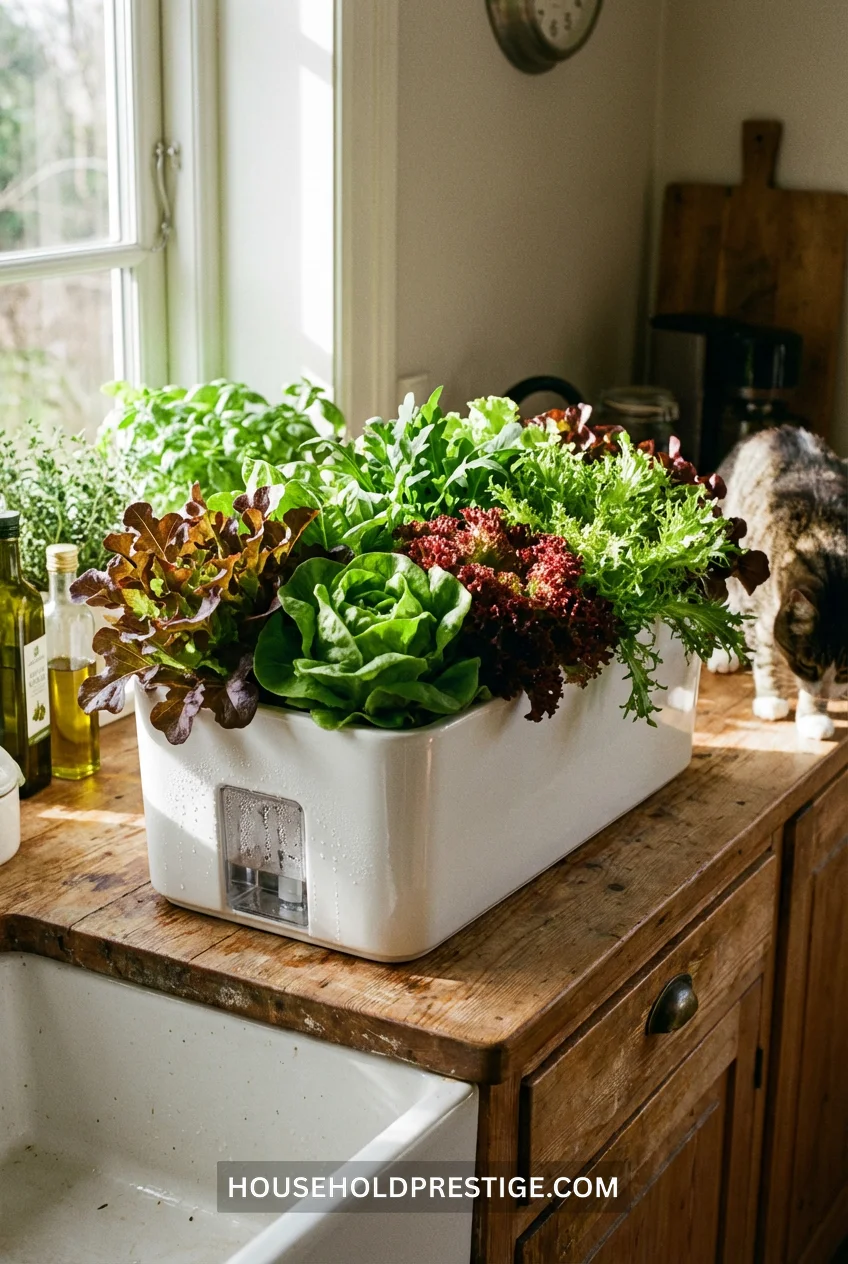
Lettuce grows fast (30 days to harvest) and doesn’t need deep roots. A self-watering container eliminates your biggest failure point—remembering to water.
What You Need:
- Self-watering planter (IKEA VÄXER series, $15-25)
- Lettuce seed mix or starter plants
- Standard potting soil
Why This Works:
The reservoir system keeps soil consistently moist without drowning roots. Lettuce likes cool temps (60-70°F), making it perfect for indoor growing where it’s naturally cooler than summer gardens. You can harvest outer leaves continuously without killing the plant.
Fill the reservoir weekly. Place near any window—lettuce tolerates partial shade better than most vegetables. Expect your first salad in about a month.
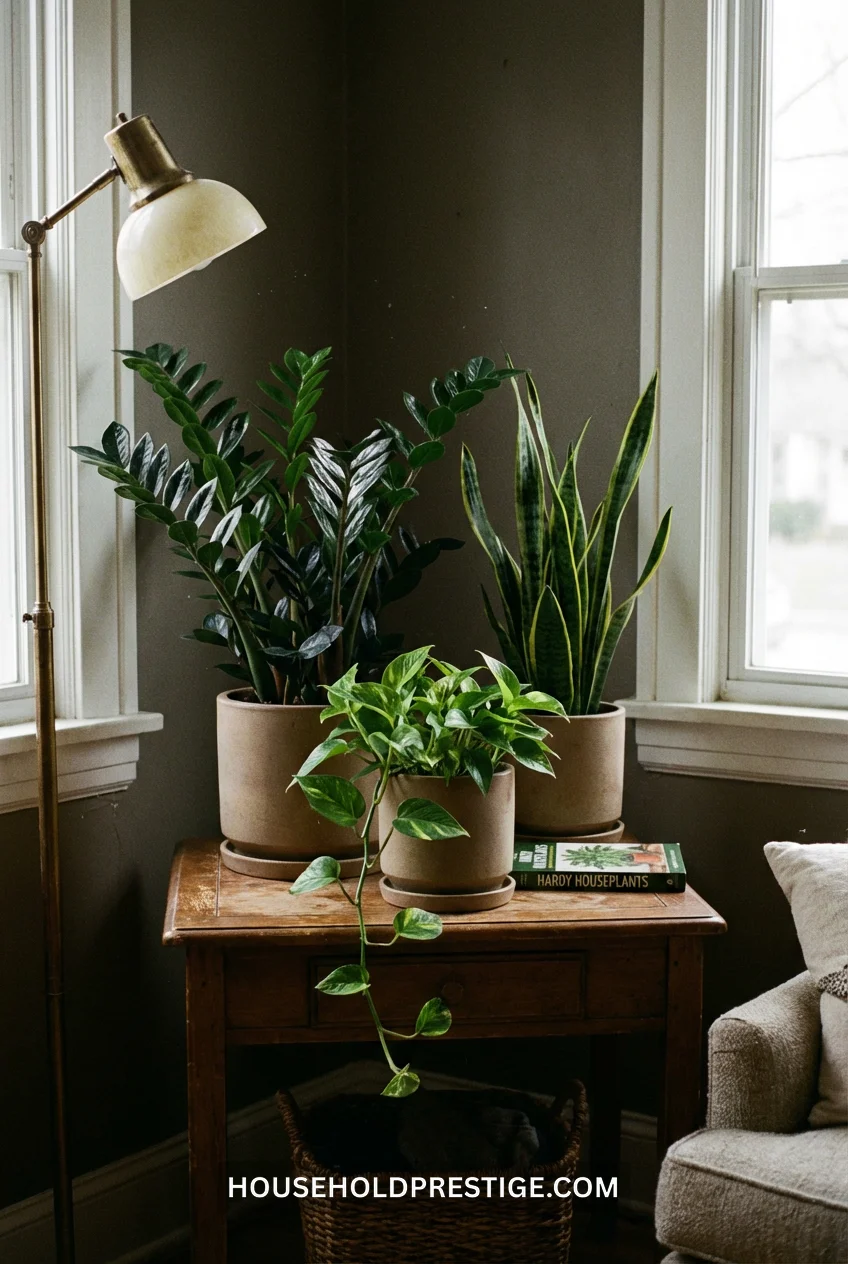
3. Hanging Pothos Curtain
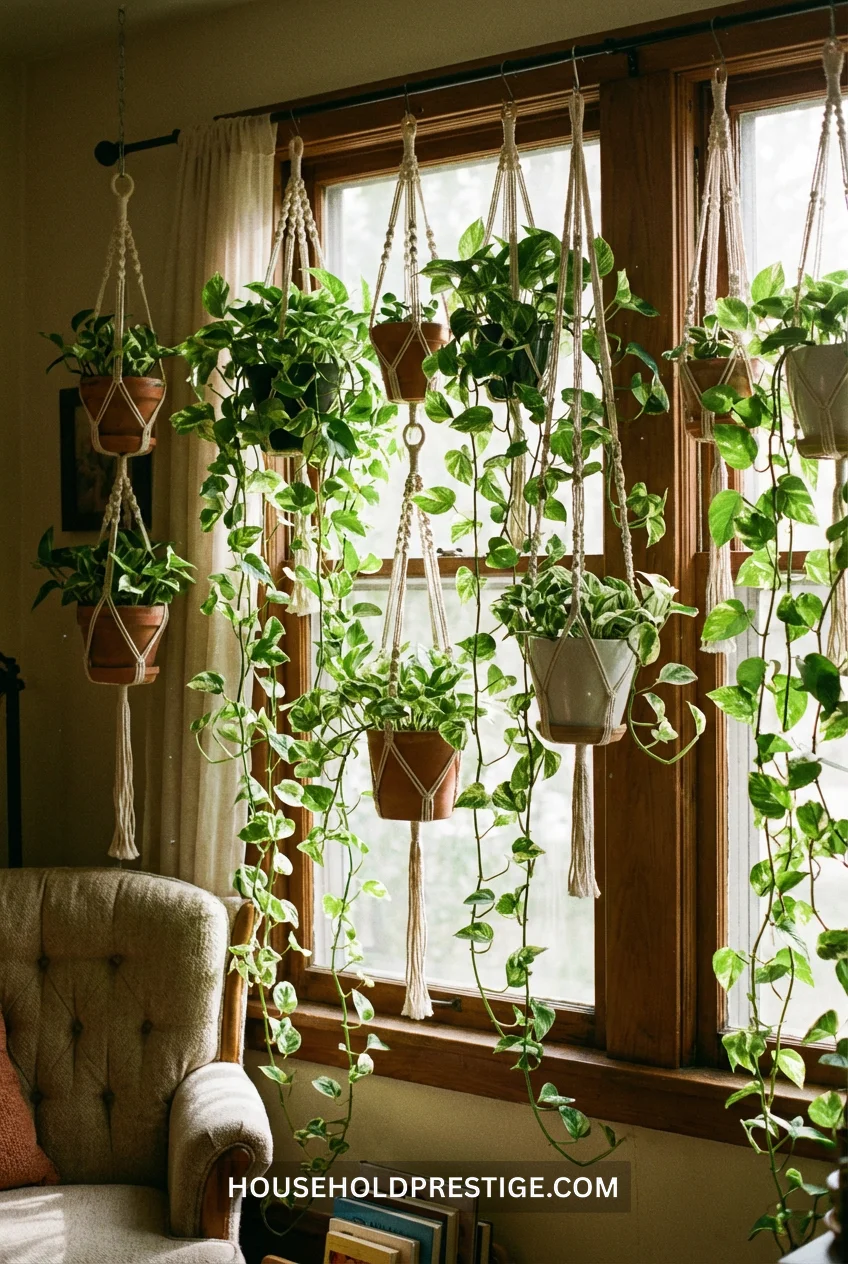
Pothos grows in water, soil, low light, bright light, and probably concrete if you gave it long enough. Buy one 6-inch pot ($8-12), and within six months you’ll have enough cuttings to fill your entire apartment.
Stick cuttings directly in water. Roots appear in 7-10 days. You now have infinite plants.
4. Microgreens on Your Counter (7-Day Harvest)
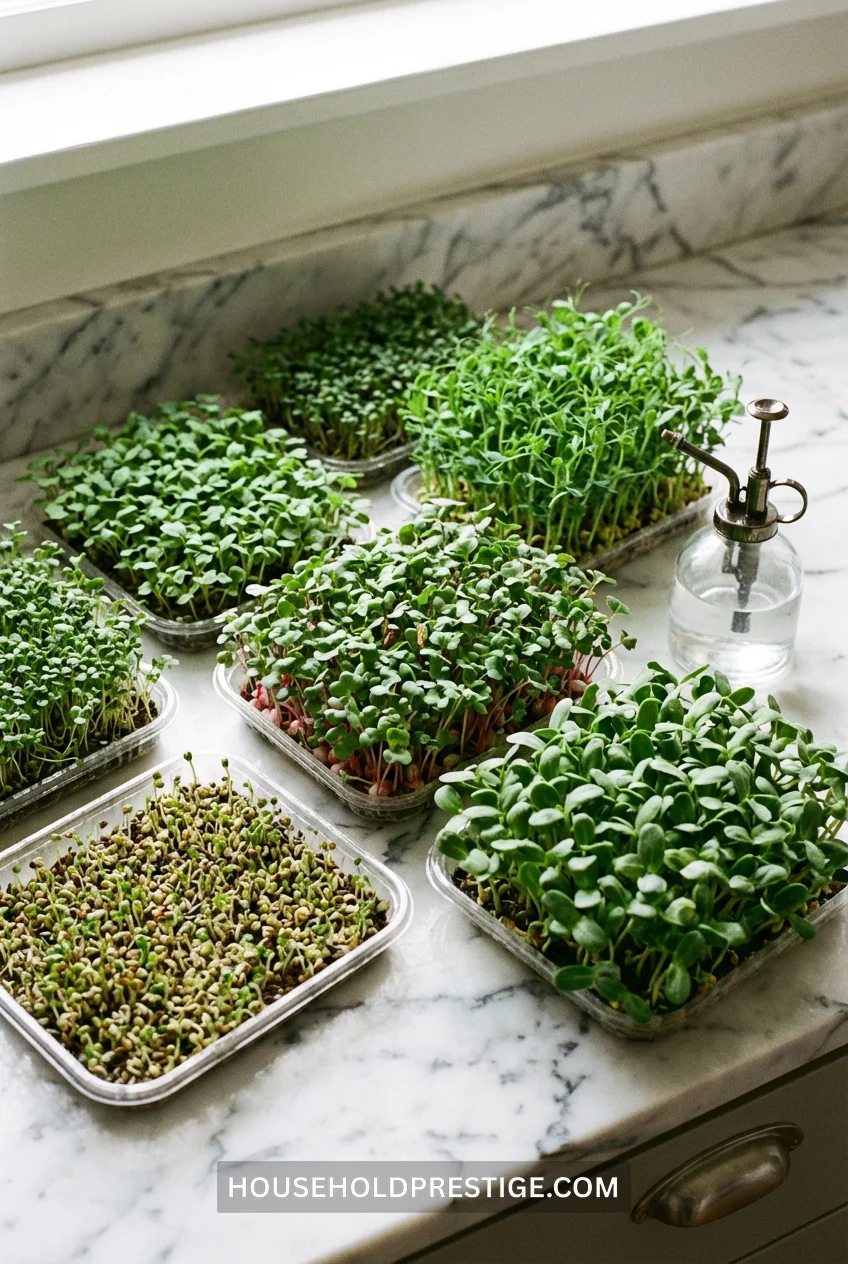
This is indoor gardening for people who want results this week, not next season.
Complete Setup Guide:
Materials & Costs:
- 10×20-inch growing trays with drainage holes ($8 for 5-pack)
- Seed starting mix ($6 per bag, lasts 20+ trays)
- Microgreen seeds: radish, broccoli, or pea shoots ($4-7 per packet)
- Spray bottle you already own
- Total first setup: $18-25
Step-by-Step Process:
- Day 1 (10 minutes): Fill tray with 1-2 inches of moistened seed starting mix. Scatter seeds densely—you want them almost touching. Press gently into soil. Mist thoroughly.
- Day 1-3 (Blackout period): Cover with another tray or cardboard. Keep in dark cabinet. This forces vertical growth and prevents leggy, weak stems. Mist daily.
- Day 4 (The reveal): Remove cover. Move to bright indirect light or under grow light. Seeds should have sprouted 1-2 inches. Mist twice daily.
- Day 5-7: Watch them explode upward. They’ll grow an inch per day in good conditions. Soil should stay consistently moist but not waterlogged.
- Day 7-10 (Harvest): When first true leaves appear (the second set after the initial sprout leaves), cut with scissors about 1 inch above soil. Rinse. Add to salads, sandwiches, smoothies.
Pro Move:
Start a new tray every 3 days for continuous harvests. Radish microgreens have the most aggressive, peppery flavor—like arugula on steroids. Pea shoots taste exactly like sweet spring peas.
Common Mistakes:
- Using garden soil (too heavy, causes mold)
- Overcrowding seeds to the point of zero airflow (invites fungal issues)
- Harvesting too late (once they develop the second true leaves fully, the flavor turns bitter)
Cost per harvest: Approximately $0.75-1.50 depending on seed choice. Each tray yields 4-8 ounces of greens that would cost $4-6 at grocery stores.
This isn’t a replacement for a garden. It’s a replacement for buying those $5 clamshells of baby greens that wilt in your fridge before you remember they exist.
5. Cherry Tomatoes in a 5-Gallon Bucket
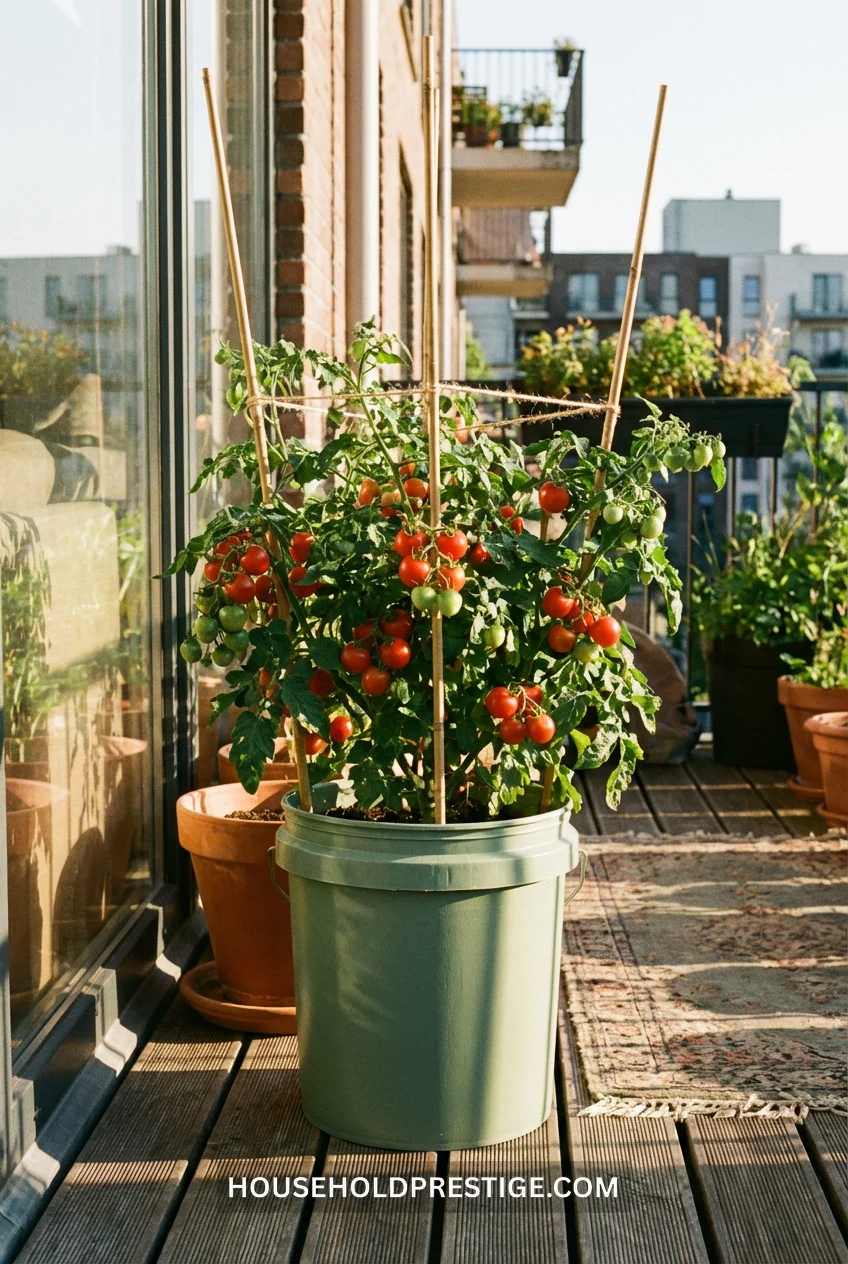
One plant. One bucket. Drill drainage holes, add soil, stick in a determinate variety (these stay compact). Water daily during fruiting. You’ll get 2-3 pounds of tomatoes over the season, which is approximately $12-18 of produce from a $20 setup.
Skip the heirloom varieties—they need too much space and support. “Tiny Tim” or “Window Box Roma” varieties max out at 12-18 inches tall.
6. The No-Window Herb Wall (With Grow Lights)

Maybe your kitchen faces a brick wall. Maybe you’re in a basement apartment. Grow lights solve this, and modern LEDs use less power than your phone charger.
The Setup:
Option A: Budget (~$35):
- Clip-on LED grow light ($15-20, Amazon)
- Wall-mounted pocket planter or repurposed shoe organizer ($10-15)
- Keep lights 6-8 inches from plants
- Run 12-16 hours daily
Option B: Permanent Installation (~$120):
- Under-cabinet LED grow strips (GE BR30 or Soltech Solutions, $40-80)
- Floating shelves ($30-40)
- Timer outlet ($8)
- Professional look, hands-off operation
Herbs need about 6 hours of actual light. Grow lights provide concentrated lumens, so 12-14 hours of LED equals 6 hours of sunlight. Set a timer and forget it.
What Grows Best:
Cilantro, parsley, thyme, oregano, and chives thrive under artificial light. Basil works but grows slower than in sunlight. Skip rosemary—it needs intense light and hates indoor humidity levels.
7. Scallions in Water (Infinite Regrowth)
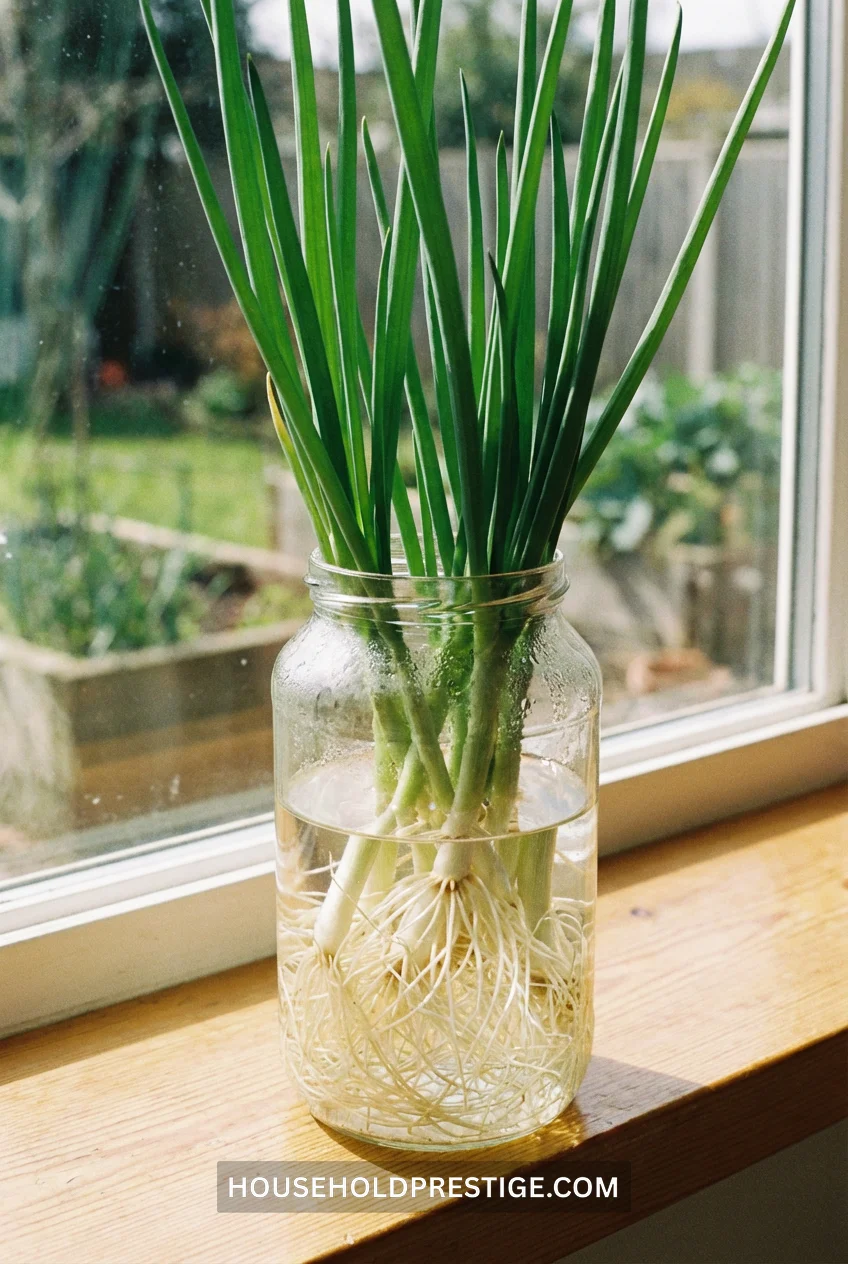
Buy green onions at the grocery store. Cut off the white parts with roots attached. Stick in a glass of water. Change water every 3 days. They regrow. Forever. This isn’t gardening—this is exploiting a biological glitch.
8. Vertical Pallet Planter (20+ Plants in 3 Square Feet)
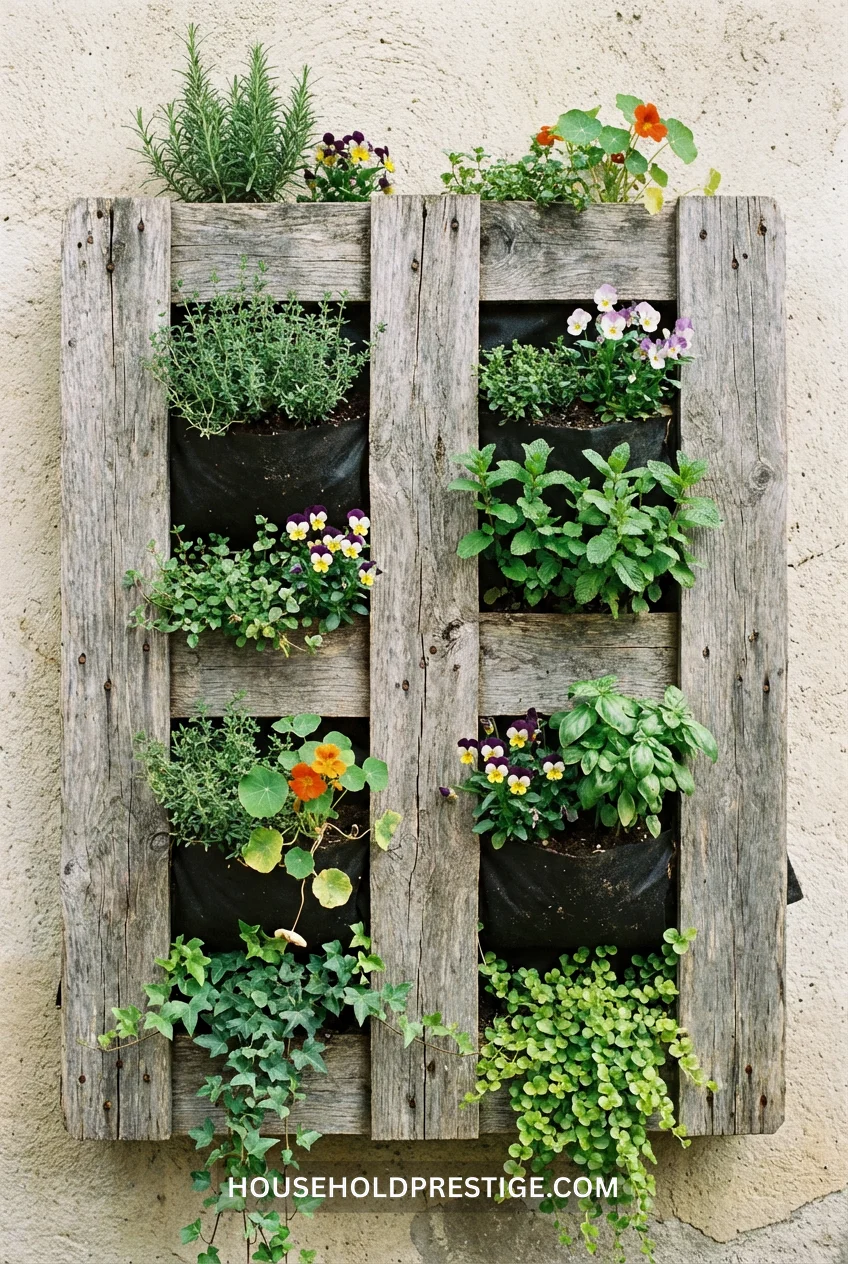
One shipping pallet, free from behind literally any retail store. Add landscape fabric backing, fill with soil, plant in the gaps. You’ve just turned 3 square feet of wall space into growing space for 20+ plants.
Installation Reality:
This takes a full afternoon. You’ll need a staple gun, landscape fabric, potting mix, and plants. Budget $60-80 total. But the result is an actual living wall that looks like something from a $300 Terrain catalog.
Mount securely to studs—a fully planted pallet weighs 40-60 pounds when wet.
9. Mason Jar Sprouting Station
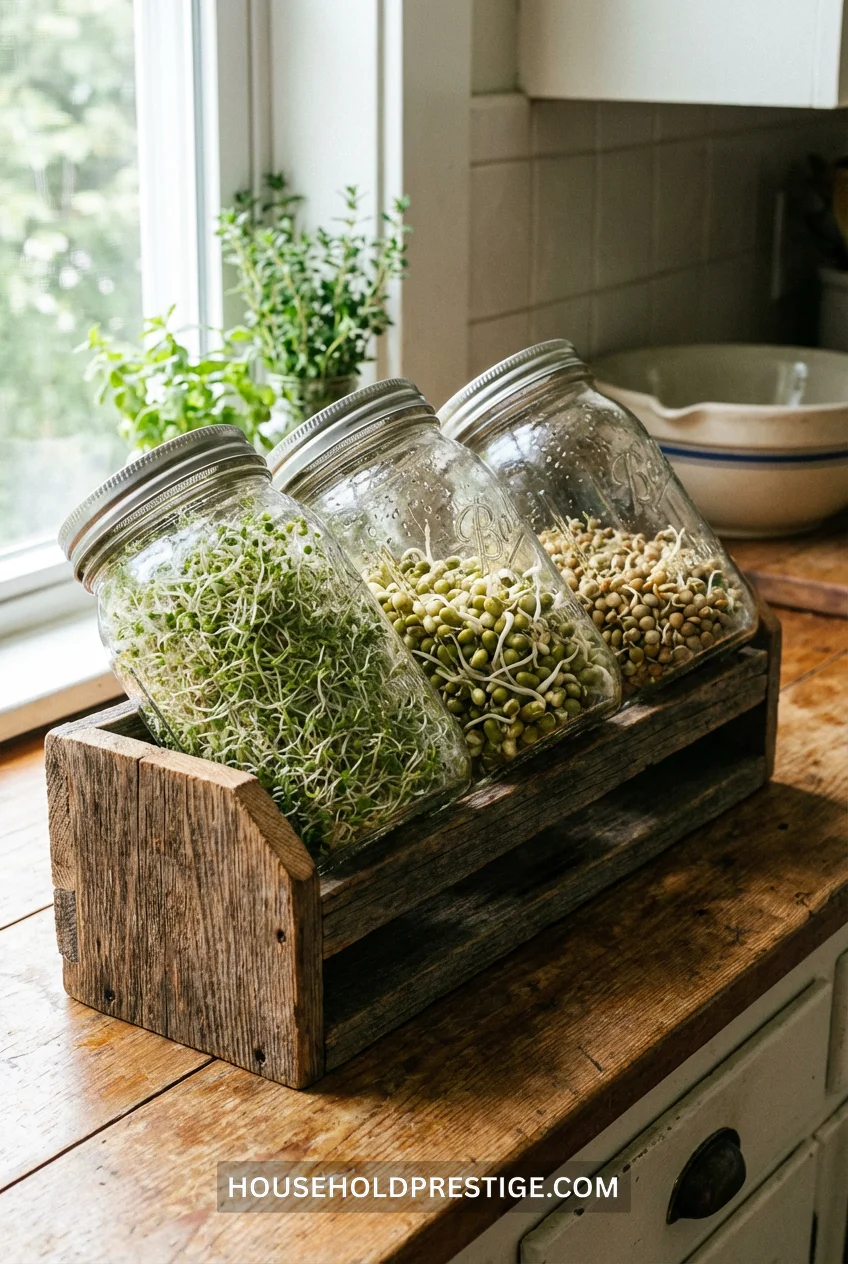
Sprouts aren’t microgreens—they’re germinated seeds eaten whole, root and all. Faster than microgreens (3-5 days), cheaper (reusable setup), and more protein per ounce than almost any vegetable.
Soak seeds overnight, drain, rinse twice daily. Done.
10. The Lazy Susan Herb Garden
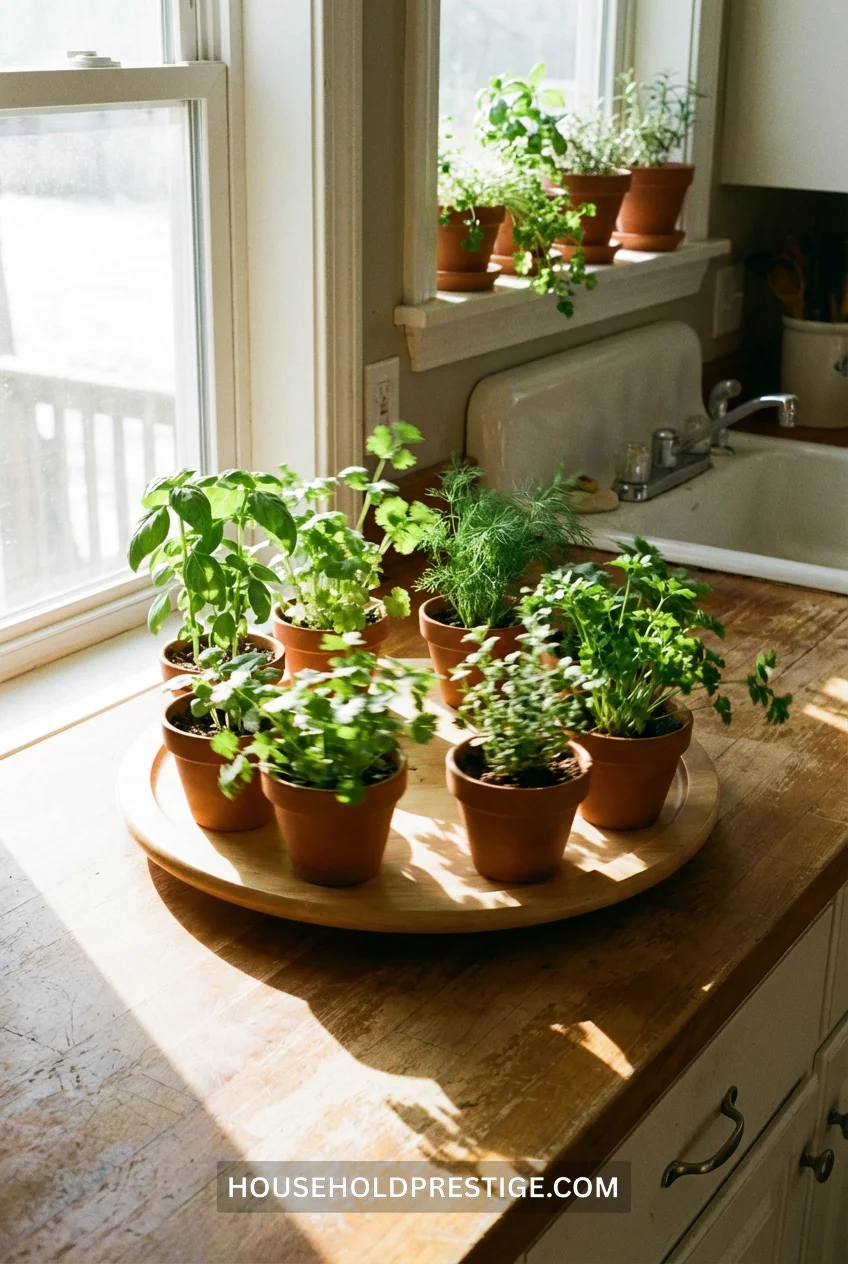
Herbs need even sun exposure. Your window only lights one side. Solution: stick all your pots on a lazy Susan, spin it 180° daily. Every plant gets equal light without you playing musical chairs with 8 pots every morning.
This is the kind of low-effort optimization that makes indoor gardening actually sustainable.
11. Mushroom Growing Kit (Foolproof Food Production)
The Truth About Mushroom Kits:
They work. Better than they have any right to. Buy a kit ($20-35 for oyster or shiitake), mist twice daily, harvest in 7-10 days. You’ll get 1-2 pounds of mushrooms from a box the size of a shoebox.
Why This Actually Works:
Mushrooms need humidity and darkness, not sun. Your dim bathroom? Perfect. That corner under your sink? Ideal. They’re not plants—they’re fungi growing from pre-colonized substrate, which means the hard part is already done.
The Process:
- Cut an X in the bag
- Mist the exposed substrate 2-3 times daily
- Within a week, tiny mushroom pins appear
- Three days later, they’re full-size and ready to harvest
- Mist the block for 7-10 more days—you’ll get a second flush
Real cost analysis: 1 pound of oyster mushrooms at grocery stores runs $12-16/lb. Kit costs $25-30 and yields 2-3 pounds across multiple flushes. You break even, learn something, and can compost the spent block.
After your first kit, you can order spore syringes and inoculate your own substrate (sawdust, coffee grounds) for $0.50-1 per pound of mushrooms. But start with a kit—it removes all variables.
12. Succulents Don’t Count (But Here’s Why You Need Them Anyway)
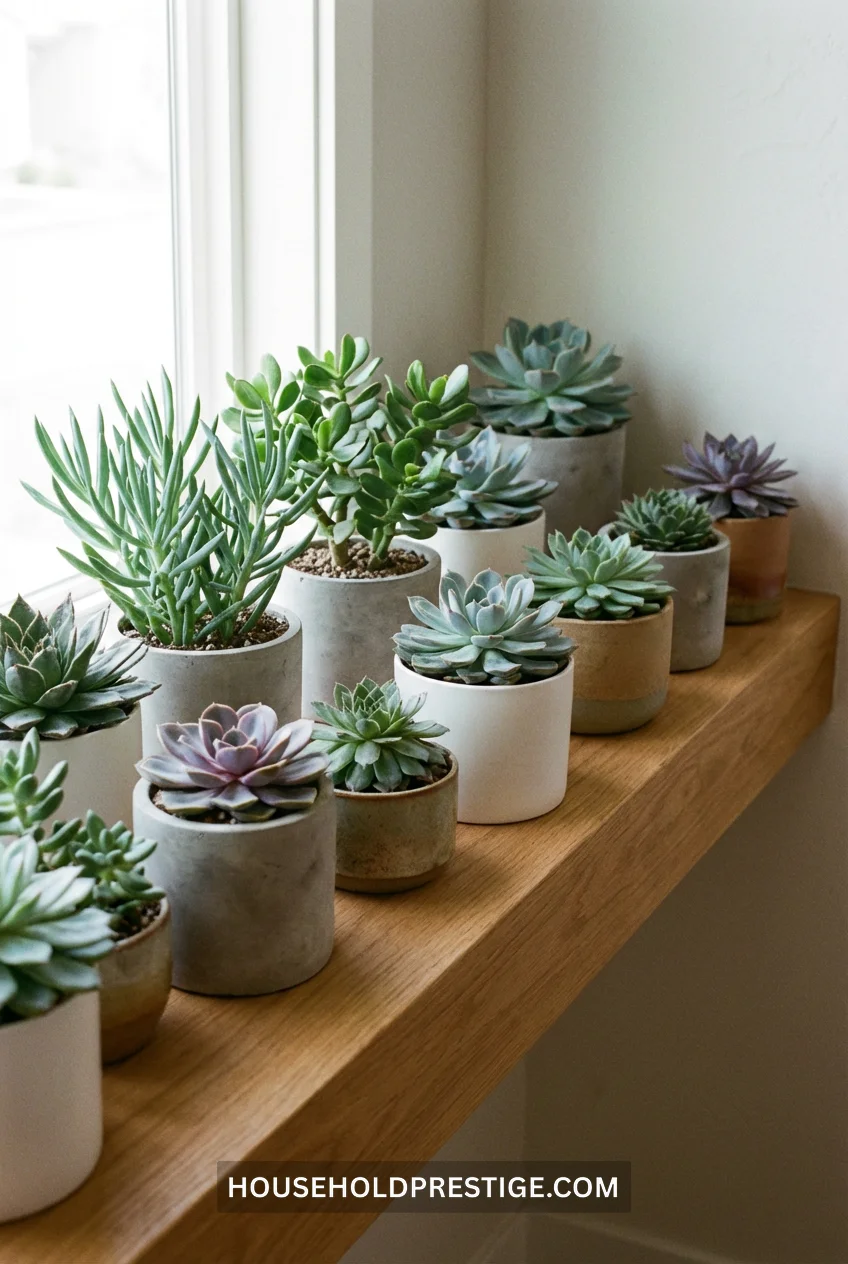
Succulents aren’t “gardening” in the harvest sense. But they’re the gateway drug to believing you can keep something alive, which is half the battle with indoor growing.
Water every 2-3 weeks. Ignore them otherwise. They want neglect.
13. Coffee Plant (Yes, Really)

Coffee plants grow indoors. They don’t produce enough beans to make your morning cup unless you have 40 of them, but they’re glossy, easy, and tolerate low light better than most tropicals. Water when dry, fertilize monthly. The red berries that eventually appear are technically edible (and contain two coffee beans each).
This is indoor gardening as conversation piece, not production.
14. Hydroponic Countertop System (High-Tech, Zero Soil)
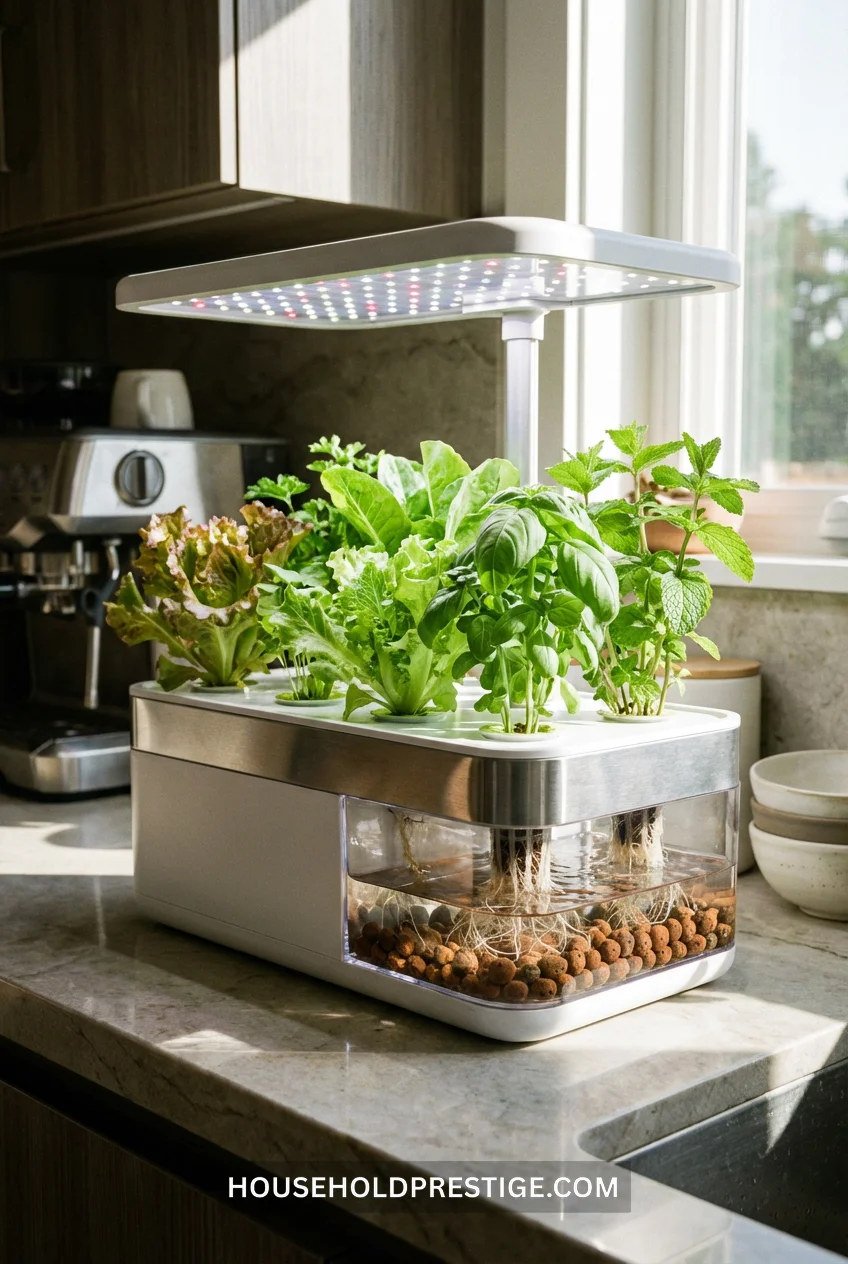
The Investment Reality:
Entry-level: AeroGarden Harvest ($80-100) Mid-range: Rise Gardens single-tier ($300-400) DIY alternative: Kratky method setup ($25-40)
Hydroponics sounds complicated. They’re not—plants sit in nutrient water instead of soil, grow 30-50% faster, and you can’t overwater them because they’re designed to be submerged.
What You Get:
- Lettuce every 4 weeks
- Herbs that grow twice as fast as in the soil
- Zero dirt, zero mess, zero bugs
- Automated grow lights (on better systems)
The Catch:
Upfront cost is high. Nutrient solution refills run $10-15 every 6-8 weeks. You’re essentially buying a small appliance, not a planter.
Is it worth it? If you actually cook and hate buying $5 herb bundles that wilt by Thursday, yes. If you want a hobby, no—hydroponics is hands-off to the point of boring.
Pro Tip:
Start with one system before committing to a full setup. The AeroGarden Harvest (6-pod) produces about $25-30 of herbs monthly. Breakeven is 3-4 months, after which it’s cheaper than buying fresh.
15. Window Box Strawberries (Everbearing Variety)
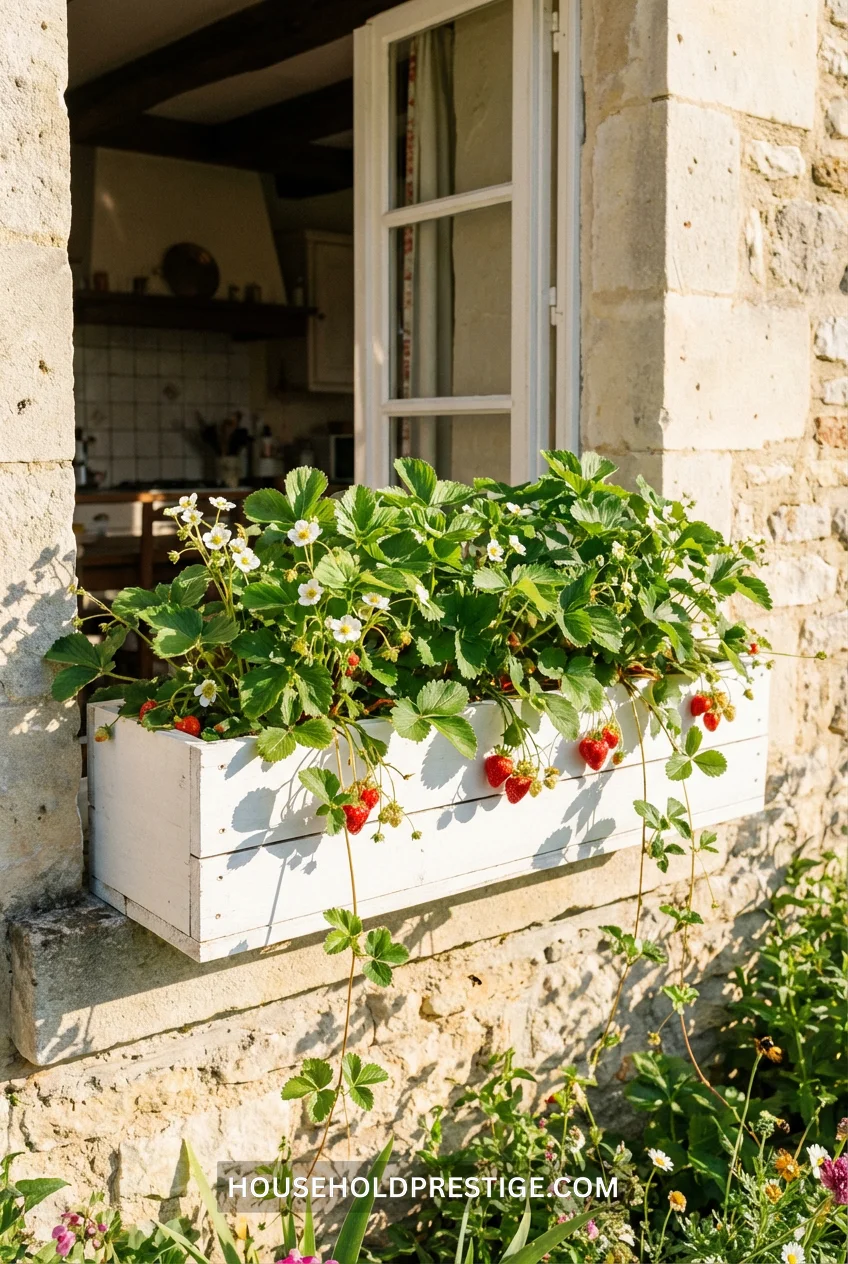
Strawberries produce in tight spaces if you pick everbearing varieties. One 24-inch window box holds 3-4 plants, yields 1-2 pounds of berries across summer and fall. They need 6+ hours of sun, so south or west windows only.
Plant in spring, harvest by early summer, keep harvesting until frost.
16. Comparison Table: Fastest Indoor Edibles to Harvest
| Plant | Days to Harvest | Difficulty | Cost | Yield Value |
|---|---|---|---|---|
| Microgreens | 7-10 days | Easy | $1/tray | $4-6 |
| Sprouts | 3-5 days | Very Easy | $0.50/jar | $3-4 |
| Lettuce (hydro) | 25-30 days | Medium | $2/plant | $4-5 |
| Green onions (regrow) | Continuous | Very Easy | Free | $2-3/month |
| Herbs (basil, cilantro) | 3-4 weeks | Easy | $3/plant | $4-5/harvest |
| Cherry tomatoes | 60-75 days | Hard | $15 setup | $12-18 total |
| Radishes | 25-30 days | Easy | $0.50/seed | $3-4 |
| Mushroom kit | 7-14 days | Easy | $25-30 | $12-16/lb |
This table assumes you’re measuring success by how fast you can eat something you grew yourself. Microgreens and sprouts win on speed. Tomatoes win on total output. Everything else is middle ground.
17. The “I Killed Everything” Starter Pack
If you have a track record of plant casualties, start here:
ZZ Plant: Survives a month without water. Tolerates fluorescent office lighting. Grows in the dark corners you assumed nothing could survive.
Snake Plant (Sansevieria): Water every 3-4 weeks. Literally prefers neglect over attention. Converts CO₂ to oxygen at night (rare among plants).
Pothos (mentioned earlier): Grows in water alone. Roots in days. Tolerates low light, bright light, irregular watering, and your general chaos.
None of these is edible. All of them prove you can keep something alive, which makes you 10x more likely to try actual vegetable growing.
18. The Transformation: Before/After Story
Before:
Three years ago, I had a north-facing apartment in Chicago with one 3-foot window. I’d tried herbs twice—both times they died within a month. The internet kept showing me sun-drenched garden windows and telling me I needed “bright indirect light” without defining what that meant.
The Shift:
I stopped trying to garden like someone with a farmhouse in Connecticut. I bought a $15 clip-on grow light, a bag of microgreen seeds, and a shallow tray.
Seven days later, I had radish microgreens. They tasted like actual food—peppery, fresh, alive. More importantly, I’d grown something successfully, which changed my entire belief system about what was possible in my space.
After:
Today, my kitchen counter has a self-watering lettuce box that produces a salad’s worth of greens every week. I have a pallet planter on my balcony (yes, I eventually moved to a place with a balcony), growing 20+ herbs. I start a new microgreens tray every 3 days. Total time investment per week: maybe 15 minutes.
What Changed:
Not the apartment. Not my schedule. Not my inherent gardening talent.
What changed: I stopped trying to replicate outdoor gardens indoors and started working with what actually thrives in low-light, temperature-controlled, limited-space environments.
The Real Bottom Line
Indoor gardening isn’t about turning your apartment into a nursery. It’s about picking 2-3 systems that match your actual life—your light situation, your space constraints, your attention span—and letting them run on autopilot.
Most people fail because they start with basil in a sad pot on a north-facing windowsill, then blame themselves when it dies. The basil needed 6+ hours of direct sun. Your window gets 2. This wasn’t your problem.
Pick what matches your conditions. Start with something fast (microgreens, sprouts, scallion regrowth) so you get an early win. Add something low-maintenance (lettuce in a self-watering box, herbs under grow lights) so it runs itself.
Then, maybe, try the ambitious stuff like tomatoes or hydroponics after you’ve proven you can keep the easy things alive.
Your apartment doesn’t need to be perfect. Neither do you. You just need to stop trying to grow sun-loving Mediterranean herbs in a dim, dry, inconsistent environment and expecting miracles.
FAQ
Can you really grow vegetables indoors without a garden?
Yes, but only specific ones. Leafy greens (lettuce, spinach, chard), herbs, microgreens, sprouts, and compact fruiting plants (cherry tomatoes, small peppers) work indoors. Full-size tomatoes, corn, squash, and root vegetables need outdoor space and deep soil. Focus on what’s designed for containers and low light rather than fighting with crops that need a backyard.
What’s the easiest indoor plant for beginners who’ve killed everything?
Scallions regrowing in water. You literally cannot kill them unless you forget to change the water for a month. Cut green onions from the grocery store, stick the white ends in a jar of water, change water every 3-4 days. They regrow indefinitely. This isn’t even gardening—it’s exploiting plant biology. Start here to prove you can keep something alive.
Do I need expensive grow lights for indoor gardening?
Only if your space gets less than 4 hours of natural light daily. South or west-facing windows work for most herbs and lettuce without supplemental lighting. If you’re in a dim apartment, a $15-20 clip-on LED grow light covers 2-3 pots. Expensive systems ($80-300) are for people who want automated everything or are growing year-round in basements. Start cheap, upgrade only if you stick with it.
How much money can you actually save growing food indoors?
Herbs give the best ROI—one basil plant costs $3 and produces $15-20 worth of fresh basil over 3 months. Lettuce saves about $4-5 weekly if you use a self-watering system. Microgreens cost $0.75-1.50 per tray and replace $4-6 grocery store clamshells. Tomatoes break even at best. Don’t start indoor gardening to save money—do it for convenience (fresh herbs always available) and quality (no wilted grocery store greens).
What vegetables grow fastest indoors?
Microgreens (7-10 days), sprouts (3-5 days), and radishes (25-30 days) are the fastest. Lettuce takes 4-5 weeks in soil, 3-4 weeks in hydroponics. Herbs need 3-4 weeks before first harvest. Anything fruiting (tomatoes, peppers, strawberries) takes 60-90 days minimum. If you want fast results to stay motivated, start with microgreens or sprouts—you’ll be eating your harvest within a week.