19 Stunning Indoor Plant Wall Ideas That Turn Blank Walls Into Living Art
February 7, 2026
Written By Ashley
Home lover, organization enthusiast, and chronic plant rescuer. Sharing the tricks that transform everyday spaces into something special.
That sad, empty wall in your living room? It’s been staring at you for months now.
You’ve thought about hanging another generic print from HomeGoods. Maybe a gallery wall of family photos. But deep down, you know what that wall really needs: life. Actual, breathing, oxygen-producing life.
Indoor plant walls aren’t just Instagram bait (though they photograph beautifully). They’re the answer to that nagging feeling that your home needs more texture, more personality, more… something. And here’s the secret nobody tells you: you don’t need a degree in horticulture or a trust fund to pull one off.
Whether you’re working with a cramped rental bathroom or a cavernous living room, vertical gardening solves two problems at once: it gives your plants the light they crave without eating up your precious floor space, and it transforms dead wall space into the most interesting thing in the room.
Let’s get into 19 indoor plant wall ideas that range from stupidly simple to weekend-warrior ambitious.
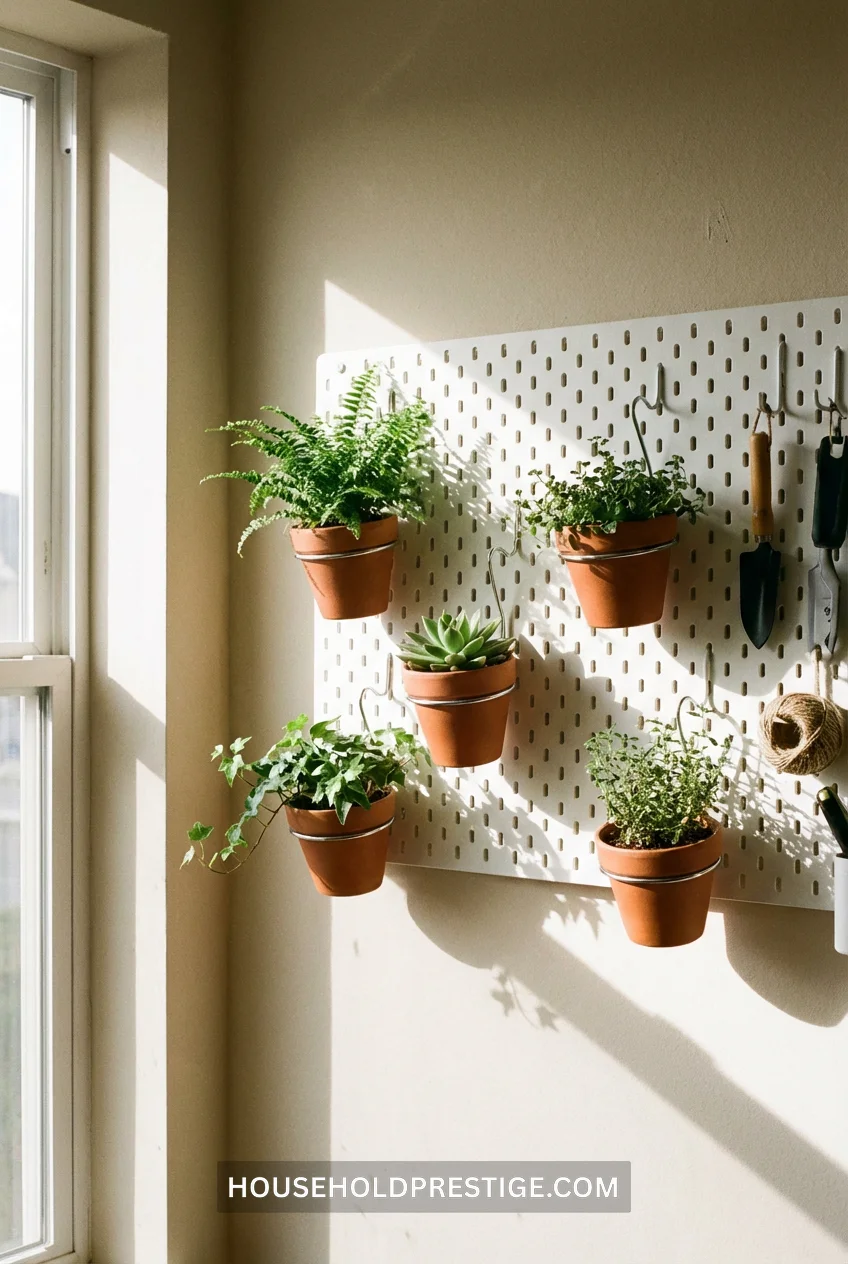
Drill a pegboard into your wall, grab some S-hooks from the hardware store, and you’re done. Hang plants in matching pots or mix it up—your choice. The beauty here is flexibility. When your pothos outgrows its spot or your cactus decides to die (they do that), you just move things around. No commitment, no holes to patch later.
Cost reality: $25 for a 2×4 foot pegboard, $8 for a pack of hooks. If you’re renting, use 3M Command strips rated for the combined weight.
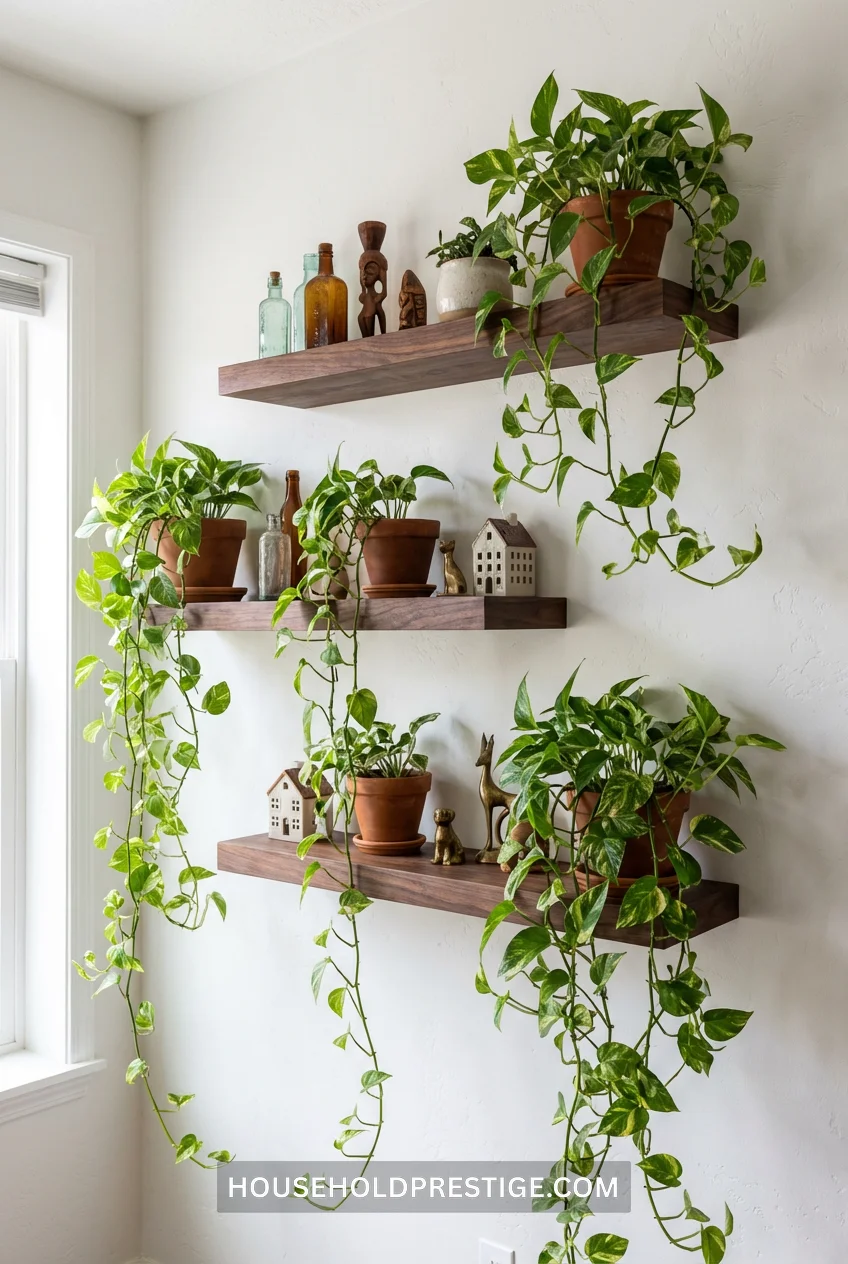
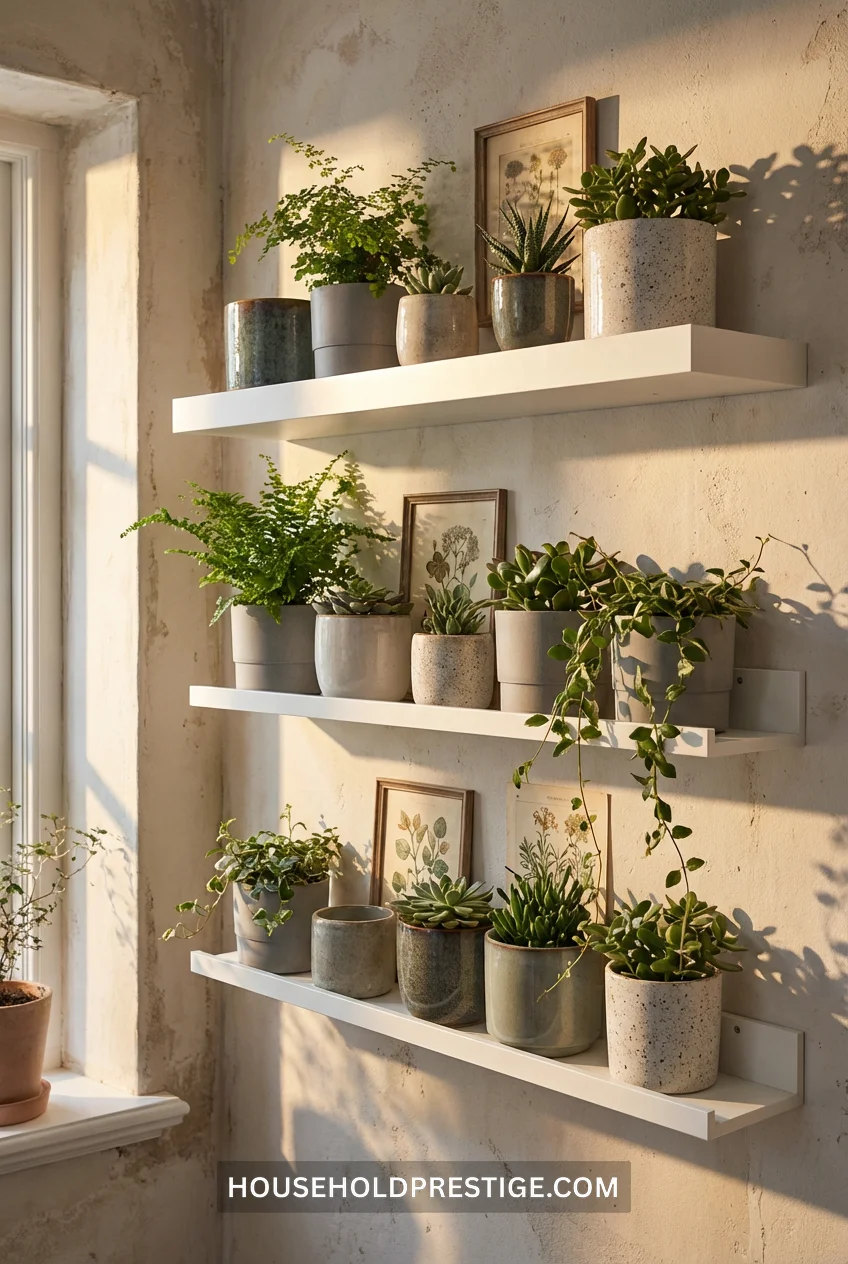
Mount three shelves at different heights. Put trailing plants—pothos, string of pearls, philodendron—on top. Let them do their thing.
The magic happens when the vines grow long enough to blur the lines between shelves. Suddenly your wall reads as one connected installation instead of three separate ledges. Takes about 3-4 months of growth to hit that sweet spot where it looks intentional instead of sparse.
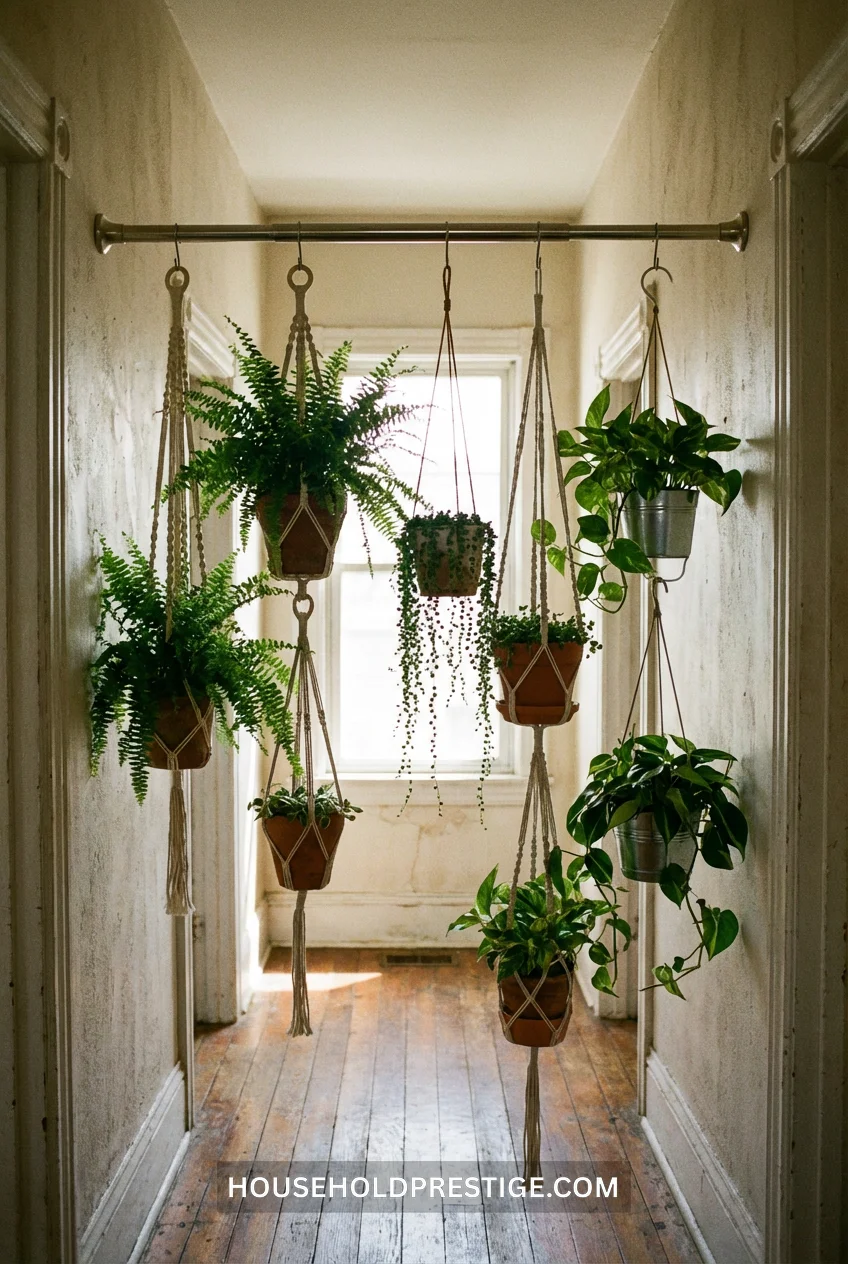
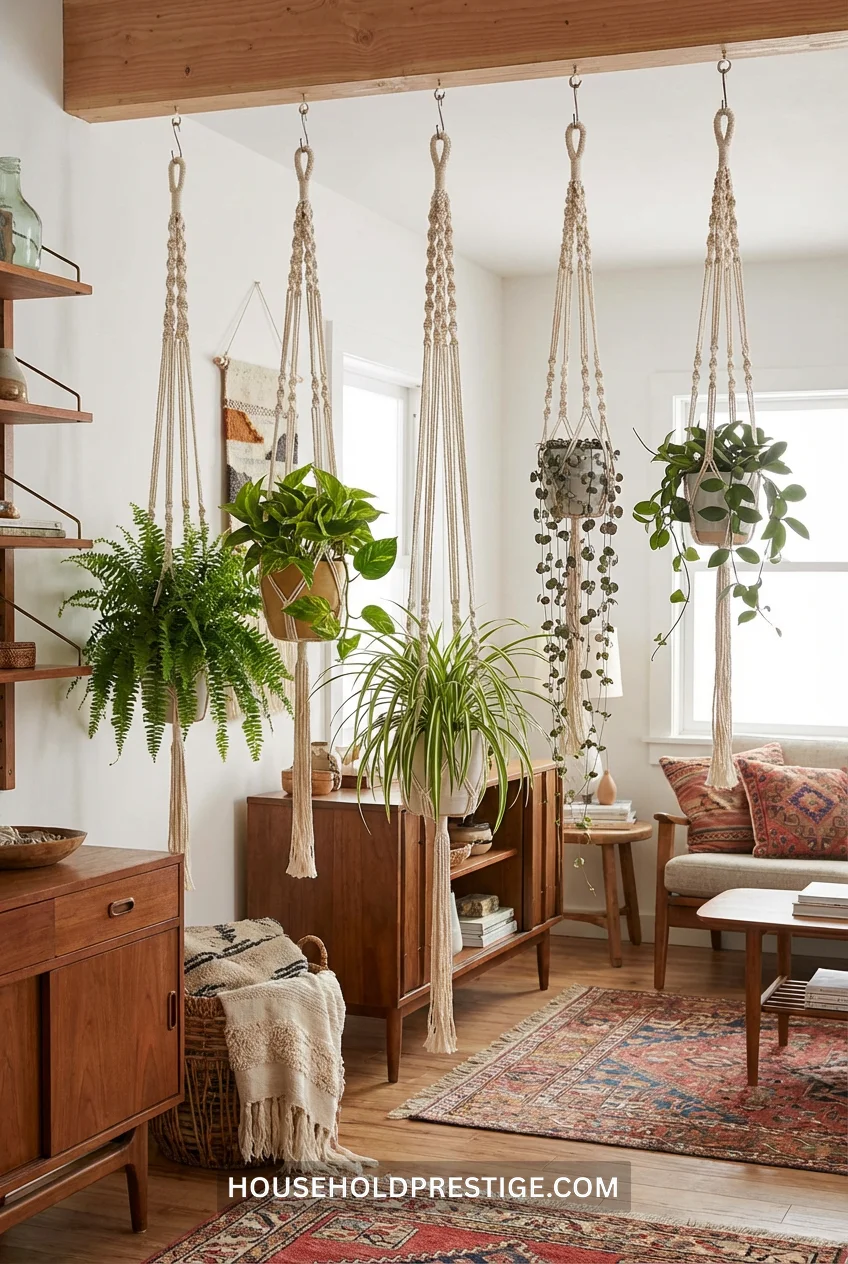
3. The Ridiculous-But-Genius Tension Rod Plant Curtain
This is for narrow hallways or that weird space between your kitchen and dining room that’s too small for furniture but too visible to ignore.
Run a tension rod wall-to-wall at ceiling height. Hang plants at varied lengths using macramé hangers or simple rope. The result? A living curtain that sections off space without blocking light or making the area feel closed off.
Why this works: Tension rods hold 20-30 pounds depending on the model. No drilling, no landlord drama. When you move, it comes down in 30 seconds. Use plants with different leaf shapes—mix feathery ferns with structural snake plants to create visual interest at every level.
The catch: You need decent ambient light. This setup works in hallways with windows at either end or rooms with good overhead lighting. Stick to low-light champions like pothos and ZZ plants if your space is dim.
4. Magnetic Spice Tins for Tiny Succulents
Empty spice tins, strong magnets, metal primer paint on your wall. Fill with well-draining soil and tiny succulents. Arrange them however you want—straight grid feels sterile, so go random.
Works brilliantly in kitchens where you can swap out a few tins for actual herbs. Your basil and thyme get sunshine, your echeveria collection gets displayed, and that blank wall above your stove finally earns its keep.
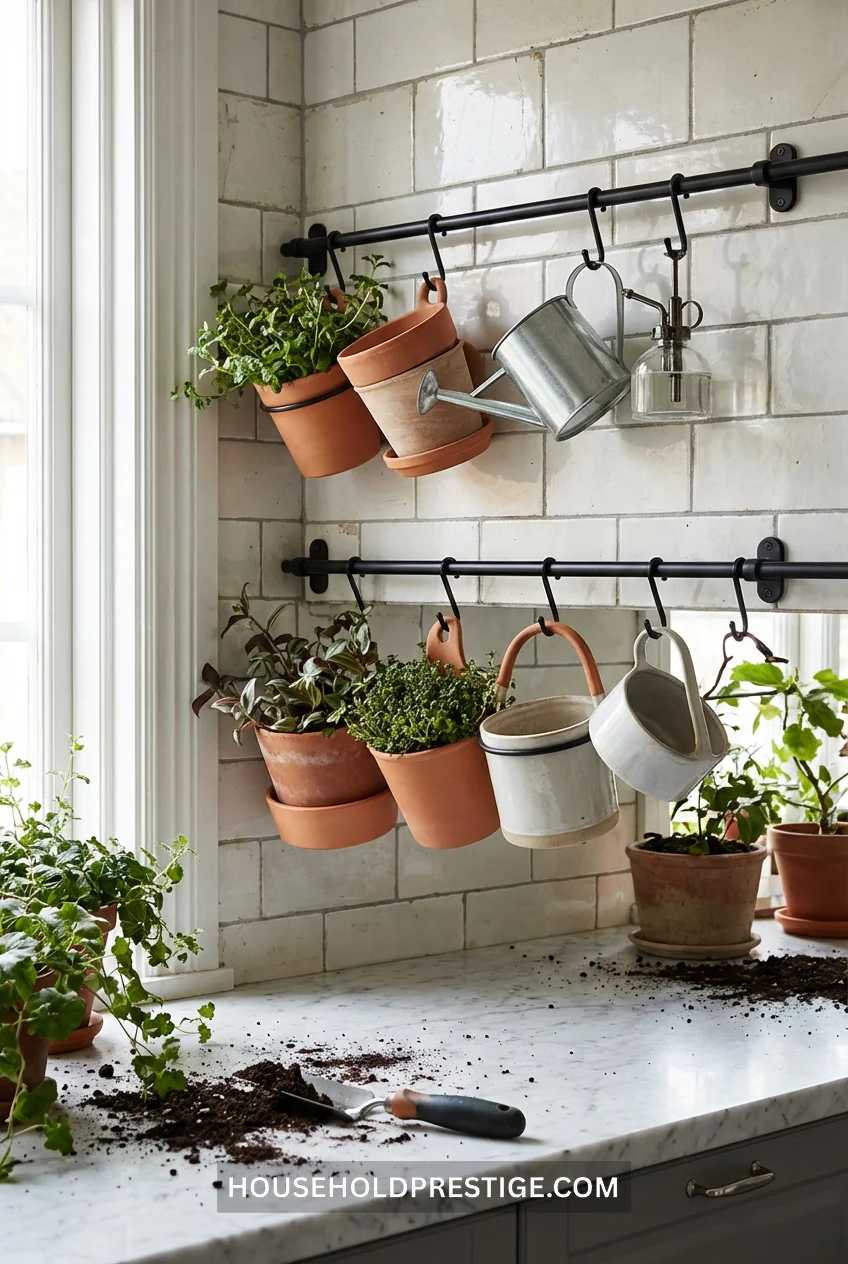
5. The IKEA Hack: KUNGSFORS Rail System Turned Plant Display
Decide your layout first. One long rail looks commercial-kitchen clean. Two parallel rails stacked 18 inches apart gives you more hanging capacity.
Mark your studs. This system holds weight, so at least two mounting points need to hit studs. Use a stud finder app on your phone if you don’t own the tool.
Install rails level. This is where people screw up. Use a 4-foot level or you’ll notice the tilt every single day and hate yourself. Ask me how I know.
Add hooks before you hang plants. Figure out spacing while the rail is empty. You want 6-8 inches between pots for airflow.
Hang heaviest plants on stud-mounted sections. Your monstera goes over the stud. Your air plant goes anywhere.
Why This Beats Regular Shelves:
Plants drip when you water them. Shelves mean you’re moving every plant to a sink, watering, waiting 20 minutes for drainage, then moving back. With a rail system, you water in place and let drips hit the floor or a tray below. Cuts watering time by 60%.
The Numbers:
One 22-inch rail: $15-18
Each S-hook: $0.75-1.50
Total for a 6-plant setup: $35-45
Common Mistakes to Avoid:
Don’t: Mount it above upholstered furniture. Water damage is real. Don’t: Use drywall anchors exclusively. This system is too heavy. Do: Add a thin wooden strip or small tray underneath to catch drips. Do: Mix pot sizes. Same-height pots look like a sad cafeteria line.
Pro Move:
Paint the rails. They come in stainless steel which looks great in modern kitchens but screams “restaurant supply” everywhere else. A coat of matte black or the same color as your wall makes the plants pop instead of the hardware.
Those $7 IKEA picture ledges (MOSSLANDA) aren’t just for photos. Line them with small pots. The 4-inch depth prevents most pots from tipping forward. Arrange pots by height—tallest in back, trailing plants in front to create depth.
Bonus: tuck a few small framed prints or postcards between plants. Breaks up the all-green and keeps it from reading as “lady who’s really into plants” and more “curated space that happens to include plants.”
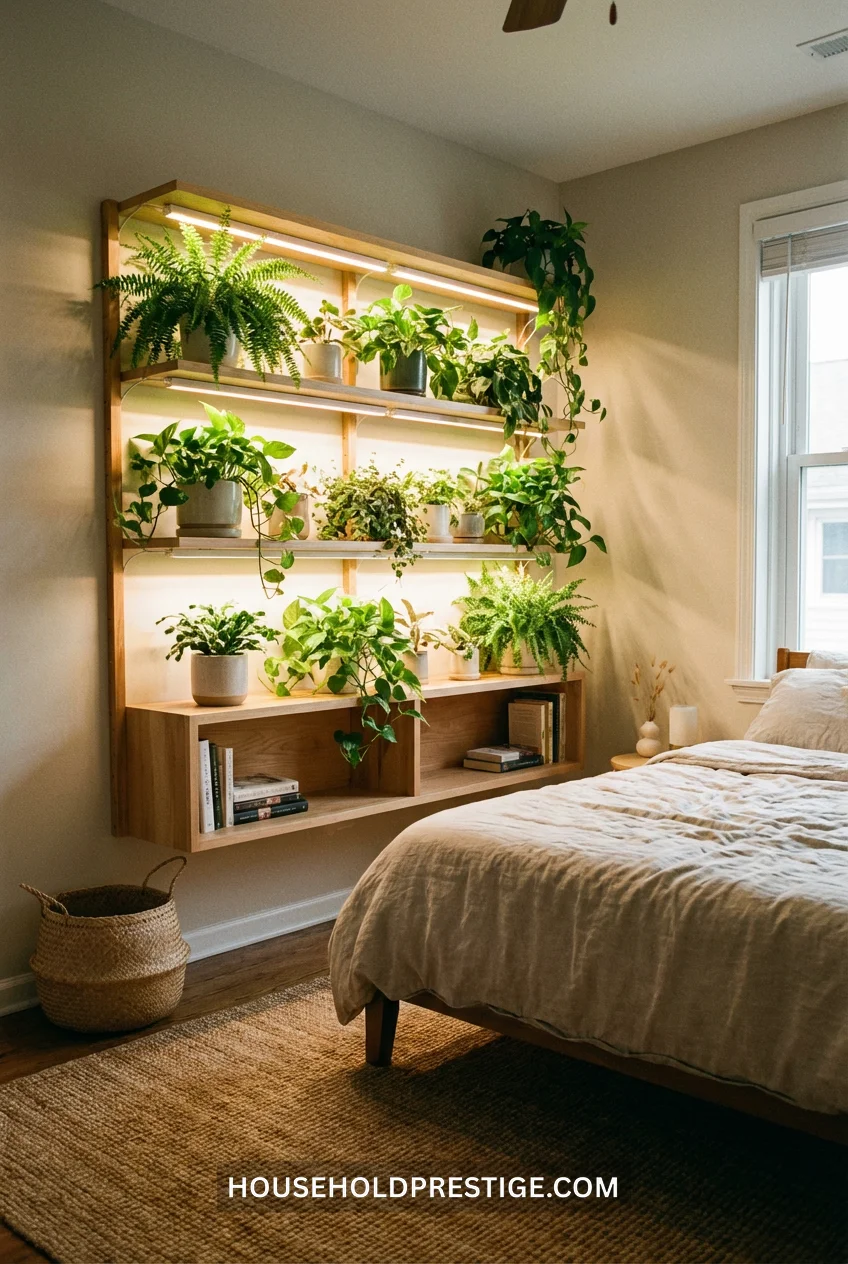
7. The Three-Shelf Vertical Garden With Grow Lights
Three 36-inch wooden shelves: $30-45 (pine works fine)
Six L-brackets (rated for 25+ pounds each): $18-24
Three LED grow light strips (24-inch): $45-60 total
Screws, anchors, level: $10
Total investment: $103-139
Dimensions That Actually Work:
Shelf depth: 8 inches minimum, 10 inches ideal
Vertical spacing between shelves: 16-18 inches (enough room for foliage growth)
Width: Whatever your wall can handle, but 36 inches fits most standard spaces
Step-by-Step Installation:
Step 1: Plan your shelf positions
Measure from floor up. Bottom shelf at 24 inches gives you clearance for furniture below. Add 16-18 inches for each additional shelf. Mark with pencil.
Step 2: Locate studs
You need two studs per shelf for proper support. If studs don’t align where you want them, use heavy-duty toggle bolts rated for 50+ pounds.
Step 3: Mount brackets
Install brackets first, shelves second. Level each bracket independently—don’t assume your walls are straight because they’re not.
Step 4: Secure shelves
Pre-drill tiny pilot holes through shelf into bracket. Prevents wood splitting. Use wood screws, not the cheap ones that came with the brackets.
Step 5: Wire the grow lights
Run LED strips along the underside of each shelf, facing down toward the shelf below. This lights the plants underneath while creating ambient glow. Connect all three to one power source using a splitter. Plug into a timer set for 12 hours on, 12 off.
Step 6: Add plants
Start with your tallest plants on the top shelf where they get most natural light plus grow light from above. Put medium-height plants in the middle. Save the bottom shelf for shade-loving plants like pothos and snake plants.
What Nobody Tells You:
Water the top shelf plants over a sink, period. Even with saucers, overflow happens. Middle and bottom shelves can be watered in place if you’re careful—just put a towel down first.
Your top shelf dries out fastest because heat rises. Check it twice as often as lower shelves.
LED grow lights run cool, but they still produce some heat. Don’t cram plants directly against the lights. Leave 4-6 inches of space.
Plant Selection That Works:
Top shelf: Begonias, African violets, succulents—anything that loves direct light Middle shelf: Pothos, philodendron, ferns—the backbone plants Bottom shelf: Snake plants, ZZ plants, peace lilies—the low-light champions
Worth It Factor:
This setup gives you 9 square feet of growing space using only 3 feet of wall width. If you added the same number of plants on the floor, they’d take up 9 square feet of floor space. That’s the entire footprint of a small desk.
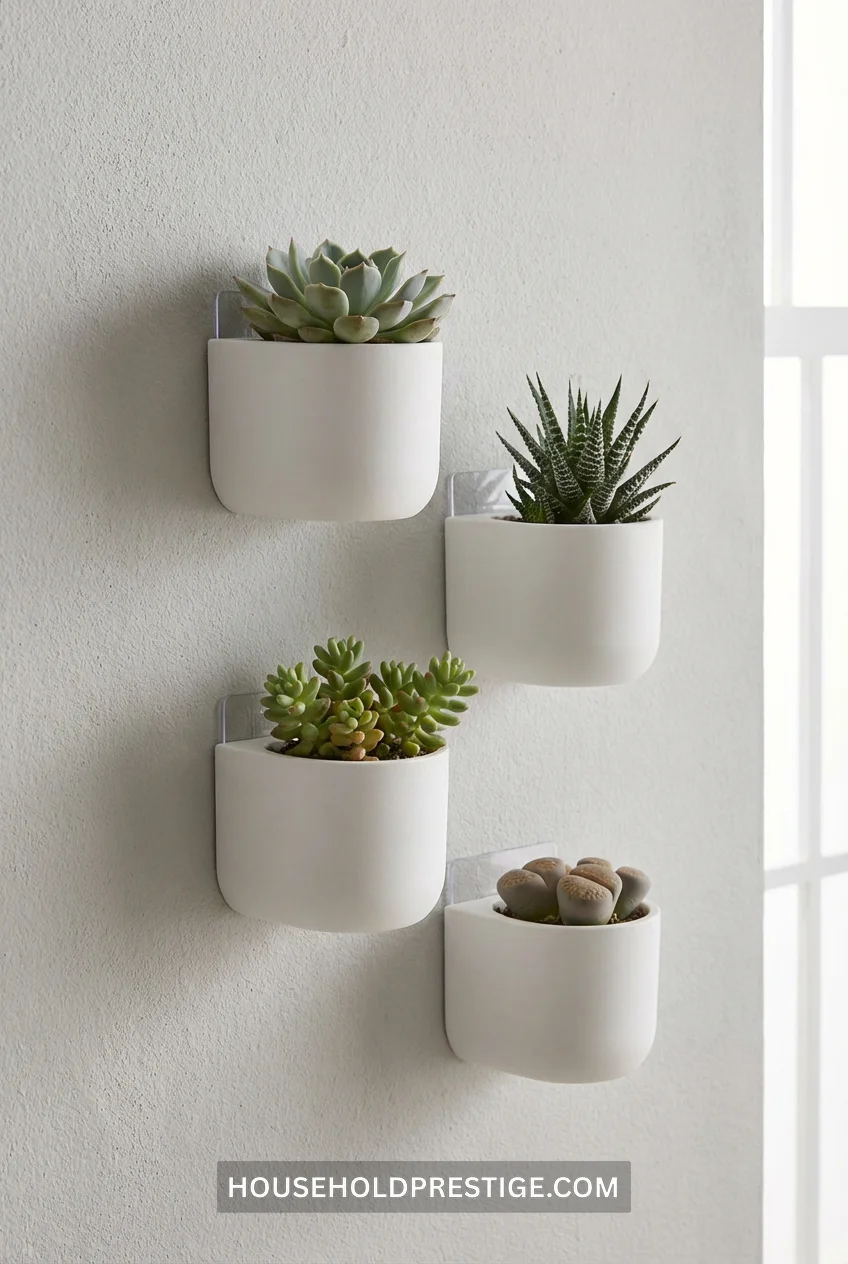
3M Command Picture Hanging Strips hold more than you think. Their large strips are rated for 16 pounds per pair. Get planters made from resin or thin metal—never ceramic or terra cotta. Add your succulent or air plant. Press firmly to the wall for 30 seconds.
This is your “I might move in six months” solution. Leaves zero damage. Takes 10 minutes start to finish.
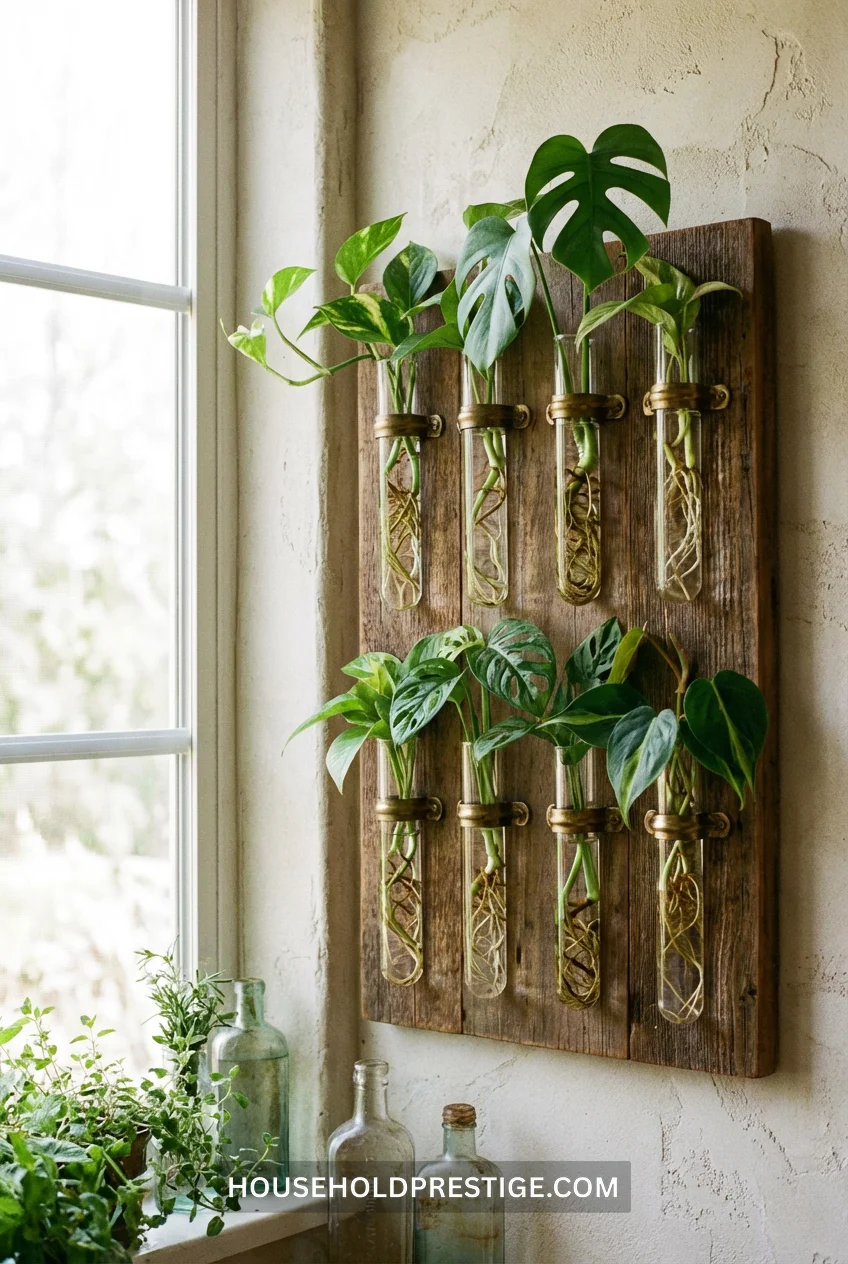
I killed $200 worth of plants before I figured out that propagation is just… free plants. You snip a cutting from your existing pothos or philodendron, stick it in water, wait 2-3 weeks, and boom—roots. New plant. Zero dollars.
But propagation stations sitting on counters get knocked over. Cats drink from them. They take up space. Mount it on the wall and suddenly you have an art installation that also happens to be a plant nursery.
What You Actually Need:
Wooden board (8×20 inches works well): $8-12
Test tube holders or small metal clamps: $15-25 for a set
Glass test tubes or small bud vases: $10-15
L-brackets for wall mounting: $5
Wood stain or paint (optional): $8
How to Build It:
Version A (Easy, 20 minutes):
Buy pre-finished wood board. Screw in decorative hooks or small shelf brackets spaced 2-3 inches apart. Hang test tubes from them using wire or string. Mount board to wall using two L-brackets.
Version B (Looks More Intentional, 1 hour):
Sand and stain a raw wood board. Drill holes sized for test tubes (usually 1-inch diameter). Insert tubes so they sit at a 15-degree angle—this keeps them from falling out and looks better than straight vertical. Mount to wall.
Best Plants for This:
Pothos, philodendron, monstera, spider plant babies, string of hearts. Basically anything that roots easily in water. Skip succulents—they rot.
The Maintenance Reality:
Change water every 5-7 days or it gets swampy. When roots hit 2-3 inches long, plant them in soil. Don’t leave cuttings in water forever hoping they’ll thrive—they won’t. Water roots are different from soil roots, and the longer you wait to transition, the harder it gets for the plant.
One macramé hanger looks lonely. Five at different heights looks intentional. Use a ceiling hook rated for 20 pounds minimum. Stagger lengths: longest in back at 48 inches, shortest in front at 24 inches. Creates depth without requiring shelf installation.
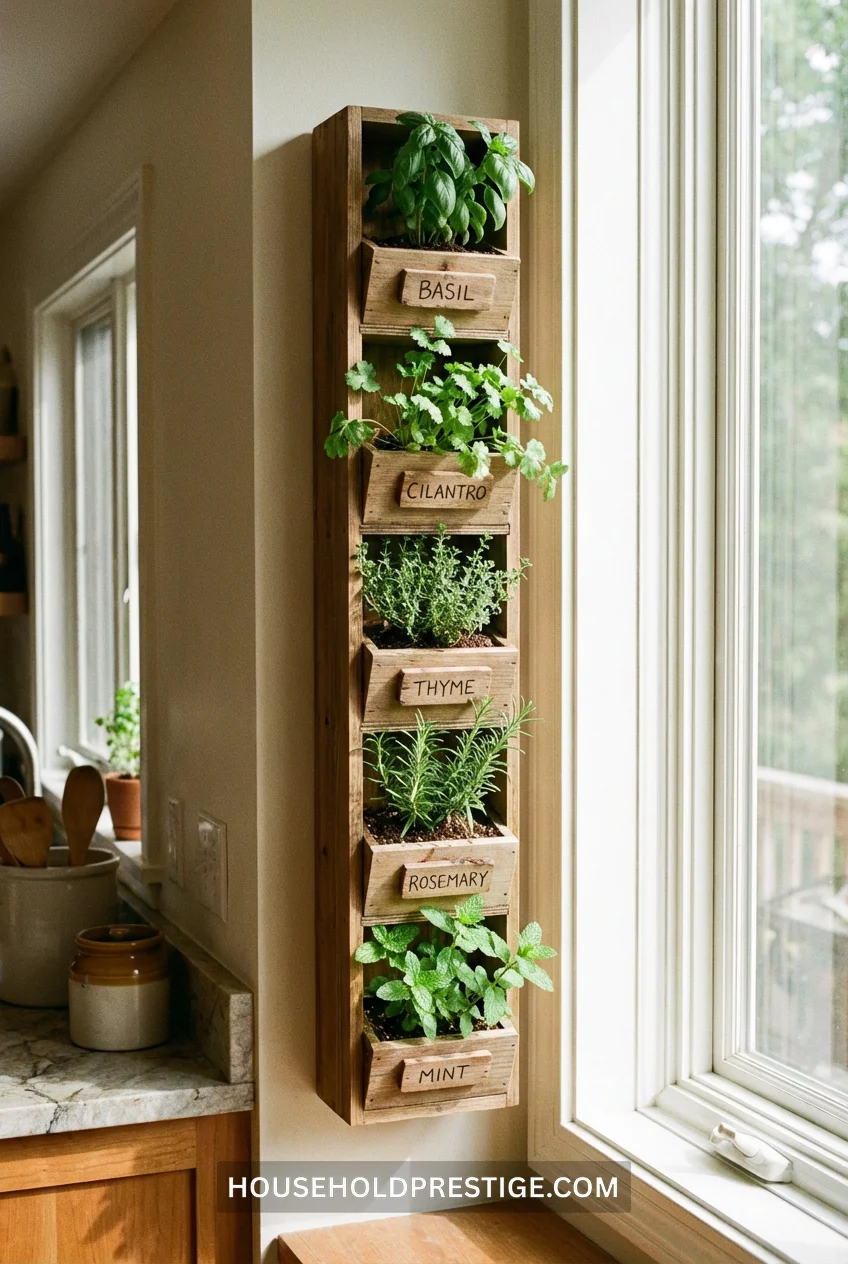
Most vertical herb gardens fail because people don’t understand that “near a window” means different things for different herbs. Basil needs 6+ hours of direct sun. Mint will tolerate shade. If you lump them all together in one location, something dies.
The Setup That Works:
Option 1: The Vertical Rail System
Mount a vertical wooden planter (you can find these pre-made for $40-60, or build one from fence pickets and landscaping fabric for $25). Position it within 2 feet of your sunniest window. Plant from top to bottom in this order:
Top tier: Thyme, oregano, rosemary (drought-tolerant, handle direct sun)
Middle tier: Basil, cilantro, parsley (heavy feeders, need consistent moisture)
Bottom tier: Mint, chives (tolerate less light, won’t dry out as fast)
Top tier dries fastest, bottom stays dampest. This arrangement uses physics instead of fighting it.
Option 2: Individual Pots on Rail Hooks
Get the IKEA KUNGSFORS rail again ($15). Mount it horizontally below your kitchen window. Hang 4-5 small pots with drainage. Each herb gets its own pot, so when your cilantro bolts (it will), you’re not disturbing the basil.
Drainage is Non-Negotiable:
Every single container needs drainage holes. Herbs drown easily. If you’re using a vertical planter without drainage, add a 1-inch layer of pebbles at the bottom of each compartment and cut your watering by 40%. Still not as good as real drainage, but it helps.
Watering Schedule That Won’t Kill Everything:
Stick your finger 1 inch into soil. Dry? Water. Still moist? Check tomorrow. That’s it. No calendar system works because light, humidity, and temperature all fluctuate.
In summer, you’ll water every 2-3 days. In winter, once a week might be enough.
The Harvest Principle:
Cut from the top, not the bottom. When you snip the top growth, the plant bushes out and gets fuller. Cut from the bottom and it gets leggy and sad.
Never take more than ⅓ of the plant at once. Your Wednesday pasta doesn’t need all your basil. Leave enough for the plant to recover.
Cost Breakdown:
Pre-made vertical planter: $40-60
Potting soil (organic): $8
Herb starts from nursery: $3-4 each × 5 = $15-20
Total: $63-88
Or build it yourself for $25-30 if you have basic tools.
Reality Check on “Fresh Herbs Year-Round”:
This works April through September without supplemental lighting. October through March, your herbs will sulk unless you add a grow light. A small LED clip-on light ($18-25) fixes this. Set it for 12 hours daily, positioned 6-8 inches from plants.
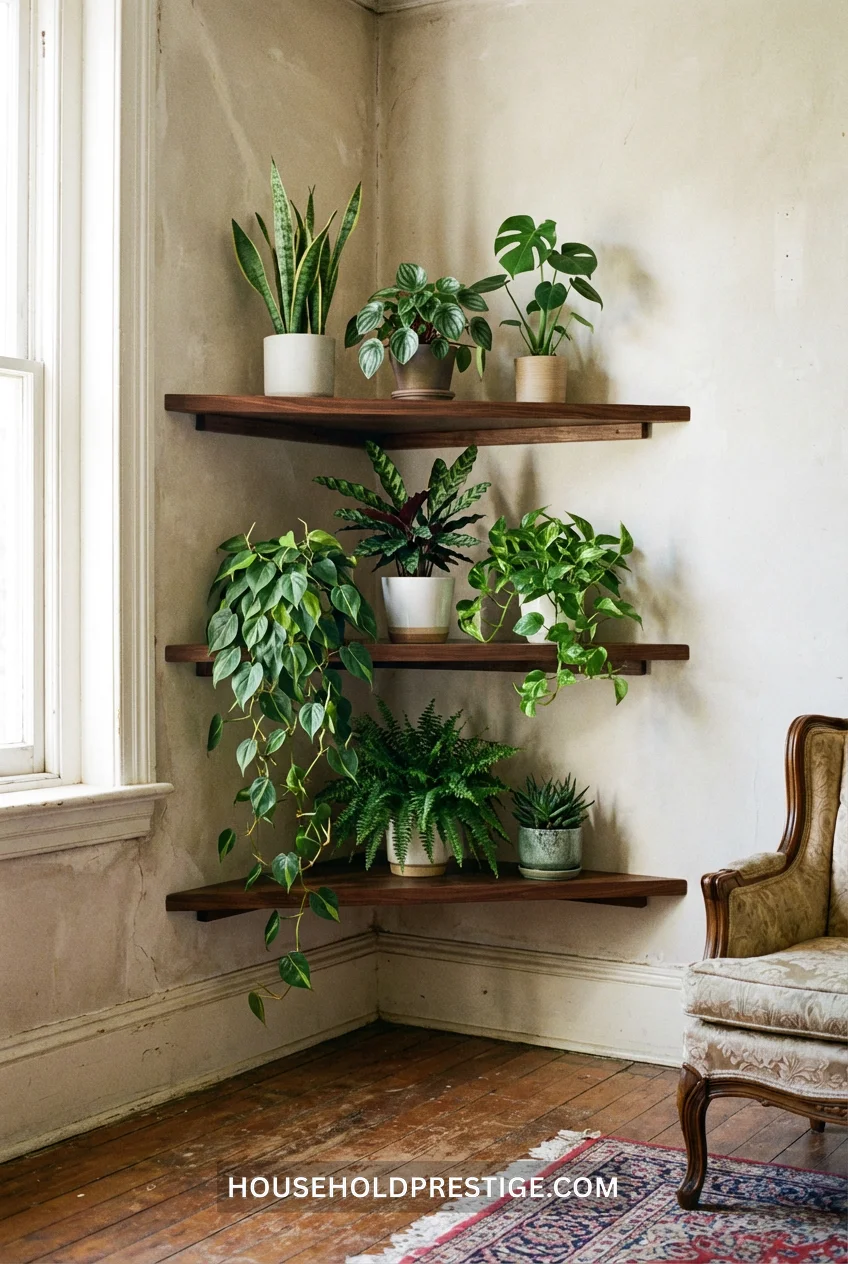
Corners are dead space. Corner shelves bring them back to life. Stack three or four triangular shelves vertically in that awkward corner between your couch and the wall. Each shelf holds 2-3 small pots. The triangular shape means they don’t stick out as far as regular shelves, so you’re not bumping into them.
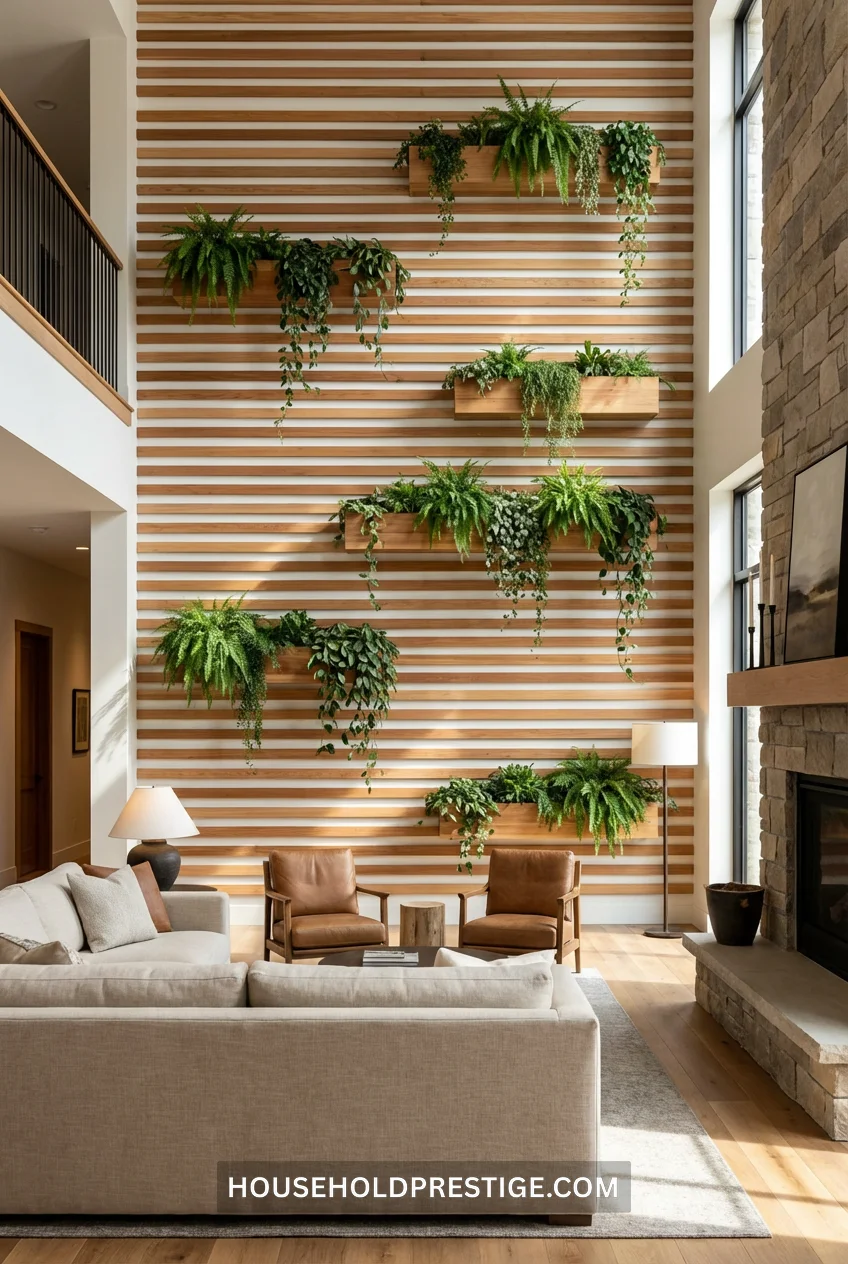
13. The Professional-Looking Slatted Wood Wall With Integrated Planters
This is the most ambitious project on this list. Takes a weekend, costs $150-200 in materials, requires actual woodworking. But the result looks like a $3,000 installation you’d see in a boutique hotel.
What You’re Building:
Horizontal wood slats (1×2 or 1×3 cedar boards) spaced 4 inches apart, mounted to a backing board, with small shelf brackets integrated between slats to hold planters.
Full Materials List:
Cedar boards (1×2 or 1×3) for slats: $80-100 (amount depends on wall size)
¾-inch plywood backing board (4×8 feet): $45-50
Small L-brackets or hidden shelf pins: $20-30
Wood stain or polyurethane: $12-15
Screws, wood glue, sandpaper: $15
Total: $172-210
The Build Process:
Day 1 (3-4 hours):
Cut plywood to desired size (I recommend 6×4 feet for first attempt)
Sand plywood smooth
Mark horizontal lines every 4 inches on plywood for slat placement
Cut cedar boards to length
Sand cedar boards (removes rough edges and splinters)
Stain or seal boards if desired (wait 24 hours for drying)
Day 2 (3-4 hours):
Glue and nail each slat to the backing board following your lines
Decide where planters will go and install small brackets between slats
Mount the entire assembly to your wall using heavy-duty toggle bolts or lag screws into studs
Add planters (use lightweight resin pots, not ceramic)
The Plant Strategy:
Put trailing plants (pothos, string of pearls) on upper shelves so vines drape down between slats. Put compact plants (succulents, snake plants) on lower shelves for structure. The slats create natural framing for the vines—it looks intentional instead of messy.
Why Cedar:
It’s naturally moisture-resistant. When you water plants, some humidity happens. Pine warps. Cedar doesn’t care.
Mistakes to Avoid:
Don’t skip the backing board. Mounting individual slats directly to drywall is a nightmare and looks sloppy.
Don’t make slat spacing wider than 4 inches or it loses visual impact.
Don’t use more than 4 planters total or it starts looking cluttered.
Worth It Factor:
This is your “I’m serious about this plant wall thing” project. Not for beginners, not for renters, not for people who hate measuring twice. But if you want the jaw-drop factor, this delivers.
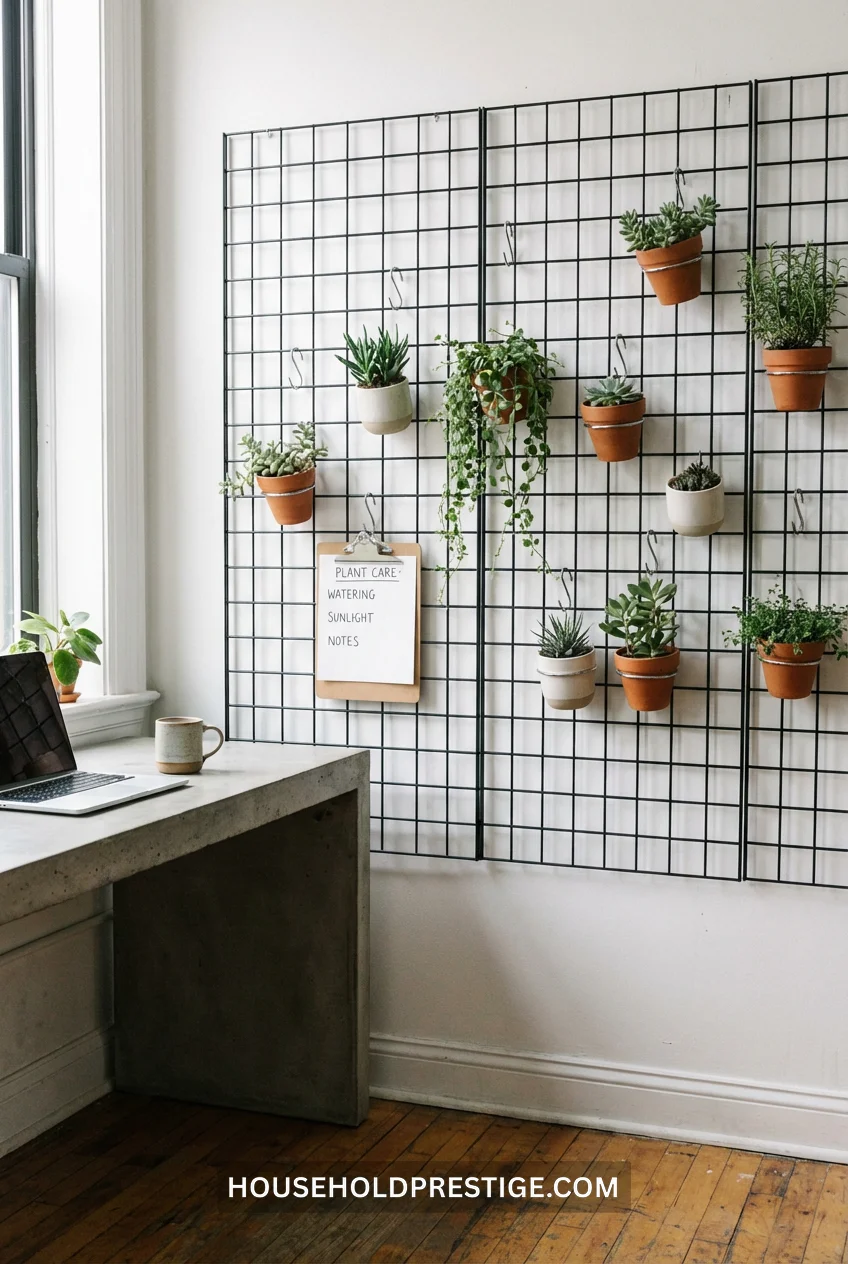
Black wire grid panels (search “mesh grid wall organizer”) run $15-25. Mount it, add S-hooks, hang small pots or test tubes. The grid pattern reads as industrial-modern, especially in black against white walls. Works particularly well in home offices where you can clip plant care notes, seed packets, and reminder tags alongside the actual plants.
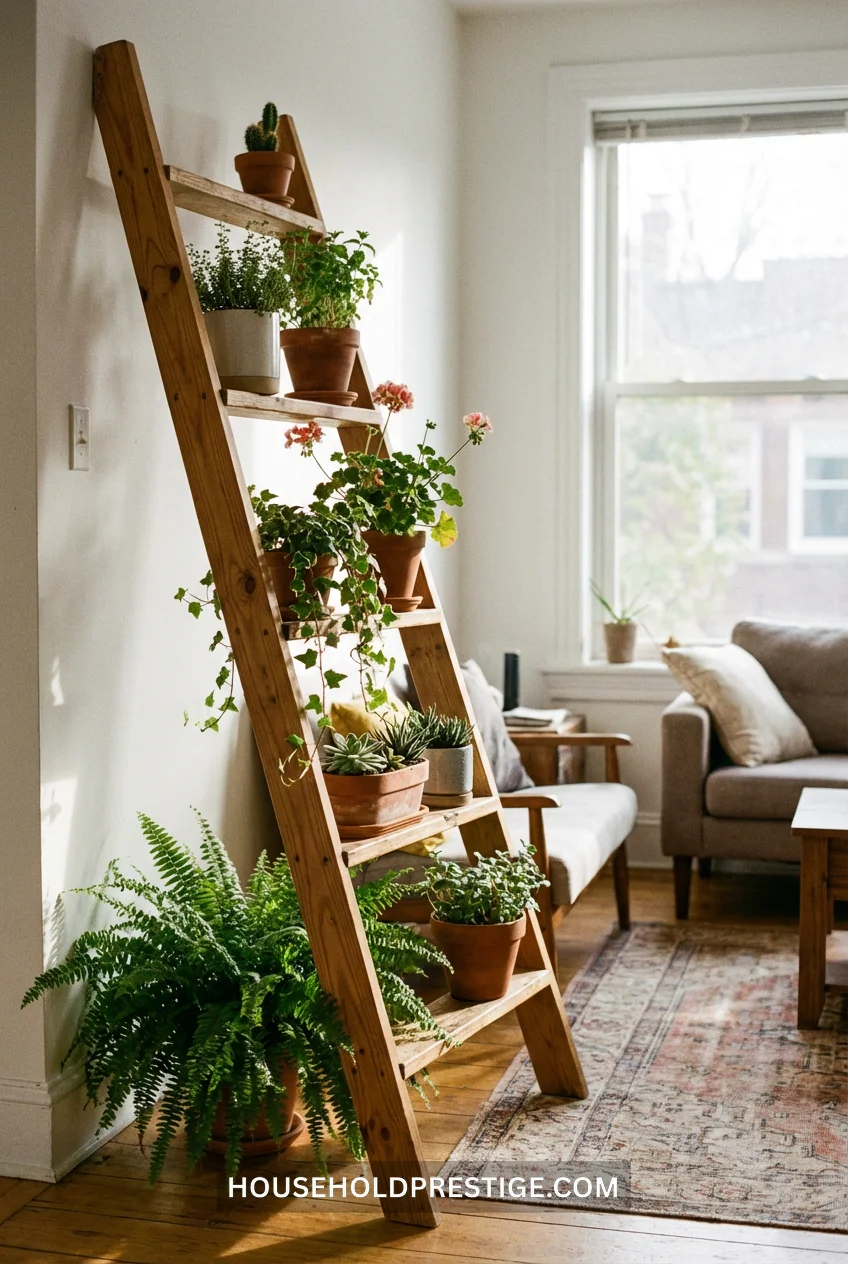
Old wooden ladder + plants on each rung = instant vertical garden with zero installation. Lean it at a 75-degree angle (steeper than you think—if it’s too upright, pots slide off). The tapered shape means each rung is a different width, which forces you to vary pot sizes. This creates visual interest by accident.
Source ladders from thrift stores, estate sales, or that dusty corner of your parents’ garage they forgot about. Sand it down, leave it raw, or paint it to match your space.
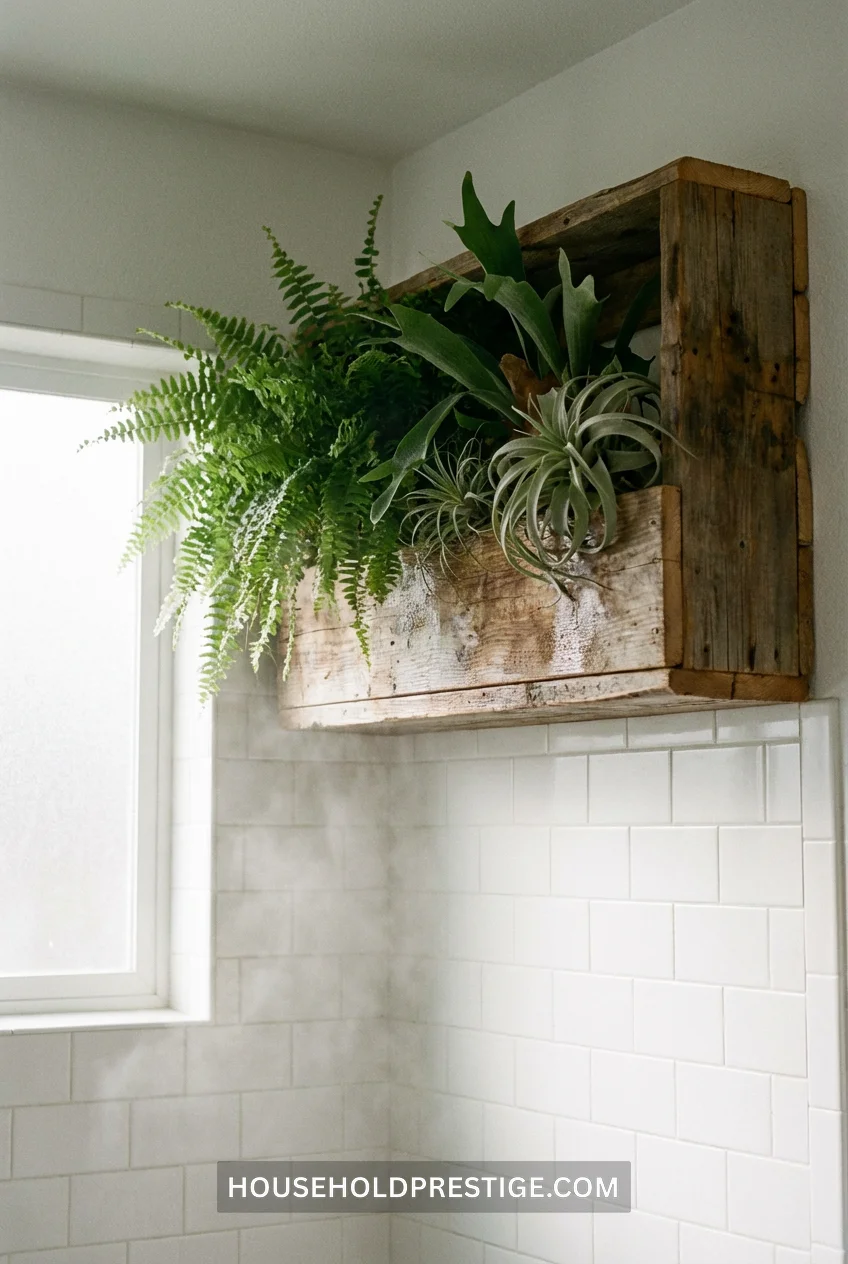
Ferns and humidity are best friends. Your bathroom shower creates a tropical microclimate every morning. Mount a small waterproof shelf (teak or treated pine) above the shower head, out of direct water spray but within the humid zone. Put ferns, air plants, or orchids up there.
The steam waters them for you. I’m not kidding. You’ll water them maybe once every 10-14 days instead of weekly. The shower does the rest.
Installation note: Use stainless steel brackets rated for outdoor use. Regular metal rusts in constant humidity.
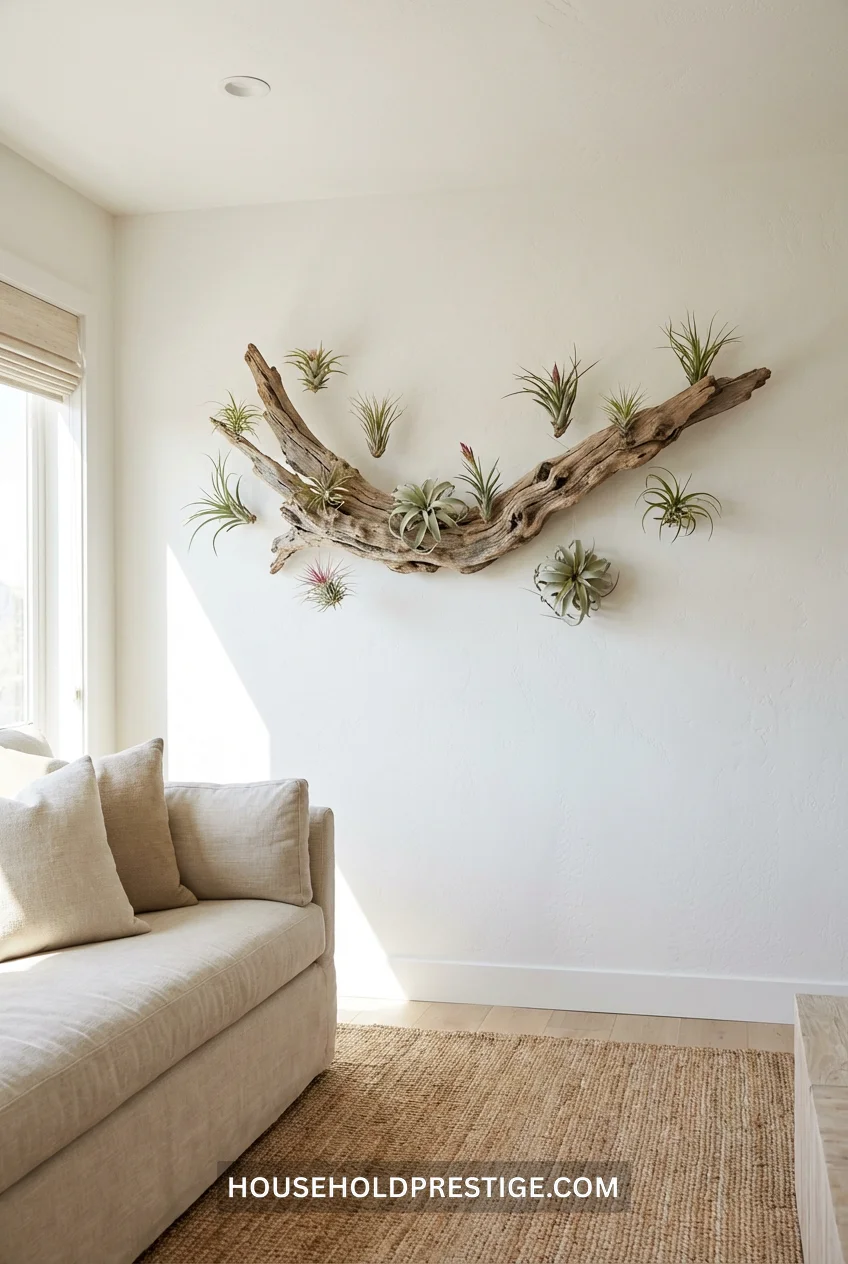
17. Air Plant Wall Art (Mounted Directly to Drift wood)
Find interesting driftwood (beach, craft stores, online). Attach air plants using clear fishing line or E6000 glue dots. Mount wood to wall. Done.
The beauty here is that air plants don’t need soil. They survive on humidity and weekly soaking. Once a week, take the whole piece down, soak it in water for 20 minutes, let it drain, hang it back up. 10 minutes of maintenance weekly for something that looks like a $400 art piece.
Hanging shoe organizers weren’t designed for plants, but they work. Clear pocket organizers let you see soil levels. Fabric breathes better than plastic. Hang it on a wall near a window, fill pockets with herbs or small trailing plants.
Tip: Put a layer of landscaping fabric in each pocket before adding soil. Prevents the bottom from sagging and extends the life of the organizer by months.
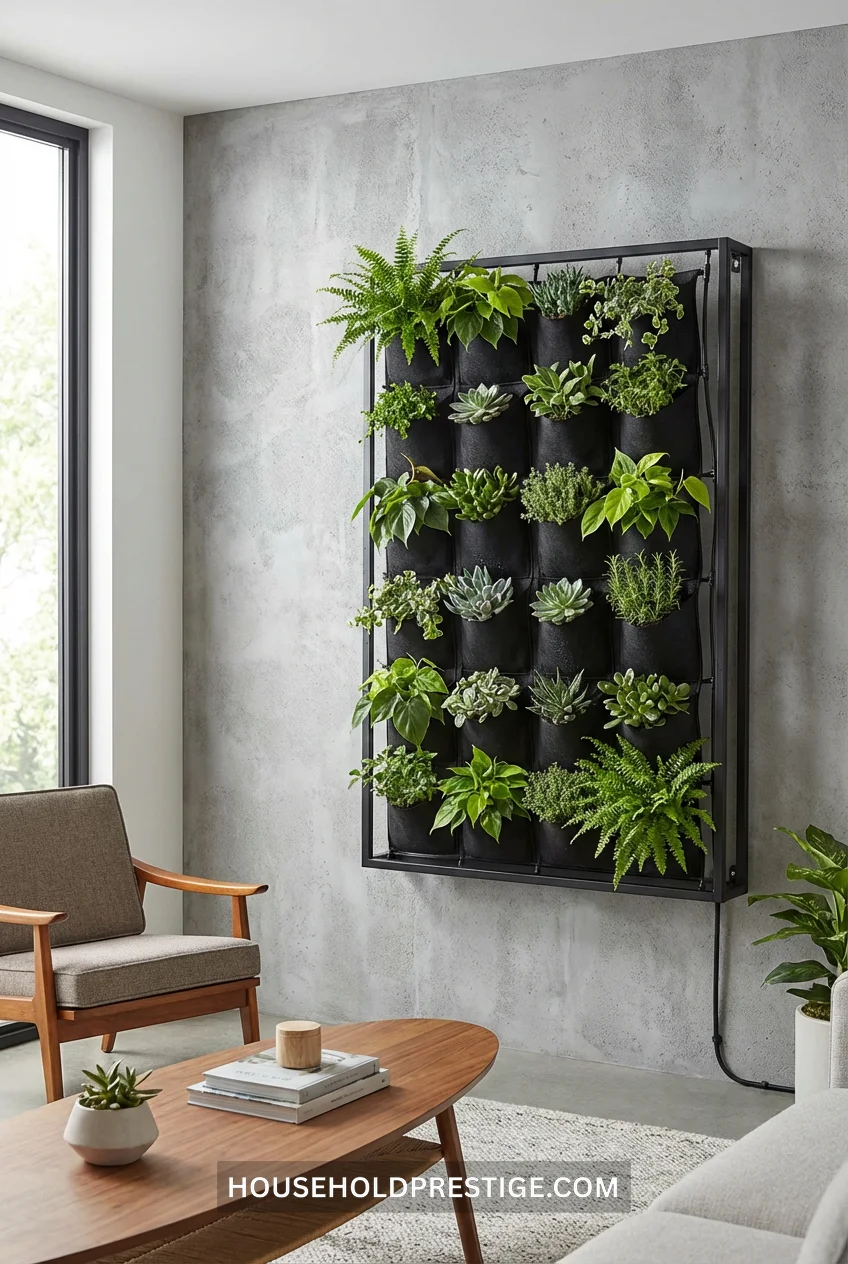
19. The “I’m Not Handy” Solution: Pre-Made Living Wall Kits
Zero DIY required. Companies like Verti-gro, Woolly Pocket, and Florafelt sell complete systems with mounting hardware, built-in irrigation (some models), and instructions a child could follow. You provide: wall space and plants. They provide: everything else.
Cost ranges from $150 for a small 2×2 foot panel to $800+ for a full wall installation with automatic watering. Expensive, yes. But if your time is worth more than your money, or if you’ve failed at every DIY attempt since 2019, just buy the solution.
Conclusion
Here’s what nobody tells you about plant walls: they’re never “done.”
Plants grow. They vine. They fill in. They sometimes die and need replacing. That empty spot that bothers you today? Give it three months and trailing vines will cover it. That plant that looked perfect last week? It might need moving to a different shelf for better light.
Plant walls are living installations, not fixed décor. And that’s exactly why they work. Your gallery wall of static prints will look the same in five years. Your plant wall will be fuller, lusher, and more interesting—or you’ll have learned enough to start over with better choices.
Either way, you’ll have tried. That blank wall won’t be blank anymore.
Pick one idea from this list. Start small if you need to. But start. Your wall is waiting.
FAQ
How do I water plants on a wall without making a mess?
Water over a sink, period. For plants mounted too high to move easily, use a long-reach watering can or turkey baster to control flow. Put a towel down first. Or mount your plant wall in a space where occasional drips don’t matter—tiled bathroom, concrete basement, garage. Saucers help, but they don’t prevent overflow completely.
What plants work best for low-light vertical gardens?
Pothos, snake plants, ZZ plants, and philodendrons tolerate low light. They won’t grow as fast, but they won’t die either. If your wall gets less than 4 hours of natural light daily, add a small LED grow light ($18-30) on a timer. Even shade-loving plants appreciate supplemental light.
Can I create a plant wall in a rental without damaging walls?
Absolutely. Use Command Strips for lightweight setups (air plants, small succulents in resin pots). Try tension rods between walls for hanging planters. Lean ladder shelves that require zero mounting. Stick to pegboards and rail systems that only need a few screw holes you can patch when you move. Avoid anything requiring lag bolts into studs unless you’re prepared to patch and paint on move-out day.
How much does a plant wall cost to create?
Ranges wildly. A pegboard setup with basic plants: $40-60. Floating shelves with grow lights: $100-150. Full slatted wood installation: $200+. Pre-made living wall systems: $150-800. Start with the cheapest option that fits your space and skill level. You can always upgrade later when you know what you actually want.
Do vertical gardens help with air quality?
Yes, but manage expectations. NASA studies show plants remove toxins, but you’d need 30-50 plants in a typical bedroom to match what an air purifier does. The real benefit is humidity (plants release moisture), mental health (greenery reduces stress), and aesthetics (your space looks better). Treat air quality improvement as a bonus, not the primary goal.
We use cookies to ensure that we give you the best experience on our website. If you continue to use this site we will assume that you are happy with it.