

You know that sinking feeling when you step into your bathroom at 6 AM? Harsh lighting. Clutter everywhere. Cold tile that makes you want to sprint back to bed.
Your bathroom should feel like the opposite of chaos. Scandinavian design gets this—it’s why their bathrooms look like private spas without the $40,000 remodel. We’re talking warm wood against white walls, storage that actually makes sense, and lighting that doesn’t scream “interrogation room.”
These 17 Scandinavian bathroom ideas work whether you rent a studio or own a sprawling suburban house. Some take 20 minutes and zero carpentry skills. Others require a weekend and a drill. But all of them center on the same principle: less clutter, more calm, natural materials that age beautifully.
1. Vertical Wood Slat Wall (One Wall, Maximum Impact)
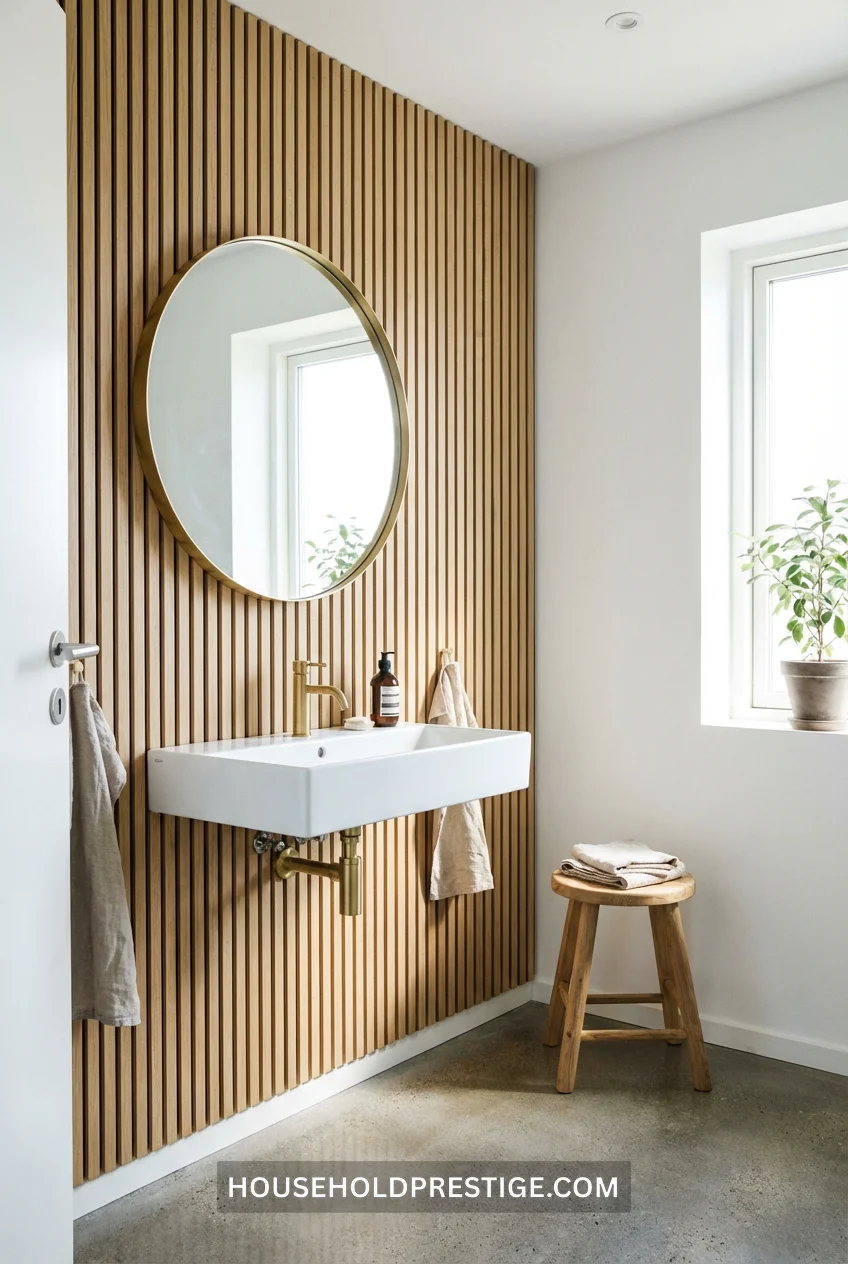
Pick your worst wall. The one where tiles are cracking or paint is peeling. Cover it floor-to-ceiling in vertical wood slats.
This isn’t paneling your grandma’s basement—we’re talking thin, evenly-spaced pine or oak strips that run from floor to ceiling. The vertical lines trick your eye into reading the room as taller. Your 7-foot-6-inch ceiling suddenly feels like 9 feet.
Installation Reality:
Materials needed:
- 1×2 inch pine boards (calculate linear footage: wall width × 8 feet for standard ceiling)
- Construction adhesive ($8-12/tube, you’ll need 2-3 tubes)
- Level, measuring tape, miter saw access
- Light wood stain or leave natural
- Clear polyurethane for moisture protection (2 coats minimum)
Cost: $150-280 depending on wall size
Time: 4-6 hours for an 8-foot wide wall
Difficulty: Intermediate (cutting boards to exact height is the tricky part)
Pro Move:
Space the slats 2-3 inches apart, not flush against each other. The gaps create shadow lines that add depth. Plus, air circulation behind the wood prevents moisture buildup—critical in bathrooms.
Paint or stain the wall behind the slats a shade darker than the wood. When light hits the slats, you get this dimensional effect instead of flat wood.
Common Mistakes:
Don’t use MDF or particle board, even if it’s cheaper. Bathrooms = moisture, and those materials swell and warp within months. Real wood costs more upfront but won’t look like a disaster by next year.
Skip the horizontal application. Horizontal slats make low ceilings feel even shorter, which defeats the entire purpose.
2. Swap Your Overhead Light for a Pendant
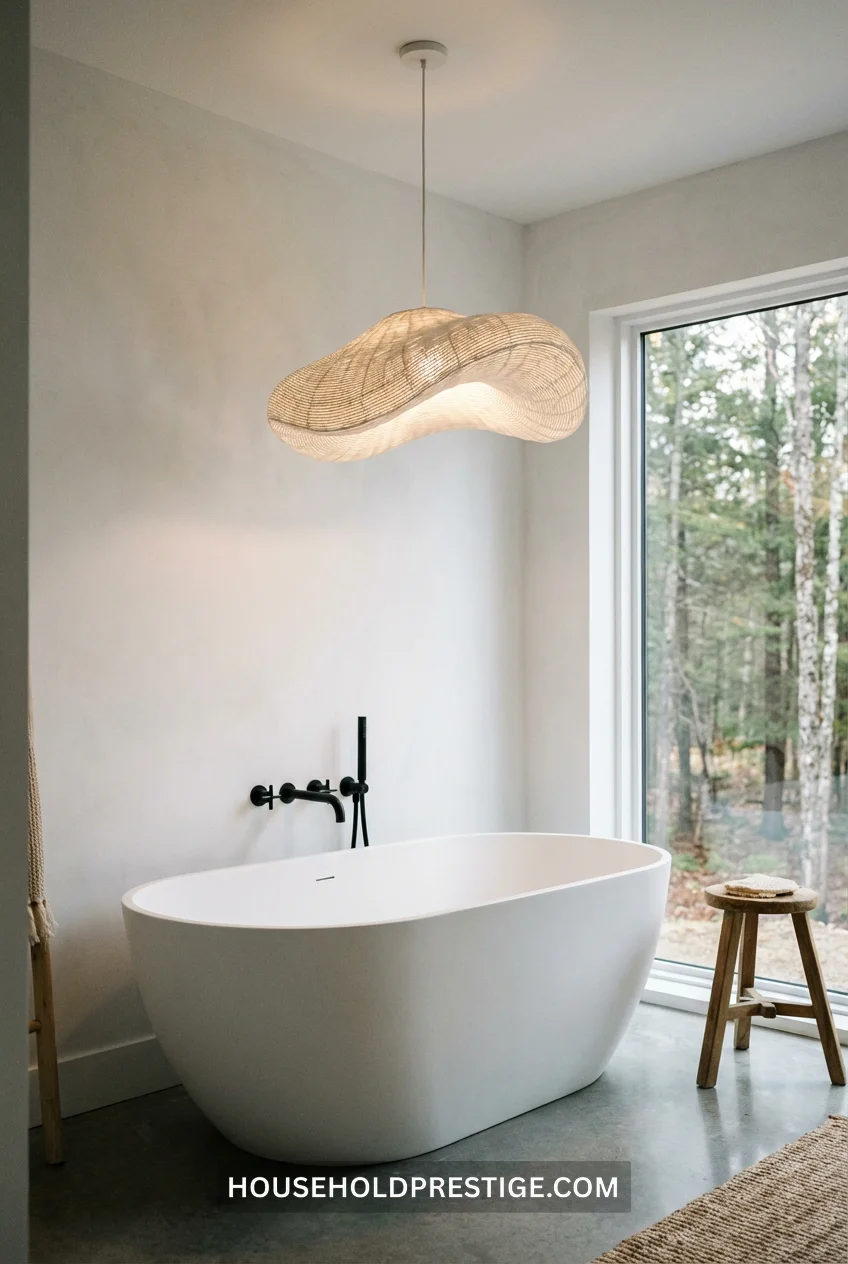
Recessed ceiling lights are fine for airports. Your bathroom deserves better.
One pendant light—positioned over your tub or centered in the room—changes everything. Scandinavian designers use pendants because they create ambiance instead of just illumination. You’re not lighting up a room; you’re creating a mood.
Good options: Woven rattan pendants, frosted glass globes, black metal cage designs. Avoid crystal chandeliers or anything that screams “formal dining room.”
Cost: $80-200 for a quality pendant, $150-300 for electrician installation if you’re not comfortable with wiring
Impact: Immediate. Visitors will ask about it.
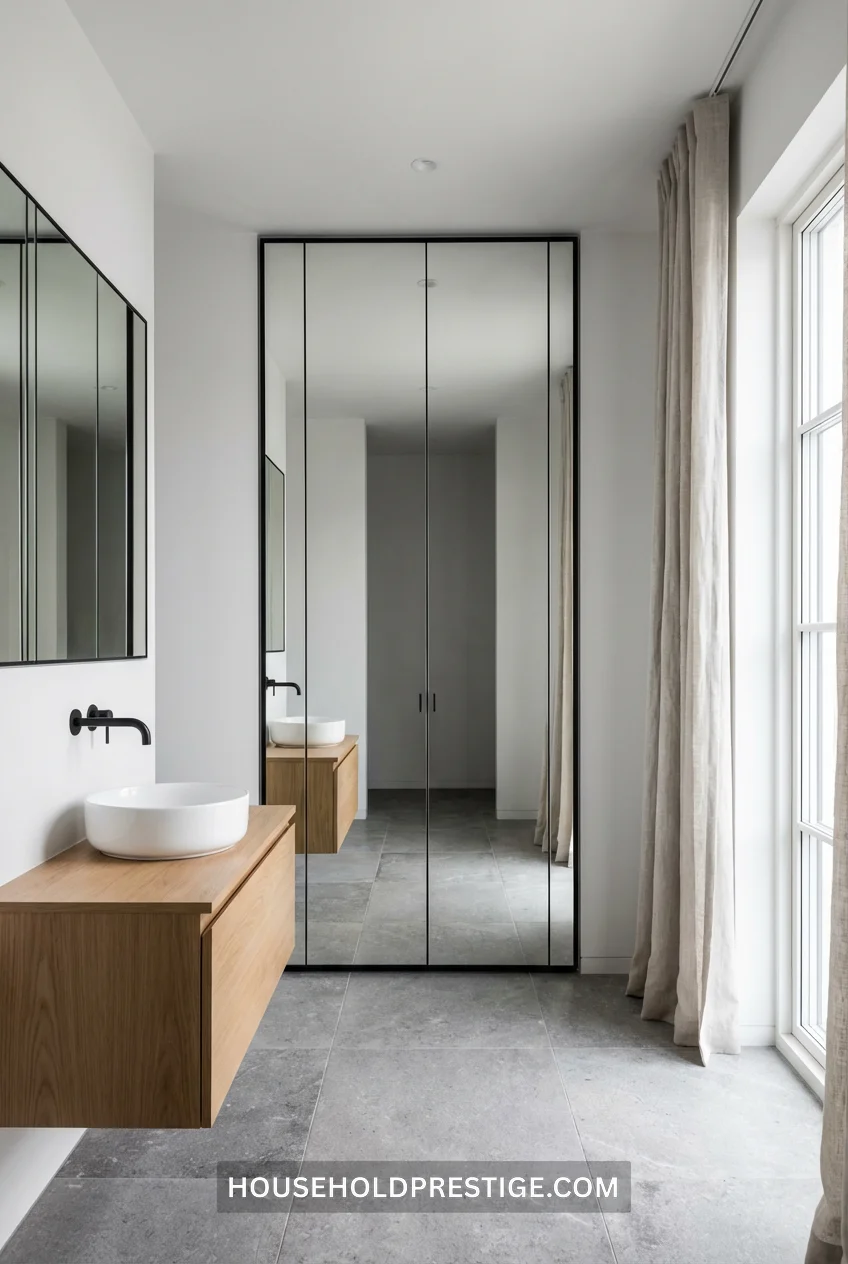
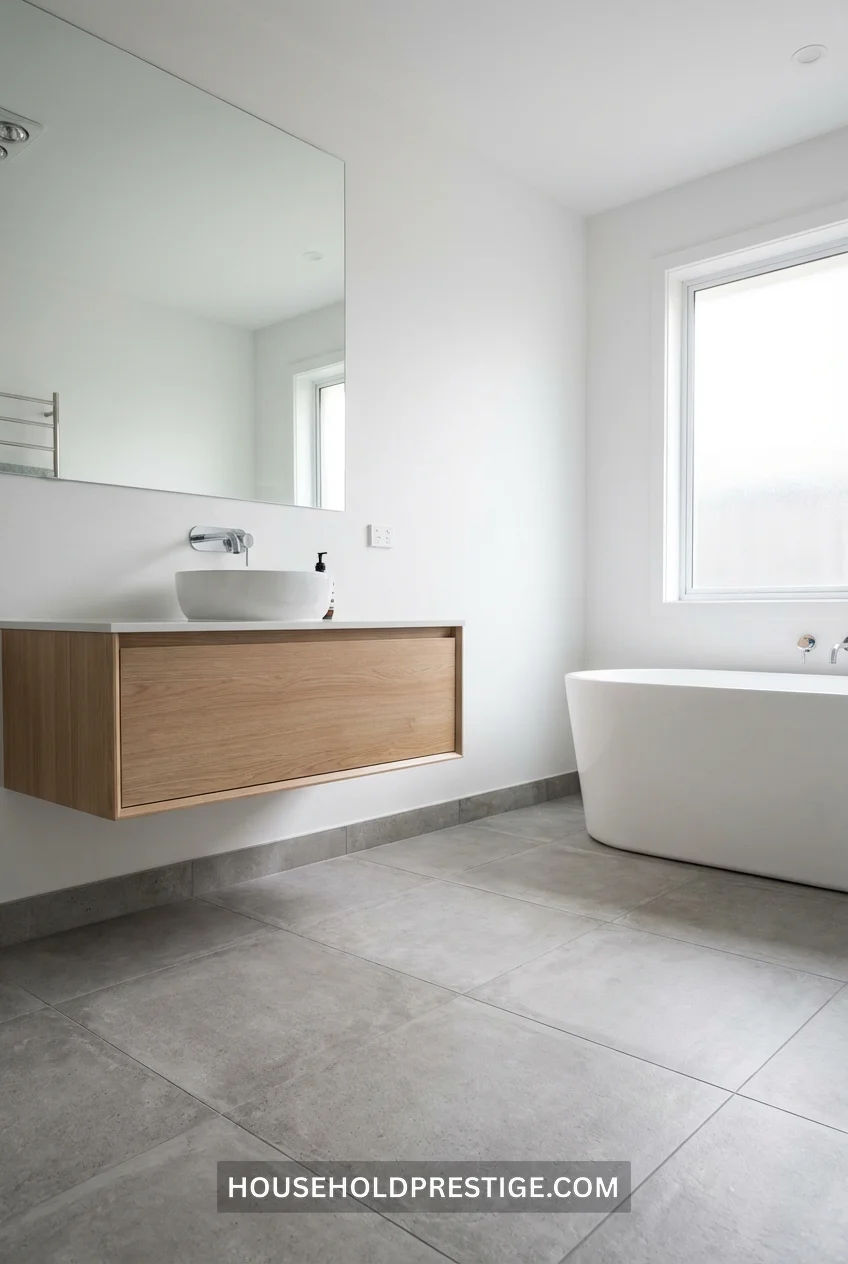
3. Floating Vanity in Light Wood
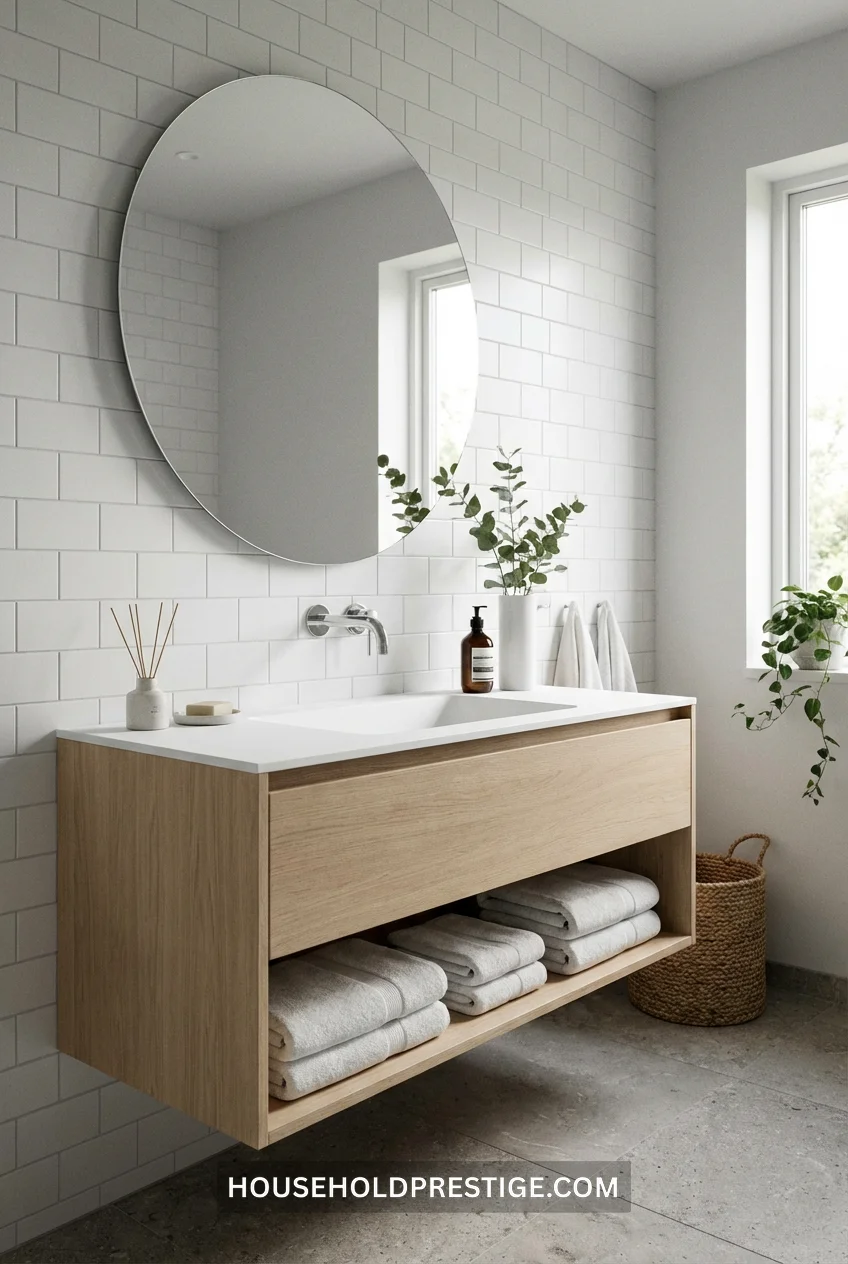
Floating vanities are the single smartest move for small bathrooms. Floor space = visual space. When you can see the floor continuing under the vanity, your brain reads the room as bigger.
But here’s what most people miss: the open shelf underneath.
Why This Works:
Traditional vanities hide storage behind doors. You crouch, dig through stacks of towels, knock over skincare bottles. Floating vanities with open shelving force you to curate what’s visible—which means you actually USE what you own instead of hoarding.
Dimensions:
Standard floating vanity height: 32-34 inches from floor to countertop (2 inches lower than traditional vanities, better for shorter users)
Depth: 18-24 inches (shallow enough to preserve floor space, deep enough for daily items)
Shelf height underneath: 10-12 inches (fits folded towels, baskets, or small bins)
Materials & Costs:
IKEA’s Godmorgon series: $300-500 (includes vanity box, top, and sink)
Custom carpenter-built: $800-1,500
Mid-range ready-made: $400-700
Installation note: Floating vanities MUST anchor into studs, not just drywall. Plan to add plywood backing if your studs don’t align with your desired vanity position. Budget $150-250 for professional installation if you’re not confident with wall anchors.
4. One Oversized Plant (Not a Collection)
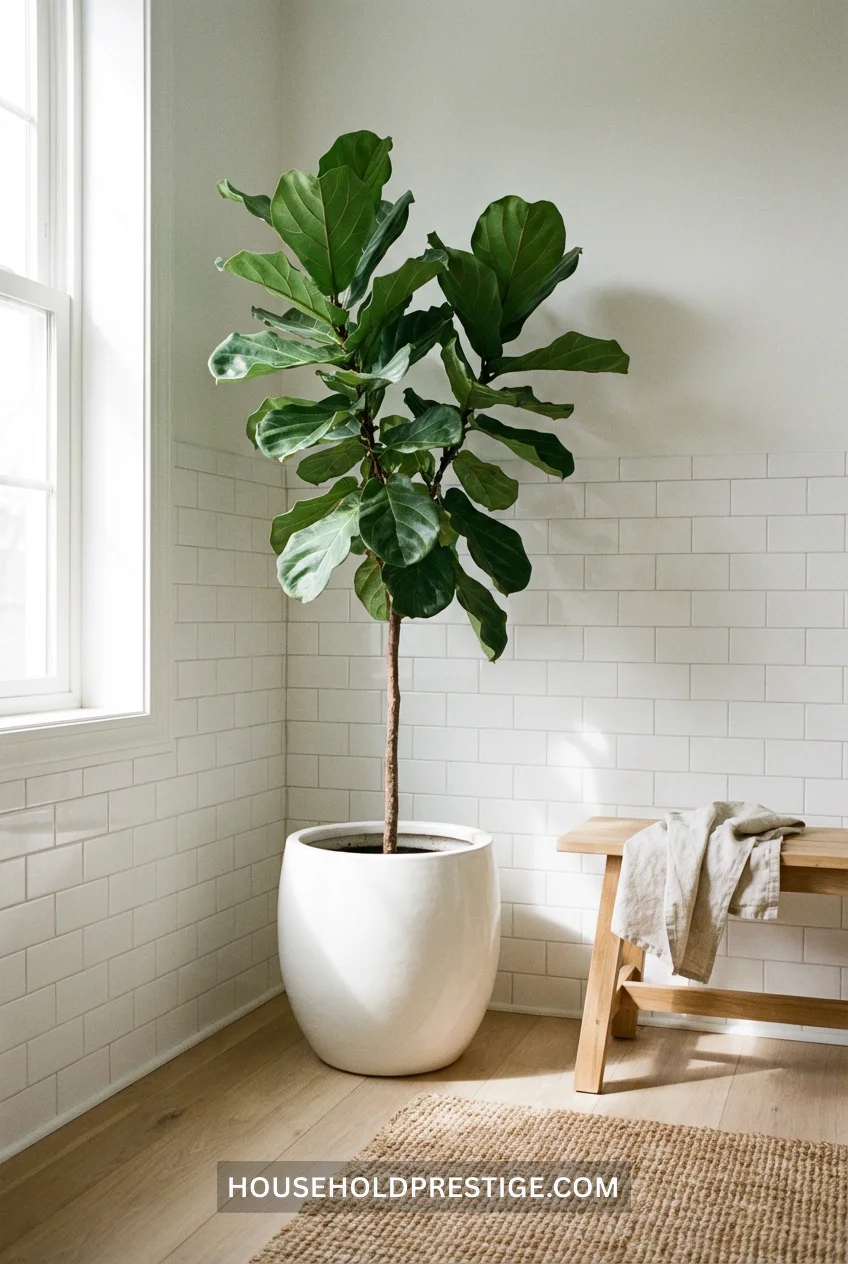
One plant. Big. That’s the rule.
Scandinavian bathrooms don’t have plant shelves crammed with succulents. They have one statement plant—tall enough to matter, positioned strategically.
Best bathroom-friendly plants:
- Monstera deliciosa (tolerates low light, loves humidity)
- Snake plant (nearly indestructible, air-purifying)
- Fiddle leaf fig (dramatic height, needs bright indirect light)
- Bird of paradise (grows 5-7 feet tall, tropical vibe)
Place it in the corner opposite your mirror. When you glance at the mirror, you see greenery in your peripheral vision—instant calm.
Cost: $30-80 for a 3-4 foot plant, $20-40 for the right pot
5. Replace Cabinet Hardware with Leather Straps
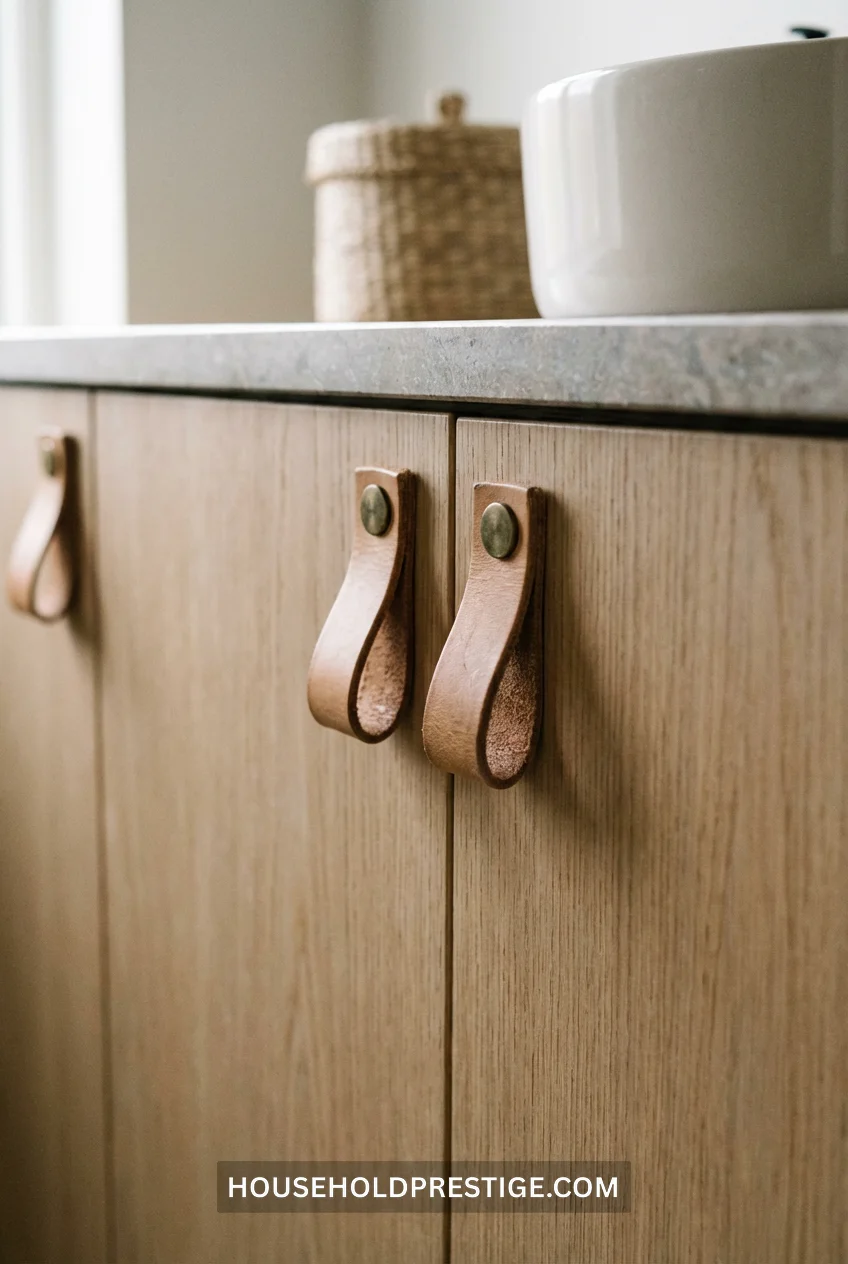
Toss the chrome knobs. Get leather straps.
This sounds weird until you see it: cabinet doors with simple leather pulls attached by brass or matte black screws. The texture contrast—smooth painted wood + supple leather—is what Scandinavian design does better than anyone.
Where to get them:
- Etsy: Search “leather cabinet pulls Scandinavian” ($8-15/pull)
- DIY option: Buy vegetable-tanned leather strips (1 inch wide, 6 inches long), brass Chicago screws from a hardware store. Drill two holes 3 inches apart, attach strap. Total cost: $3-5 per pull.
Installation: 10 minutes per cabinet. Drill, screw, done.
6. Black Grout, White Subway Tiles
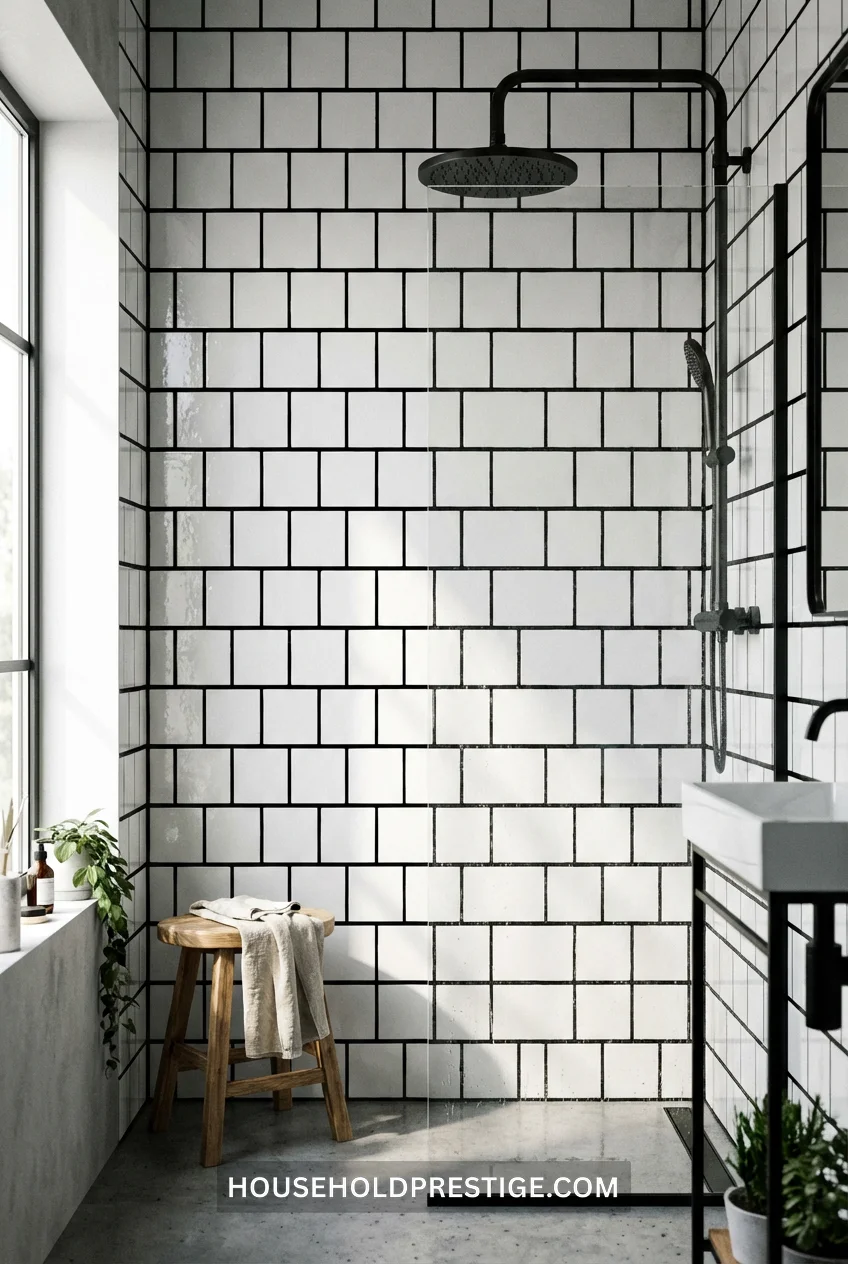
White subway tiles with white grout disappear into blandness. Black grout turns them into a design feature.
The contrast creates a grid effect—organized, intentional, modern without trying too hard. Plus, black grout hides staining better than white. Your shower looks cleaner, longer.
Cost difference: Black grout costs the same as white ($12-18 per bag). Labor costs are identical.
Pro tip: Use epoxy grout in black, not cement-based. It’s stain-resistant and doesn’t require sealing.
7. Ladder Towel Rack (Lean It, Don’t Mount It)
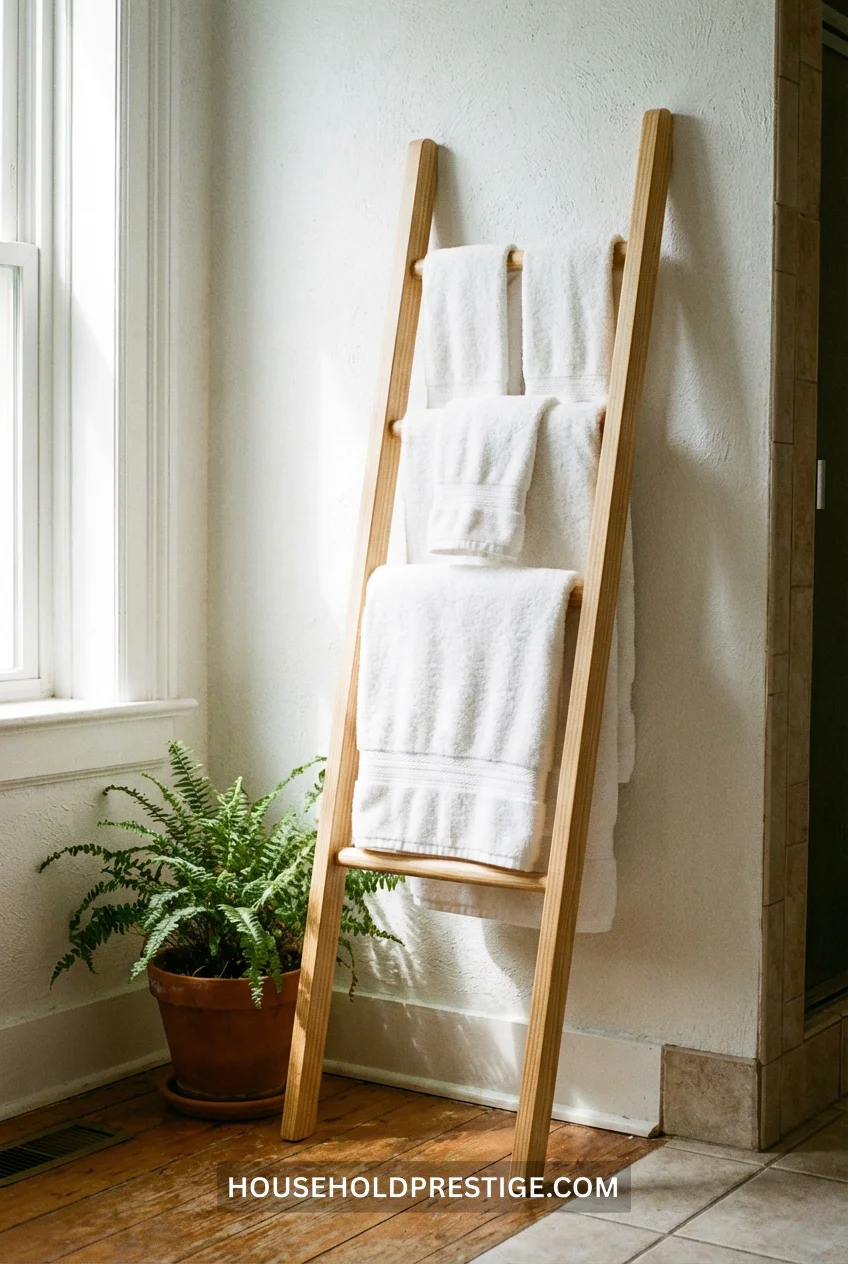
Wall-mounted towel bars are permanent. Ladder racks are flexible.
Lean a wooden ladder (5-6 feet tall, 18-24 inches wide) against the wall. Drape towels over each rung. Move it when you repaint or rearrange. Take it with you when you move.
Cost: $60-120 for a quality ladder rack
Capacity: 4-6 towels depending on rung spacing
Bonus: Doubles as decor. Fill a basket with rolled towels at the base.
8. Ceiling-Height Medicine Cabinet (The Full Wall Version)
Standard medicine cabinets hold 12 items. A ceiling-height version holds 50+.
This isn’t a standard install—it’s a statement piece. Picture a recessed cabinet that runs from countertop to ceiling (4-5 feet tall), 24-36 inches wide. Mirrored doors on the front. Adjustable shelves inside.
Why Full-Height Works:
Most people use 20% of their bathroom storage. The top shelf becomes a graveyard for expired medications. A ceiling-height cabinet with proper shelving forces vertical organization—daily items at eye level, backstock items above, rarely-used items at the top.
Specifications:
Depth: 4-6 inches (recessed into wall, so this requires access to the stud cavity)
Width: 24-36 inches (must fit between wall studs if recessing, or surface-mount for flexibility)
Shelves: 6-8 adjustable shelves spaced 8-10 inches apart
Mirror: Full front mirror or split doors with mirrors
Installation Requirements:
You’re cutting into drywall and potentially relocating plumbing or electrical if they’re in that wall cavity. This is NOT a DIY project unless you’re experienced.
Professional installation cost: $800-1,500 (includes cabinet, installation, drywall patching/painting, and mirror doors)
DIY cabinet cost: $300-600 if you’re comfortable with wall cutting and framing
The Catch:
This only works on exterior walls or walls without plumbing/electrical. If your bathroom shares a wall with another bathroom, you’re probably out of luck unless you surface-mount (which defeats the recessed aesthetic).
When It’s Worth It:
Small bathrooms with zero counter space. Shared bathrooms where multiple people need storage. Bathrooms where a traditional vanity won’t fit but you still need serious storage.
9. Concrete-Effect Tiles on the Floor
Actual concrete floors crack, stain, and require resealing every few years. Porcelain tiles that LOOK like concrete? Zero maintenance, waterproof, and they cost less.
Look for large-format tiles (24×24 inches or bigger). Fewer grout lines = more seamless look = your bathroom reads as bigger and more cohesive.
Cost: $4-8 per square foot for porcelain concrete-effect tiles
Installation: $8-12 per square foot for professional install
10. Under-Shelf Basket System
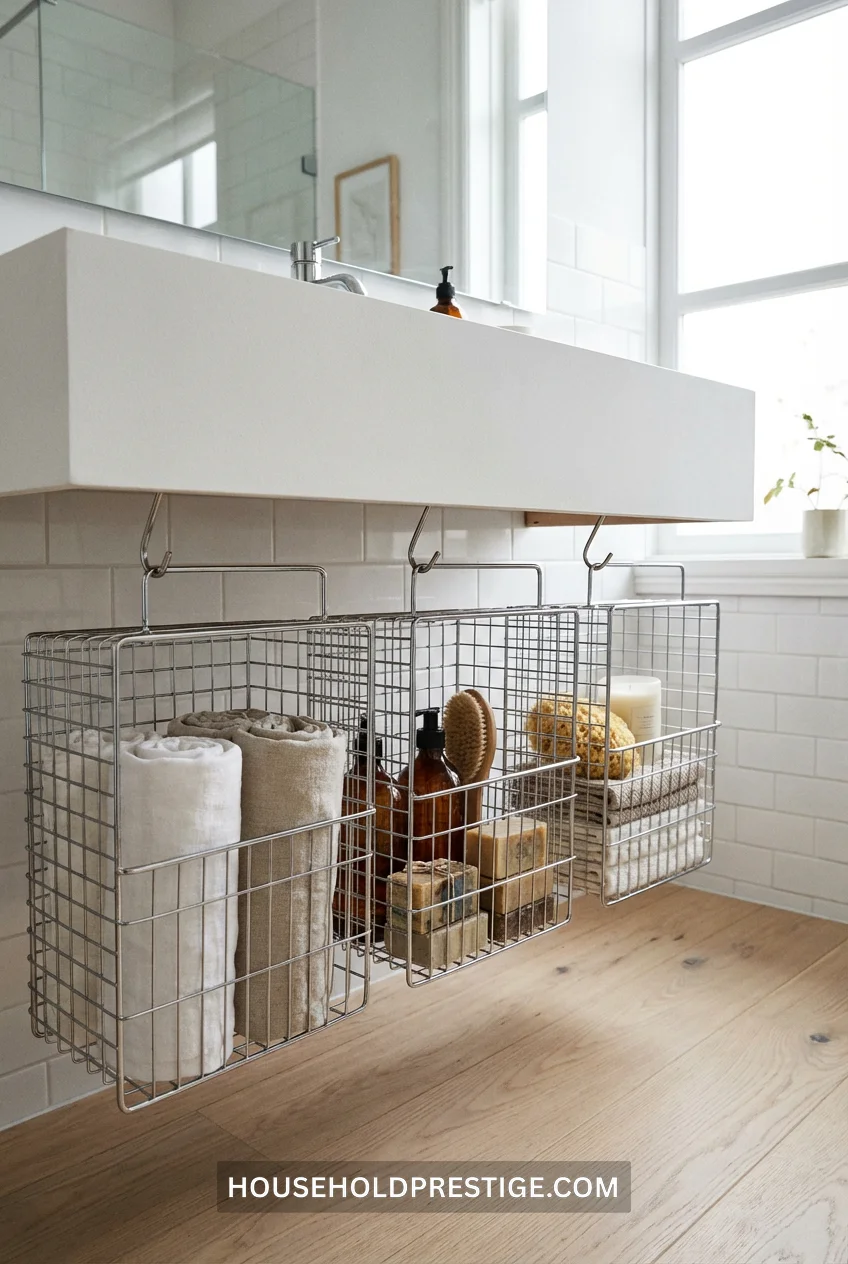
Your floating shelf has wasted space underneath. Fix it with hanging wire baskets.
These slide onto the shelf edge and hang below. Fill them with rolled hand towels, extra toilet paper, or daily skincare. Suddenly that 8-inch shelf becomes 16 inches of functional storage.
Cost: $12-25 per basket (get 2-3)
Install time: 30 seconds. They clip on.
11. Heated Towel Rack (The One Luxury That’s Worth It)
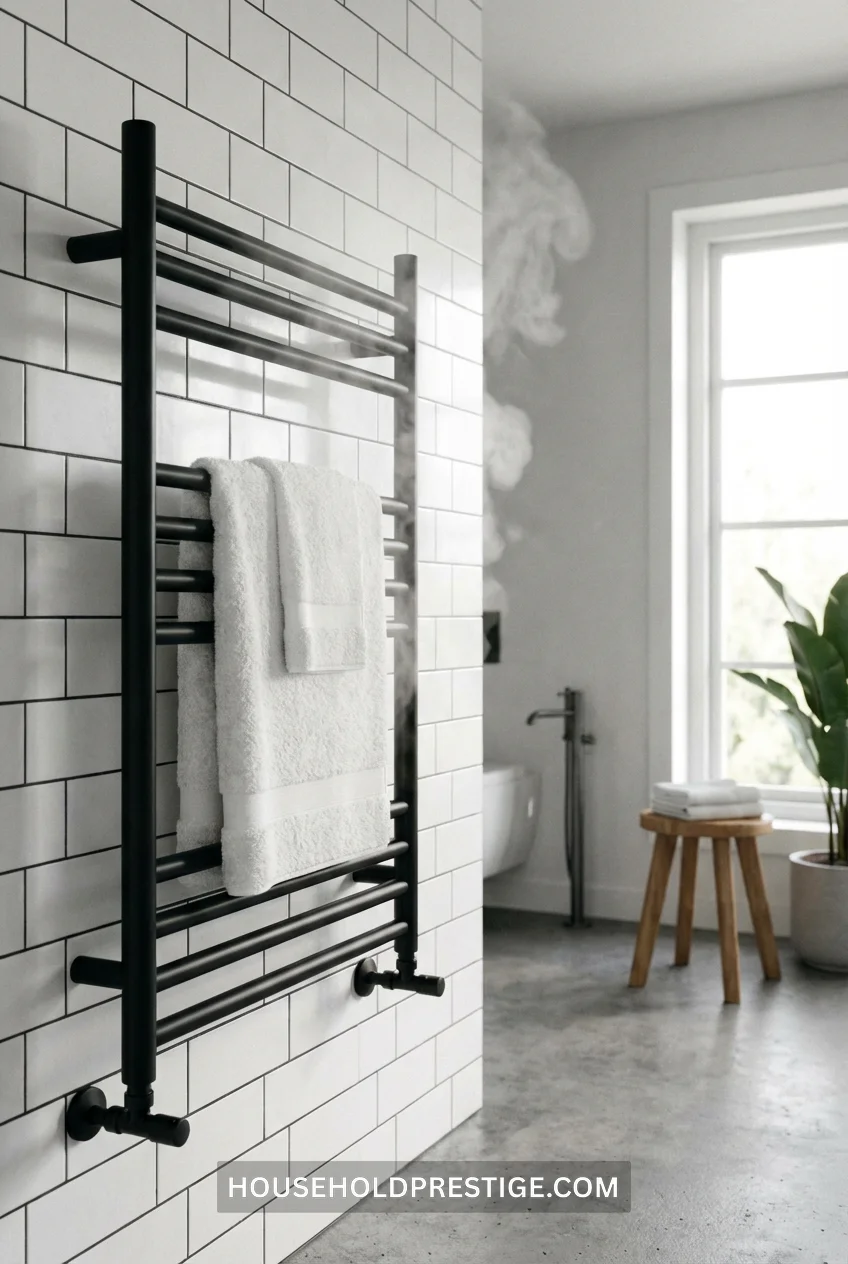
Stepping out of the shower into a cold bathroom is misery. Wrapping yourself in a warm towel feels like a hug from someone who actually cares about your comfort.
Heated towel racks aren’t just for luxury hotels. Wall-mounted electric versions cost $200-400 and plug into a standard outlet. You flip them on 30 minutes before your shower. Your towels stay warm, dry faster (so they don’t get that mildewy smell), and your bathroom feels like a spa instead of a prison.
Specifications:
Hardwired vs. plug-in: Hardwired looks cleaner (no visible cord) but requires an electrician ($150-300 for installation). Plug-in versions work fine if you can hide the cord behind the rack or route it discreetly.
Size: 6-bar racks work for couples. 10-bar racks handle family-sized laundry.
Finish: Matte black integrates with Scandinavian minimalism. Chrome reads too shiny/traditional.
Energy cost: $3-8/month if you run it 2 hours/day. Negligible.
Best brands: Amba (mid-range, $250-450), WarmlyYours (luxury, $400-700), Ancona (budget, $150-250)
Pro Tip:
Mount it adjacent to the shower, not across the room. The closer it is, the less time you spend shivering while you grab your towel.
Common Mistakes:
Don’t buy an oversized rack for a small bathroom. A 40-inch wide 10-bar rack overwhelms a 5×8 bathroom. Stick to 20-30 inch widths.
12. Stone Ledge Shower Shelf (Built-In, Not Stuck-On)
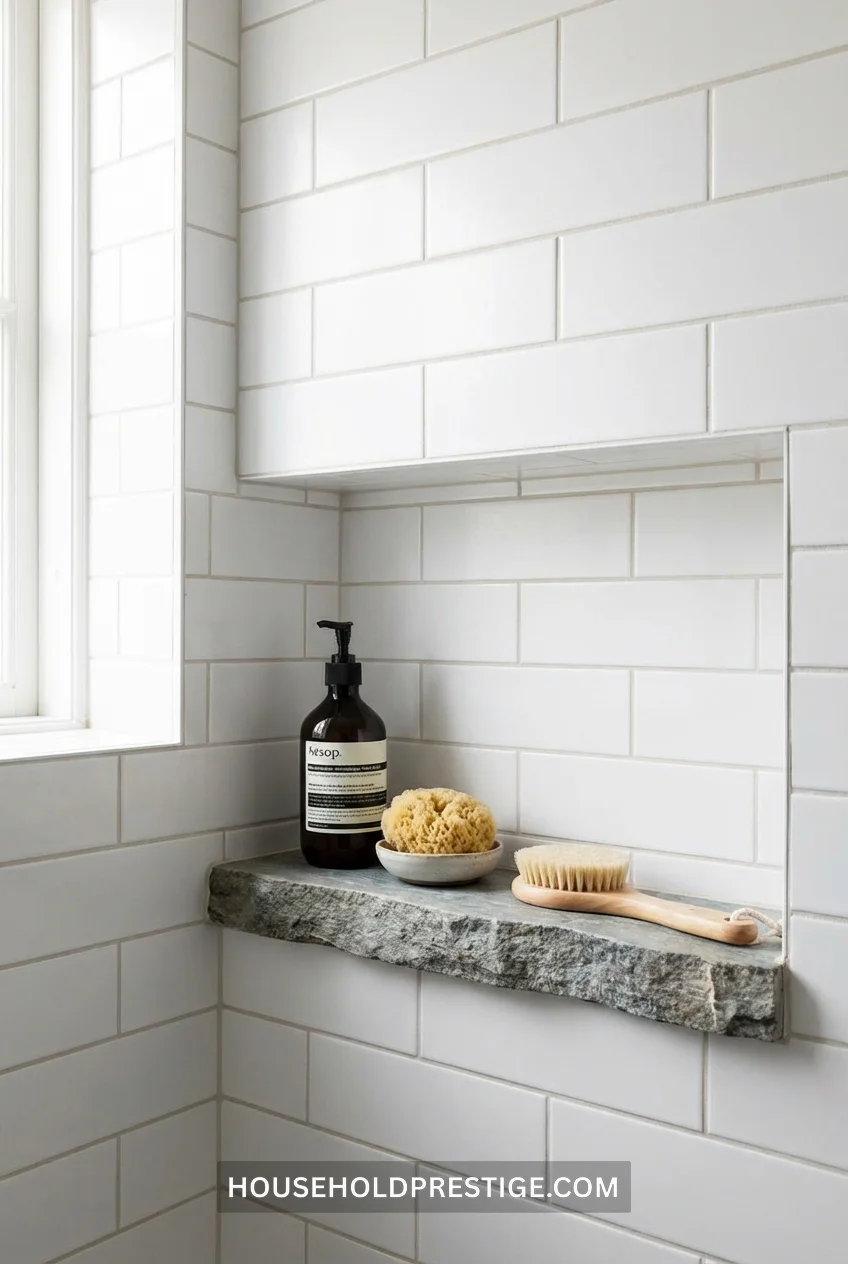
Those suction-cup shower caddies are an insult to your shower. They fall. They rust. They look cheap.
A stone ledge shower shelf—recessed into the wall, not stuck onto it—is permanent, elegant, and holds everything you actually use.
What This Is:
During your tile install, the installer creates a recessed niche (12-18 inches wide, 6-8 inches tall, 3-4 inches deep). Instead of tiling the bottom shelf, you install a single slab of marble, granite, or engineered stone. Waterproof. Won’t mold. Won’t fall off.
Cost: $150-300 for the stone slab + installation (done during your tile work)
Timing: Only makes sense if you’re already retiling your shower
Best stone choices:
- White Carrara marble: Classic, $80-150 per slab cut to size
- Absolute Black granite: Modern, hides soap scum, $60-120
- Engineered quartz: Stain-resistant, $100-200
When to Skip This:
If you’re not retiling, don’t bother. Cutting into existing tile to retrofit a niche is expensive ($500+) and risks cracking surrounding tiles.
13. Skylight or Sun Tunnel
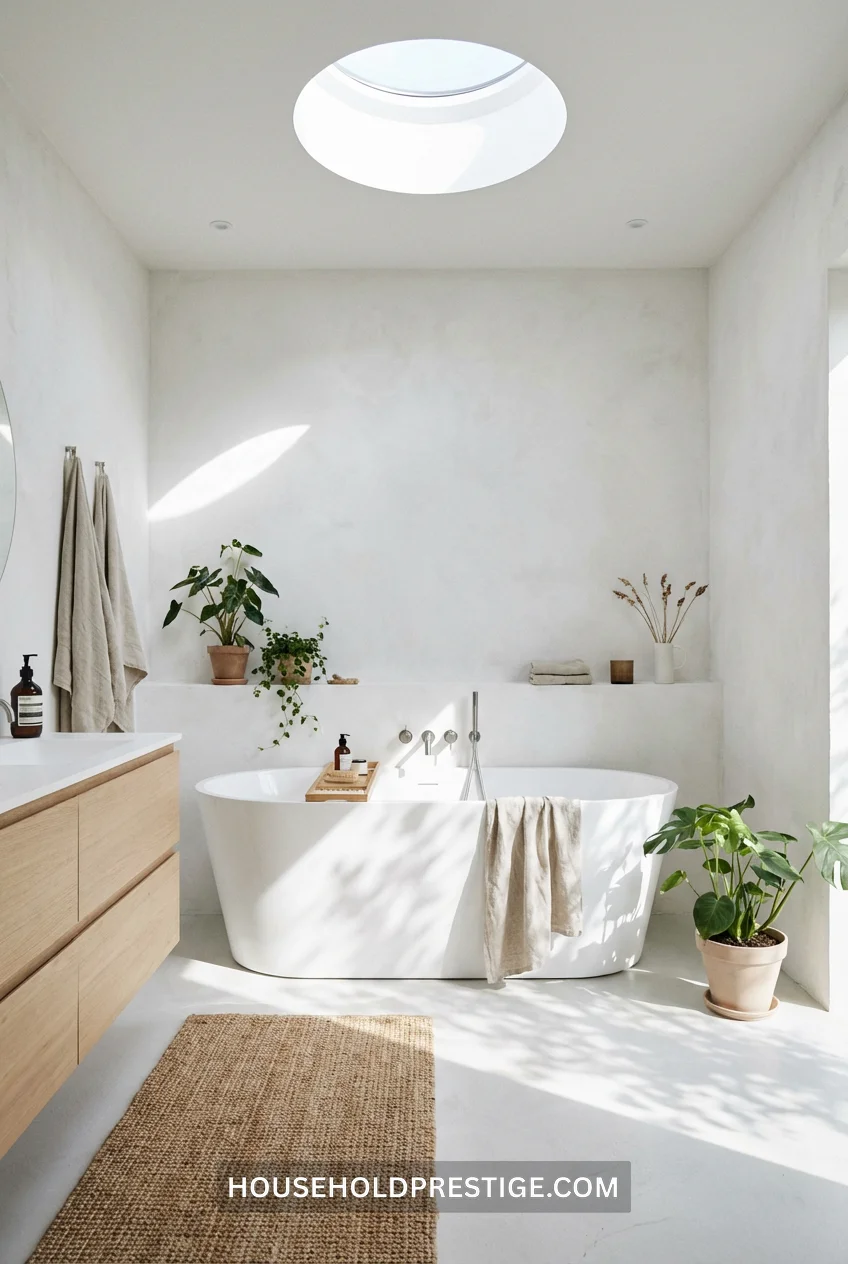
Natural light transforms bathrooms from functional boxes into spaces you want to spend time in.
If you have attic access above your bathroom, a sun tunnel (also called a light tube) brings in daylight without the cost of a full skylight. It’s a reflective tube that runs from your roof to your bathroom ceiling, with a diffuser that spreads light evenly.
Cost comparison:
- Sun tunnel: $300-700 installed (VELUX makes 10-inch and 14-inch models)
- Traditional skylight: $1,500-3,000 installed
- Solatube (premium sun tunnel brand): $500-1,000 installed
Light output: A 14-inch sun tunnel delivers as much light as a 3×3 foot window. Your bathroom goes from dim cave to naturally lit oasis.
Installation time: 4-6 hours for a professional. Not a DIY project—you’re cutting into your roof.
When It’s Worth It:
Bathrooms with zero windows or tiny windows that face north (minimal light). Bathrooms where privacy concerns mean you keep blinds closed all day. The ROI is sanity—you stop feeling like you’re showering in a basement.
14. Whitewashed Wood Ceiling
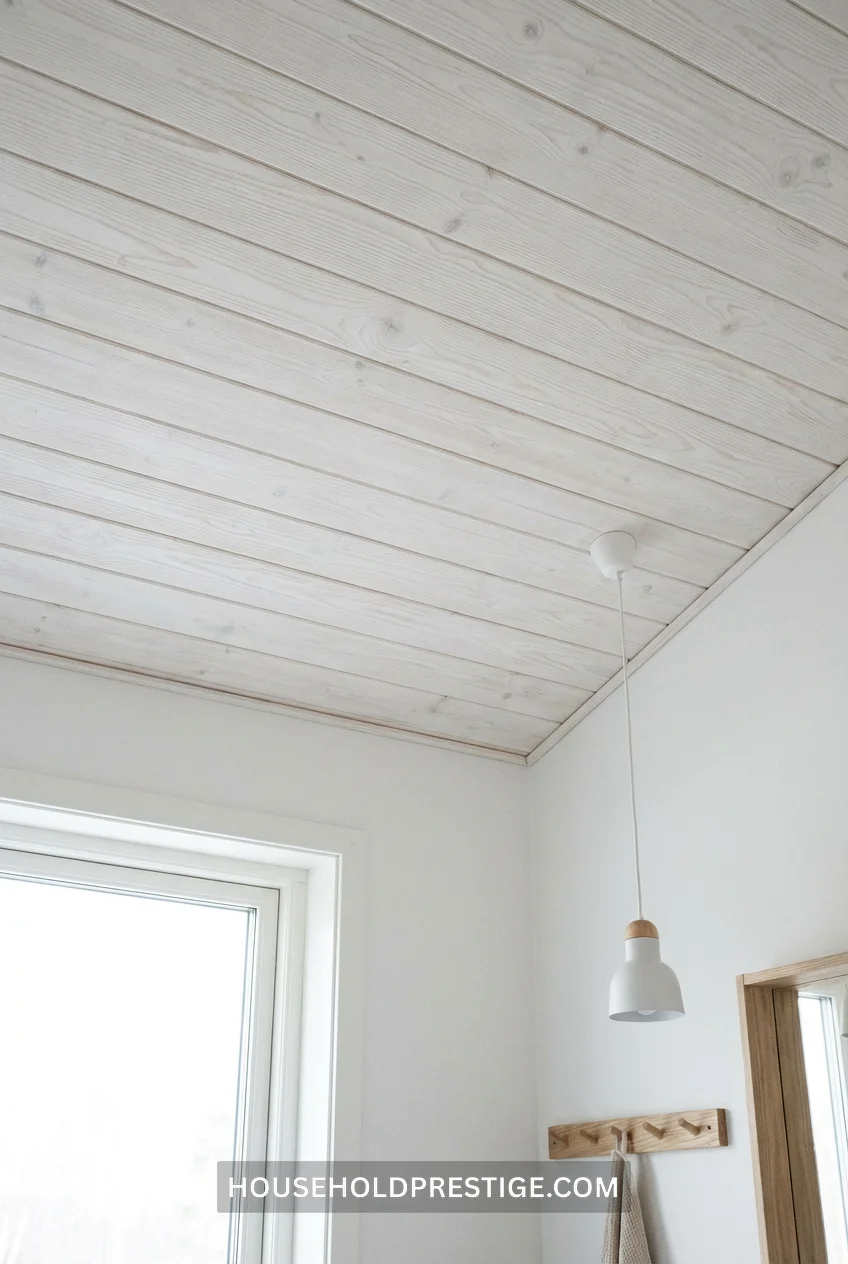
White drywall ceilings are forgettable. Whitewashed wood ceilings make people look up.
This is tongue-and-groove pine or cedar, stained white but allowing the wood grain to show through. The texture catches light differently than flat paint. Your bathroom feels warmer, more intentional.
Cost: $5-12 per square foot for materials, $8-15 per square foot for professional installation
Example: 8×10 bathroom ceiling = 80 sq ft = $1,040-2,160 total installed
DIY-friendly? Yes, if you’re comfortable with a nail gun and working overhead. Rent scaffolding ($60/day) instead of using a ladder—you’ll finish faster and safer.
15. Matte Black Fixtures Throughout
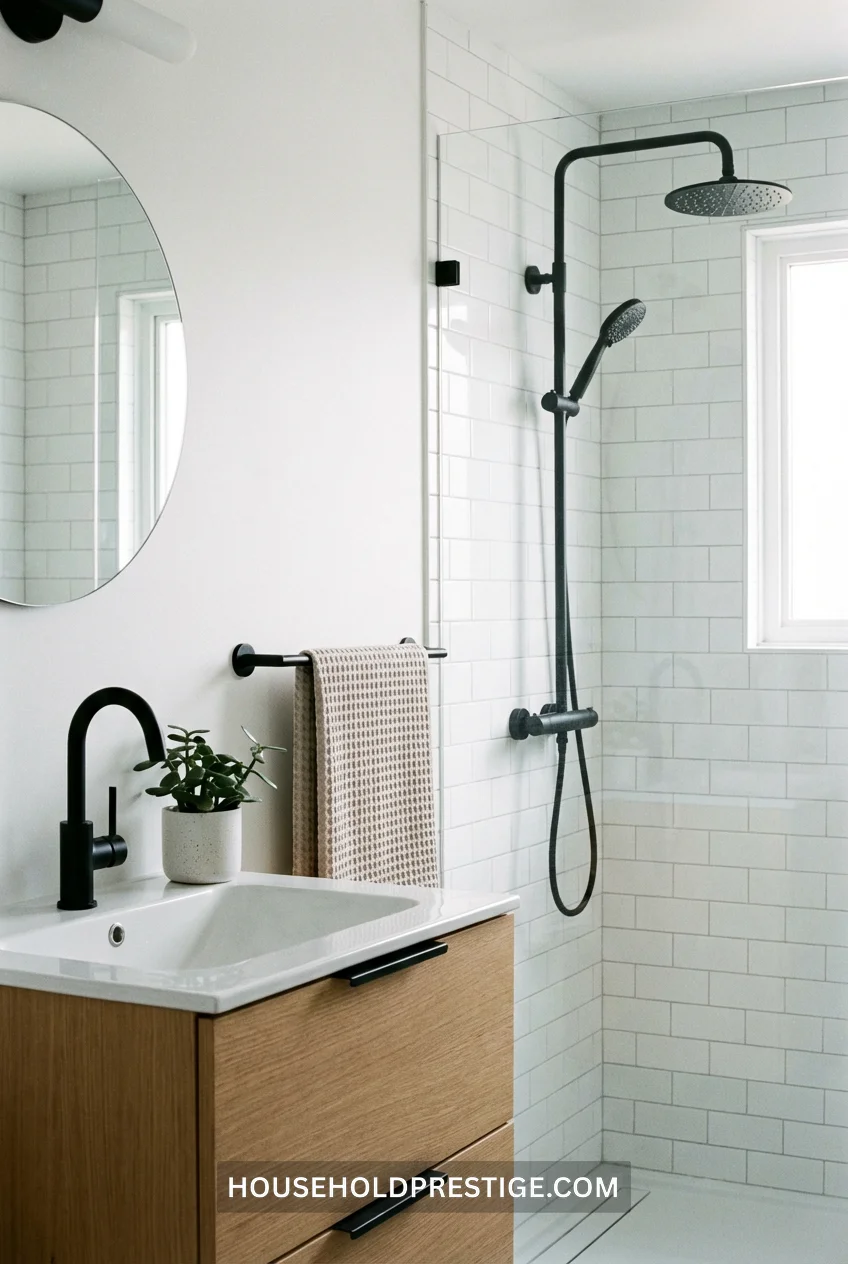
Chrome fixtures date your bathroom to 2008. Matte black fixtures feel current and will age well.
But here’s the key: ALL your fixtures need to match. Matte black faucet + chrome towel bar = you tried but failed. Commit to one finish across every touchpoint: faucet, showerhead, towel bars, toilet paper holder, cabinet pulls, light fixtures.
Where to buy coordinated sets:
- Delta (mid-range, complete collections available)
- Kohler (luxury, architectural lines)
- Amazon Basics (budget, surprisingly decent quality)
Cost difference vs. chrome: Essentially none. Matte black costs the same as chrome at every price point.
16. Open Shelving (But Only for Pretty Items)
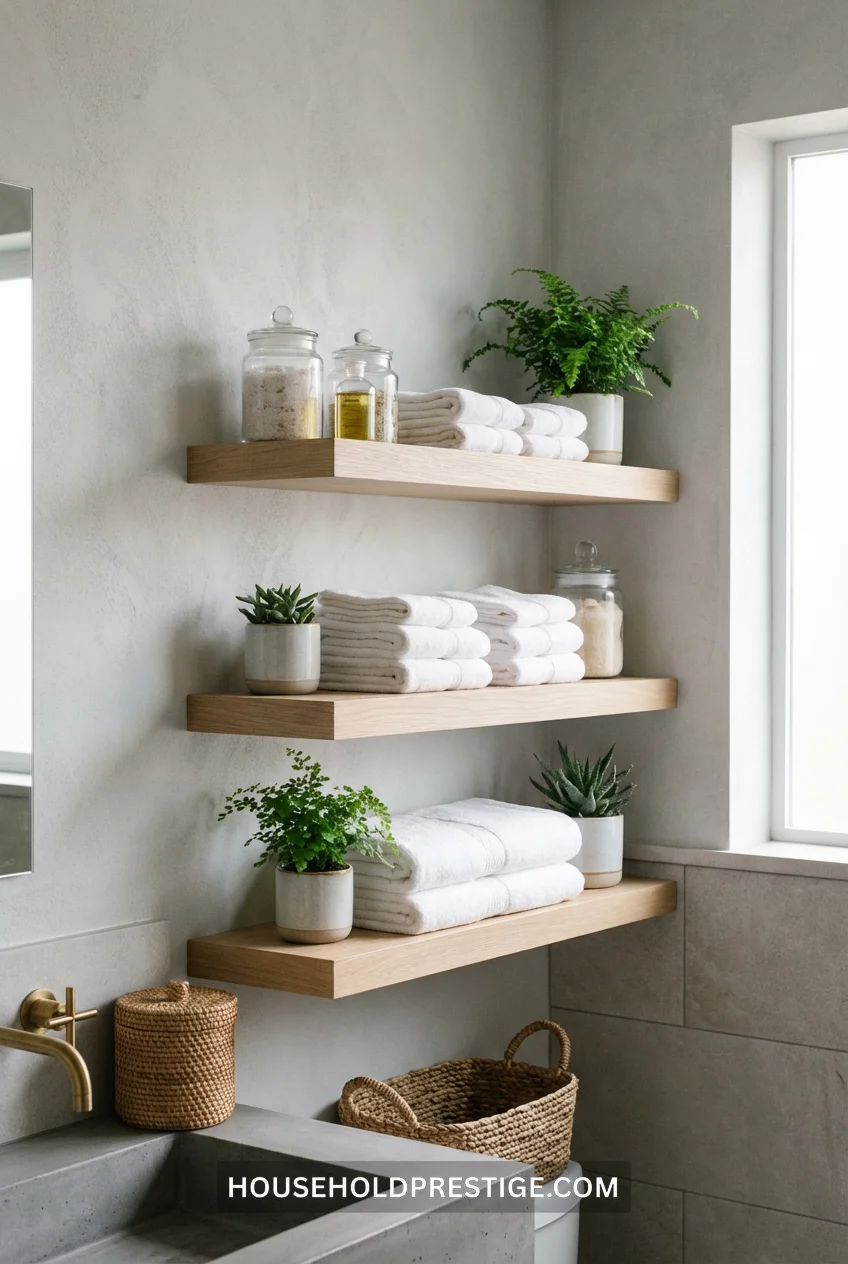
Open shelving only works if you’re ruthlessly honest about what deserves to be seen.
What looks good on open shelves:
- Rolled white towels
- Glass apothecary jars with cotton balls/Q-tips
- Small potted plants
- Matching skincare bottles (decant into uniform containers if needed)
What looks terrible:
- Prescription bottles
- Half-used shampoo bottles
- Random-sized products
- Anything with garish packaging
Install 2-3 floating shelves. Style them like a photo shoot. Move everything ugly into closed storage.
Cost: $15-40 per shelf (IKEA’s Lack shelves work perfectly for this)
17. Threshold Marble Slab (The Detail No One Talks About)
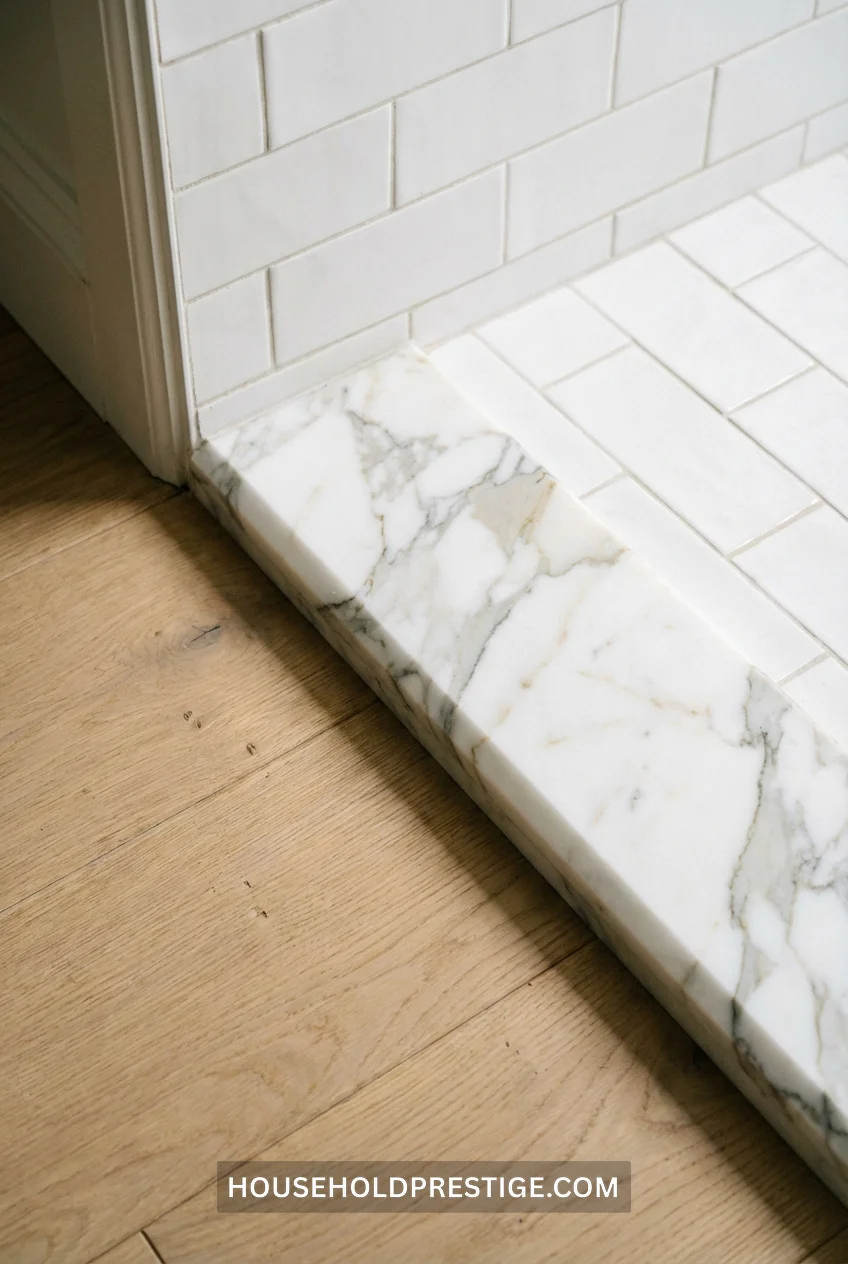
The threshold—that strip between your bathroom floor and the hallway floor—is usually cheap metal or basic wood. Replace it with a marble slab.
This is a 3-4 inch wide piece of marble, cut to your doorway width, installed flush with your floors. It’s a detail most people don’t notice consciously, but it registers subconsciously as “this bathroom was done RIGHT.”
Cost: $60-150 for a custom-cut marble threshold, $100-200 for professional installation
Install time: 2 hours
Best marble types:
- White Carrara (classic, veining adds interest)
- Absolute Black granite (modern, hides dirt)
- Calacatta marble (luxury, bold veining)
Why This Matters:
Thresholds take abuse—foot traffic, water splashes, dragging items across them. Marble handles it. Metal thresholds corrode. Wood swells. Marble just… exists, looking expensive, for decades.
Conclusion
Your bathroom doesn’t need a designer or a $50,000 budget to feel like a spa. Scandinavian design works because it prioritizes what actually matters: natural light, real materials, and storage that makes sense.
Start with one idea. Maybe it’s the floating vanity that opens up your floor space. Maybe it’s swapping harsh overhead lights for a pendant that makes you want to linger. Maybe it’s the heated towel rack that turns your morning routine from miserable to luxurious.
The best bathroom isn’t the one with the most stuff—it’s the one where everything has a reason to be there. That’s the Scandinavian approach. Less clutter. More calm. Real materials that age instead of just getting old.
Pick one project this weekend. Your 6 AM self will thank you.
FAQ
What makes a bathroom “Scandinavian” versus just minimalist?
Scandinavian bathrooms emphasize warmth alongside minimalism. You’ll see natural wood (usually light oak, ash, or pine), textured materials like linen or woven baskets, and neutral colors that feel cozy rather than stark. Minimalism can feel cold—all white, all hard surfaces. Scandinavian design balances clean lines with organic materials that make the space feel lived-in and welcoming.
Do Scandinavian bathrooms work in small spaces?
Yes—arguably better than in large spaces. The core principles (floating vanities, light wood, white walls, minimal decor) all make small bathrooms feel larger. Vertical wood slats draw the eye upward. Floating furniture exposes more floor. Large-format tiles reduce visual clutter from grout lines. A cramped 5×7 bathroom benefits more from these strategies than a spacious master bath.
What’s the biggest mistake people make with Scandinavian bathroom design?
Going too stark. People see “minimalist” and remove all warmth—no wood, no texture, just white tile and chrome fixtures. The result feels clinical, not calming. Scandinavian design needs the contrast of natural materials. Add wood (vanity, shelving, or accent wall). Include texture (woven baskets, linen towels, plants). The white backdrop should showcase these elements, not stand alone.
Are heated towel racks worth the cost?
If you live in a cold climate or take morning showers, absolutely. The $200-400 upfront cost pays for itself in daily comfort. Warm towels dry faster (reducing mildew), and the rack adds ambient warmth to the room. It’s the one “luxury” feature that delivers tangible daily value. If you live somewhere perpetually warm, skip it—but for most climates, it transforms your routine.
Can you mix Scandinavian design with other styles?
Yes, but carefully. Scandinavian design pairs well with Japanese minimalism (both value simplicity and natural materials), mid-century modern (similar wood tones and clean lines), and even rustic farmhouse if you keep it edited. What doesn’t work: heavy ornamentation, bold patterns, or excessive color. If you want to mix styles, keep the Scandinavian bones (white walls, wood accents, clean lines) and add subtle nods to other aesthetics through decor or fixtures.