

Staring at your tiny bathroom, wondering how professional designers make small spaces look like luxury spa retreats?
You’re not alone. Most of us deal with bathrooms barely bigger than a closet – yet somehow, designers create magazine-worthy spaces in the exact same square footage. The difference isn’t magic or a massive budget. It’s knowing which specific tricks actually work when space is tight.
I’ve spent months analyzing what separates cramped, cluttered bathrooms from ones that feel surprisingly spacious. These 23 pro-level ideas aren’t the same tired “add a mirror” advice you’ve seen everywhere. These are the specific techniques – with exact measurements, product recommendations, and installation details – that actually transform how a small bathroom functions and feels.
By the end, you’ll know exactly which changes make the biggest impact in tight spaces.
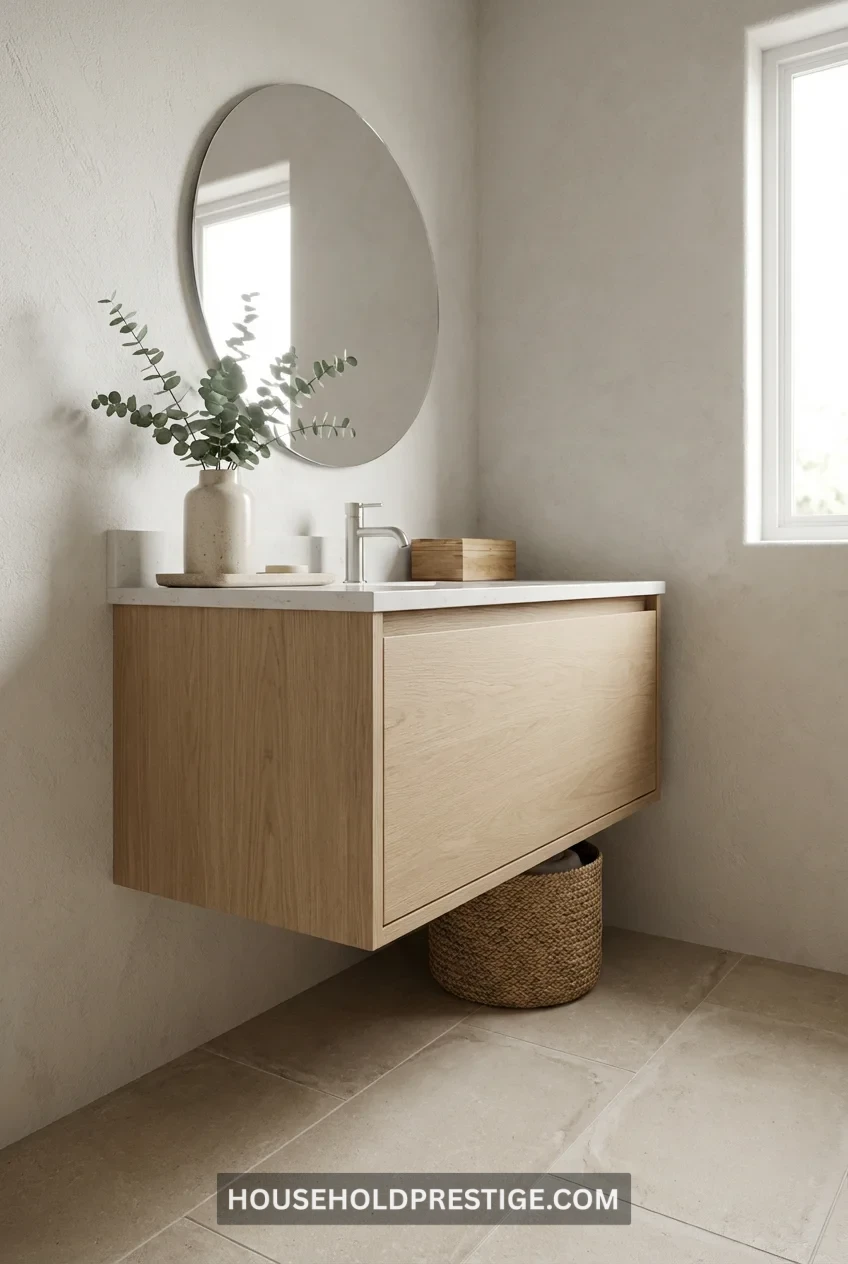
1. Wall-Mounted Floating Vanity (The Space Illusion Trick)
Ripping out that bulky floor vanity and installing a wall-mounted one is the single fastest way to make a small bathroom feel bigger. Why? Visible floor space tricks your brain into perceiving more room.
Choose a floating vanity that’s 18-24 inches deep (not the standard 30-inch depth). Brands like IKEA’s Godmorgon series or West Elm’s Mid-Century models come in shallower profiles perfect for tight spaces. The exposed floor underneath makes cleaning easier, too—no more dust bunnies hiding behind vanity legs.
Pro tip: Install the vanity at 32-34 inches high instead of the standard 36. This lower height creates visual breathing room above and makes the ceiling feel taller.
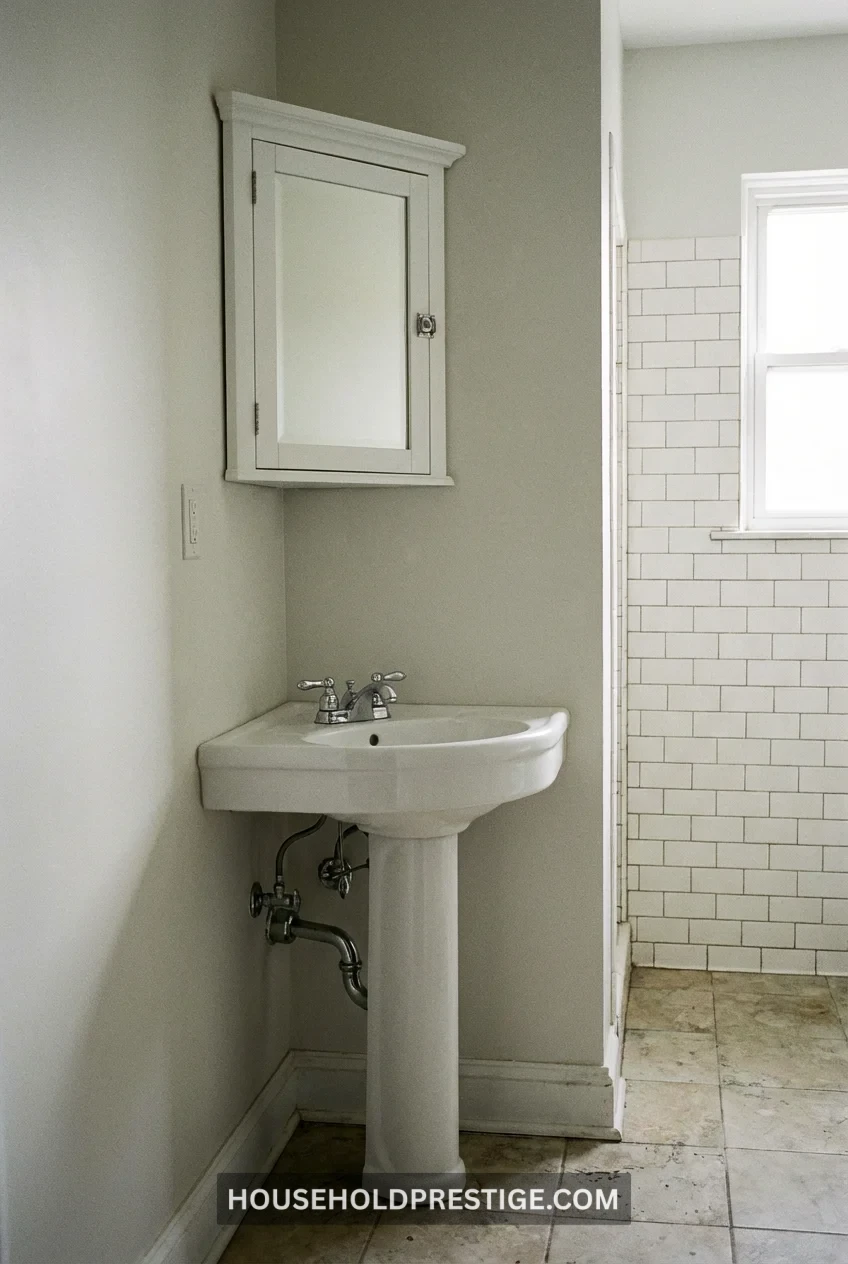
2. Corner Sink Configuration
Dead corner space is wasted space. A corner sink placement opens up the entire opposite wall for storage or a larger shower.
Corner sinks work best in bathrooms under 40 square feet. Look for pedestal corner sinks (12-15 inches from corner to front edge) or wall-mounted corner basins. American Standard and KOHLER both make compact corner models specifically designed for small spaces.
Installation reality check: You’ll need to relocate plumbing, which typically costs $300-600 if you’re hiring a plumber. But you gain 6-10 square feet of usable floor space—worth every penny in a cramped bathroom.
Pair your corner sink with a corner medicine cabinet above. This doubles down on corner efficiency and keeps toiletries organized without cluttering countertops.
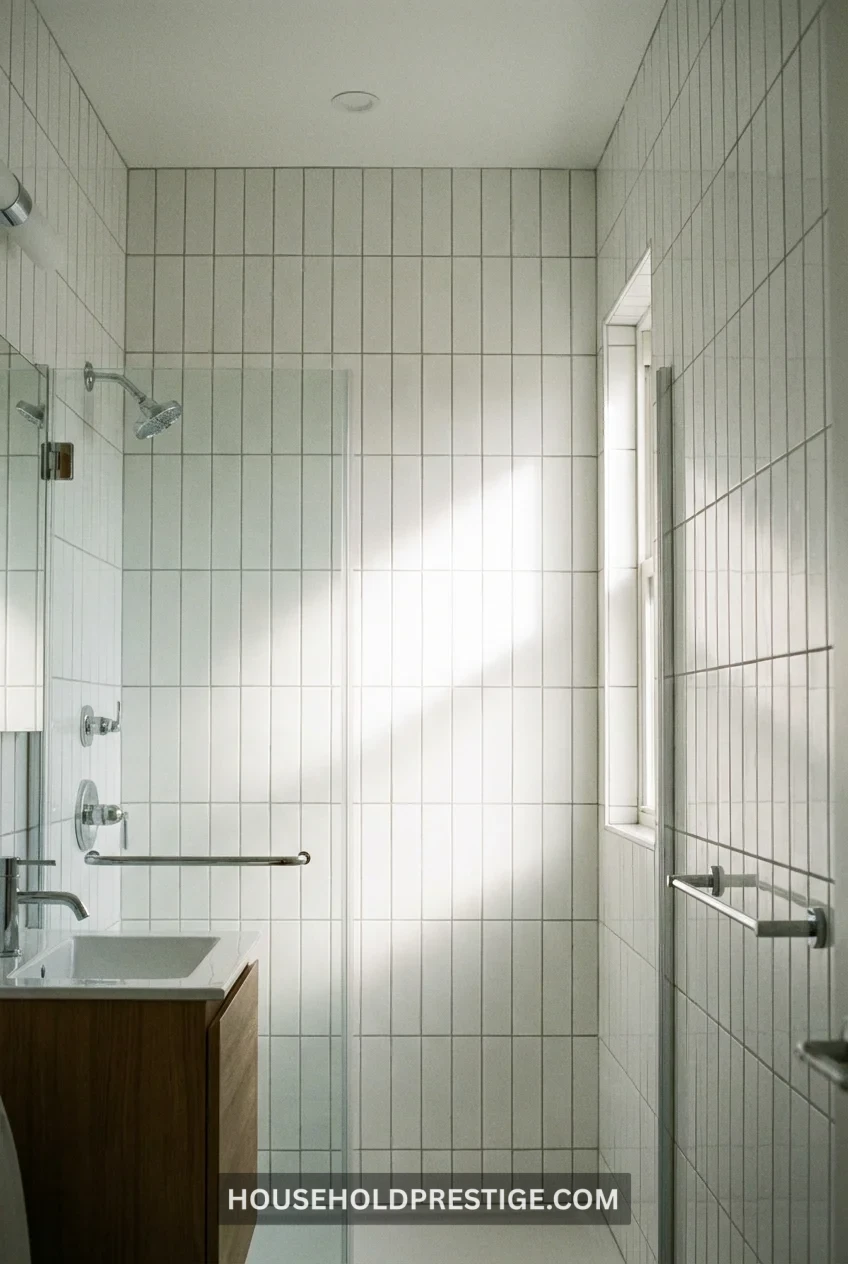
3. Floor-to-Ceiling Vertical Tile
Run subway tiles vertically instead of horizontally. Your 7-foot ceiling suddenly reads as 9 feet. Same cost, same tiles, completely different visual impact. One color from floor to ceiling—breaking it up at waist height kills the illusion.
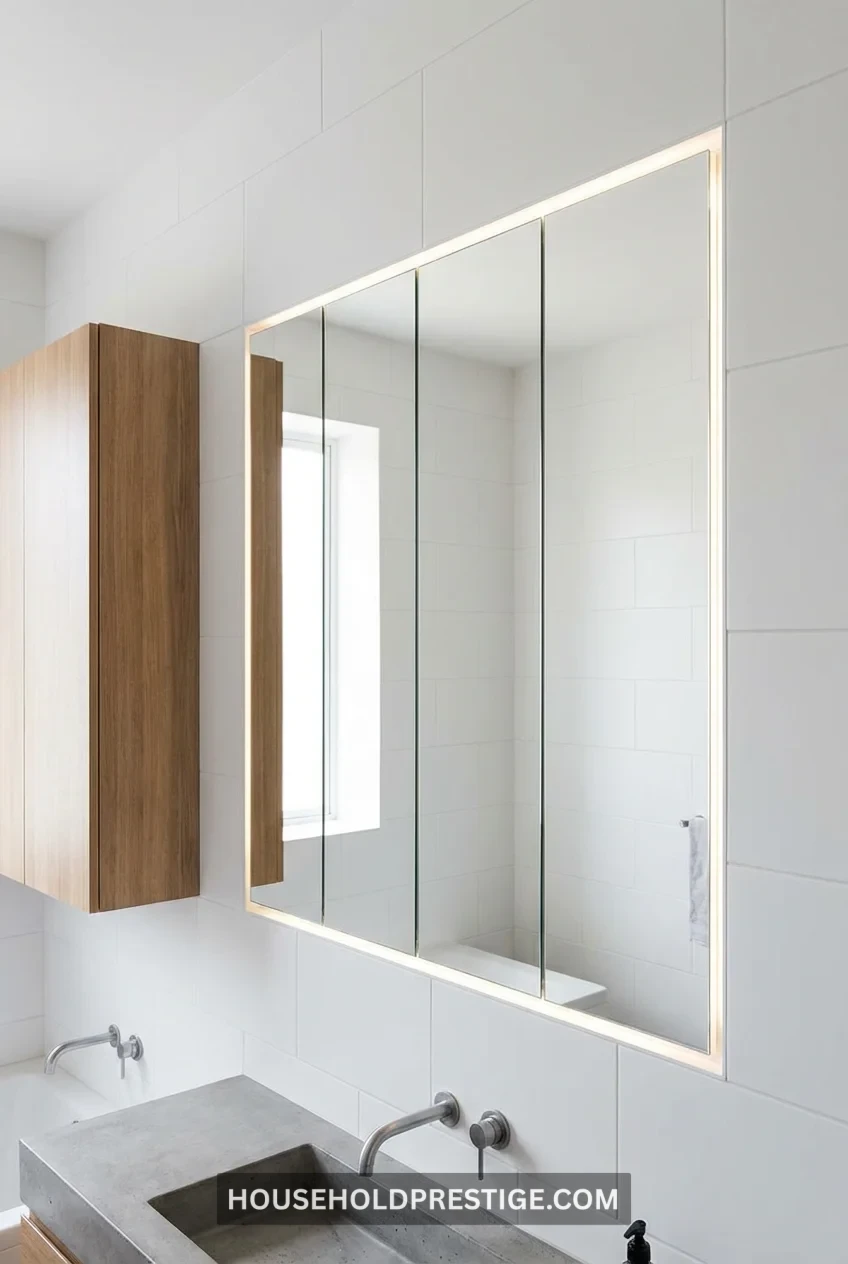
4. Recessed Medicine Cabinet (Not Surface-Mount)
Surface-mounted medicine cabinets stick out 4-6 inches and make tight bathrooms feel even tighter. Recessed cabinets sit flush with the wall, eating up zero floor space while giving you 3-4 inches of storage depth.
The catch: You need wall studs spaced to accommodate the cabinet, or you’re cutting into studs (more complex). Measure your stud spacing before buying. Standard recessed cabinets fit between 14.5-inch or 16-inch stud spacing.
ROBERN makes excellent recessed cabinets with built-in lighting and outlets inside. Yes, outlets inside the medicine cabinet—genius for charging electric toothbrushes and keeping cords hidden.
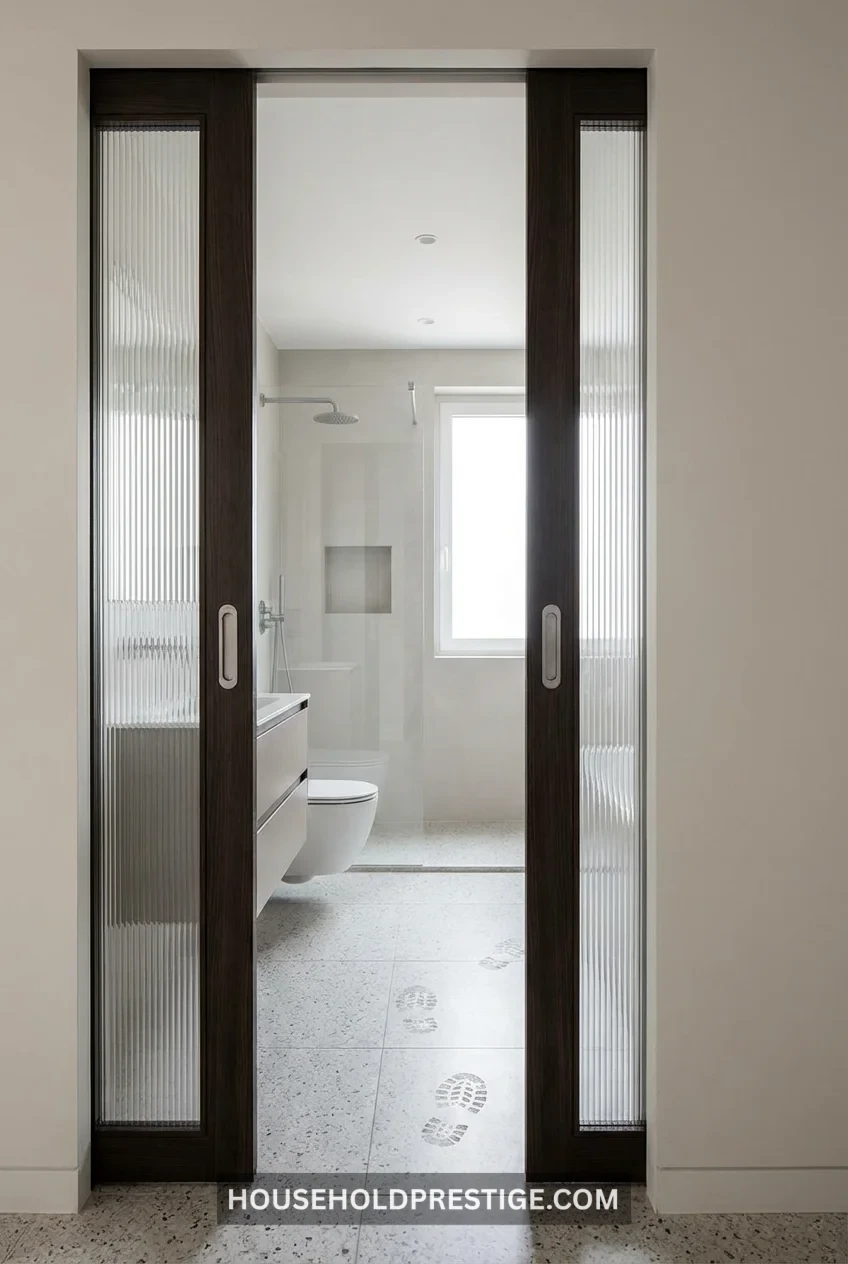
5. Pocket Door Instead of Swing Door
Standard bathroom doors swing into the room, eating up 8-12 square feet of space when open. A pocket door slides into the wall cavity, reclaiming that entire arc of unusable space.
Cost reality: Pocket door installation runs $800-1,500 (including framing) if you’re retrofitting. But in a 5×7 bathroom, that 10 square feet of gained space is massive.
The downside: You lose the wall space where the door slides in—can’t hang towel bars or shelves there. Plan carefully. Best for bathrooms where one wall is already dedicated to the door anyway.
Barn doors are the budget alternative ($200-400 installed), but they don’t hide in the wall. They slide along the wall, so you still lose some wall space.
6. Large-Format Tiles (Bigger = Fewer Grout Lines)
Small tiles with lots of grout lines make small spaces feel busy and cramped. Large-format tiles (12×24 inches or bigger) have fewer grout lines, creating a cleaner, more spacious look.
Use 12×24 tiles on floors and 12×24 or 24×48 on walls. The bathroom feels more unified, less chopped up. Porcelain large-format tiles run $3-8 per square foot—not much more expensive than smaller tiles.
Installation note: Large tiles require perfectly level floors/walls. If your floors are wonky, you’ll need leveling compound first, adding $1-2 per square foot to installation costs.
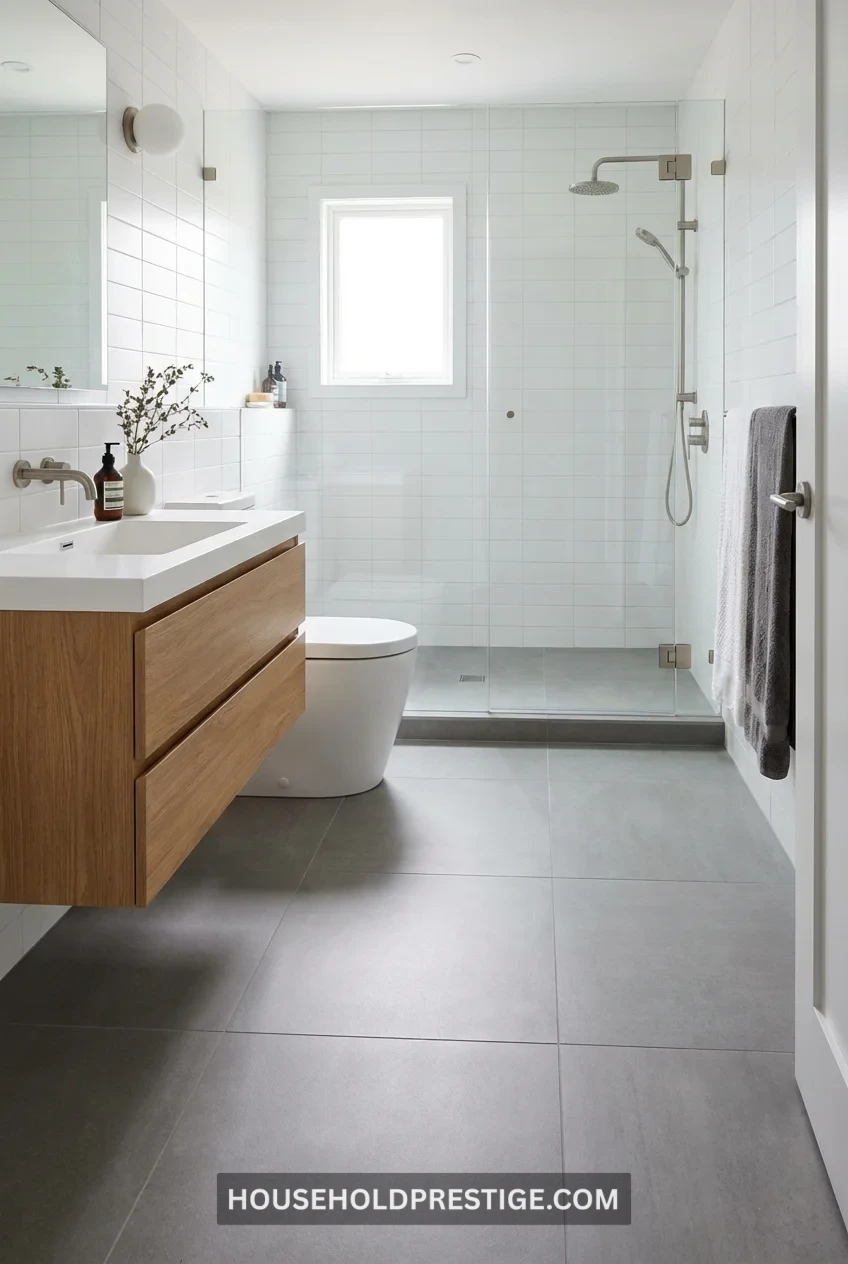
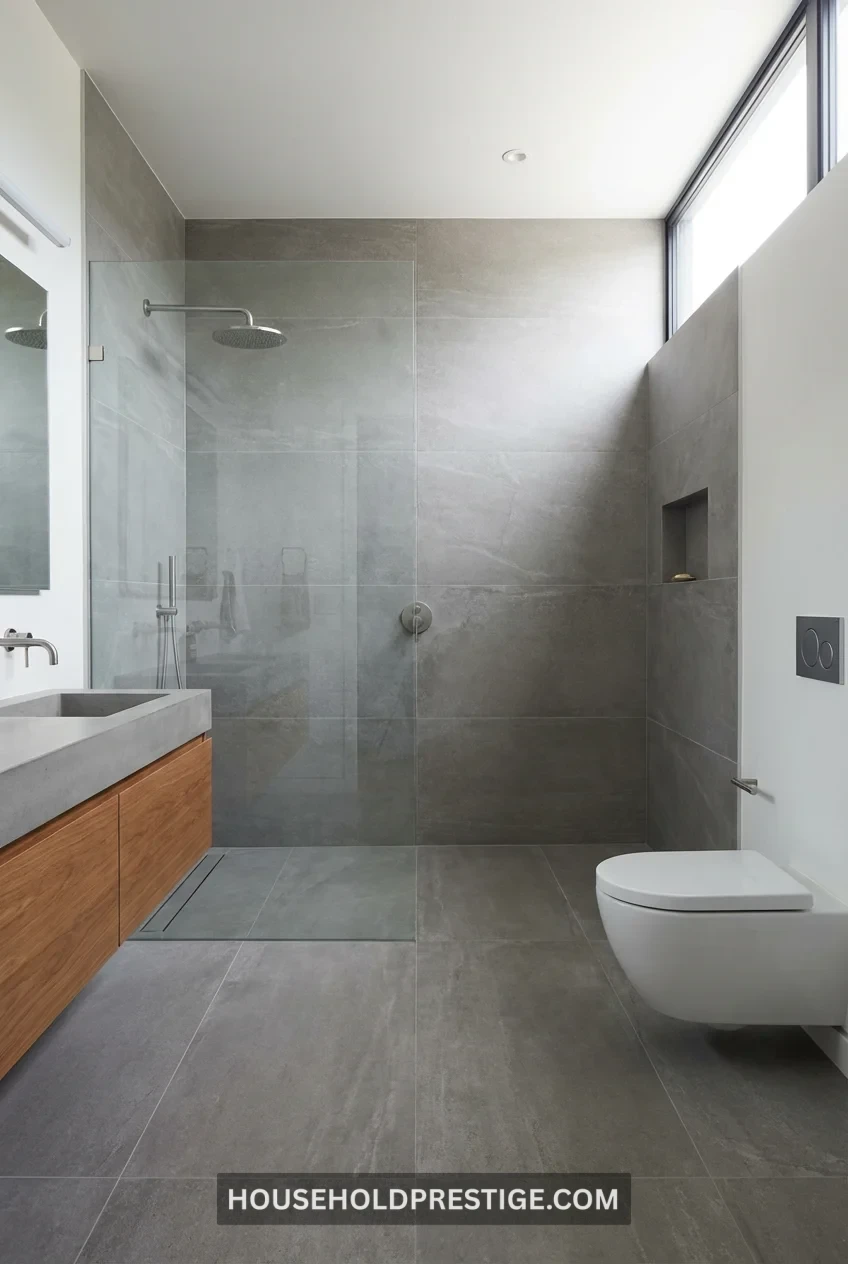
7. Glass Shower Partition (Not Curtain)
Shower curtains visually cut your bathroom in half. A frameless glass partition keeps sightlines open, making the entire space feel connected and larger.
Size matters: Half-wall glass panels (36-42 inches tall) work better than floor-to-ceiling in small bathrooms. They contain water without blocking airflow or making the shower feel like a phone booth.
DreamLine and VIGO make affordable frameless glass panels ($250-500) that mount directly to the wall without bulky frames. Installation is DIY-friendly if you’re handy with a drill.
Maintenance reality: Glass shows water spots. You’ll wipe it down every few days or deal with soap scum buildup. But the spacious feel is worth the extra 30 seconds of maintenance.

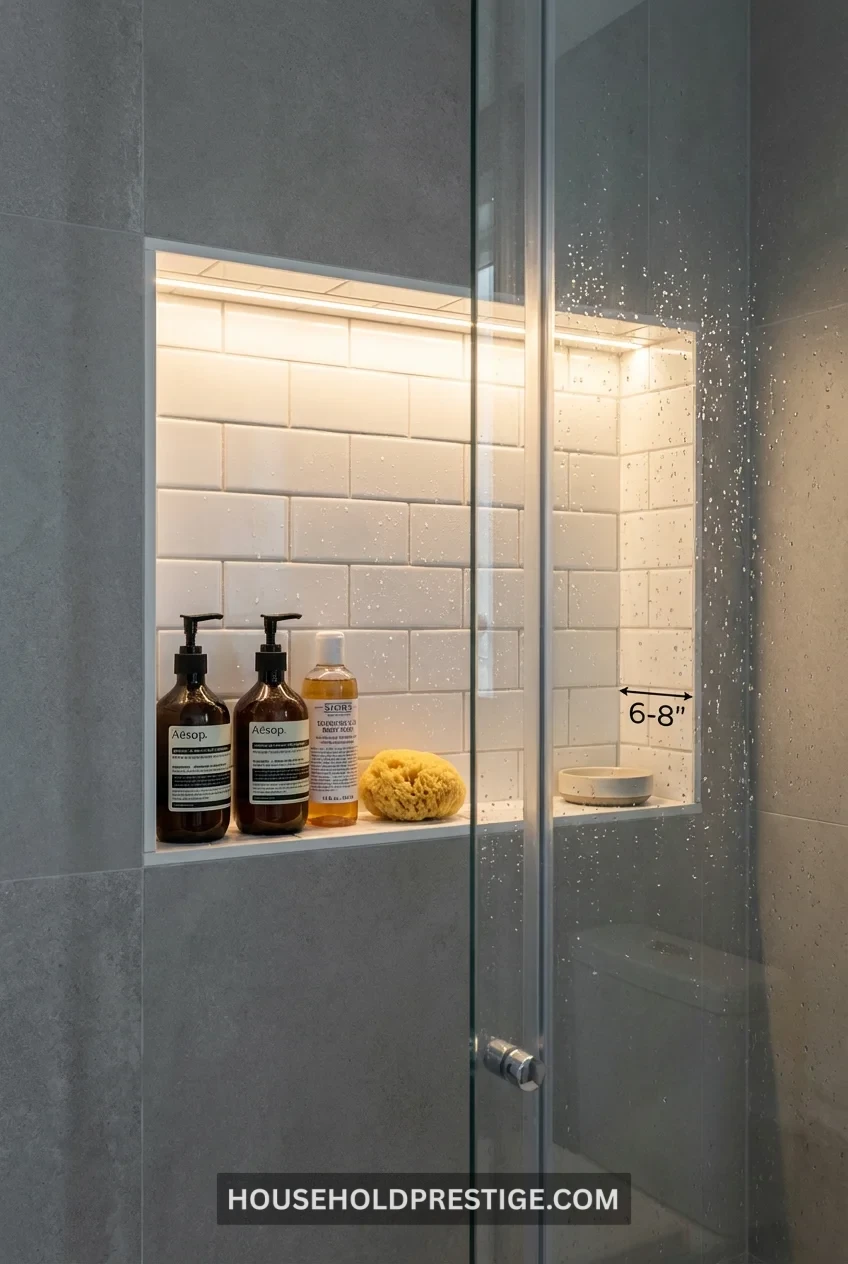
8. Recessed Shower Niche with LED Strip (The Complete Build)
Wall niches for shampoo bottles keep products off the floor and corners, making your shower feel bigger. But most people install them wrong—too shallow, wrong height, no lighting. Here’s how to do it right.
Why This Works: Shower caddies hang from showerheads, occupy corner space, and fall down constantly. Floor-sitting bottles create visual clutter and take up standing room. A properly built niche solves both problems while adding a luxury spa element that most bathrooms lack.
The Perfect Niche Dimensions: Your niche needs to be 12-14 inches wide, 6-8 inches deep, and 12 inches tall. These aren’t random numbers. Standard shampoo bottles are 8-10 inches tall and 3 inches in diameter. The 12-inch height accommodates tall bottles with room for your hand to grab them. The 6-8 inch depth prevents bottles from falling out when you bump them, but doesn’t require cutting through wall studs (most studs are 3.5 inches deep with 1/2-inch drywall on each side = 4.5 inches available space without structural work).
Step-by-Step Installation Process:
- Location Selection: Install your niche on the shower’s long wall at 48-52 inches from the shower floor (eye level for most adults). Don’t put it on the showerhead wall where water spray hits directly—moisture will seep into the niche faster.
- Stud Finding: Use a stud finder to locate wall studs. Your niche will fit BETWEEN studs (typically 16 inches on center). If you find wiring or plumbing behind your chosen spot, move to the next stud bay.
- Cutting the Opening: Mark your 12×12 inch opening with a level. Cut drywall with a utility knife or oscillating multi-tool. Remove drywall to expose the stud cavity. You’ll see insulation—remove it from the niche area.
- Frame the Box: Cut 2×4 lumber to create the niche frame. You need: two vertical sides (12 inches), a bottom piece (width between studs minus 3 inches), and a top piece (same width). Secure with 3-inch wood screws into the existing studs. The frame creates a recessed box.
- Waterproofing (CRITICAL): Apply RedGard or Aquadefense waterproofing membrane to the entire niche interior—back, sides, bottom, top. Two coats, letting the first dry completely (4-6 hours). Skip this and you’ll have mold within 6 months.
- Tile Installation: Tile the niche interior to match your shower walls. Use small tiles (2×2 or 2×4) for the niche—easier to work with curved corners. Apply thin-set mortar, set tiles, grout after 24 hours. Slope the bottom shelf forward slightly (1/4 inch toward the shower) so water drains out instead of pooling.
- LED Strip Installation: Purchase waterproof 12V LED strips rated IP67 or IP68 (Amazon, $15-25 for 6-foot strips). Measure the width of your niche opening. Cut the LED strip to size (they have marked cut lines every 4 inches). Peel the adhesive backing and press the strip along the TOP inside edge of the niche, running the full width. The power cable will hang down—tuck it behind the vertical side tile and route it to your shower floor where it exits under the door. Plug into a nearby outlet (use a GFCI outlet for safety).
Materials Needed & Costs:
- 2×4 lumber (8-foot board): $6
- RedGard waterproofing (1 gallon): $45
- Thin-set mortar: $15
- Small-format tiles: $20-40 depending on choice
- Grout: $8
- Waterproof LED strip: $15-25
- Miscellaneous (screws, tools): $15
Total cost: $125-155 if you DIY. Contractor installation adds $300-500 in labor.
The Pro Move—Double Stack Niches: Instead of one large niche, install two stacked 6-inch tall niches separated by a tile row. Top niche holds daily-use items (shampoo, conditioner, body wash). Bottom niche holds razors, loofahs, and less-used products. This vertical organization prevents overcrowding and makes everything more accessible. The 6-inch separation also creates a natural visual break that looks intentional rather than cramped.
Common Mistakes to Avoid: Don’t install the niche directly under the showerhead—it’ll fill with water. Don’t make it shallower than 6 inches—bottles will fall out every time you shower. Don’t skip the waterproofing membrane—saving $45 now means ripping out moldy drywall in a year. And don’t forget to slope that bottom shelf forward.
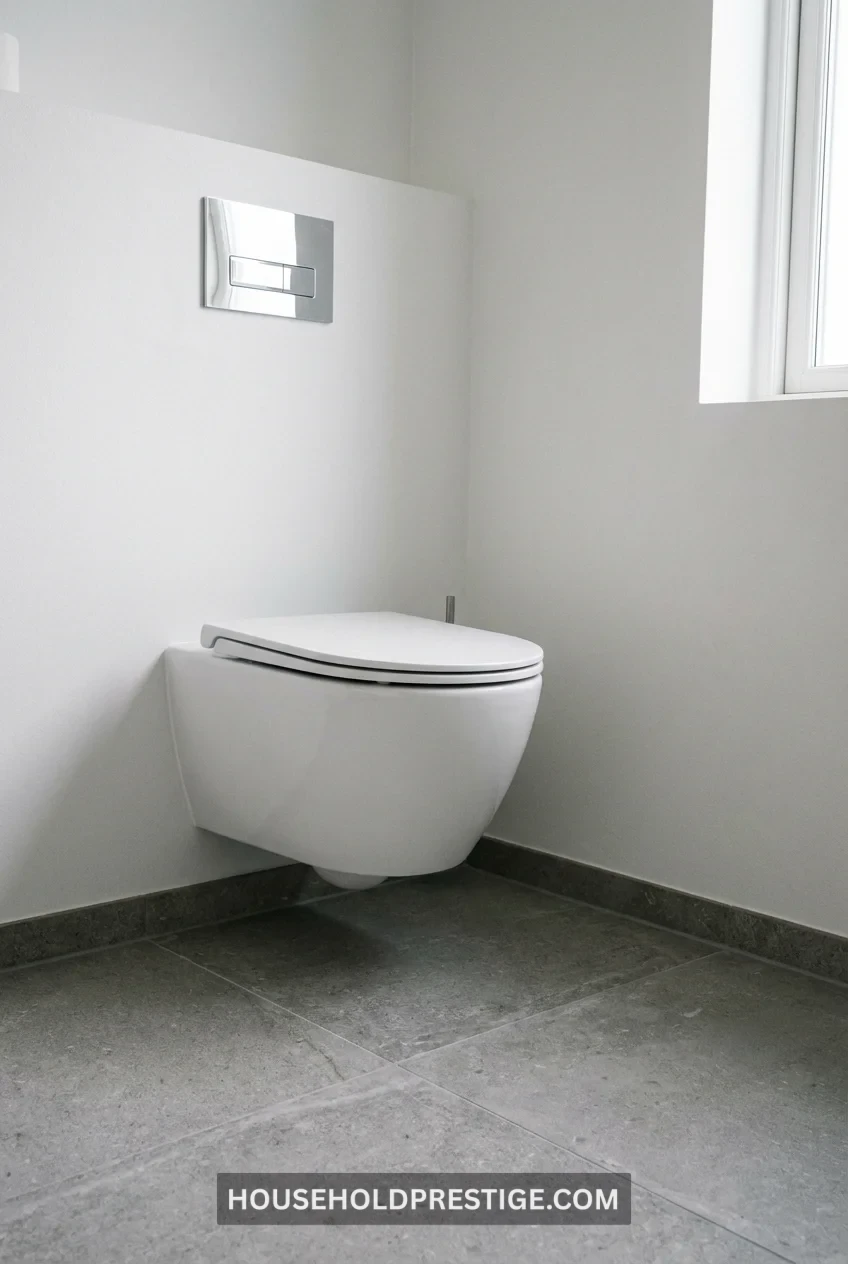
9. Wall-Mounted Toilet (The Floor Space Hack)
Wall-hung toilets float off the floor, exposing 12-15 inches of floor space underneath. This visual trick makes the bathroom feel significantly less cramped, plus cleaning becomes effortless—no base to mop around.
The reality: Wall-mounted toilets require an in-wall carrier system (GEBERIT is the gold standard), which means opening your walls. Installation costs $1,200-2,000 including the toilet and carrier. Not cheap.
When it’s worth it: If you’re already renovating and have walls open, add maybe $400 over a standard floor toilet. If your walls are finished, it’s harder to justify unless space is desperately tight.
Models like the TOTO Aquia or Duravit Starck work well in small bathrooms. Look for compact elongated bowls (not round)—they’re more comfortable but still space-efficient.
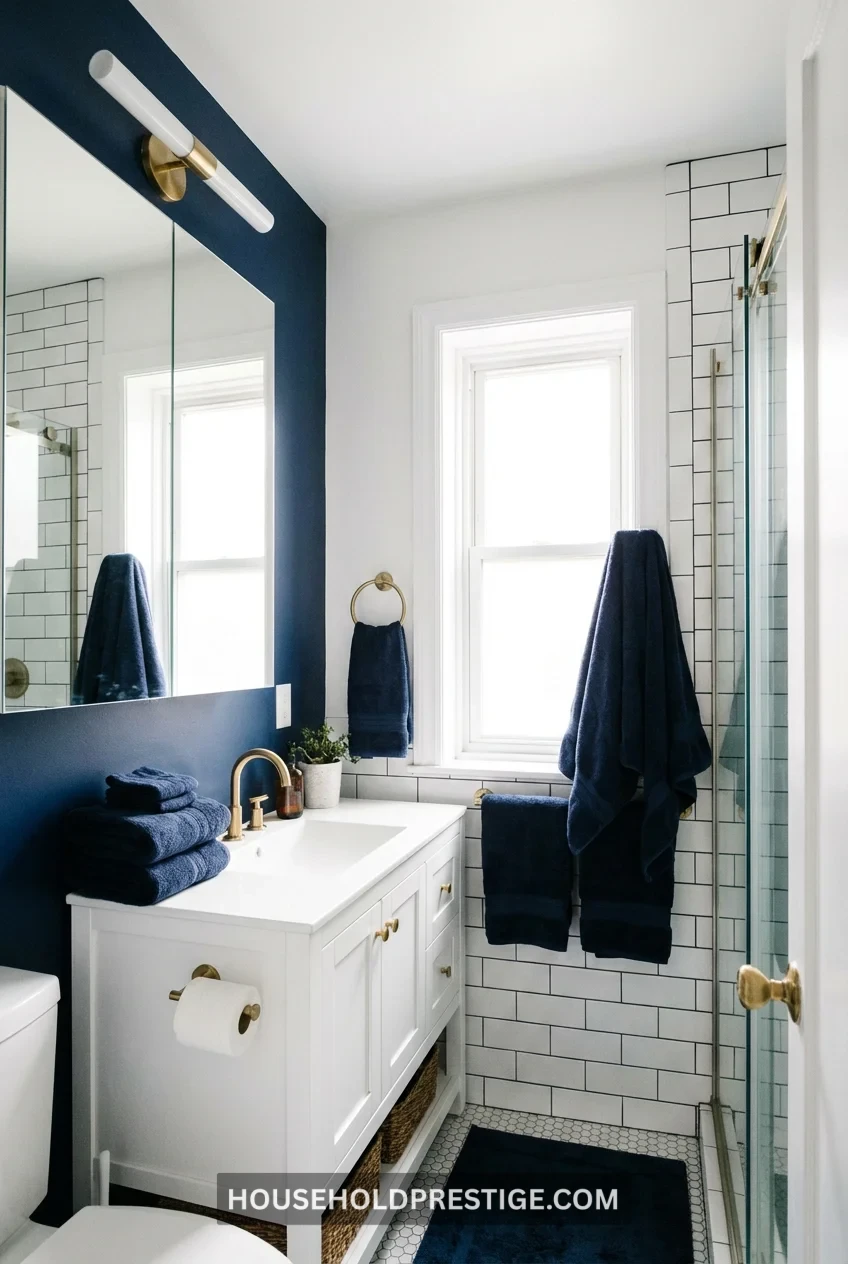
10. Bright White + One Accent Color Only
Color chaos makes small spaces feel smaller. Stick to bright white as your base, then add exactly one accent color—navy, charcoal, sage green, or warm terracotta.
Use your accent color on one wall (the non-wet wall), in towels, or through accessories. The discipline of one accent color makes the space feel intentional and larger. Multiple colors fragment the visual space, making it feel chopped up and smaller.
White selection matters: Not all whites are equal. Benjamin Moore’s “Chantilly Lace” or Sherwin Williams’ “Pure White” are true whites (no undertones) that keep spaces feeling crisp and spacious. Avoid cream or off-whites—they make small bathrooms feel dated and dingy.
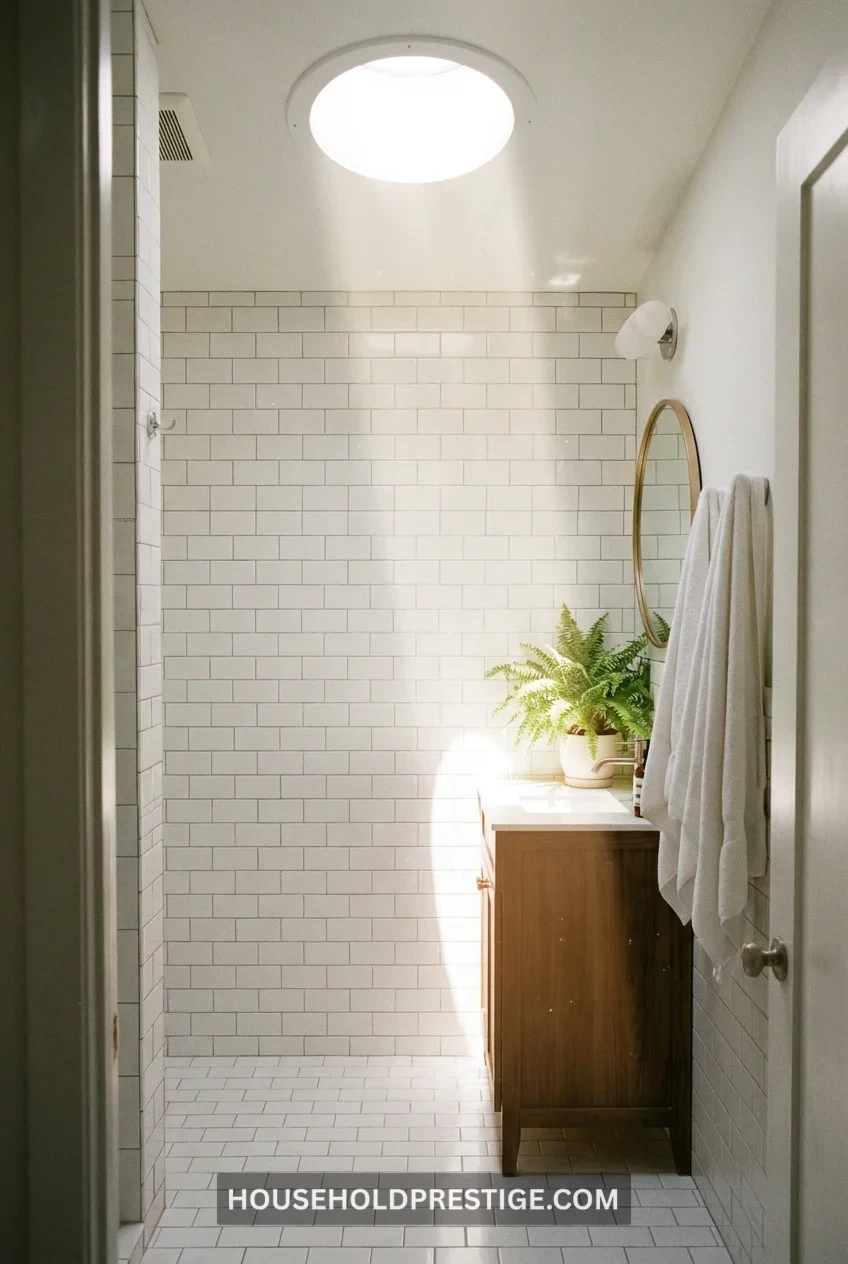
11. Skylight or Sun Tunnel (Natural Light = Bigger Feel)
Natural light makes any space feel bigger. If you have roof access above your bathroom, a skylight or sun tunnel brings in daylight without sacrificing wall space for windows.
HEAD-TO-HEAD COMPARISON:
| Feature | Traditional Skylight | Sun Tunnel (Tubular Daylighting) |
|---|---|---|
| Cost | $1,000-3,000 installed | $500-800 installed |
| Light Output | Excellent (full sun exposure) | Good (10-inch tube = 40-60W equivalent) |
| Installation Complexity | High (requires framing, flashing, interior finishing) | Moderate (simple tube + ceiling cap) |
| Roof Penetration | Large (24×24 to 48×48 inches) | Small (10-14 inch diameter) |
| Ventilation Option | Yes (operable models available) | No (sealed unit) |
| Roof Work Required | Extensive (may trigger re-roof codes) | Minimal (small flashing kit) |
| Best For | Bathrooms 60+ sq ft, when ventilation matters | Bathrooms under 50 sq ft, budget-conscious |
| Maintenance | Moderate (seals need checking, potential leaks) | Low (sealed system, rarely leaks) |
| Lifespan | 15-20 years | 20+ years |
| DIY Possible? | No (structural work required) | Maybe (if comfortable on roof) |
My Recommendation: For bathrooms under 50 square feet, a 10-inch sun tunnel from VELUX or Solatube delivers enough daylight to skip turning on lights during daytime. You’re spending $500-800 versus $1,000-3,000, and installation is less invasive. Save the traditional skylight for larger bathrooms where the bigger light output and venting capability justify the cost.
The Roof Age Warning: Both require roof penetrations. If your roof is 12+ years old, your local building code might require a partial re-roof once you start cutting holes. That’s an extra $2,000-5,000 you didn’t budget for. Check with your building department before committing to either option.
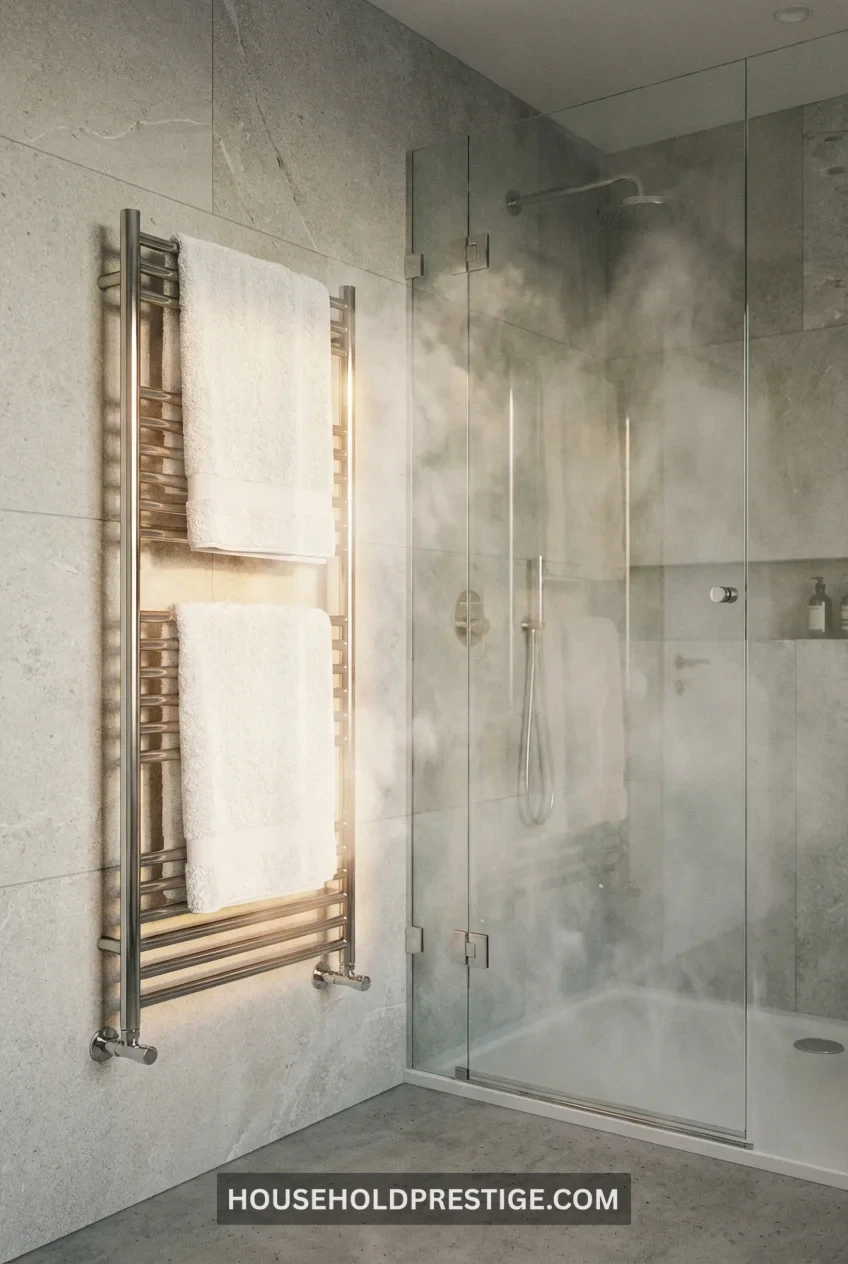
12. Heated Towel Rack (Dual-Purpose Brilliance)
Heated towel racks are a luxury and a function. They dry towels fast (preventing mildew), warm your towel for post-shower comfort, and eliminate the need for bulky towel storage.
Wall-mounted electric towel warmers run $150-400 (Amba, WarmlyYours). They plug into standard outlets and use less electricity than a hair dryer—about $2-4 per month to run constantly.
Space saving: Instead of 3-4 towels stacked on a shelf taking up vertical space, you hang 2 towels on the warmer. They dry between uses, so you don’t need backups. This frees up cabinet space for other storage.
Install it on your shower wall or next to the shower entry. The warmth also helps prevent bathroom humidity/mold issues.
13. Mirrored Cabinet Fronts (Not Just Medicine Cabinet)
If you have storage cabinets under the sink or on walls, swap solid fronts for mirrored fronts. Reflective surfaces double the visual space and bounce light around the room.
The Cautionary Tale—When I Over-Mirrored My Bathroom:
I thought I’d discovered the ultimate small bathroom hack. Mirrors make spaces feel bigger, right? So I went full mirror-crazy: mirrored cabinet doors under the sink, a mirrored wall behind the toilet, mirrored trim around the window, and even adhesive mirror tiles on the shower wall opposite the glass door.
The result? My bathroom felt like a funhouse. Every time I moved, I saw myself from 6 different angles. Getting dressed became disorienting—which reflection was the “real” me? The mirrored shower wall showed water spots within 3 days, and cleaning 4x the mirror surface turned into a weekly chore I resented. Worst of all, the space didn’t feel bigger—it felt chaotic and cheap, like a discount Vegas hotel room.
What I Learned—The 30% Rule:
Mirrors work beautifully when they cover roughly 30% of your visible wall space. Go beyond that, and the effect flips from “spacious” to “claustrophobic funhouse.” Your brain needs visual anchors—solid surfaces, texture, and color. All mirrors = no anchors = spatial confusion.
The Right Way to Use Mirrored Cabinets:
IKEA’s PAX system lets you customize cabinet fronts with mirrors. Or DIY it—buy thin mirror panels from a glass shop, cut to size, and attach to existing cabinet doors with mirror adhesive ($20-40 per door). But here’s the key: mirror your under-sink cabinets OR one wall cabinet, not everything.
Choose ONE mirrored surface beyond your main vanity mirror. That’s it. Under-sink cabinet doors are the smartest choice because they’re below eye level—they reflect light upward and expand the visual space without creating the disorienting multiple-reflection effect of eye-level mirrors.
What Actually Works:
- ✓ One main mirror above the sink
- ✓ Mirrored cabinet doors under sink
- ✓ MAYBE one mirrored medicine cabinet
- ✗ Mirrored walls
- ✗ Mirrored ceilings (never)
- ✗ Mirror tiles anywhere
- ✗ Multiple mirrors facing each other
Save yourself the mistake I made. Strategic mirroring = elegant. Mirror overload = tacky.

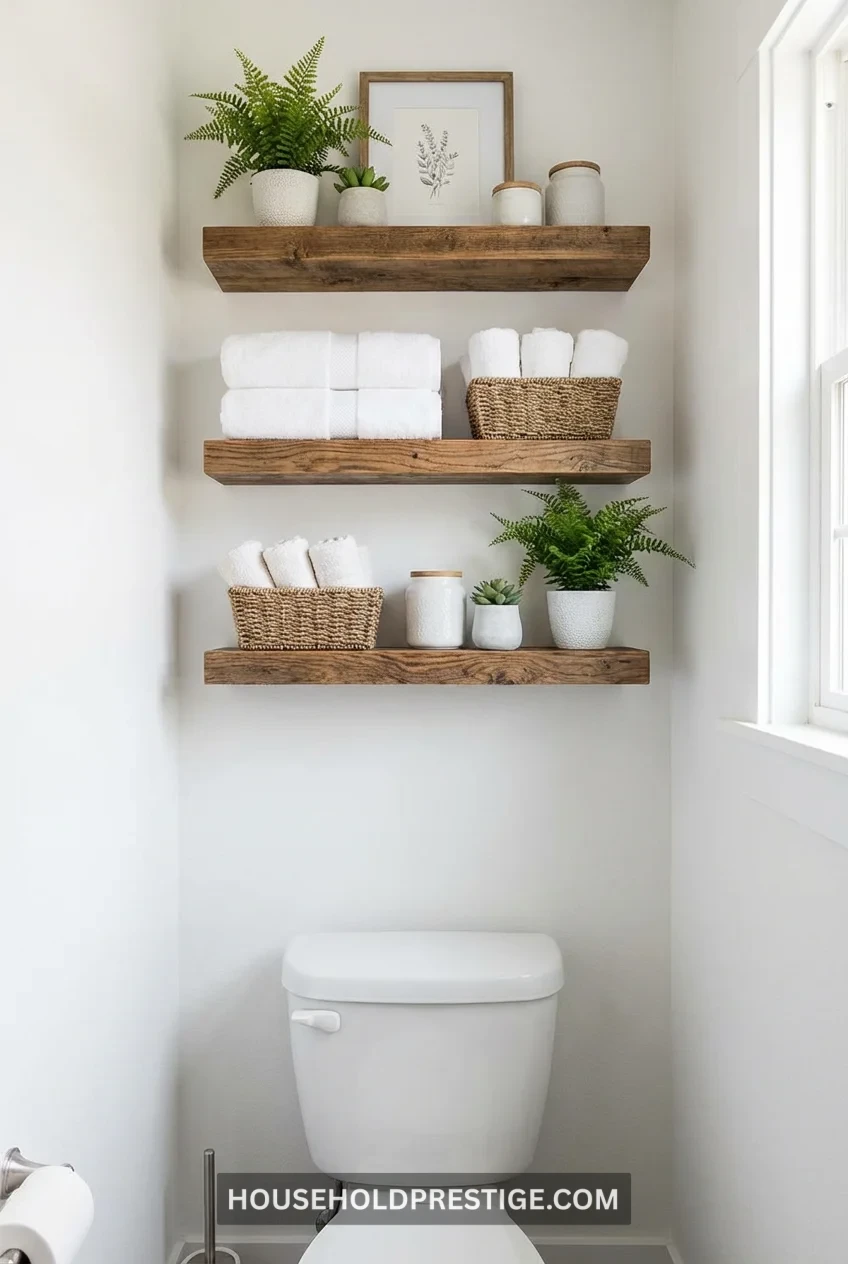
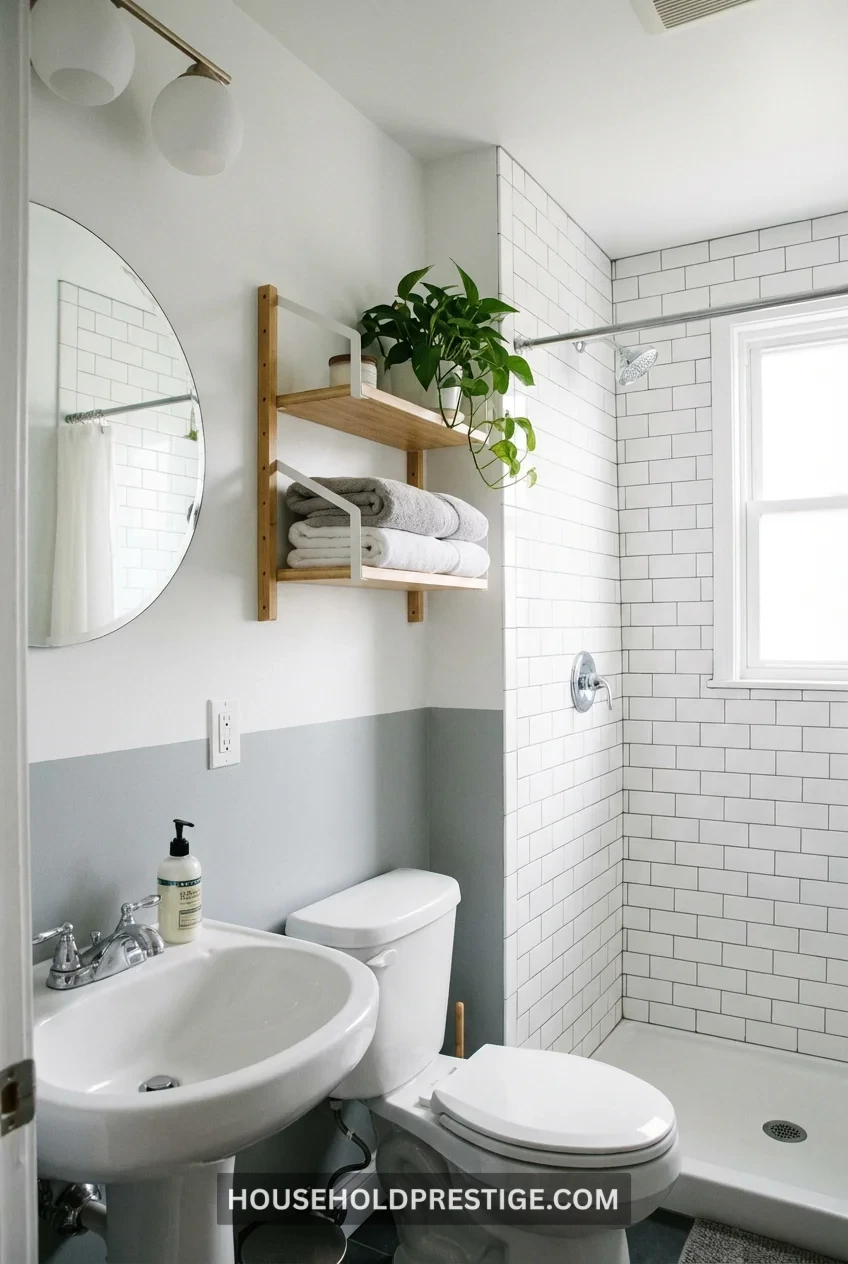
14. Narrow Depth Shelving (3-5 Inches)
Deep shelves (8-12 inches) in small bathrooms waste space—you can’t reach items at the back, and they stick out awkwardly. Narrow shelves (3-5 inches deep) hold toiletries without protruding into walkways.
Build floating shelves above the toilet or beside the mirror using 1×4 or 1×6 pine boards ($5-10 per 8-foot board). Stain or paint to match your decor. Three 24-inch shelves provide tons of storage without eating floor space.
What fits on 4-inch shelves:
- Folded towels (folded to 12 inches wide)
- Toiletries and cosmetics
- Rolled washcloths
- Decorative plants and candles
Don’t put: Toilet paper rolls (they’ll fall off). Bulk storage items. Heavy objects.
15. Continuous Tile from Shower to Floor (Wet Room Concept)
Installing the same tile from the shower floor through the rest of the bathroom floor eliminates visual breaks. Your eye reads it as one continuous space, not “shower” + “bathroom.”
This works best with curbless showers (no step-up), creating a true wet room feel. Requires proper floor drainage slope (1/4 inch per foot toward the drain) to prevent water pooling outside the shower.
Cost consideration: Waterproofing the entire bathroom floor adds $500-1,000 to your tile job. But in a 40-square-foot bathroom, the unified look makes the space feel substantially larger.
Use slip-resistant tiles rated 0.6+ coefficient of friction (COF). Porcelain tiles with textured surfaces work best for wet areas.
16. Compact Combo Fixtures (Sink-Toilet-Storage Unit)
For bathrooms under 25 square feet, consider an integrated unit combining sink, toilet, and storage. These systems originated in European and Japanese design where space is premium.
Brands like Duravit and LAUFEN make compact combo units where the toilet cistern sits behind the vanity, and the sink mounts above. The entire footprint is 24-30 inches wide by 18 inches deep—saves massive space compared to separate fixtures.
The tradeoff: Less customization. You’re locked into the manufacturer’s design. And repairs can be more complex since everything’s integrated.
Cost: $1,500-3,000 for the unit itself, plus installation. Comparable to buying quality separate fixtures, but you gain 30-40% more floor space.

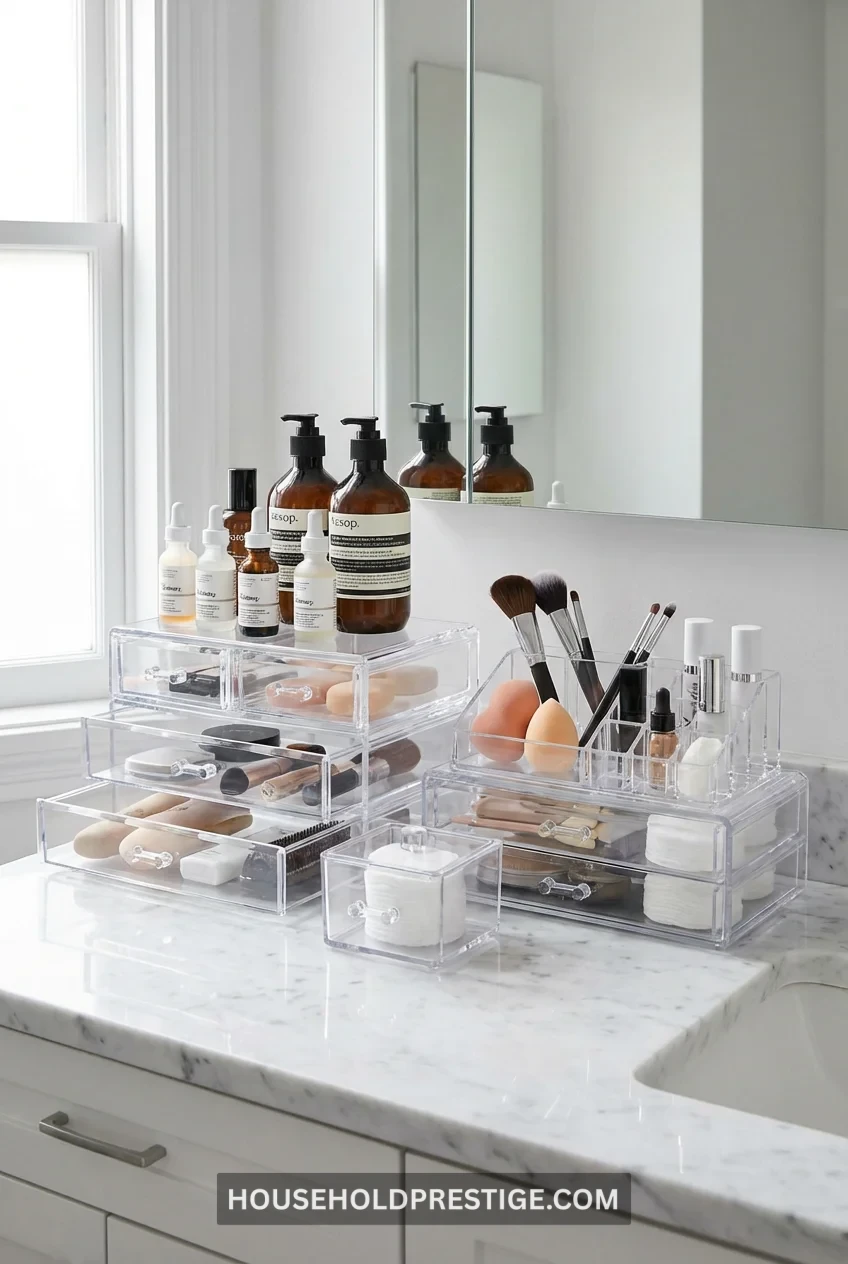
17. Clear Acrylic Accessories (Invisible Storage)
Opaque storage containers add visual clutter. Clear acrylic organizers “disappear”—you see through them to the wall, making the bathroom feel less crowded.
Use clear acrylic for toothbrush holders ($8-15), cotton ball containers ($10-15), shower caddies ($20-30), and soap dishes ($6-12). The Container Store and MUJI sell excellent options. They’re dishwasher-safe too. Group them on a mirrored tray for zero visual weight.
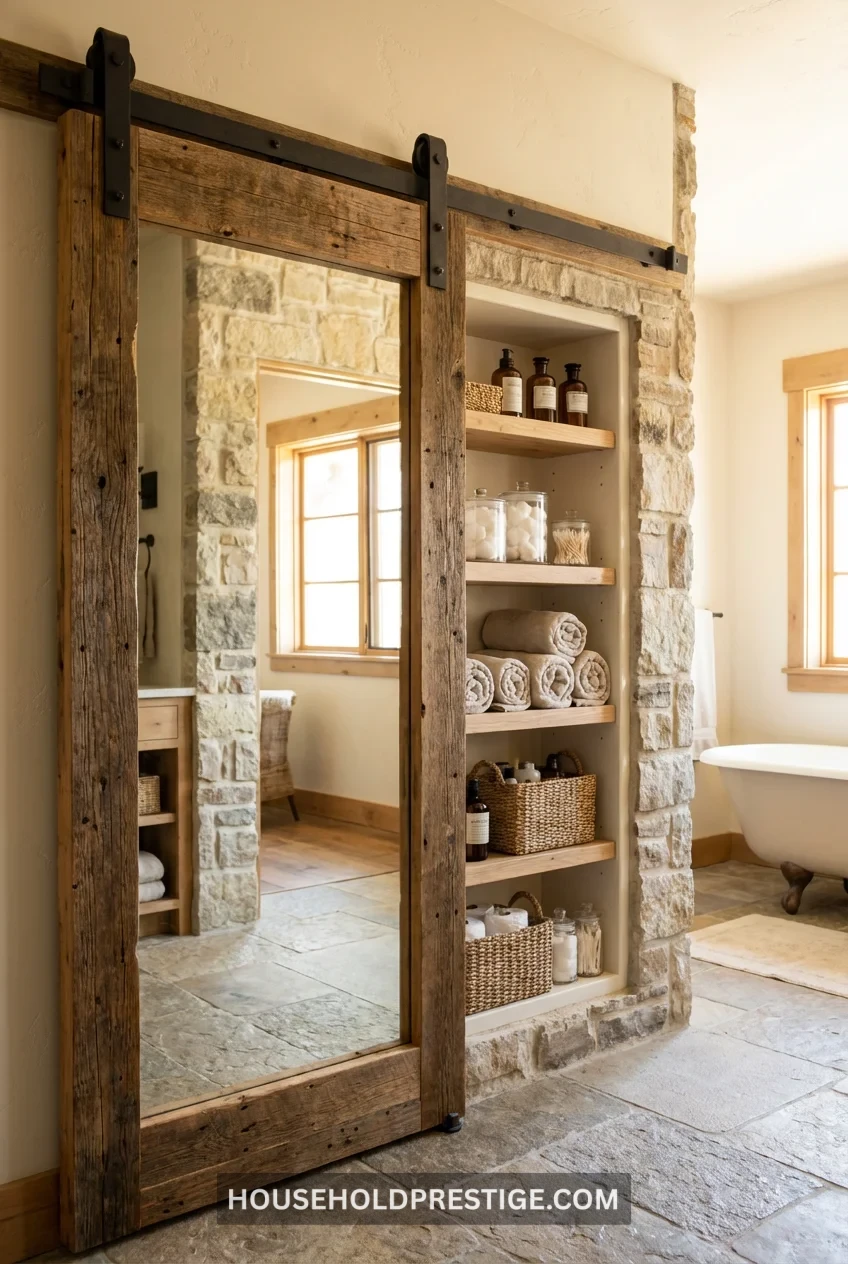
18. Sliding Barn Door Mirror (Two Functions, One Space)
Mount a full-length mirror on a barn door track over a recessed storage niche. Slide the mirror to access storage, and close it for a clean mirror surface.
Build or buy a shallow recessed niche (4-6 inches deep) in a non-load-bearing wall. Install barn door hardware across the opening. Mount a full-length mirror to a lightweight door panel. Boom—hidden storage plus a full-length mirror without using any floor space.
DIY cost: $150-250 for hardware, mirror, and materials. Takes a weekend to build.
What to store: Cleaning supplies, extra toilet paper, hairdryer, styling tools, and rarely-used toiletries.
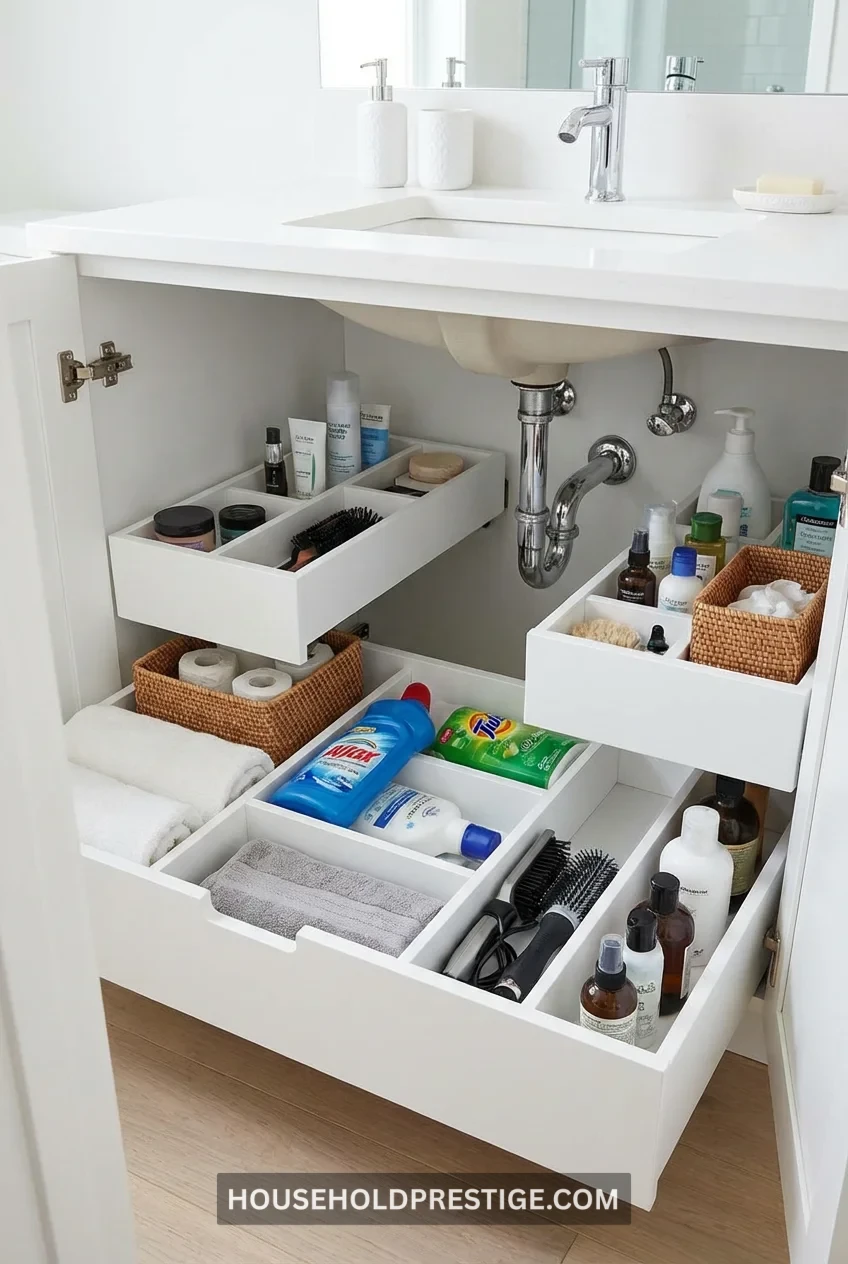
19. Under-Sink Drawer System (Not Open Shelves)
That cabinet under your pedestal sink? Stop leaving it empty. Install a custom drawer system that wraps around the plumbing.
Companies like Rev-A-Shelf make under-sink drawer inserts ($80-150) specifically designed to work around P-traps. You get 3-4 shallow drawers instead of awkward open space. Stores toiletries, cleaning supplies, and hair tools in organized layers.
Installation: Most systems attach with screws to the cabinet base. Takes 30 minutes with a drill.
Size check: Measure your P-trap configuration first. Some drawer systems don’t fit older, bulky traps. You might need a plumber to install a space-saving P-trap ($50-100).
20. Monochromatic Color Blocking (Horizontal Stripes)
Paint the lower half of the walls one shade darker than the upper half, with a dividing line at 40-48 inches high. Two shades of the same color—light gray below, ultra-light gray above. The horizontal division stretches visual width. Use painter’s tape and a laser level for a perfectly straight line. Wonky lines kill the illusion.
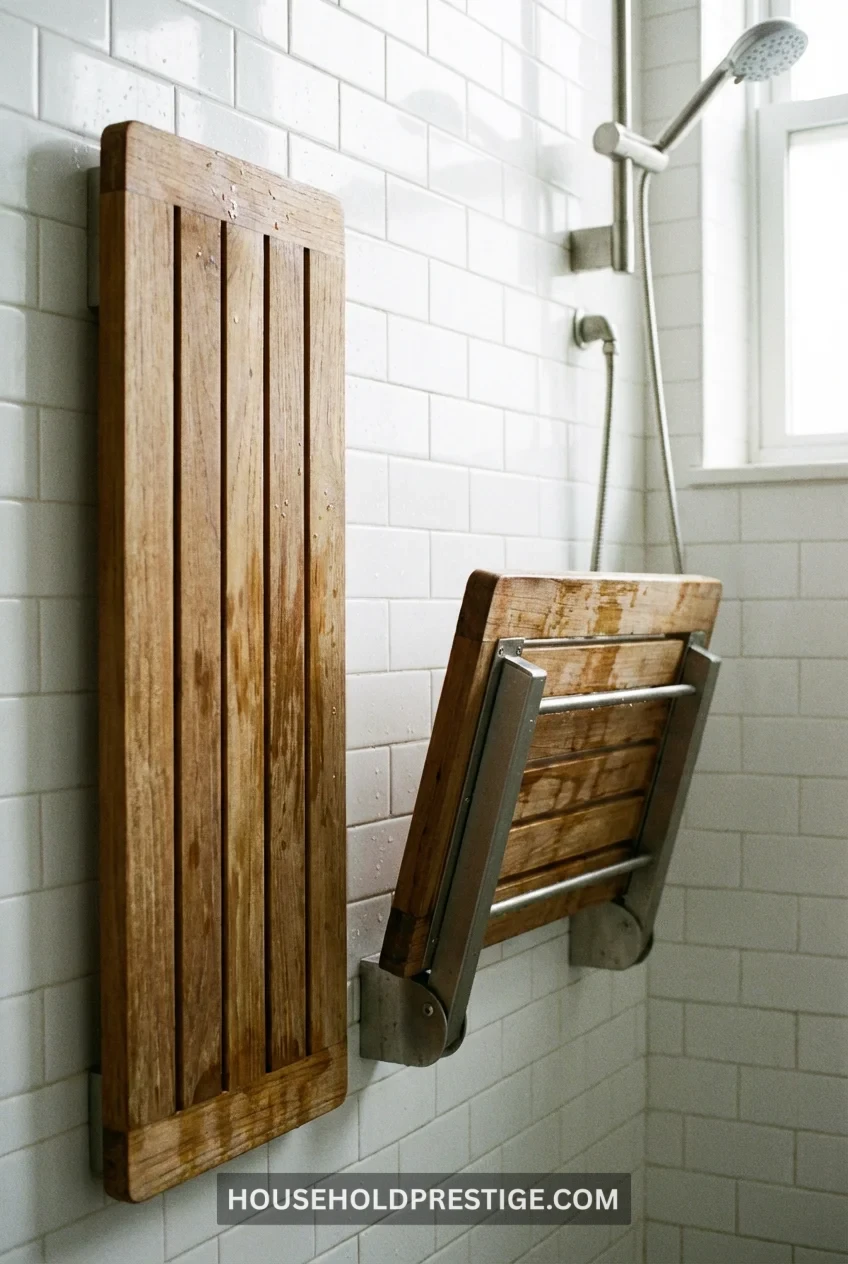
21. Fold-Down Shower Seat (Hidden When Not Needed)
Permanent shower benches eat up precious shower space. A fold-down teak or acrylic seat mounts to the wall, flips up when not in use.
Look for seats rated for 250+ pounds (MOEN makes excellent ones, $80-150). They’re not just for accessibility—they’re convenient for shaving legs, resting, or holding shower products temporarily.
Installation location: Mount on the shower’s long wall, 17-19 inches off the shower floor. This height works for most adults without interfering with shower spray.
Material choice: Teak resists water and looks high-end. White acrylic is cheaper ($50-80) but can yellow over time. Stainless steel is most durable but coldest to sit on.
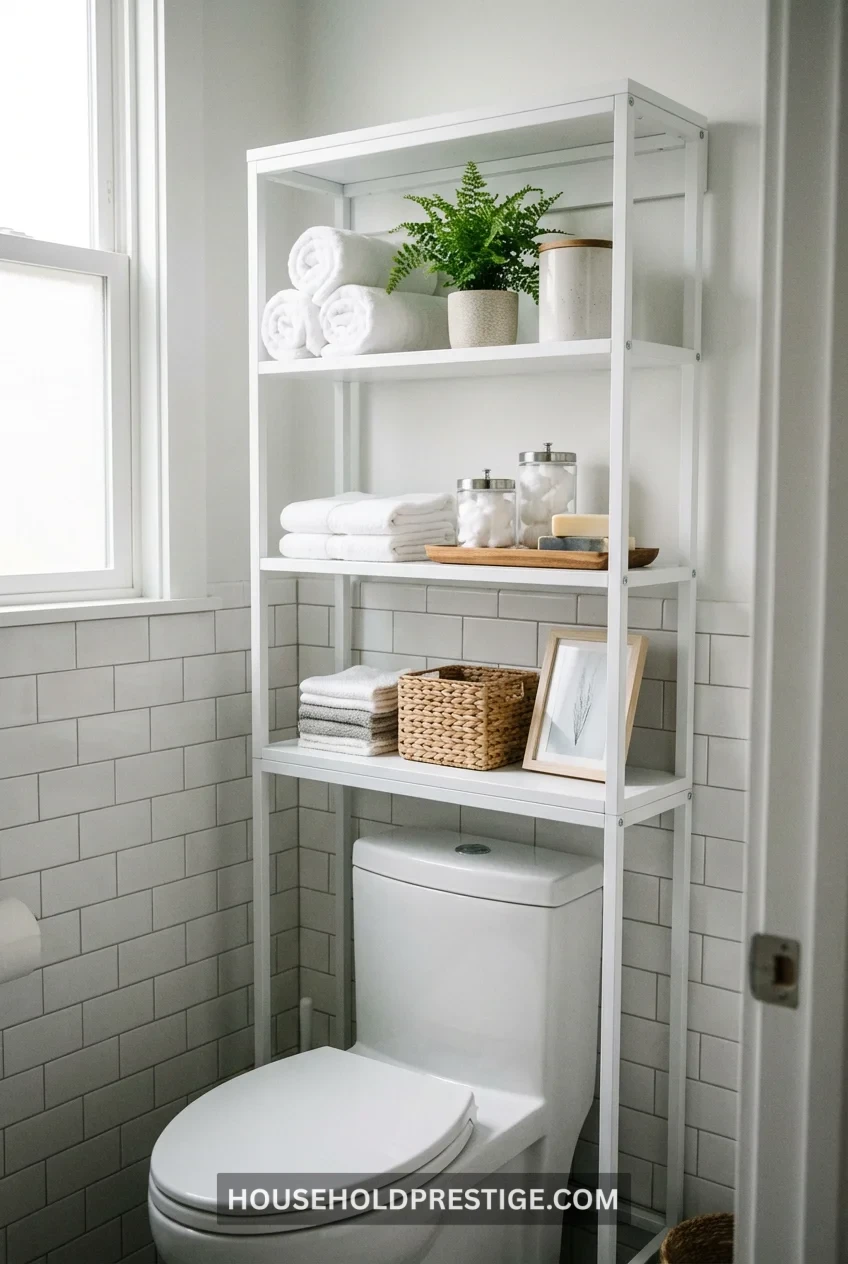
22. Over-the-Toilet Etagere (Vertical Storage Gold)
The space above the toilet is dead space in most bathrooms. An over-the-toilet etagere (open shelving unit) captures 6-9 square feet of vertical storage without touching your floor.
Look for units 60-68 inches tall, 24-30 inches wide, and no more than 10 inches deep. Deeper units stick out and feel bulky. IKEA, Wayfair, and West Elm all make excellent options ($80-200).
Styling tip: Don’t cram every shelf full. Use the top shelf for decorative items (plants, candles), the middle shelves for neatly folded towels, and the bottom shelf for daily-use items. Leave some negative space—overstuffed shelves make the bathroom feel cramped.
Stability: Secure the unit to the wall with L-brackets, especially if you have kids. Freestanding etageres can tip if bumped.
23. Smart Mirror with Built-In Storage (Tech + Function)
Smart mirrors with integrated LED lighting and hidden storage behind the mirror surface are the ultimate small-bathroom solution. You get a mirror, lighting, and storage in one wall-mounted unit.
Brands like Electric Mirror and Keonjinn make models with touch controls, defogging, and USB charging ports built in. Prices run $300-800, depending on size and features.
Storage capacity: Most smart mirrors have 3-5 inches of depth behind the mirror for medications, skincare, and daily-use items. Magnetic or click-open mechanisms keep the storage hidden.
Installation note: These require an electrical outlet behind the mirror location. If you don’t have one there, budget $150-300 for an electrician to add one.
Worth it? If you’re replacing an old medicine cabinet anyway, spending an extra $200-300 for a smart mirror makes sense. The integrated lighting alone saves on installing separate vanity lights.
Conclusion
Your small bathroom doesn’t need to feel cramped. These 23 pro-level ideas prove that smart design beats square footage every time.
The biggest transformations come from the structural changes—floating vanities, wall-mounted toilets, and glass partitions. These create actual and visual space. But even simple swaps like clear acrylic containers or narrow shelving make measurable differences.
Pick 3-5 ideas that match your skill level and budget. You’ll see the impact immediately. Small bathrooms aren’t a design problem—they’re an opportunity to get creative with every single inch.
FAQ
Q: What’s the most impactful change for a small bathroom under $200?
A: A large mirror is the single best bang-for-buck upgrade. A 36×48 inch frameless mirror ($80-150) reflects light and doubles the visual space instantly. Pair it with a fresh coat of bright white paint ($30-40), and you’ve transformed the feel of the room for under $200 total.
Q: Should I use wallpaper in a small bathroom or stick to paint?
A: Wallpaper can work beautifully, but stick to one accent wall (not all four) and choose vertical patterns to draw the eye up. Peel-and-stick wallpaper ($30-60 per roll) is renter-friendly and easy to test. Avoid busy, small patterns—they make tight spaces feel cluttered. Large-scale geometric or subtle vertical stripes work best.
Q: How do I prevent mold in a small bathroom with no window?
A: Install a powerful exhaust fan rated for your bathroom size (check CFM ratings—you need 1 CFM per square foot minimum). Run the fan during showers and for 20 minutes after. Add a small dehumidifier ($40-60) if moisture persists. Mold grows in humidity above 60%, so controlling moisture is everything in windowless bathrooms.
Q: What’s the ideal color temperature for small bathroom lighting?
A: Use 3000K-3500K (warm white to neutral white) for the main lighting. This temperature is flattering for skin tones without feeling too yellow or too harsh. Task lighting around mirrors can be slightly brighter at 4000K for detailed grooming tasks. Avoid cool white (5000K+) unless you’re going for a clinical look—it makes small spaces feel cold and uninviting.
Q: Can I DIY most of these ideas, or do I need a contractor?
A: About 60% of these ideas are DIY-friendly: floating shelves, paint, accessories, adhesive storage, towel warmers, and etageres require basic tools only. The remaining 40% need professional help: moving plumbing (corner sinks), electrical work (smart mirrors, heated floors), tile installation, and wall-mounted toilets. Budget $1,500-3,000 for contractor work if tackling structural changes.