

I’m standing on a kitchen chair with a roll of painter’s tape, slapping paper circles onto the dining room wall. Nine of them, each traced from a thrifted plate. This is the best of all hanging plates on the wall ideas, because nothing gets a hole until it looks right.
Below are 21 arrangements. Each one gives you a plate count, a size mix, the gaps, and the hanger to buy. Screenshot one, grab your stack, and hang it today.
Four Numbers to Know Before You Hang Anything
These four rules decide whether a plate wall looks curated or chaotic.
- Gaps: Leave 2-3 inches between plate edges for a tidy look, up to 4 inches for a loose one.
- Ratio: Use one large plate (12-14 inches) for every 3-4 smaller ones (6-9 inches).
- Height: Center the whole arrangement 57-60 inches from the floor. Over a table, counter, or headboard, keep the bottom edge 8-10 inches above it.
- Paper first: Trace every plate on kraft paper, cut it out, and tape the circles to the wall. Move them until you love it, then nail through the paper.
While the paper is up, check for outlets, switches, and vents. Keep plates at least 2 inches clear of each one.
Layouts That Work on Almost Any Wall
1. The Rule-of-Three Column
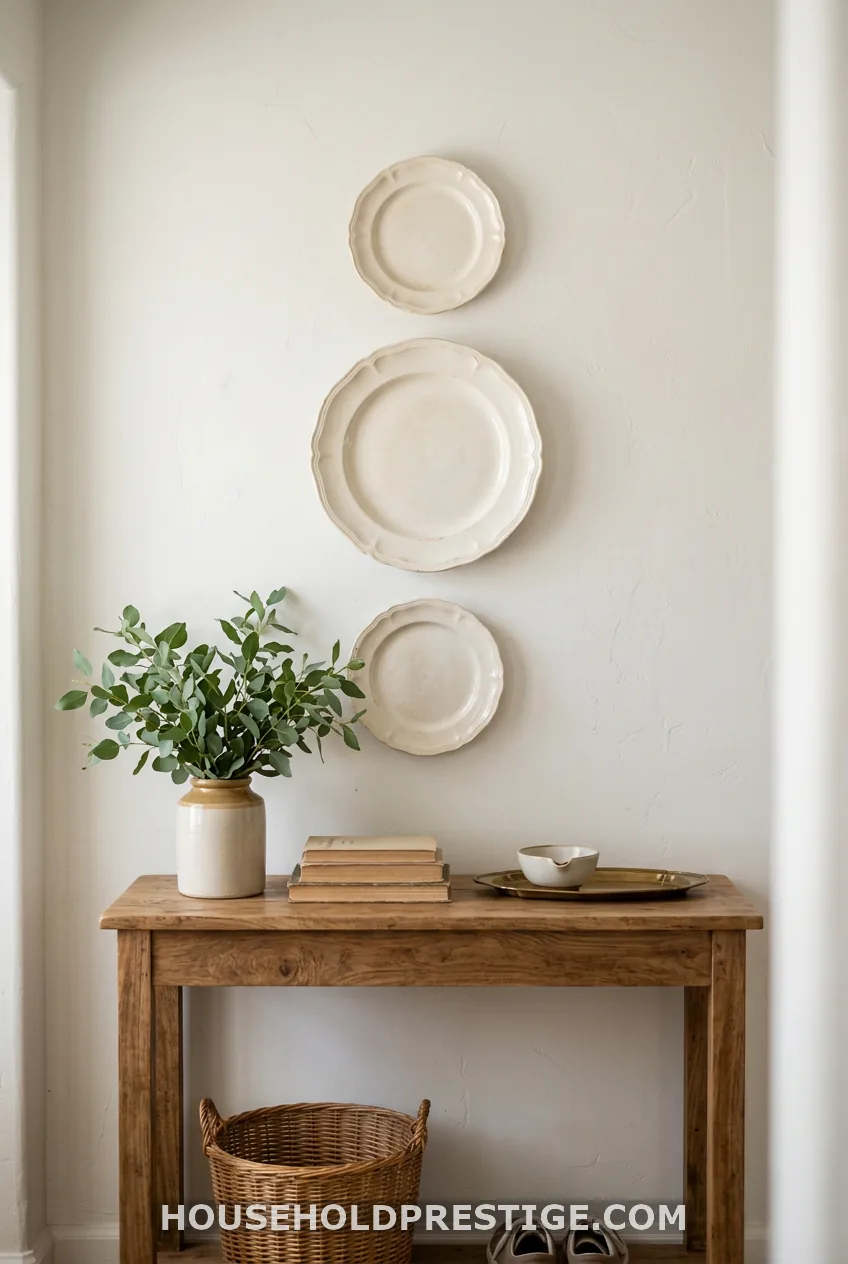
Stack three plates over a console or bench. Use one 12-inch charger between two 8-inch plates, all in one color family. Leave 8-12 inches between them.
Hang each on a spring wire plate hanger. Cream ironstone or blue transferware on a white wall gives you that French country look.
2. The Classic Grid
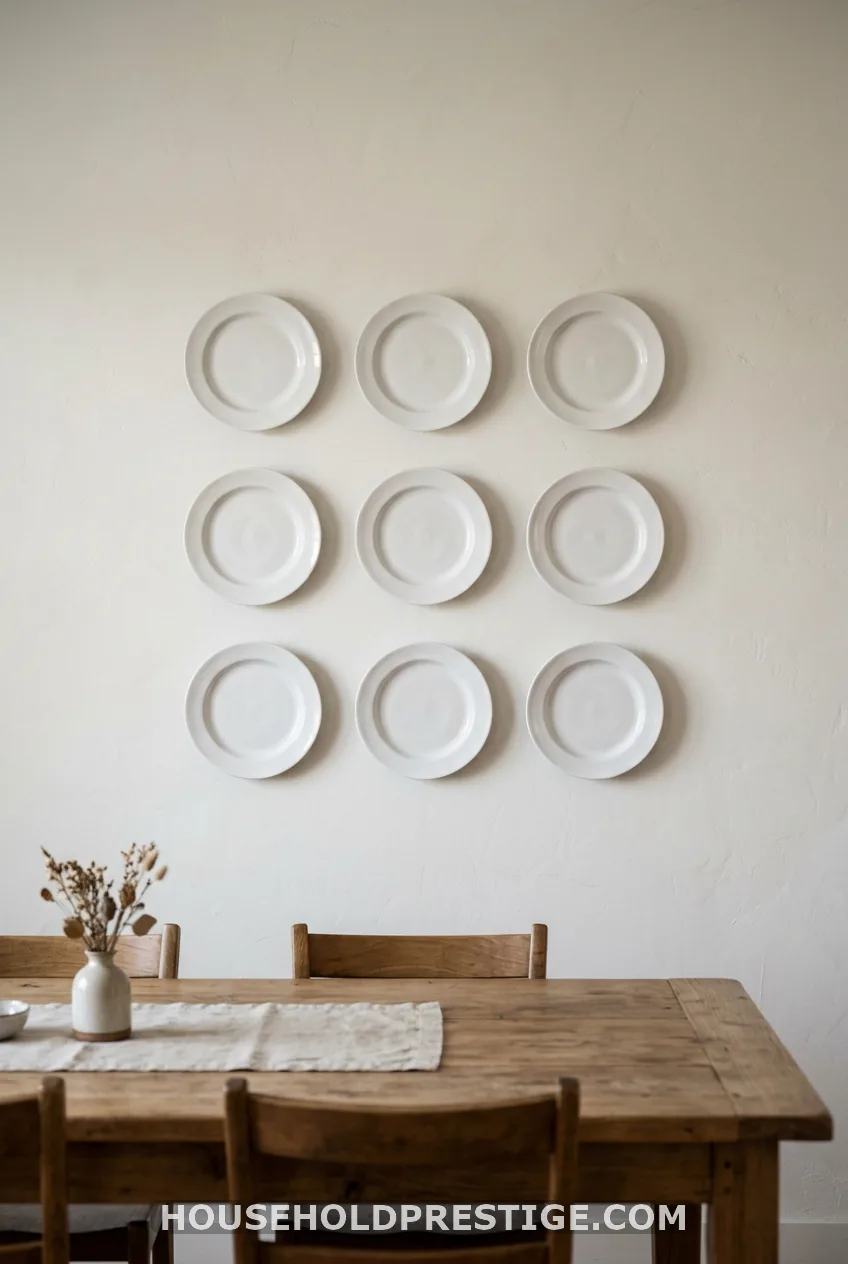
This is the formal option for the wall behind the dining table. Hang nine 8-inch plates in a 3×3 grid, or twelve in a 4×3. Keep every gap at exactly 3 inches.
Run painter’s tape for the columns and check them with a laser level. Mark every center before you touch a hammer. Stoneware is heavy, so use wire hangers on 20-lb drywall anchors.
3. The Big Platter and Its Orbit
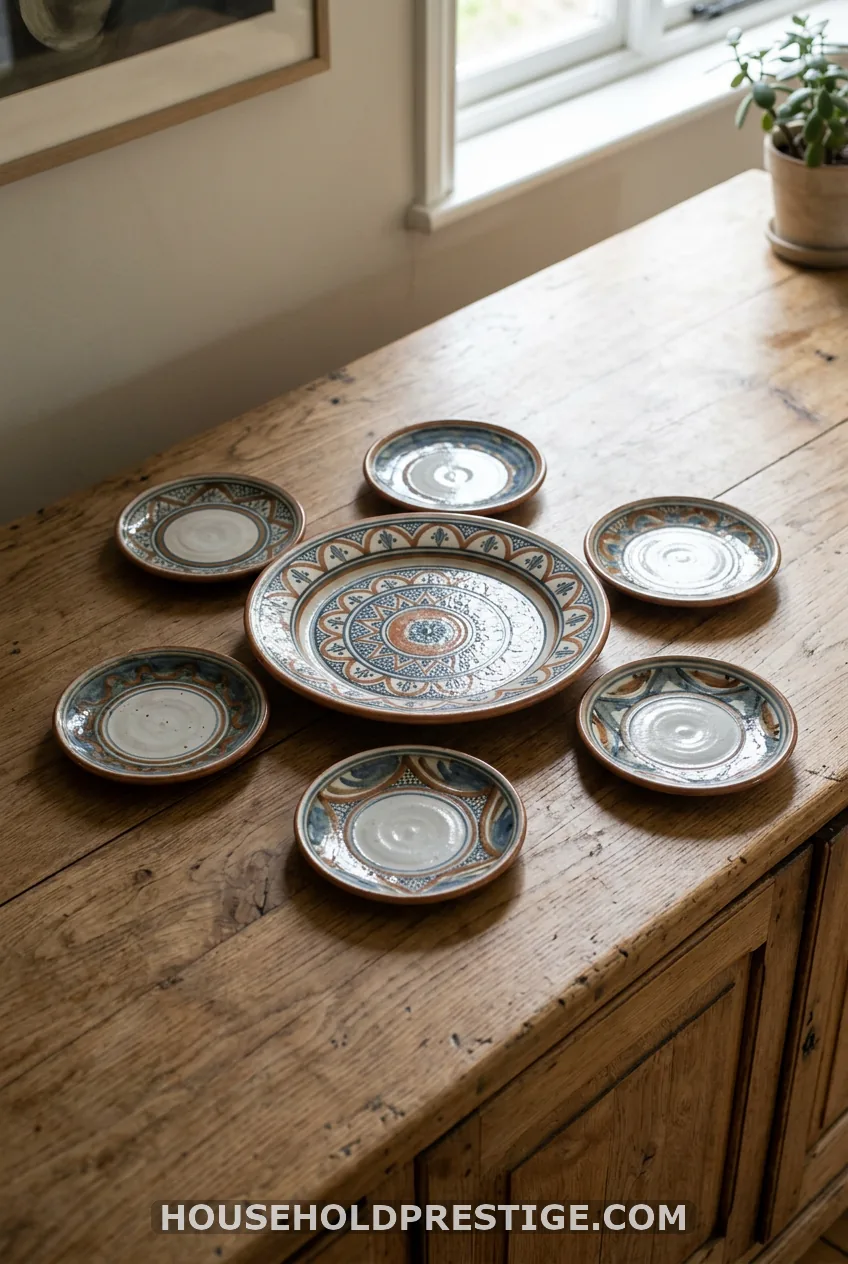
Pick one 14-inch platter and hang it first. Then ring it with 5-7 smaller plates, each 3 inches from its neighbor. Build the whole ring on the floor before you move to the wall.
This one looks great over a buffet or mantel. Add a dab of museum gel on each bottom rim so nothing rattles when a door slams.
4. The Organic Mosaic
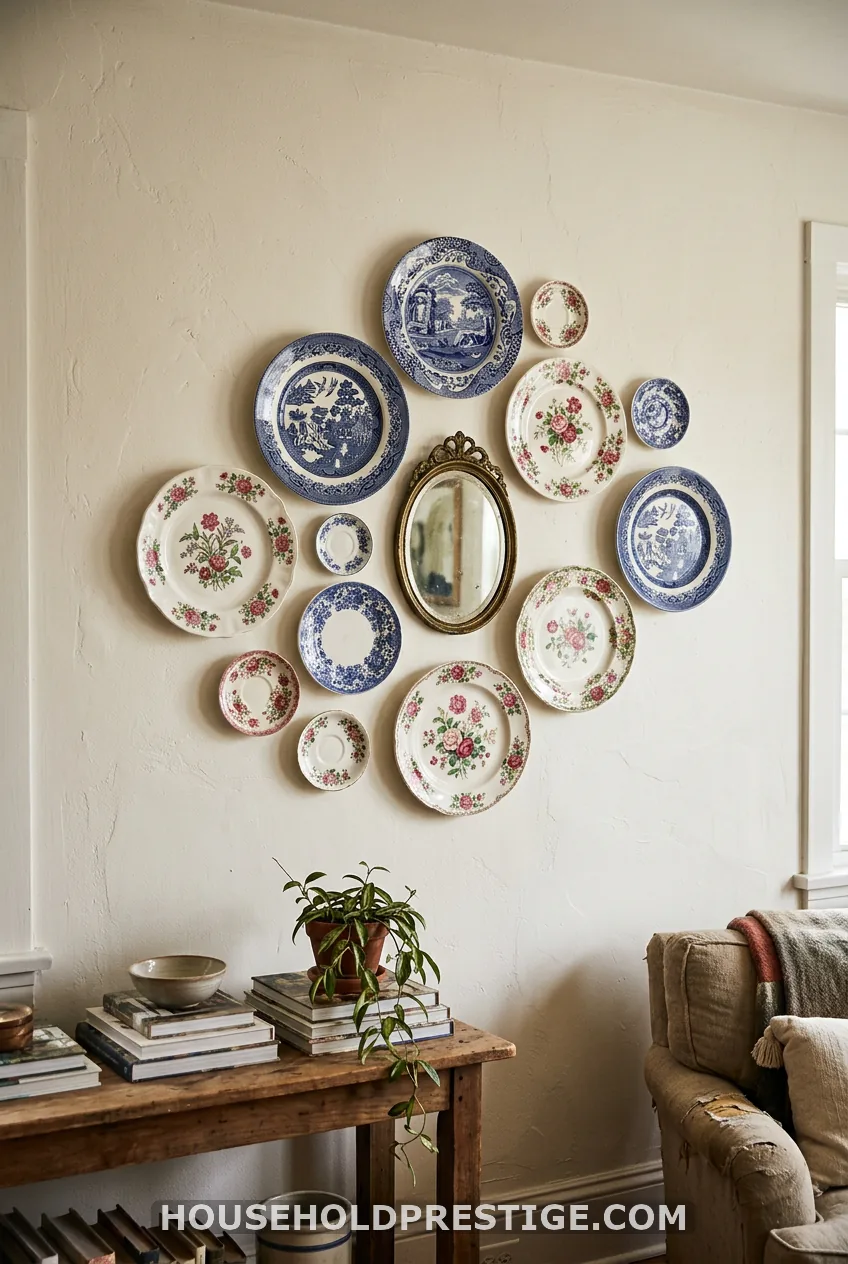
Hang 9-15 mismatched plates with no grid, 2-4 inches apart. One shared thread keeps it calm. Pick all florals, all blue and white, or all hand-thrown pottery.
Lay the full layout on the floor and photograph it. Copy the photo onto the wall. Tuck in one small mirror or print to break up all those circles.
5. The Vertical Stack for Skinny Walls
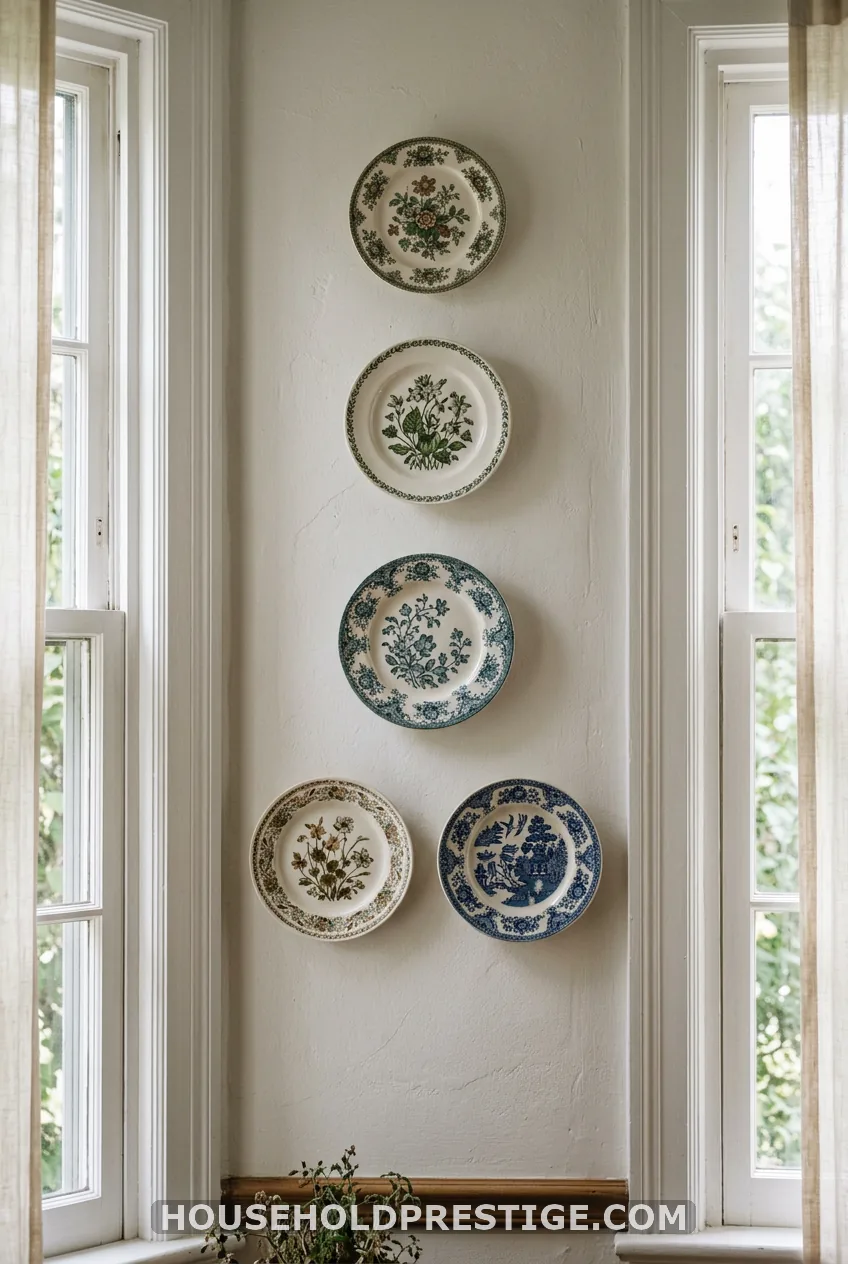
Use 4-6 plates in a column between windows, on a chimney breast, or down a hallway. Keep 2-3 inches between each. Level every plate.
Finish the base with two plates side by side. That keeps the column from looking like a totem pole. It also gives your orphan plates and saucers a home.
6. The Modern Minimal Trio
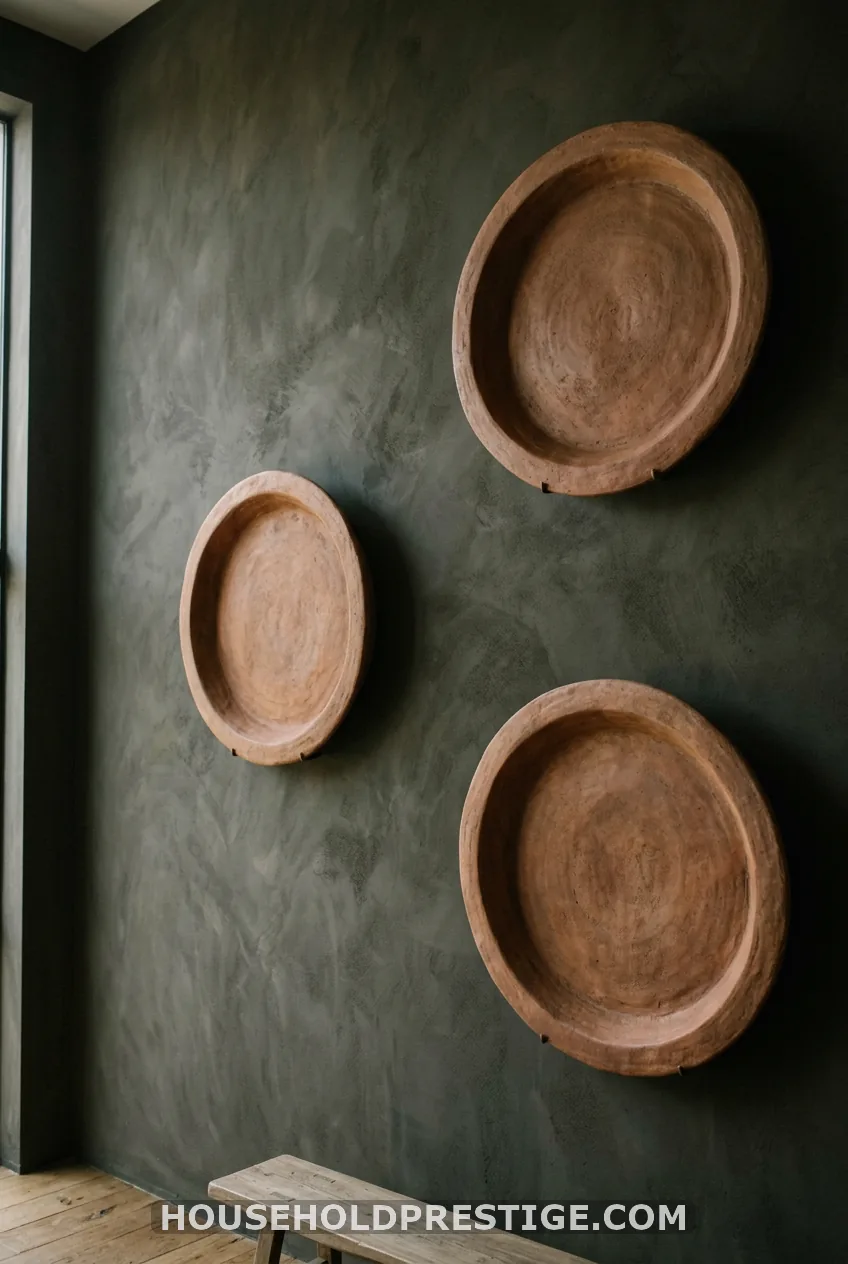
Go big. Hang two or three matte chargers, 15-18 inches wide, on a saturated or limewashed wall. Space them 6-10 inches apart so the empty wall becomes part of the design.
Choose matte black, bone, or terracotta with no pattern. Oversized chargers are heavy, so skip adhesive. Use heavy-duty hangers and anchors rated well above the plate weight.
7. The Stairwell Ascent
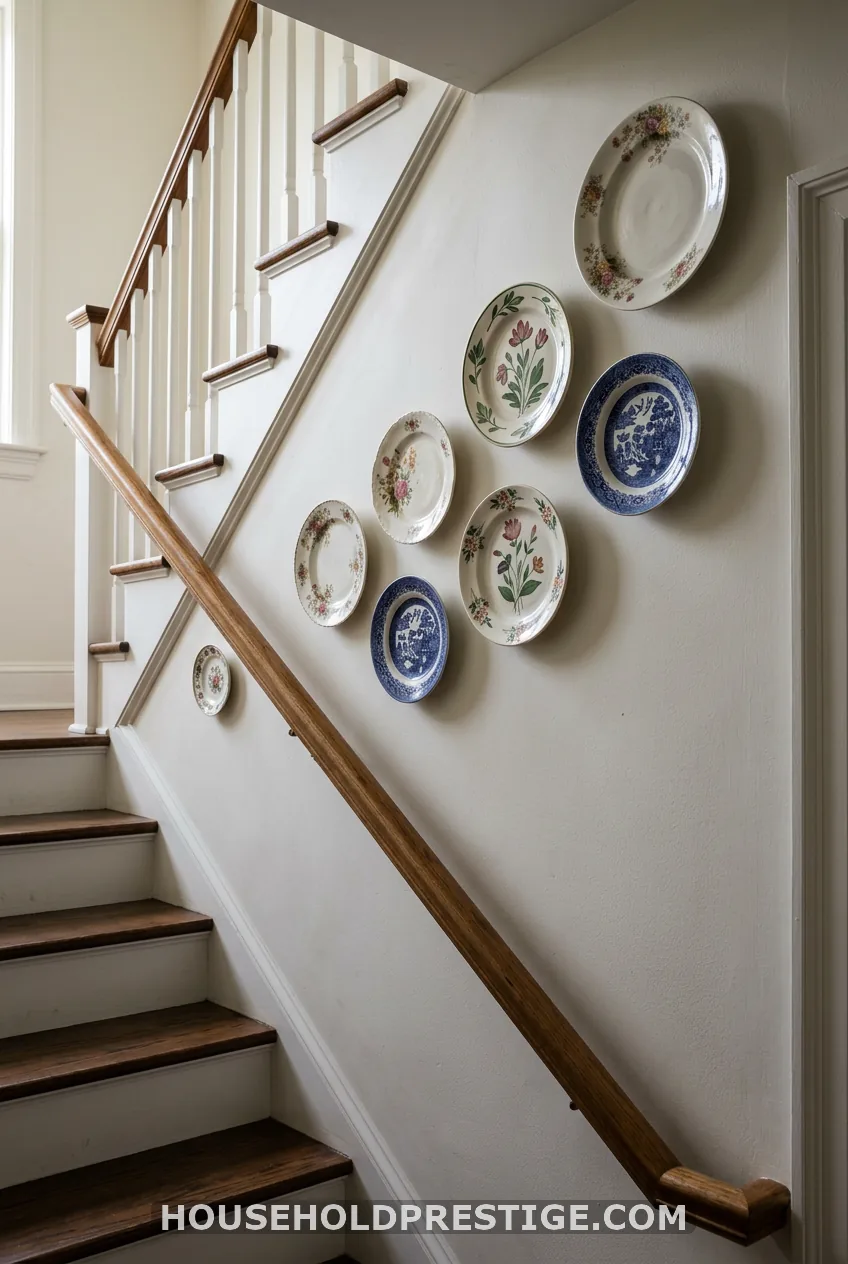
Hang 7-10 plates on a diagonal, each stepping up 10-14 inches. Run painter’s tape along the handrail angle first. Hang every plate along that line.
Size them small to large as they rise. Stairwell walls get bumped more than any other spot, so use wire hangers with anchors. Never use sticky strips here.
Plate Walls by Room
8. The Kitchen Soffit Row
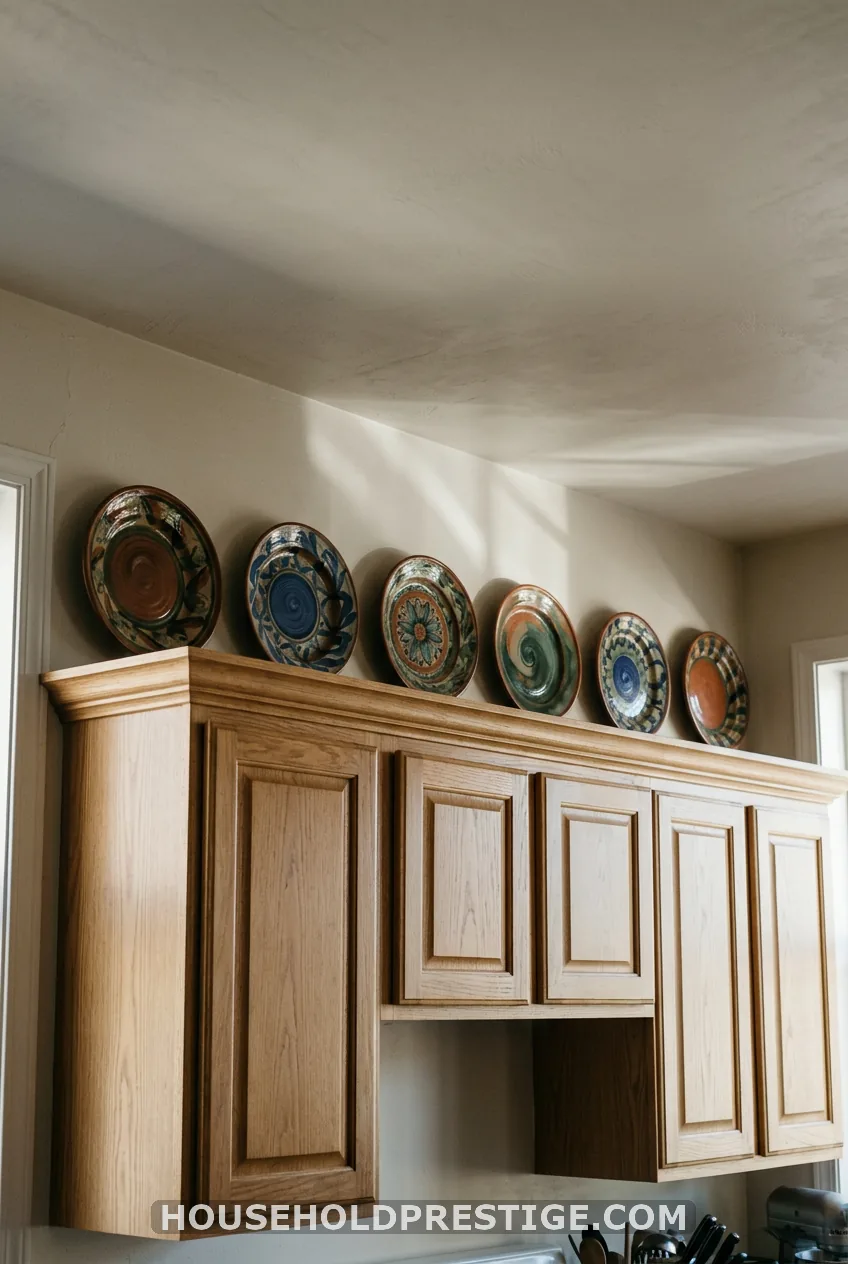
Line up 5-7 plates in one row along the soffit or above the cabinets. Space them evenly. Use glazed ceramic, never unglazed pottery, which soaks up cooking residue.
Grease and steam kill adhesive. Use wire hangers screwed into studs or anchors. Wipe the plates with a degreasing cloth every three months to keep the glaze glossy.
9. The Blue-and-White Dining Cluster
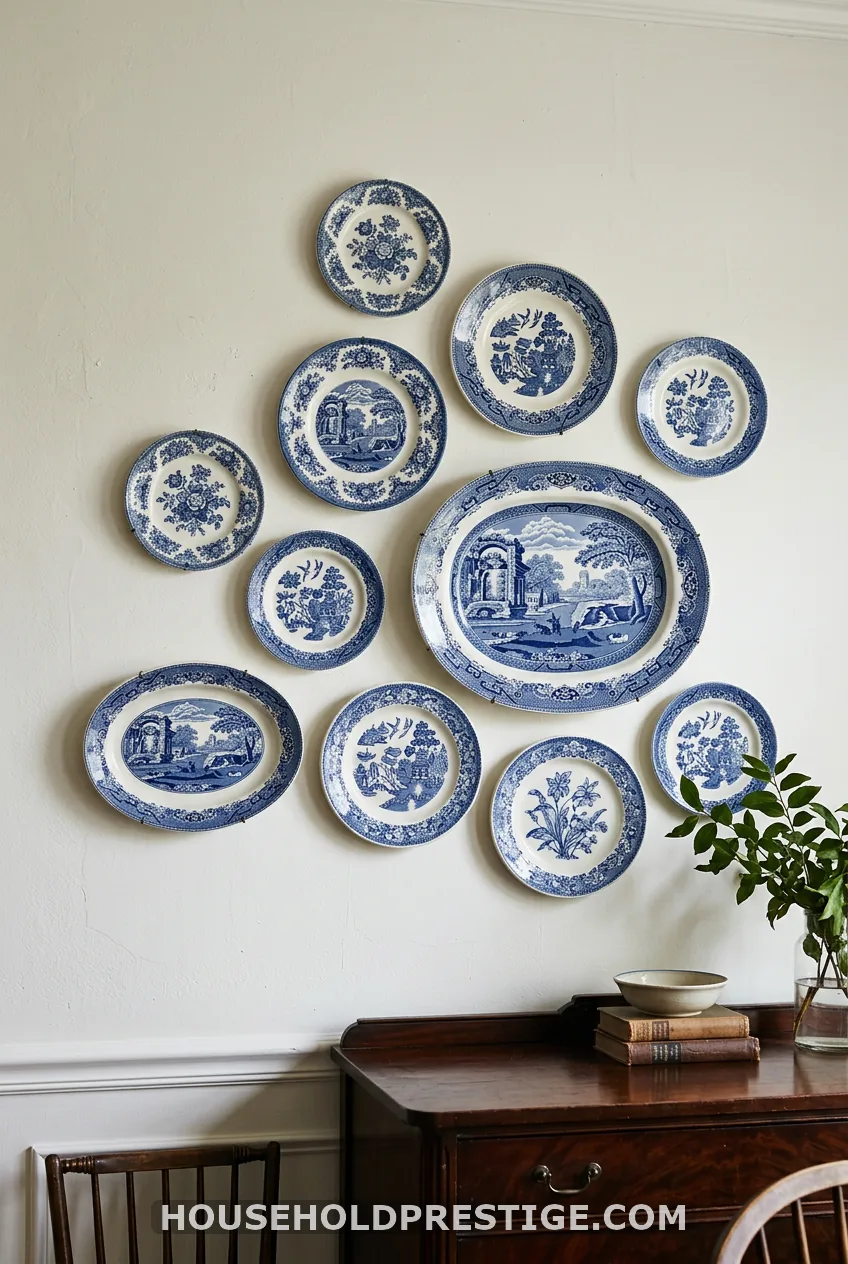
Hang 8-12 transferware or Chinoiserie plates, plus one or two oval platters. Set the largest platter slightly off-center. The wall will feel collected over time.
Hunt for singles at thrift stores, consignment shops, estate sales, Etsy, and eBay. Broken sets cost far less than full ones. A thrifted plate often runs $2-8, while new ceramics can run $15-40 each.
10. The Bedroom Plate Wall
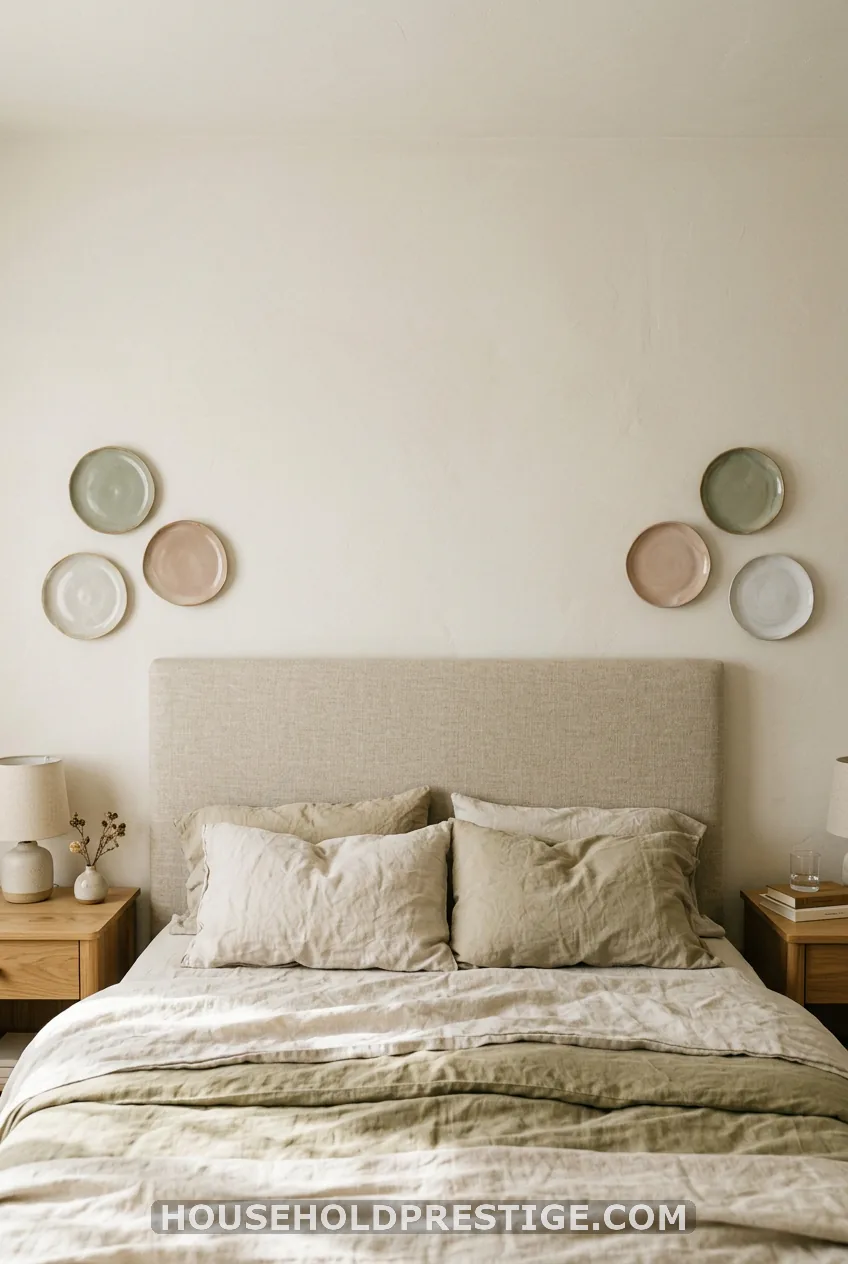
Pick 5-7 small plates in low-contrast colors, so the room stays restful. Keep the bottom row 8-10 inches above the headboard. Never hang a plate where a pillow could knock it.
Matching pairs on each side of the bed look planned. An odd-numbered cluster looks collected. Over a bed, I use wire hangers on anchors, not adhesive.
11. The Mirror Ring
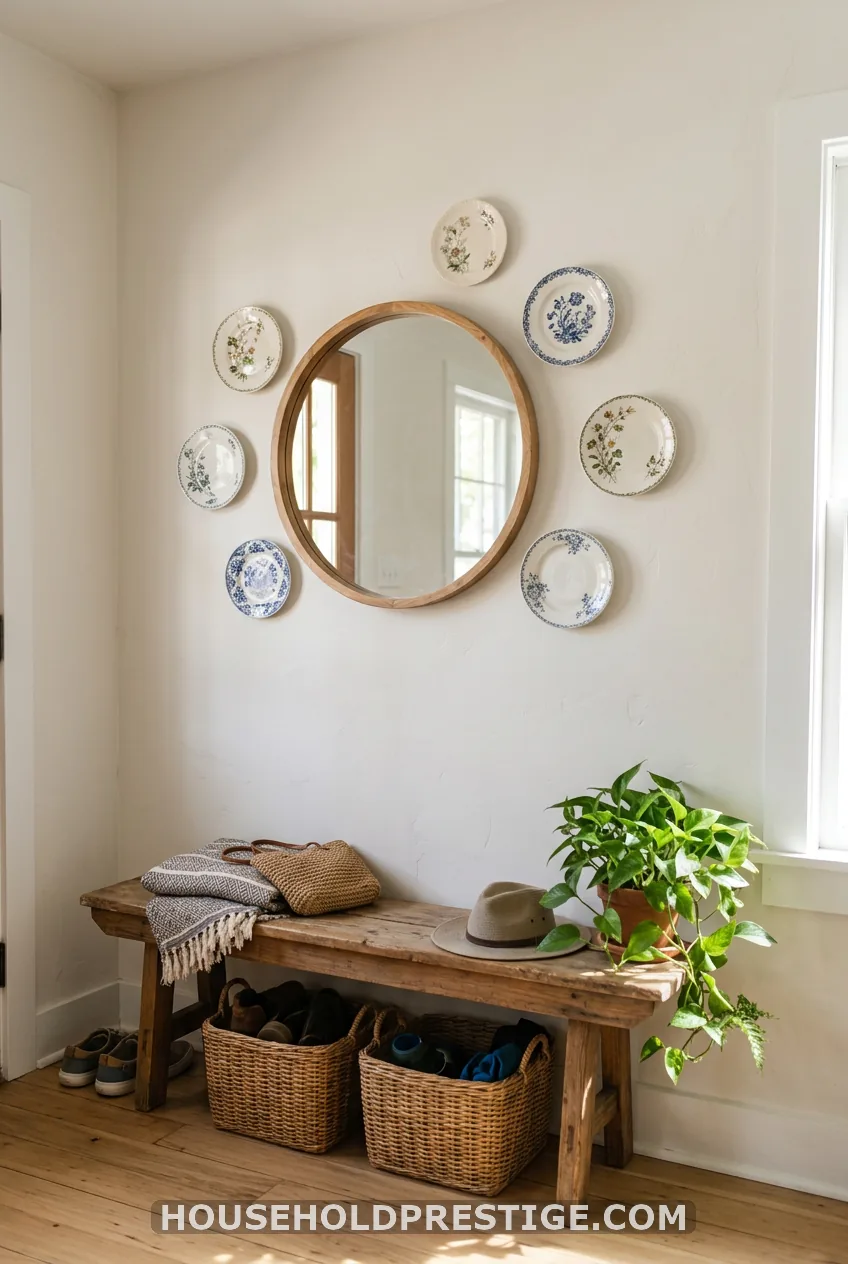
Hang a round mirror first, then circle it with 6-8 plates in the 6-8 inch range. Keep gaps at 2 inches. The mirror bounces light and breaks the repeat of plate shapes.
12. The Plate and Art Hybrid
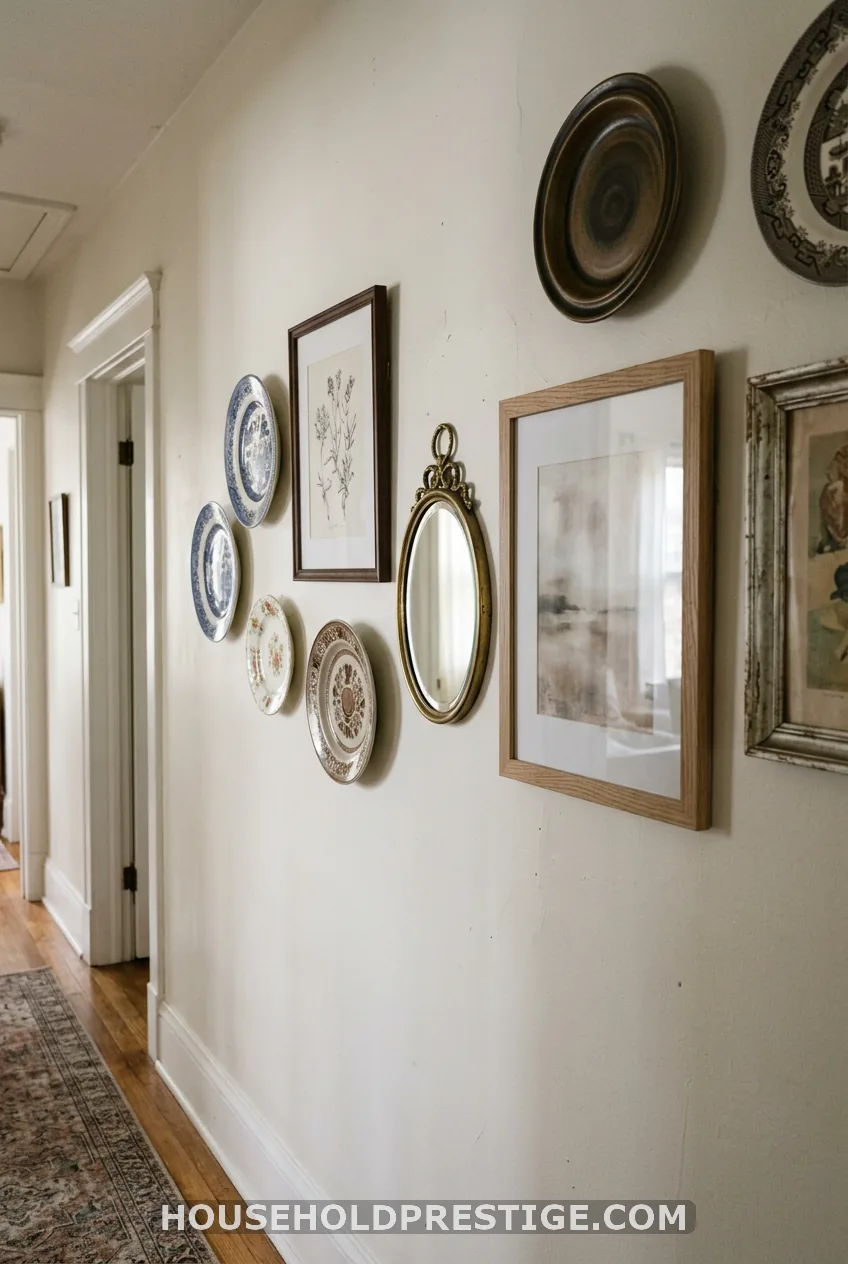
Mix 4-6 plates with 2-3 framed prints in one arrangement. Hang the art first. Then trace the plates on paper and fill the gaps.
Repeat one metal finish across frames and hangers. This suits long hallway or living room walls that one medium can’t carry alone.
Style Directions
13. The Farmhouse Mix
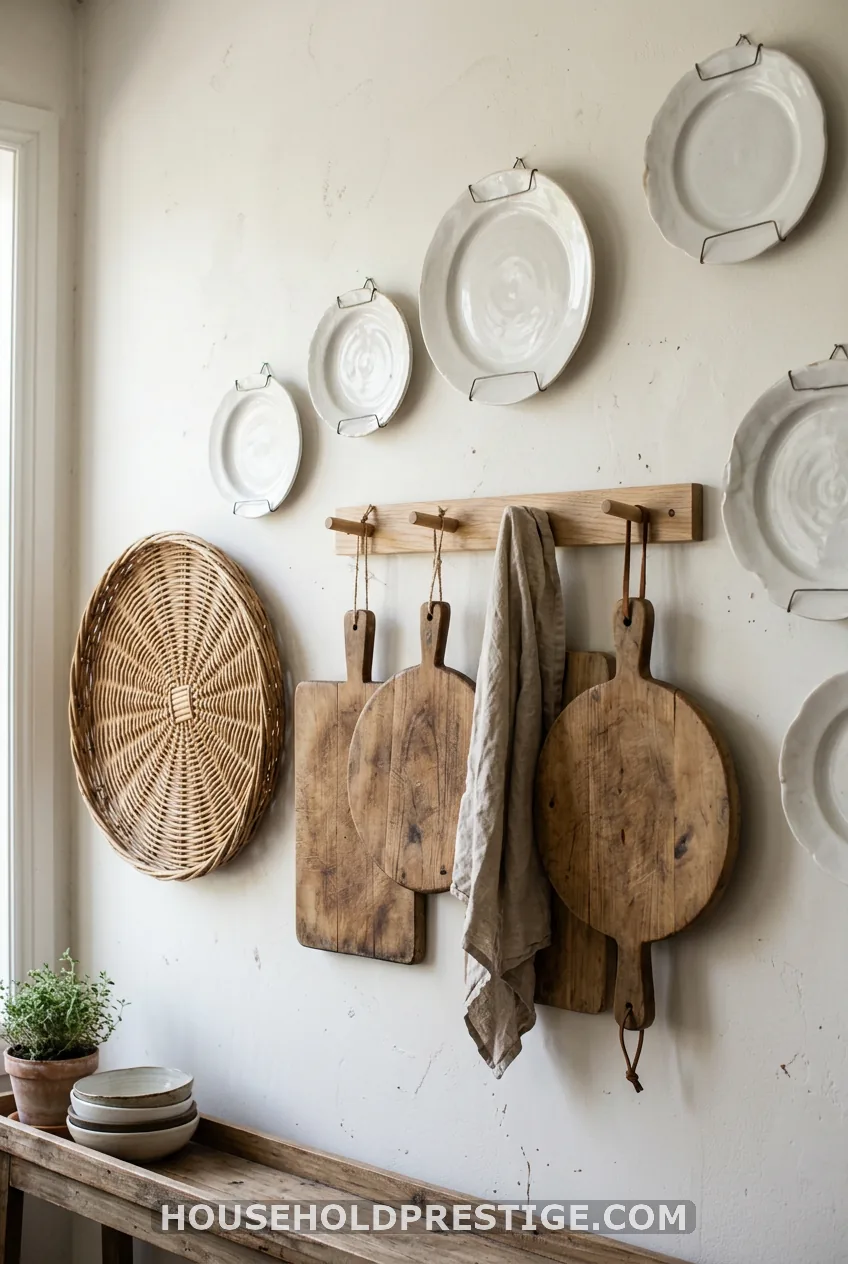
Aim for about 60% plates and 40% other things. Lean wooden boards on a peg rail. Hang one flat basket for texture. Without the mix, the wall reads like a dish rack.
Stick to three tones: white, wood, and one metal finish. Plates take wire hangers. Boards and baskets take sawtooth hangers or D-rings.
14. French Country Over a Window
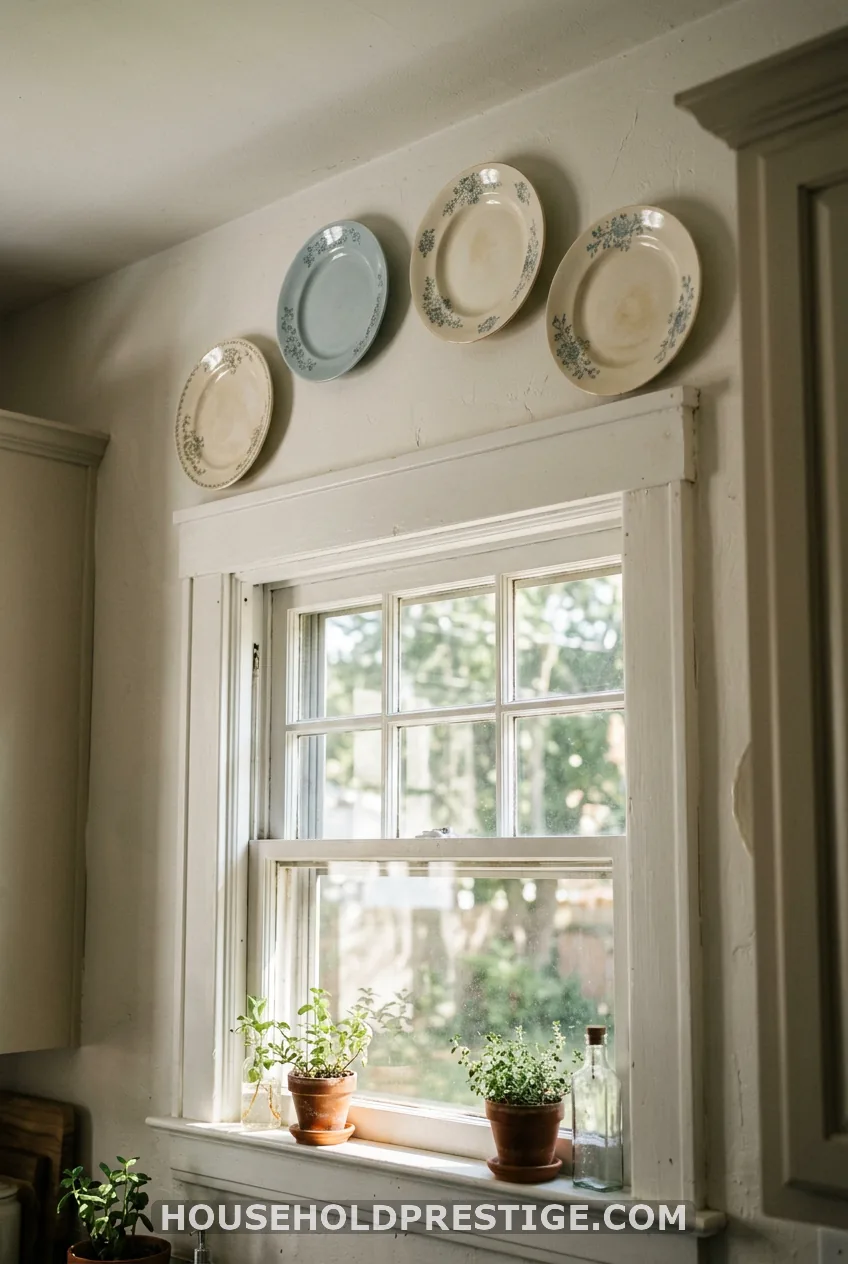
Arch four or five plates above a window frame. Use 7-9 inch plates in cream, pale blue, and faded yellow. Keep the gaps at 2-3 inches and the outer plates level with the trim.
15. The Seasonal Swap Wall
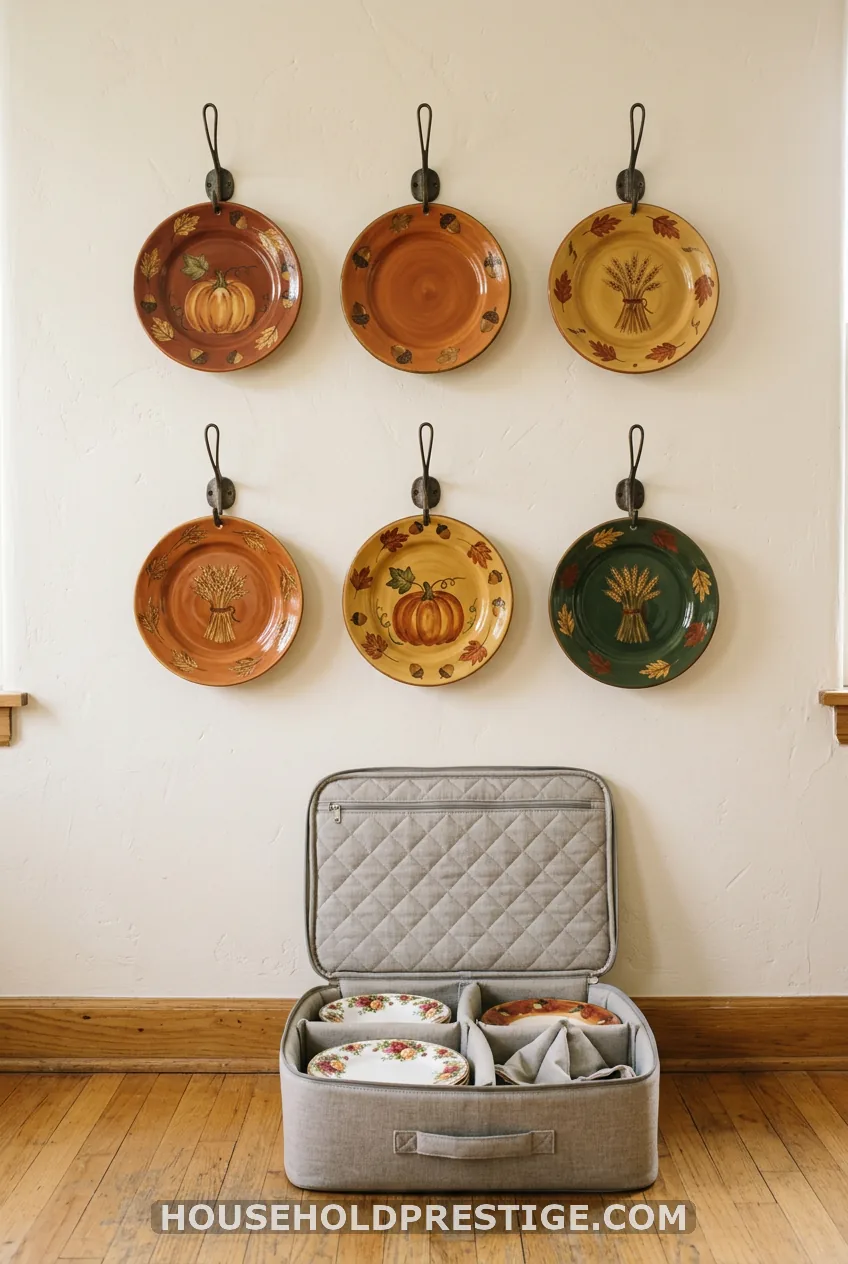
Install a permanent grid of hooks or a plate rail. Then swap plates by season: florals for spring, harvest tones for fall. Keep the same count and size, so every plate drops onto the same hardware.
Label the back of each plate with painter’s tape. Store the off-season set in a padded bin. It’s a smart way to show inherited china without locking it into one look.
Methods and Problem Solvers
16. The Plate Ledge
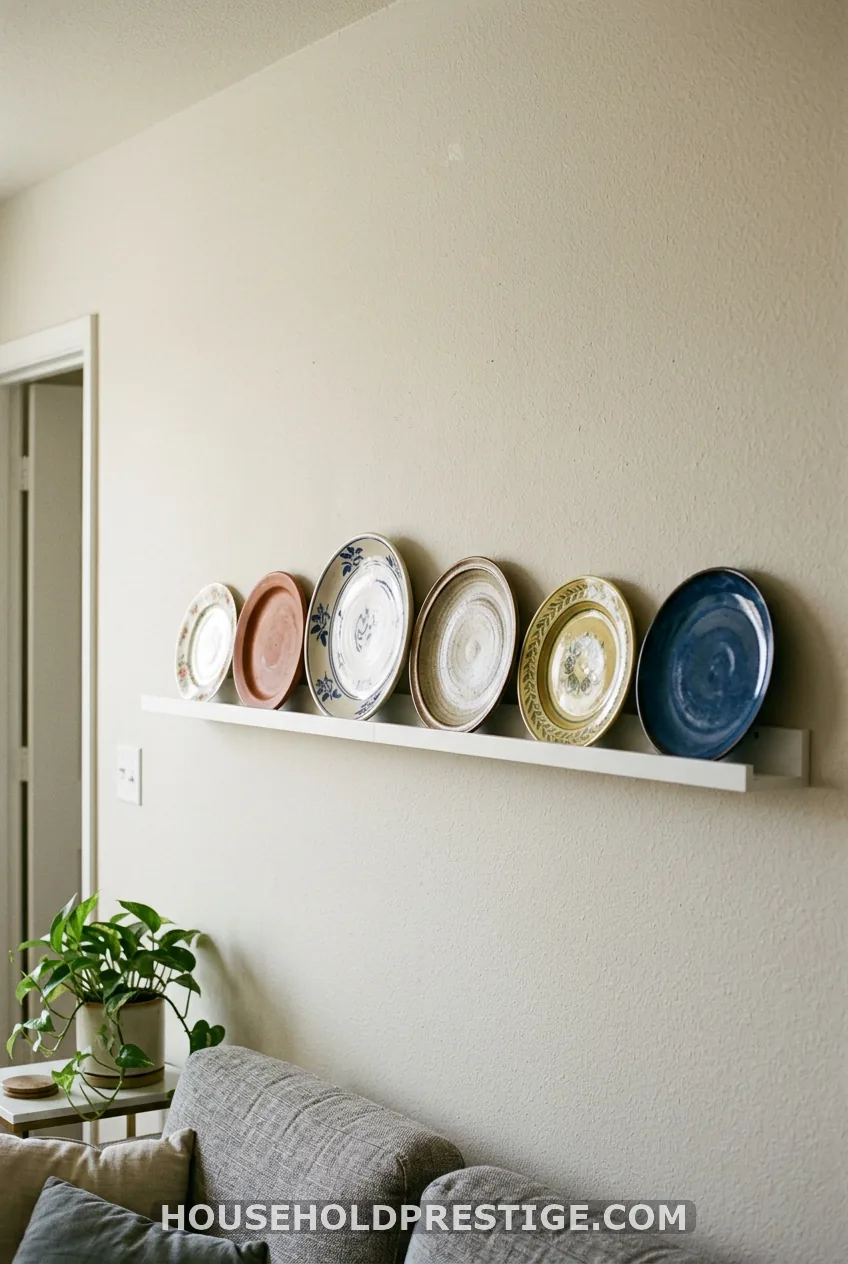
One picture ledge holds 5-8 plates. You drill 2-4 holes for the whole wall, not one per plate. Set each plate on a small stand or a pinch of museum putty so it can’t slide.
Great for apartments, plaster walls, and anyone who swaps decor often.
17. The No-Drill Method (Deep Dive)
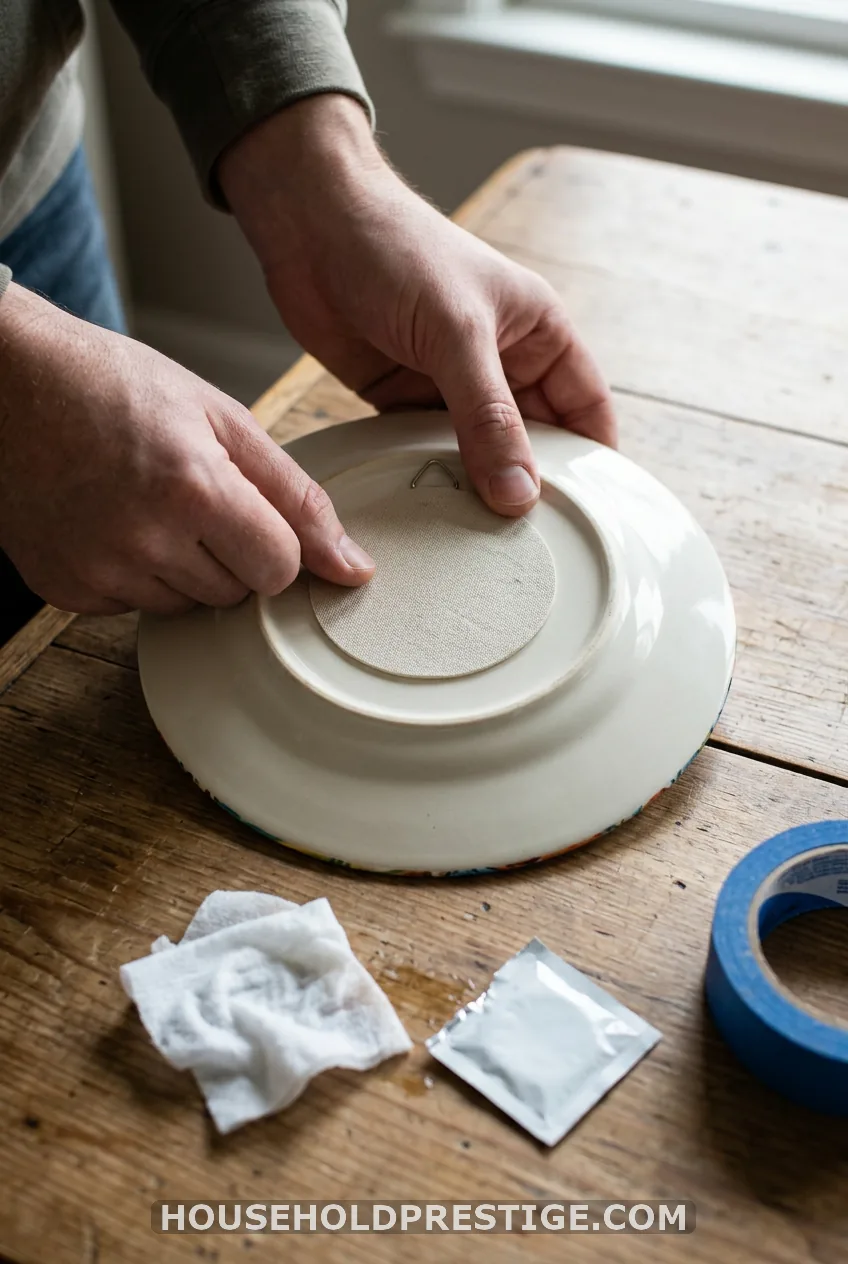
Adhesive works only for light decorative plates, under about 2 lb. It fails in kitchens and bathrooms, on textured walls, and under heavy stoneware. If your wall passes, here is the routine.
What you need
Adhesive disc hangers or strips, rubbing alcohol, a lint-free cloth, and a pencil. A set of six runs about $8-12.
Steps
- Weigh the plate on a kitchen scale. Buy hangers rated for double that weight.
- Wipe the wall and plate back with rubbing alcohol. Let both dry fully.
- Press the disc onto the center of the plate back, not the rim, for balance.
- Wait 24 hours before hanging.
- Re-check after the first big temperature swing.
The mistake to avoid
Hanging on freshly painted walls. Paint needs about a month to cure. Before that, adhesive peels paint along with the plate.
18. Hanging Ovals and Squares
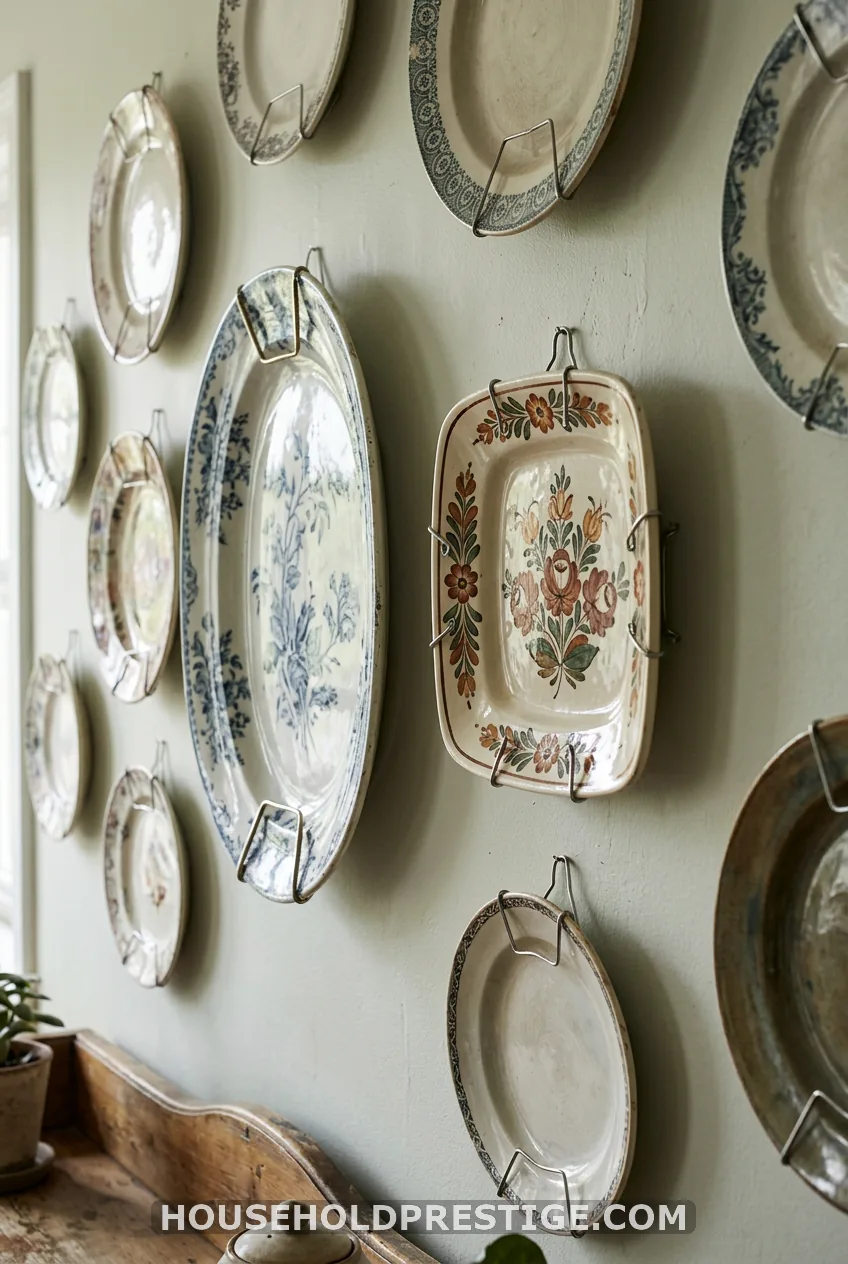
Ovals tip sideways on a single hook. Use two hangers, or one wide-spread hanger, and level the platter from its long edge. Square plates need a hanger that grips at the corners.
19. Myth: The Plates Must Match
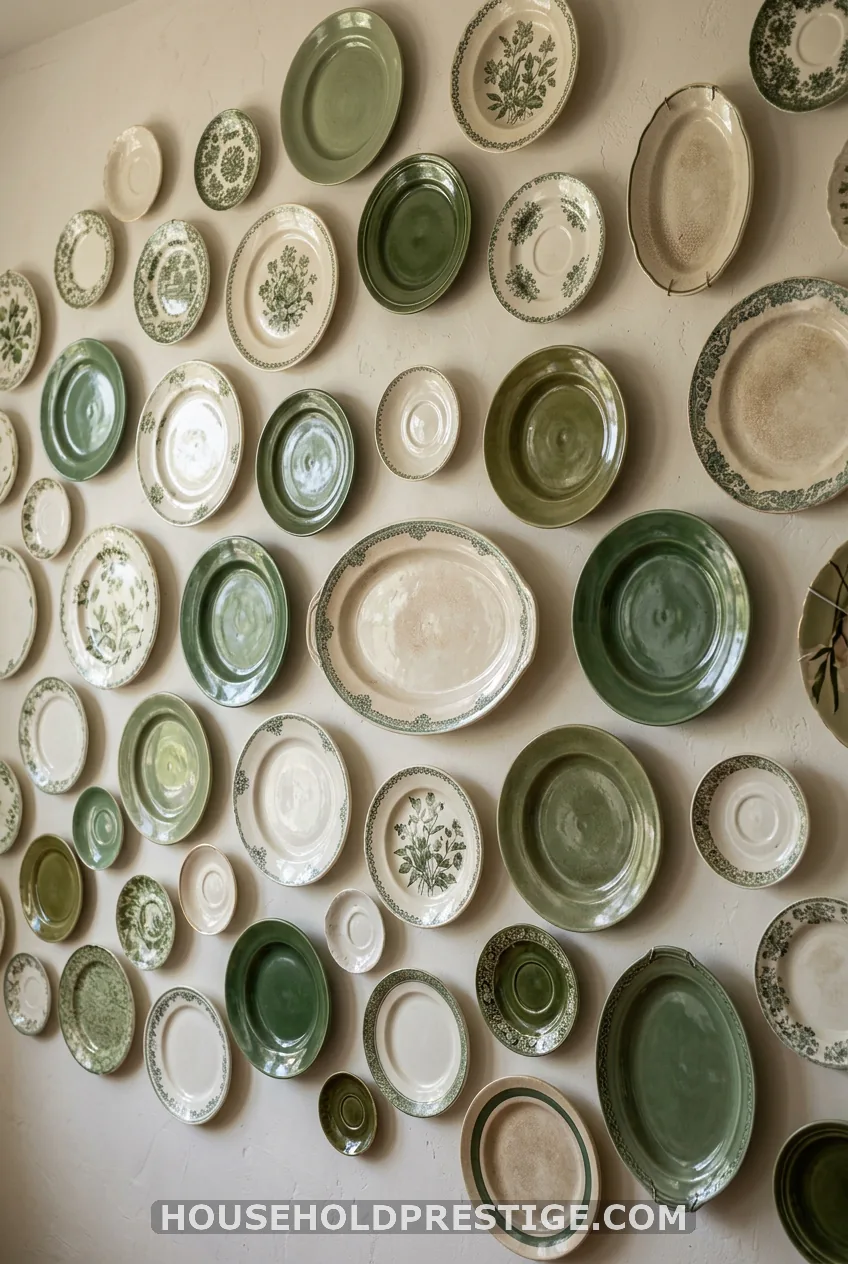
What most people think: a plate wall needs a full matching set.
Reality: mismatch is the whole charm. Tie unlike plates together with one shared color, era, or pattern type, or keep every plate round. Two or three extra plates in the cart will save you when the layout needs filling.
20. The Sticky Strip Disaster
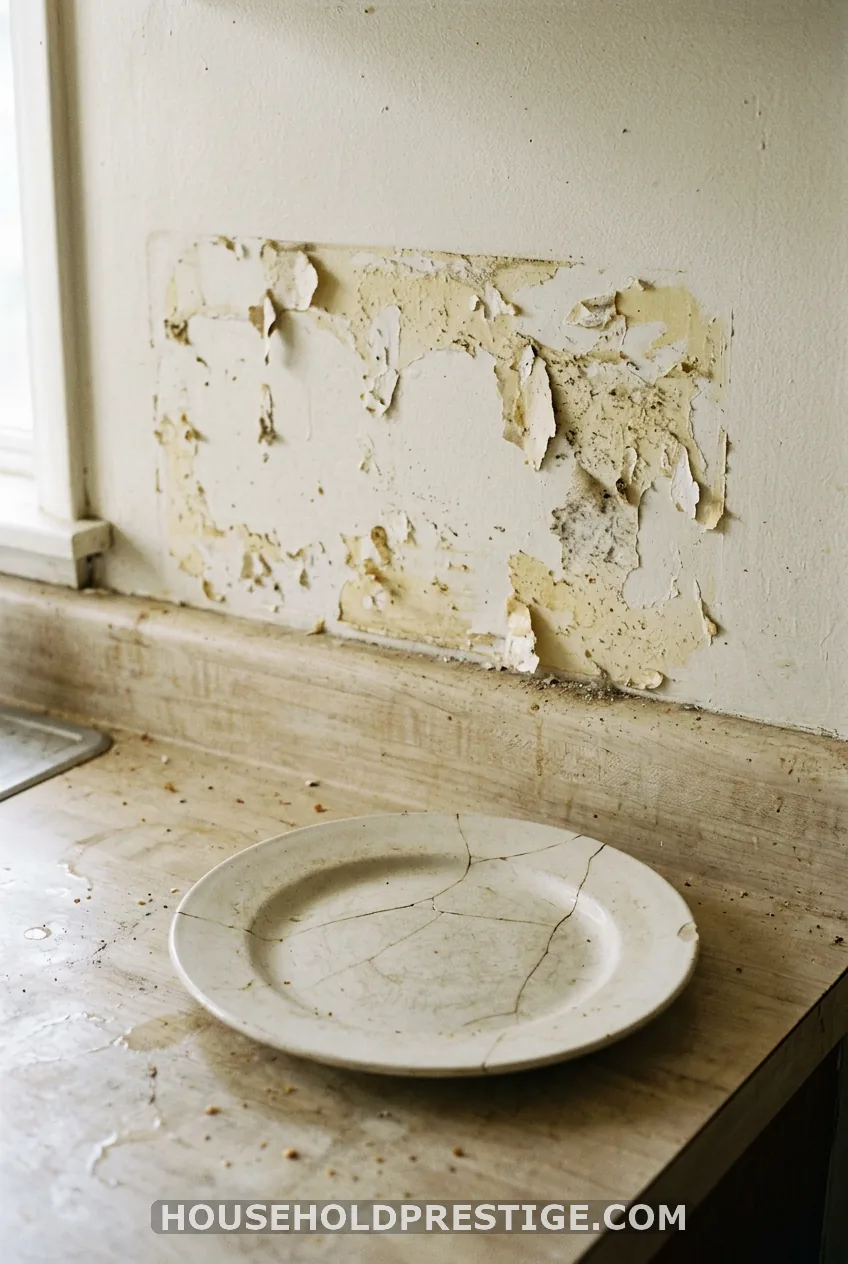
I hung a favorite plate over my stove with an adhesive strip. It held for three weeks. Then steam and a greasy afternoon of frying loosened it, and it hit the counter.
Lesson learned: heat, grease, and humidity beat adhesive every time. Anywhere near a stove or shower, use a screwed-in wire hanger and an anchor.
21. The Hardware Match-Up
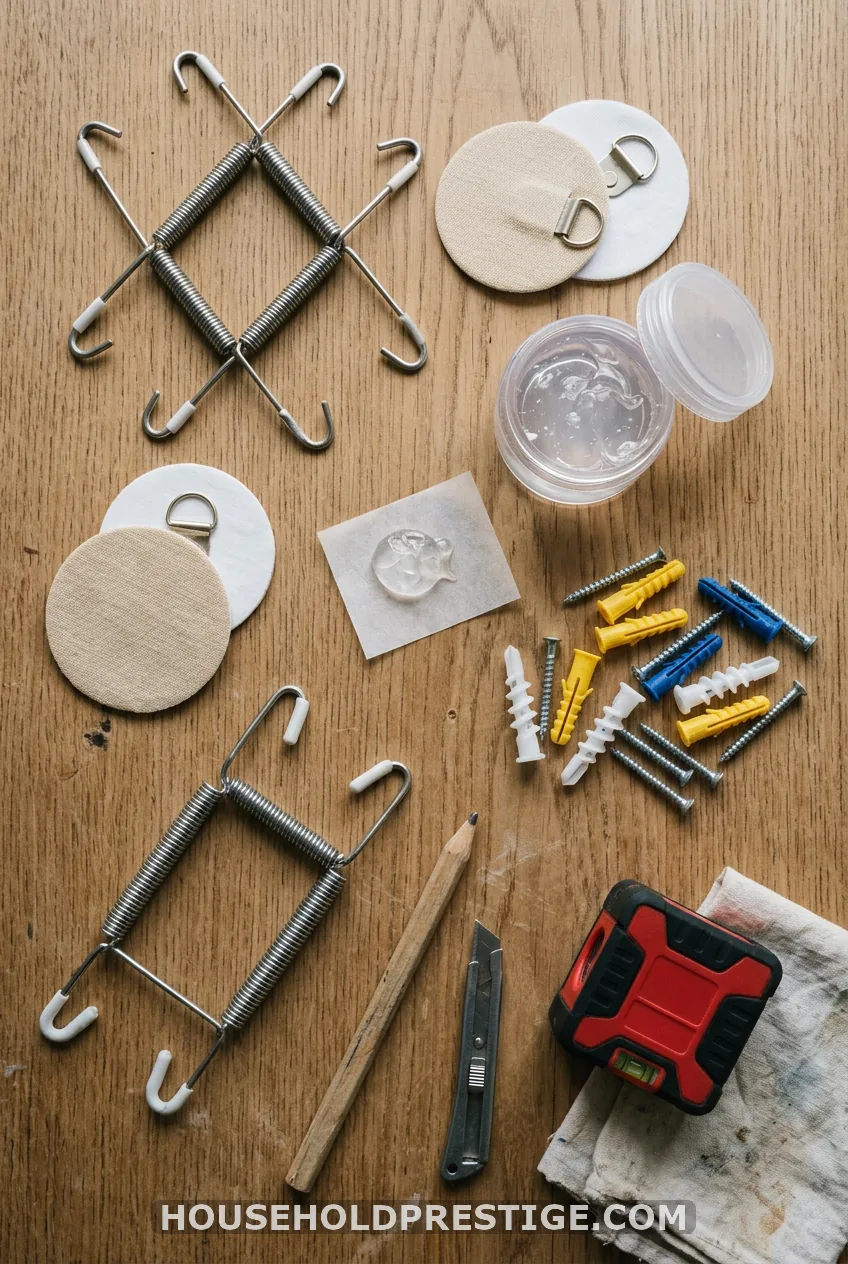
Match the hanger to the plate, then tug-test each one before you step back.
- Spring wire plate hangers: The best all-rounder for round plates 6-14 inches. Needs a nail or hook.
- Adhesive discs and strips: Light decorative plates only. Skip kitchens and bathrooms.
- Museum gel or putty: Not a hanger. It stops slipping and rattling.
- Wall anchors rated 20-50 lb: For stoneware, ceramic, and oversized chargers. Pick the type for drywall, plaster, or tile.
To hide visible hooks, hang a smaller plate in front or choose hangers with prongs that tuck behind the rim.
Which Plate Wall Will You Hang First?
Pick one layout, trace your plates, and tape the paper to the wall tonight. You can fix a bad layout in minutes with tape. Fixing it with a hammer takes much longer.
So which of these 21 arrangements is going on your blank wall first?
FAQ
How many plates do I need for a plate wall?
Start with 5-7 plates for a small wall like an entryway or bedroom. A full dining room wall takes 9-15. Buy two or three extras while thrifting, since the layout almost always wants them.
How far apart should plates be hung?
Two to three inches between edges gives a tight, formal grid. Three to four inches suits a loose, eclectic mosaic. Even gaps matter more than the exact number.
What’s the strongest way to hang a heavy ceramic plate?
Hook a spring wire plate hanger onto a wall anchor rated 20-50 lb. Add a dab of museum gel on the bottom rim to stop slipping. Skip adhesive strips for stoneware and oversized chargers.