

I was holding a Golden pothos vine in one hand and a roll of masking tape in the other, trying to stick it to the wall. The tape lost. The vine slid down, took a leaf with it, and landed in my coffee.
That was the day I started hunting for a proper pothos trellis. After a lot of trial, a few snapped vines and one tipped-over pot, I sorted the ideas into 15 that work. Each one gets a quick rating for space, drilling, cost and the pothos variety it suits. You can pick one in a minute and set it up this weekend.
Why a Trellis Is Usually the First Move
Pothos will trail from a shelf forever and look fine. Give it something to climb, though, and the plant changes. Climbing vines grow larger, more mature leaves than trailing ones, and that is the main reason to add a trellis.
Here is the short version of your three options:
- Trellis: low upkeep, no mess, reusable. This is the winner for most people.
- Moss pole: better for aerial-root grip and bigger leaves, but it wants regular misting.
- Bare wall: pothos roots grip textured surfaces weakly and can mark painted drywall. Skip it.
Every idea below has a rating line. “Drilling” tells you if it puts holes in your wall. “Best for” tells you which pothos looks right on it.
Before You Pick: 3 Things That Decide What Works
Light comes first. Pothos climbs toward light. Put a trellis in a dark corner and it will sit empty. Bright indirect light, like a spot a few feet from an east or south window, gets you real growth.
Weight matters. A 6-inch nursery pot is light and tips easily. A tall trellis loaded with vines acts like a sail. Slip the nursery pot inside a heavier ceramic pot, or add a layer of gravel or a few stones at the bottom, before you go tall.
Match the trellis to the vine you have today. Never buy a 6-foot trellis for an 18-inch vine. Buy for the plant you own, then upgrade as it grows.
For damage-free mounting, keep these on hand: 3M Command hooks, clear adhesive wall clips, plant velcro or soft garden ties, and a tension pole if you want height.
One safety note. Pothos is toxic if chewed by pets or small children. Keep the plant and any dangling ties out of reach.
No-Drill Wall Ideas
These work on a wall without a single hole. They suit renters best.
1. The Clear Adhesive Wall-Clip Grid
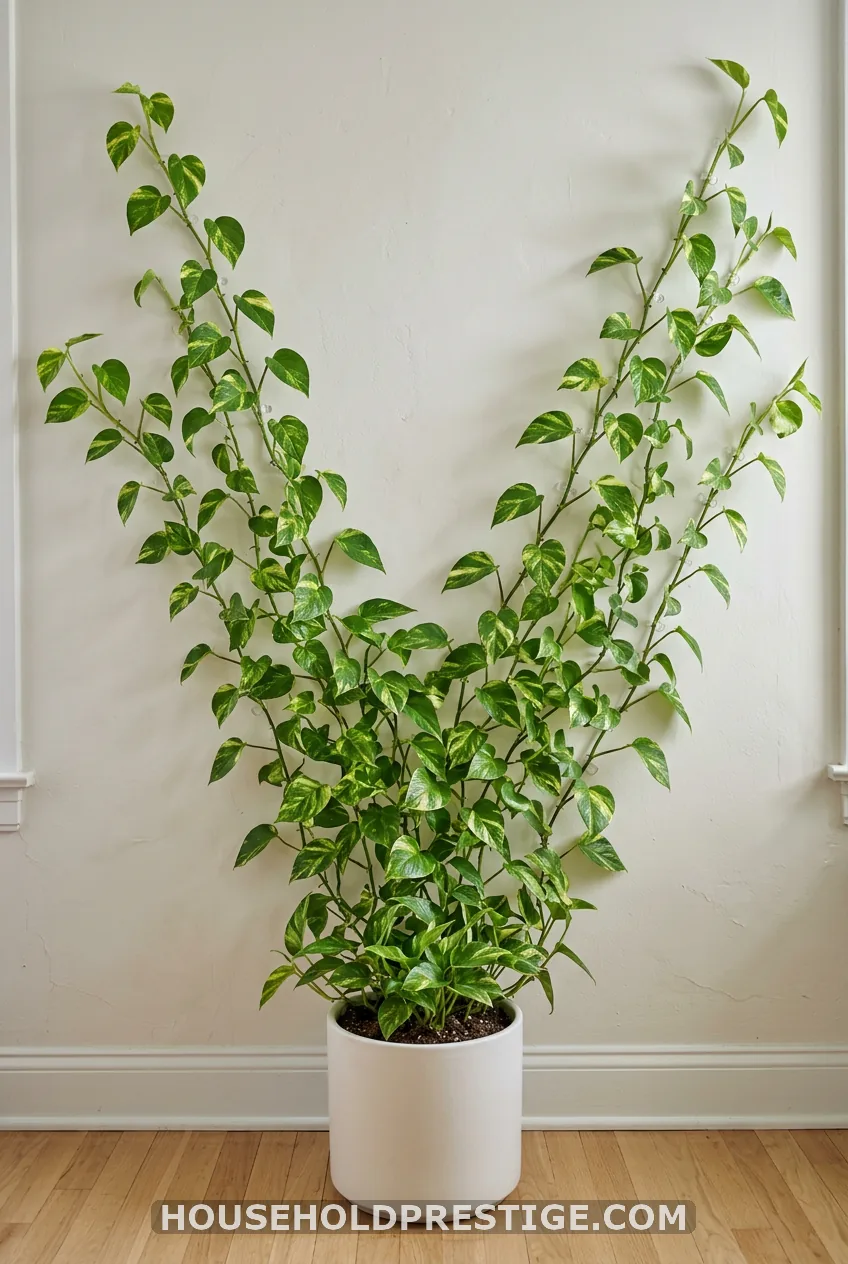
Space: wall only, tiny footprint. Drilling: none. Best for: Golden and Neon pothos. Cost: about $8 to $12 for a pack. Time: 20 minutes.
This is the idea I recommend most. You lay the vines out in a fan or a V and press a clear clip over the stem every few inches. From a few feet away, the clips vanish and the vines look like they climbed on their own.
Here is how I set it up:
- Lay the vines on the floor and decide on the shape first. A fan with three or four vines looks fuller than one straight line.
- Wipe the wall with a dry cloth. Dust kills adhesive.
- Place the first clip about 3 inches above the pot, over the stem and just below a leaf node. Never clip the leaf stem itself.
- Add a clip every 6 to 8 inches along each vine. Keep the clip loose enough that the stem can thicken.
- Press each clip for 30 seconds so the adhesive sets.
The mistake to avoid is trusting the clips with weight. They hold grams, not kilos. As vines thicken, they pull.
Check the grid every month or two and reposition any clip that has lifted. Peel them off slowly, with a hair dryer on low heat for 10 seconds, and the paint stays put.
2. The Repurposed Coat Hanger Trellis
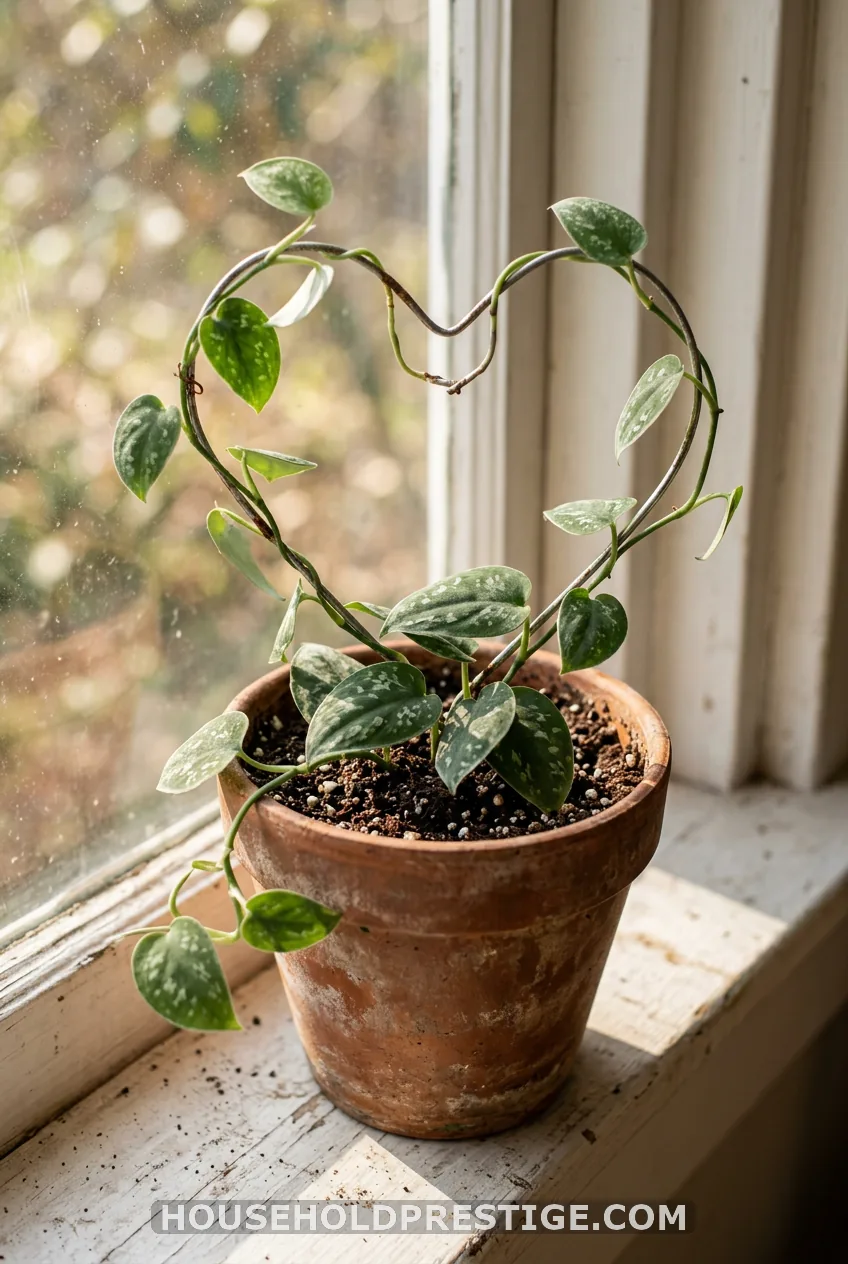
Space: pot-sized. Drilling: none. Best for: satin pothos (Scindapsus pictus). Cost: free. Time: 10 minutes.
Straighten the hanger with pliers, then bend it into a heart, circle or arch. Push both ends 3 to 4 inches into the soil. Done.
Wire suits the light, silvery leaves of satin pothos. A heavy Marble Queen will pull a thin hanger over, so save this one for lighter vines.
3. Bamboo Teepee
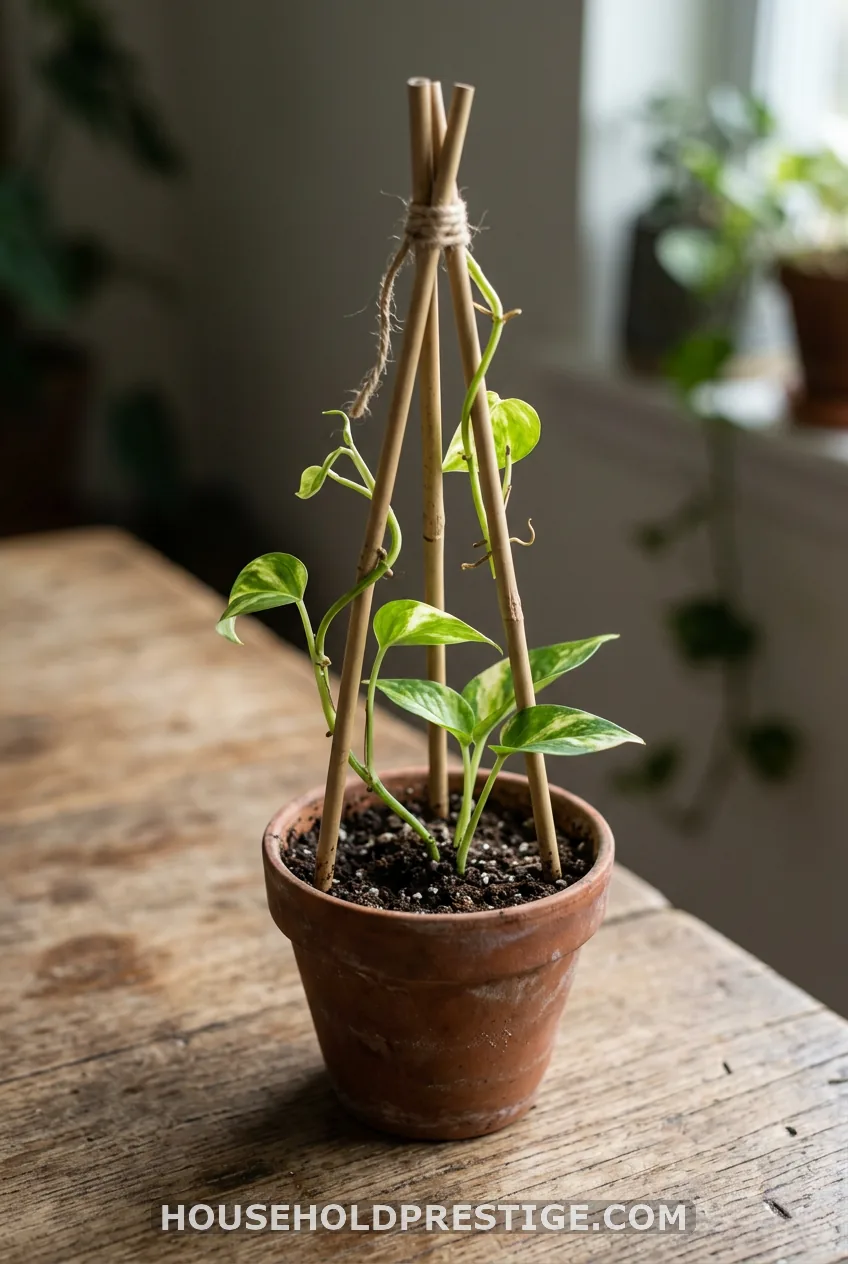
Space: pot-sized. Drilling: none. Best for: young cuttings and 4-inch starter pots. Cost: $3 to $6. Time: 15 minutes.
Size the teepee to the pot, not the room. Three or four canes about 18 to 24 inches long is plenty. Push them into the soil near the rim, lean them together at the top, and bind them with twine.
Wrap the vines around the canes in one direction, and keep going the same way as the vine grows. That keeps the spiral tidy and stops the vine from unwinding when it gets heavy.
11. Picture-Frame and Hoop Wall Trellis
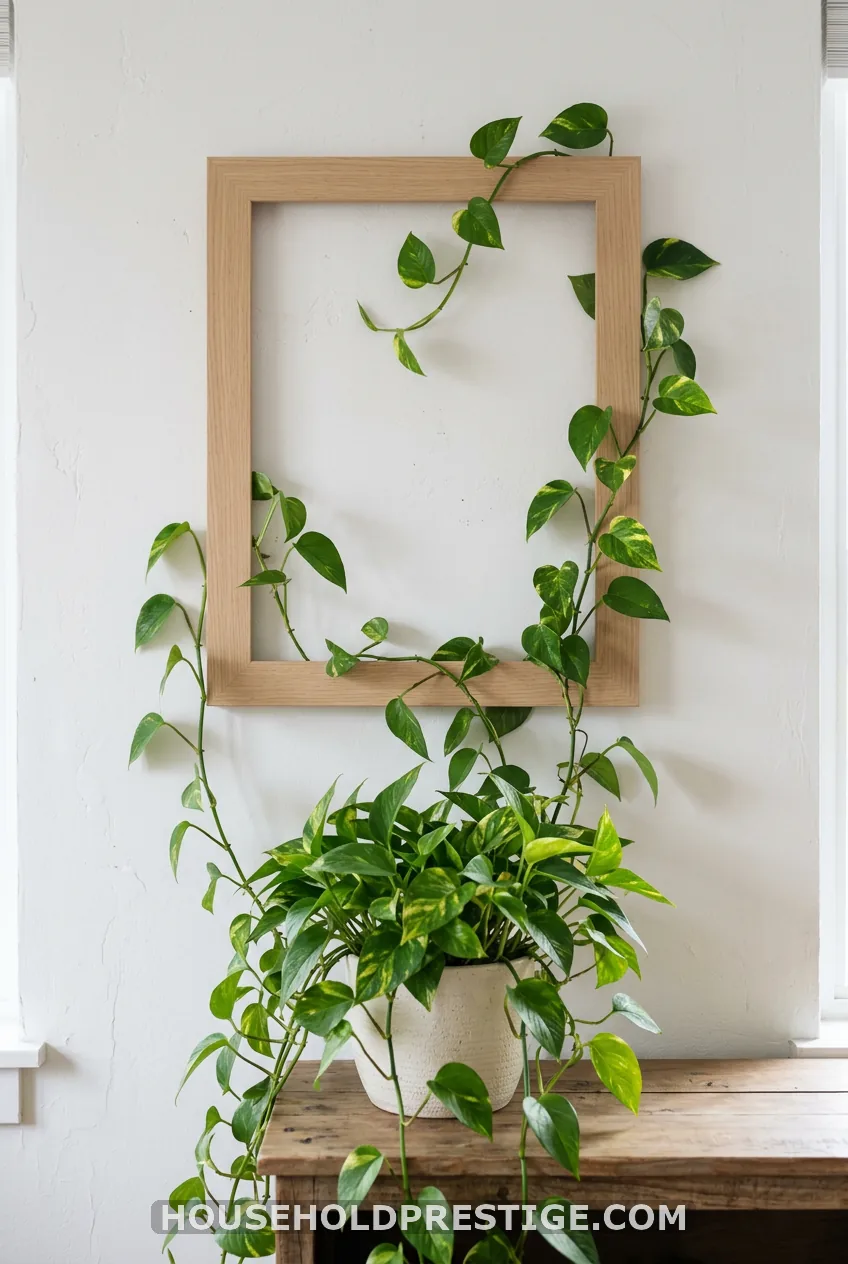
Space: wall, a little above the pot. Drilling: none with Command strips. Best for: Marble Queen and Neon. Cost: $5 to $15 at a thrift store. Time: 20 minutes.
Take the glass and backing out of a cheap frame, or use an embroidery hoop. Hang it with Command strips rated for the frame’s weight. Then guide the vines up and through the opening instead of letting them flop over the top.
Weave the vine in and out by hand, with one loose tie where it enters the frame. The frame becomes a piece of art with a plant growing through it.
In-Pot Supports
These live inside the pot. They are the quickest way to make a plain nursery pot look planned.
9. Arch or Hoop Trellis Inside the Pot
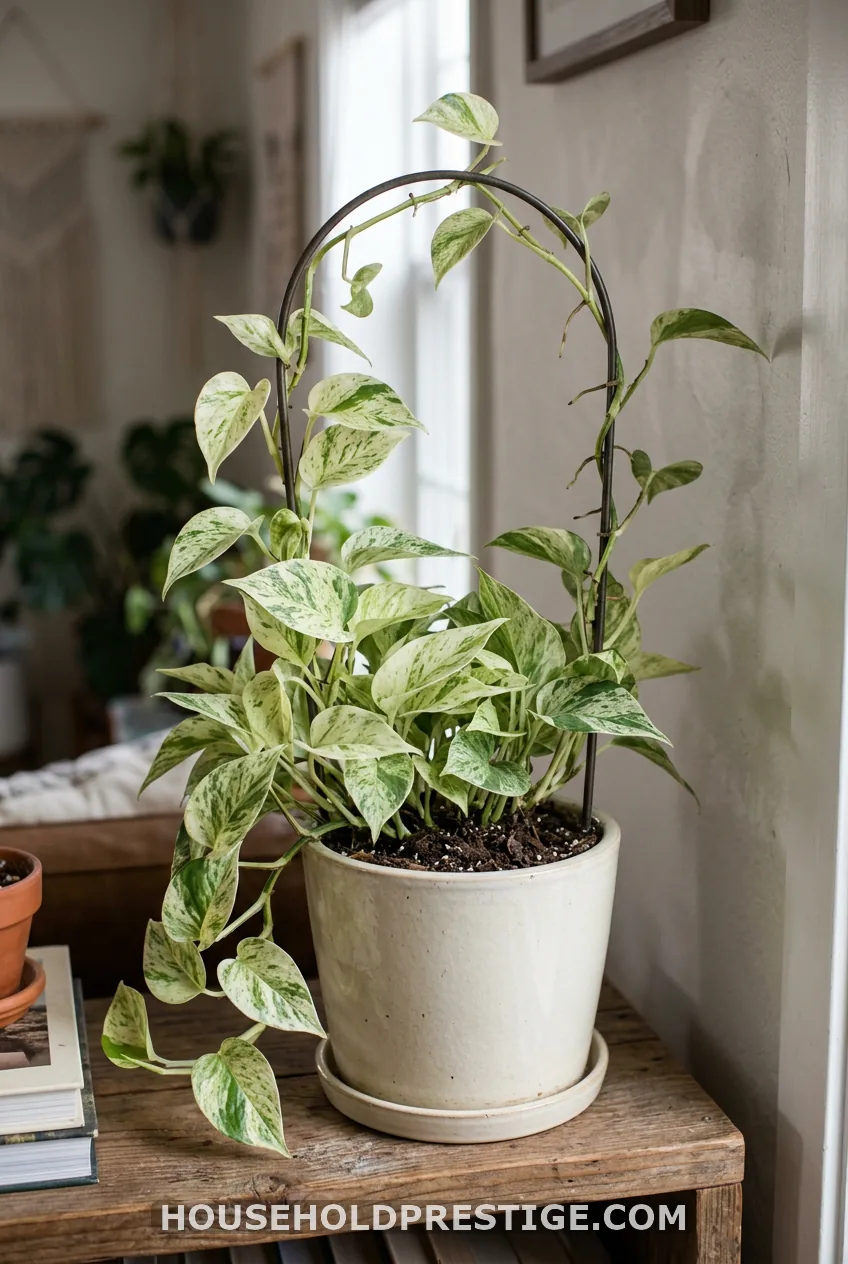
Space: pot-sized. Drilling: none. Best for: Marble Queen and N’Joy. Cost: $10 to $20. Time: 5 minutes.
Single arches, double hoops and heart shapes all work the same way. Push the legs deep, at least 4 inches, so the frame stands without wobbling.
The variegation on Marble Queen and N’Joy pops against a small frame. The leaves become the design. Pick a thin black or brass wire frame and let the plant do the talking.
13. The Upcycled Branch or Driftwood Trellis
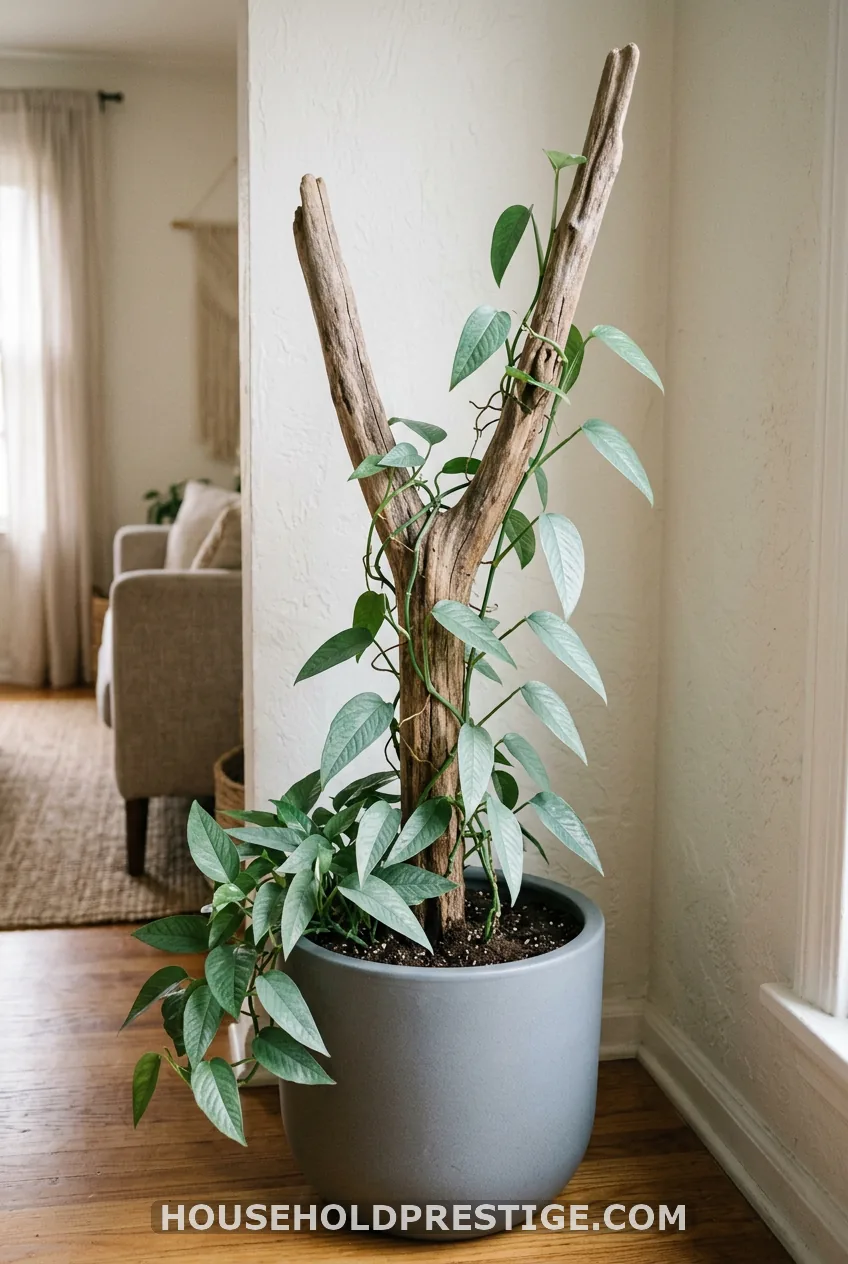
Space: pot-sized, 2 to 3 feet tall. Drilling: none. Best for: Cebu Blue and Scindapsus. Cost: free to $10. Time: 20 minutes.
A single forked branch is the most natural climbing post you can find. Natural wood suits the cool, small leaves of Cebu Blue far better than bright plastic.
Clean any found wood before it goes in the pot. Scrub it with a brush, soak it in a 10 percent bleach solution for 30 minutes, rinse well, and let it dry for a few days. That removes bugs and mould spores.
14. Stackable Plastic In-Pot Trellis
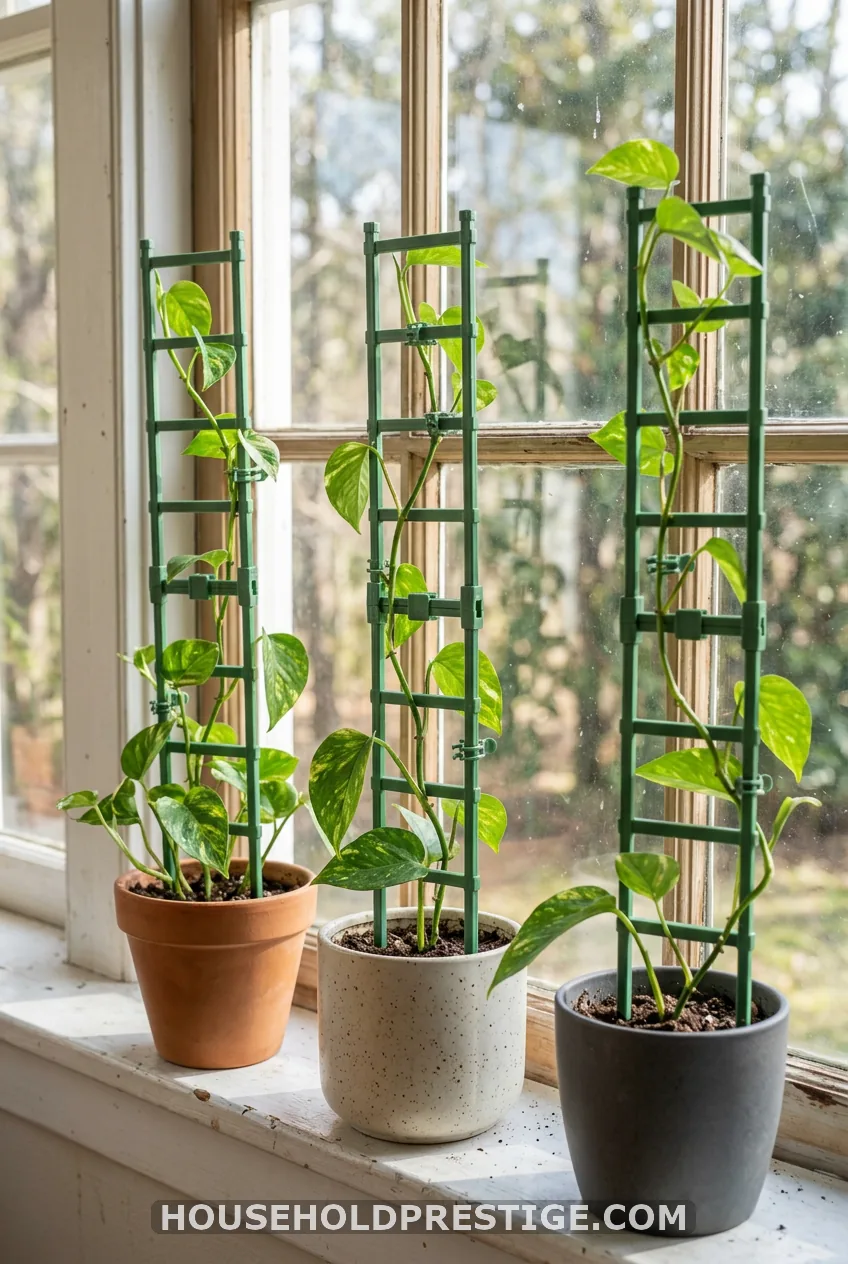
Space: pot-sized. Drilling: none. Best for: anyone with several pothos. Cost: about $10 to $15 for a multi-pack. Time: 5 minutes each.
This is the cheap workhorse. The sections clip together, so you add a piece as the plant grows. A six-pack covers a whole shelf of plants.
It is less pretty than the listing photos suggest. Bright green plastic is hard to hide. Spray-paint it matte black or sage before use and it blends in much better.
Floor-Standing Statement Pieces
These take more floor and more care. They also give the biggest payoff.
4. The Wooden Ladder Trellis Against a Wall
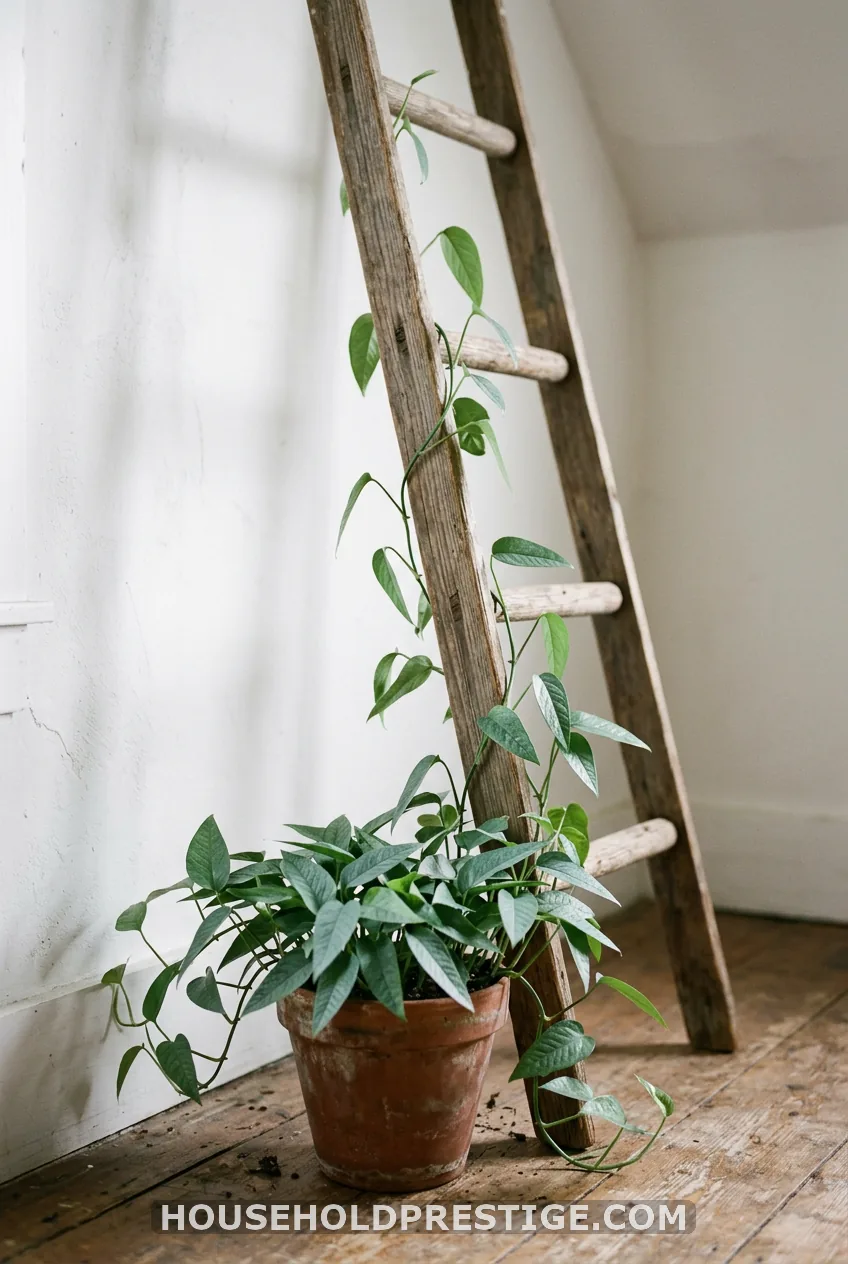
Space: 1 to 2 square feet of floor. Drilling: none if leaned. Best for: Cebu Blue. Cost: $25 to $60. Time: 15 minutes.
Leaning a ladder is the no-tools version. Mounting it to the wall is steadier, but it needs screws, so renters should lean it. Add a small Command hook near the top for a loop of twine if you worry about a slide.
Cebu Blue has small leaves that look sparse on a wide frame. A narrow ladder shows off its shape. Keep the pot centered under the ladder for that styled look.
5. Floor-to-Ceiling Tension Pole Trellis
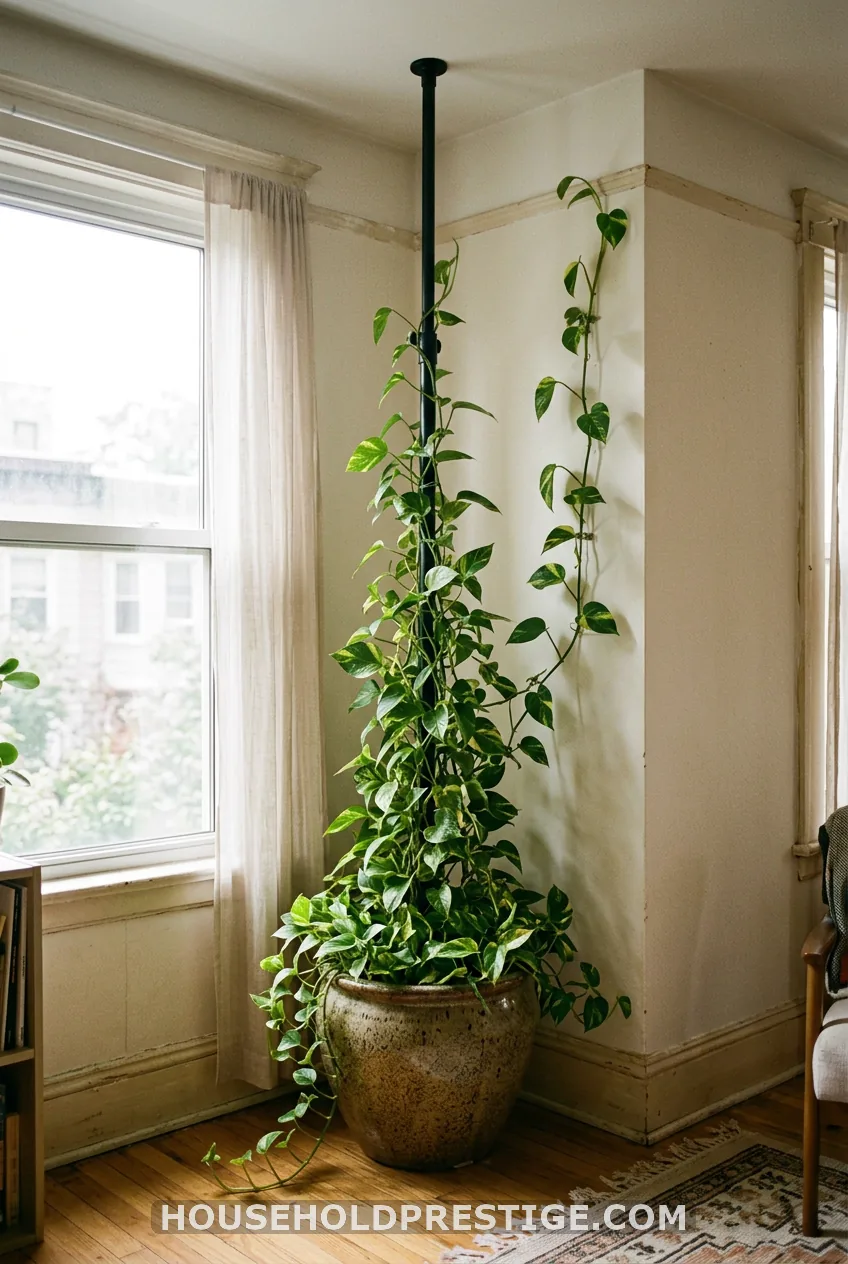
Space: a corner, about 12 by 12 inches. Drilling: none. Best for: mature Golden pothos with long vines. Cost: $30 to $70. Time: 30 minutes.
Here is the cautionary tale. I once built this with a 6-inch nursery pot and a big, leafy vine. A week later I found the whole thing on the floor, soil everywhere, and the pole rolling across the room.
The pole itself held fine. The pot was the problem. Tension poles stay up only through pressure between floor and ceiling, and a light pot on a rug gives you nothing to push against. Two fixes worked for me:
- Use a heavy ceramic pot, 10 inches or wider, and set the pole’s base on hard floor.
- Tie vines to the pole with soft ties so their weight does not hang off the pole alone.
Skip this idea if your ceiling is under 8 feet. Short ceilings leave you cramming a vine into a stubby stick.
6. Wire Grid or Grid Wall Panel
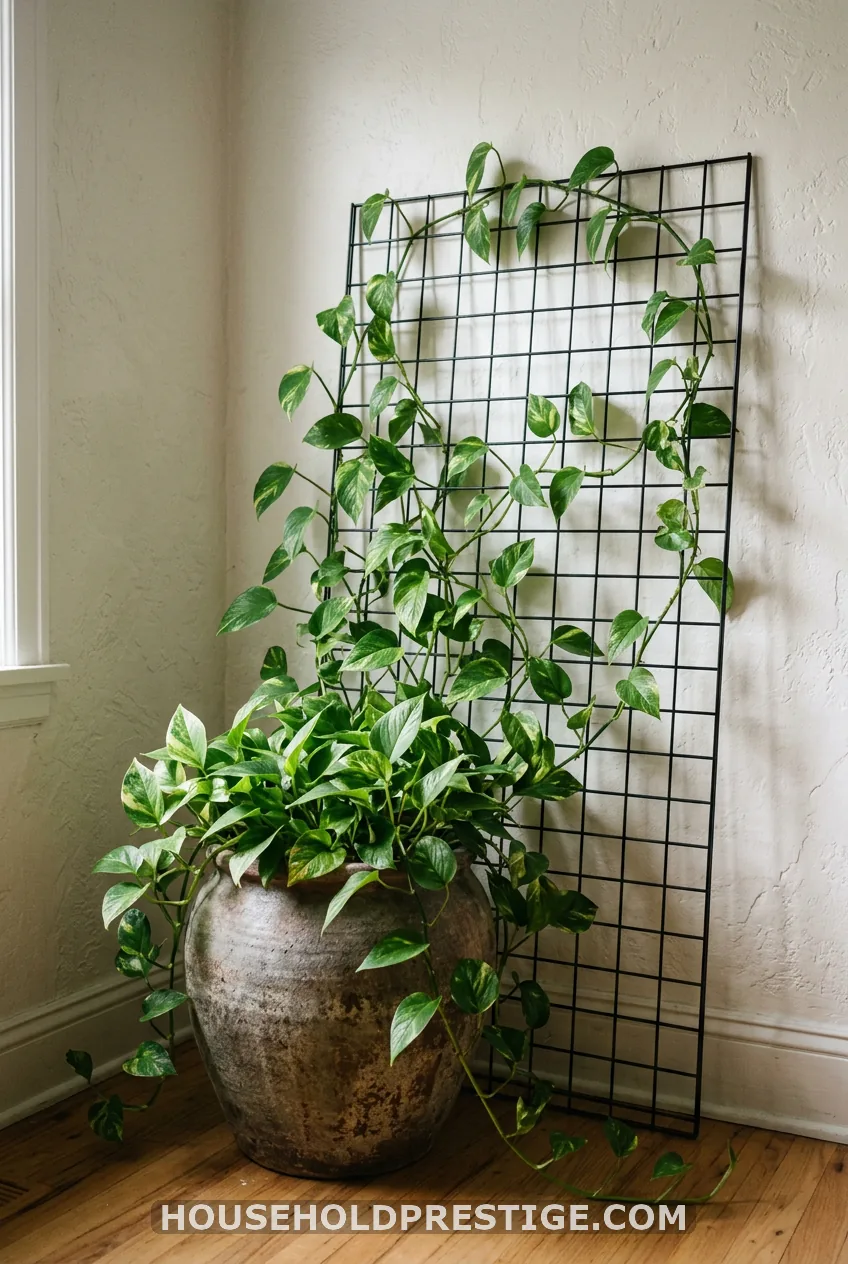
Space: about 2 by 3 feet of wall. Drilling: none if leaned. Best for: Neon and Golden, which fill a grid fast. Cost: $15 to $40. Time: 20 minutes.
Grid panels from IKEA or a craft store give you the green-wall look quickly. Lean the panel and zip-tie the top to a Command hook for steadiness.
Golden and Neon reach across the squares fast. Marble Queen grows slower and stays leggy, so give it time.
7. Pipe and Industrial Shelving as a Trellis
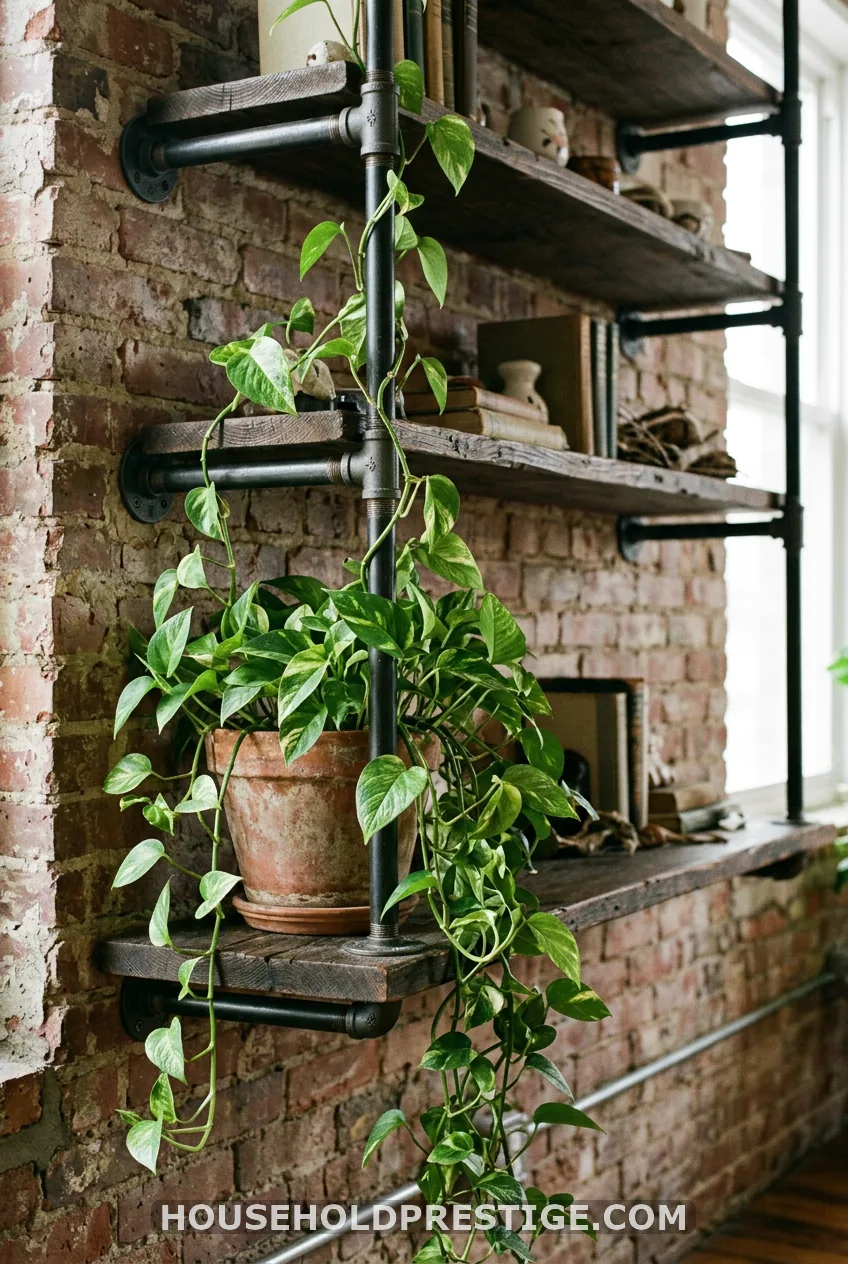
Space: shelving you already own. Drilling: none. Best for: Golden pothos. Cost: free if you have the shelf. Time: 20 minutes.
Let the vines run along the metal instead of building a frame. The black-pipe version looks rustic and a little farmhouse. Use clips or soft ties every foot or so.
Watch the heat. Metal near a sunny window gets hot enough to scorch tender vine tips. Keep the vines on the shaded side of the pipe.
Hanging and Dividing Ideas
8. The Macrame or Rope Ladder Trellis
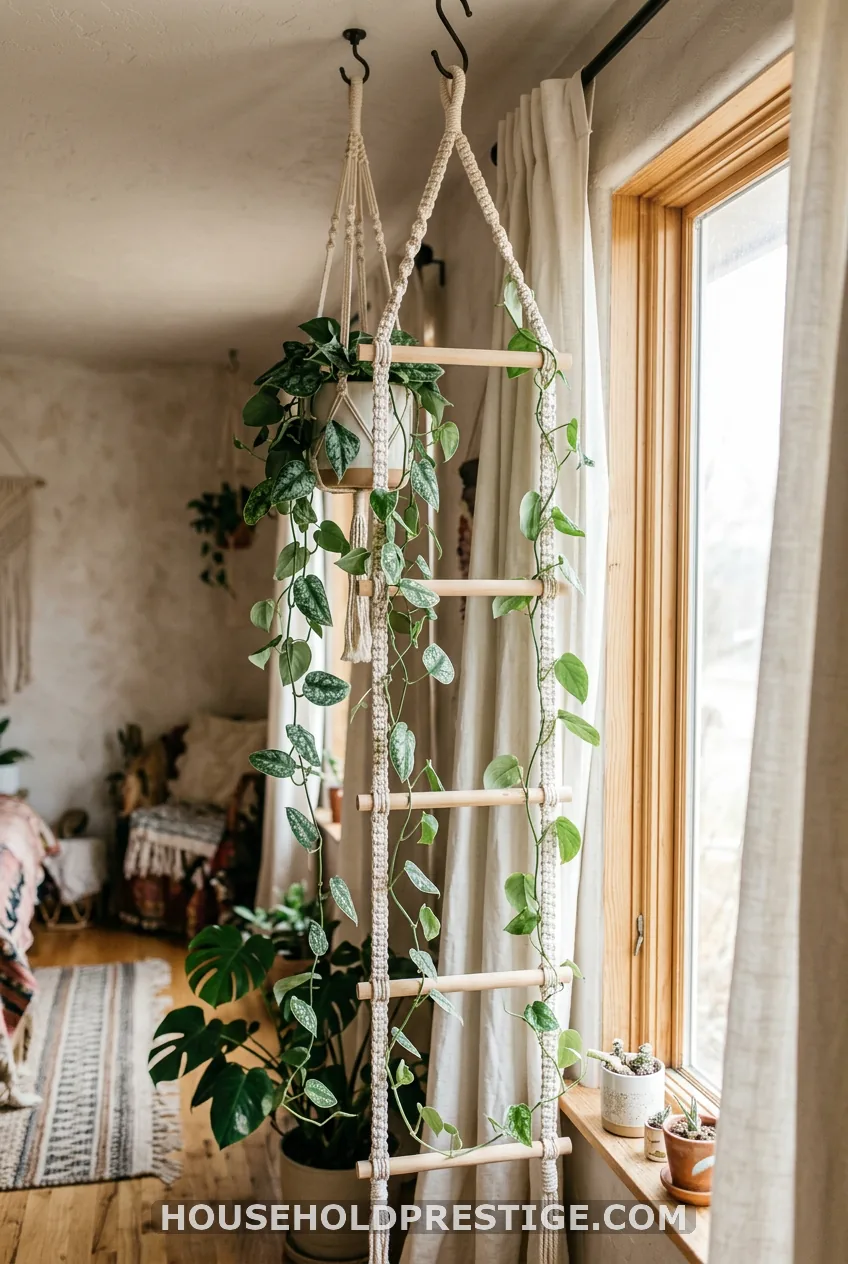
Space: none on the floor. Drilling: needs a ceiling hook, so ask your landlord. Best for: satin pothos. Cost: $20 to $40. Time: 30 minutes.
This is for people with no wall space. The silvery leaves of satin pothos match the soft boho look of cotton rope.
Check the weight. A macrame ladder plus a pot of wet soil can weigh 5 pounds or more. Use a hook rated for it and anchor it into a joist, not bare drywall.
10. The Room Divider Trellis
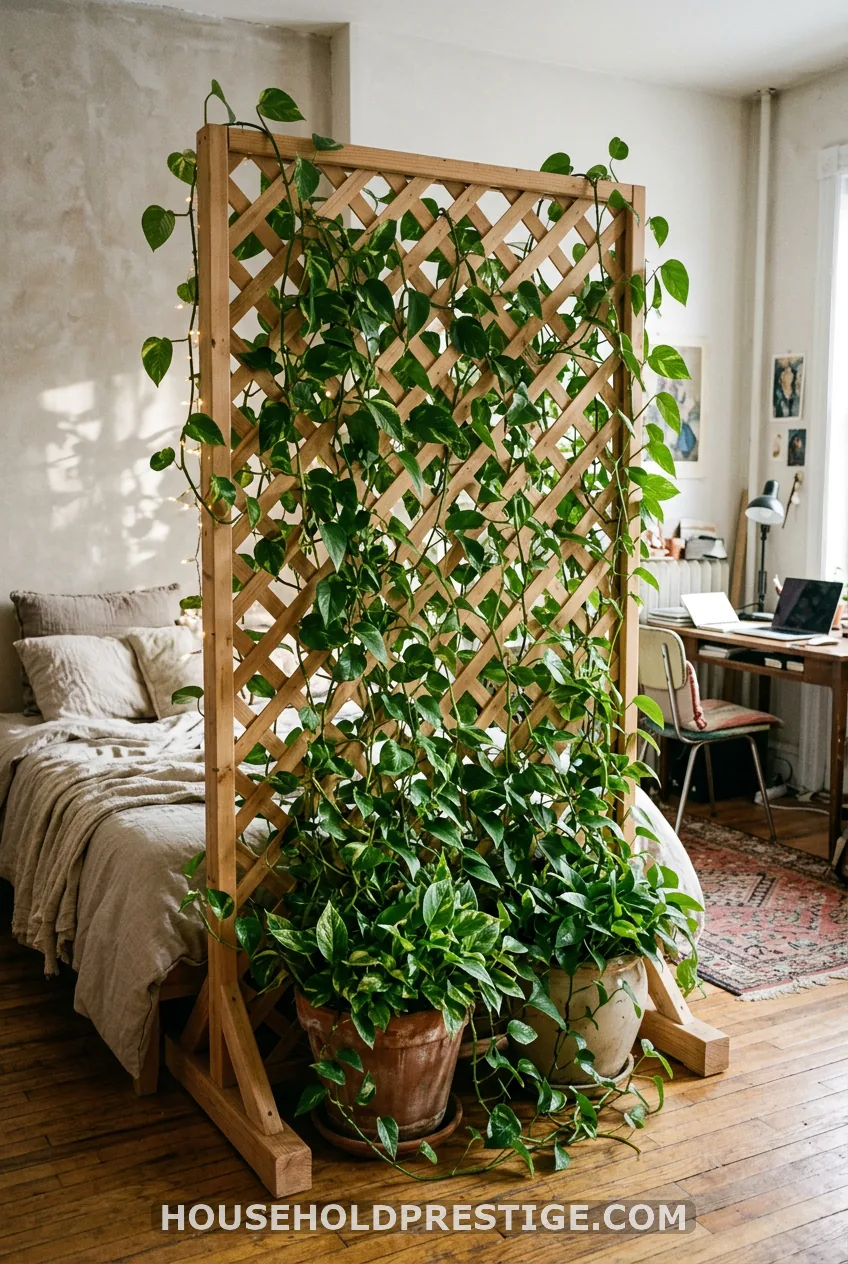
Space: 3 to 4 feet of floor width. Drilling: none. Best for: Golden and Neon. Cost: $40 to $120. Time: 45 minutes.
Two pots and a freestanding lattice give you a soft green partition. This is a good fit for a rental studio where building a wall is not an option.
Set your expectations. A divider takes a full season or more to fill, and that is normal. Start with two or three vines per pot and tie them in as they grow.
Long Walls and Honest Alternatives
12. Cable Railing or Wire Trellis
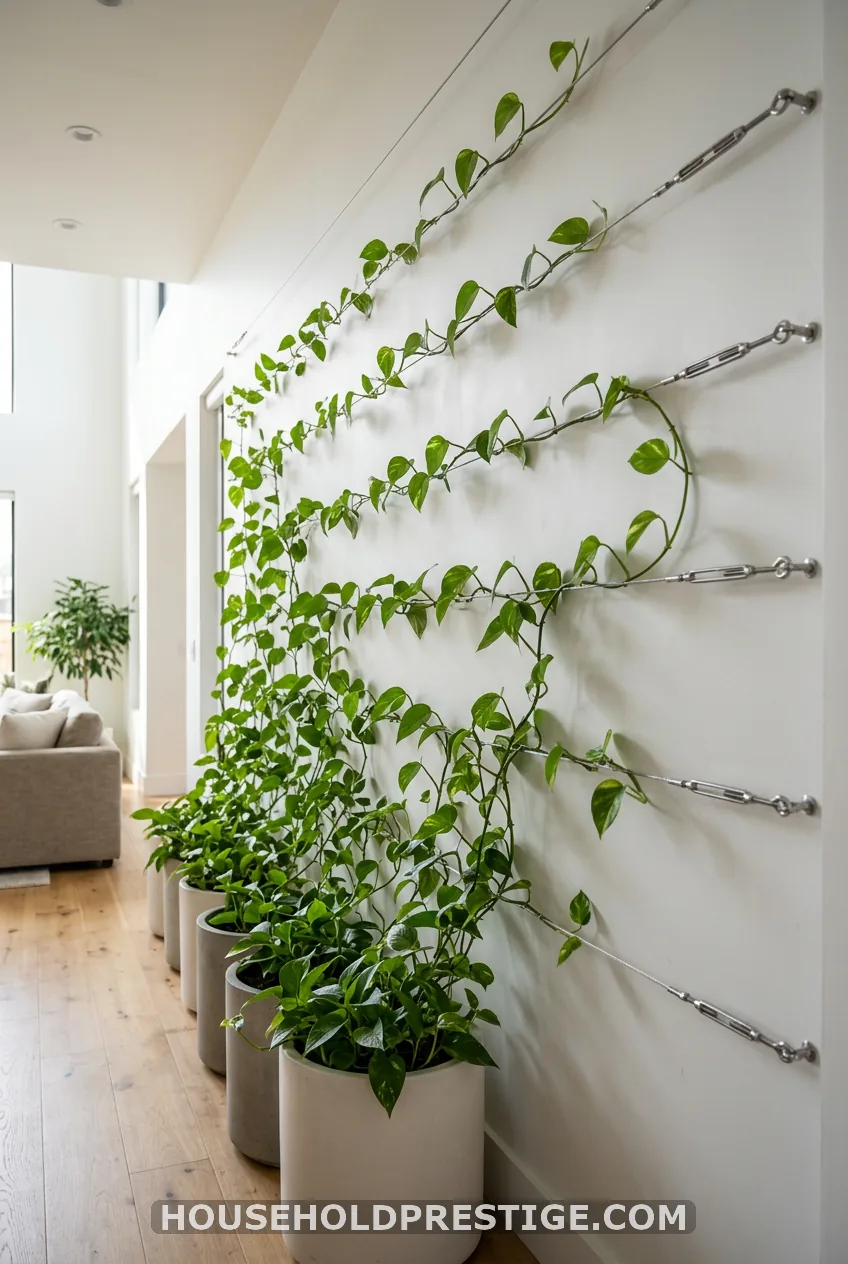
Space: a long stretch of wall. Drilling: yes. Best for: a mature Golden pothos with many vines. Cost: $60 to $150 from Home Depot. Time: 2 hours.
Horizontal wires with turnbuckles give a clean, modern line. It is the most expensive option here, and it needs screws. It is worth it only if you own the wall and you already have a plant with several long vines to run in parallel.
15. Moss Pole, Coir Pole or Wood Plank
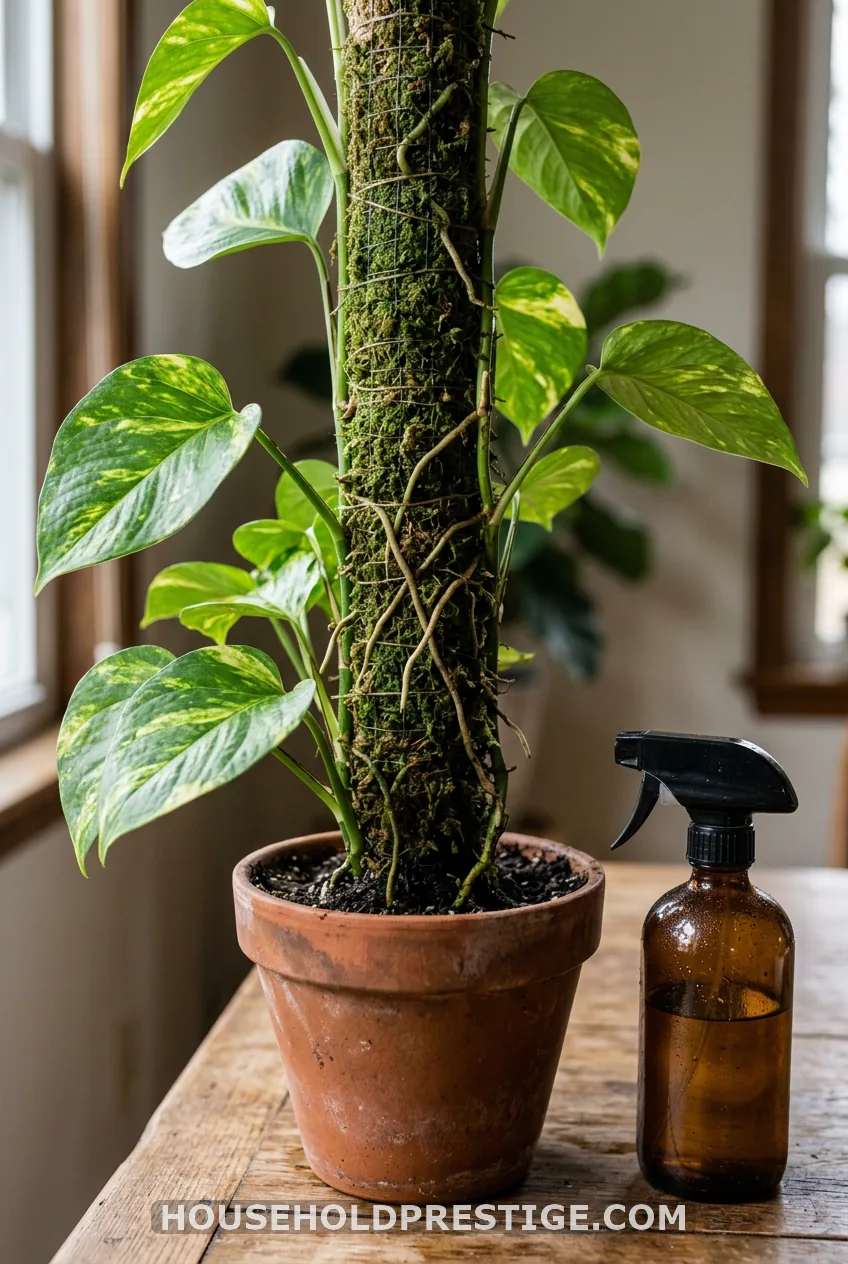
Space: pot-sized. Drilling: none. Best for: growers who like hands-on care. Cost: $12 to $35. Time: 15 minutes, plus upkeep.
Many people think a moss pole is always better than a trellis. In reality, it depends on how hands-on you want to be.
A damp moss pole does beat a trellis in one way. Aerial roots grip it, and the plant often grows bigger leaves. The cost is upkeep.
You mist it, you watch for mould, and fungus gnats like the damp. A moss pole also cannot be reused when the moss breaks down.
A coir pole or a wood plank is the middle ground. Aerial roots still grip, and there is far less misting. If you want big leaves and little work, start there.
How to Train Pothos Onto Any Trellis in 5 Minutes
Use these steps for every idea above:
- Anchor at the leaf nodes, the little bumps where leaves meet the stem. Never tie the leaf itself.
- Use plant velcro or soft garden ties, and tie loosely so the stem can grow thicker.
- Wrap gently in one direction and check weekly while the vine is still pliable.
- Do not bend a vine more than it wants to go. A snapped tip is not a loss, since it roots as a cutting in a glass of water.
- Rotate the pot a quarter turn each month so the plant climbs evenly instead of leaning toward the window.
Picking the Right One for You
Match your situation to the idea:
- Renter, small pot: clear clip grid, bamboo teepee, in-pot arch.
- Long vines, bare wall: tension pole or wire grid.
- Cebu Blue or satin: driftwood, wire hoop or slim ladder.
- Five pothos, no budget: stackable plastic trellis.
Be honest about timing too. A pothos that just moved into a new home often stalls for weeks before it climbs. A healthy vine in bright indirect light typically adds 1 to 2 feet a growing season.
Your trellis will look sparse at first. That is normal.
Four mistakes make a trellis look bad within six weeks:
- Buying a trellis bigger than the plant.
- Skipping light, which is the real reason most vines stall.
- Letting aerial roots grab painted drywall instead of a clip.
- Watering a tall setup without checking that the base is steady.
One Last Thing
Pick the smallest trellis that fits the vine you have now, put it in bright light, and let the plant grow into it.
FAQ
Do pothos actually need a trellis?
No. Pothos will trail happily from a shelf or basket. Given something to climb, though, most varieties shift toward larger, more mature leaves instead of staying small, and that is the main reason to add a trellis.
What’s the best pothos trellis for a renter?
Clear adhesive wall clips, a tension pole, or an in-pot arch or bamboo teepee. All three need zero drilling and come off cleanly when you move.
Which trellis is best for Cebu Blue or satin pothos?
Choose a thin, natural-looking frame, like a driftwood branch, a wire hoop or a slim wooden ladder. Both have small, cool-toned leaves that get lost on a chunky or bright plastic trellis.