

There it sits. Your above ground pool — functional, ready, and surrounded by nothing but raw grass and a ladder that wobbles. You know it could look so much better. You’ve seen the Pinterest photos where the pool practically disappears into a stunning wooden deck and you thought: that’s way out of my budget.
It isn’t. A well-designed deck around an above ground pool doesn’t require a contractor, a second mortgage, or a summer’s worth of weekends. It requires a smart plan and the right idea matched to your yard.
I’ve rounded up 17 deck designs that get built — not just pinned. Some cost less than $500. One will take you a full weekend of focused work. And every single one will make your pool look like it belongs there.
1. The Full Wraparound Deck
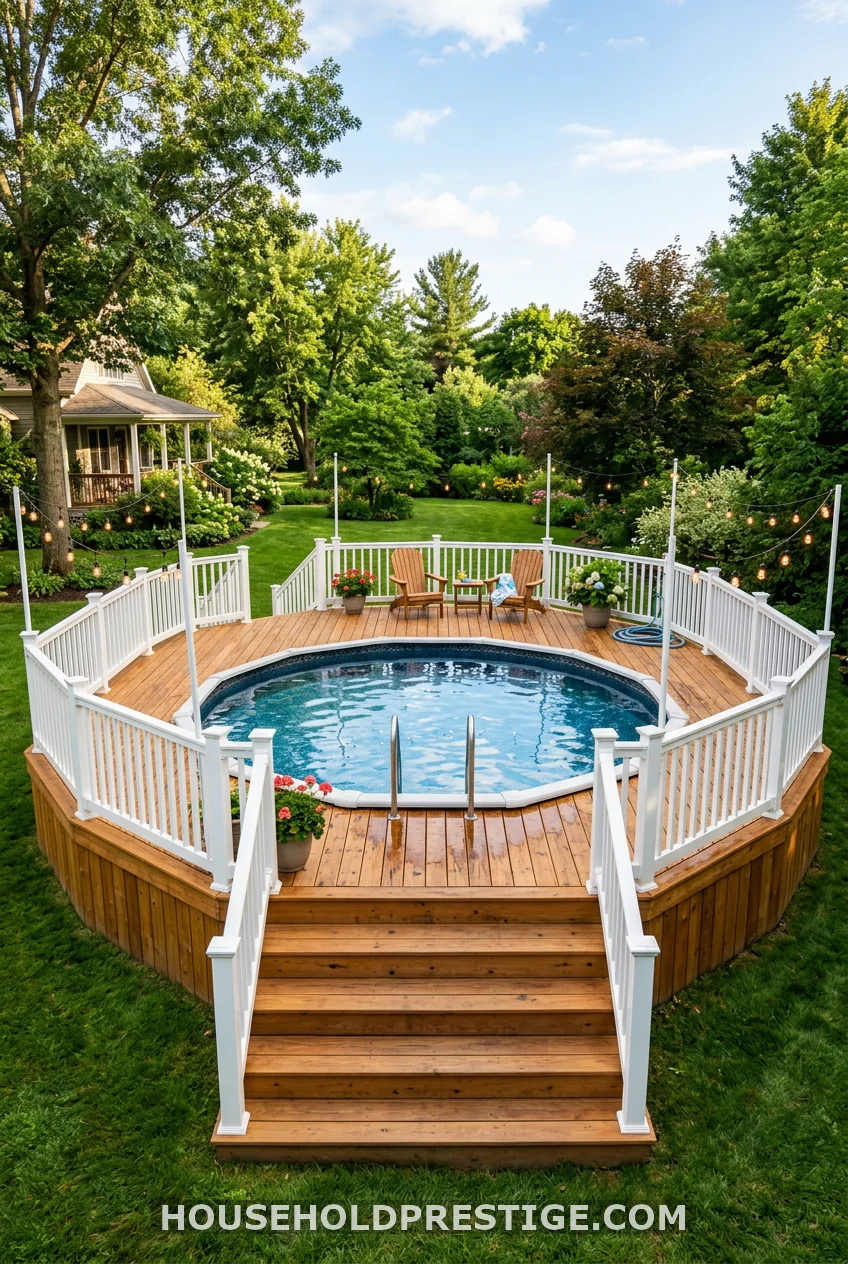
If you want the one deck style that makes an above ground pool look completely in-ground, this is it.
A full wraparound deck encircles the pool on all sides, bringing the deck surface flush with the top rail. Once it’s done, you can’t tell where the pool ends and the deck begins — and that’s the whole point.
Why It Works
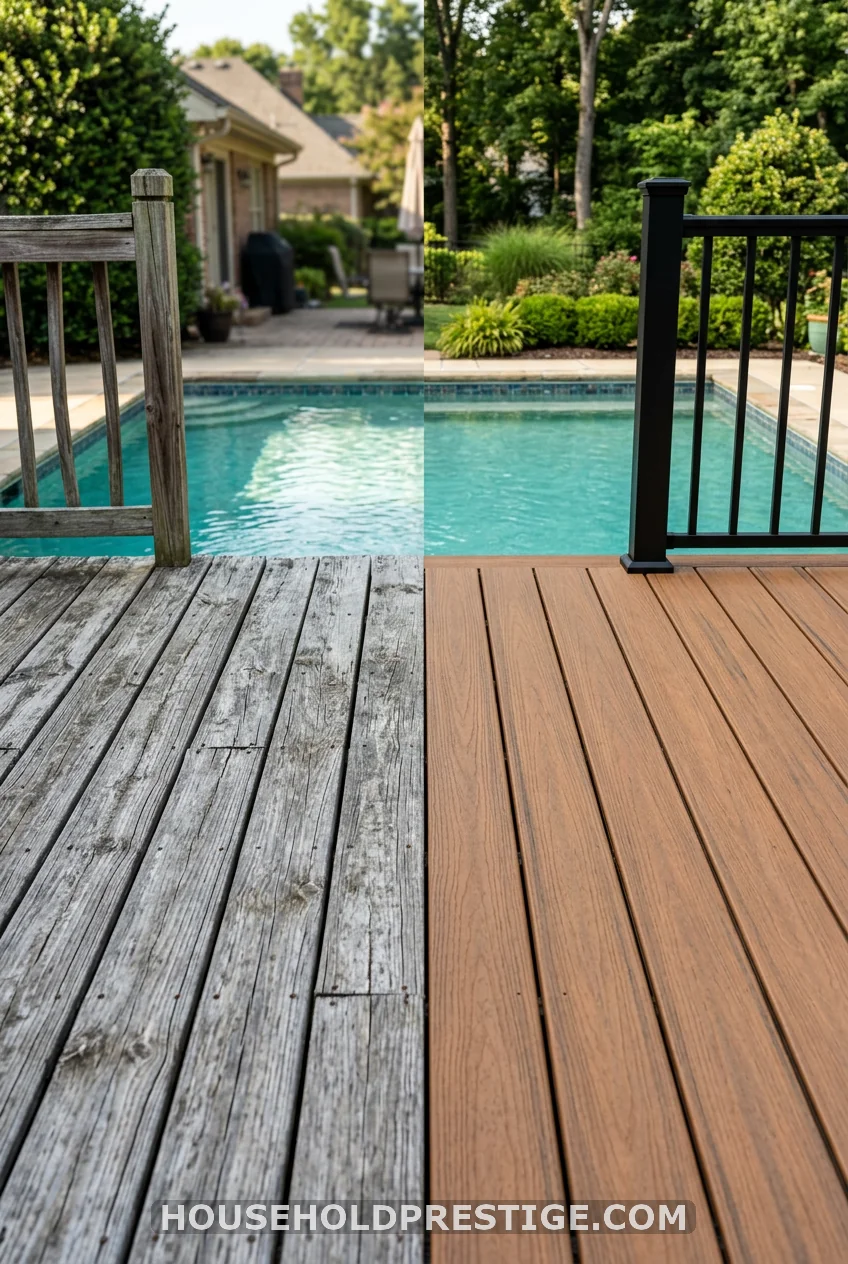
The wraparound solves the above ground pool’s biggest visual problem: the exposed wall. That blue or beige metal exterior is the reason most above ground pools look cheap. Cover it completely with wood framing and skirting, and suddenly you have something that could pass for a $30,000 inground installation.
Functionally, it gives you 360-degree access — useful for maintenance, for kids jumping in from multiple sides, and for adults who want to walk the perimeter without scrambling through wet grass.
Dimensions
For a standard 24-foot round pool, plan for a deck that extends 4–6 feet out from the pool wall on all sides. That gives you enough room for a lounge chair, a side table, and safe passage. Go narrower than 3 feet and it feels cramped; wider than 8 feet and you’re building a small outdoor room (which isn’t necessarily a bad thing).
Pool wall heights run 48 inches, 52 inches, or 54 inches depending on your model. Build your deck joists so the finished surface lands 1–2 inches below the top rail. This is critical — if you build flush or above the rail, you compromise the pool’s structural integrity.
Step-by-Step Build Overview
- Mark your footprint. Use spray paint or stakes to outline the deck perimeter. Account for the 4–6 foot extension all around.
- Call 811. Before any digging, have your utility lines marked. It’s free and legally required in most states.
- Set your footings. For a deck this size, concrete tube footings are standard. Dig holes 12 inches in diameter, 12–18 inches deep (below your frost line). Pour and set post anchors while concrete is wet. Let cure 24–48 hours.
- Install posts and beams. Use 4×4 pressure-treated posts. Beams are typically doubled 2×8 or 2×10 lumber, depending on your span.
- Frame the joists. 2×6 joists on 16-inch centers is the standard. Run them toward the pool so the decking boards run parallel to the pool edge — this looks cleaner visually.
- Cut your pool opening. The frame around the pool needs to fit snugly. Cut a circular or polygon opening to match your pool’s shape. Most round pools work with an octagon or 12-sided polygon frame — don’t try to cut a perfect circle in lumber.
- Lay your decking boards. Run boards away from the house or toward the dominant view. Leave a 1/8-inch gap between boards for drainage. Composite boards need slightly wider gaps per manufacturer specs.
- Install railings. Required in most jurisdictions if the deck is 30 inches or more above grade. Use post-and-rail kits from any home center — a standard 6-foot section runs $40–80 in pressure-treated wood.
- Add skirting. Lattice panels beneath the deck hide the pool wall and the structure. Pre-cut 4×8 panels are $25–40 each and install with just a staple gun and trim boards.
- Finish and seal. Sand rough edges, apply a penetrating wood sealer or stain ($30–60 per gallon). Reapply every 1–2 years.
Materials & Costs
| Item | Estimated Cost |
|---|---|
| Concrete tube footings (12–16 footings) | $80–120 |
| 4×4 posts (16 posts, 8 ft) | $200–280 |
| Beam lumber (doubled 2×10) | $180–240 |
| Joist lumber (2×6, 16″ OC) | $300–420 |
| Decking boards (pressure-treated 5/4×6) | $600–900 |
| Railing kit (40 linear feet) | $320–480 |
| Lattice skirting | $150–220 |
| Hardware, fasteners, joist tape | $80–120 |
| Stain/sealer | $50–80 |
| Total (DIY labor) | $1,960–2,860 |
Hire a contractor and that same deck runs $8,000–18,000 depending on your market.
Pro Move
Install a hinged access hatch in the skirting — approximately 24×24 inches — near your pool pump and filter. You’ll thank yourself every time you need to check equipment, bleed lines, or winterize without crawling under the frame.
Common Mistakes to Avoid
- Attaching the deck directly to the pool wall. Above ground pools are not structural. Never bolt your deck frame to the pool — build it as a freestanding structure that happens to sit against the pool.
- Skipping the permit. Most jurisdictions require a permit for decks over 200 square feet or over 30 inches above grade. Fines can exceed the permit cost. Budget $50–200 for permits.
- Wrong board direction. Boards running toward the pool look intentional and draw the eye to the water. Boards running parallel to the pool edge can make a small deck feel even smaller.
- Forgetting pool liner access. Your deck surface should land below the top rail specifically so a liner installer can reach over and work without cutting your deck.
2. The Floating Partial Deck
Build one side only. Seriously.
A 6×10 foot floating platform next to your pool — no railings required if it’s under 30 inches high — gives you a dry launch pad, a spot for towels, and real entry access for under $400. Floating decks sit on concrete piers instead of deep footings, level themselves on flat ground, and install in a single weekend. No permit in most areas. No contractor. Just a circular saw, a drill, and a free Saturday.
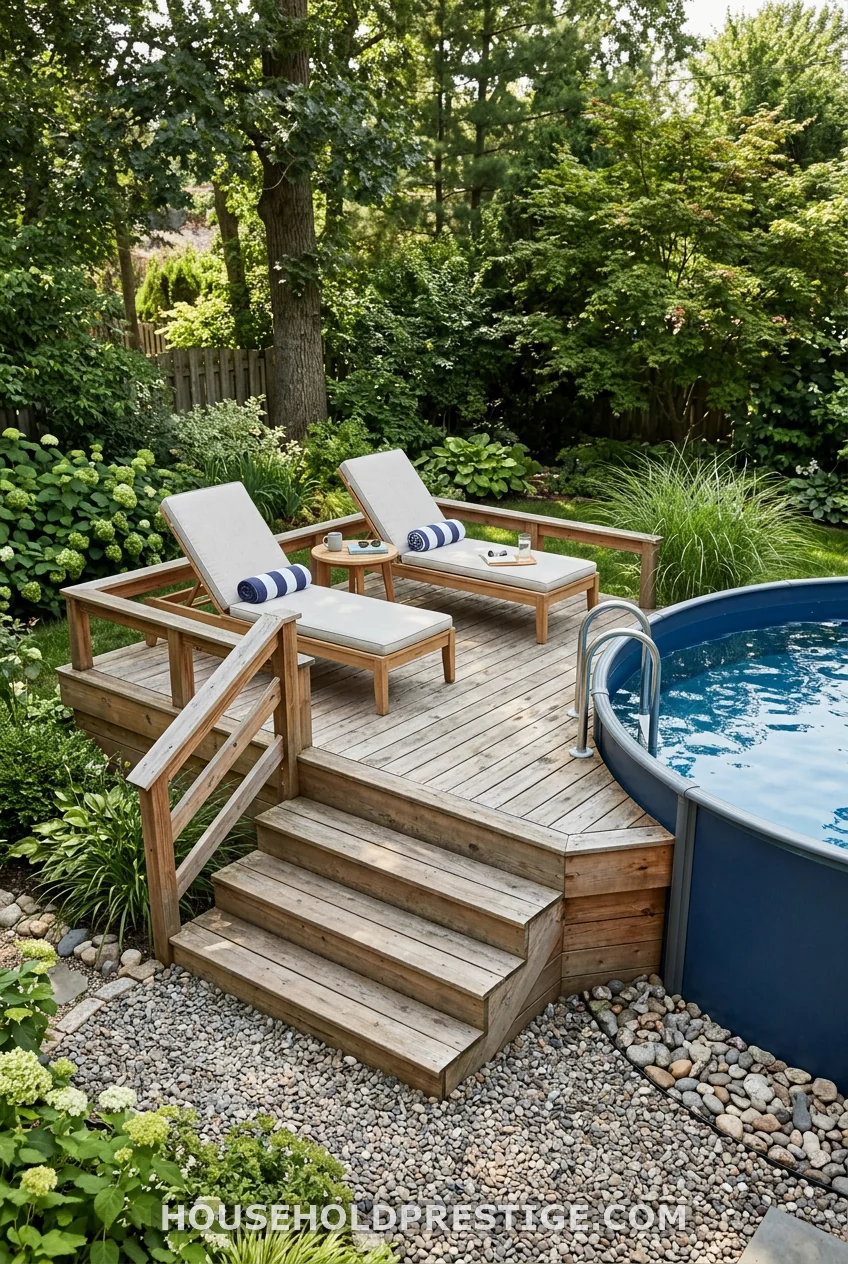
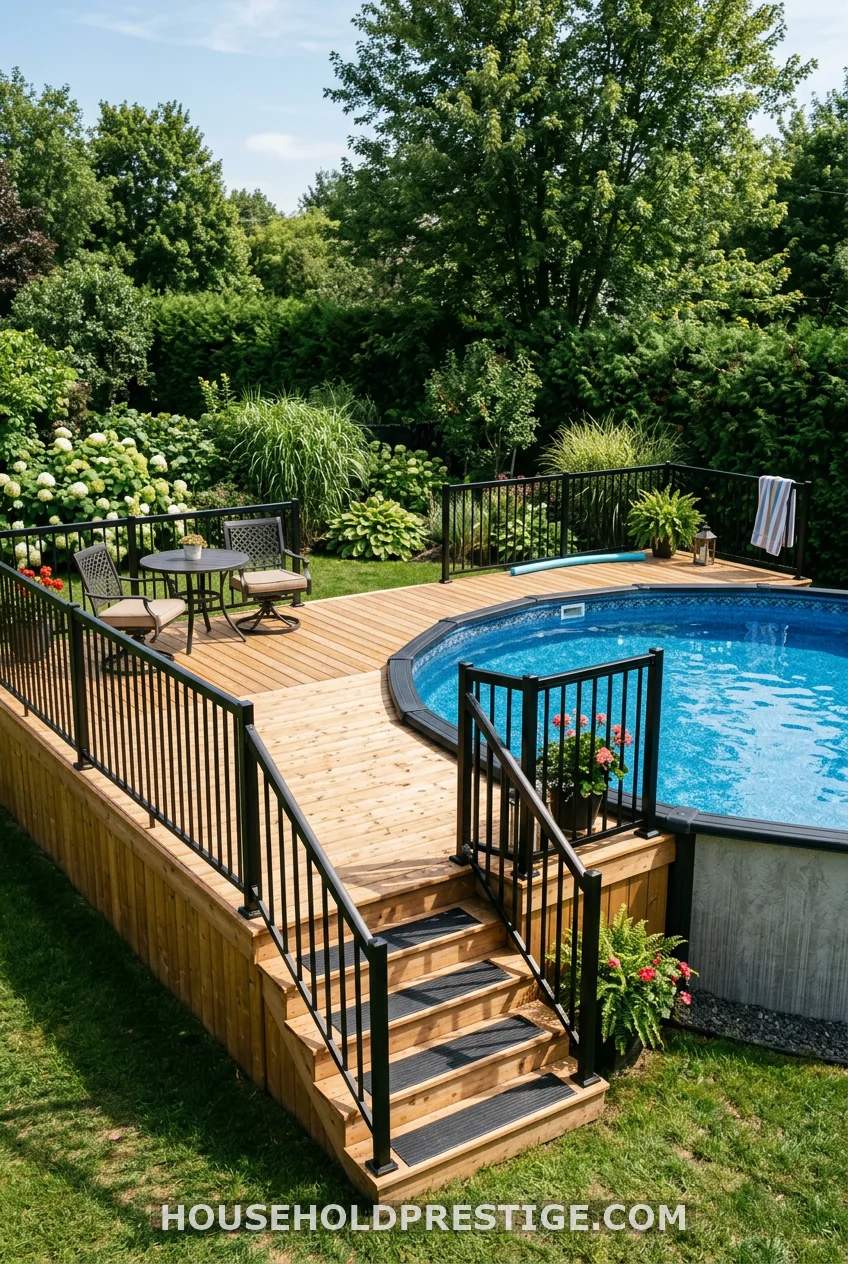
3. Multi-Level Deck with Defined Lounge Zone
Two levels solve a problem most single-level decks create: the awkward choice between deck height that’s pool-entry-friendly and deck height that’s furniture-friendly.
Build the upper tier at pool rail height — flush, seamless, and perfect for sliding in and out of the water. Drop the outer tier 12–18 inches lower and suddenly you have flat, stable ground for furniture without the furniture sitting weirdly elevated.
The transition step between levels also functions as casual seating. Wide steps — 48 inches across — are better than narrow ones at 24. People sit on them. Kids perch there. It becomes part of the social space without you planning for it.
Cost reality: Multi-level adds 20–30% to material costs compared to a single-level design of the same footprint. The extra lumber for the step framing and the second set of joist bays adds up, but the functional gain is worth it if entertaining is a priority.
When it’s worth it: You already have a large-enough yard. If your outdoor space is under 500 square feet total, a single-level wraparound will feel more open. Multi-level shines in spacious yards where you want to create distinct zones without building a separate patio.
4. What I Got Wrong the First Time (The Pallet Deck Cautionary Tale)
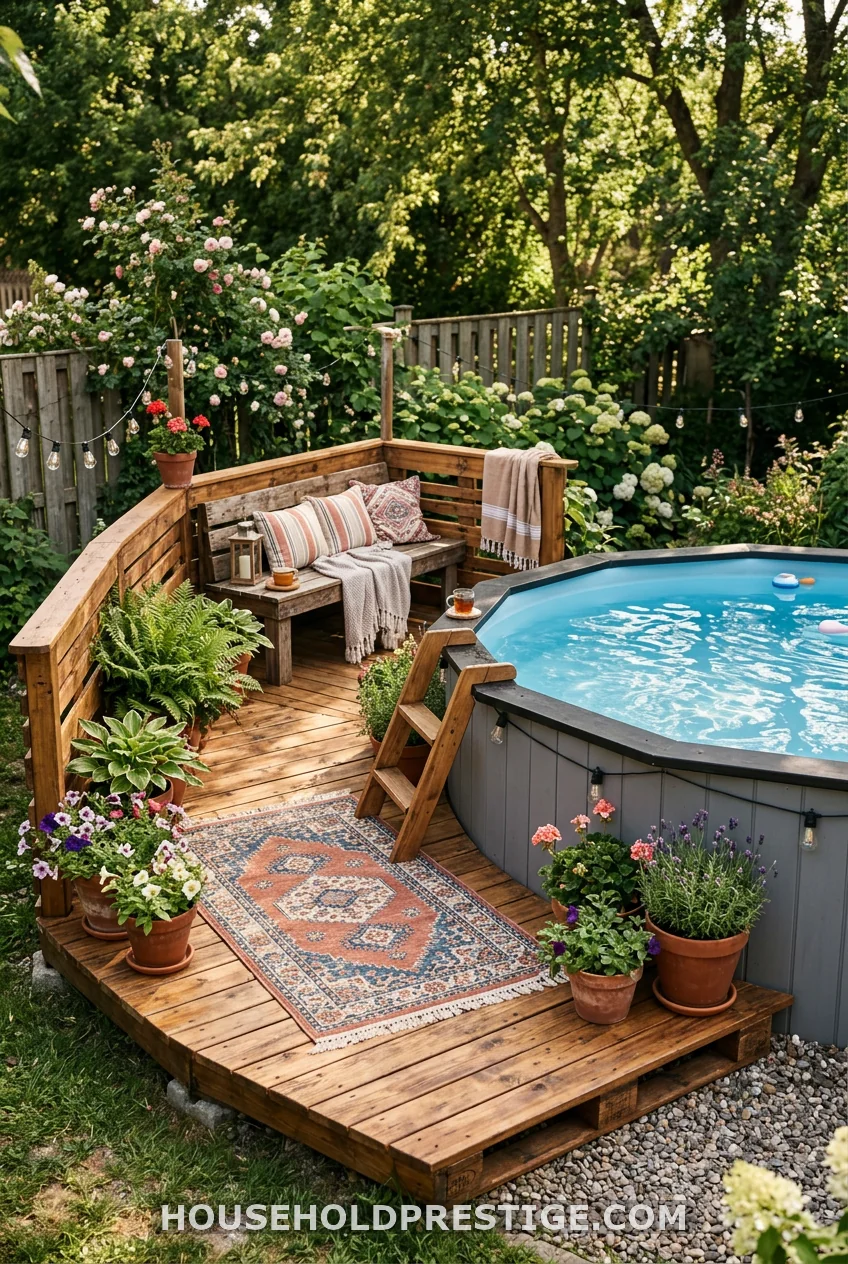
Three summers ago, I decided to build the cheapest possible pool deck. Pallets, I told myself. Free from the hardware store, Instagram-worthy, basically a weekend project.
Here’s what happened.
I spent two full Saturdays sourcing pallets — which are not, it turns out, just sitting in free piles everywhere. Many are heat-treated (HT, stamped on the side — fine), but I found three that were methyl bromide treated (MB — a fumigant you do not want underfoot in bare summer feet). Sorting them took longer than building the deck.
The build itself was fine. Laid them out, screwed them down, sanded the faces smooth. It looked charming in week one.
By month six: two boards had split along the grain from water exposure. By the following spring, I had a soft spot near the entry steps that I kept meaning to fix.
The problem isn’t that pallets don’t work. They do — provisionally. The problem is that shipping pallets use low-grade mixed hardwoods and softwoods not chosen for outdoor durability. They weren’t built to be decks. Without a quality penetrating sealer applied before installation and reapplied annually, they absorb water, swell, crack, and eventually rot.
The fix: If you love the pallet look and the budget, do this instead: use pallets only for the non-structural surface layer. Build your actual frame from pressure-treated 2x4s. Lay the pallet boards — not whole pallets — over that frame as decking. Sand them, prime them, and seal with an oil-based exterior wood sealer. That’s a deck that lasts 5–8 years instead of 18 months.
Budget this approach at $200–350 total. Still cheap. Still charming. Now built to last.
5. The Off-House Extension
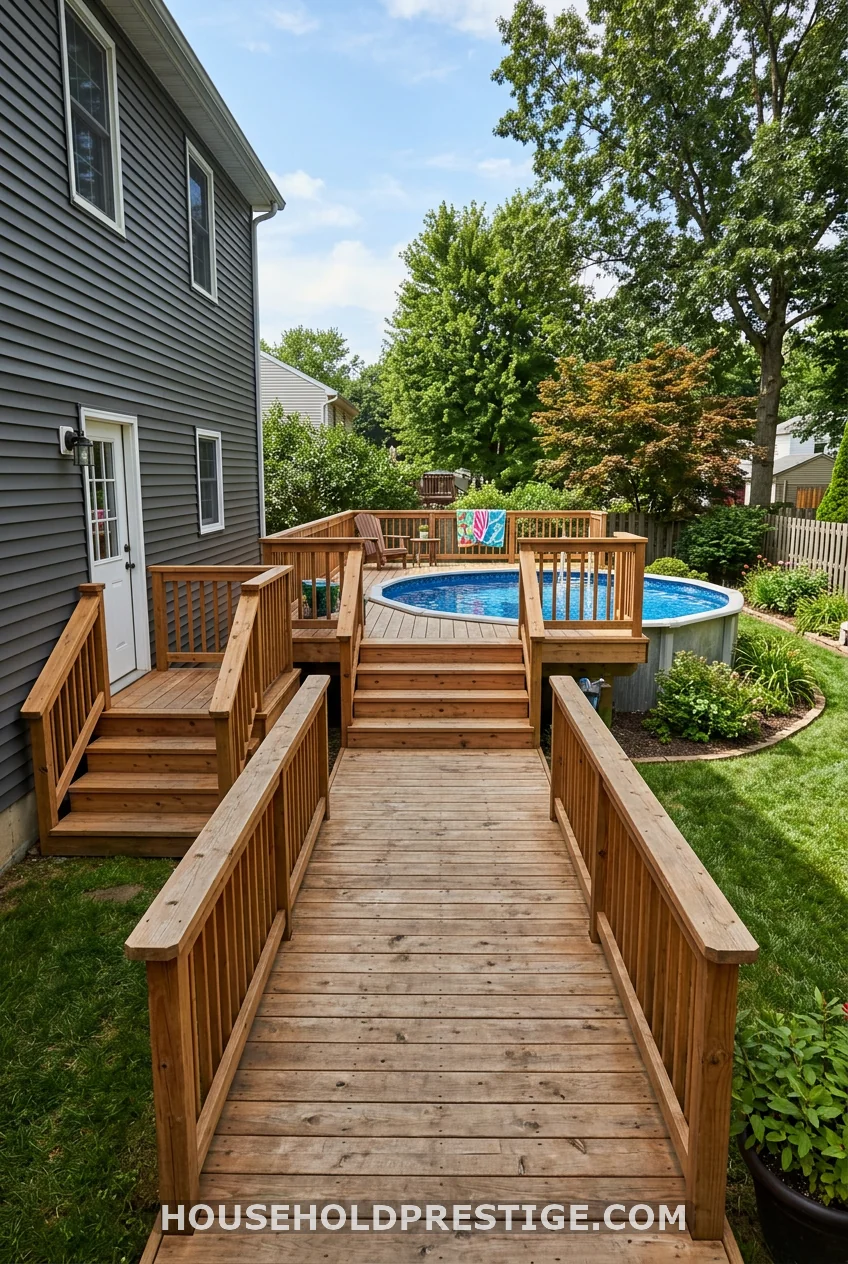
Run your deck from the back door straight to the pool. No gap, no grass to cross on wet feet.
Most above ground pools sit 10–40 feet from the house. A connecting deck platform — even a 4-foot-wide walkway — turns that gap into part of the living space. It’s especially useful if your back door is elevated, since you can slope the connecting platform as gradual steps rather than a steep staircase. Check local codes: connecting a deck to a house typically requires a ledger board attachment with specific lag bolt patterns and flashing tape, and triggers a permit in most municipalities.
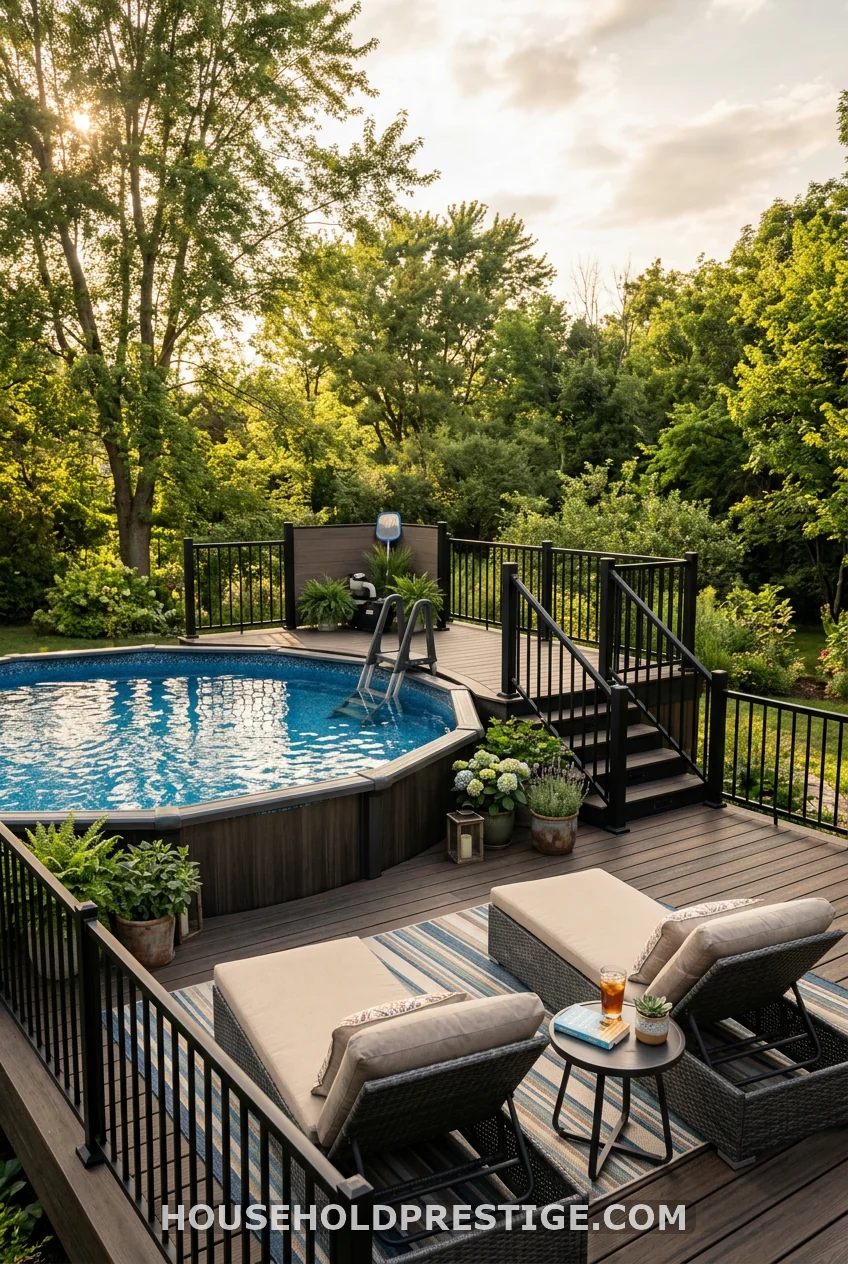
6. Composite Decking with Cable Railings
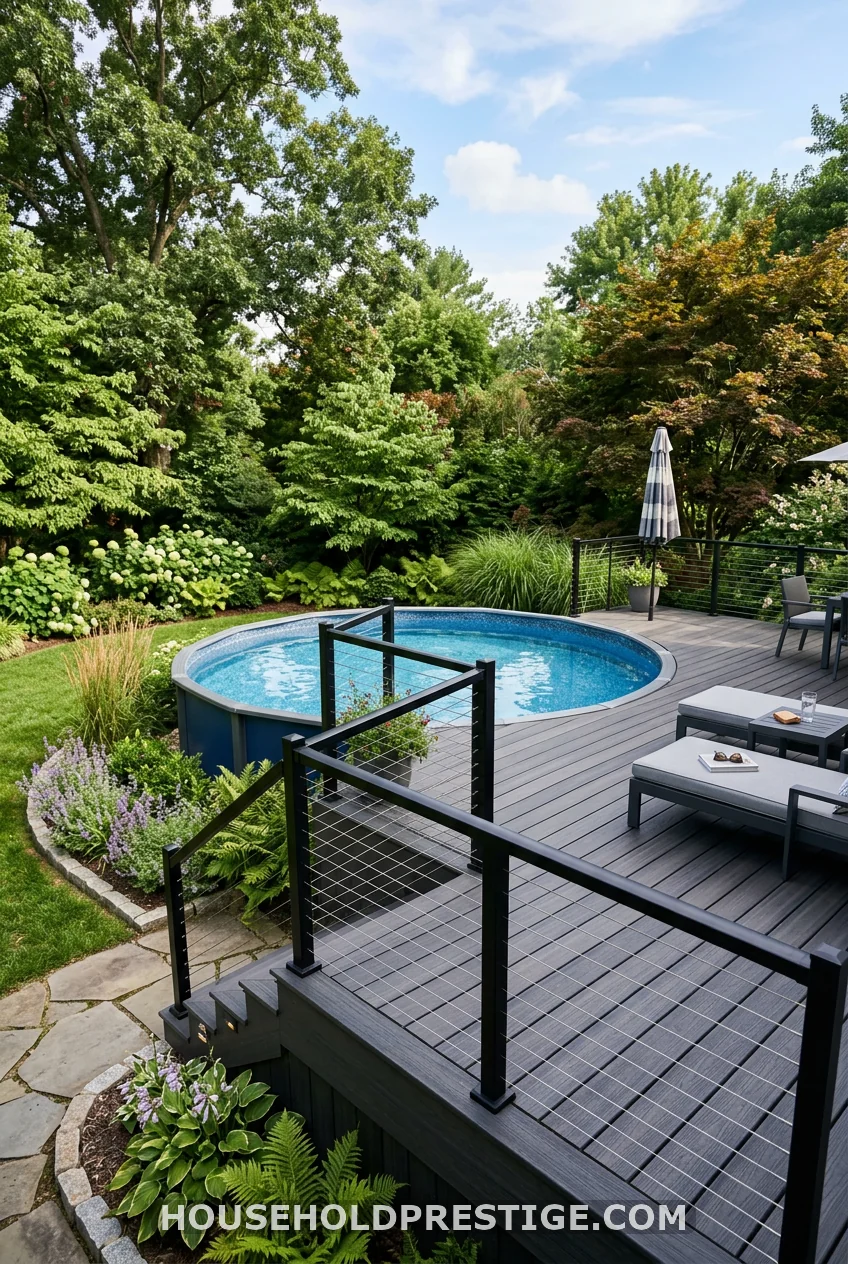
Composite decking is the argument against pressure-treated wood that that holds up in practice.
Pressure-treated lumber costs $1–2 per linear foot upfront. Composite boards — brands like Trex Enhance or TimberTech Azek — run $4–8 per linear foot. That gap looks significant on the purchase order and negligible over ten years.
Here’s the math: pressure-treated wood needs sanding, staining, and sealing every 1–2 years. Plan on $100–200 per year in materials and a full weekend of labor. Composite is warrantied for 25–35 years. No sanding. No staining. Hose it down. That’s it.
For an above ground pool specifically, composite pays back faster than on a standard house deck, because pool decks take constant water exposure — chlorine splash, wet feet, spray-downs — that accelerates wood degradation.
Cable railings pair well with composite for a clean, modern look. A 4-foot railing section with stainless cable runs $80–120 in kit form. The open look between cables preserves sightlines to the pool — relevant if you’re watching kids swim — and prevents the closed-in feel that wood balusters can create on smaller decks.
7. Raised Deck with Under-Deck Storage
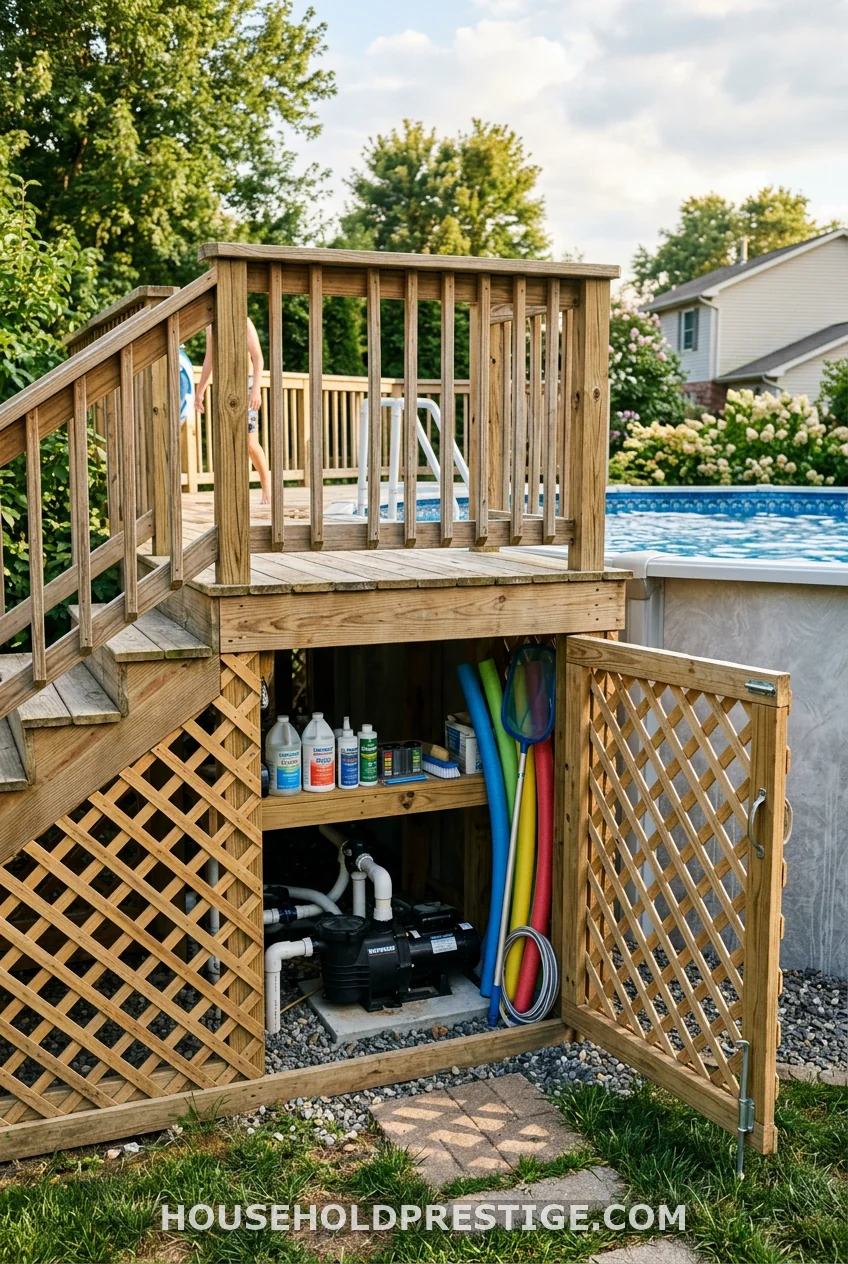
Build your deck 3–4 feet off the ground and you gain a storage room you never planned for.
Most above ground pools require the deck to be elevated to reach the pool rim anyway. That elevation creates dead space beneath the structure that most people ignore. Don’t.
Install lattice skirting on three sides and a hinged door panel on the fourth. Add a simple wire shelf system inside ($25 at any home improvement store) and you have a dedicated home for: pool noodles, floats, a chemical storage shelf (keep this ventilated and off the floor), the pump and filter, the garden hose, and winter cover storage.
The under-deck storage approach eliminates the need for a separate pool shed — a purchase that runs $300–800 for a basic resin unit. The skirting itself costs less than that, and you gain more usable space.
Installation note: Frame your skirting opening at least 30 inches wide by 36 inches tall. Going smaller means crawling, which you’ll hate by the third time you need the chlorine tablets.
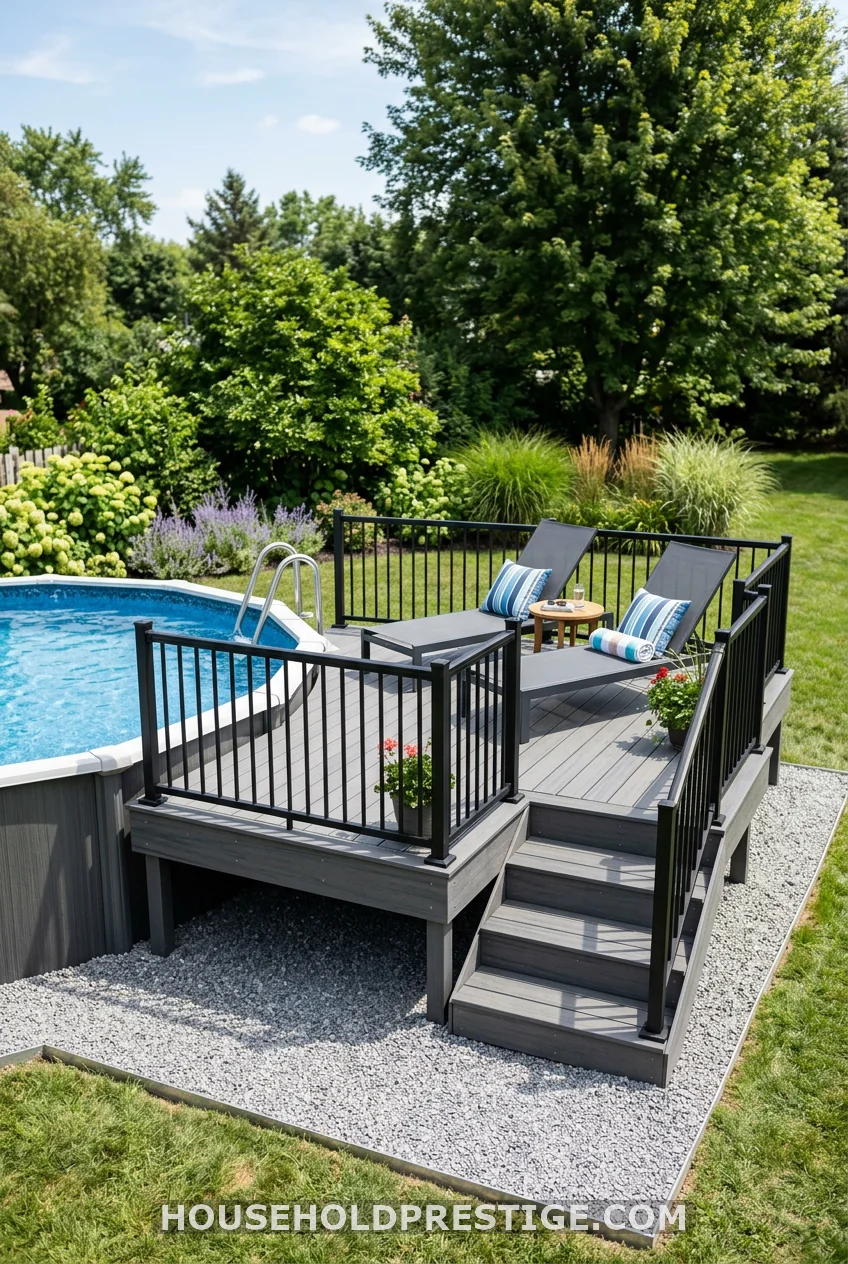
8. The Gated Safety Deck
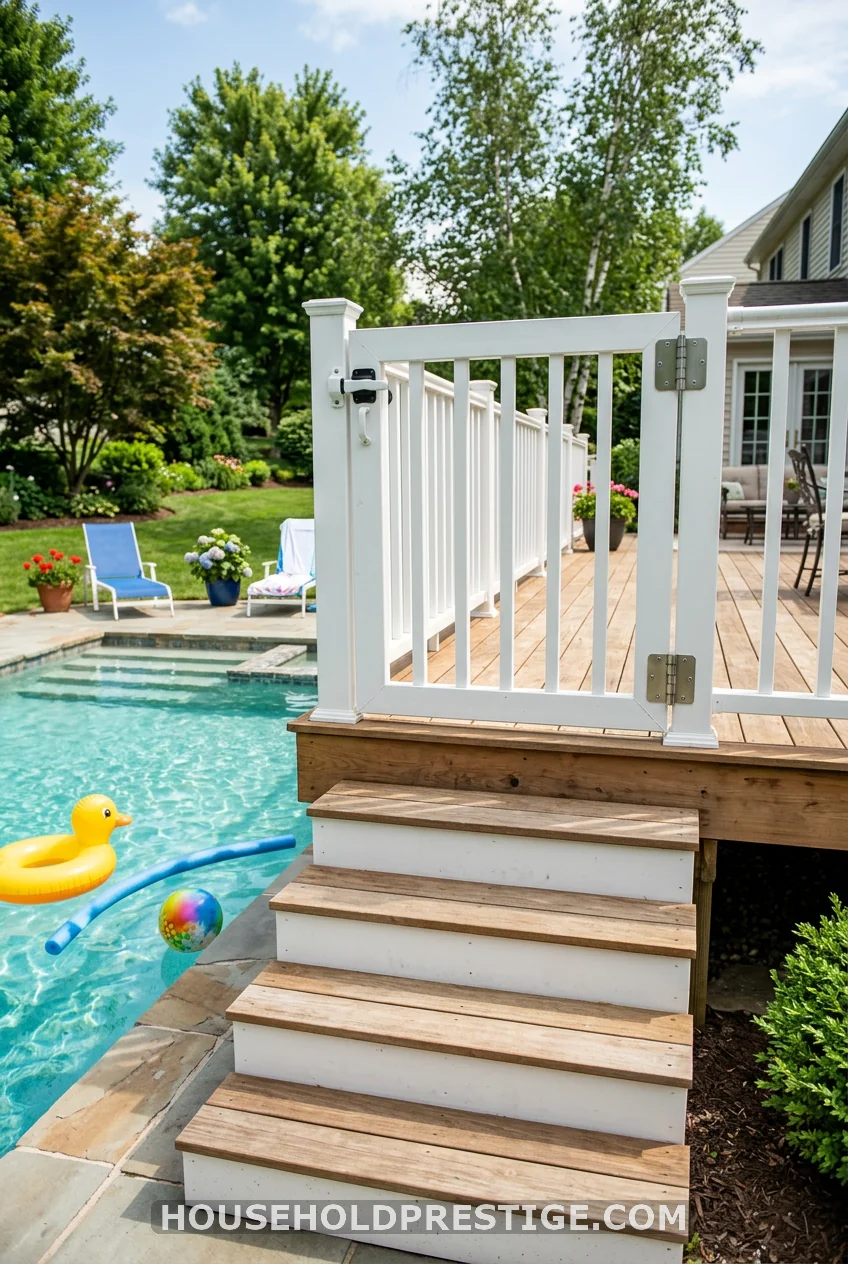
Gate the only staircase up. One gate, one latch, one rule change.
If you have young children or grandchildren, this is not optional. Most states require a barrier that prevents unsupervised pool access for children under five, and many HOAs enforce this regardless of local code. A self-latching gate at the top of your deck stairs — positioned so the latch is at adult height and out of children’s reach — satisfies most jurisdictions and gives you genuine peace of mind.
The gate hardware itself costs $30–60. The gate structure is just a framed panel of decking material that matches your railings. A spring hinge closes it automatically when released. Don’t skip this.
9. Resort-Style Deck with Pergola
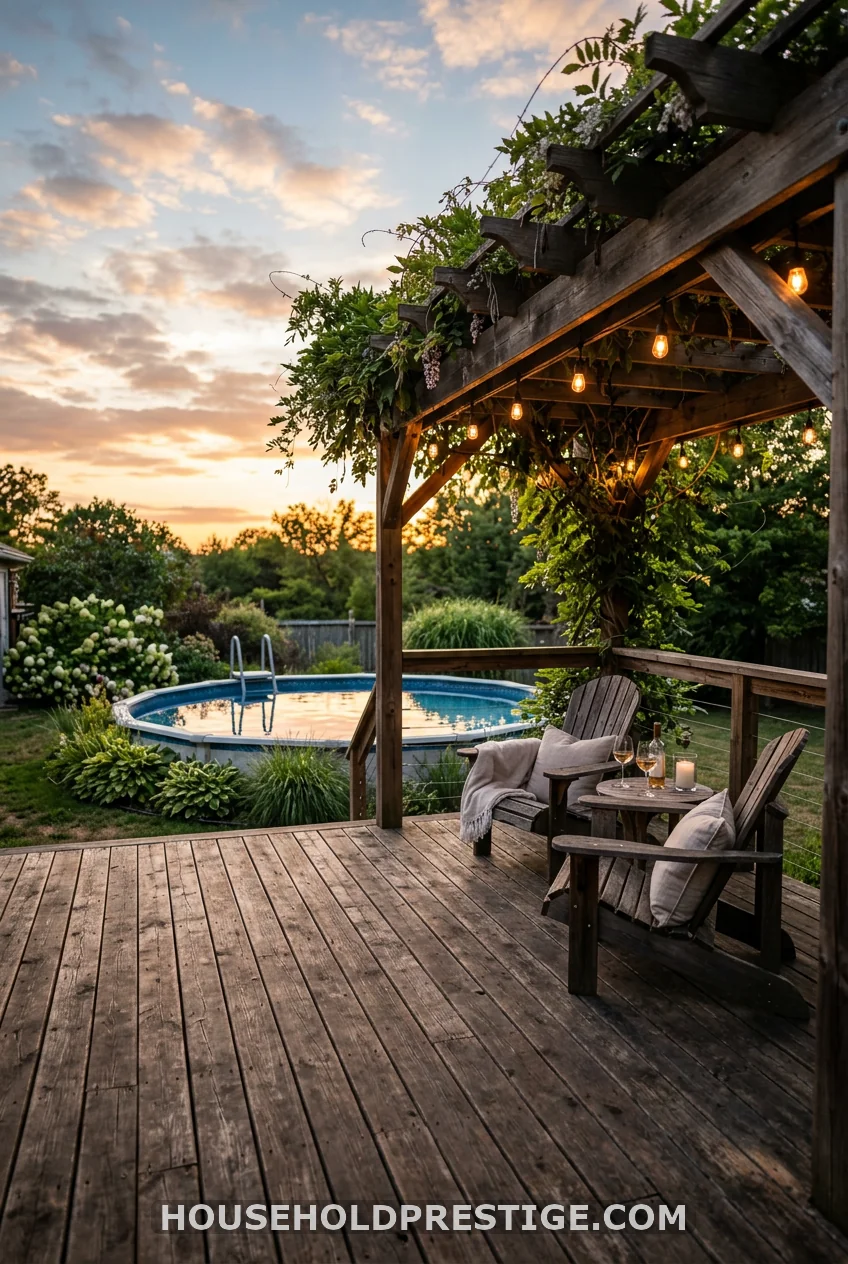
A pergola transforms a deck from a platform into a destination.
You don’t need a full deck cover — just one pergola structure over the lounge corner creates shade, gives a visual anchor to the space, and instantly reads as intentional design rather than improvised pool infrastructure.
A DIY pergola kit runs $400–900 for a 10×10 foot structure. Position it at the far corner of your deck opposite the pool entry stairs. Add string lights along the beams ($25–40 for a 48-foot set) and a weatherproof outdoor rug ($50–120) beneath two Adirondack chairs. That corner becomes the best seat in the yard — shaded, elevated, with a direct view of the water.
Pro tip: Plant a fast-growing annual vine like morning glory ($3 seed packet) at the base of the pergola posts in spring. By midsummer, you have natural shade and a properly lush look that looks designed and costs essentially nothing.
10. The L-Shaped Platform
Cover the entry side and one long side. Stop there.
An L-shaped deck costs 40–50% less than a full wraparound, handles all your practical needs — pool entry, towel space, a small seating area — and still looks intentional. For yards where a full deck would crowd the space or kill too much lawn, the L-shape is the right call. Build the long side at least 5 feet wide; the short entry side can be 3–4 feet.
11. Octagonal Deck for Round Pools
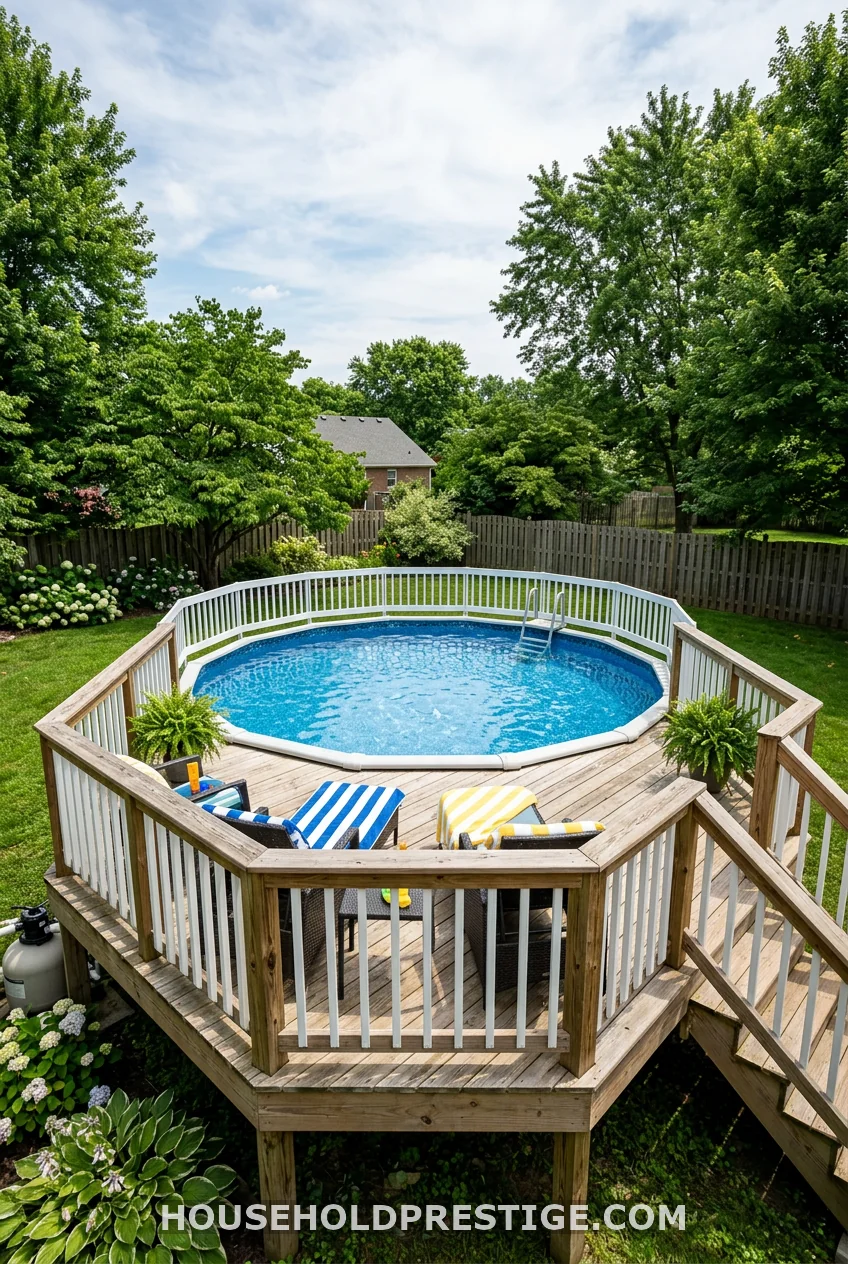
Round pools meet square lumber awkwardly. An octagonal frame solves that with geometry.
An eight-sided deck polygon closely approximates a circle without requiring any curved cuts — which are notoriously difficult with standard framing. Each 45-degree angled corner adds visual interest, and the shape naturally creates small corner platforms that work as built-in seating nooks or planter spots.
Frame each octagon segment as its own rectangular bay and angle-cut the outer rim boards. A competent first-time builder can complete this framing in a day with basic tools — a circular saw, a speed square, and a drill. The octagon works best for 18–24-foot round pools.
12. Wraparound Deck with Built-In Bench Seating
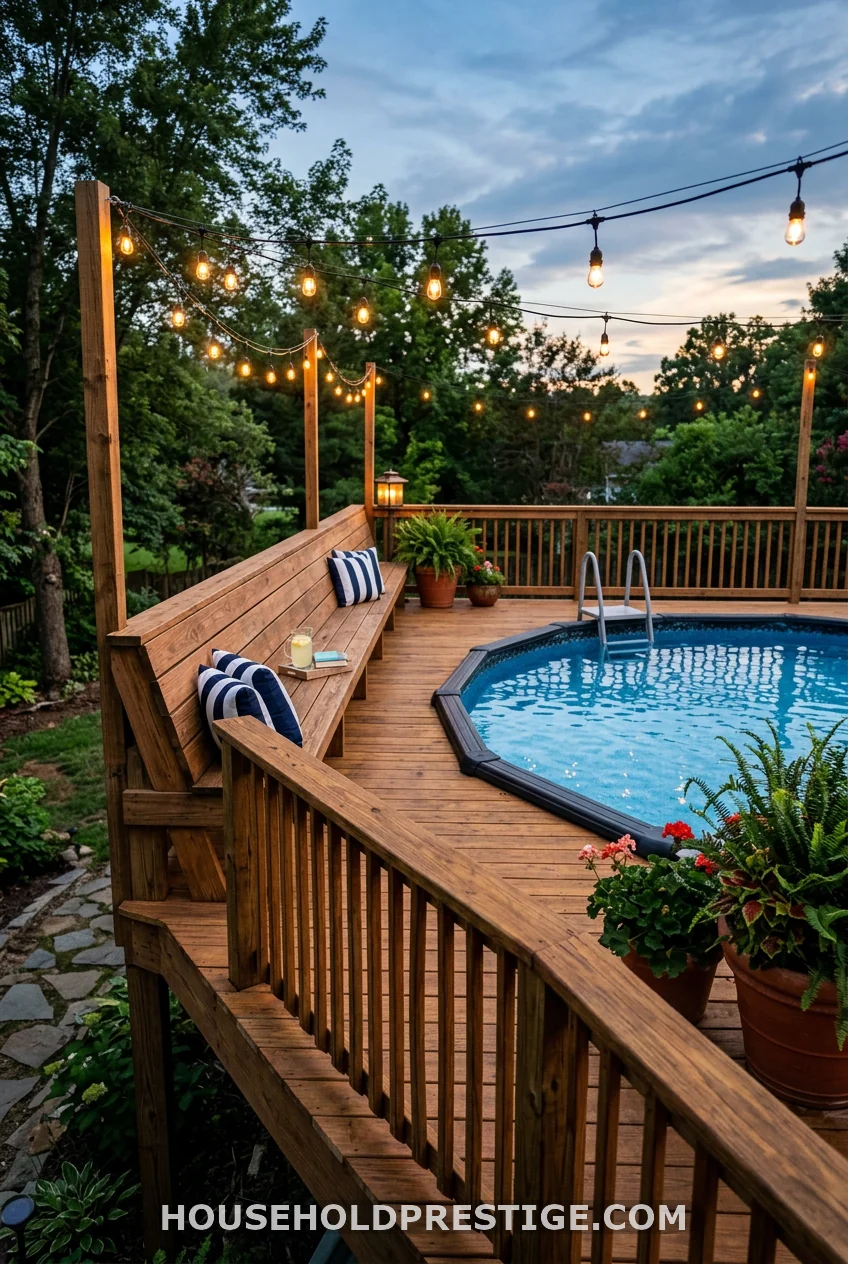
Built-in benches cost less than outdoor furniture and survive weather without fading, blowing over, or going missing at the end of the season.
Frame them as part of the deck structure: a simple 2×4 ledger attached to the railings at 18 inches high, with 2×6 seat boards running along the top. Add a 2×6 backrest angled 10–15 degrees and you have proper outdoor seating. A 10-foot bench run uses $40–60 in lumber and 2 hours of build time.
Place the bench on the side of the deck with the best view — facing the pool and the yard, not facing a fence. This single design choice makes a pool deck feel like a place people want to stay rather than pass through.
13. Myth: “Composite Decking Is Out of Reach for Most Budgets”
What most people think: Composite is for custom builds and wealthy homeowners. Real people use pressure-treated.
Reality: The 10-year math almost always favors composite.
Let’s run the actual numbers for a 300-square-foot pool deck:
| Pressure-Treated Wood | Composite (Trex Enhance) | |
|---|---|---|
| Material cost | $1,500–2,100 | $2,800–3,600 |
| Year 2 maintenance | $150 | $0 |
| Year 3 maintenance | $150 | $0 |
| Year 5 (possible replace boards) | $200+ | $0 |
| Year 8 maintenance | $150 | $0 |
| 10-year total (materials + upkeep) | $2,150–2,750+ | $2,800–3,600 |
| Life expectancy | 10–15 years | 25–35 years |
The price gap narrows significantly by year 8. By the time you’d be replacing a wood deck, composite hasn’t even hit its stride.
The scenario where wood wins: you’re building a starter deck on a pool you’re not sure you’ll keep for more than three years. Short time horizon? Go wood. Long-term? Composite is the rational choice, not the luxury one.
14. Deck with Lattice Privacy Panels
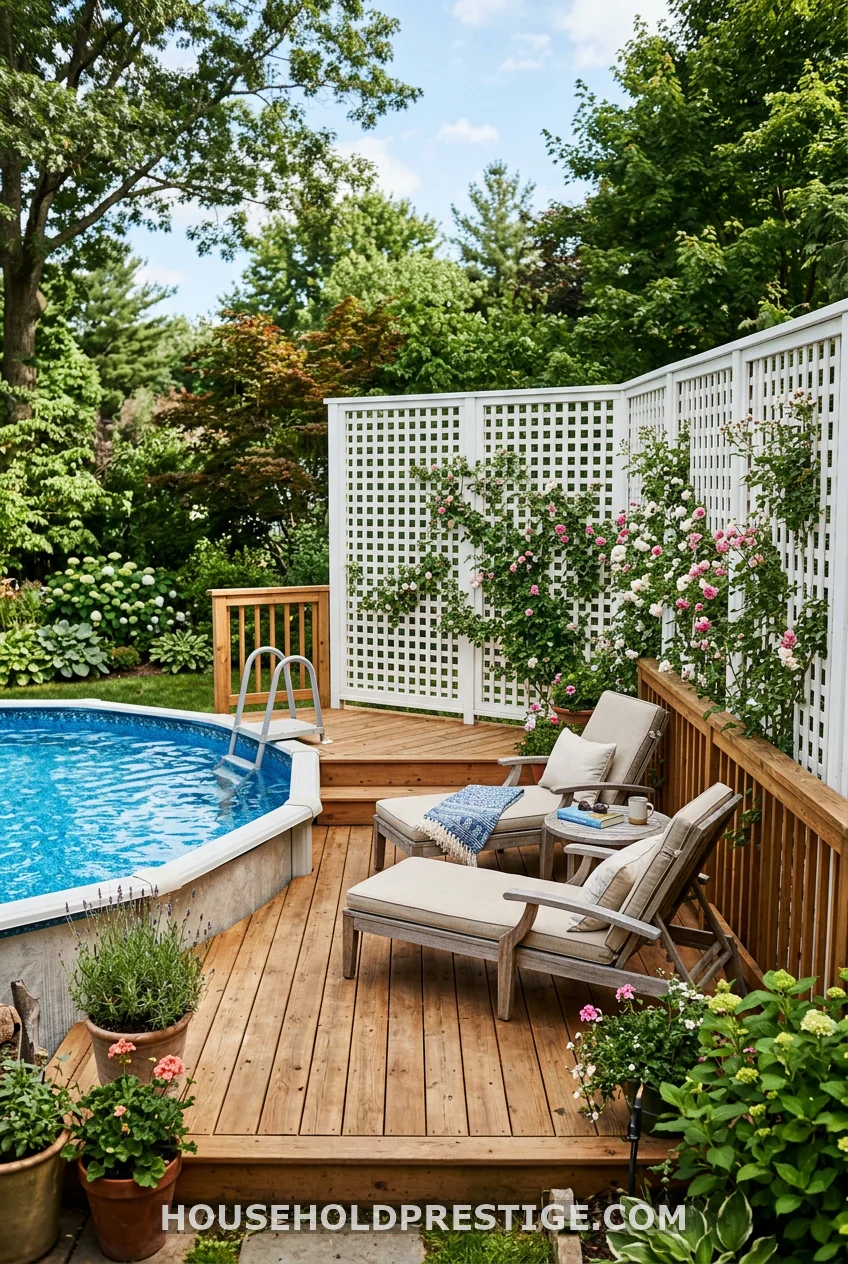
Neighbor’s yard too close? A lattice privacy screen changes the experience of the deck entirely.
Mount 6-foot tall lattice panels to your railing posts using simple post extenders — available at any home center for $8–12 each. The panels create enclosure without completely blocking airflow or light. Plant a fast-growing climbing rose, jasmine, or sweet pea at the base, and by midsummer you have a soft, fragrant screen that feels nothing like a fence.
The privacy effect is psychological as much as physical. You don’t need to block every sightline. Just enough to make the pool area feel like a room rather than a fishbowl.
15. The Minimalist Entry Platform
Three hundred dollars. One weekend. Done.
A single entry platform — 8×8 feet, built with pressure-treated 2×6 framing, surface-level footings, and standard deck boards — solves the actual problem most above ground pools have: no dry, stable place to get in and out.
You don’t need a wraparound on day one. Build the platform now. Add the L-shape next summer. Extend to the full wraparound the year after. Every stage is functional and complete on its own. Starting small means starting now, and the pool looks 300% better by this weekend.
16. Tropical-Inspired Deck with Bamboo Accents
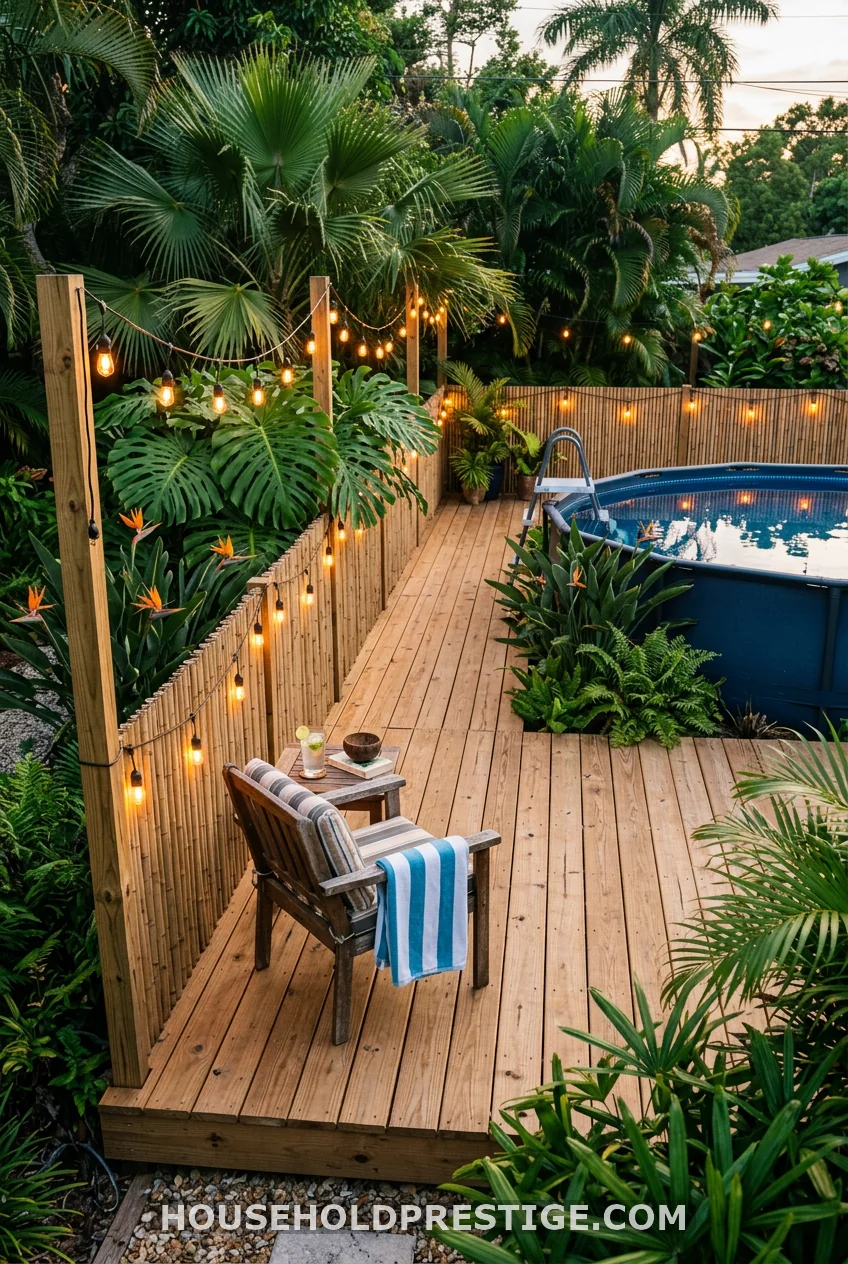
Skip the standard balusters and run natural bamboo fencing panels between your railing posts instead.
Bamboo fence rolls cost $25–40 for an 8-foot section and attach with zip ties or wire to your existing post-and-top-rail structure. The effect is immediate — suddenly the deck reads as a tropical cabana rather than a suburban pool surround. Pair it with two or three large-leafed tropical plants in oversized pots (elephant ear, cannas, or bird of paradise all work in warm climates; in colder zones, they overwinter indoors) and string lights overhead.
The bamboo fencing isn’t permanent — it’ll need replacing every 2–3 years. But at $40 a section, that’s not a hardship.
17. Paver Hybrid: Deck + Stone Surround
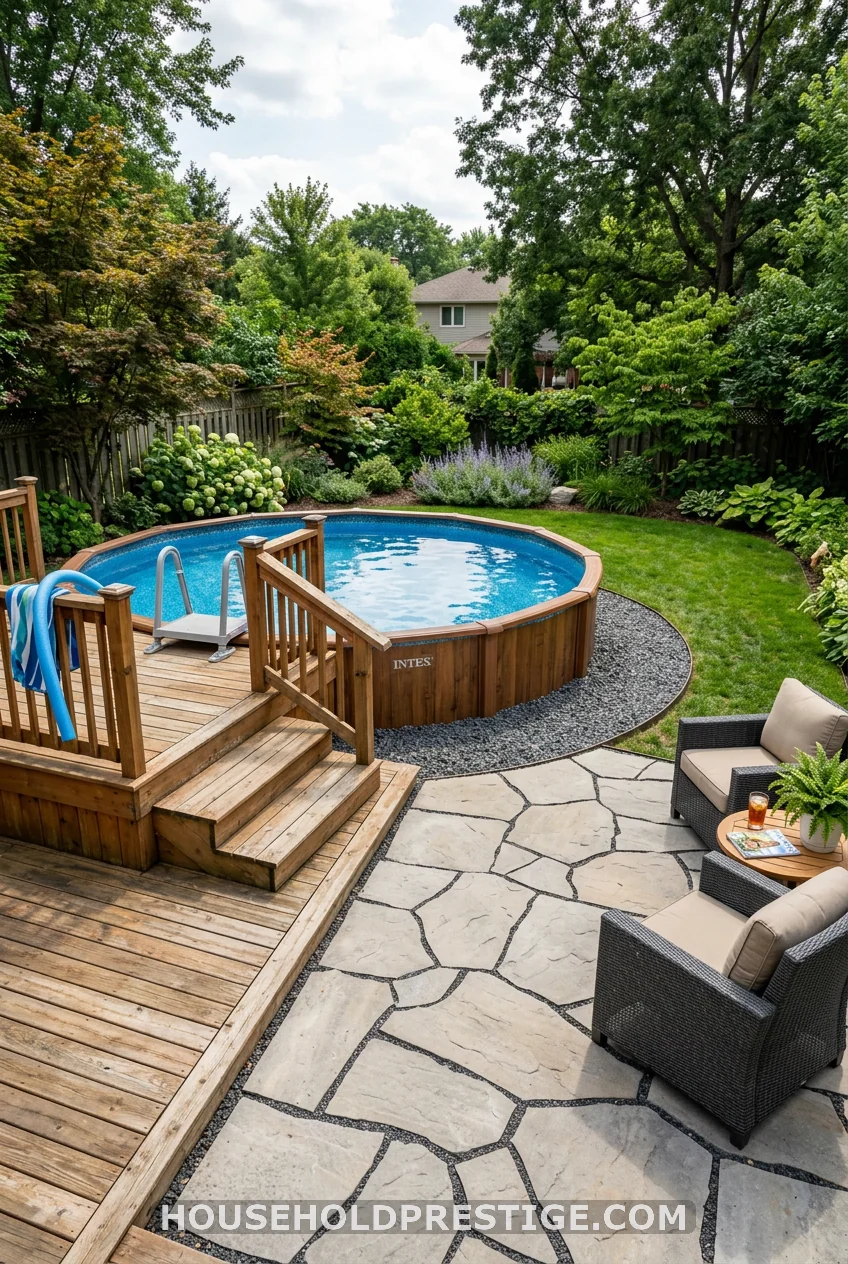
Not every side of your pool needs a raised deck. Pavers can handle the remaining perimeter for a fraction of the framing cost.
Build a raised deck on the entry side — this is the functional core, the part that gets you in and out of the water. Then surround the other three sides of the pool with a paver patio laid on compacted gravel base. Large format concrete pavers (24×24 inches) cost $3–6 each and install without mortar on a 4-inch compacted gravel bed.
The deck and paver combination creates visual contrast that makes both materials look more intentional. The warm wood of the deck against the cool stone of the paver surround reads as a designed choice rather than a budget constraint. Total cost for a 24-foot round pool: $1,200–1,800 for deck side, plus $600–1,000 for paver surround — well under $3,000 for a complete, polished pool surround.
Putting It Together
The best deck around an above ground pool is the one that matches what your yard your yard needs. A small yard with two kids benefits more from a gated entry platform and paver surround than from an ambitious wraparound. A backyard built for entertaining calls for multi-level structure and a pergola corner.
Start with the entry side. That one platform — even modest in size — immediately changes how the pool looks and feels to use. Everything else is an expansion of that first investment.
Pick the design that fits your budget and your summer. Then build it. Your pool has waited long enough.
Frequently Asked Questions
How much does a deck around an above ground pool typically cost?
A simple floating entry platform runs $300–500 in materials. A full wraparound deck for a 24-foot round pool costs $1,900–3,000 DIY or $8,000–18,000 professionally installed. The biggest cost variable is labor — doing it yourself cuts the total by 60–70%.
Do I need a permit to build a deck around an above ground pool?
In most U.S. jurisdictions, yes — if the deck is over 200 square feet or higher than 30 inches above grade. Check with your local building department before you start. Permit costs range from $50–200. Skipping the permit and getting caught typically results in a fine larger than the permit cost, plus mandatory compliance work.
What is the best material for an above ground pool deck?
Pressure-treated lumber is the most affordable upfront at $1–2 per linear foot. Composite decking (Trex, TimberTech, Fiberon) costs more initially — $4–8 per linear foot — but requires almost no maintenance and lasts 25–35 years versus 10–15 for wood. For high-water-exposure pool decks, composite pays back faster than it does on standard decks.
Should I attach my deck directly to the above ground pool?
No. Above ground pool walls are not structural and cannot bear the load of a deck frame. Always build a freestanding deck structure that sits independently and simply butts up against the pool wall. This protects both the pool and the deck from structural failure and allows liner replacement without deck demolition.
How wide should the deck be around an above ground pool?
A minimum of 3 feet for walking clearance, but 4–6 feet is standard for comfort. If you want to place furniture on the deck, plan for at least 5–6 feet of clear space so a lounge chair or two chairs with a side table fit without crowding the pool entry.