

You loaded the washer, shut the door, and squeezed sideways out of the room. Again. Your narrow laundry room isn’t a deal-breaker — but right now it’s not doing you any favors either. Tight, underlit, and always one basket away from chaos.
The good news? Narrow laundry room ideas have gotten very good. Not “I’ll just stack some shelves” good — seriously functional, designed-for-tight-spaces good. Whether you’re renting and can’t touch the walls, or you’re ready to commit to a real layout overhaul, there’s something here that will make a visible difference.
These 17 ideas cover fast wins and full overhauls alike. I’m sharing specific measurements, product names, and honest costs throughout. Read to the end for the FAQ — there’s one answer about lighting that changed how I thought about my own narrow room.
1. Stack Your Machines — The Smarter Appliance Setup
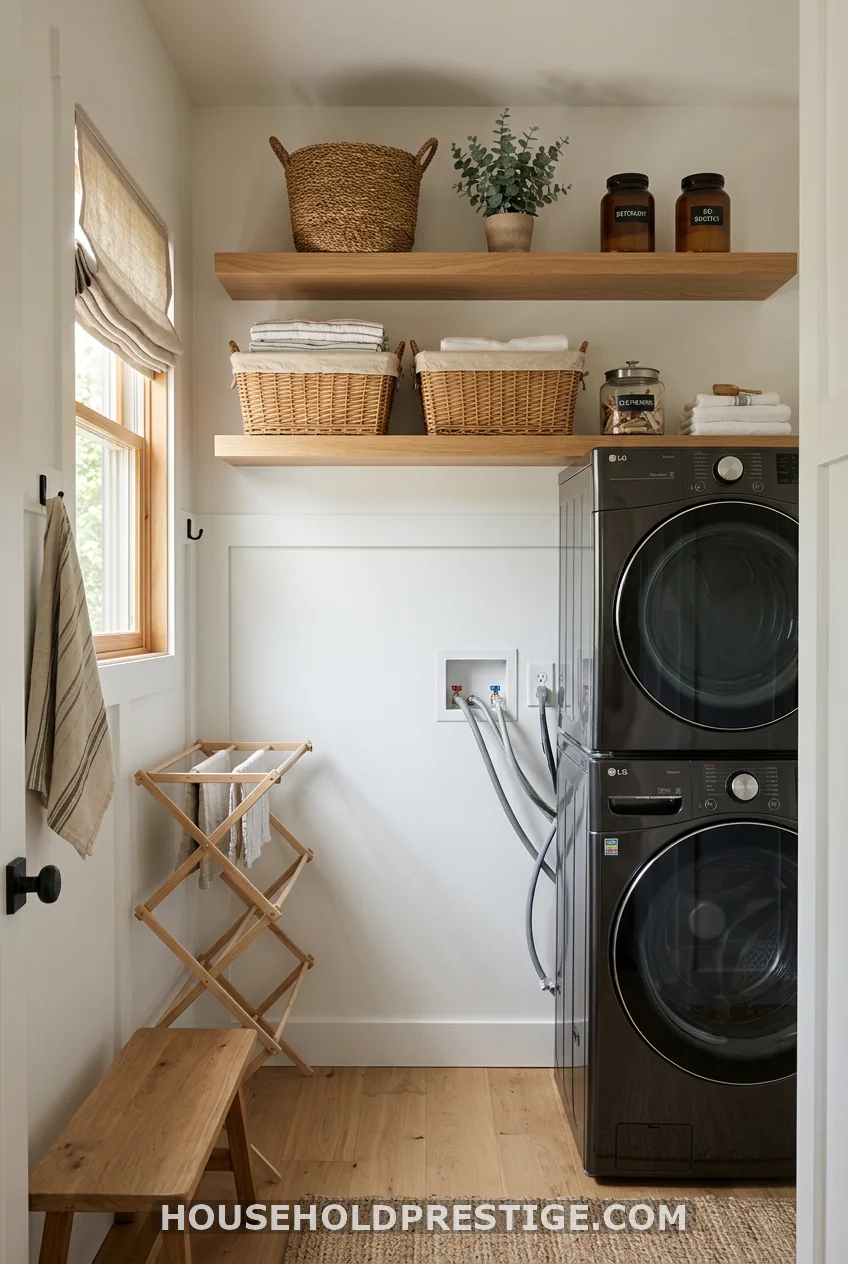
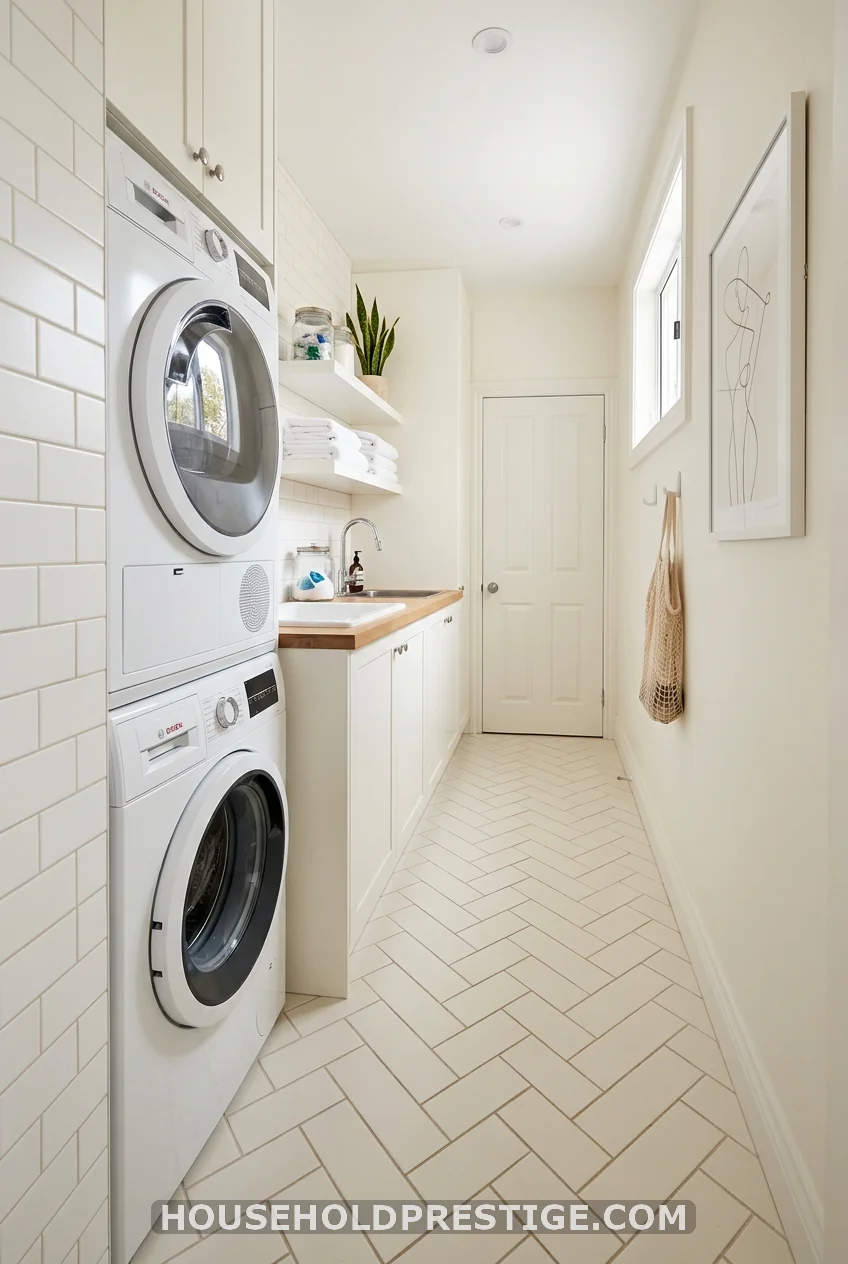
Stacking your washer and dryer is the single highest-impact move in a narrow laundry room. Side-by-side machines take up 54–60 inches of wall space minimum. Stack them vertically, and that footprint drops to 27–30 inches — suddenly, there’s a whole empty wall you didn’t know you had.
The catch is machine type. You need front-loading units to stack, and they need to be from the same brand — or at minimum, the same width. Compact models run 24 inches wide; full-size run 27 inches. The LG WM3400CW washer ($800) and DLEC3522W dryer ($750) are a well-matched 24-inch combo that stacks with LG’s kit. GE’s GFW148SSMWW ($850) is another solid 24-inch option with good reviews in tight spaces.
If you’re renting, check your hook-ups before buying anything. Gas to electric is not a renter-friendly swap. Also, verify the plumbing connection height — front-loaders draw from a lower position than top-loaders, and some older rough-ins need a simple extension hose.
Stacking also frees the wall above the machines for deep shelving at a comfortable 16–18 inches of depth — wide enough for laundry baskets, detergent jugs, and folded towels. That wall was wasted before. Now it works.
2. The Slim Gap Cart Nobody Mentions
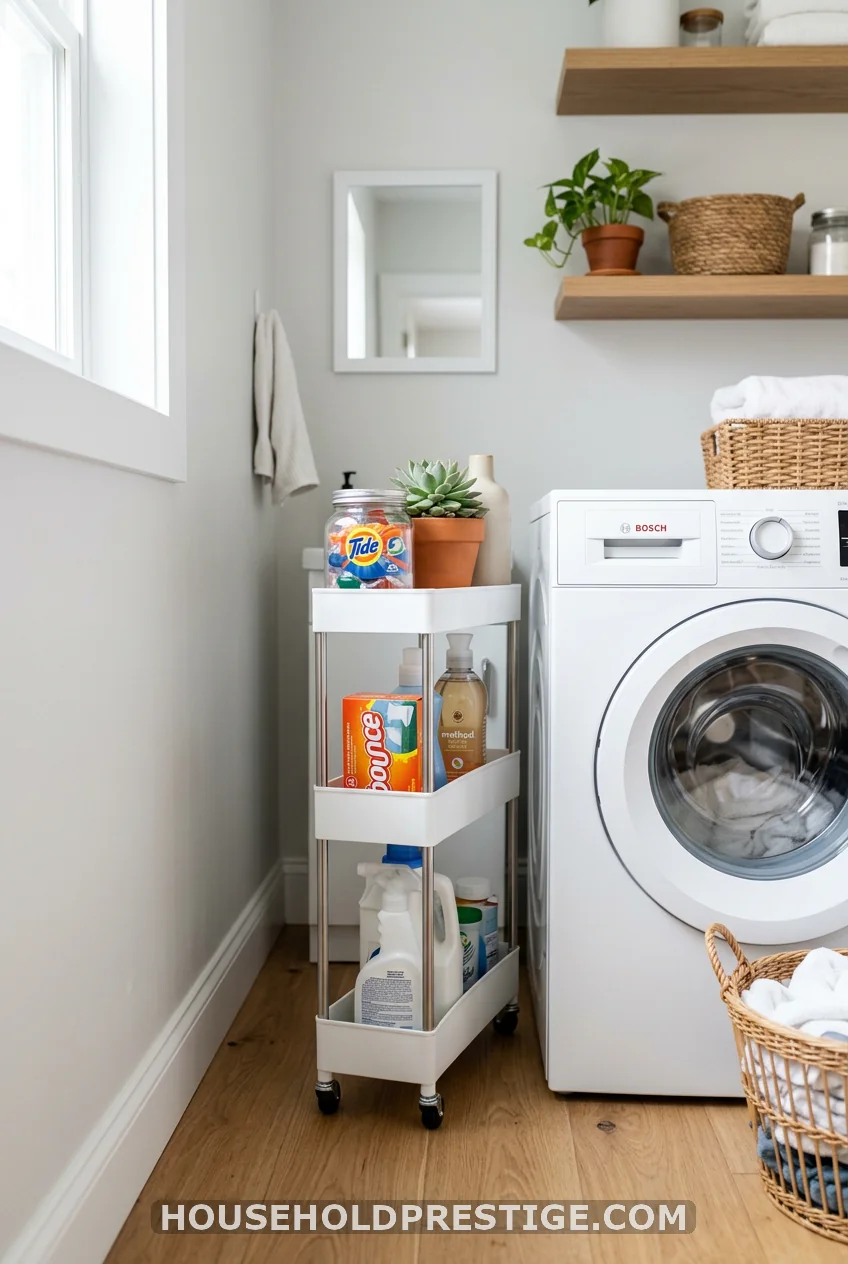
Measure the gap between your dryer and the nearest wall or cabinet. If it’s anywhere from 3 to 9 inches, a slim rolling gap cart fits there. SONGMICS makes 3-tier carts in 3.9, 5.5, and 7.5-inch widths — $28 to $45 on Amazon. Load the shelves with pods and dryer sheets, hook a paper towel roll on the side, and pull it out when you need it. One purchase, zero installation, immediate payoff.
3. How to Plan a Narrow Laundry Room Layout From Scratch
Most narrow laundry room makeovers fail for one reason: people buy things before they measure. A shelf that’s 2 inches too deep blocks the door swing. Machines that don’t leave clearance for the drain hose create a scramble. All of it is avoidable with 45 minutes of planning up front.
Here is the framework I use before touching a single product listing.
Step 1: Measure Everything First
Write down these five numbers:
- Floor-to-ceiling height — standard is 96 inches; older homes vary
- Wall-to-wall width — use the narrowest measurement
- Door swing clearance — or confirm it’s a pocket, barn, or bifold door
- Hook-up locations — where the plumbing rough-in and dryer vent are
- Window placement — if any, it affects shelf and cabinet positioning
Narrow laundry rooms typically run 48–72 inches wide. A 48-inch-wide room means single-wall layout only — code requires a 36-inch walking aisle, and with machines on one wall that leaves 12 inches for the opposite wall, which isn’t enough for appliances. A 60-inch-wide room opens up the galley option.
Step 2: Choose Your Appliance Configuration
Three configurations to consider:
- Side-by-side with counter above: Requires 54–60 inches of wall width. Good for rooms 5+ feet wide. Creates a natural folding surface at counter height.
- Stacked, single wall: 27–30 inches of wall width. Works in any narrow room. Best choice for rooms under 5 feet wide.
- All-in-one washer-dryer combo: The LG WM3555HWA (~$1,300) is 27 inches wide and only 24 inches deep — useful for rooms under 4 feet that need maximum front clearance.
Step 3: Decide Between Galley and Single-Wall
A galley layout runs appliances and storage on both long walls. It works at 60 inches or wider. Appliances go on one long wall; shelving, a folding station, and hanging space go on the opposite wall. This is the most efficient layout if you have the width for it.
A single-wall layout puts everything on one long wall. Works at any width. In a 48-inch-wide room, this is your only option. Stack the machines, add shelving above to the ceiling, and keep the opposite wall for a slim pegboard or nothing at all.
Step 4: Map Your Storage Zones
Plan three zones:
- Active zone — detergent, dryer sheets, stain remover. Place these within arm’s reach of the machines. Open shelves at eye level or a slim pull-out cabinet are ideal.
- Folding zone — a counter or fold-down wall shelf at 34–36 inches from the floor (standard counter height). You need at least 20 inches of depth to fold a standard shirt.
- Overflow zone — seasonal items, bulk supplies, extra hangers. Upper cabinets or high shelves above 70 inches from the floor work well here; these are accessed infrequently.
Step 5: Budget Breakdown
| Component | Budget | Mid-Range | High-End |
|---|---|---|---|
| Appliances — stacked pair | $1,100–$1,400 | $1,600–$2,200 | $3,000+ |
| Open shelving — 3 shelves | $40–$80 | $120–$200 | $300+ |
| Upper cabinets — 2 units | $150–$250 | $350–$600 | $1,000+ |
| Fold-down shelf | $35–$60 | $90–$160 | $250+ |
| Flooring — peel-and-stick | $50–$100 | $150–$300 LVP | $400+ tile |
| Full budget build total | $1,375–$1,640 |
Common Mistakes to Avoid
Forgetting the dryer vent path. In a tight space where the dryer sits flush against the wall, a periscope vent kit ($25 at any hardware store) redirects the exhaust at a 90-degree angle and saves 3–4 inches of clearance.
Shelves that are too deep. In a narrow room, 12 inches is enough for almost all laundry supplies. Anything deeper than 14 inches blocks your body when reaching, and in a 48-inch room that depth starts eating your walking aisle.
Skipping the door assessment. A standard inswing door needs 28+ inches of floor clearance to open. In a 4-foot room, that eats your entire entry zone. Pocket doors, barn doors, or bifolds recover that floor space at minimal cost — and none of them require structural changes.
4. Peel-and-Stick Wallpaper: The Renter’s Zero-Regret Update
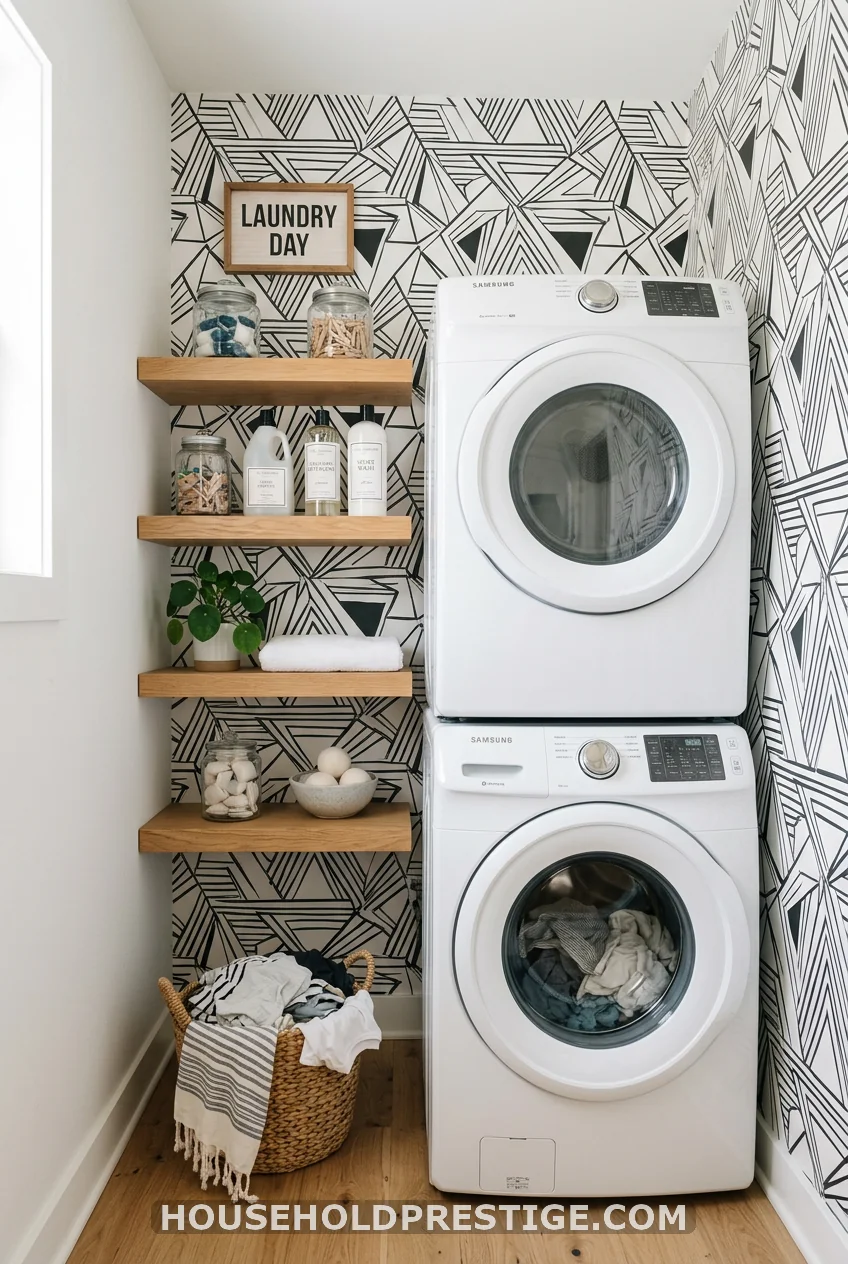
Pick the wall you see when you walk in and cover it in peel-and-stick wallpaper. Tempaper and NuWallpaper both make repositionable options starting at $1.99 per square foot. A single narrow wall — 6 feet wide by 8 feet tall — runs $95 to $120 in materials. One bold wall is the right move. You don’t need to paper all four.
5. Floating Shelves Instead of Upper Cabinets
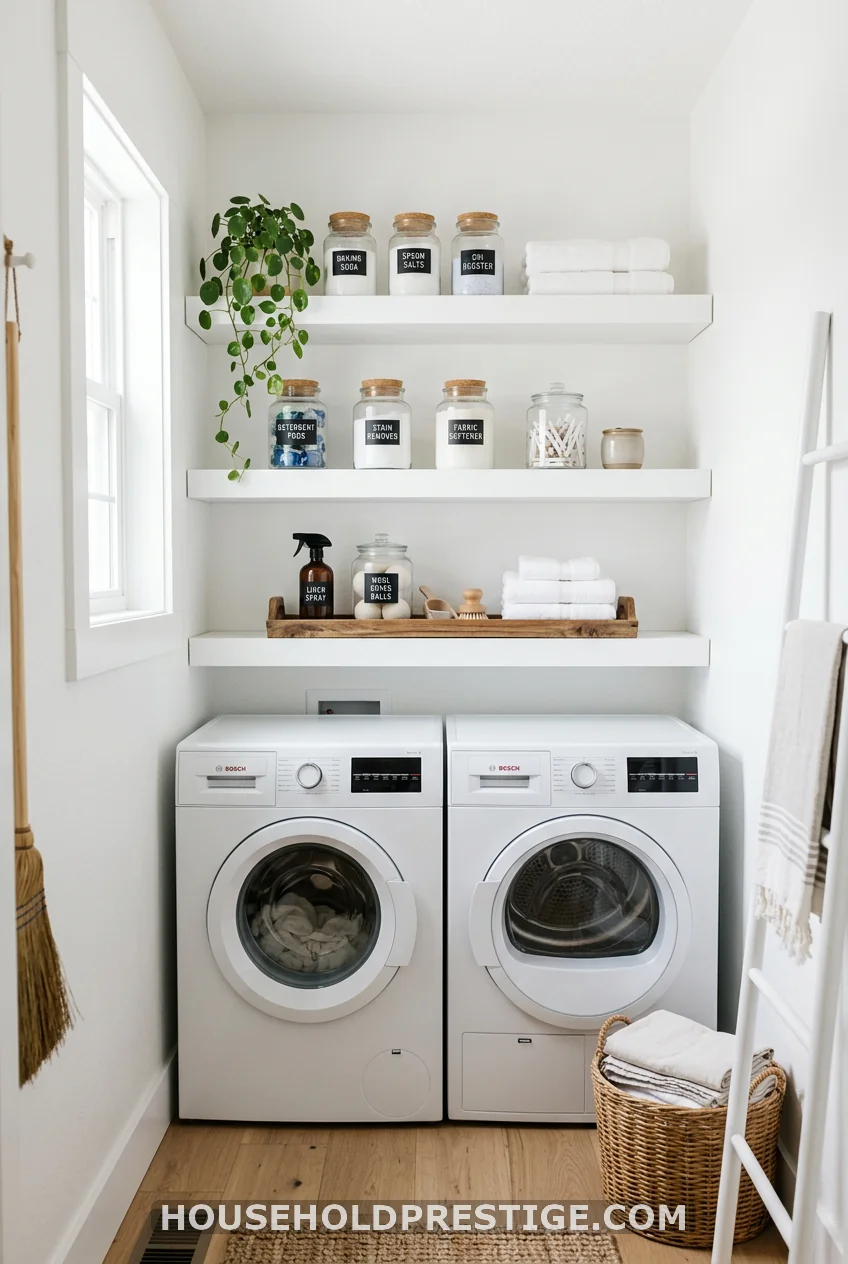
Upper cabinets add visual bulk in a narrow room. Cabinet doors need swing clearance to open, and in a tight space you’re constantly sidestepping them. Floating shelves give you the same storage with no doors — and visually, the wall reads as more open.
The right shelf depth for a laundry room is 10–12 inches. That fits a 100-oz detergent jug (typically 10–11 inches wide), a row of labeled glass jars, or a folded stack of towels. IKEA’s Bergshult shelf ($25 for a 47-inch length) paired with Sandshult brackets is a clean, minimal option. For a more adjustable system, Rubbermaid’s FastTrack rail system ($60–$90 for a starter kit) lets you reposition shelf heights over time without drilling new holes.
Spacing matters as much as depth. Leave 16–18 inches between shelf layers so you can reach the back row without hitting the shelf above you. Most installations are too close together, and the back third of every shelf becomes dead storage within a week.
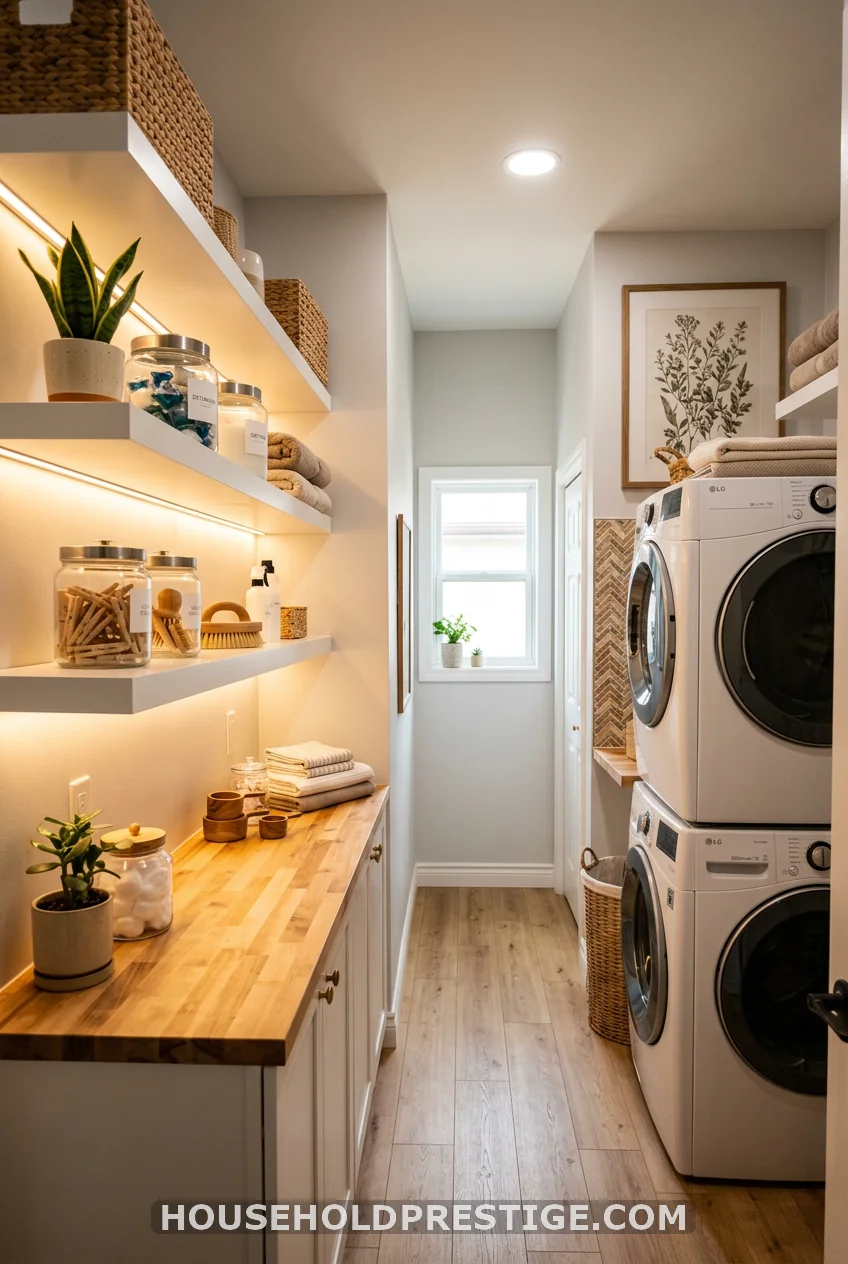
6. The Lighting Myth That Makes Narrow Rooms Feel Even Smaller
What most people assume: One bright overhead fixture is enough for a small room. Bright equals open.
What happens instead: A single ceiling fixture in a narrow laundry room creates flat, top-down light and harsh shadows along the walls. The walls look closer. The room feels like a corridor with the ceiling pressing down.
The myth: Brightness solves the problem.
The reality: Layering solves the problem.
A two-layer system works like this. Layer one is your existing ceiling fixture — keep it, it handles functional light for loading and unloading. Layer two is a strip of warm LED lights mounted under your upper shelves or cabinets, aimed at the counter and wall surfaces below. Plug-in under-cabinet LED strips (no electrician, no hardwiring) run 2700K–3000K for warm white light and cost $15–$30 for a 16-foot reel from Amazon or Home Depot.
The horizontal band of warm light at eye level visually widens the room. The eye reads the illuminated wall surface and interprets lateral space rather than depth. It’s not a design theory — it’s how human vision processes contrast and light gradients.
The bonus: Under-shelf lighting also makes it easy to read labels on your supply shelf at 6 a.m. without squinting at a shadow.
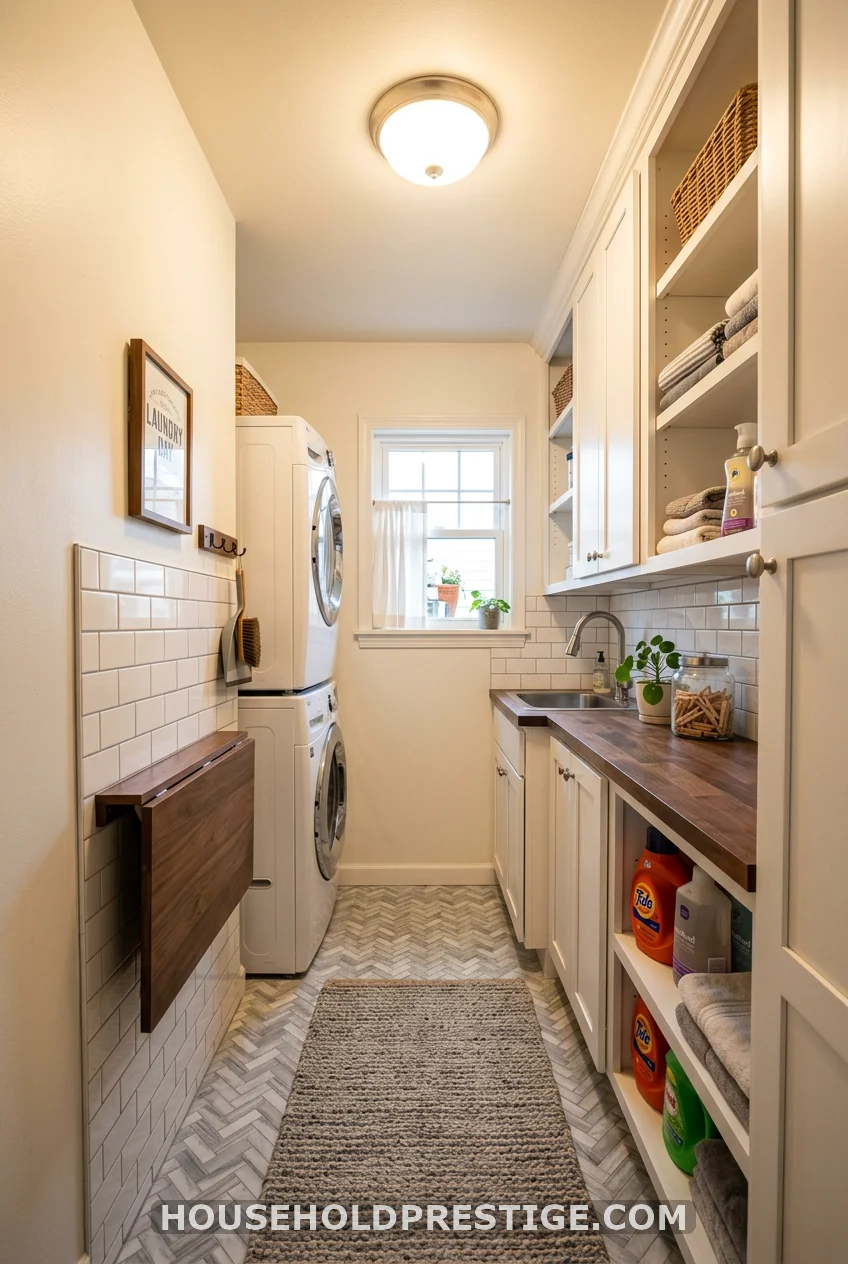
7. A Wall-Mounted Folding Station That Disappears
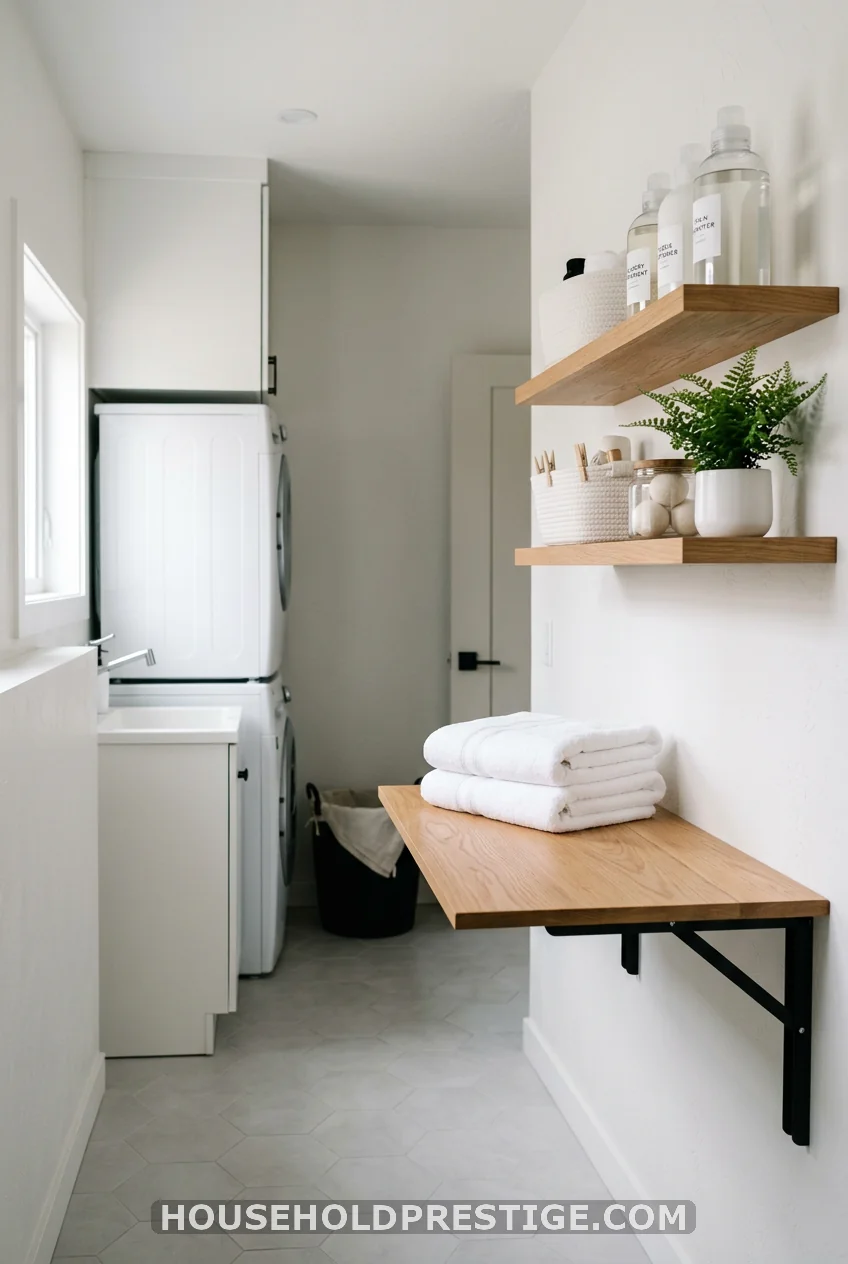
A narrow room almost never has floor space for a freestanding folding table. The solution is a fold-down shelf that mounts to the wall, opens flat when you need it, and folds flush when you don’t.
IKEA’s Norberg wall-mounted drop-leaf table ($70) is a minimal, clean option. Baxton Studio makes a Murphy-style cabinet version (~$150) that doubles as a small enclosed cabinet when folded up. Both mount at standard counter height: 34–36 inches from the floor. Open depth is 18 inches — enough for most folding tasks. Closed, they add 3–4 inches to the wall.
Installation note: Anchor into studs, not drywall alone. A loaded folding counter at waist height carries real downward force. A $10 stud finder and proper lag screws into two studs take 30 minutes with a drill and hold indefinitely. Skip this step, and the shelf eventually fails mid-fold, which is as bad as it sounds.
8. A Retractable Ceiling-Mounted Drying Rod
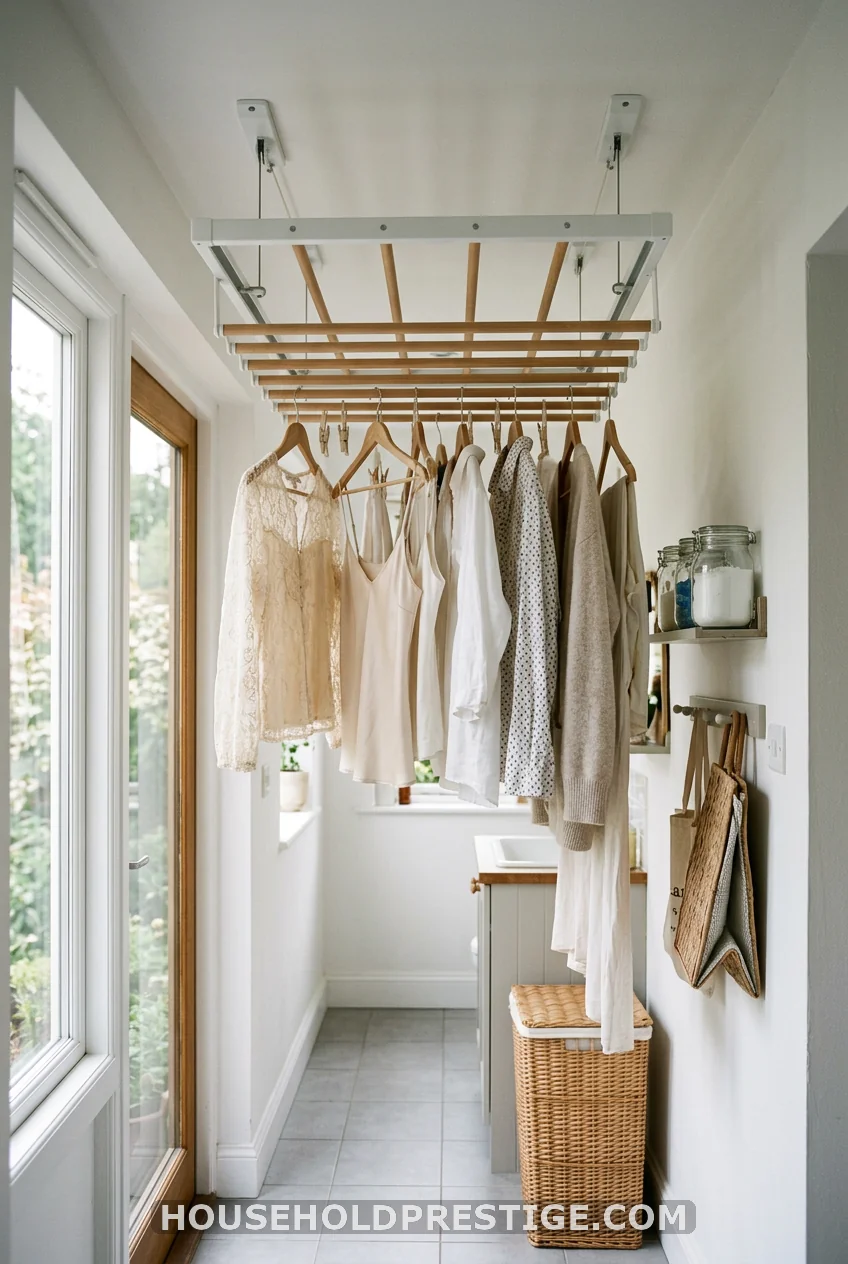
Floor space in a narrow laundry room is too valuable for a standing drying rack. A ceiling-mounted retractable drying rod solves this without sacrificing a single square foot.
When pulled down, the rod holds 10–15 garments above the washer or along the center of the room. When released, it retracts up to the ceiling and disappears. The Brabantia Wallfix wall-mounted version ($60) and the Aeroline ceiling model ($55) are both well-reviewed. Mount at 7–8 feet and load at shoulder height by pulling the line down. For delicates that need longer hang time, this beats any floor rack because it uses the one dimension narrow rooms have in abundance: height.
9. Paint the Ceiling a Contrasting Color
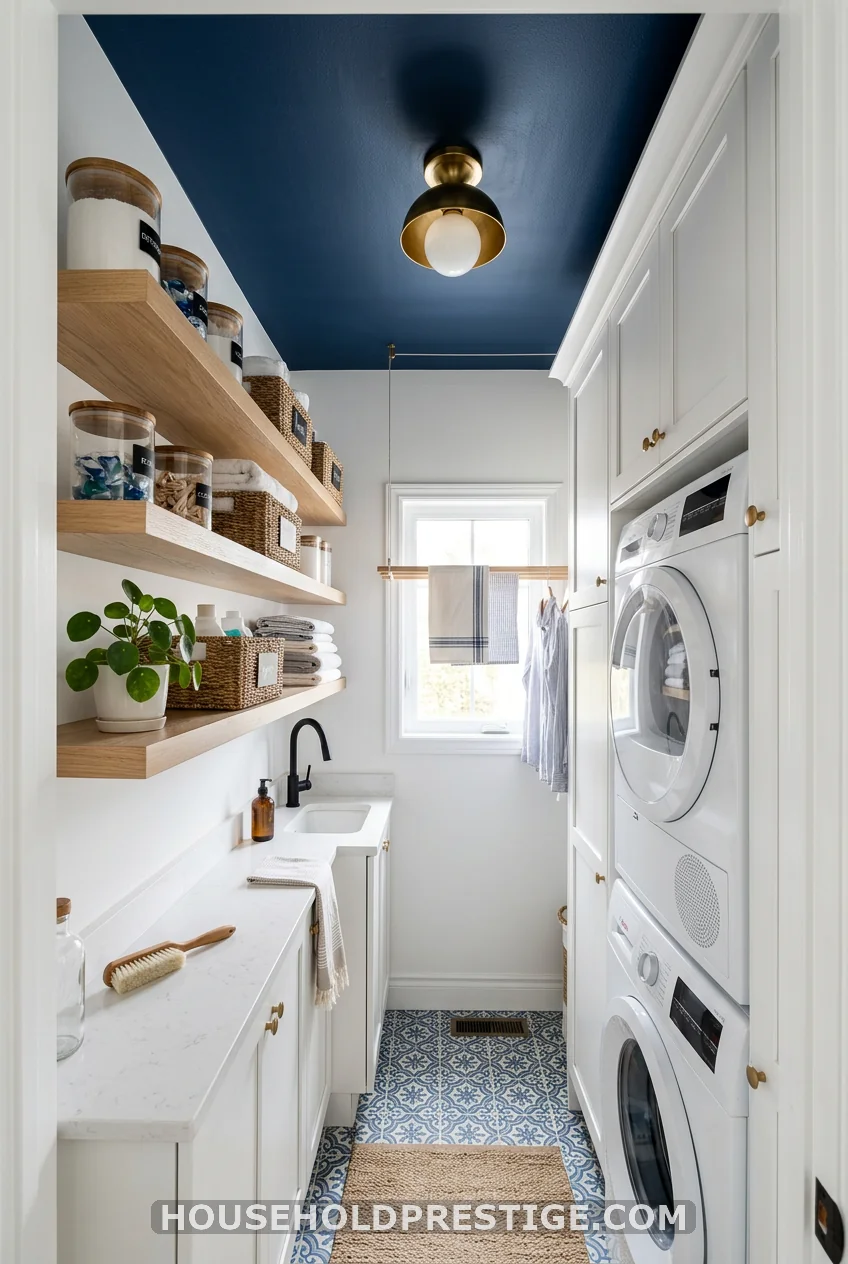
Paint the ceiling a saturated color — navy, sage green, deep terracotta — while keeping the walls white or light. One quart of ceiling paint covers the entire ceiling of a small laundry room and costs $15–$25. The eye reads “designed on purpose” instead of “unfinished basement.” The room feels intentional. Cost: one Saturday afternoon and $25 in paint.
10. Barn Door vs. Bifold: The Space-Saving Door Comparison
Standard inswing doors need 28–34 inches of floor clearance to swing open. In a 48–60-inch-wide room, that door eats a significant chunk of your usable entry zone. Two alternatives that fix this cleanly:
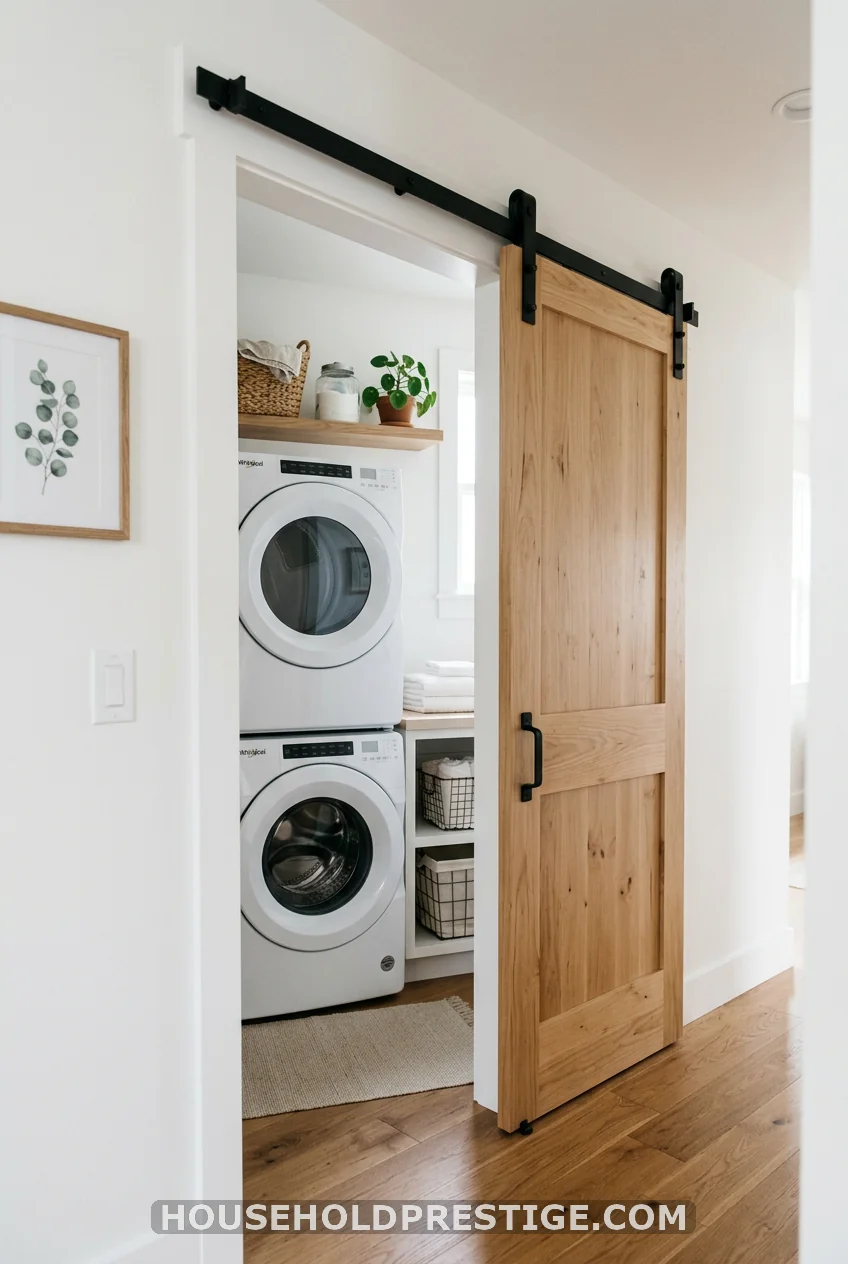
Barn doors slide along a wall-mounted track. They need wall space beside the opening equal to the door width — typically 32–36 inches. They need zero clearance into the room, which is the key win. A complete barn door kit including hardware and a basic slab door runs $120–$300. Visual payoff is high. One honest note: barn doors never fully seal, which matters if laundry noise is an issue at night.
Bifold doors fold accordion-style and need only 12–15 inches of clearance to open. They’re already installed in many laundry closets. If yours feel flimsy and dated, upgrade just the hardware: new pivot brackets, a bottom guide, and a center pull handle run about $30 total and make a cheap bifold feel solid and smooth.
Pocket doors are the cleanest option — they disappear entirely into the wall. The catch is that retrofitting them requires opening the adjacent wall framing, which is a contractor job starting around $800. Worth planning for if you’re doing a broader renovation. Not a DIY weekend project.
11. Under-Machine Pedestals with Pull-Out Drawers
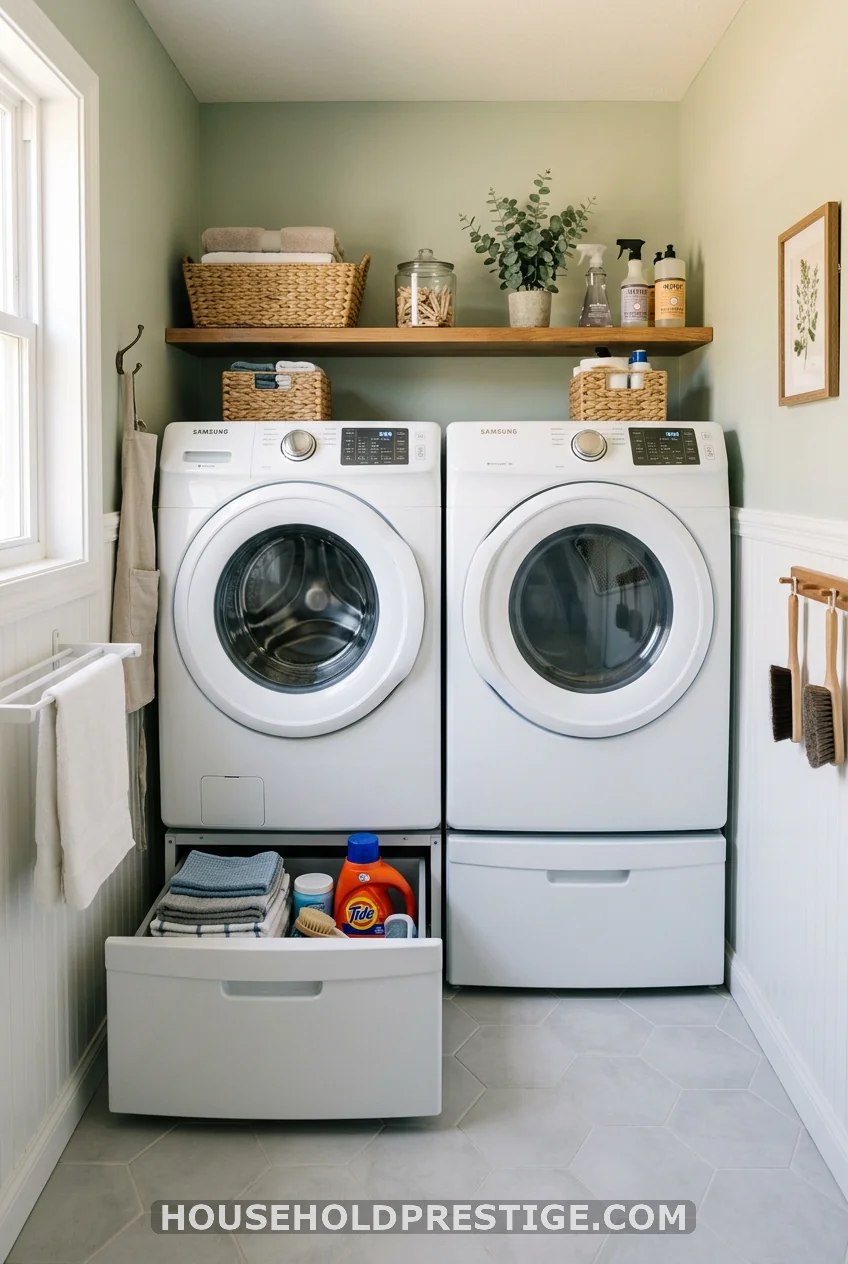
If you have side-by-side front-loaders and aren’t switching to stacked, pedestals are a legitimate storage addition. OEM pedestals from LG, Samsung, and Whirlpool raise machines 13–16 inches from the floor and include a pull-out drawer holding roughly 3 cubic feet of storage. Price: $200–$250 per pedestal from the manufacturer.
The practical use for that drawer space: a compact folded hamper, spare detergent, and the ironing board if it’s a slim one. Loading comfort is the secondary benefit — reaching into a front-loader drum at knee height repeatedly is hard on your back. Raising 13–16 inches puts the opening at hip level, which is a real quality-of-life improvement on load day.
One specification note: pedestals are brand-specific. LG pedestals only fit LG machines; Samsung only fits Samsung. Confirm the exact model number before ordering — there’s no universal fit.
When it’s worth it: If your side-by-side machines are already in place and a full layout change isn’t on the table, pedestals add storage and ergonomics without any demolition. Purely additive.
12. The Pegboard Wall for Laundry Tools
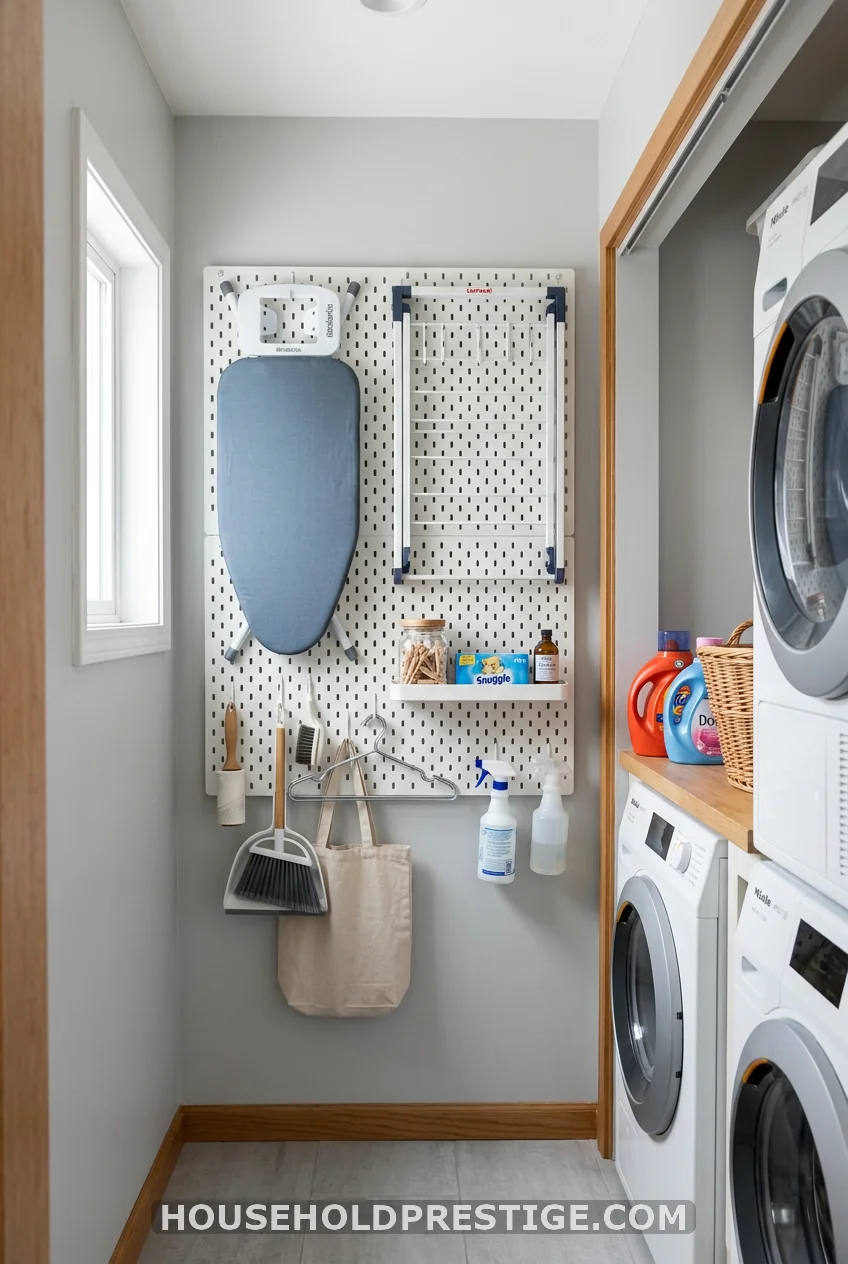
Mount a 24″ × 48″ pegboard on the wall across from your machines. Hang the ironing board, drying rack, lint roller, and cleaning spray bottles. Everything goes vertical; nothing touches the floor. A pre-cut MDF pegboard from Home Depot is $20. A pack of pegboard hooks costs $12. The full project runs $35 and takes one hour.
13. Tile Laid on the Diagonal
A straight tile set parallel to the long walls makes a narrow room feel like a hallway. A diagonal tile set at 45 degrees plays a visual trick: the eye follows the angled lines outward toward both walls rather than straight down the length of the room. The space reads wider without changing a single measurement.
This works best with square tile at 6 × 6 or 12 × 12 inches. Larger format tiles make the diagonal more dramatic; small mosaic tiles lose the effect. Standard porcelain tile at 12 × 12 runs $1.50–$3.00 per square foot. Professional installation adds $4–$8 per square foot. As a DIY project, diagonal cuts do require a tile saw — factor in a $50/day rental if you don’t own one.
Peel-and-stick vinyl tile can also be laid diagonally for a renter-friendly version at $0.75–$1.50 per tile. Cuts at the edges are less precise, but the visual effect still reads clearly on a laundry room floor.
14. A Tension Rod Under the Upper Shelf
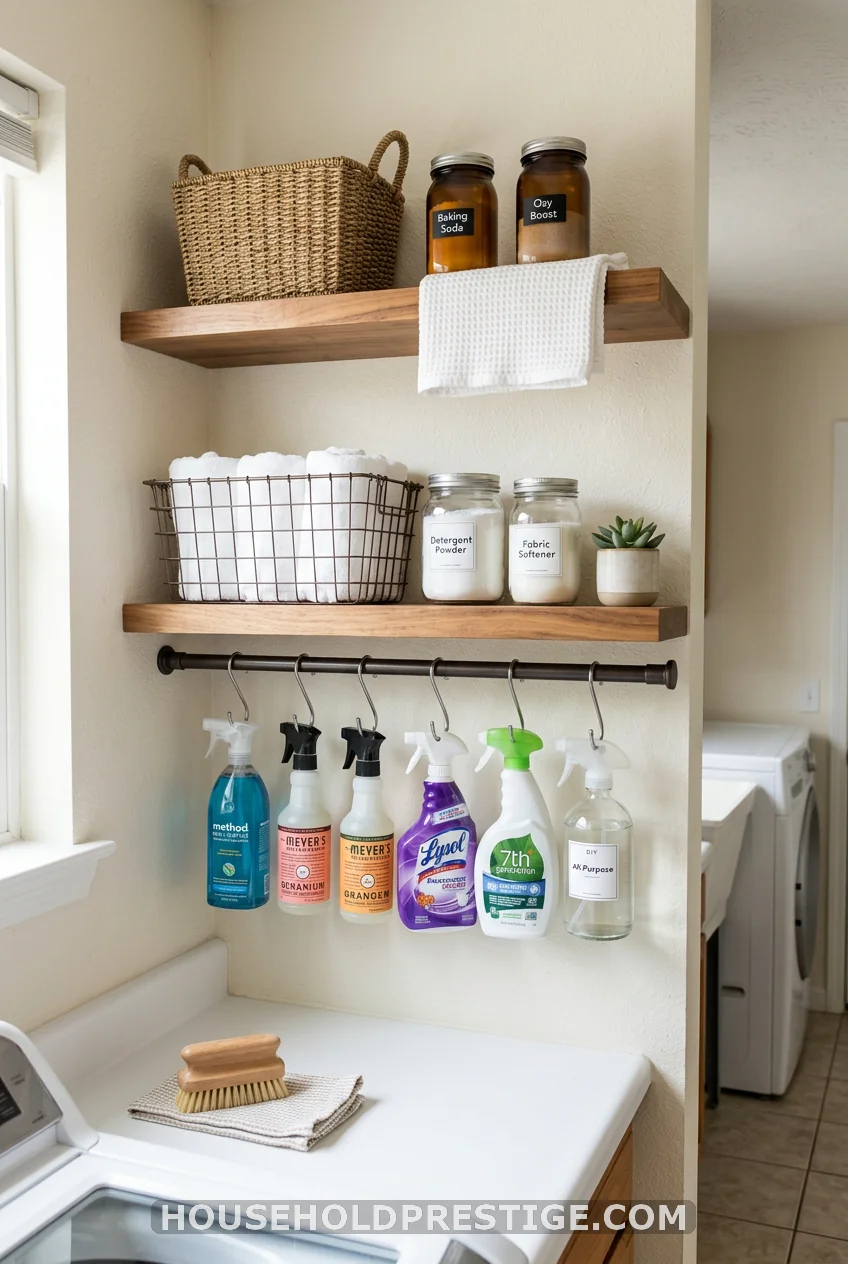
Install a tension rod between the undersides of two adjacent shelves — or inside a lower cabinet. Hang spray bottles from S-hooks below the rod. The shelf surface stays clear for baskets and jars, and your supplies stay visible and easy to grab. Tension rod: $6. A pack of ten S-hooks: $4. This costs less than a single organizer bin and takes five minutes.
15. The Galley Mudroom Combo
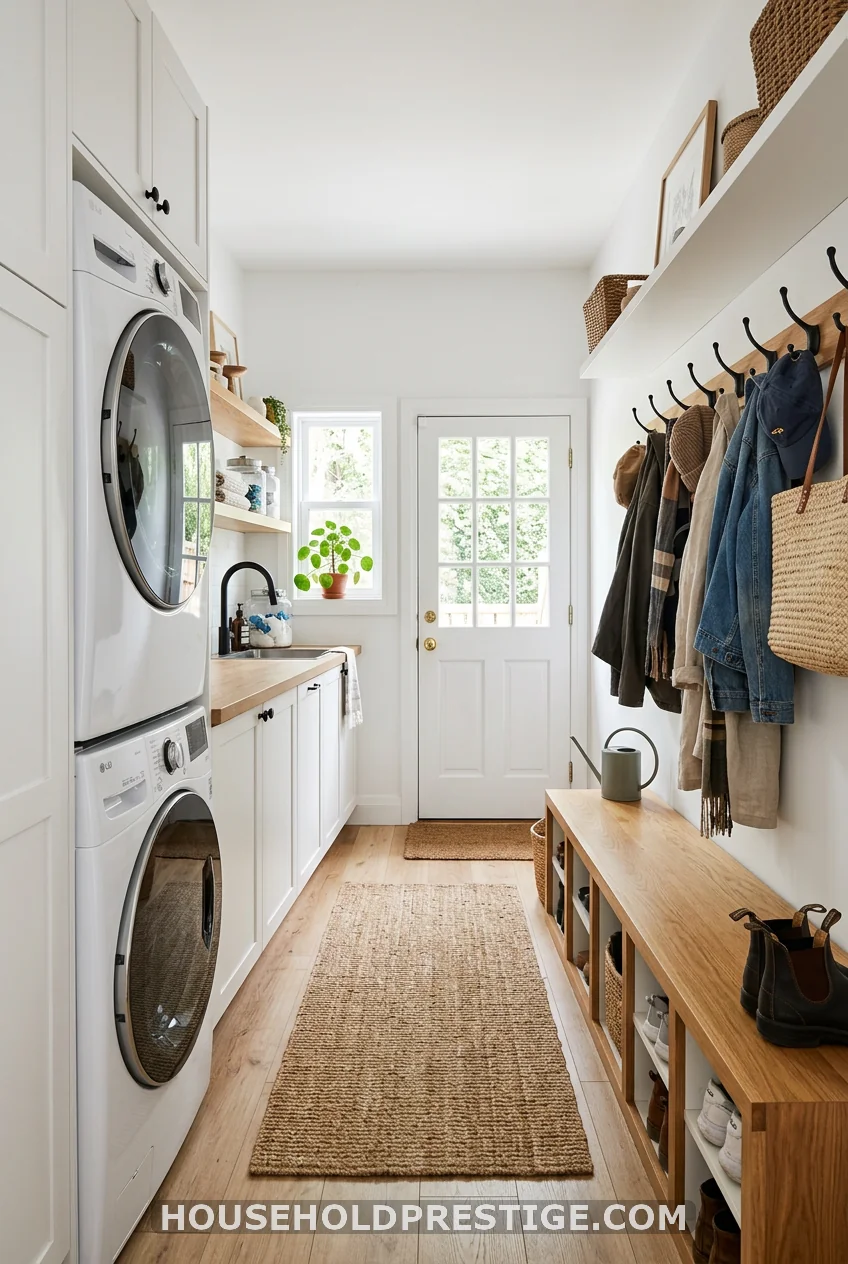
If your laundry room is also the entry point from a garage or back door, the galley mudroom layout is worth designing on purpose rather than tolerating by accident.
The setup: machines on one long wall, mudroom function on the other. The mudroom wall gets a bench at 17–19 inches high (standard seat height), open cubbies below for shoes, and a row of 4–6 sturdy coat hooks mounted 60–66 inches from the floor. IKEA’s Eket wall cabinet ($35 per unit) works well for shoe storage, and the Bjärnhult hook bar ($15) handles coats and bags. A 6-foot mudroom wall built from IKEA components runs $150–$250 total.
The critical measurement: leave a 36-inch walking path down the center of the galley. That’s code minimum and comfortable for two people passing each other. In a 60-inch-wide room, this means a 12-inch bench depth maximum on the mudroom side — slim, but functional for shoes and seating.
Pro tip: Put a pull-out hamper inside one of the bench cubbies. Coming in from outside, you drop dirty clothes straight into the hamper without carrying them to another room. The load is already sorted before it ever reaches the machine.
16. Magnetic Side-Panel Storage
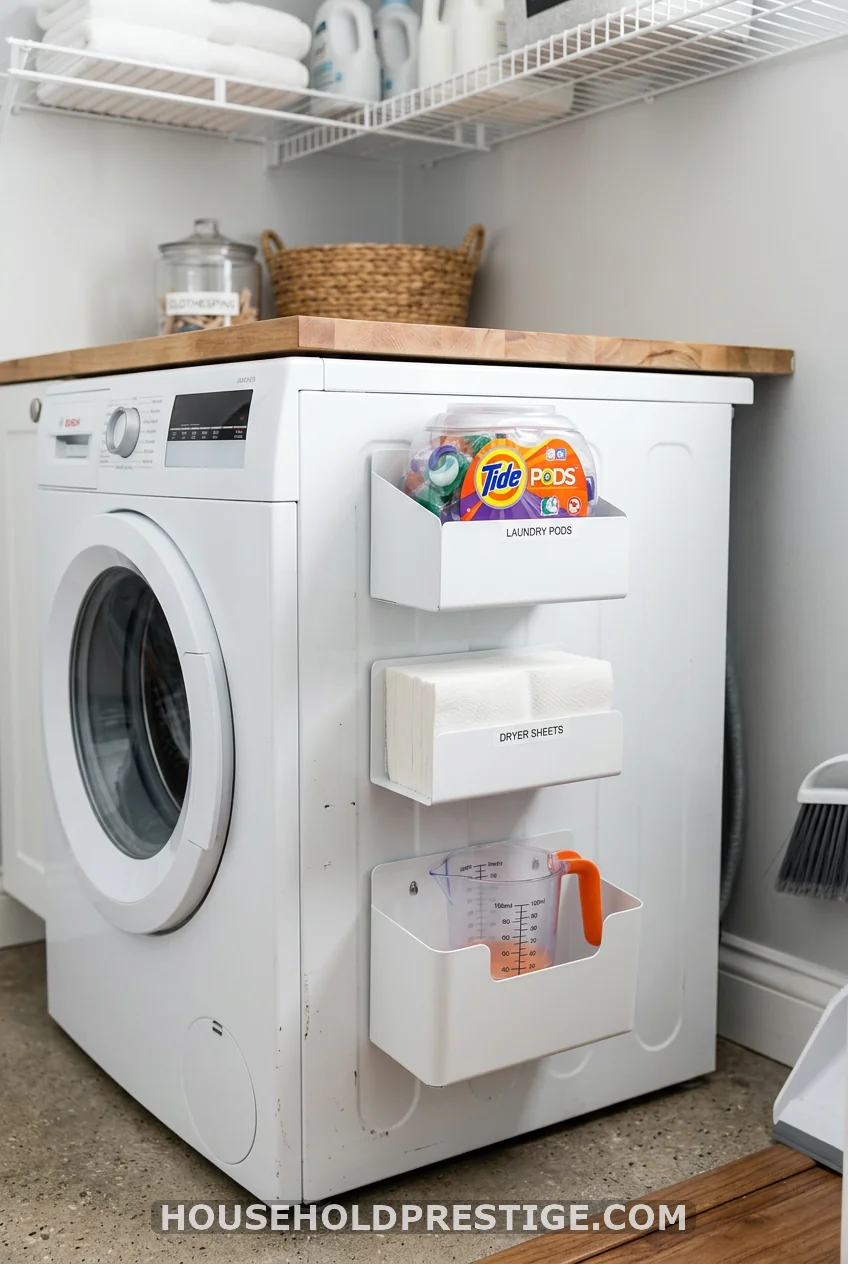
The side panels of most modern front-loaders are magnetic. A set of magnetic storage bins — $15 to $25 for a 3-pack — sticks directly to the machine and holds pods, measuring cups, or stain sticks right where you need them. No tools, no holes, no installation. For renters, this is the highest return-per-dollar storage option in this entire list.
17. Vertical Shiplap or Board and Batten
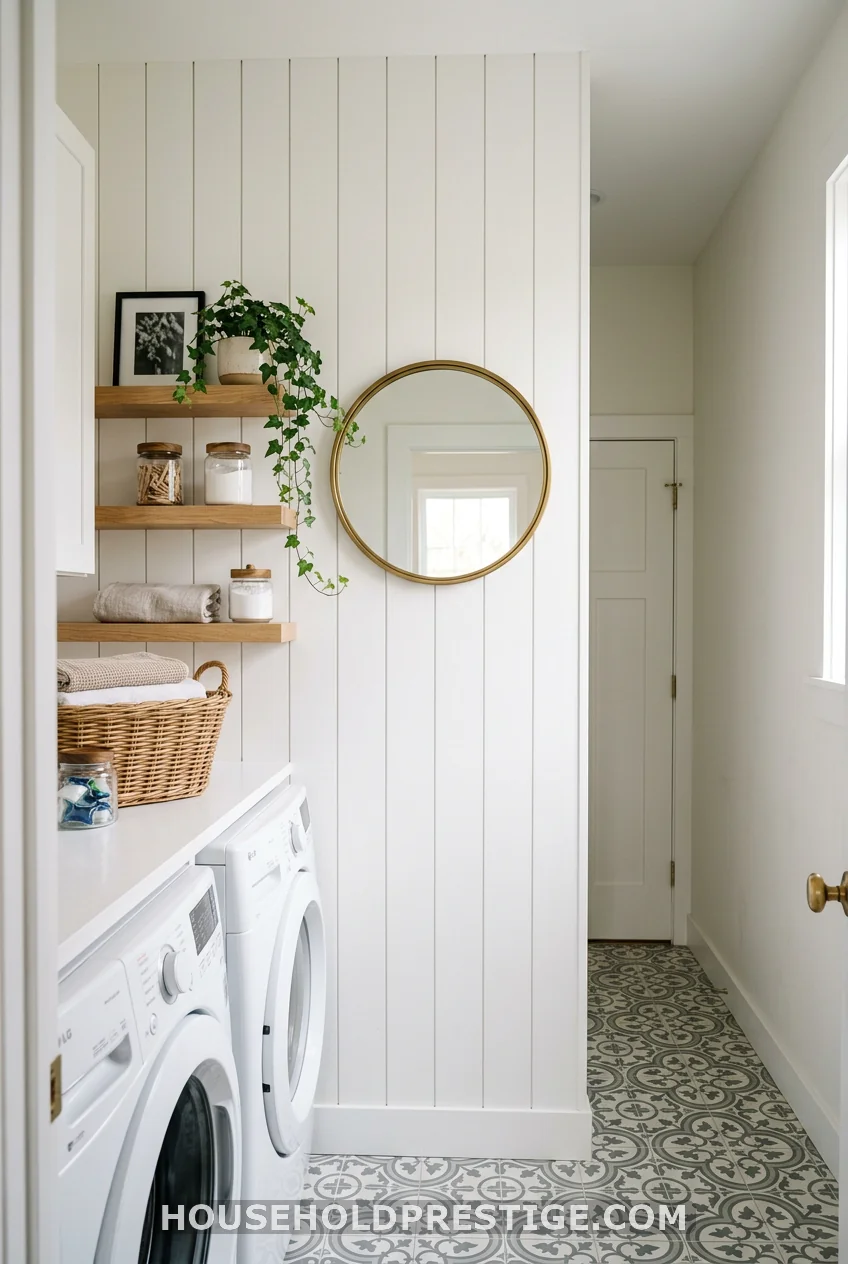
Horizontal shiplap is everywhere right now. In a narrow room, you want vertical lines instead. Vertical shiplap or board and batten pulls the eye upward, adding perceived height to a room that cannot afford to feel lower than it is.
Vertical shiplap at 4–6-inch plank width with 1/8-inch gaps between boards creates a rhythmic pattern that reads as a designed wall, not just a surface treatment. Paintable MDF boards from a lumber yard run $0.40–$0.80 per linear foot. For a wall that’s 8 feet high and 5 feet wide, materials run $60–$90 plus paint.
Board and batten is simpler to execute: a horizontal baseboard at the bottom, vertical battens every 16–20 inches up the wall, and a cap rail at chair-rail height. Total material cost for one accent wall is usually under $50. Both treatments work best on the wall across from your machines — the one you look at every time you do laundry.
A Few Final Thoughts
Your narrow laundry room isn’t the design problem it feels like on a Monday morning with laundry spilling out the door. It’s a tight space with exactly as much potential as you’re willing to plan for.
Start with the layout framework in item #3 if you’re doing a real overhaul — knowing your dimensions makes every other decision faster and cheaper. If you want fast wins this weekend, the gap cart, the tension rod, and the magnetic side bins together cost under $60 and take less than an hour to set up.
Every idea in this list treats the narrow footprint as a given and finds the space anyway. Vertical storage, dual-purpose furniture, optical tricks with tile and light — these aren’t workarounds. They’re just good design for what the room is.
Frequently Asked Questions
What is the minimum width for a laundry room to use a galley layout?
The minimum for a functional galley laundry room is 60 inches (5 feet) of wall-to-wall width. This leaves the required 36-inch walking aisle down the center, with 12 inches of depth on each side for storage. Rooms narrower than 60 inches need a single-wall layout.
Can you stack any washer and dryer together?
No. Machines need to be the same width and typically from a compatible product line. Most manufacturers sell a specific stacking kit that locks the dryer to the washer during spin cycles. Never stack without a kit — the top unit can shift. Check your brand’s compatibility chart or call their support line before purchasing.
What’s the best flooring for a narrow laundry room?
Luxury vinyl plank and porcelain tile are the two best choices — both handle water, moisture, and machine vibration well. For a rental or a budget update, peel-and-stick vinyl tile holds up for two to four years with proper seam treatment. Avoid laminate and solid hardwood near appliances; both are vulnerable to water from hose failures or overflow.
How do I stop a narrow laundry room from smelling musty?
The most common cause is a front-loader door gasket that stays wet between cycles. Leave the door open 2–3 inches after every load. Wipe the rubber gasket with a white vinegar cloth weekly. A small wall-mounted exhaust fan ($35–$60) wired to the light switch runs automatically during use and pulls humidity out of the room without requiring a window.
Are peel-and-stick tiles durable enough for a laundry room floor?
For light to moderate foot traffic on a dry floor, yes. The failure point is usually the edges lifting near the machines from vibration and humidity cycling. Press all seams with a wallpaper seam roller when installing, apply a bead of floor adhesive pen under any edge near the machine feet, and the tiles hold well for two to four years. Full porcelain tile installation is a better long-term investment, but peel-and-stick is a solid renter or staging solution.