

There’s this specific kind of dread that hits when you open a laundry room cabinet and a rogue detergent bottle falls out and takes three more things with it. Sound familiar? I’ve been there. Laundry rooms are often the most neglected room in the house from a design standpoint — and the cabinets? Usually, an afterthought bolted up in whatever space was left over.
Here’s what I’ve learned after completely overhauling my own laundry room and obsessively researching what works: laundry room organization cabinets aren’t just about looking pretty in photos. They’re about building a system where every wash load flows from dirty to folded without you ever hunting for the stain remover. These 25 ideas go well beyond what most roundups cover — you’ll find real measurements, specific brands, step-by-step breakdowns, and the common mistakes that waste hundreds of dollars. Let’s get into it.
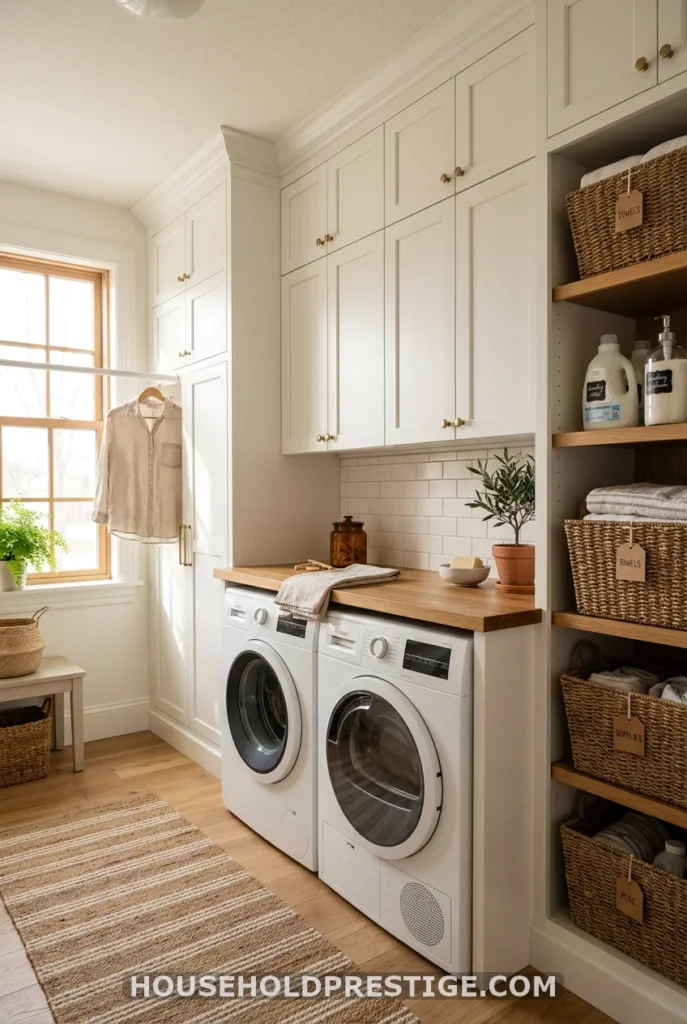
1. Floor-to-Ceiling Upper Cabinets
Most laundry rooms waste 18 to 24 inches of dead space above standard upper cabinets. Floor-to-ceiling cabinets close that gap and give you a place to store seasonal items, spare detergent, and backup cleaning supplies out of the way but within reach. IKEA’s SEKTION pantry tall units max out at 90 inches — enough to reach most standard 9-foot ceilings with a simple trim piece at the top.
2. Upper Cabinets Above the Washer and Dryer with a Pull-Down Shelf
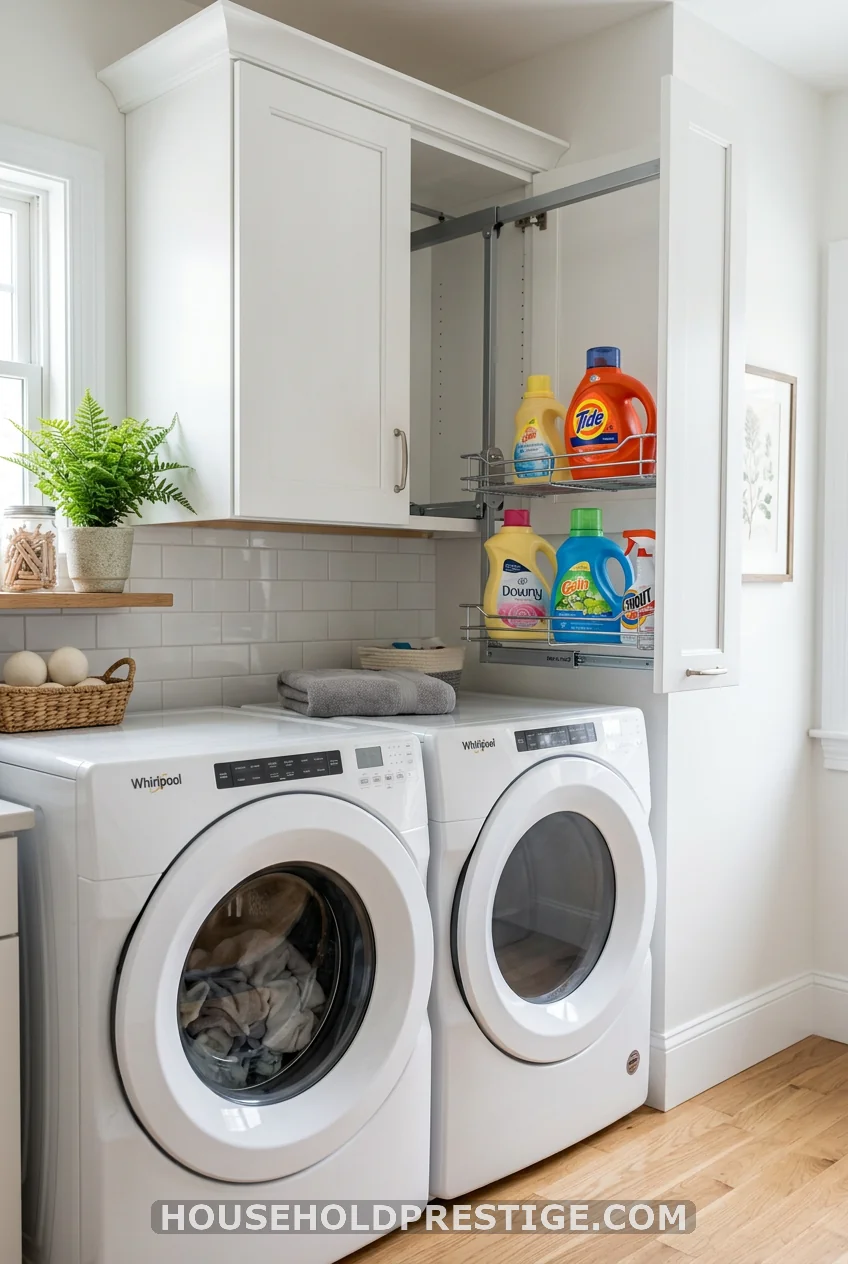
This is the single most functional upgrade you can make to a laundry room, and almost nobody talks about the details of doing it right. Most people slap cabinets up above their appliances, can’t reach anything inside without a step stool, and then just pile stuff on top of the machines instead. A pull-down shelf inside those cabinets changes everything.
Why It Works
Your washer and dryer sit between 36 and 43 inches off the floor. Standard upper cabinets installed with proper clearance have their bottoms at about 54 to 60 inches. If you’re 5’4″, anything beyond the front row of that cabinet is basically invisible. A pull-down shelf mechanism — essentially a spring-loaded rack that swings the shelf content down to counter height — solves the reach problem completely and turns dead cabinet depth into usable daily storage.
Dimensions to Know Before You Start
- Clearance between appliance top and cabinet bottom: 18 inches minimum (don’t go less — you need room to lift the lid on top-loaders and pull laundry from drum-style)
- Cabinet depth: 12 to 15 inches for uppers (standard kitchen cabinet depth; anything deeper blocks loading access)
- Width per cabinet: 24 to 36 inches works best; wider than 36 inches gets structurally awkward
- Pull-down shelf capacity: most hardware handles 22 to 44 lbs — more than enough for detergent, softener, and stain spray bottles
Step-by-Step Installation
- Measure and mark the cabinet bottom height. From the floor, measure up 54 to 60 inches and mark a level line across the wall. Use a 4-foot level. Do not eyeball this.
- Locate studs. Use a magnetic or electronic stud finder. Mark every stud center along your line with painter’s tape. You need to hit at least two studs per cabinet.
- Install a ledger board. Cut a 1×3 or 1×4 board to your cabinet run width. Screw it into studs along your level line. This supports the cabinet weight while you position and fasten.
- Hang the cabinets. Rest each cabinet on the ledger board while you drill 3-inch cabinet screws through the cabinet back and into studs. Use two screws per stud. Check level after each cabinet. Join adjacent cabinets together with 1.25-inch cabinet screws through the stiles.
- Install the pull-down shelf hardware. The Häfele Dispensa-Boy (model 45.19.xxx series) is the gold standard here — $65 to $125 depending on the size. It mounts to the interior cabinet walls and folds down on a spring mechanism. Follow the template included in the box; the installation takes about 30 minutes with a drill and a square.
- Mount cabinet doors. Add soft-close hinges for quiet, controlled closing. Blum CLIP top hinges run about $4 to $8 each and are available at any cabinet hardware supplier.
Materials and Costs
| Item | Budget Option | Mid-Range | High-End |
|---|---|---|---|
| 30″ wide upper cabinet box | IKEA SEKTION: $80 | Hampton Bay (Home Depot): $140 | Kraftmaid: $350 |
| Pull-down shelf hardware | Häfele 45.19.060: $65 | Häfele Dispensa-Boy Plus: $95 | Rev-A-Shelf 591 series: $125 |
| Soft-close hinges (pair) | Blum CLIP top: $8 | Grass TIOMOS: $12 | — |
| Cabinet screws and anchors | $8–$12 | — | — |
| Total per 30″ cabinet | ~$165 | ~$260 | ~$500+ |
DIY installation saves you $200 to $400 in labor vs. hiring a handyman. The skill level required is intermediate — if you’ve hung a heavy mirror or built IKEA furniture, you can do this.
The Pro Move
Add a magnetic child-safety latch on the interior — around $6 on Amazon — if you store any cleaning chemicals in these cabinets. Even if you don’t have kids now, future-you (or a future buyer of your home) will thank you.
Common Mistakes to Avoid
- Installing too low. Anything under 18 inches of clearance above the appliances makes loading top-load washers miserable. Measure twice.
- Skipping the stud check. Cabinet screws into drywall anchors alone will not hold a loaded cabinet long-term. Always hit studs.
- Buying 24-inch-deep cabinets. Kitchen base cabinet depth is 24 inches — but for wall cabinets in a laundry room, 24 inches deep blocks your ability to open front-loader doors fully. Stick to a 12 to 15-inch depth.
- Not finishing the bottom of the cabinet. Raw plywood facing down looks unfinished. Add iron-on edge banding in a matching veneer — about $8 for a roll — for a clean look.
3. Floating Wall Cabinets at Eye Level for Daily Essentials
Think of these as your “active” cabinets — the ones you open every single laundry day. Install them at 48 to 54 inches from the floor (bottom of cabinet) so the shelf inside sits right at hand height. Keep only what you use every week in here: detergent, stain pen, dryer sheets, lint roller. If it doesn’t get used at least twice a week, it doesn’t earn prime real estate.
4. Glass-Front Cabinet Doors
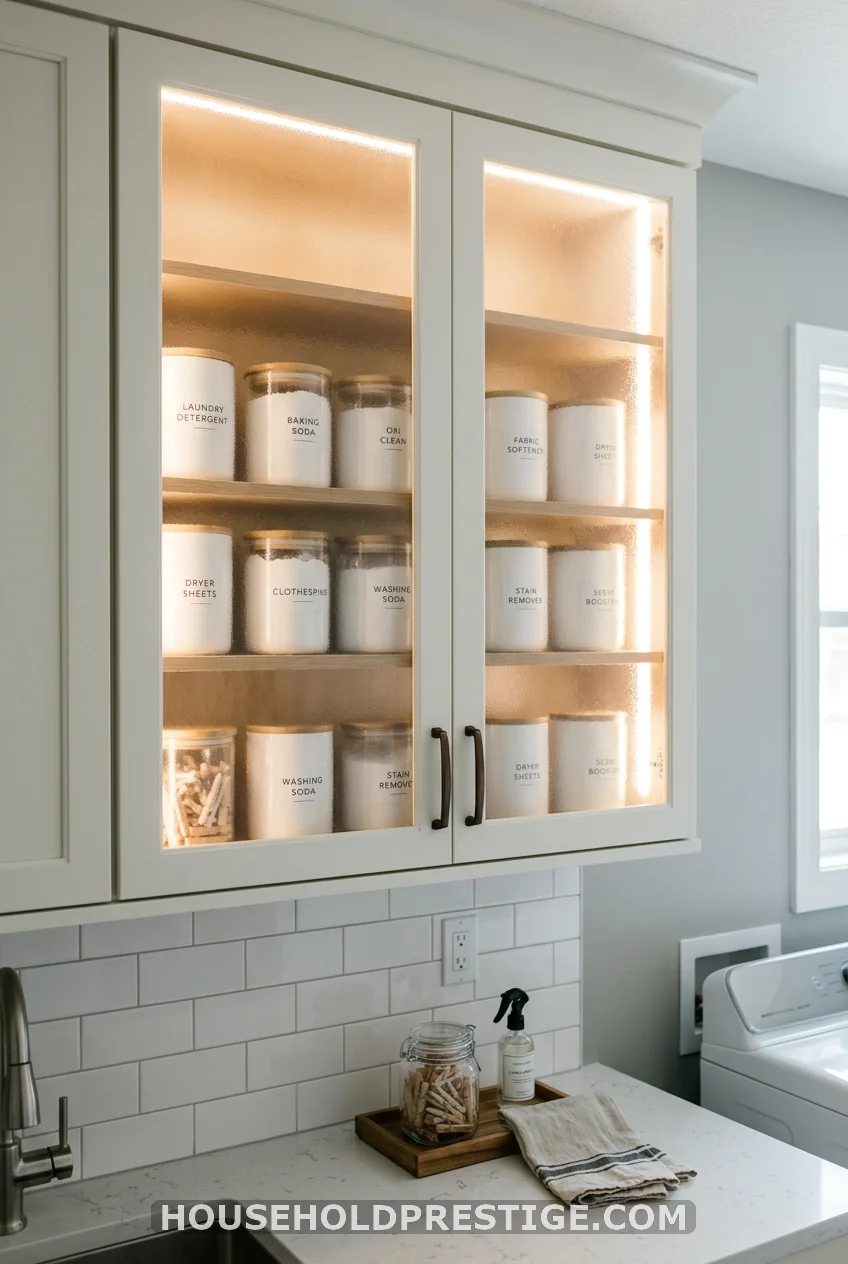
Glass fronts work best when you’ve already committed to uniform containers inside. Decant your powder detergent into a tall canister, your pods into a matching jar, and your stain sprays into a row of matching bottles. When everything behind the glass looks intentional, the cabinets become a design feature rather than storage you’re hiding. Frosted glass is more forgiving than clear — it blurs the imperfect days. IKEA sells the JUTIS glass door as an add-on for SEKTION and HAVSTA cabinets, starting around $25 per door.
5. Beadboard Cabinet Doors for Farmhouse Character
Flat-front cabinets look sleek. Beadboard looks lived-in and warm. The vertical grooves add texture without cluttering a small laundry space. Home Depot stocks beadboard cabinet doors (Hampton Bay Holden series) as replacements, and you can swap out plain doors for beadboard versions on most standard cabinet boxes for around $30 to $60 per door. Paint them in Benjamin Moore White Dove OC-17 for the classic cottage look that pins well.
6. A Built-In Folding Counter Over the Appliances
If there’s one thing that makes laundry less painful, it’s having a dedicated surface for folding right where the clothes come out. No more carrying a warm pile to the bedroom. A counter over the appliances — ideally 36 inches deep if your machines are side-by-side — can be as cheap as a pre-cut IKEA BADELUNDA butcher block panel ($60 for 98″x25″) trimmed to width, or as premium as 2cm-thick quartz at $50 to $80 per square foot installed.
For DIY: rest the counter on top of the machines (if they’re flat-top front-loaders) and screw L-brackets into the wall studs behind to stabilize it. Add a 1×2 wood cleat along the wall as a back support. The whole build takes about 2 hours. Sand and oil the butcher block with food-safe mineral oil ($8 at any hardware store) to protect it from the inevitable detergent splash.
7. Pull-Out Hamper Drawers Inside a Base Cabinet
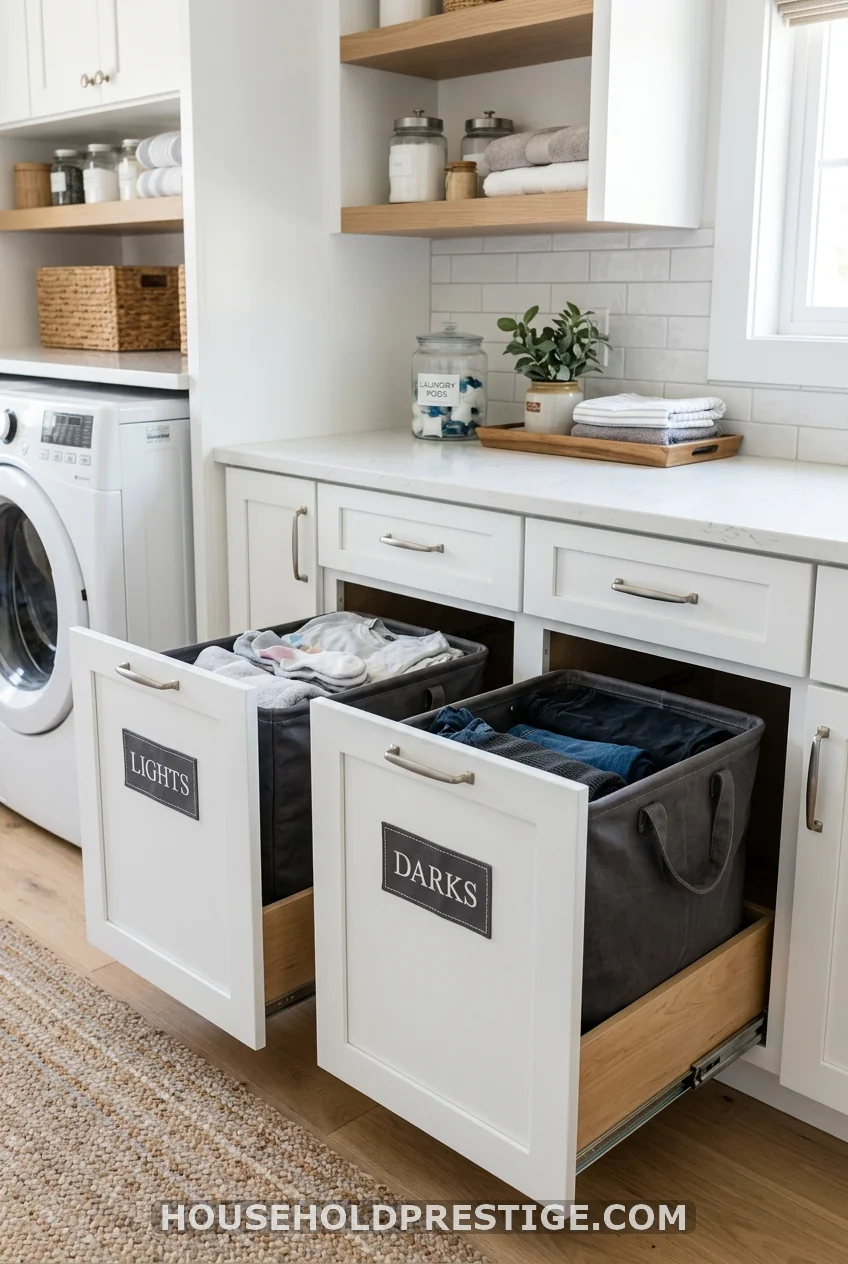
Pre-sorting laundry is one of those habits everyone claims they do, but almost no one follows through on — because the system makes it inconvenient. A base cabinet with two or three pull-out hamper drawers changes the math. You drop clothes directly into the labeled bag (Lights / Darks / Delicates) as you undress. On laundry day, you lift the bag out and carry it straight to the machine.
Rev-A-Shelf makes the best pull-out hamper system on the market: their 18-inch two-bag unit (model RAS-18-2-WH) fits inside a standard 18-inch-wide base cabinet and runs about $120 to $180 depending on the retailer. The canvas bags are machine washable. The drawer slides out smoothly on full-extension ball-bearing slides rated for 75 lbs.
For the cabinet itself, an 18-inch base cabinet from IKEA SEKTION runs around $110 to $140. Total build cost: under $320 for a sorting system that takes about 90 minutes to assemble and install.
8. Base Cabinets with Deep Pull-Out Drawers
Skip the doors-that-open-to-a-cave approach for base cabinets. Full-extension pull-out drawers bring everything in a deep cabinet to you, instead of requiring you to kneel and reach. For a laundry room base cabinet, a drawer set with three different heights — shallow on top for small tools, medium for cleaning bottles, deep on the bottom for bulk items — makes sense. IKEA MAXIMERA drawers retrofit into SEKTION bases for around $35 to $55 per drawer.
9. The Pull-Out Ironing Board Cabinet
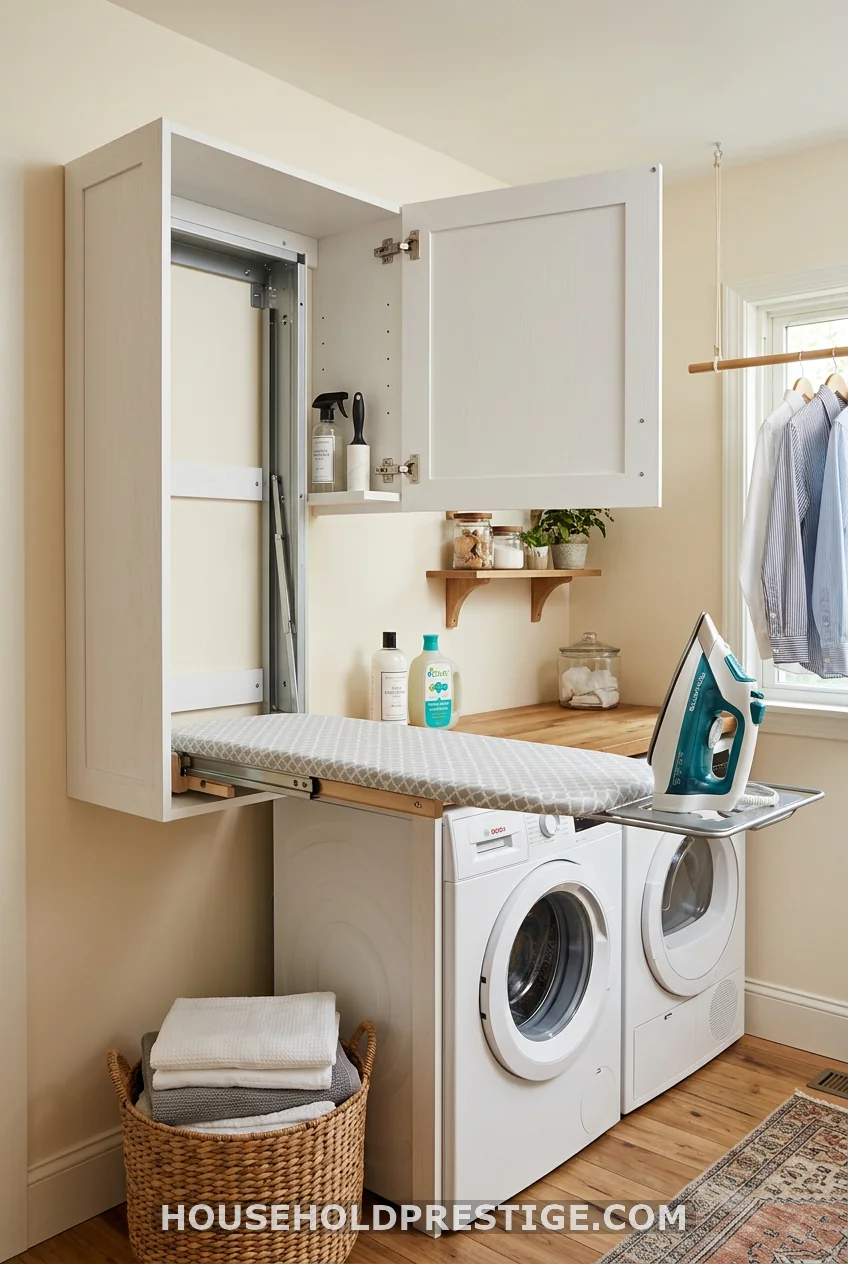
If you’ve been setting up a freestanding ironing board in the middle of the room like it’s 1987, this will feel like witchcraft. The Iron-A-Way ANE-42 is a wall-recessed ironing board cabinet that mounts flush into the wall between two studs. Open the door, and a full-size ironing board folds out. Close the door, and the wall looks like a cabinet. Retail price is around $200 to $350, and installation requires cutting an opening between studs — a 4-hour DIY project with a drywall saw and basic carpentry skills, or a half-day handyman call.
10. A Cabinet with a Built-In Hang-Dry Rail
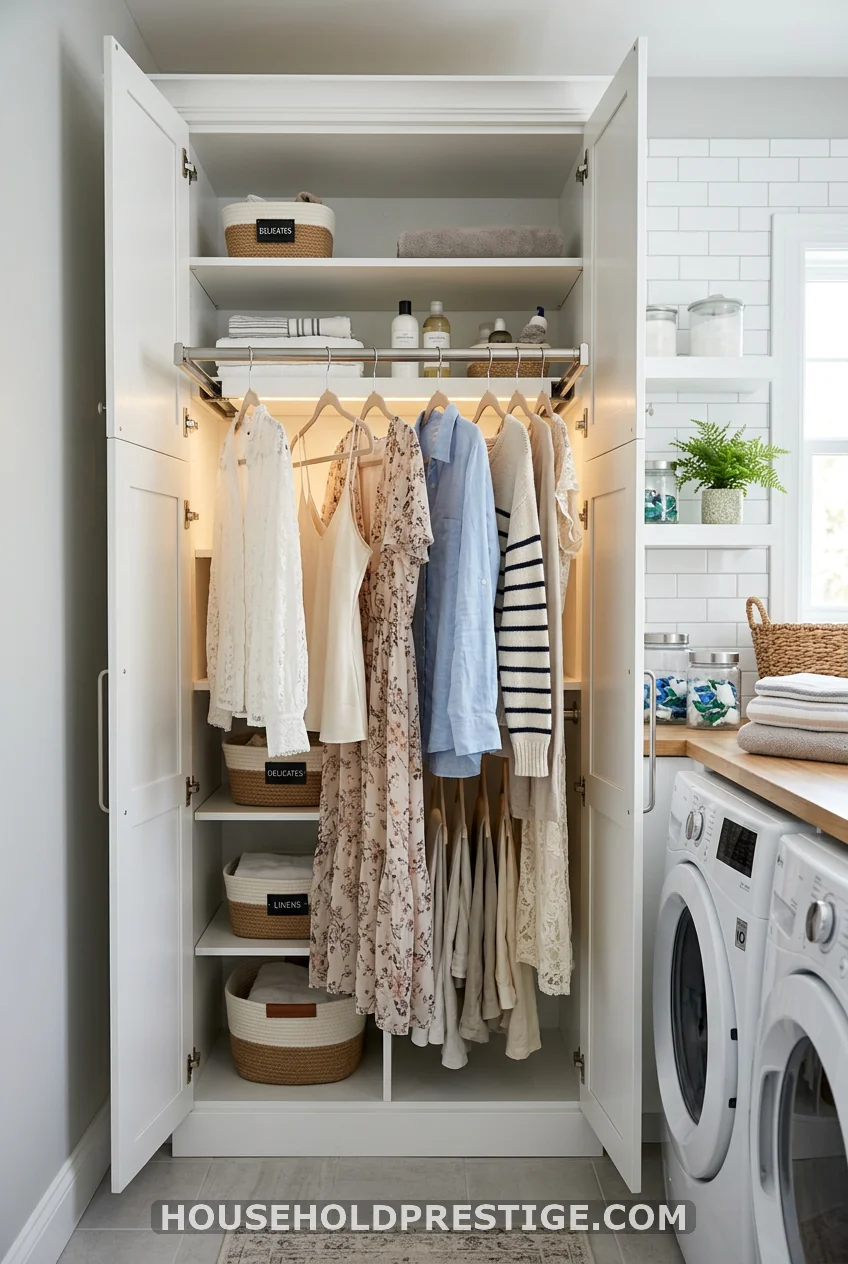
Cashmere sweaters, silk blouses, anything with a “lay flat to dry” tag — they all need somewhere to go that isn’t your shower rod. A tall cabinet (at least 60 inches interior height) with a mounted hang-dry rail inside solves this. Mount a simple chrome closet rod — a standard 18-inch closet pole, available at Home Depot for $8 — between two shelf pin holes inside the cabinet at the top. Clothes hang inside, the door closes, and nobody sees the inside of a wet sweater on laundry day.
11. A Dedicated Detergent Drawer with Labeled Dividers
One drawer. One job. Your detergent, pods, stain stick, oxygen bleach, and dryer sheets all live here with a drawer organizer insert dividing them into lanes. The Container Store sells adjustable bamboo drawer dividers for $12 to $20 that fit most standard drawer widths. Label each lane with a label maker (Brother P-Touch, around $20) so anyone in the household can put things back in the right spot. This sounds small, but it eliminates the “where’s the stain remover” emergency that happens mid-laundry every single time.
12. Corner Cabinet Storage with a Lazy Susan Insert
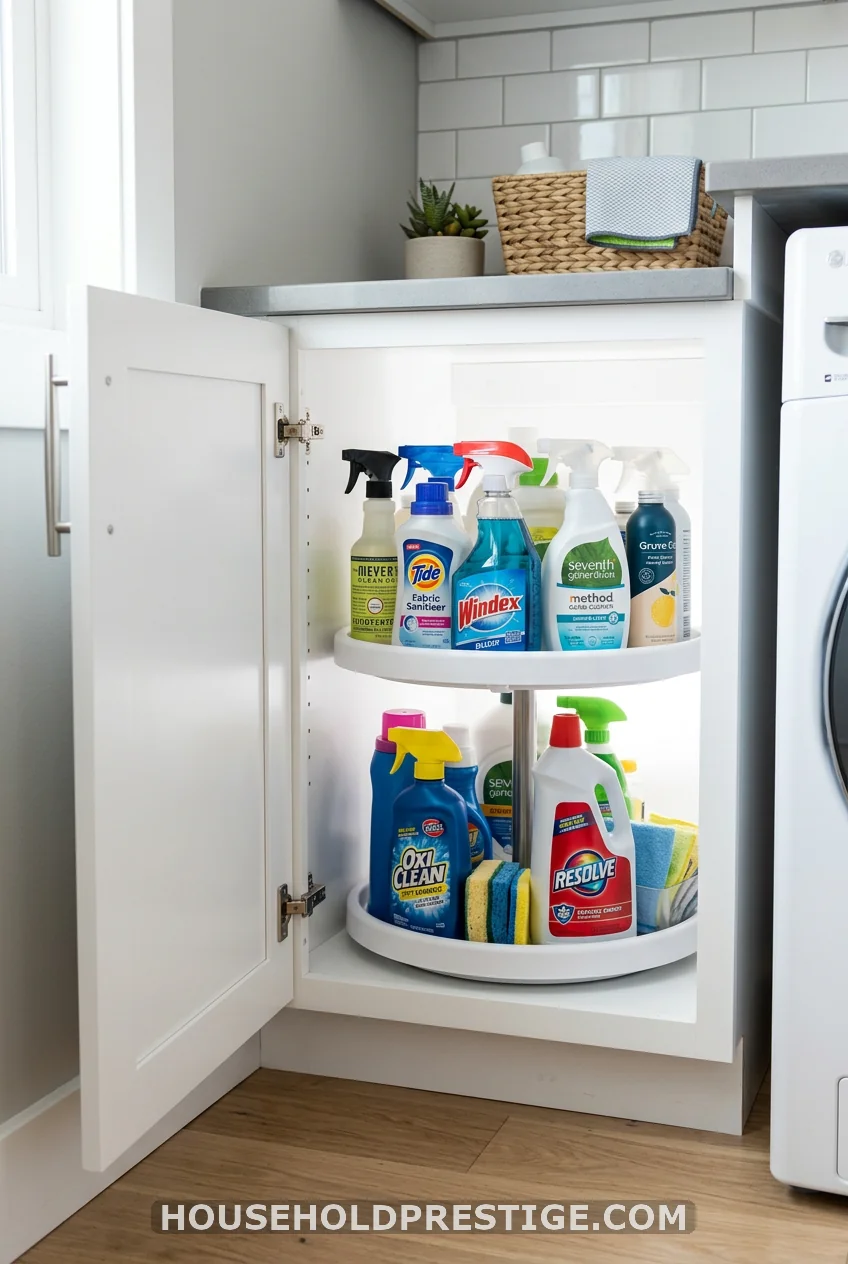
Blind corner cabinets are the Bermuda Triangle of laundry room storage. Things go in and never come out because nobody wants to reach into a dark corner on their knees. The fix: a kidney-shaped or D-shaped lazy Susan insert. KV (Knape & Vogt) and Häfele both make units that fit 33-inch and 36-inch blind corner base cabinets, running $40 to $90 at hardware suppliers or online. The rotating trays bring the back of the corner forward with a simple spin — and you’ll suddenly “find” three products you forgot you owned.
13. The Mudroom-Cabinet Hybrid Wall
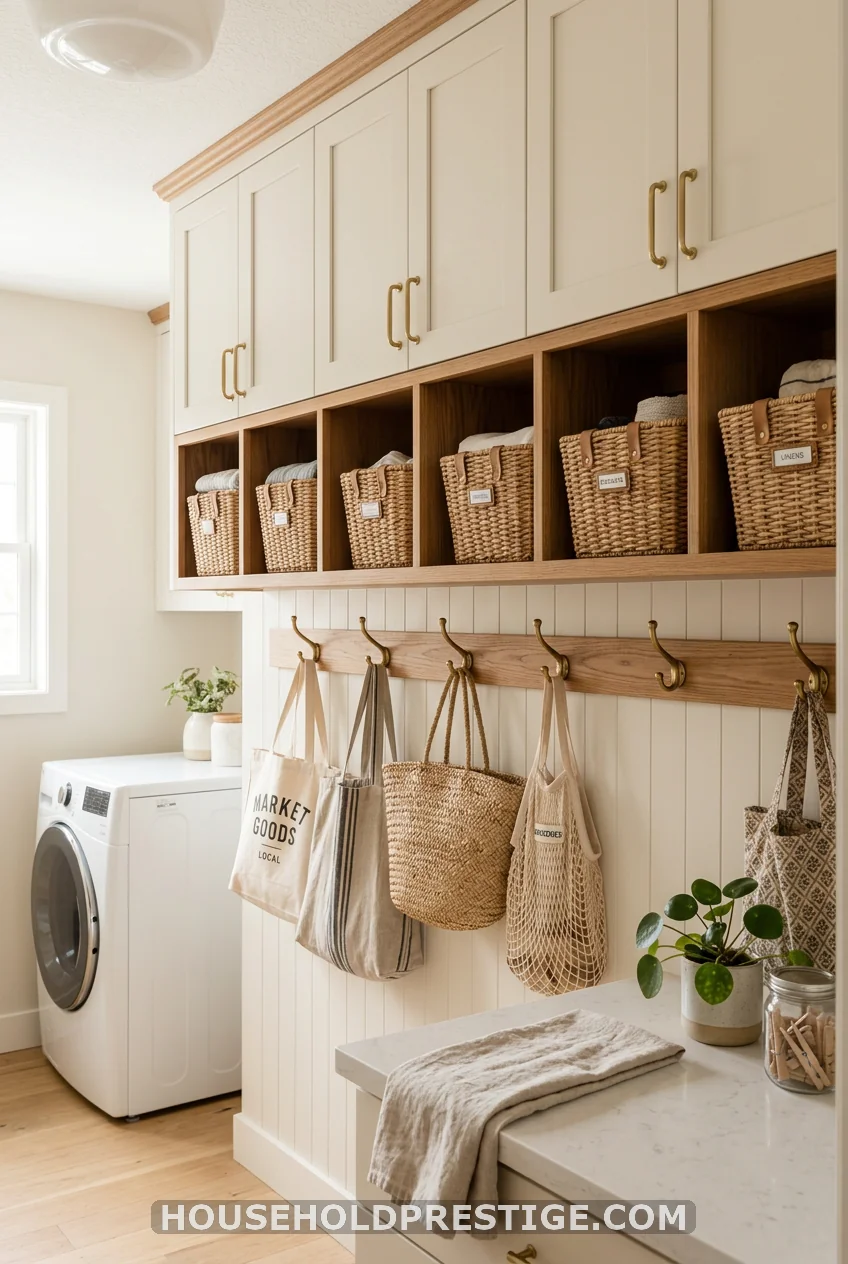
If your laundry room sits near a back door or garage entrance, you’re missing a major opportunity. A mixed cabinet wall — closed upper cabinets for supplies, open middle cubbies with labeled baskets for each household member, and a row of hooks below for bags, reusable totes, and dog leashes — serves double duty as a laundry room and mudroom drop zone. This is a custom-feeling setup you can achieve with IKEA KALLAX (for the cubbies) flanked by SEKTION wall cabinets, plus a row of BROR hooks. Total cost for an 8-foot wall: $400 to $700 DIY.
14. The IKEA SEKTION Laundry Room Hack (Full Step-by-Step)
What interior designers and contractor-minded homeowners already know: IKEA kitchen cabinets are some of the most durable, configurable, and cost-effective cabinet boxes on the market — and they work beautifully in laundry rooms. You get more hardware options, better interior organizer accessories, and a more finished look than any dedicated “laundry cabinet” kit sold at big box stores.
Why SEKTION Works for Laundry Rooms
SEKTION carcasses are made from particleboard with a melamine coating — highly moisture resistant. The steel leg system levels on uneven laundry room floors (those utility floors are almost never level). The modular system means you can configure it to fit awkward plumbing locations. And the door fronts are interchangeable: you can use IKEA’s own fronts or upgrade to Semihandmade wood doors, Reform fronts, or Kokeena for a completely custom look at a fraction of the price.
Dimensions That Matter
- SEKTION base height: 30 inches (add legs for height adjustment, 3.5 to 5.5 inches)
- Base cabinet widths: 12, 15, 18, 21, 24, 30, 36 inches
- Wall cabinet heights: 15 inches or 30 inches tall
- Tall/pantry: 80 or 90 inches — use these flanking a washer/dryer stack
- Counter depth: 25.5 inches for IKEA’s standard countertop panels
Step-by-Step
- Measure your laundry room. Sketch the room with plumbing and dryer vent locations marked. Note exactly where the washer hookup is and the dryer vent exits. Leave 1 inch clearance behind machines for hoses.
- Use IKEA’s free kitchen planner tool. Go to IKEA.com, open the Kitchen Planner, and enter your measurements. Build your layout virtually. The planner tells you exactly which parts you need and flags conflicts.
- Order and deliver. IKEA flat-pack delivery charges $50 to $99 depending on your location. For a typical laundry room (6 to 8 cabinets), expect 6 to 12 large boxes. Order extra screws and the SEKTION cabinet assembly kit.
- Assemble cabinet boxes. Each box takes 20 to 40 minutes. Lay each one flat on a blanket, attach cam locks and dowels, then stand upright. Do not skip the back panel — it adds squareness and rigidity.
- Install base cabinets first. Set the steel leg system to approximately level height. Use a long level across all cabinets. Shim the legs up with the adjustable feet until the run is level and plumb. Screw adjacent cabinets together through the stile strips with 1.25-inch screws.
- Secure to wall. Drive 3-inch screws through the cabinet rail at the back top into wall studs. Two screws per cabinet minimum.
- Install wall cabinets. Use the IKEA rail system (comes with wall cabinets) for easy adjustment after hanging. Again, anchor into studs.
- Choose your door fronts. IKEA AXSTAD flat grey: $20 to $45 per door. IKEA BODBYN shaker cream: $25 to $55. Semihandmade wood fronts: $80 to $180 per door for a fully custom look.
- Add UTRUSTA interior hardware. UTRUSTA pull-out (1 shelf, full extension) fits inside SEKTION bases and costs $45. A SEKTION drawer insert set runs $55. These are the organizers who make the inside as good as the outside looks.
- Install the countertop. IKEA BADELUNDA butcher block: $60 trimmed to width. Secure from inside the cabinet with corner brackets.
Realistic Cost Breakdown for a Standard 8-Foot Laundry Room Wall
| Component | DIY IKEA Cost | Custom Cabinet Cost |
|---|---|---|
| Cabinet boxes (6 units) | $500–$750 | $2,500–$4,000 |
| Door fronts | $150–$600 | Included |
| Interior organizers | $150–$250 | Included or extra |
| Countertop | $60–$200 | $400–$800 |
| Hardware (hinges, pulls) | $60–$120 | Included |
| Total | $920–$1,920 | $4,500–$10,000+ |
Common Mistakes With IKEA Laundry Room Installs
- Not accounting for washer hookup clearance. If your cold and hot water connections are on the left wall, that’s where you need open access — don’t plan a base cabinet blocking those valves.
- Using 24-inch-deep base cabinets alongside front-load machines. The standard 24″ depth works, but if your machines have a front handle that swings outward, you may not have enough walkway clearance. Measure the full door-open depth of your machine first.
- Skipping the leveling legs. IKEA’s adjustable steel legs are not optional in a laundry room. Floors in utility rooms shift. Legs let you re-level later without touching the cabinet.
- Leaving the toe kick as an afterthought. The toe kick panel is cut and snapped in last. It’s an easy 15 minutes that transforms the look from “DIY project” to “professional install.”
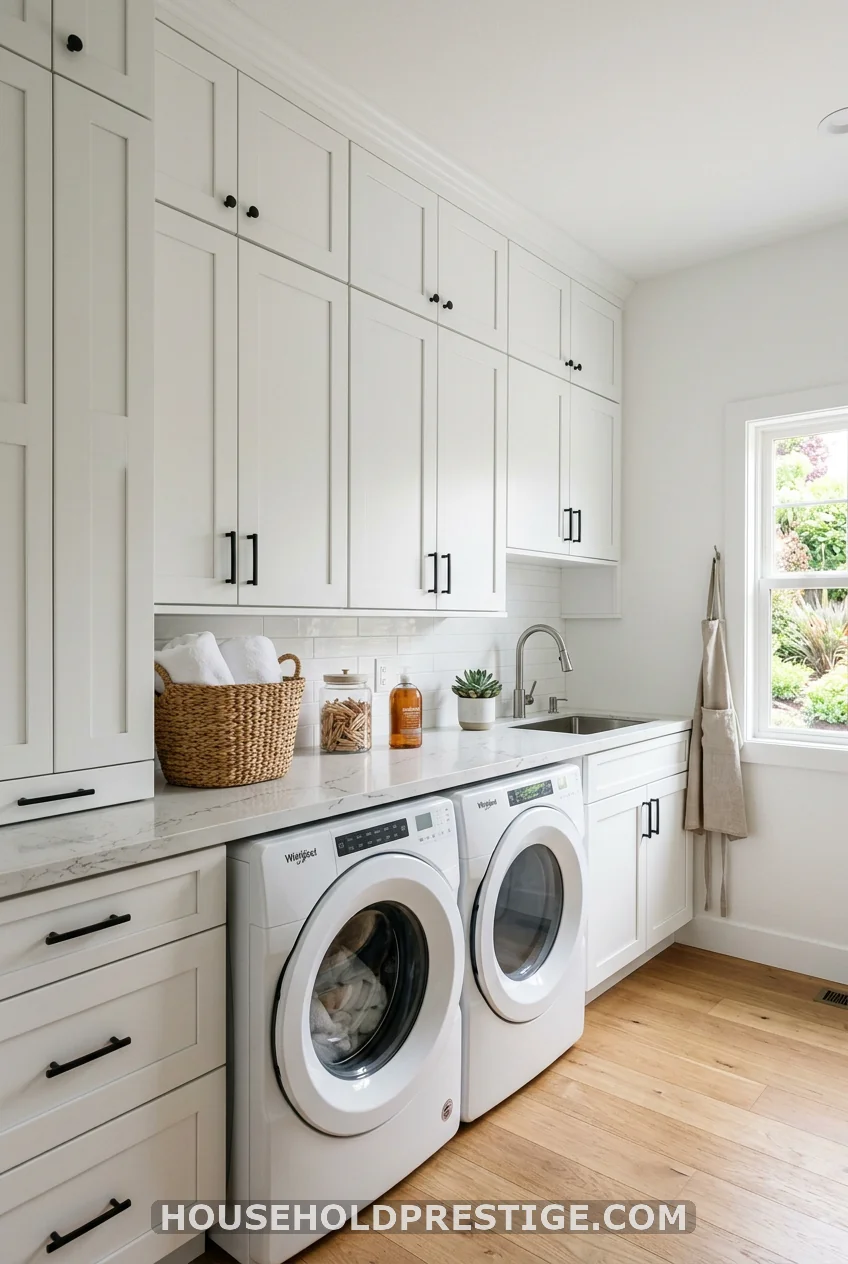
15. Two-Tone Cabinets — Upper White, Lower Contrast Color
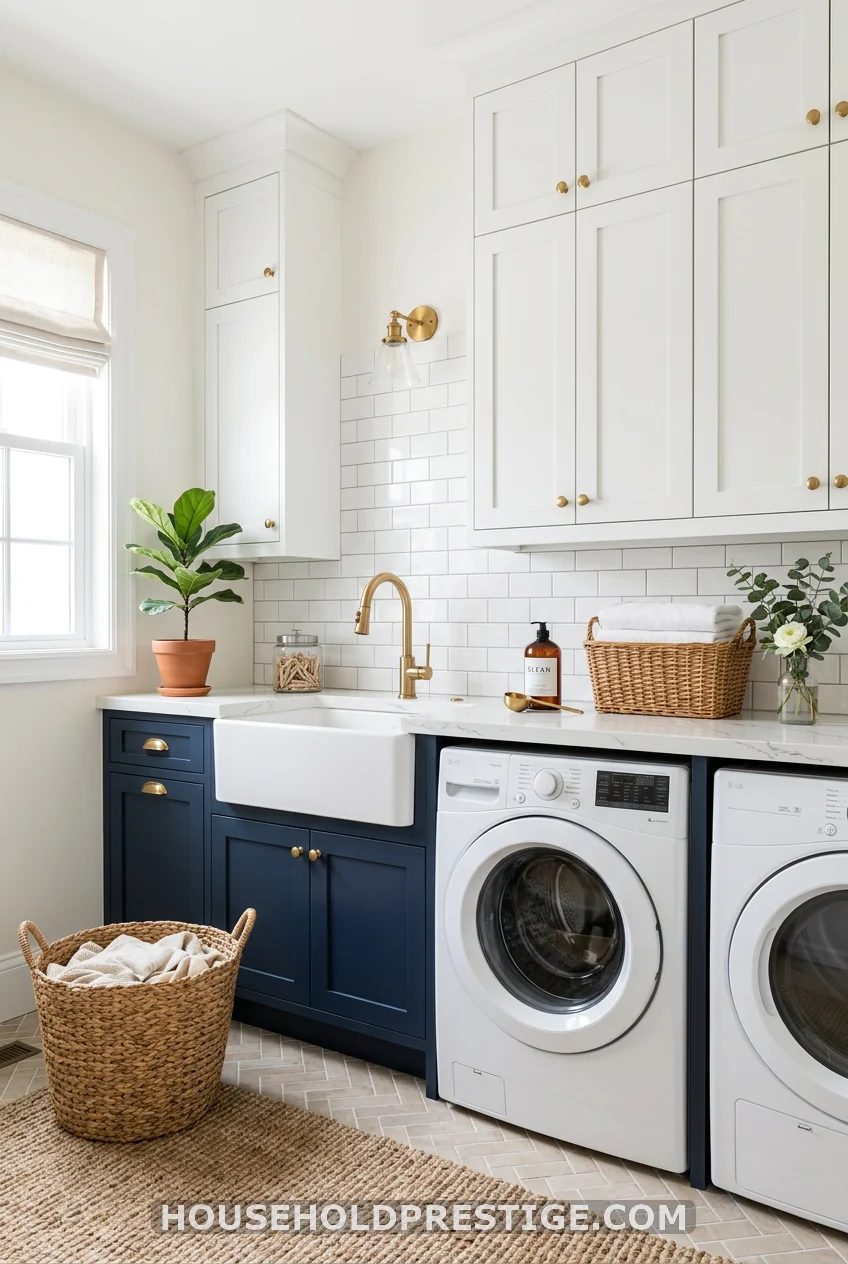
Upper cabinets in white or cream keep the eye moving upward, making a small laundry room feel taller. Lower cabinets in a contrast color — navy, sage green, charcoal, or deep forest — ground the room and hide the inevitable scuffs and splashes that happen at base level. The hardware is where you tie the two together: unlacquered brass or brushed gold pulls look expensive across both tones without costing much. Cabinet hardware runs $3 to $12 per pull at most hardware stores — budget $40 to $80 to upgrade every pull in the room.
16. Dark Cabinet Colors (The Case for Going Bold)
Navy cabinets do not make a small laundry room feel smaller. This is one of the most persistent myths in home design. Dark colors create depth, and a small room with dark, finished cabinets reads as intentional and designed rather than cramped and unfinished. Benjamin Moore Hale Navy HC-154 and Sherwin-Williams Peppercorn SW7674 are the two colors that photograph best for laundry rooms and hold up well with the humidity and cleaning-product fumes the room generates. Use a semi-gloss finish — it wipes clean and holds up to steam.
17. Shaker vs. Flat-Front Cabinets — Which Wins in a Laundry Room?
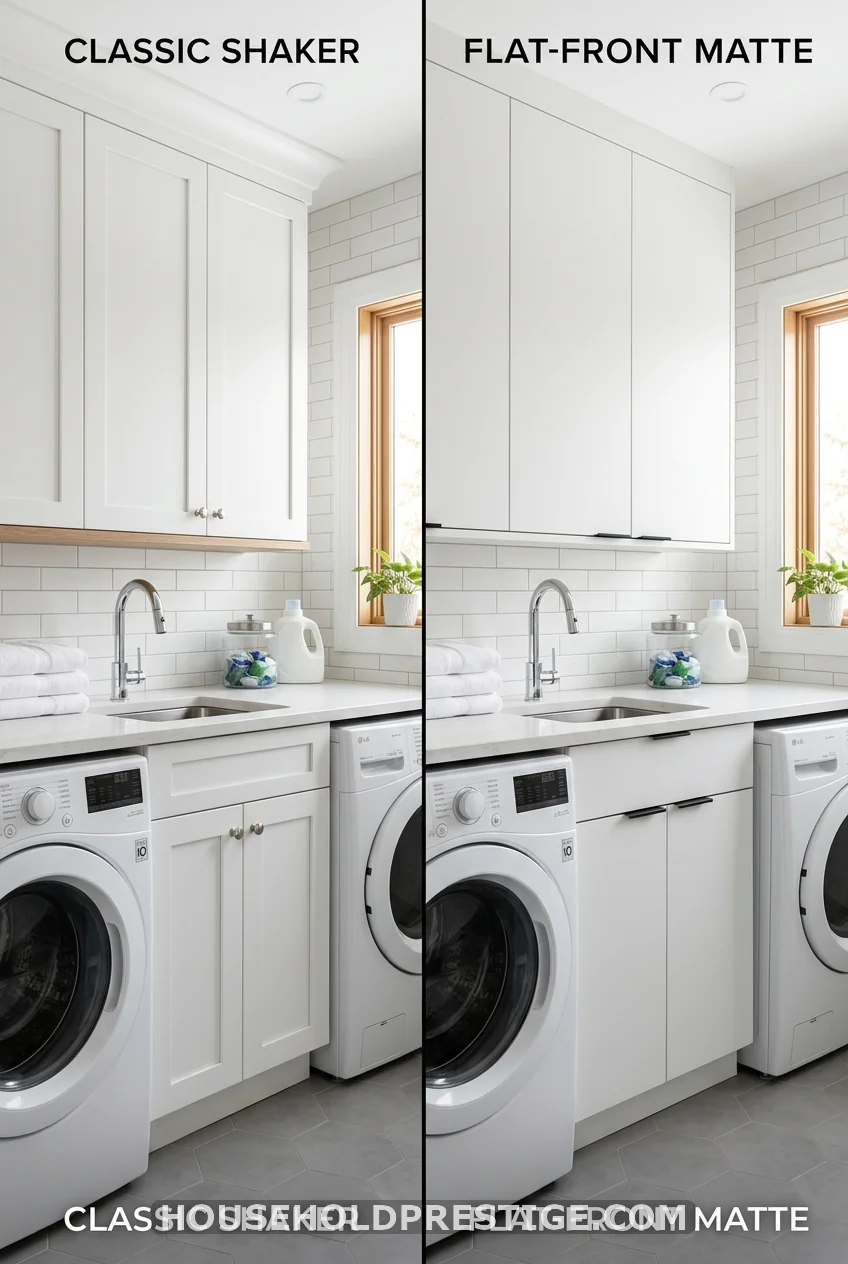
Most people pick their cabinet style based on what looks good in photos. But in a laundry room specifically, the choice has practical implications.
What most people think: Shaker cabinets are traditional, and flat-fronts are modern — just pick whichever matches your house style.
Reality: In a small laundry room that collects detergent drips, steam, and lint, the recessed panel of a shaker door traps grime in the groove. Flat-front cabinets wipe down in one stroke.
| Feature | Shaker Doors | Flat-Front Doors |
|---|---|---|
| Cleaning ease | Moderate — groove traps lint and drips | Excellent — wipe clean in seconds |
| Style | Timeless, traditional, farmhouse-friendly | Modern, contemporary, Scandinavian |
| Cost | ~10–15% more than flat (more mill work) | Less expensive per door |
| Photography appeal | Slightly better — shadow line adds depth | Clean and minimal |
| Best room size | Any | Works especially well in small spaces |
The verdict: If you’re in a small laundry room and clean it yourself, flat-front is the practical winner. If the room is larger, the laundry room connects to visible living areas, or you love the farmhouse aesthetic, the shaker is worth the slightly higher cost and extra cleaning time.
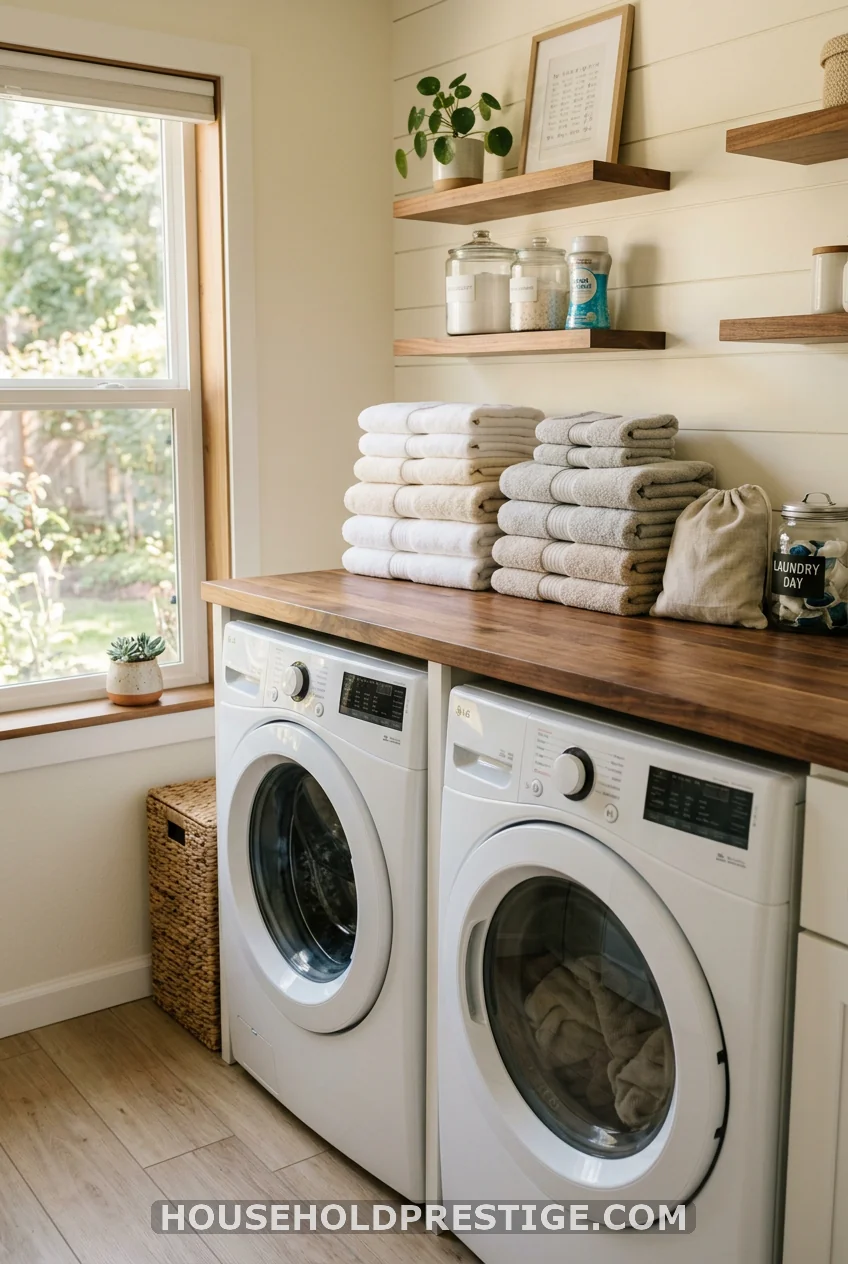
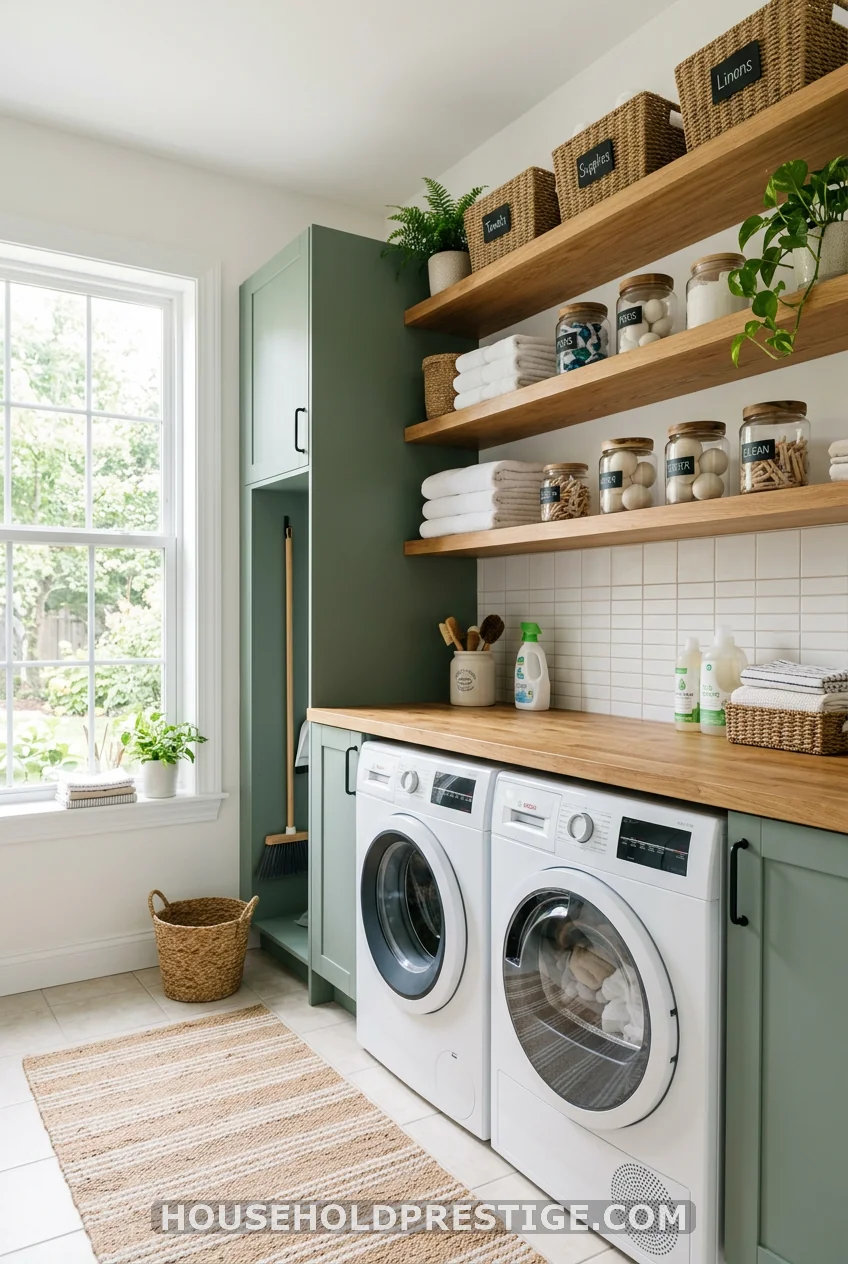
18. The Open-Shelf + Closed-Cabinet Combination Wall
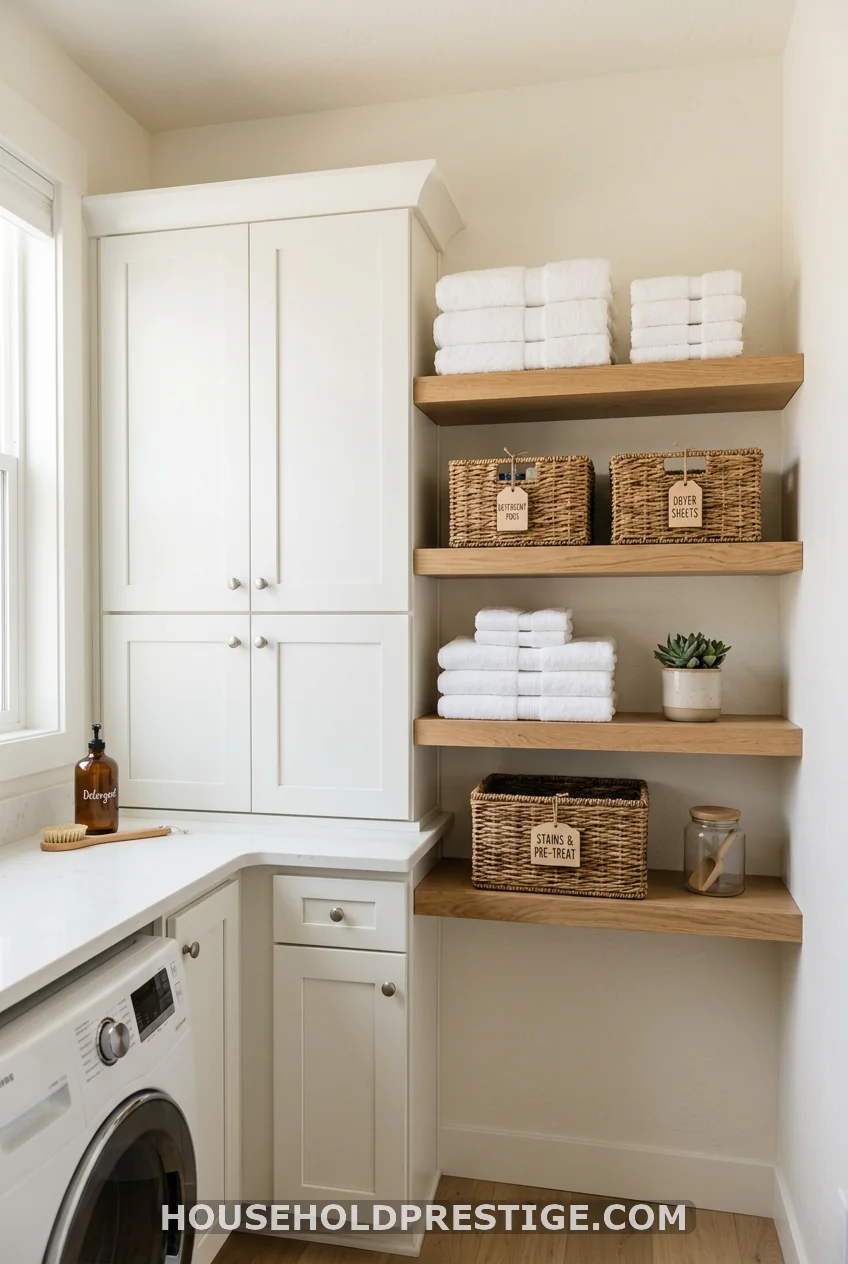
Fully closed cabinet walls look buttoned-up but make grabbing frequently-used items a constant door-opening exercise. Fully open shelving looks airy but requires everything to be permanently tidy — which a working laundry room will never be. The combination approach is what designers spec for functional laundry rooms: closed cabinets for anything you’d rather not display (cleaning chemicals, extra rolls, stain treatments), and open shelves for folded linens, matching baskets, and the items you reach for every day. The visual rhythm of closed-open-closed breaks up the room and makes it feel larger.
19. Sliding Barn Door Cabinets
In a tight laundry room where swing-out cabinet doors hit you, the washing machine, or each other, sliding doors solve the clearance problem entirely. A barn door-style sliding door mounted on a top-mounted rail gives you the full cabinet opening without requiring 18 to 24 inches of swing clearance in front. Winsoon and Goldenwarm both make barn door hardware kits for $40 to $80 that work with standard cabinet doors.
20. Under-Cabinet LED Strip Lighting
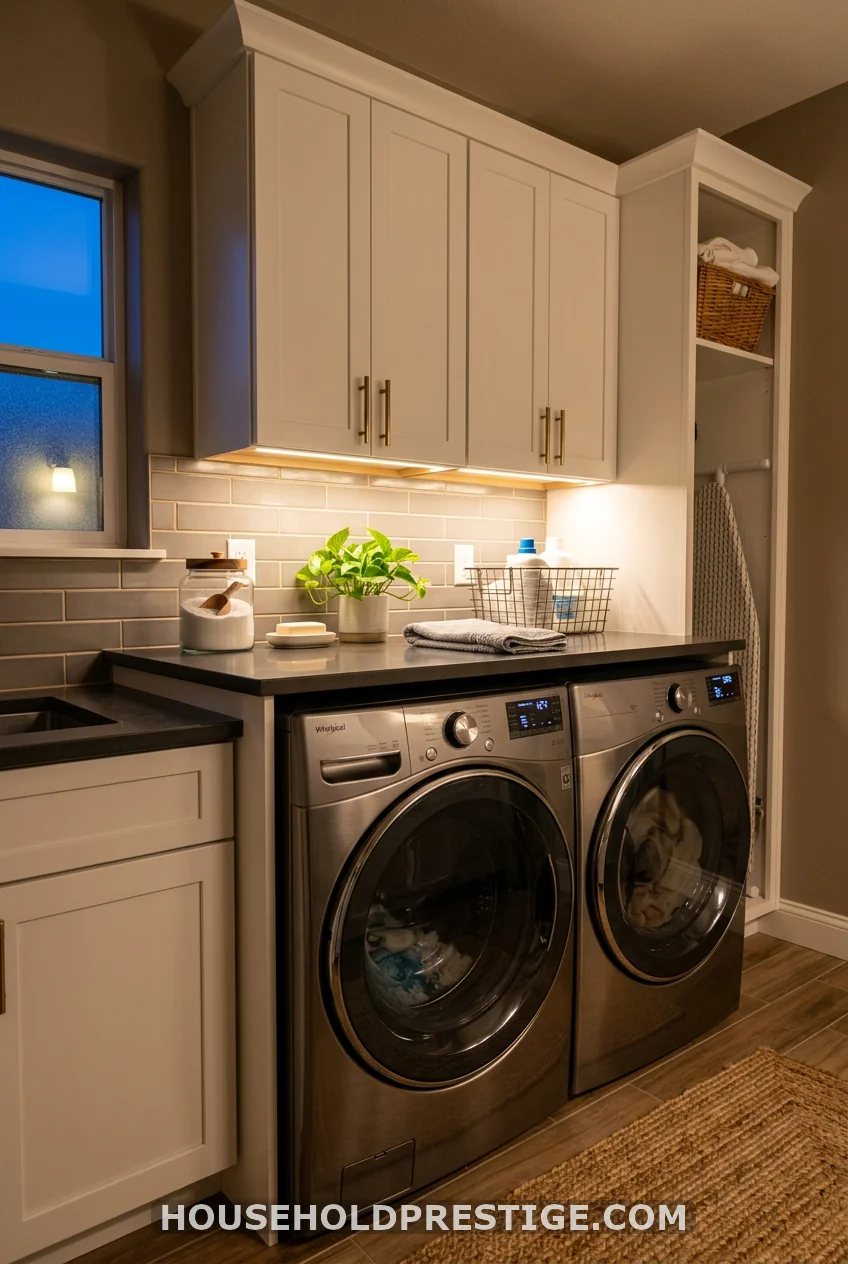
Laundry rooms are notoriously dim — one overhead fixture for a room full of sorting, stain-treating, and reading care labels is never enough. Under-cabinet LED strips cost $20 to $40 for a full run (Govee or Lepower strips from Amazon) and plug into any standard outlet. For a more permanent look, Legrand’s Radiant under-cabinet light bars ($35 to $65 each) hardwire directly and come with a rocker switch. The light hits the counter surface and the top of the machines, which is exactly where you need it.
21. The Most Common Mistake People Make With Laundry Room Cabinets

I made this mistake myself. After spending three weekends installing beautiful new cabinets, my laundry room was still chaos within two months. Here’s why.
What most people think: Adding cabinets creates organization.
The reality: Cabinets without zones just hide your mess in more expensive containers.
Before I ripped everything out and started again, my cabinets looked fine from the outside. Inside? A box of fabric softener sharing shelf space with spare lightbulbs, WD-40, an unopened yoga mat, and three different half-empty detergents. “More storage” doesn’t fix the real problem, which is a lack of a system.
The laundry room has exactly four functions: Sort. Wash. Dry. Fold. Your cabinets should reflect that workflow, not fight against it.
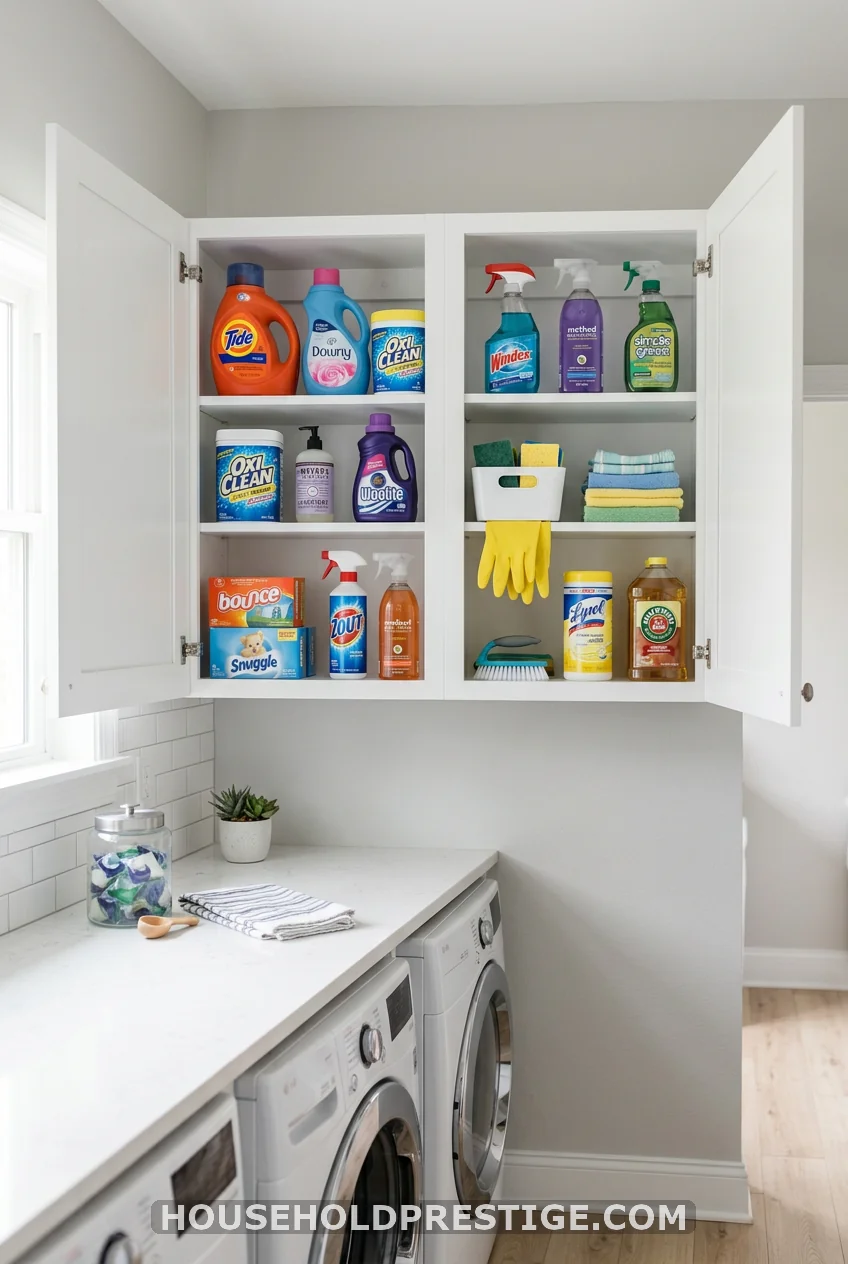
- Sort zone cabinet (near the entrance): Pull-out hamper drawers by category. Nothing else.
- Wash zone cabinet (above/beside the washer): Detergent, pods, stain spray, bleach. Active supplies only.
- Fold zone cabinet (above counter): Folded items waiting to be put away. Temp staging only.
- Store zone cabinet (floor-to-ceiling tower): Bulk supplies, seasonal items, things used less than weekly.
When I rebuilt with this framework, every item in the room had exactly one home. Laundry day now takes about 40% less time — not because the machines got faster, but because I stopped spending seven minutes hunting for the stain pen.
22. Budget Makeover: From Wire Shelves to Organized Cabinets
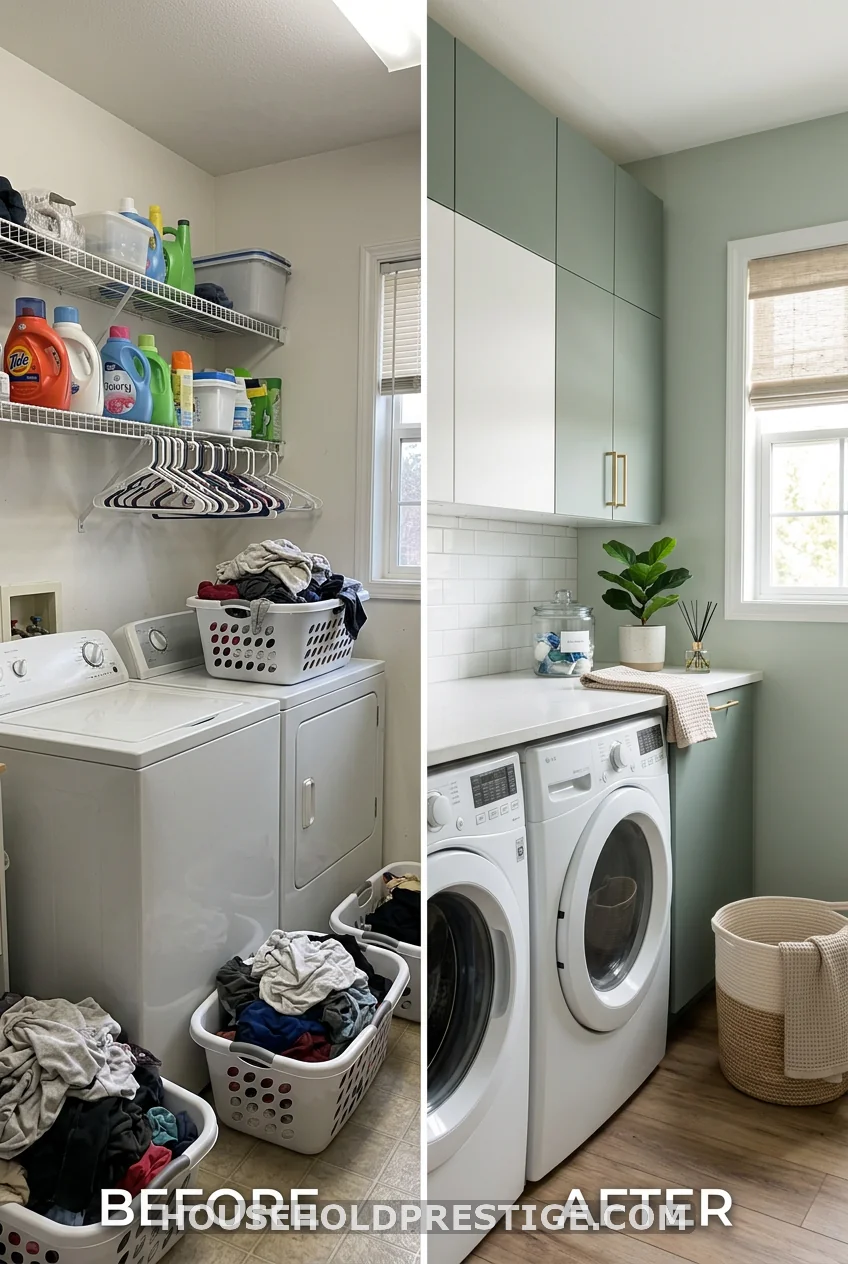
Before: Two 48-inch Rubbermaid wire shelf units from Walmart. Total cost: $75. Bottles tip over, small items fall through the wire, lint collects on every surface, and the whole thing looks like temporary storage that became permanent.
After: IKEA SEKTION base cabinet (24-inch wide) + two wall cabinets (30×15 inch) + IKEA BADELUNDA butcher block countertop. Cabinet fronts painted in Sherwin-Williams Sage SW 0017 with a small foam roller (two coats). Simple black cup pulls. Total cost: $618.
The transformation took one full weekend. The look went from chaotic utility space to something that shows up in home listing photos as a feature. Materials:
- IKEA SEKTION base cabinet 24″: $110
- IKEA SEKTION wall cabinets x2: $155
- IKEA BADELUNDA butcher block panel: $60
- Cabinet paint + primer: $45
- Cup pulls x8: $28
- Hinges and screws: $25
- Misc: $18
- Total: $441 (installation was DIY; add $200 to $400 if hiring out)
The lesson: you don’t need custom cabinetry to get a laundry room that looks and functions like a custom install. You need a plan and two free weekends.
23. A Pull-Out Drying Rack Inside a Cabinet
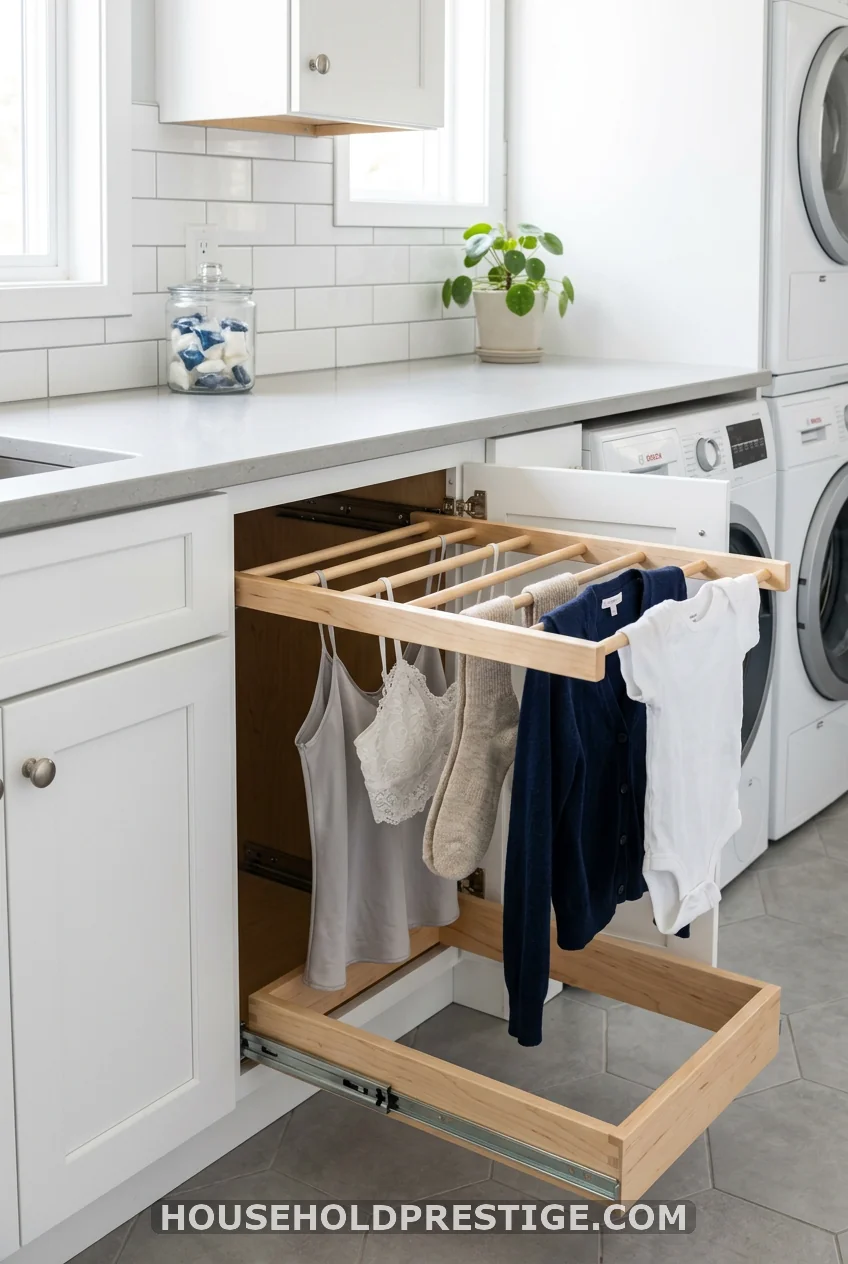
A dedicated air-dry zone that disappears when not in use is one of the best space-saving moves in a small laundry room. The Häfele Vauth-Sagel drying rack insert mounts inside a base or tall cabinet on a sliding mechanism. Extend it when you need it, fold and slide it back in when you don’t. Retail price runs $85 to $150 depending on the configuration, and it installs in under an hour with a drill and the included template. For a DIY version, you can mount a set of wooden dowels on a pull-out drawer slide inside a deep cabinet for around $30 — less polished, but it works.
24. A Deep Pantry-Style Cabinet for Bulk Laundry Supplies
If you buy detergent at Costco (and you should — a 210-ounce Kirkland Ultra Clean runs about $24 vs. $18 for a 64-load Tide at the grocery store), you need somewhere to put it. A 24-inch-wide pantry-style tall cabinet — at least 84 inches high with adjustable shelves — gives you space for the Costco-size container, an extra jug of fabric softener, spare dryer sheet boxes, and a dedicated cleaning kit without any of it taking up working counter or shelf space.
25. Cabinet Inserts and Interior Drawer Organizers
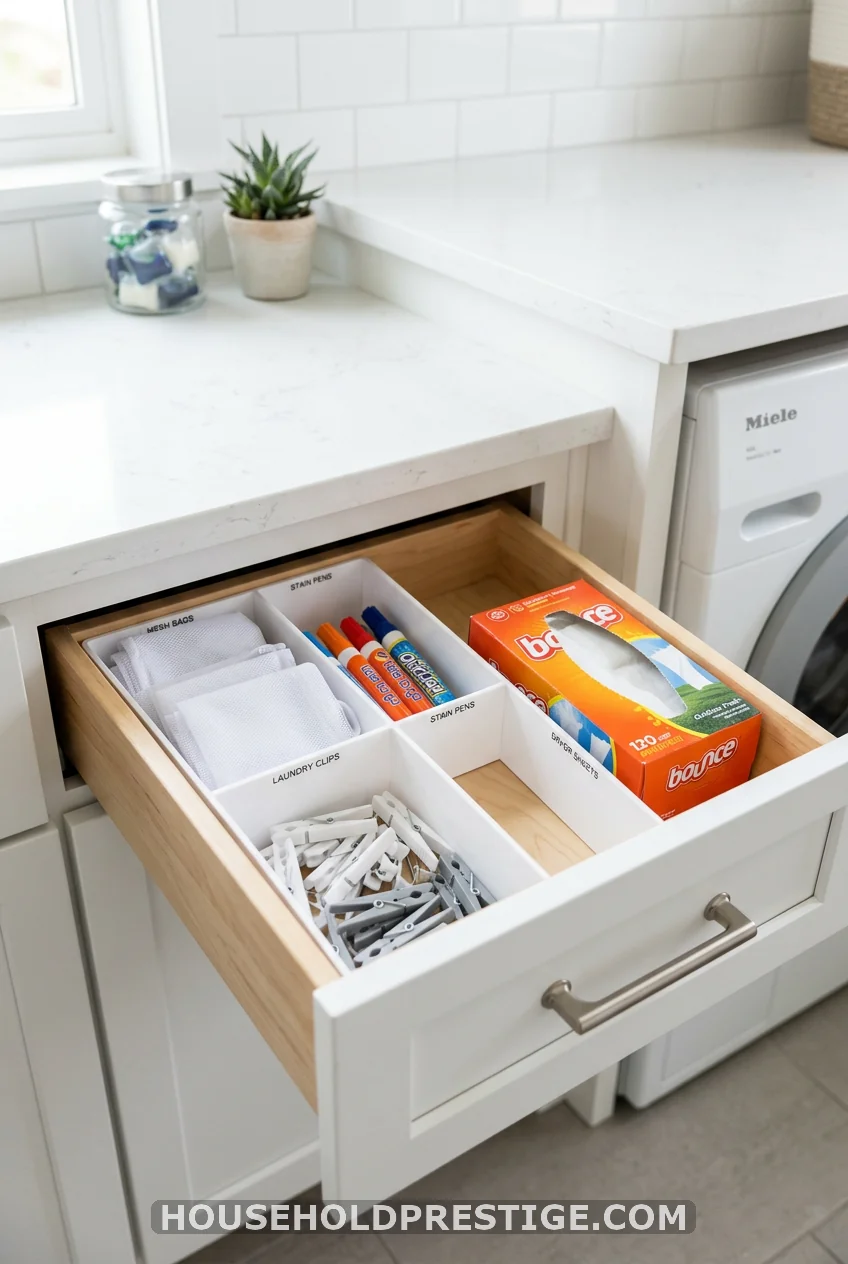
The cabinet is just a box. What happens inside it is where the organization lives. The best cabinet inserts for laundry rooms:
- Rev-A-Shelf 4WDB-18 drawer organizer: Adjustable wood dividers, fits 18-inch drawers, $35 to $50. Great for the detergent drawer.
- IKEA RATIONELL pull-out: Fits inside SEKTION base cabinets, full-extension, $45. Best bang for the buck.
- Knape & Vogt Economy Hamper: Wire hamper on pull-out slides, fits 15-inch cabinet minimum, $55 to $75 at Lowe’s.
- Bamboo drawer organizer set (Amazon): Adjustable bamboo dividers, 5 to 8 pieces, $15 to $25. Best for shallow drawers with small supplies.
- Command adhesive hooks inside cabinet doors: $4 to $6 for a pack of 4. Mount them inside the cabinet door to hang a lint brush, small scissors for snipping tags, or a laminated cheat-sheet of care symbol meanings.
The goal isn’t a magazine shoot. It’s creating a system where anyone in your household can find something and put it back correctly — without being told where it goes.
Wrapping It Up
The best laundry room organization cabinets aren’t the most expensive ones or the most beautiful ones in someone else’s Pinterest photo. They’re the ones built around your laundry workflow, with real zones, real dimensions, and real costs you can plan around. Start with one change — a pull-out hamper drawer, a proper upper cabinet above the machines, or just a lighting strip that finally makes it possible to read a care label. One improvement leads to the next. Before long, you’ll have a laundry room you don’t actively avoid.
Drop a comment and tell me which idea you’re trying first — I love hearing what works in real homes.
Frequently Asked Questions
What is the best cabinet height above a washer and dryer?
The bottom of wall cabinets should sit 54 to 60 inches from the floor, leaving at least 18 inches of clear space above the appliances. This clearance ensures you can load top-load washers and access the full drum on front-load models without the cabinet door blocking you.
What type of cabinet material holds up best in a laundry room?
Melamine-coated particleboard (used by IKEA SEKTION and most mid-range cabinet brands) performs very well in laundry rooms because it resists moisture and wipes clean easily. Solid wood cabinets can work, but are more susceptible to warping in high-humidity spaces unless sealed. Avoid MDF without a sealed coating — it swells when it gets wet.
Are IKEA kitchen cabinets good for laundry rooms?
Yes — arguably better than cabinets marketed specifically for laundry rooms. IKEA SEKTION offers more size configurations, more interior organizer options, and more door styles than most dedicated laundry cabinet lines, at a lower price point. The modular system also accommodates awkward plumbing and vent locations well.
How deep should laundry room wall cabinets be?
12 to 15 inches deep for wall-mounted upper cabinets. Standard kitchen uppers are 12 inches and work well. Avoid going deeper than 15 inches above a front-load washer or dryer — the cabinet will prevent you from fully opening the machine door or block your reach into the drum.
What is the cheapest way to add cabinets to a laundry room?
IKEA SEKTION cabinets are the best value for a DIY install — a basic wall cabinet starts at $65 and a base unit at $110, with assembly and installation you can do yourself over a weekend. Painting bare-wood stock cabinets from a home center is slightly cheaper but requires more prep work. Avoid builder-grade particle board cabinets from discount sources — they swell and delaminate in humid laundry environments within a few years.