

My daughters share one reach-in closet. It is 24 inches deep and not an inch more. For a long time, it ate everything we put inside it. Socks vanished. Shoes piled up by the door. One kid swore her favorite shirt was “stolen,” and we found it folded into her sister’s stack.
If you have kids and a closet that loses things, you know that exact morning. So I started testing kids’ closet organization ideas one at a time, keeping what worked and tossing what looked nice on Pinterest but failed in real life. Below are the ones that earned their spot. Some take five minutes. One took a Saturday. By the end, you will know which to try first and how to make a shared, small closet hold two kids’ worth of stuff without the daily fight.
1. Split the Closet by Kid, Not by Clothing Type
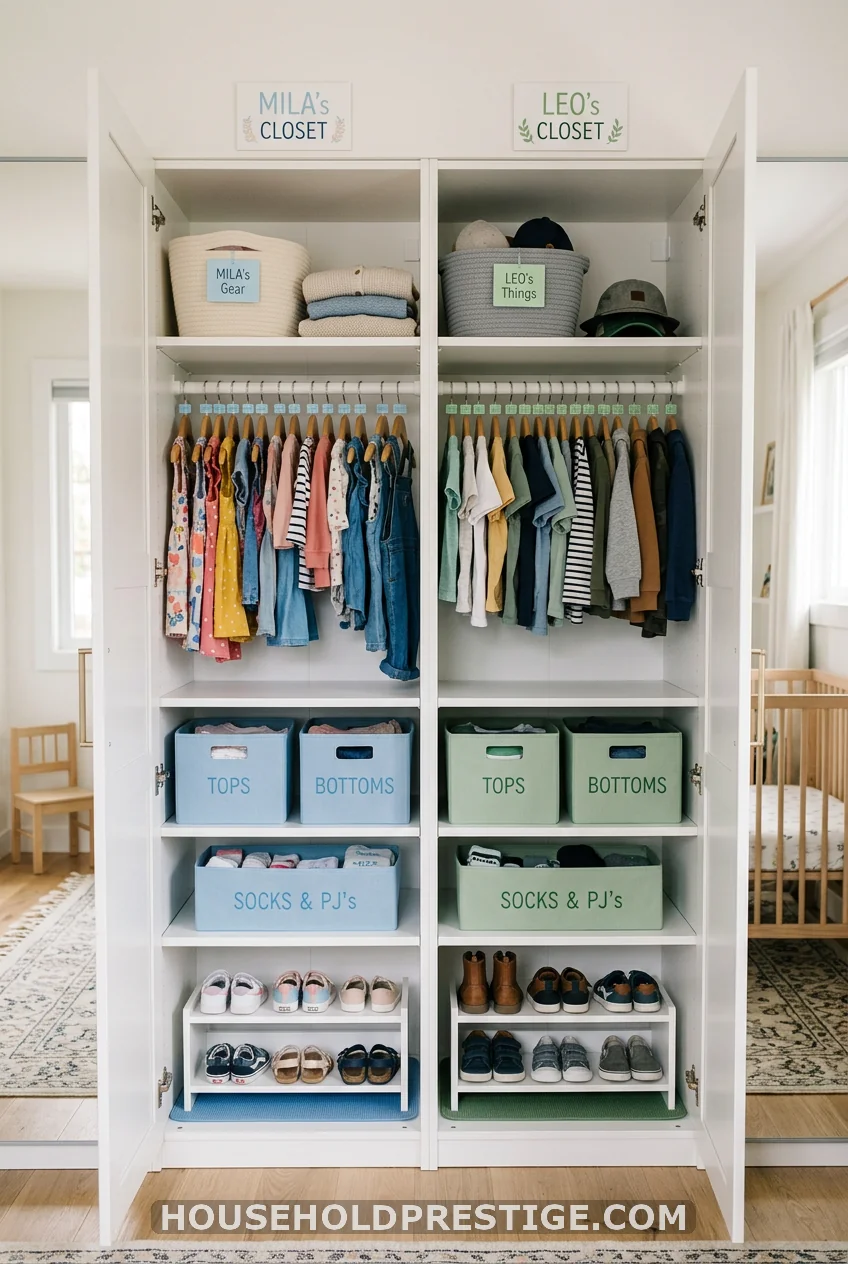
Most of us sort a closet by category. All the shirts here, all the pants there. In a shared closet, that backfires fast. Two kids dig through the same pile and neither one knows what is theirs.
Flip it. Give each child a side. One rod, one shelf, one bin row per kid. Draw a clear line down the middle, even if the closet is tiny. A different bin color or a name label is enough to mark the border.
This one change does more than any product. When everything a child owns lives in one spot, they know where to look and where to put it back. The arguing drops almost overnight.
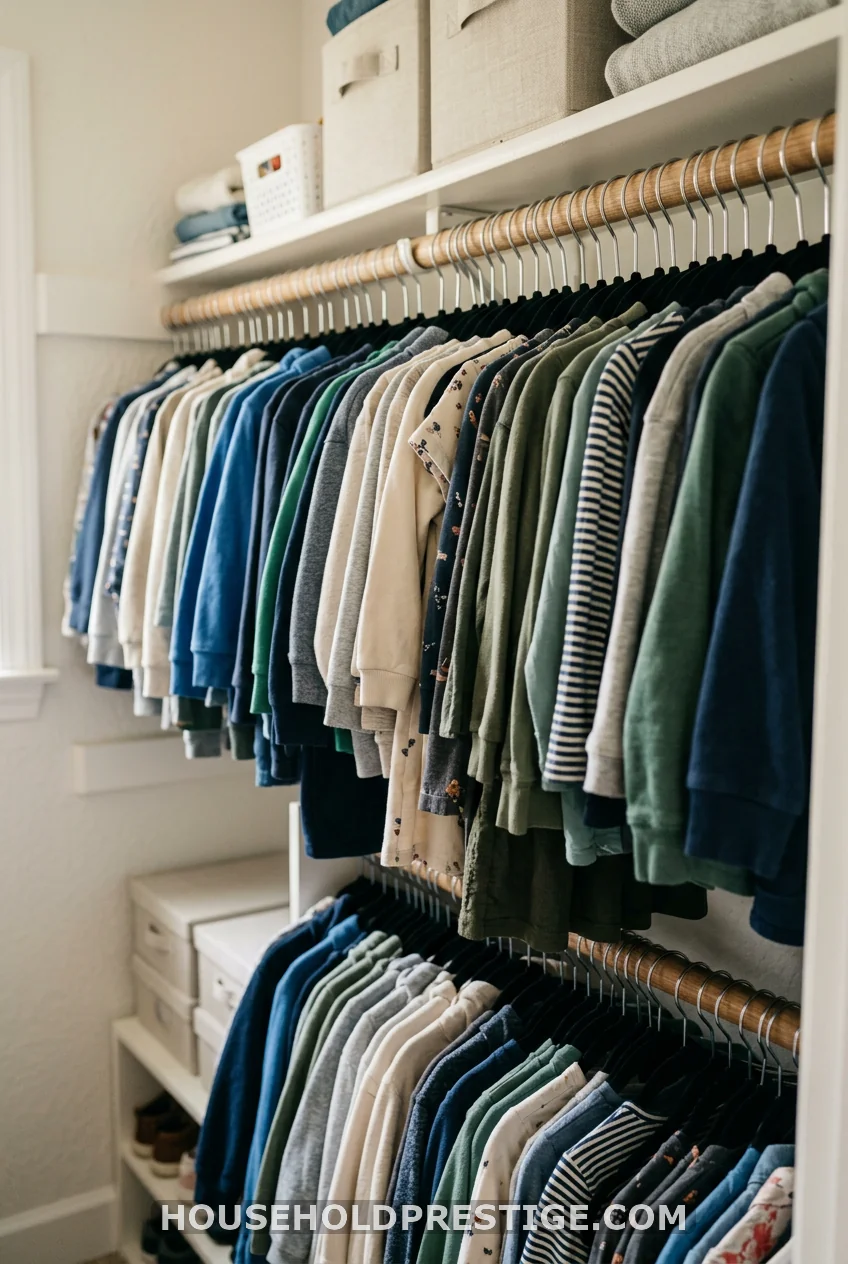
2. Add a Second Rod Down Low
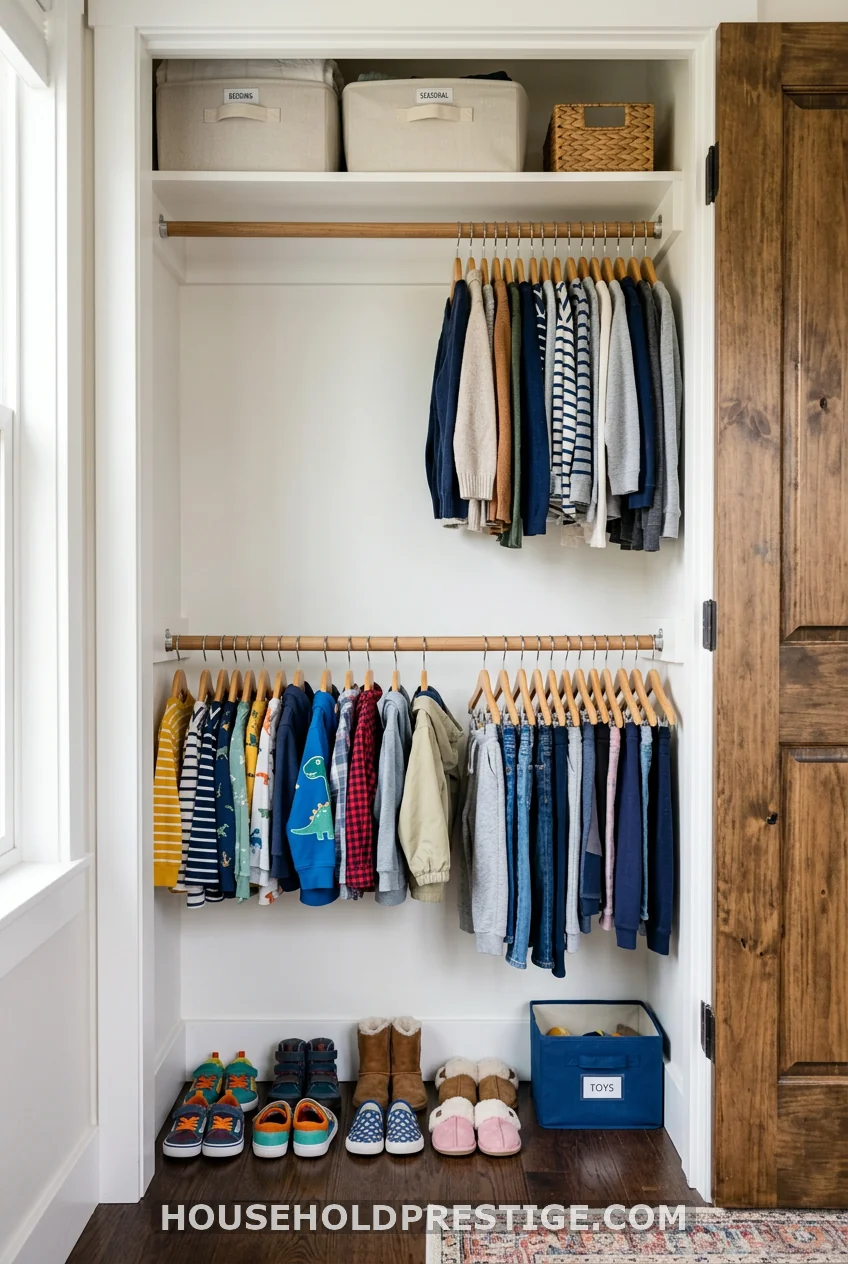
Kids’ clothes are short. One rod up high wastes the whole bottom half of the closet. Add a second rod below it, and you double your hanging space for free. Put the low rod where your child can reach it. Now they hang their own clothes, and you stop being the only person who touches that closet.
3. Build a Split Double-Rod and Cube System That Grows With Them
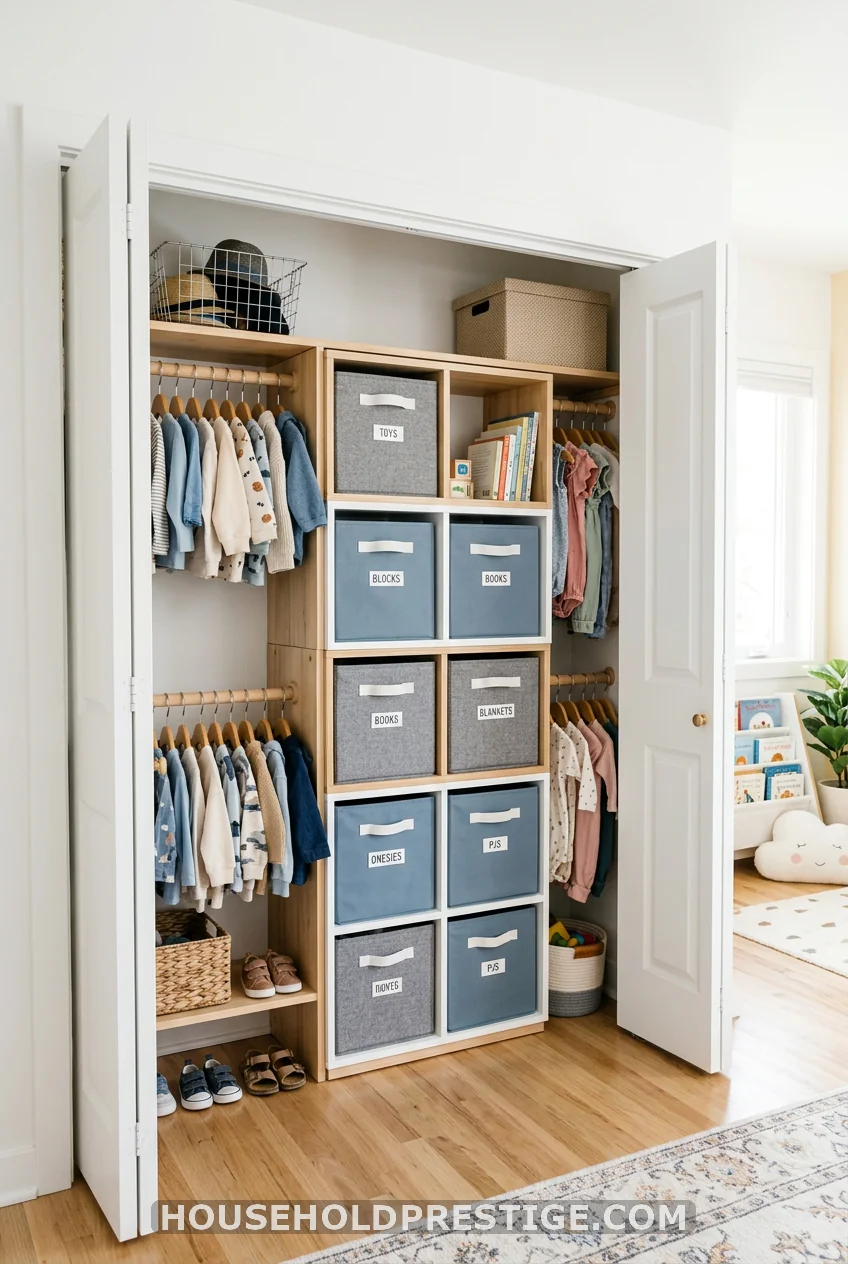
This is the one project on the list that takes real time. It is also the one that fixed our closet for years instead of weeks. If two kids share a space and the builder-basic single rod is failing you, build this.
Why It Works
A single rod gives you one zone. A center tower with a rod on each side gives you four: two hanging sides, a stack of drawers, and a top shelf for overflow. Each kid gets a mirror-image half. The cubes hold folded clothes in bins so nothing topples, and the whole thing adjusts as your kids grow taller.
Dimensions to Plan Around
- Standard reach-in closet: about 24 inches deep and 96 inches (8 feet) tall.
- Set the lower rod about 30 inches off the floor for a toddler or preschooler. They can reach it.
- Set the upper rod around 60 inches for longer items and grown-up reach.
- Two three-cube units stacked run roughly 88 inches, which fits under an 8-foot ceiling with room to spare.
- Place shelves at 40 inches and 80 inches so each kid’s half mirrors the other.
Step-by-Step
- Empty the closet fully. Wipe it down. A fresh coat of white paint takes an hour and makes the finished space look twice as clean.
- Measure the width and mark the center on the back wall with a pencil.
- Assemble two three-cube organizer units. Stack one on top of the other in the center.
- Anchor the tower to a wall stud with an L-bracket at the top and the bottom. Do this before you load it. A loaded cube tower that is not anchored is a tip hazard for a climbing kid.
- Hang a rod on each side of the tower. Use the 30-inch and 60-inch marks. Adjustable rods let you raise the low one later.
- Slide a fabric drawer into each cube. Sort by category for one kid on the left, the other on the right.
- Add a top shelf above the rods for out-of-season bins.
Materials and Rough Costs
- Two three-cube organizer units: about $35 each, so $70.
- Two adjustable closet rods: about $15 each, so $30.
- Six to eight fabric drawer bins: about $5 each, so $30 to $40.
- L-brackets and wall anchors: about $8.
- Slimline hangers, 50-pack: about $14.
- Printable or stick-on labels: $0 to $25.
That lands around $150 to $185 for a full two-kid system. Prices shift, so treat these as a planning guide, not a receipt.
Common Mistakes to Avoid
- Skipping the wall anchor. It is the one step nobody photographs and the one that keeps a kid safe.
- Hanging the low rod too high. If your child cannot reach it, you have built a closet for yourself, not for them.
- Buying bins before you measure the cubbies. Bring the cube size to the store.
- Choosing solid, glossy bins. Kids cannot see inside them, so the contents become a mystery within a week. Clear or open-front bins win.
Build this once, and the closet stops being a weekend chore. It becomes the spot where your kids can run themselves.
4. Hang Shoes on the Back of the Door
The back of the door is dead space. An over-the-door pocket organizer fixes that in two minutes. One shoe per clear pocket means every pair stays visible and off the floor. Most organizers hold enough for two kids. The clear pockets matter most, since your child grabs what they need without digging.
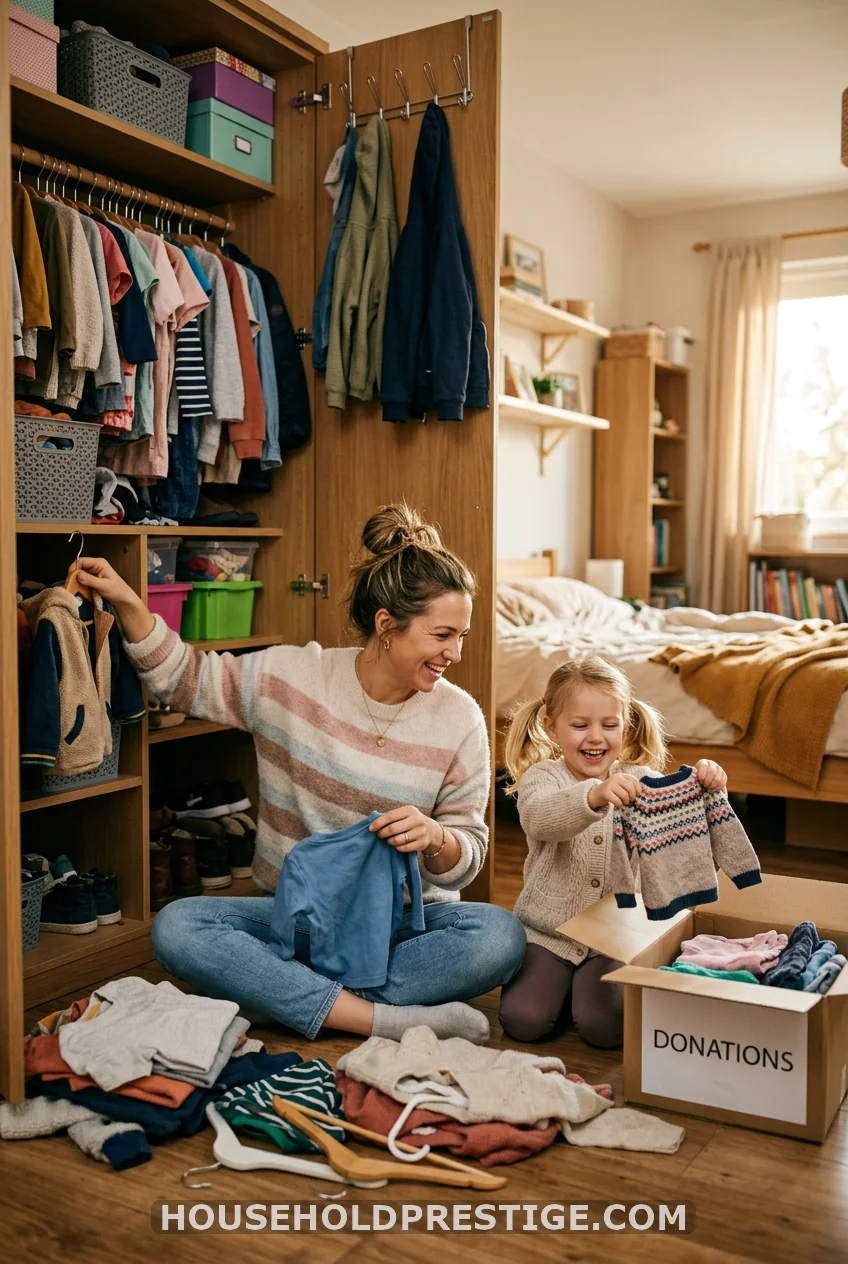
5. Keep an Outgrown Basket Inside the Closet
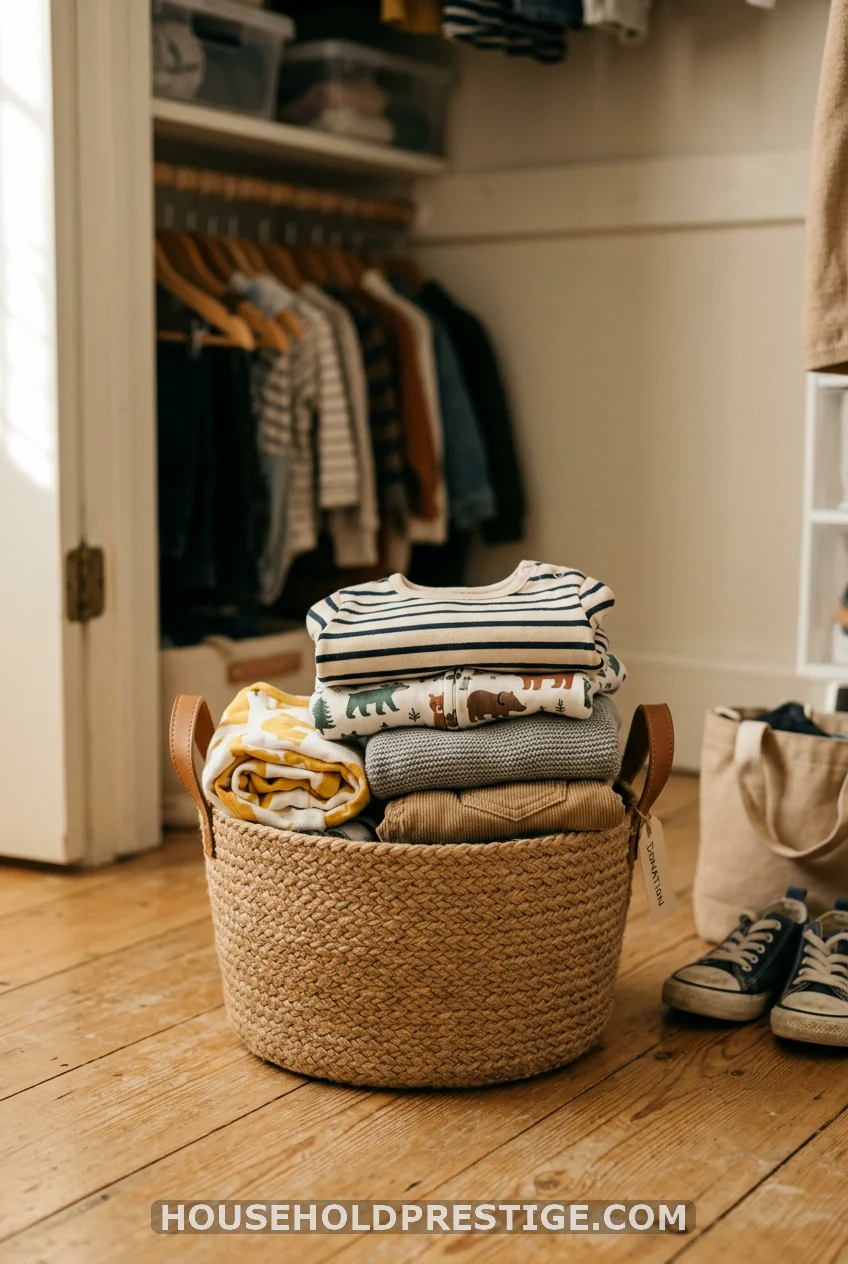
Kids outgrow clothes faster than you can sort them. Without a catch-spot, the too-small stuff gets shoved back onto the shelf, and the cycle repeats. A single basket on the closet floor breaks it.
The rule is simple: the moment something does not fit, it goes straight into the outgrown basket, not back on the shelf. When the basket fills, it leaves the house for donation or a younger cousin. No floor piles. No mystery items nobody claims.
6. The Matching-Basket Mistake I Made (So You Don’t Have To)

I want to save you a bad afternoon. When I first organized our shared closet, I bought a set of big, sturdy, gorgeous woven baskets. They looked perfect in the photos. Then my oldest reached up for hers, and the whole thing came down on her face. Too big. Too heavy. Far too high.
I had organized the closet for a magazine, not for a six-year-old.
So I went back out and found soft fabric bins in the dollar-store section. Lightweight. A little floppy. Not pretty enough for a styled shelf. But my daughter could lift hers down with one hand, pick her own clothes, and put the bin back without help. That is the whole point of a kid’s closet.
The lesson stuck with me. Before you buy a single bin, ask one question: Can the kid who uses this carry it on their own? If the answer is no, it does not matter how good it looks. Style serves the kid here, not the other way around.
7. Give Each Child a Color
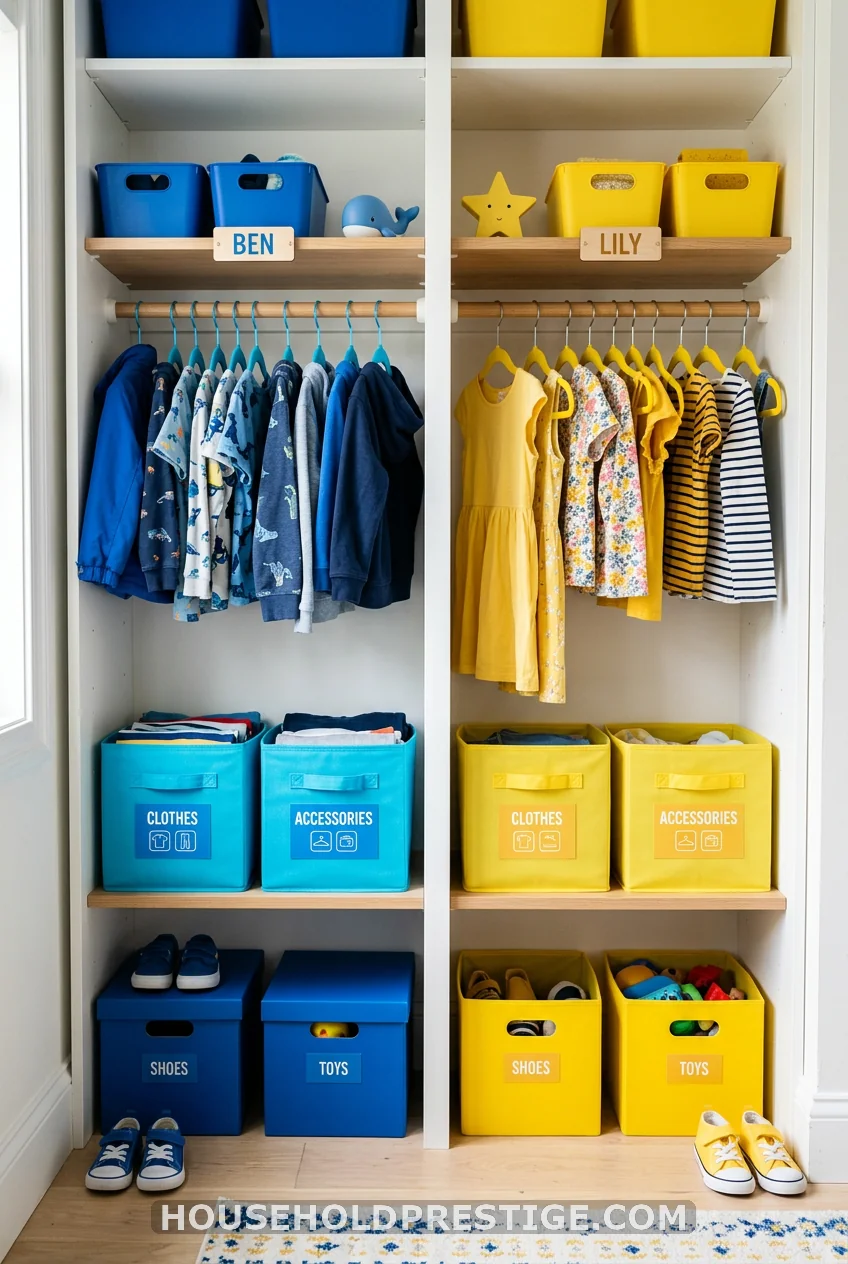
Pick a color per kid and use it everywhere. Blue hangers, blue labels, blue bins for one. Yellow for the other. After laundry, sorting takes seconds because the color tells you where each piece goes. No tag-reading. No size-guessing.
8. Use Open Bins Instead of Stacking
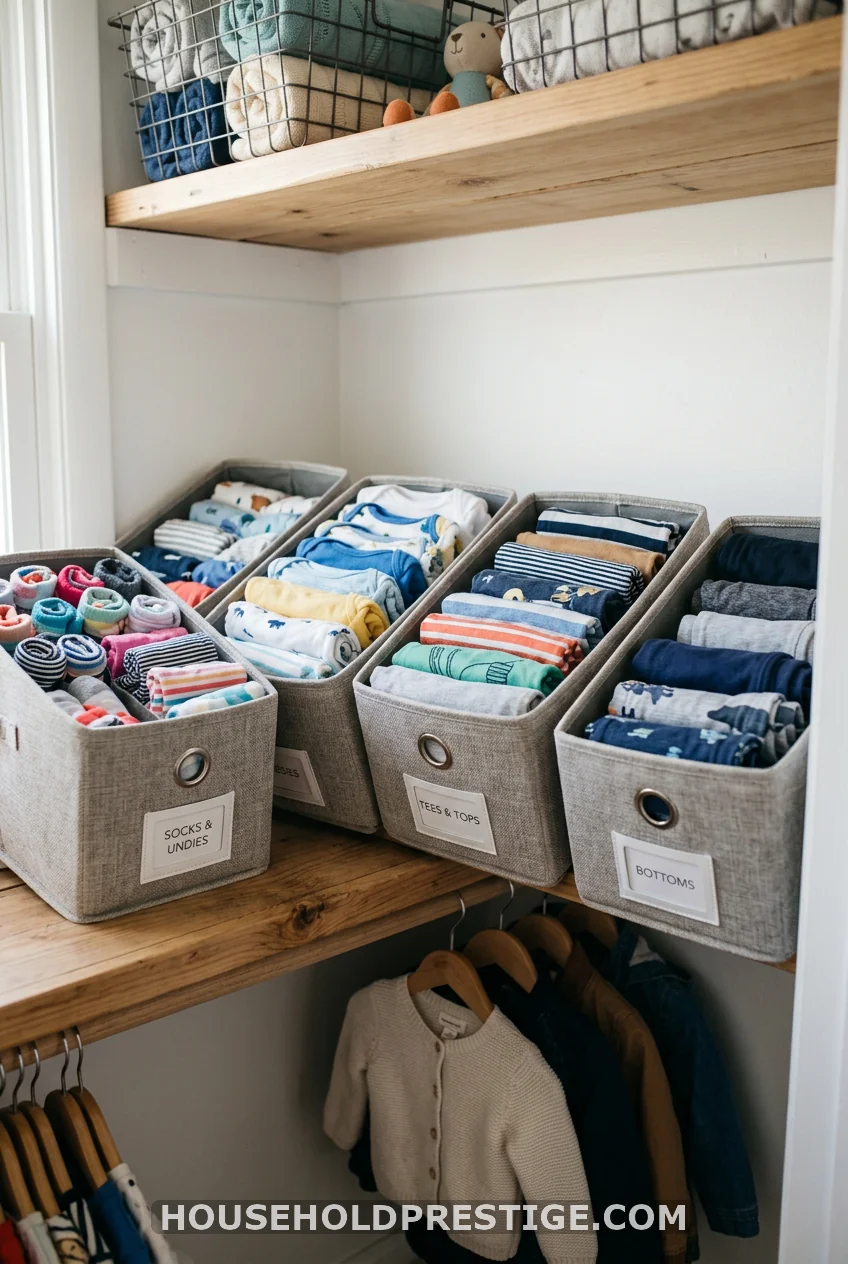
Stacked folded clothes look tidy for two days. Then a kid pulls one shirt from the bottom, and the tower collapses. Open bins solve it. One category per bin: socks here, pajamas there. Kids grab without wrecking the pile, and you can scan what is running low at a glance.
9. Set Up a Tomorrow ‘s-Outfit Hook
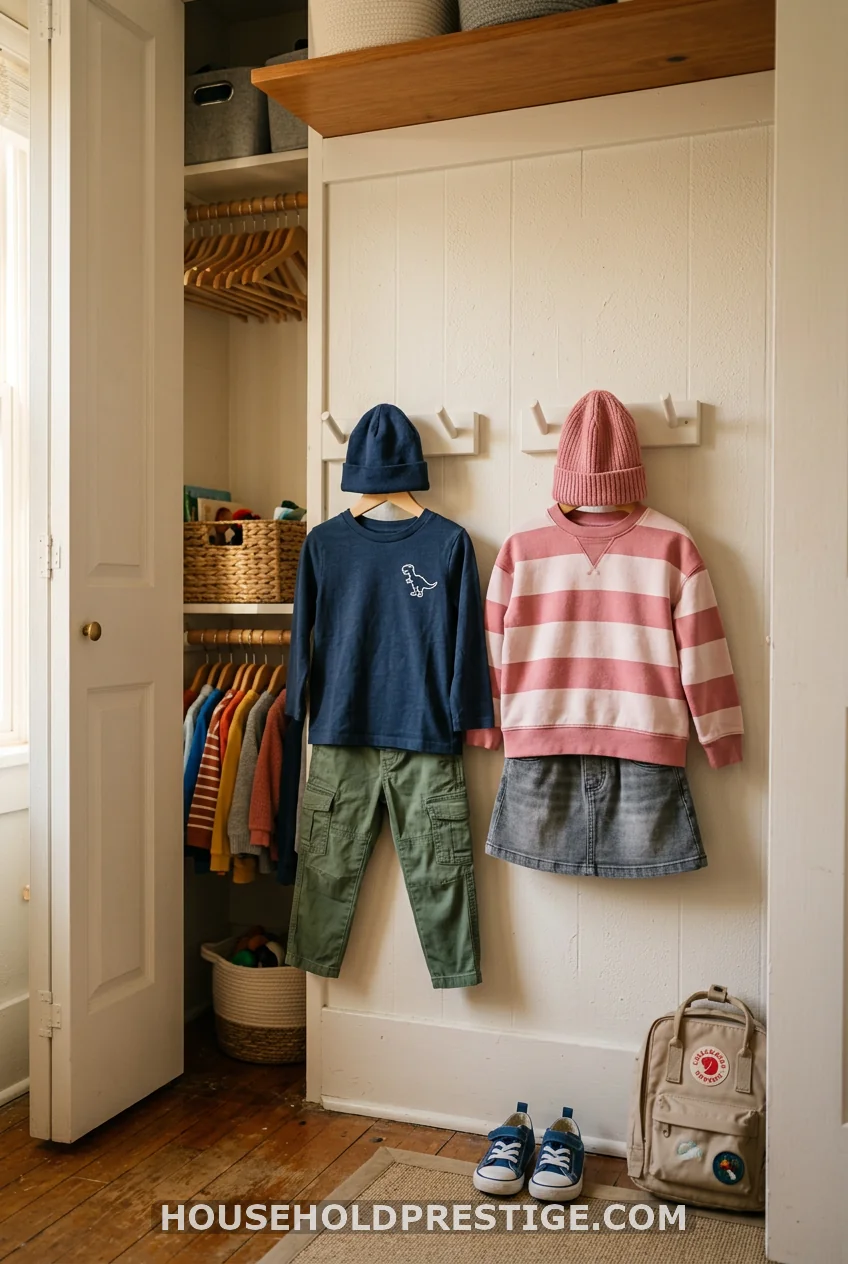
School mornings turn into a search party when everyone is half asleep. A single hook per kid, set at their height, ends it. Each night, they hang the next day’s full outfit, socks and all. In the morning, the clothes are visible, wrinkle-free, and ready.
The bonus is quiet but real. A kid who picks tomorrow’s outfit the night before is learning to plan ahead. The hook does the nagging for you.
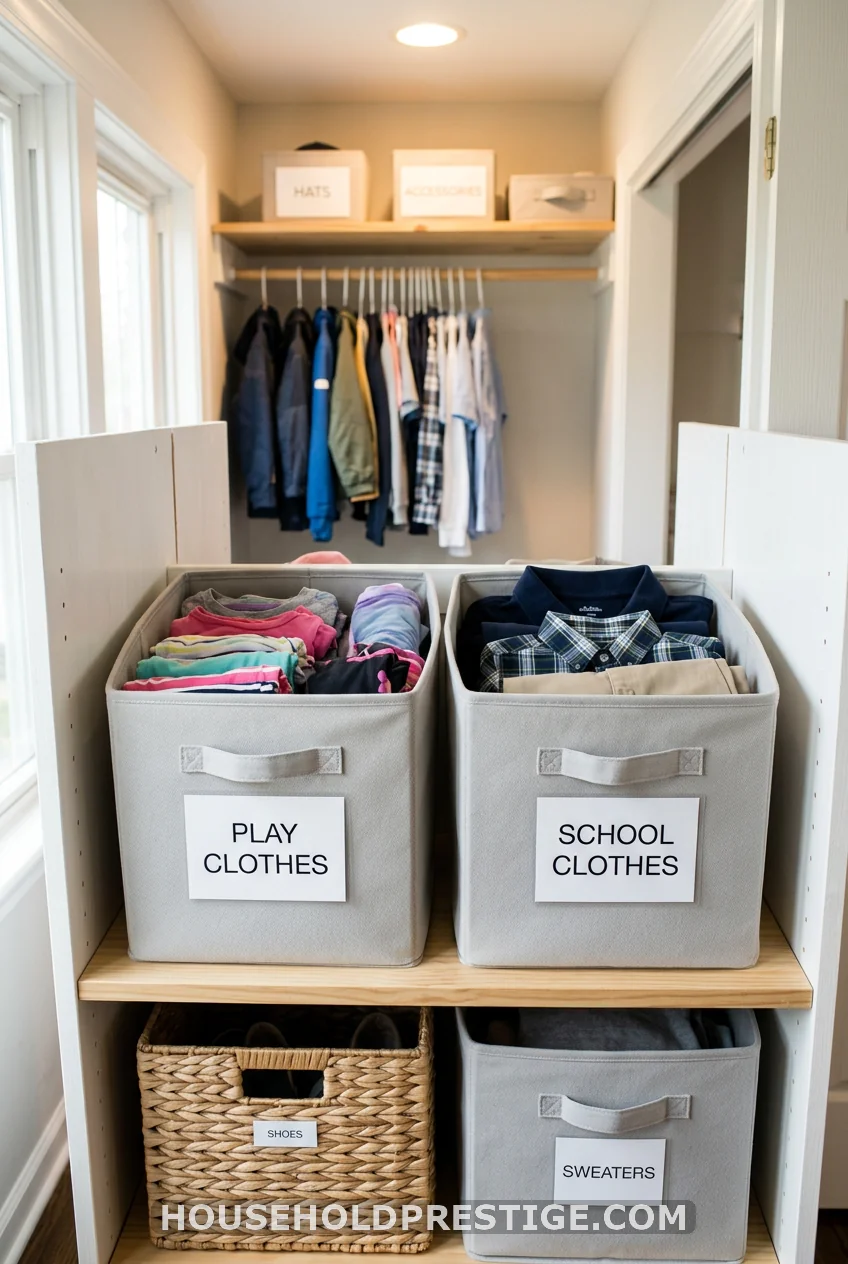
10. The Label Myth, Busted
What most parents think: Labels are fussy, extra work. You make them once, the kids ignore them, and you have wasted a Sunday with a label maker.
What I found instead: Labels are the reason a system survives past week one. The work is not the labeling. The work is the daily decision about where things go, made over and over by everyone in the house. A label removes that decision.
When a shelf says “school clothes” and a bin says “socks,” nobody has to think. Your kid does not think. You do not think. The clothes go back where they belong on autopilot, which is the only way any closet stays organized once the novelty wears off.
Use pictures instead of words for kids who cannot read yet. A small photo of socks on the sock bin works just as well as the printed word, and a three-year-old can follow it.
The myth says labels are for show. The truth is, they are the cheapest insurance you can buy against the closet sliding back into chaos.
11. Add a Step Stool That Earns Its Spot
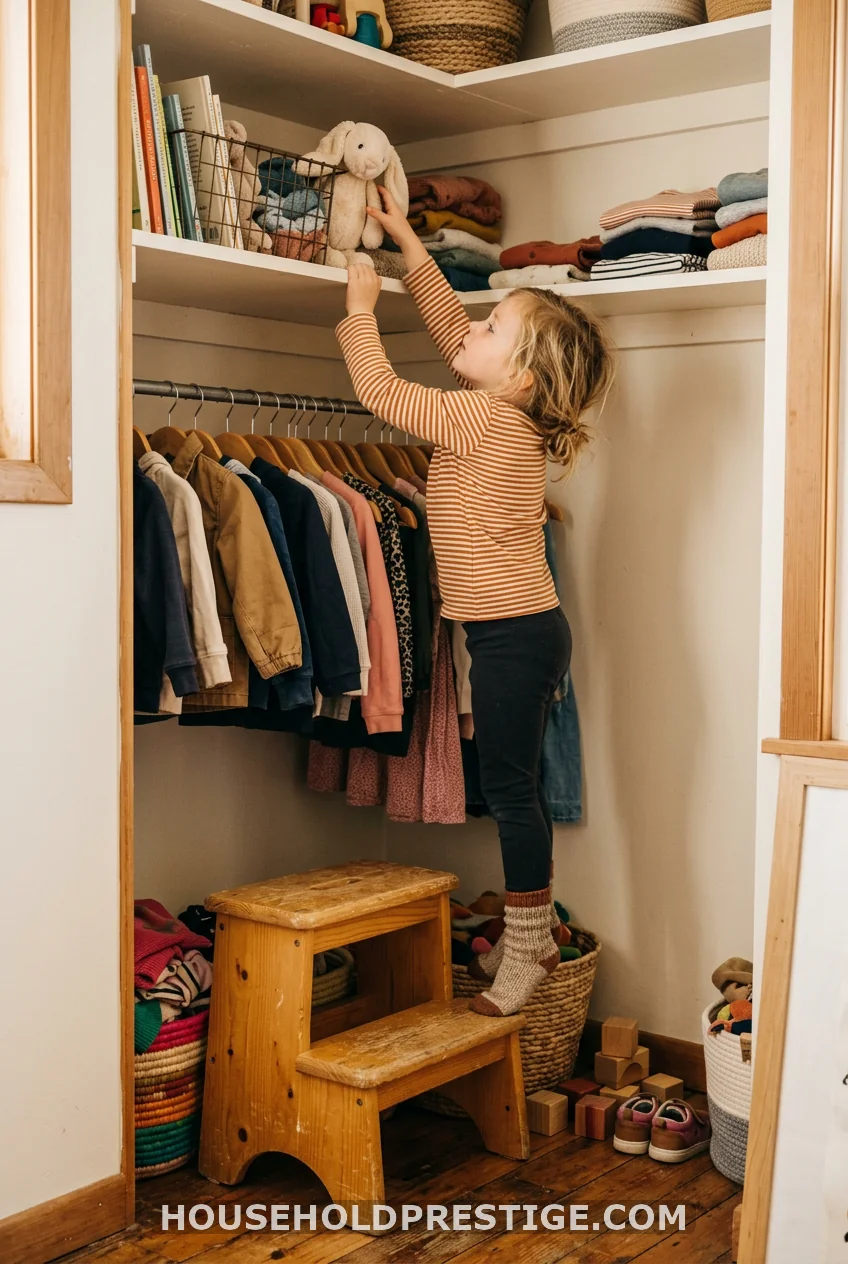
A kid who can reach their stuff puts their stuff away. A small stool tucked in the closet corner gives short legs access to higher shelves. It takes the load off you and hands your child a bit of independence. Small object, big payoff.
12. Switch to Slimline Hangers
Bulky plastic hangers steal the room you do not have. Slimline velvet hangers, around $14 for a 50-pack, fit far more clothes on the same rod. The non-slip surface keeps shirts from sliding into a heap on the floor, too. In a small shared closet, the inches you save here add up fast.
13. Send Overflow Under the Bed
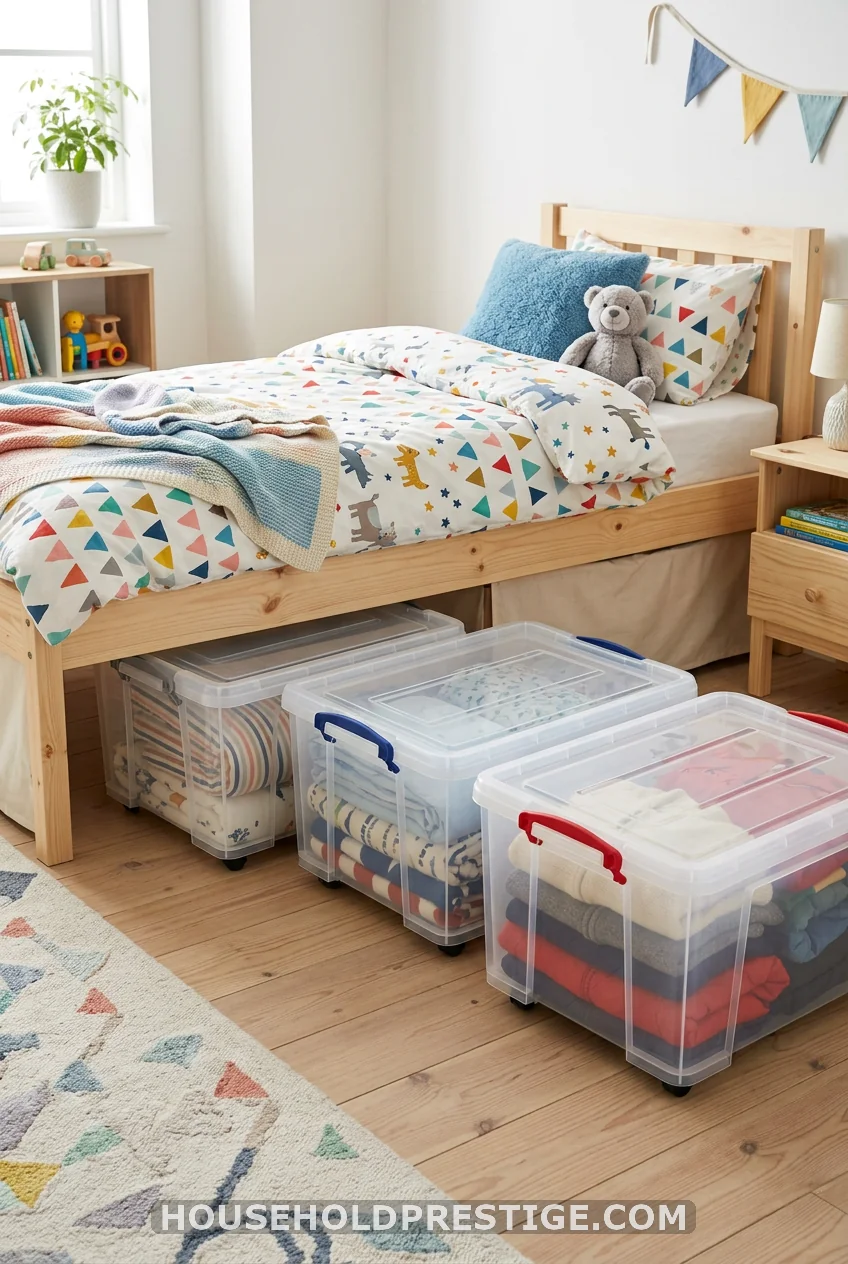
The closet does not have to hold everything. The space under the bed is some of the best storage real estate in a kid’s room, and most of us ignore it.
Use flat, clear, lidded bins on wheels or low gliders. Store the bulky, rarely-touched things there: extra bedding, off-season coats, hand-me-downs waiting for the next kid to grow into them. That frees the closet for daily clothes, which is the stuff that needs to be easy to reach.
Label the under-bed bins, too. Out of sight turns into out of mind fast, and a label saves you from pulling out three bins to find the winter hats.
14. Hang a Pegboard for the Older Kid
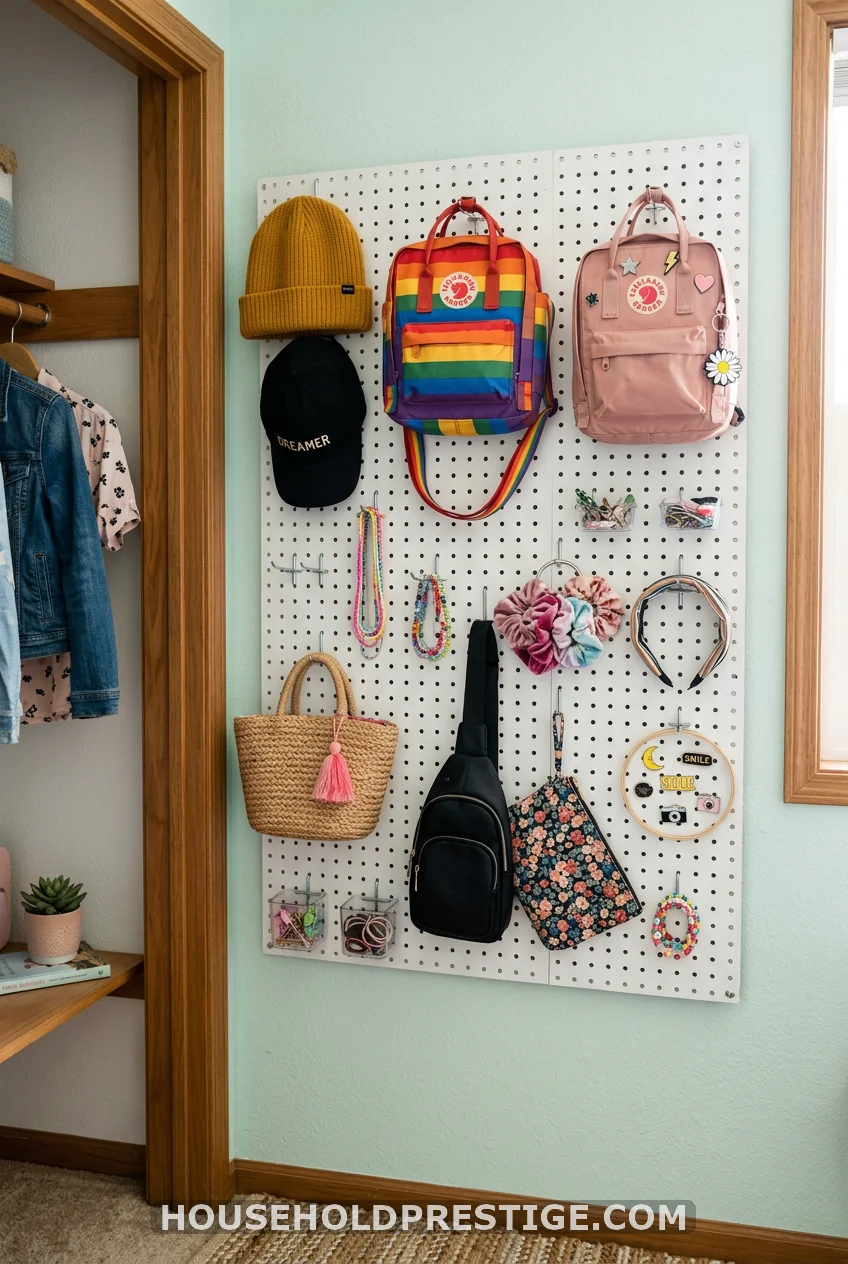
Tweens and teens collect things that little kids do not. Bags, headphones, hats, and a growing pile of accessories that have no home. A pegboard on an empty closet wall handles it.
The strength of a pegboard is that it moves with them. Hooks pop in and out, so the layout changes as the collection changes. Hang a few baskets on it for small stuff and pegs for the rest. It keeps the floor clear and gives an older kid a setup that feels like theirs, not a nursery hand-me-down.
15. Rotate Clothes by Season
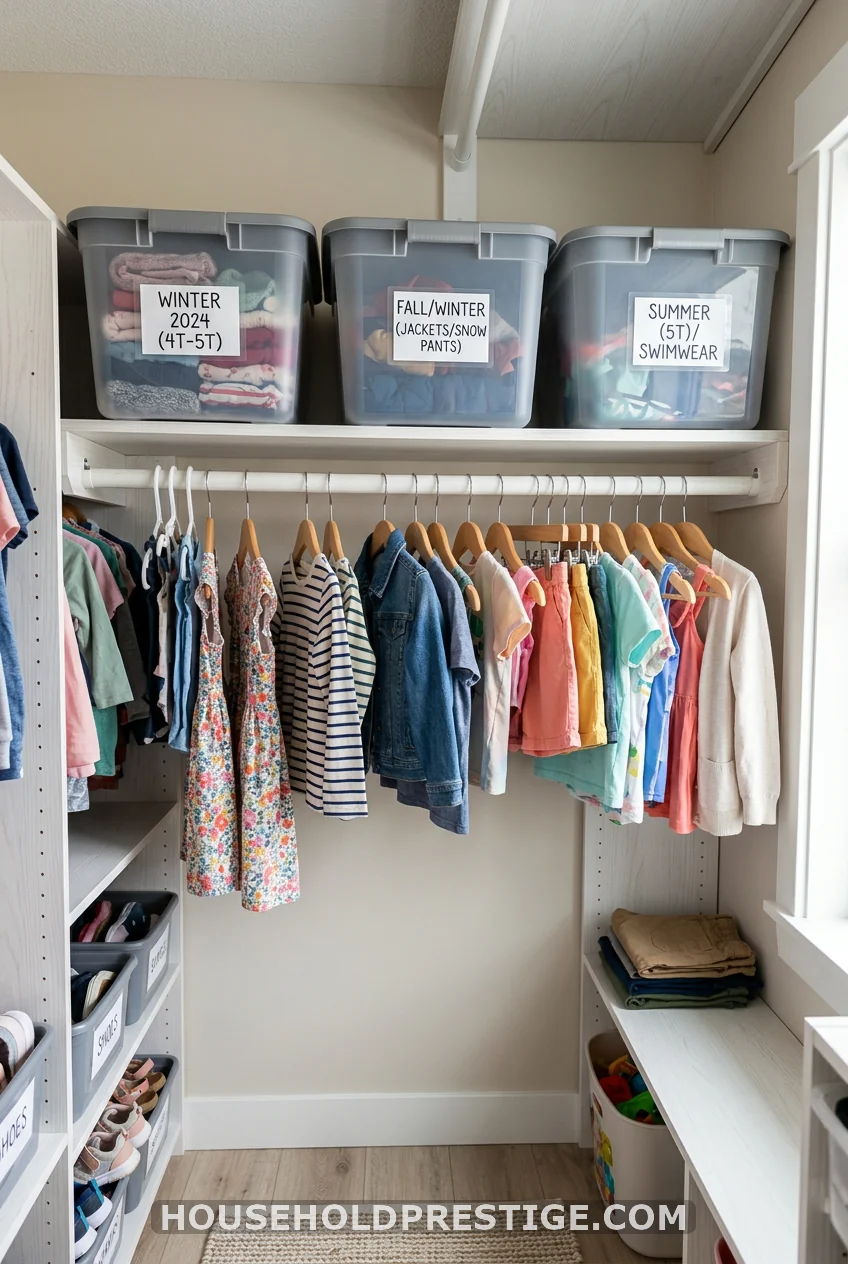
Keeping all four seasons in one shared closet guarantees a mess. Pull the off-season clothes into labeled bins on a high shelf or under the bed. What hangs in the closet should be only what your kids can wear right now. This cuts the visible clutter by half and costs nothing.
16. Mount a Hook Bar for Backpacks
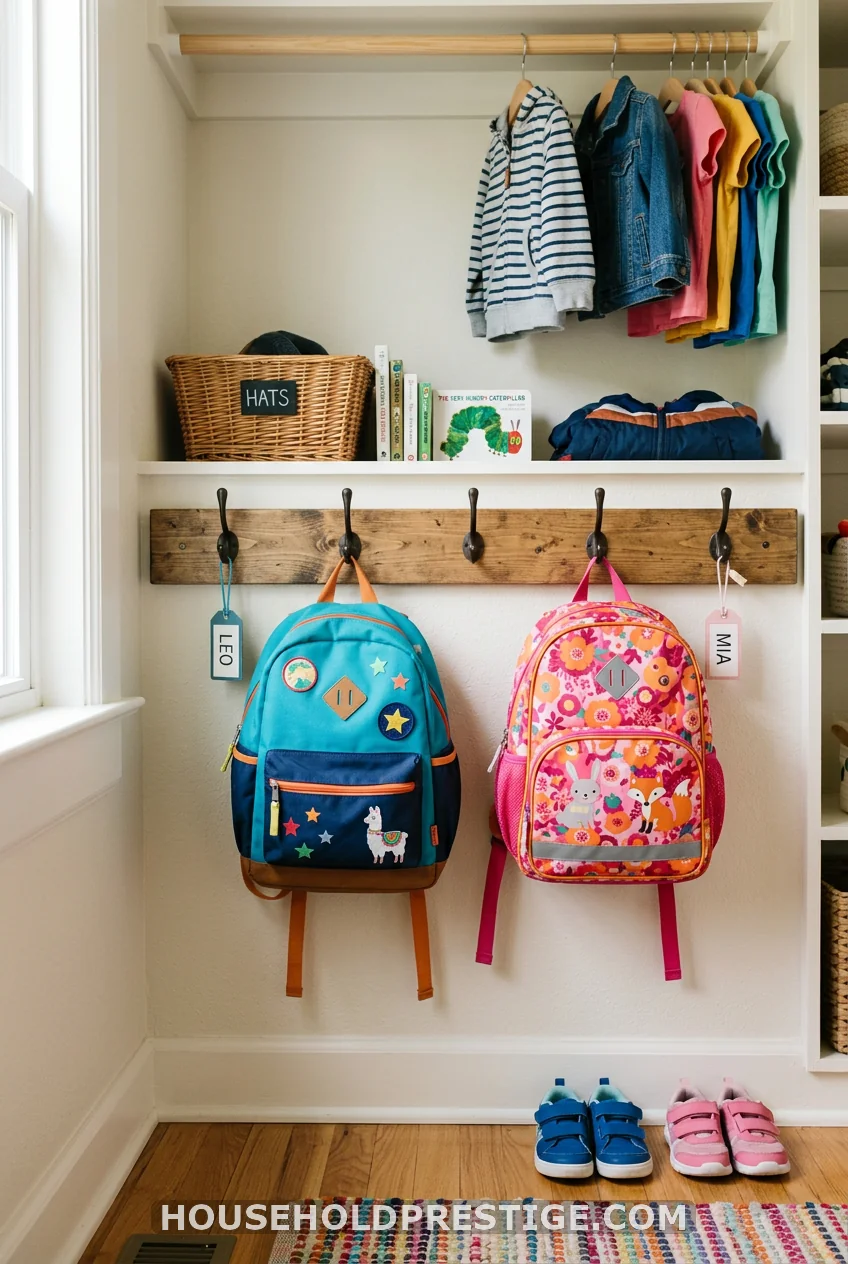
Backpacks are bulky, and they end up everywhere but where they should. A low hook bar inside the closet, one hook per kid, gives each bag a home. Bags stay off the floor, ready to grab on the way out the door, and the closet floor stays clear for shoes.
17. Do a 15-Minute Monthly Reset
No system stays perfect on its own. The fix is small and regular, not big and rare. Once a month, set a timer for fifteen minutes.
Pull everything off one rod or one shelf. Sort fast: what still fits stays, what does not goes in the outgrown basket, what is out of season moves to the high bin. Put the rest back where its label says it goes.
Do it with your kids, not for them. They learn which clothes they reach for most, and they start to see why the system works. Fifteen minutes a month beats a four-hour overhaul twice a year, every time.
Bringing It All Together
You do not need a custom closet or a big budget to make a shared kids’ closet work. You need a clear line between each kid’s stuff, storage that your child can reach, and a quick monthly habit to keep it honest. Start with one idea. Split the space by kid first, since that single move does the most. Add a low rod next. Build the cube system when you have a free Saturday.
The goal was never a closet that looks flawless in a photo. It is a closet your kids can run themselves, where the morning starts calmly instead of with a hunt for missing socks. Pick one idea today and try it for a week. You will feel the difference the next morning.
Frequently Asked Questions
How do I organize a kids’ closet for two children sharing one space?
Divide the closet by child first, not by clothing type. Give each kid their own rod, shelf, and bin row, and mark the border with a color or a name label. When everything one child owns lives in a single zone, they know where to look and where to put things back, which cuts the daily arguing.
What are the best kids’ closet organization ideas for a small space?
A second low-hanging rod doubles your usable space for free, slimline hangers fit more clothes on each rod, and the back of the door holds shoes in a pocket organizer. Send bulky, off-season, and rarely-used items under the bed so the closet itself only holds daily clothes.
At what height should I hang a closet rod for a young child?
Set the lower rod about 30 inches off the floor for a toddler or preschooler so they can reach their own clothes. Keep a second rod around 60 inches for longer items and adult reach. Use adjustable rods so you can raise the low one as your child grows.
How do I keep a kid’s closet organized long-term?
Build a 15-minute monthly reset into your routine. Pull clothes off one rod or shelf, sort what fits, drop outgrown pieces into a donation basket kept inside the closet, and return the rest to labeled spots. Labels and a regular habit matter more than any single product.
What storage bins work best in a kids’ closet?
Choose lightweight, clear, or open-front bins your child can lift and see into on their own. Heavy or solid bins look tidy but defeat the purpose, since kids cannot manage them without help and cannot tell what is inside. Soft fabric bins are a budget-friendly pick that little hands can handle.