

By July, my pool deck looked like a yard sale. Wet towels draped over chairs, a deflated unicorn float wedged behind the filter, goggles in three different “safe spots” I could never find again. If your pool area has hit that same tipping point, these pool organization ideas are for you. I have tried most of them in my own backyard, broken a few, and kept the ones that survive sun, splash, and a houseful of kids.
Here is the promise: by the time you reach the bottom, you will have a plan for every messy category. Floats. Towels. Toys. The little stuff that vanishes. Some fixes take ten minutes. One is a full weekend build that I will walk you through, bolt by bolt. Pick what fits your space and skip the rest.
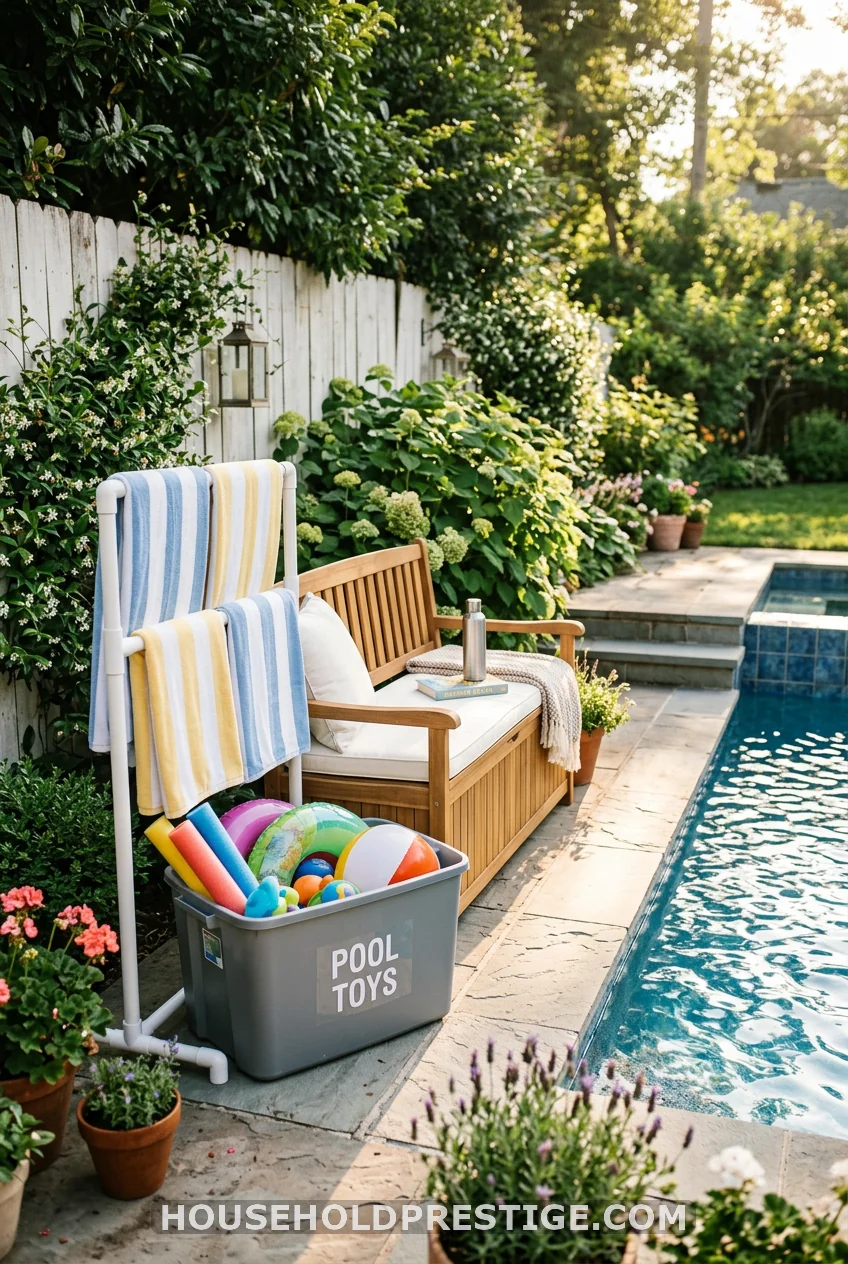
1. Build a PVC Towel and Float Rack (The One Worth a Weekend)
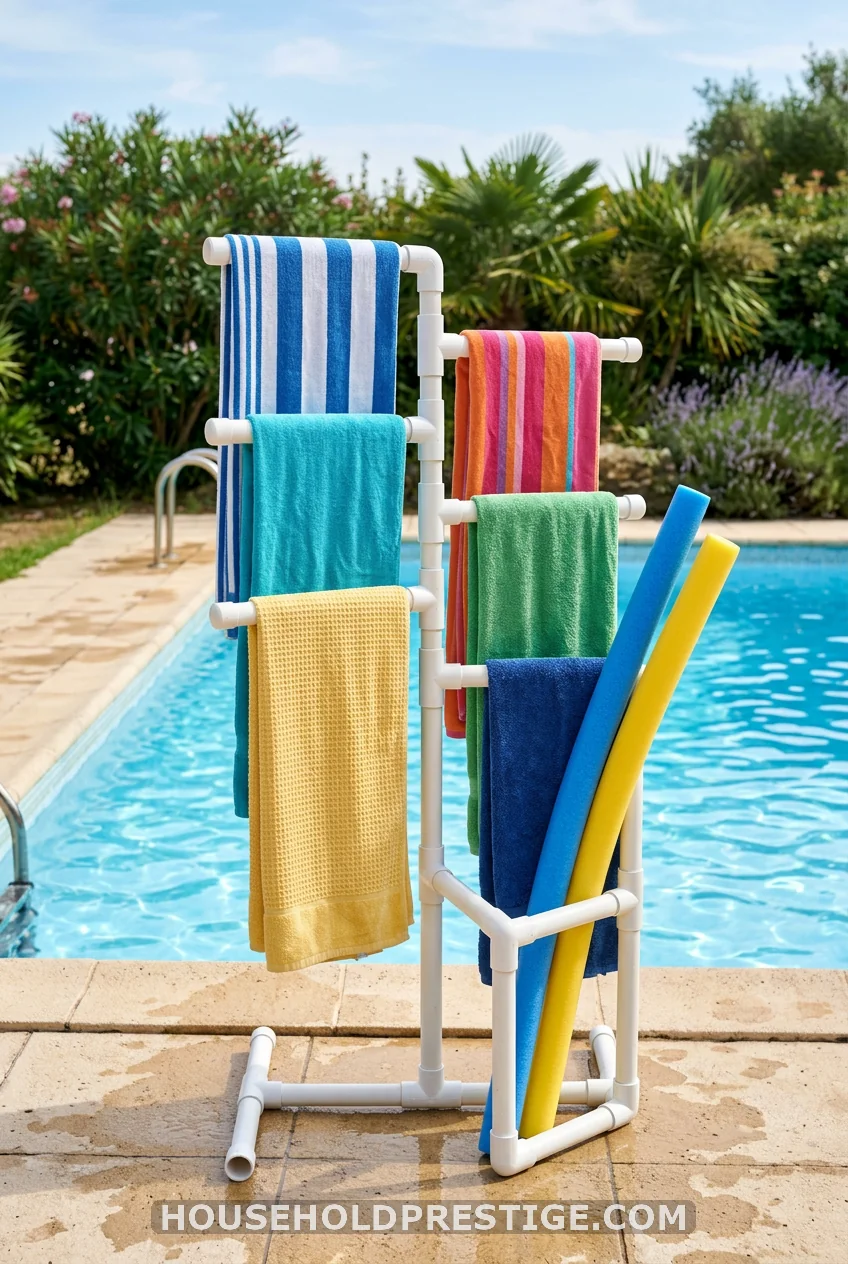
This is the project I push hardest, because it solves three problems at once. Wet towels get a place to dry. Floats and noodles lean against the frame instead of blowing into the water. And the whole thing breaks down for winter. The two highest-saved posts in this niche are both DIY rack builds, so the demand is real. Most blogs show you a photo and stop there. I am going to give you the full build.
Why this works
A towel hung over a chair stays damp and starts to smell by day two. Air needs to move around the fabric. A rack with spread arms and open sides dries a beach towel in a couple of hours, even in humidity. The same frame doubles as a leaning post for long items, which keeps your deck walkable.
Dimensions that hold up
Aim for a base around 32 inches by 42 inches and a height of 40 to 48 inches. That footprint resists tipping when six wet towels hang on one side. Go shorter and a gust takes it over. Go much taller and it gets top-heavy.
Step-by-step
- Cut your 1-inch PVC: two 42-inch pieces and two 32-inch pieces for the rectangular base, plus one 42-inch upright. Add six 12-inch arms.
- Sand the printing off each pipe with 100-grit paper. It takes ten minutes and the finished rack looks store-bought.
- Dry-fit the base rectangle using four 3-way corner fittings. Check that it sits flat.
- Glue every base joint with PVC cement. Leave the vertical upright unglued so you can pull it for storage.
- Slide the upright into a T-connector on the back rail. Stack the arms using cross fittings spaced about 6 inches apart.
- Cap every open arm end so towels slide off without catching.
- For stability, fill the base pipes with play sand before capping. This is the trick most tutorials skip.
Materials and rough costs
| Item | Quantity | Cost |
|---|---|---|
| 1-inch PVC pipe (10 ft) | 4 | $12-16 |
| 3-way and cross fittings | ~10 | $8-12 |
| End caps | 6 | $3-5 |
| PVC cement | 1 | $5 |
| Play sand | 1 bag | $4-6 |
That lands you under $40, often closer to $31 if you already own a hacksaw. A comparable poolside valet at a store runs well past $100.
Common mistakes to avoid
Gluing the upright in place. You will regret it the first time you try to fit the rack in a shed. Using a thin-wall pipe, which sags under wet towels. Buy the heavier schedule-40 pipe in the same diameter. Skipping the sand, which is the difference between a rack that stands and one that face-plants in the first storm.
Pro move
Drill a few small drainage holes in the lowest base pipe before you fill it with sand. Rain finds a way in, and you want a path out.
2. Hook a Mesh Hamper to the Fence
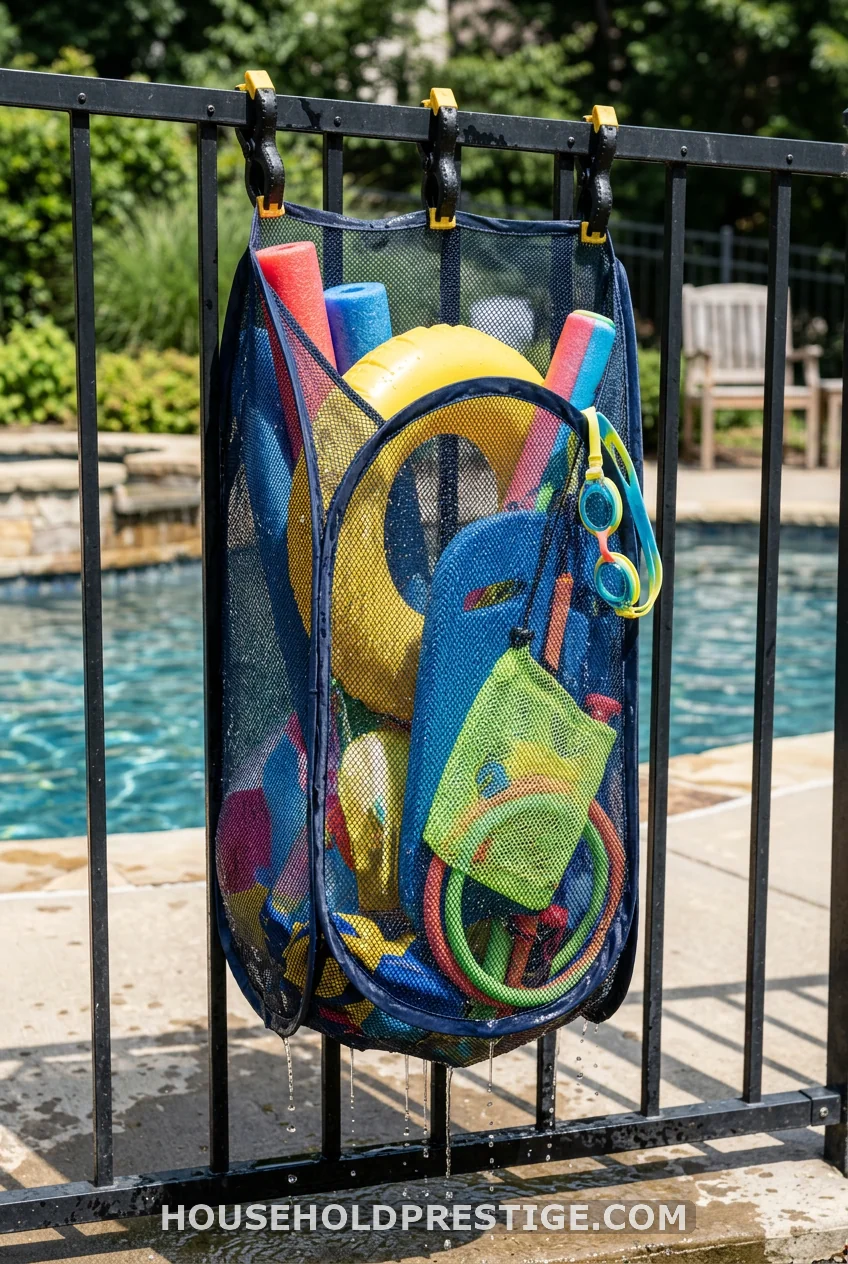
Grab a wide mesh laundry hamper. Add two velcro straps. Hook it to your pool fence. Toss in wet goggles, dive rings, and small toys, and they drip-dry through the netting by morning. No mildew, no mystery puddle in the garage. Cost is about $10, and it folds flat when summer ends.
3. Choose a Storage Bench That Hides the Mess
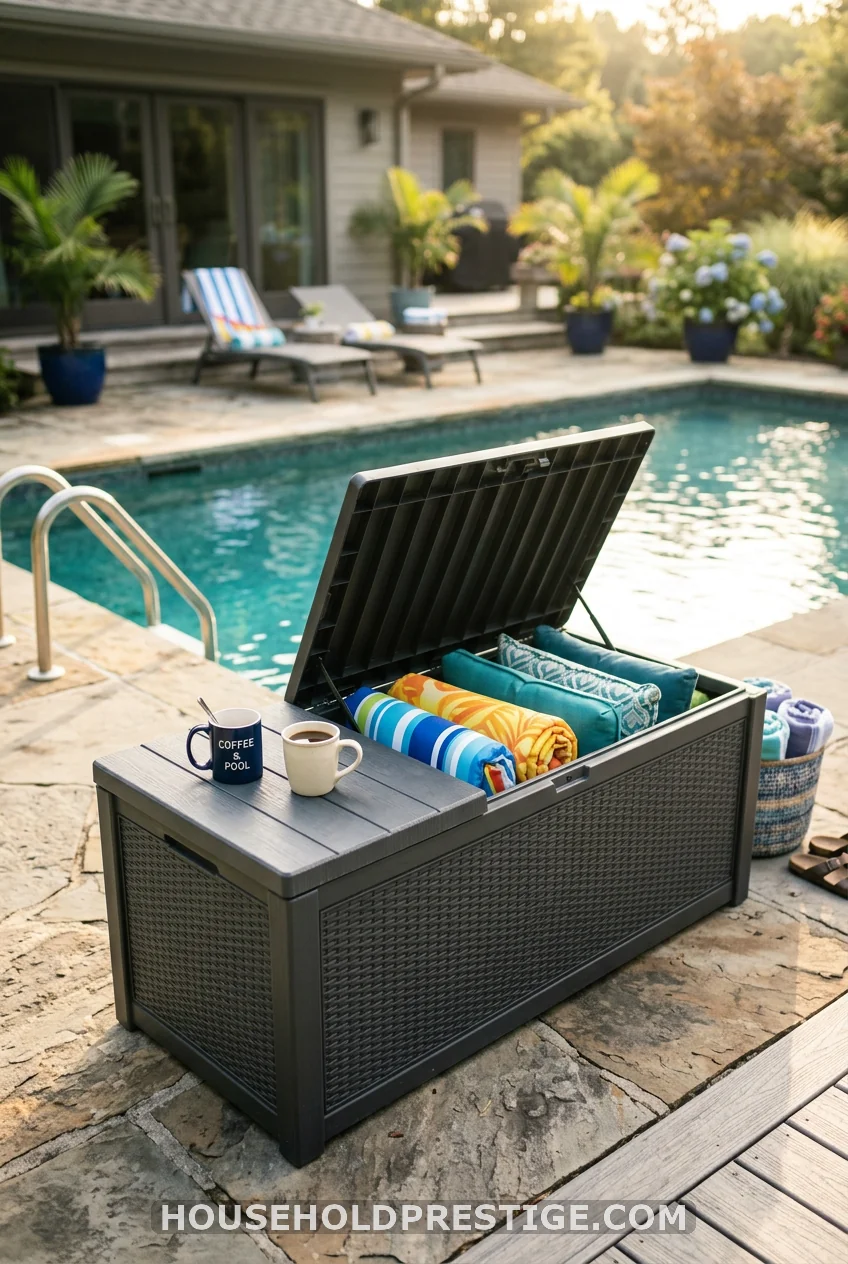
A lidded storage bench earns its spot twice. People sit on it. Floats, covers, and seat cushions live inside it, out of the sun and out of sight. Look for a resin or rattan-style box with a weep hole so rainwater drains instead of pooling around your cushions.
I keep mine stocked with the bulky stuff I reach for daily: two big rafts, a stack of towels, and the skimmer net. The Keter and Suncast deck boxes in the 100 to 150-gallon range fit a surprising amount and shrug off weather. Set the box on a couple of pavers so the base stays off wet ground, and it will outlast cheaper bins by years.
4. Mount a Pegboard for the Small Stuff
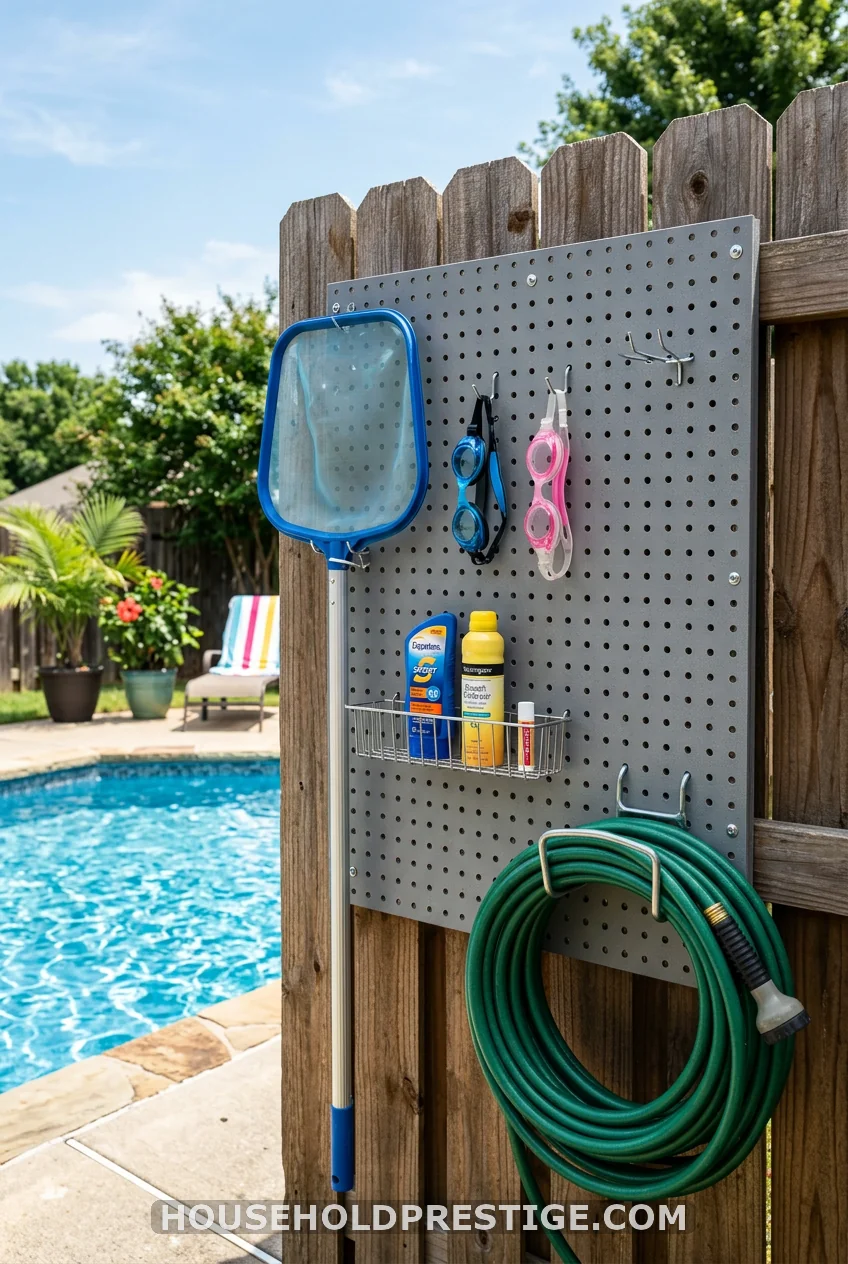
Goggles, masks, and the skimmer net never have a home. Give them one. A pegboard on the fence or shed wall puts every small item at eye level. Rearrange the hooks as the season shifts. Cost is low, and you stop buying replacement goggles you already own.
5. The Wet-Towel Mistake That Cost Me a Warranty
Let me save you the lesson I learned the slow way.
We installed a removable mesh safety fence in the spring when our son started crawling. It is the right call for little ones, and I would do it again. But that first summer, with no rack in place, everyone draped wet towels over the top rail. It seemed harmless.
Two things went wrong. First, the constant weight and moisture on the rail voided the fence warranty, which I found buried in the fine print only after the rail started to bow. Second, the towels never fully dried in that tight fold, so they came in smelling of mildew every single time.
The fix was the rack in idea number one. Once towels had a real home, the fence stayed a fence, and the laundry stopped souring. If you have mesh fencing, treat the top rail as off-limits for hanging. It is not a towel bar, even though it looks like the most convenient one in the yard.
6. Repurpose a Door Into a Towel Station
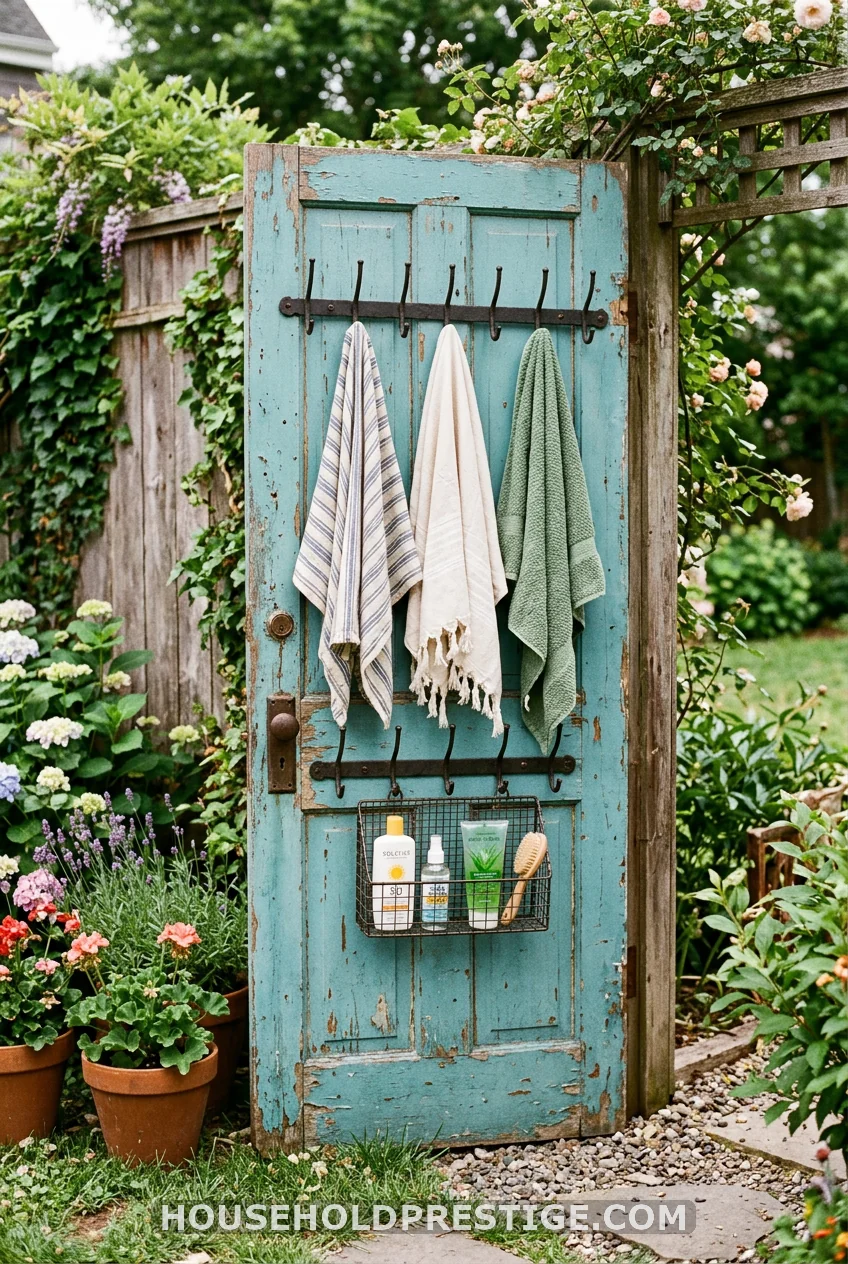
Got an old solid-core door in the garage? Stand it up, paint it a cheerful color, and add a row of towel hooks and a wire basket. It becomes a poolside towel station that looks like decor. Total spend stays under $25 if the door is free, and it gives drips a place to land that is not your kitchen floor.
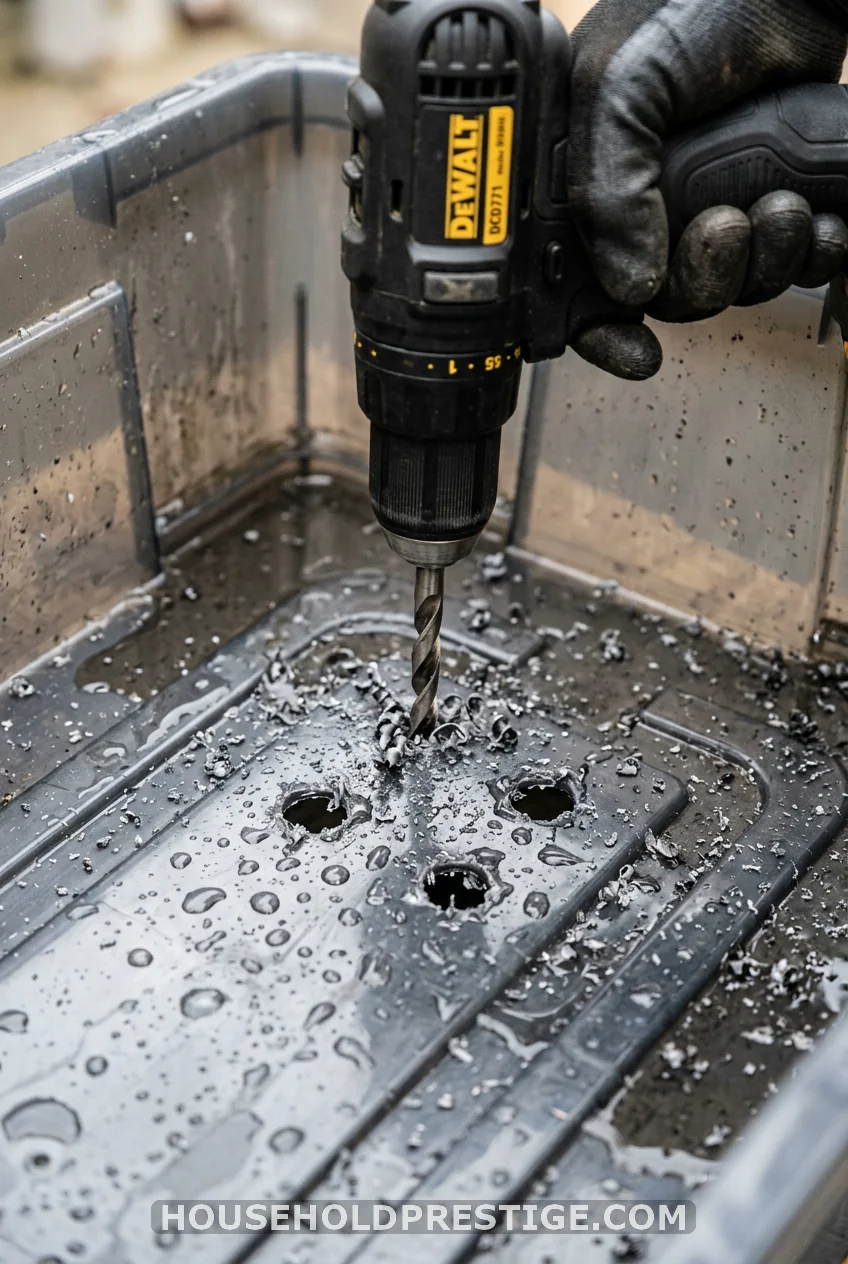
7. Sort Toys With Labeled, Drilled Bins
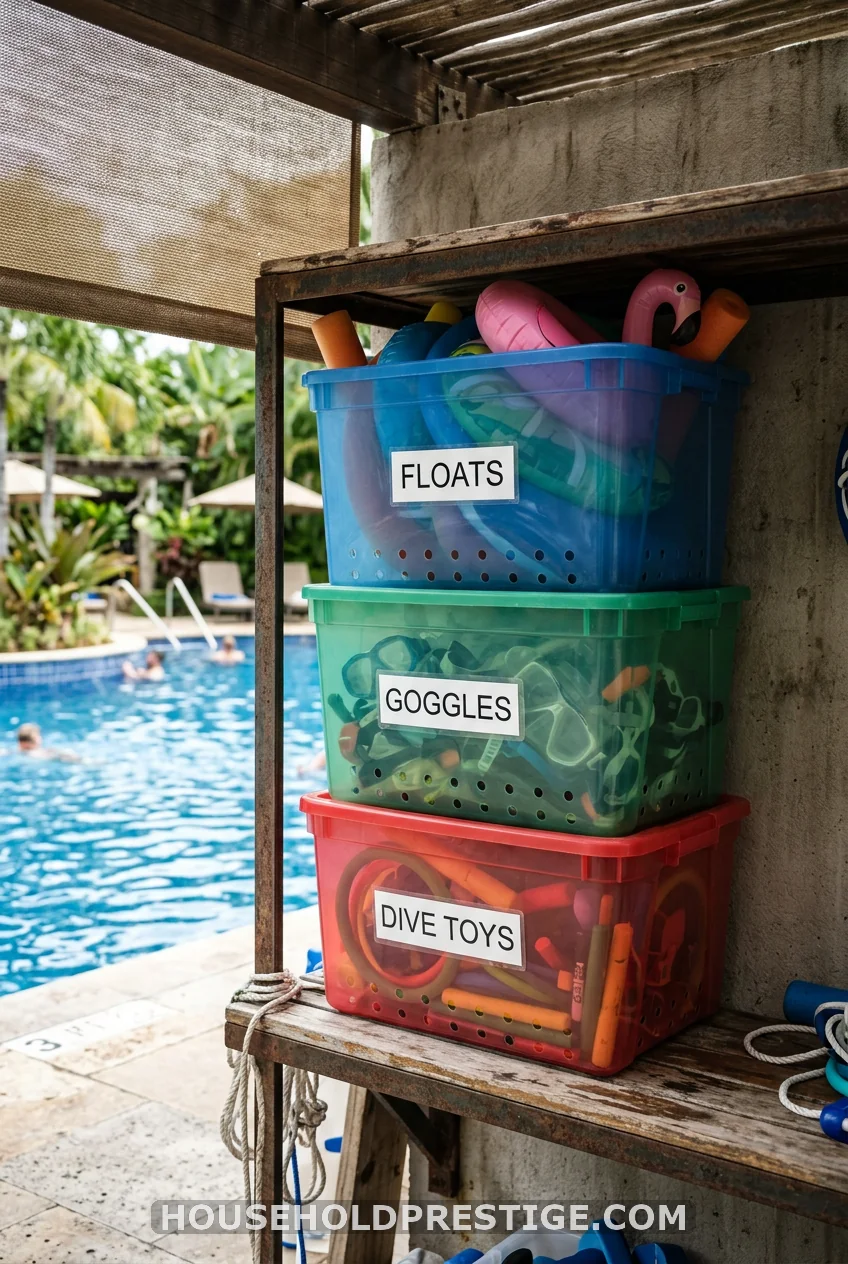
A single giant tub turns into a wet, tangled pit by August. Split it up instead.
Run three or four bins with clear labels: dive toys, floats, goggles and masks, and a catch-all. Assigning each kid a color stops the “that’s mine” squabble before it starts, and cleanup becomes a thirty-second sort.
The detail that matters most: drill drainage holes in the bottom of every bin. Solid totes trap pool water and breed that musty smell within a week. A dozen quarter-inch holes let everything breathe and dry. Stack the bins on a low shelf in the shade so the plastic does not bake brittle in direct sun.
8. Myth: You Need a Whole Pool House to Stay Organized
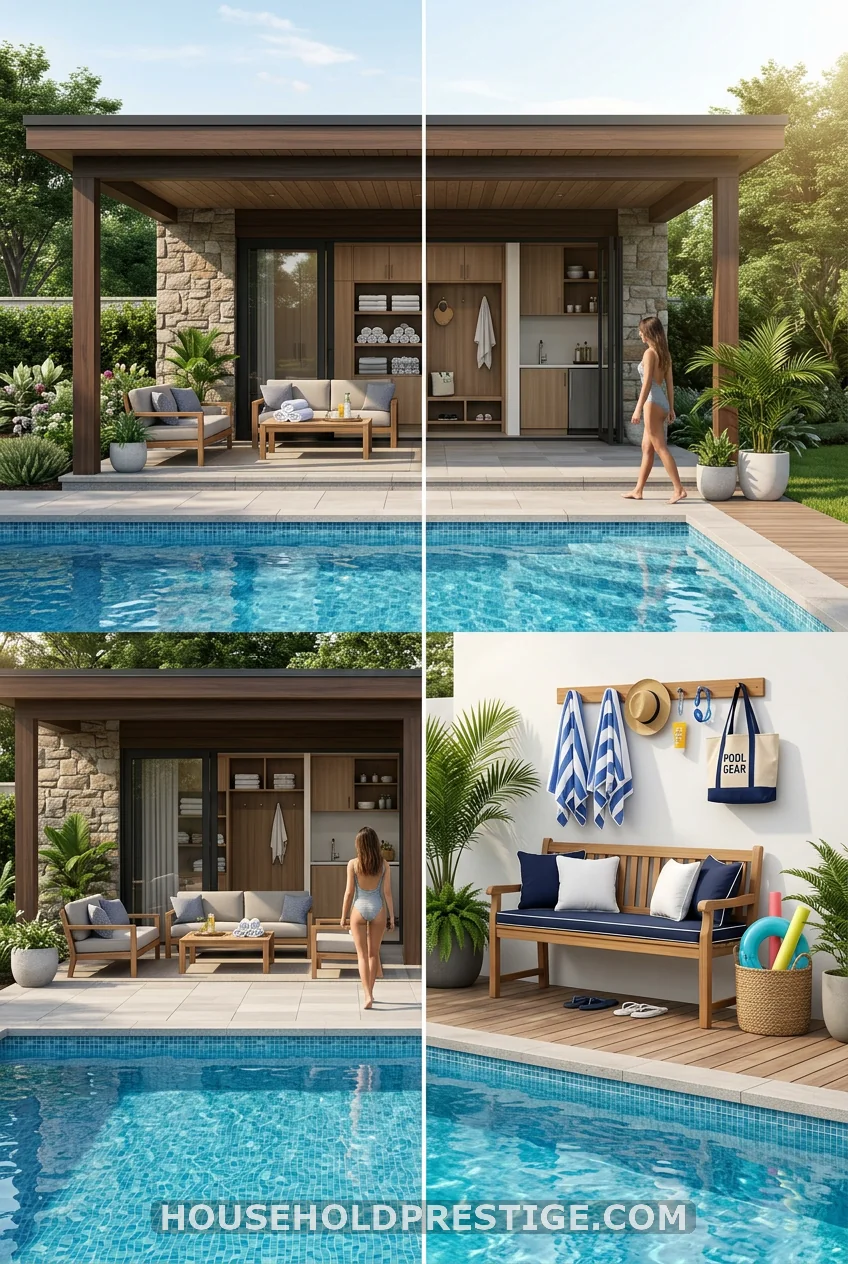
What most people think: real pool organization means a dedicated pool house, a built-in cabinet wall, or a pricey teak valet tower.
The reality: a $40 rack, one storage bench, and a few drilled bins handle the same load for a fraction of the cost. A blogger I follow with a sleek minimalist pool keeps her whole setup hidden with a bench and a couple of baskets, no pool house in sight. Square footage is not the fix. A home for each category is the fix. Spend the saved money on a second set of fast-dry towels instead.
9. Send Off-Season Gear Overhead
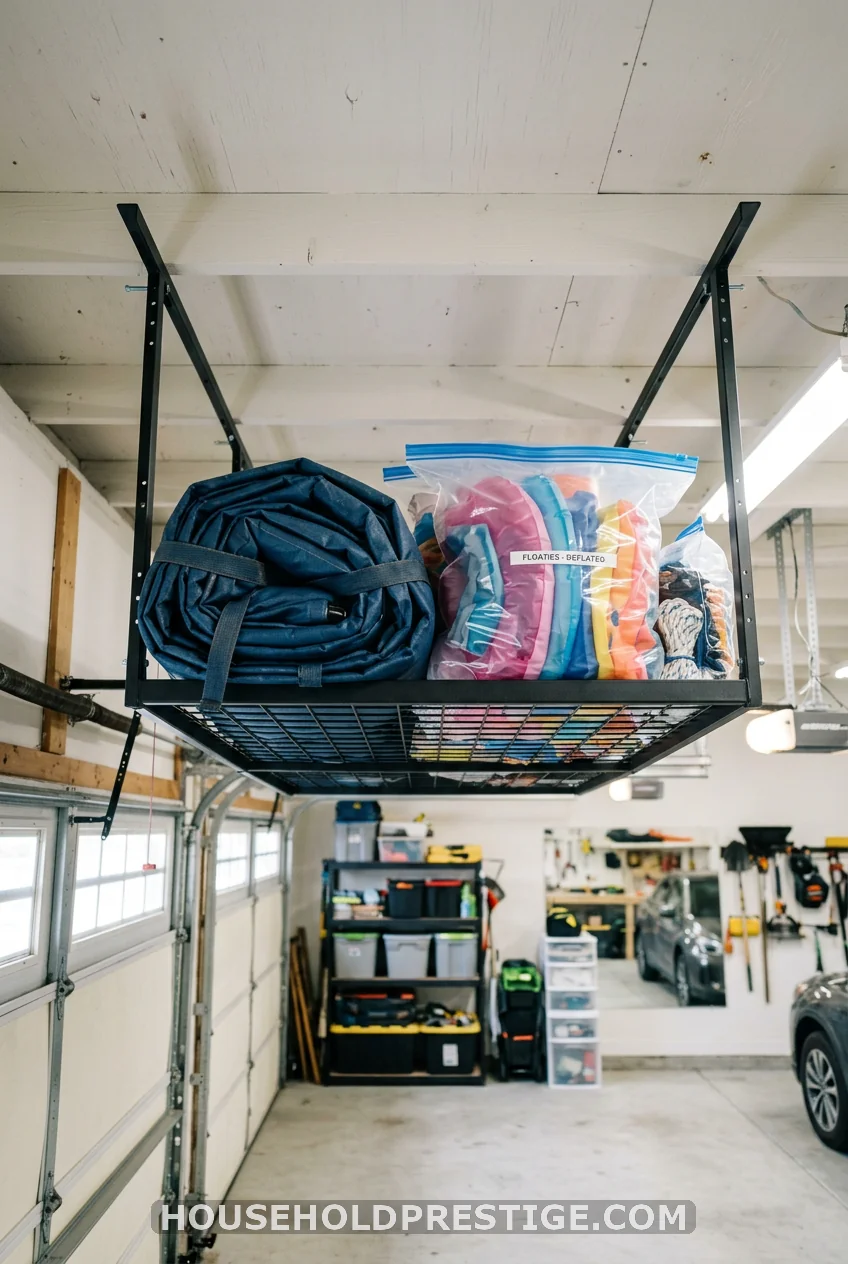
Winter covers and rarely-used rafts hog floor space. Move them up. An adjustable overhead garage rack mounts to the ceiling and swallows bulky off-season gear. Bag the floats first to keep dust off. You reclaim the floor for the bench and bins you reach for daily.
10. Roll Out a Grab-and-Go Station
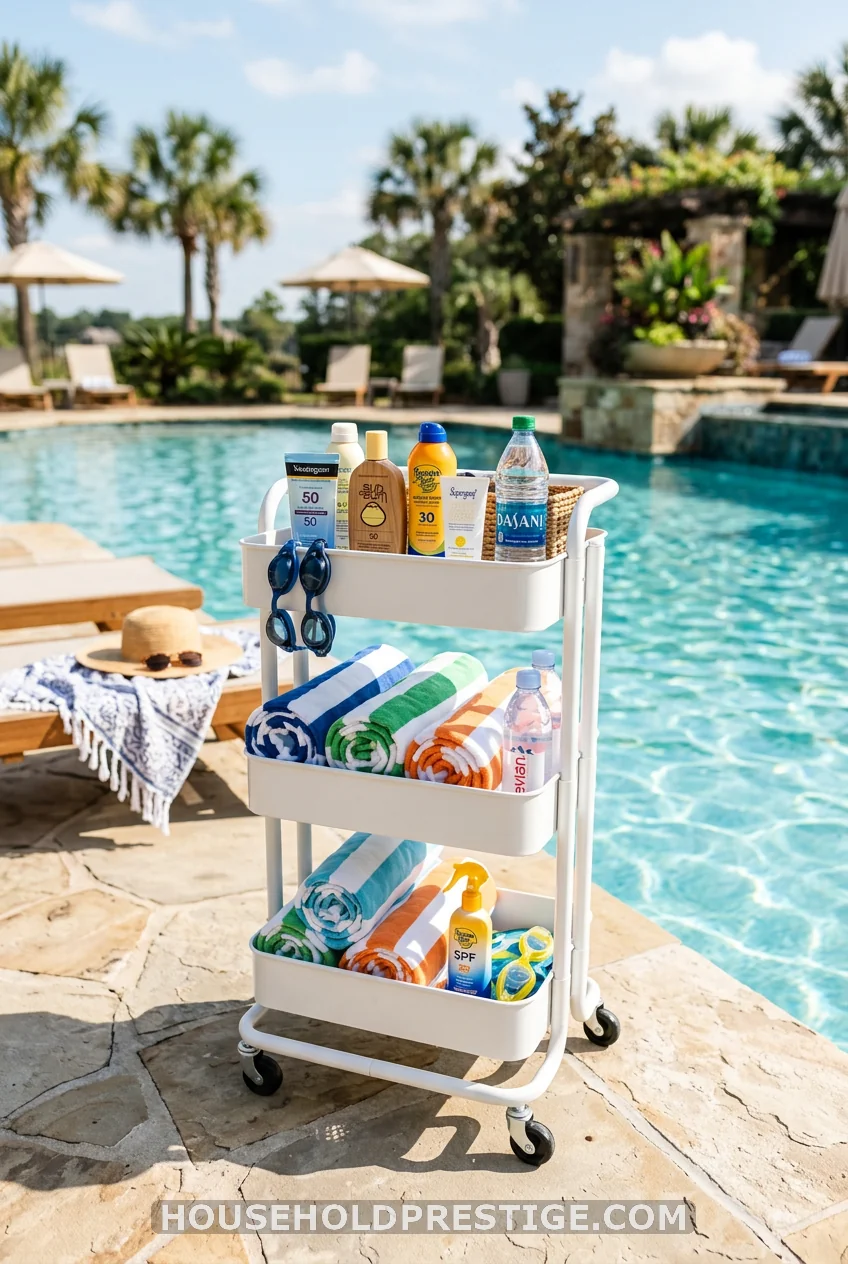
This is the upgrade that changed our routine the most, and it costs almost nothing to copy.
I took a three-tier rolling cart, the kind sold for kitchens and crafts, and turned it into a poolside command center. Top tier: sunscreen, bug spray, lip balm, and a small first-aid kit. Middle tier: rolled towels, one per person. Bottom tier: water bottles and a few snacks in a sealed container.
When it is pool time, I roll the whole thing out the back door in one trip. When the sky turns, I roll it back in. No more nine trips carrying armfuls of stuff. The cart has wheels rated for outdoor use, so the deck does not scratch it up.
Want a floating version for in-water drinks? Cut a hole in a foam pool noodle ring, drop a small plastic tub through the center, and you have a floating cooler caddy for a couple of dollars. It keeps cans within reach and off the steps where someone always knocks them over.
11. The Drainage Rule That Beats Mildew
One rule outranks every product on this list. Anything that holds wet pool gear needs drainage. Drill holes, choose mesh, or pick bins with built-in vents. Trapped water is what turns storage into a science experiment. Solve drainage first, and the rest of your system lasts.
Bringing It All Together
You do not need every idea here. Pick the rack for towels and floats, one bench or bin system for the bulky gear, and a single grab-and-go cart for the daily run. Add drainage to all of it. That trio handles the mess that used to swallow my deck, and it took one weekend and well under $100 to set up.
The best part is the quiet that follows. No more hunting for goggles. No more soggy laundry sneaking into the house. Just a pool area that is ready when you are. Start with the one fix that nags you most, and build from there. Your future self, the one not wrestling a tangled tub of toys in 90-degree heat, will thank you.
Frequently Asked Questions
What is the cheapest way to organize pool toys?
Drilled plastic bins and a mesh laundry hamper cost under $25 combined and handle most of the load. Sort toys by type or by kid, and add drainage holes so wet items dry instead of growing mildew.
How do I store pool floats so they last longer?
Keep floats out of direct sun when not in use, since UV breaks down the vinyl and fades the print. A lidded storage bench or an overhead garage rack works well. Rinse off chlorine and let them dry fully before storing to prevent sticky, cracked seams.
Where should I keep wet pool towels?
Hang them on an open rack with spread arms so air circulates, and they dry in a couple of hours. Avoid draping them over a mesh safety fence rail, which traps moisture and can void the fence warranty. A PVC rack or a hook-fitted door both do the job.
How do I keep my pool area organized in a small backyard?
Go vertical and multi-use. A pegboard handles small gear on a wall, a storage bench gives you seating plus hidden space, and a rolling cart moves the daily items in and out without a permanent footprint. You do not need a pool house to stay tidy.
What pool organization ideas work for renters?
Stick to freestanding and removable solutions. A PVC rack, a rolling cart, a mesh hamper with velcro straps, and stackable bins all travel with you and leave no holes in walls or fences.