

The floats are winning.
You’ve got three swim rings draped over the porch railing, a stack of noodles leaning against the fence like they’re waiting for the bus, and one inflatable raft that somehow migrated to the middle of the lawn overnight. Every morning, someone in your family walks out and trips over something that belongs in the pool — not on the patio.
Two summers ago, I finally got tired of the neon chaos and started testing DIY pool float storage ideas that actually fit my backyard and my budget. None of the 13 ideas below costs more than $40. Several cost nothing. Some take under an hour. Pick the one that matches your space and skill level, and you’ll have a tidy pool area before the weekend is over.
1. Build a PVC Pool Float Rack in an Afternoon
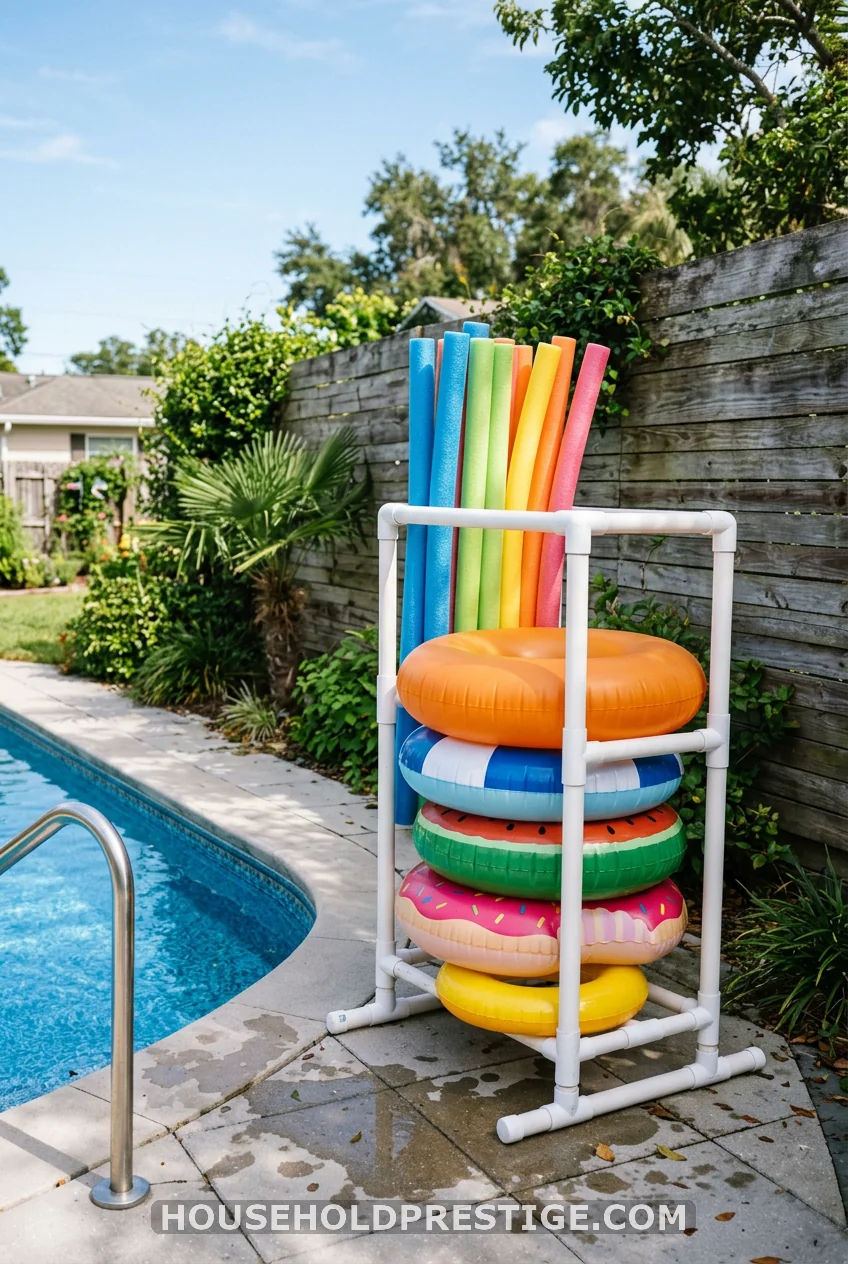
If you’ve priced out pool float storage at a retailer lately, you already know the sticker shock is real. Pottery Barn sells a teak pool float organizer for $399. Home goods stores stock deck boxes that can’t actually hold a full-size raft without bending the lid. PVC pipe is the answer — and a rack that holds 8–10 floats will cost you $25–40 in materials from any hardware store.
Why It Works
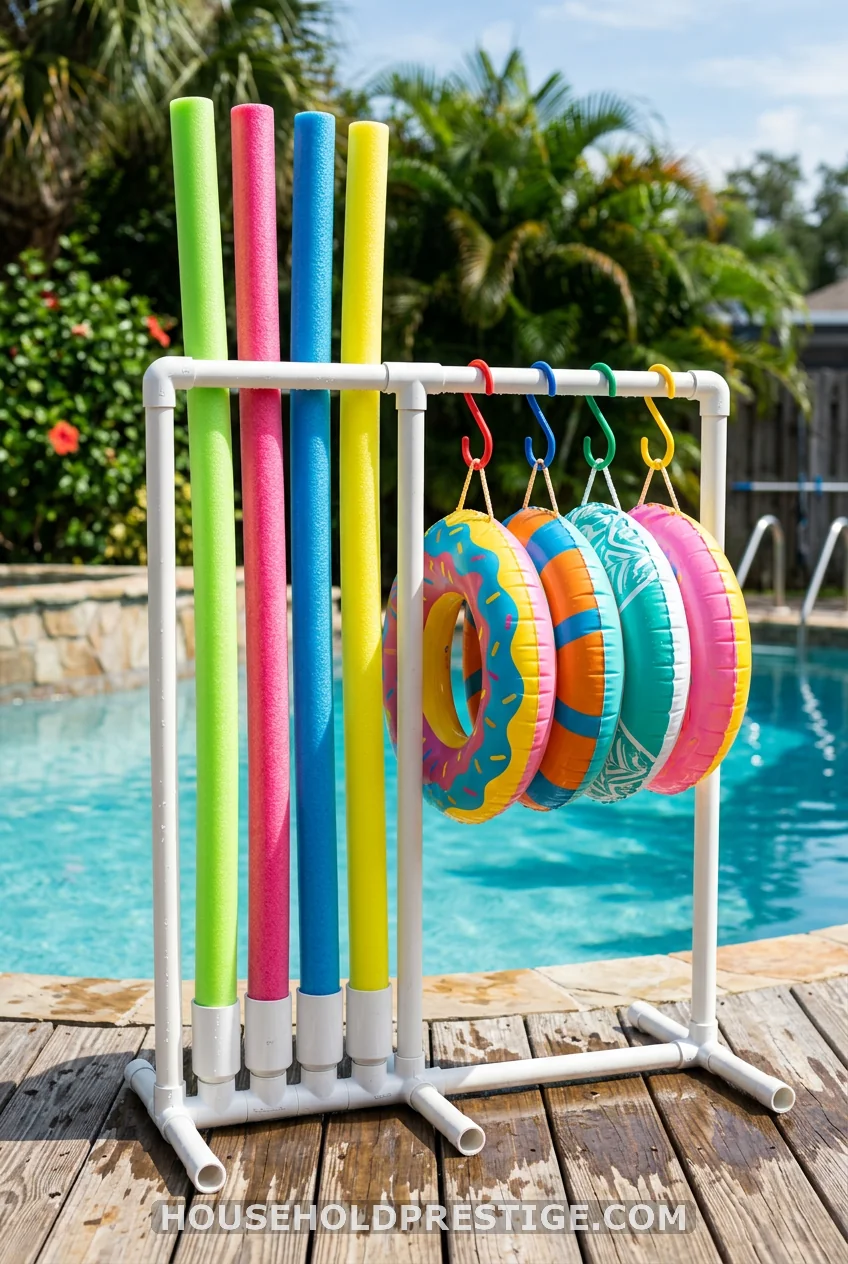
PVC Schedule 40 pipe is designed to live outdoors. It doesn’t rust, warp, rot, or absorb moisture. It’s UV-resistant when painted with the right product, and it’s light enough to move around the deck without help. The structure holds noodles vertically (the correct way to store them — more on that in the FAQ), and S-hooks on the top rail let you hang inflatable rings and rafts by their handles.
What You Need
| Material | Quantity | Approx. Cost |
|---|---|---|
| 2″ Schedule 40 PVC pipe, 10-ft sections | 3 | $5–6 each |
| 2″ PVC tee connectors | 4 | $1.50 each |
| 2″ PVC elbow connectors | 4 | $1.50 each |
| 2″ PVC end caps | 4 | $1.00 each |
| PVC primer and cement (small kit) | 1 | $7–9 |
| 3″ S-hooks, pack of 8 | 1 | $4 |
| Krylon Fusion Spray Paint for Plastic | 1–2 cans | $8 each |
| Estimated Total | $28–40 |
You’ll also need a hacksaw or PVC pipe cutter ($12 at Harbor Freight — worth owning), a tape measure, and a permanent marker.
Dimensions That Work
- Two vertical uprights: 54 inches tall each
- Base feet (front and back): 20 inches wide × 2 per side — this gives you a stable footprint without it tipping when loaded
- Top cross bar: 28 inches wide
- Mid cross bar: 28 inches wide, positioned 24 inches off the ground — this divides noodle space from the lower hang zone
A 54-inch upright height clears standard adult-height pool noodles (60 inches) when they lean at a slight angle. If your noodles are on the shorter side, 48 inches works fine.
Step-by-Step Build Instructions
- Cut your pipe. Using the cut list above, mark your 10-ft sections and cut. You’ll get roughly: two 54″ uprights, four 20″ base legs, and two 28″ cross bars from three 10-ft sections. A PVC pipe cutter is easier than a hacksaw — no rough edges.
- Dry-fit the entire rack first. Don’t cement anything yet. Assemble the full rack using your tees, elbows, and end caps without adhesive. Check that it stands level and doesn’t wobble. Adjust any cuts if needed. This step saves a lot of frustration.
- Prime and cement. Starting from the base and working upward, brush PVC primer (the purple stuff) onto both the pipe end and the inside of the fitting. Follow immediately with cement on both surfaces. Push together with a slight twist, hold for 30 seconds. Work in small sections — cement sets fast.
- Let it cure. Walk away for a minimum of 2 hours before putting any weight on the rack. Full cure is 24 hours. Rushing this is the most common mistake — a joint that looks solid will fail under a loaded float.
- Spray paint the rack. Use Krylon Fusion All-In-One for Plastic — it bonds chemically to PVC rather than just coating it, so it won’t peel. Standard exterior spray paint will flake off within a season. Apply 2–3 light coats, letting each dry for 20 minutes before the next.
- Attach S-hooks. Hang your 3-inch S-hooks from the top cross bar. Hang inflatable rings, kickboards, and rafts by their built-in handles. If your floats don’t have handles, loop a short piece of bungee cord through the valve stem — it doubles as a hang point.
- Load it up and position it. Set the rack in a shaded corner of the pool deck if possible. Direct UV exposure over multiple seasons fades colors and can slightly soften cheaper PVC. A shaded spot also makes grabbing a float far more pleasant at 2 pm in August.
Common Mistakes to Avoid
- Using 1″ pipe — it flexes too much under the weight of a fully-inflated float. Stick to 1.5″ or 2″.
- Skipping the dry-fit — once it’s cemented, it’s permanent. Check your dimensions first.
- Painting before the cement cures — solvent fumes from fresh cement can bubble your paint. Wait 24 hours.
- Setting the rack directly on concrete — drill four small holes in the base feet so water doesn’t pool inside the pipe and breed mosquitoes.
Pro Move
Run your standard garden hose nozzle through the top cross bar opening before cementing the cap on. You now have a rinsing station attached to your float rack. Kids rinse off the toys before storing them. Chlorinated water dries on the rack instead of your floats. It costs $0 extra and takes five minutes.
2. Mesh Rolling Laundry Bin — No Build Required
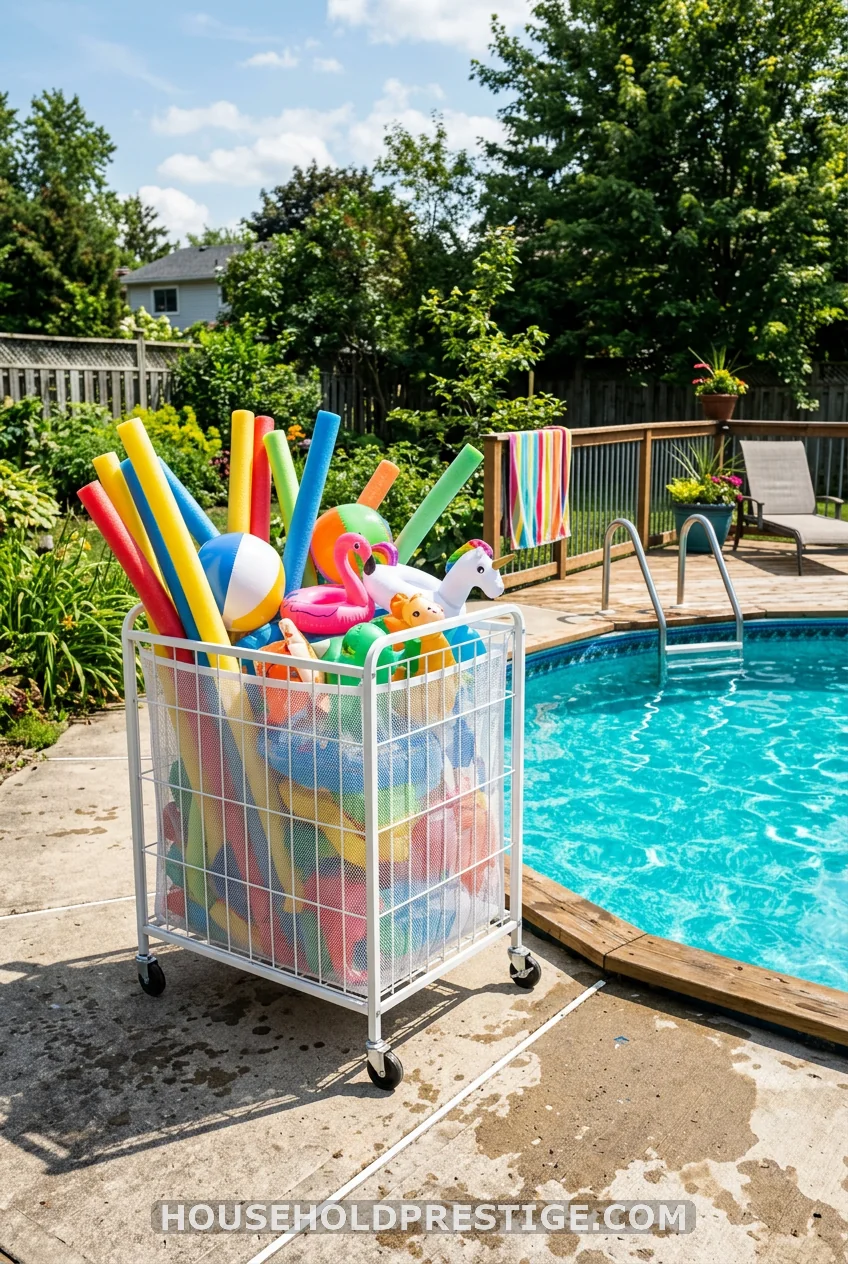
A heavy-duty mesh laundry hamper on wheels — the kind sold at IKEA (FILTIS, about $10) or Target ($15–20) — is a legitimate float storage solution when you have limited build time. Toss in noodles, rings, and dive toys. The mesh drains water automatically so nothing mildews. Roll it into the garage before a storm. Done. It won’t win a design award, but it’ll survive every summer you throw at it.
3. Free Pallet Wall Station
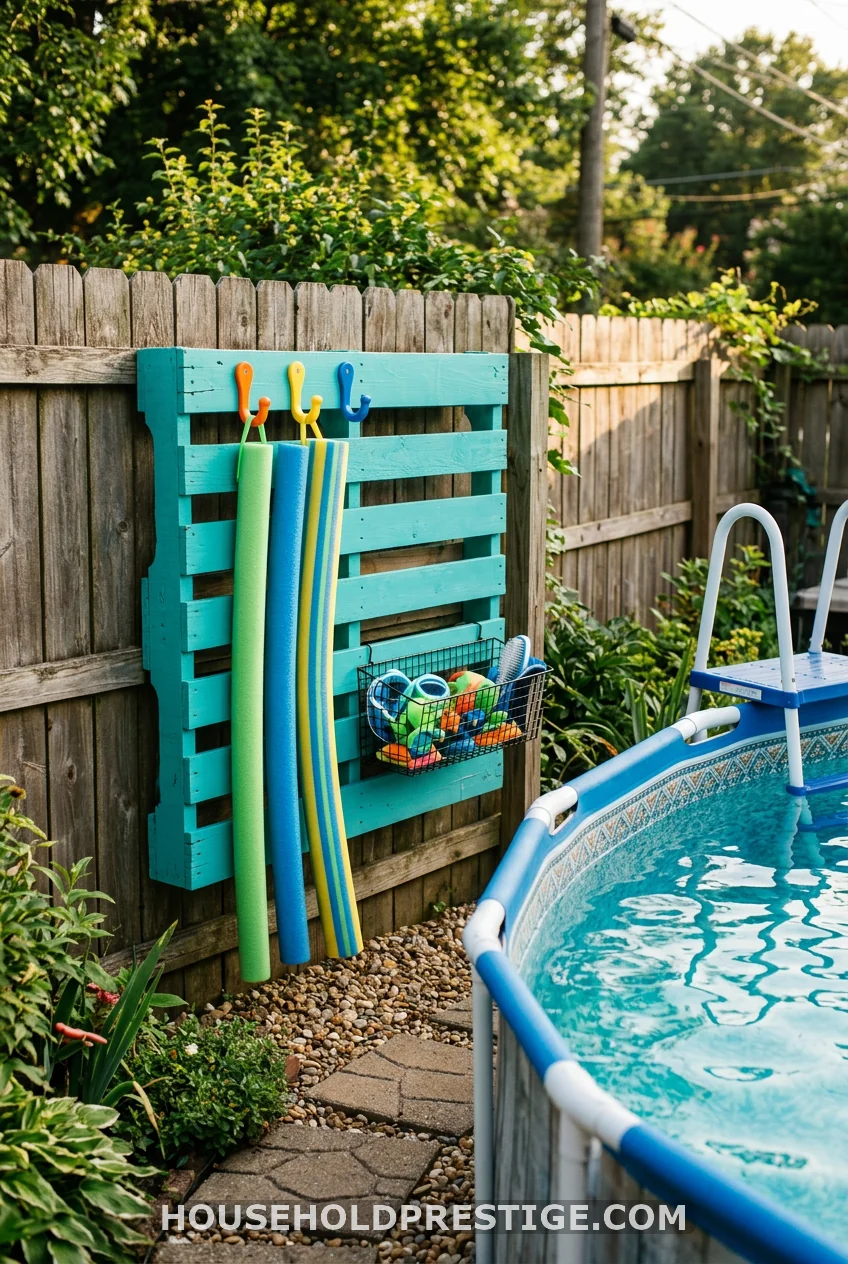
Wooden pallets are the most DIY pool float storage material that nobody talks about as much as they should. They’re free — check behind hardware stores, garden centers, and restaurant supply warehouses. A single pallet gives you a ready-made grid of slats perfect for hooks, baskets, and noodle slots with zero cutting required.
Materials needed:
– 1 free wooden pallet (marked “HT” — heat treated, not MB/methyl bromide-treated)
– 2–3 cans Rust-Oleum Painter’s Touch 2X Spray Paint in your chosen color (~$5 each)
– 6–8 colorful plastic hooks with screws (~$8 at the dollar store)
– 2 small wire or plastic baskets for small gear (~$5 total)
– (4) 3/8″ × 3.5″ lag bolts if mounting to a fence
Steps:
1. Sand the pallet lightly with 80-grit to remove splinters. It doesn’t need to be smooth — just safe to handle.
2. Lay flat on a drop cloth and spray paint 2 coats. Let dry 30 minutes between coats.
3. Screw plastic hooks into the top slats — these hold towels, pool nets, and goggles.
4. Zip-tie or screw small baskets to the lower slats for dive rings, sunscreen, and water guns.
5. Mount to your fence with lag bolts through the back rail, or cut two 30-inch sections of 2×4 and screw them on as legs if you don’t have a fence.
Total time: about 2 hours including paint drying. Total cost: $20–25 if the pallet is free.
4. Fence-Rail Hook Strip
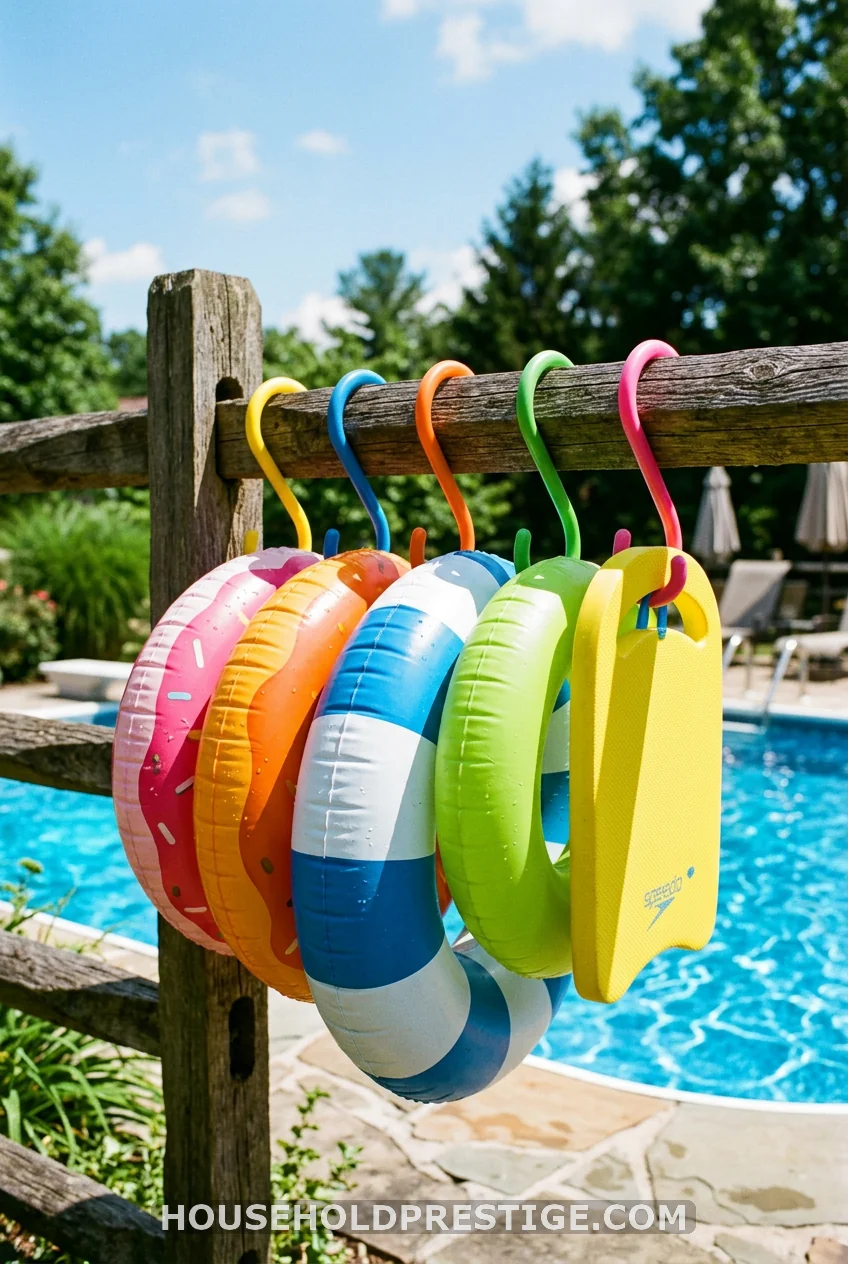
Buy a pack of 20 adhesive or screw-in outdoor hooks for $8. Screw them directly into your existing fence rail at 6-inch spacing. Hang pool rings, kickboards, goggles, and deflated floats. No building. No painting. No instructions. The whole setup takes 15 minutes with a drill and costs less than a cup of coffee per hook. If you rent and can’t drill into the fence, 3M Command Outdoor Hooks hold up to 5 lbs each and peel off cleanly.
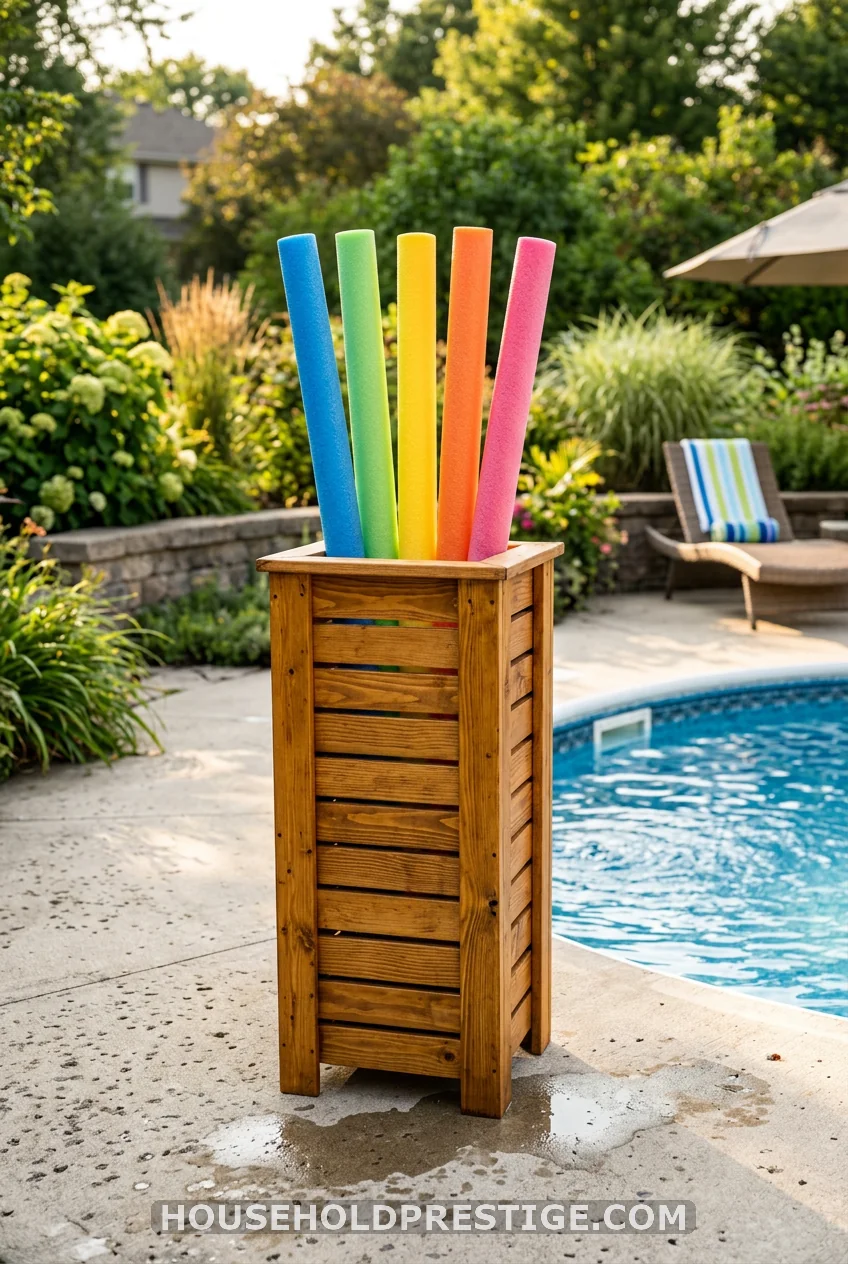
5. Cedar Slat Storage Bin — $30 vs. $399
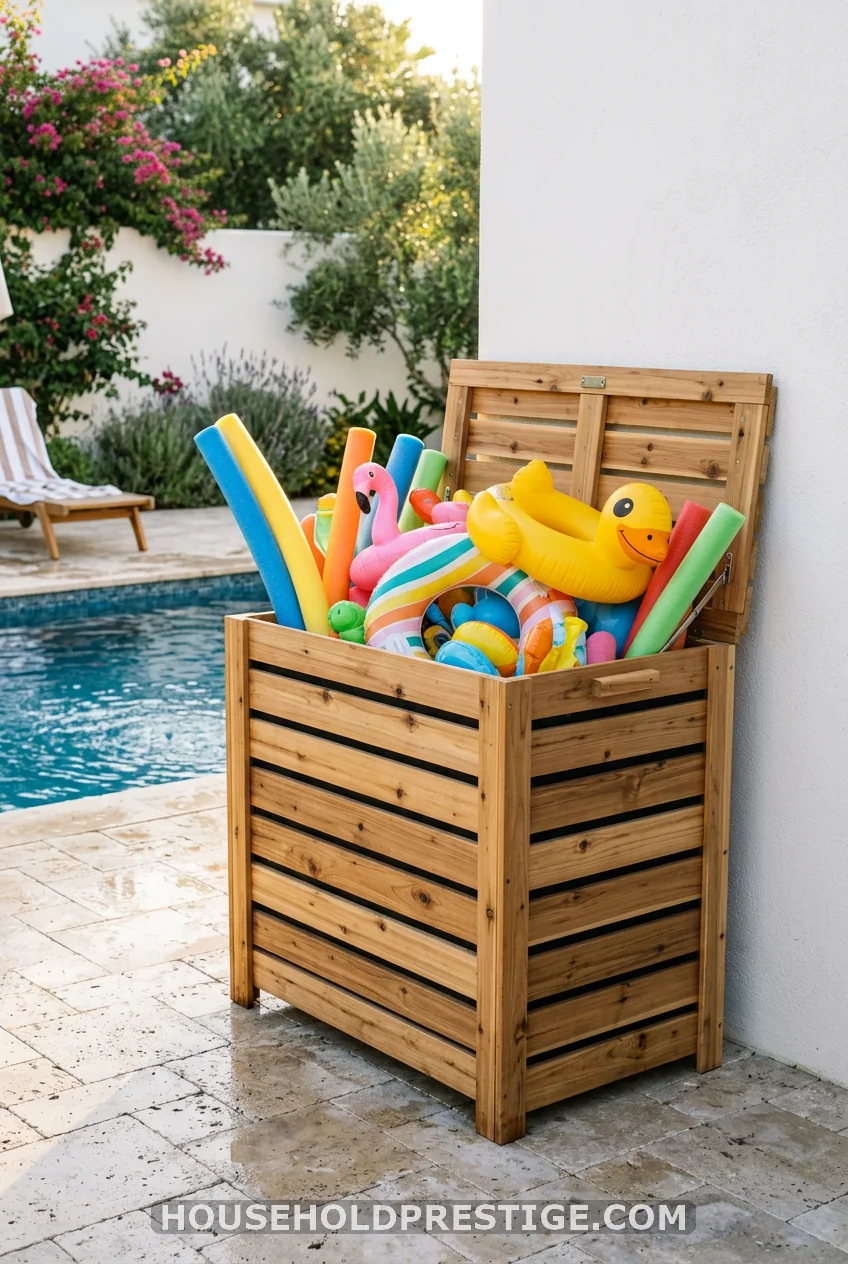
A woodworker named Tamar at 3x3custom.com built a cedar pool toy storage bin inspired by a Pottery Barn teak organizer retailing at $399. Her cedar version cost $30. That price gap should make your jaw drop.
The build uses cedar fence pickets from Home Depot ($3–5 each — you’ll need about 8) assembled into a slatted box roughly 24 inches wide × 18 inches deep × 30 inches tall. A divider runs down the center: the front section holds small accessories like goggles, sunscreen, and dive toys; the back holds noodles and larger floats upright.
The slats are spaced 1 inch apart, which means water drains straight through — no mildew, no moisture trap. Cedar is naturally weather-resistant, so you don’t even need to seal it unless you want to. A coat of Thompson’s Water Seal Timber Oil in Teak (about $18 per quart) will keep it looking sharp for 3–4 seasons.
Skill level: Beginner with a circular saw or miter saw. A Kreg pocket hole jig ($25) makes the joinery faster, but it isn’t mandatory — screws work fine. Drill pocket holes on the underside of your slats, and no fasteners will be visible from the outside.
6. Why Your Waterproof Deck Box Is Ruining Your Floats
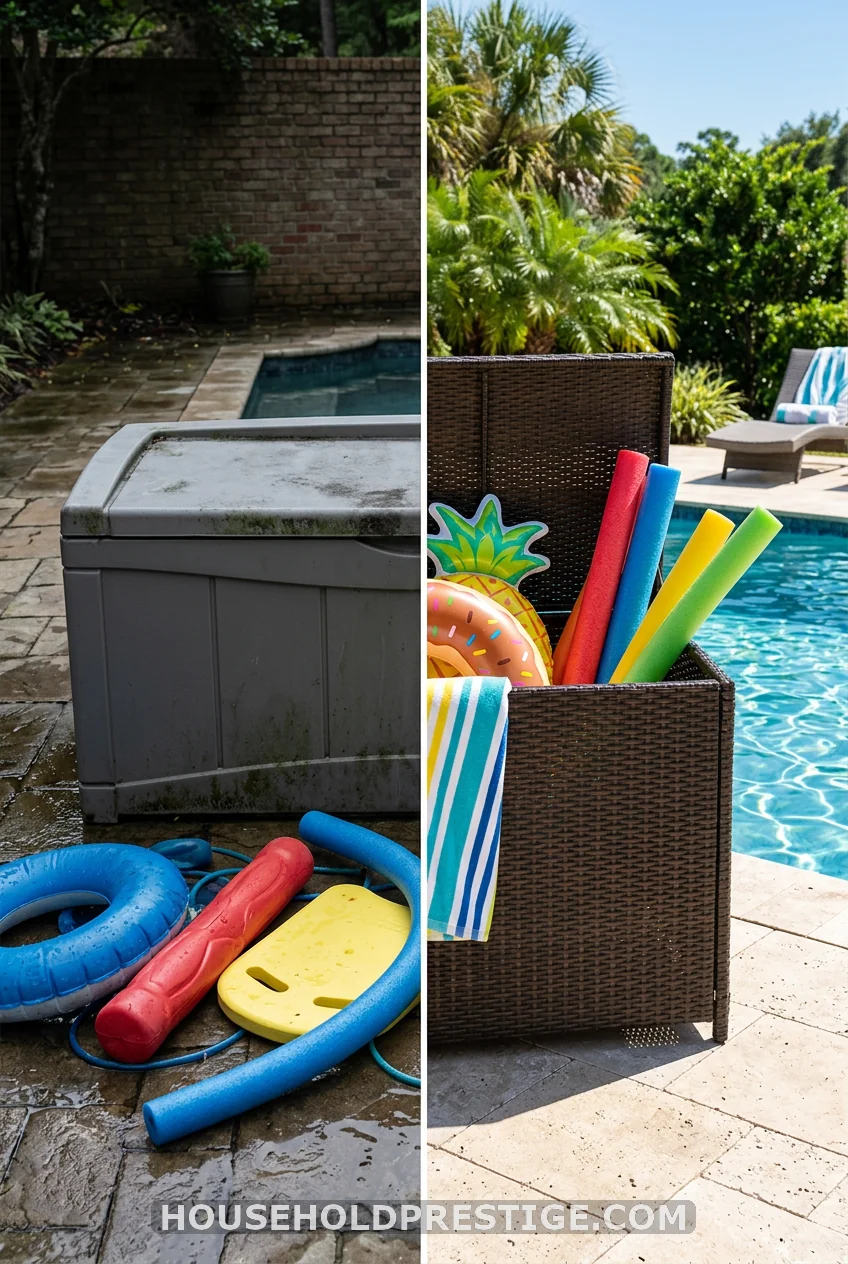
What most people think: A $120 waterproof deck box from the hardware store is the logical answer to outdoor toy storage. It’s sealed, it’s weatherproof, it looks tidy. It must be the best solution.
What actually happens: You throw damp noodles and a half-inflated float inside on a Tuesday afternoon. The lid clicks shut. Inside that sealed box, with zero airflow and no drainage, the moisture has nowhere to go. By Thursday, the inside smells like a wet gym bag. By August, there’s visible mildew on the underside of your foam noodles. By next summer, the floats are stained, the noodles are crumbling at the ends, and the deck box itself has a permanent funk that no amount of cleaning removes.
The problem isn’t the box. The problem is the seal. Solid, airtight storage is the enemy of anything wet.
What actually works: If you already own a deck box and you’re keeping it, here’s the fix — drill a grid of 1/2-inch holes in the bottom of the box (a standard drill bit, 5 minutes, done). Now water drains out, air circulates, and your floats survive. Even better: never put anything in the box while still wet. Rinse toys with the hose, shake them off, and let them sit on the deck for 20–30 minutes first. This single habit extends the life of every foam noodle and inflatable you own by at least two seasons.
The better build choice: Open-weave storage — mesh bins, slatted cedar boxes, PVC racks, and pallet stations — beats sealed containers in every wet outdoor environment. Airflow is the real waterproofing. No mildew can survive it.
7. Tomato Cage Noodle Tower
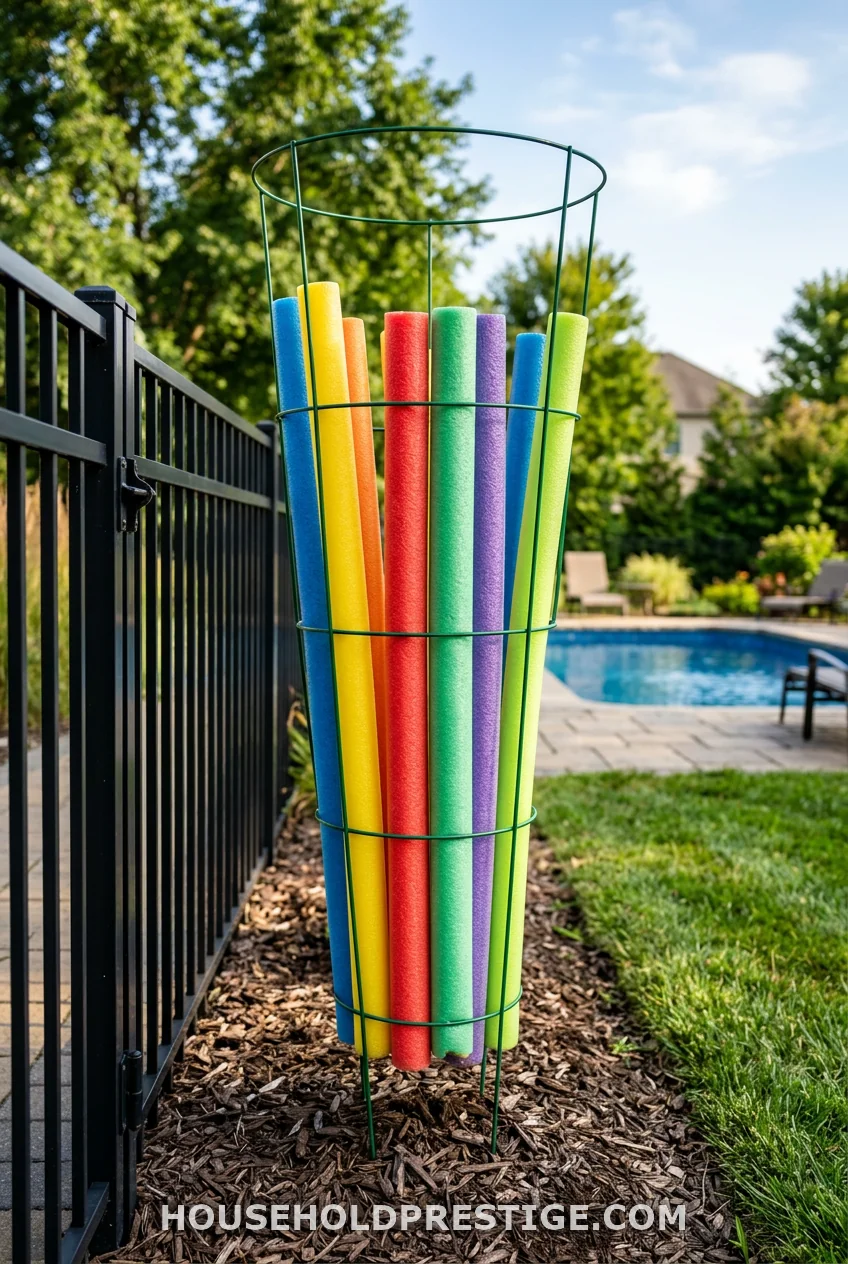
Push a large galvanized tomato cage ($4–6 at any garden center) into a patch of mulch or soft ground beside your pool fence. That’s it. Each wire opening holds one upright pool noodle. A standard 54-inch cage holds 6–8 noodles, depending on their diameter. The cage is easy to move, costs almost nothing, and already lives in your garage with the garden tools. In October, pull out the noodles, fold the cage, and put it back with the tomato stakes.
8. Ana White Planter Box Float Corral
Ana White’s community builds are some of the most pinned DIY projects on the internet for a reason — the plans are free, and the builds actually work. One community member modified the basic planter box plan to build a pool noodle holder by making it 40 inches tall, using four 4-inch fence pickets and one 5.5-inch fence picket. The 4-inch spacers between the pickets create openings exactly sized for a pool noodle to slide in vertically.
Total lumber cost runs $15–20, depending on wood prices at your local store. Stain inside and out since the interior shows through the gaps — Minwax Weathered Oak is a good outdoor choice at about $12 for a half-pint. The whole build is a Saturday morning project with a circular saw and drill. The free plans are at ana-white.com.
9. Bungee Cargo Net Between Two Fence Posts
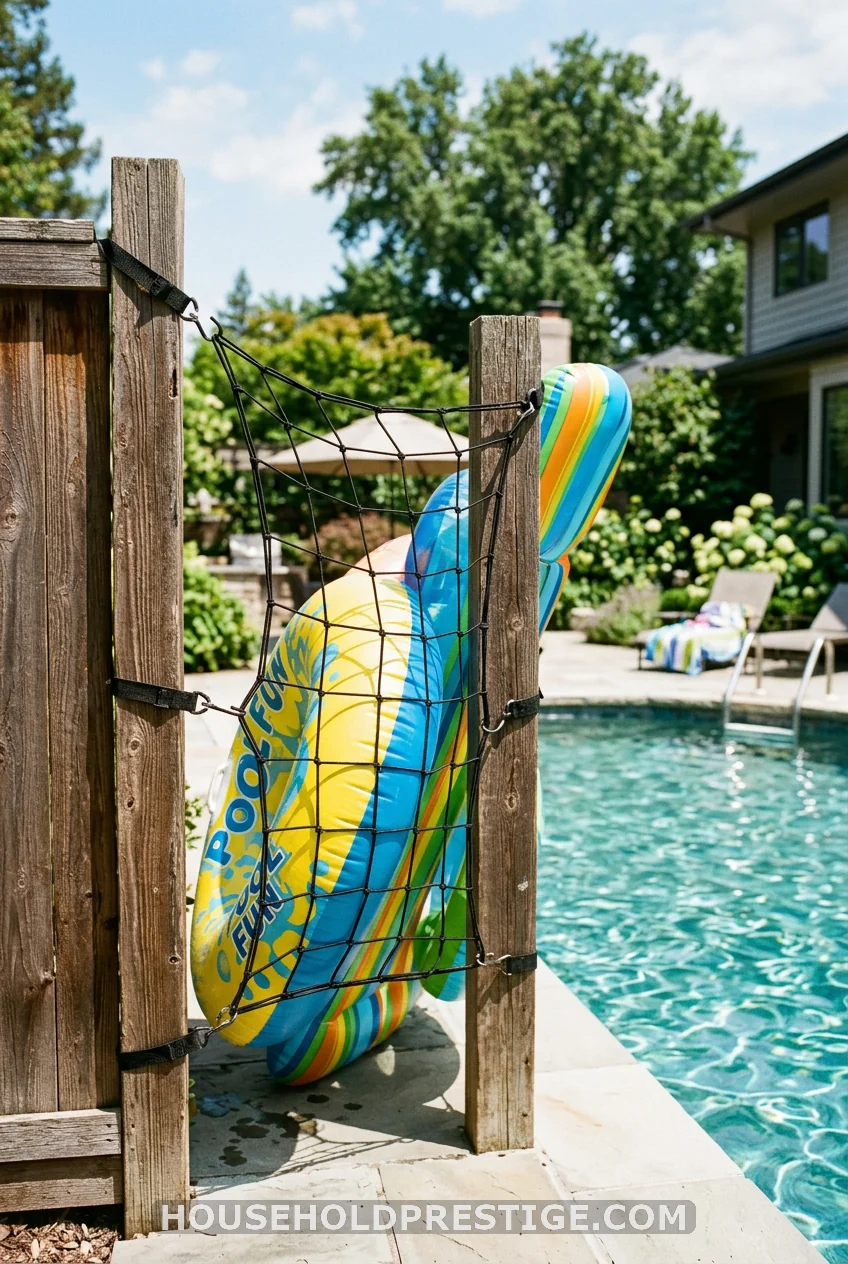
Stretch a 4 × 6-foot bungee cargo net ($10–15 on Amazon or at auto parts stores) between two fence posts. Hook the corners to eye screws ($2 for a pack of 8) that you screw into the post at 12-inch intervals. Your netting holds deflated rafts, kick boards, and pool rings flat against the fence — off the deck, out of the way, and completely visible so nothing gets left out in the rain.
10. Repurposed Rain Gutter Float Wall
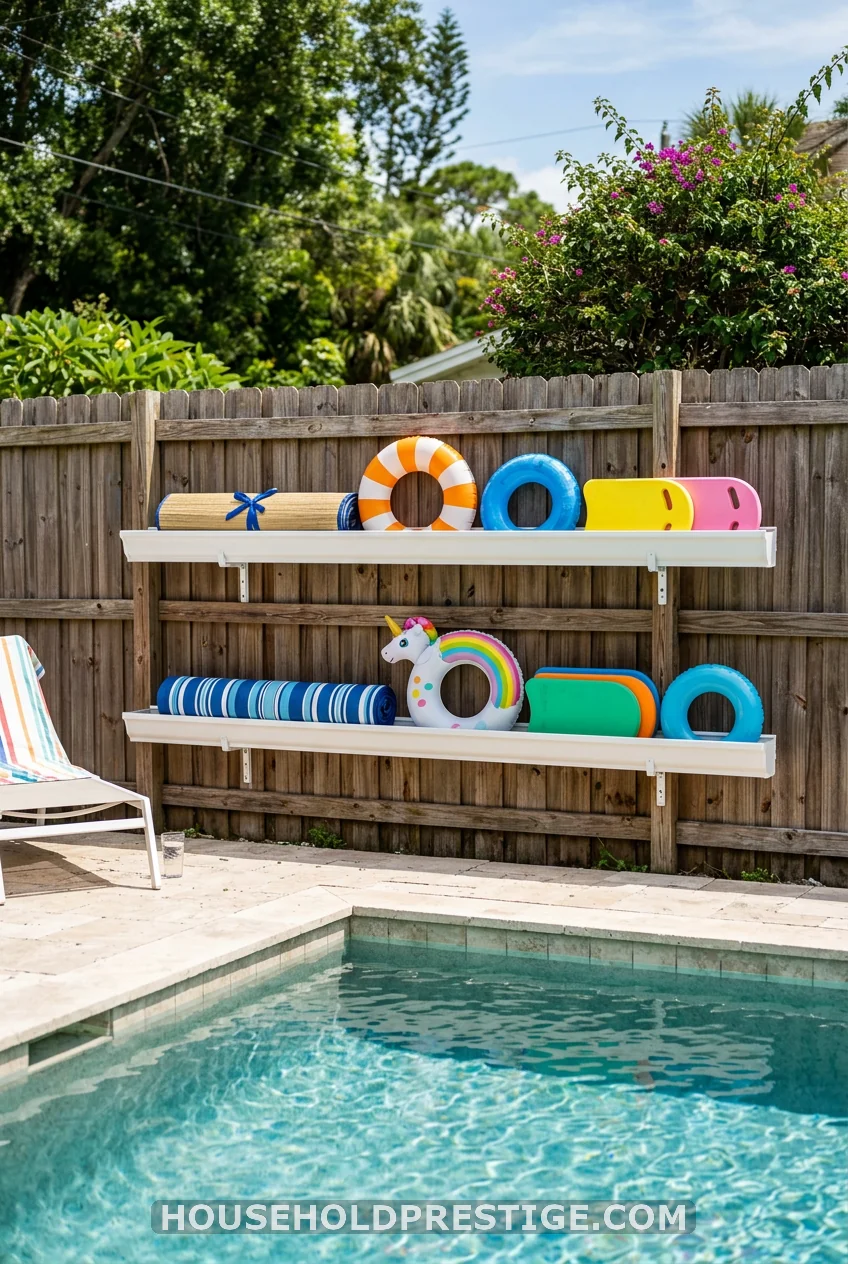
Vinyl rain gutter sections — the 10-foot pieces sold for $5–7 at any hardware store — make outstanding wall-mounted float holders when you mount them horizontally. Cut sections to 4 or 5 feet, cap the ends with gutter end caps ($1.50 each), and screw them to your fence or garage wall with gutter brackets at 12-inch intervals.
Mount two gutters: one at 18 inches from the ground for shorter items like kickboards and pool rings, and one at 36 inches for rolled beach mats and flat floats. The gutter’s natural curve cradles round inflatables without them rolling off. Total cost for two mounted sections: $20–25. Drill a small drainage hole at each low point so rainwater doesn’t collect.
11. Empty Cat Litter Container Float Bin
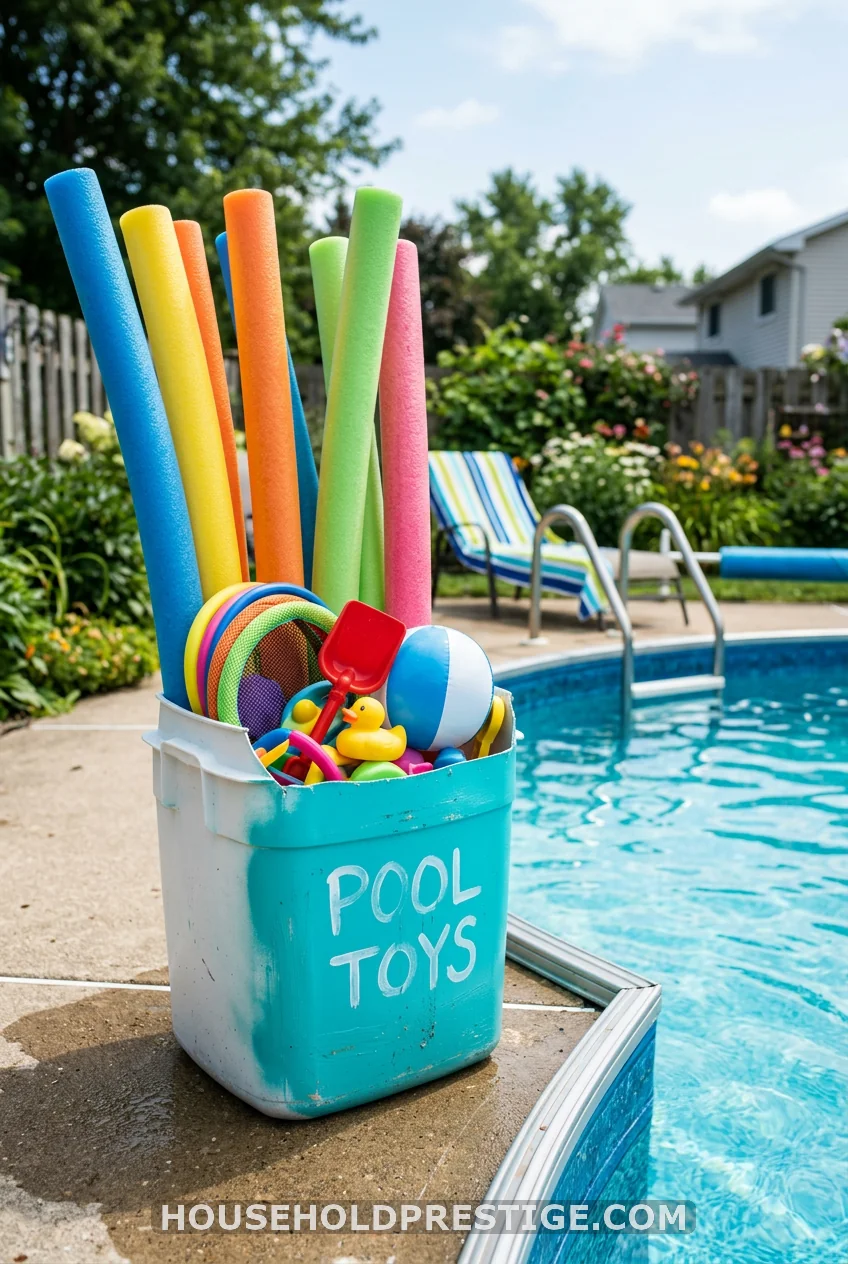
A 35-pound empty cat litter container is one of the most structurally solid free storage bins you can find. The walls are thick, the base is wide and stable, and the handle makes it easy to move. Cut off the lid portion with a utility knife, drill 6–8 drainage holes in the bottom, spray paint the outside with Rust-Oleum 2X in any color you want ($5 a can), and you have a pool float bin that can handle 4–5 noodles or a pile of small inflatables without complaint. Ask neighbors if they have empty ones — most people are happy to give them away.
12. Repurposed Wooden Crate Rolling Cart
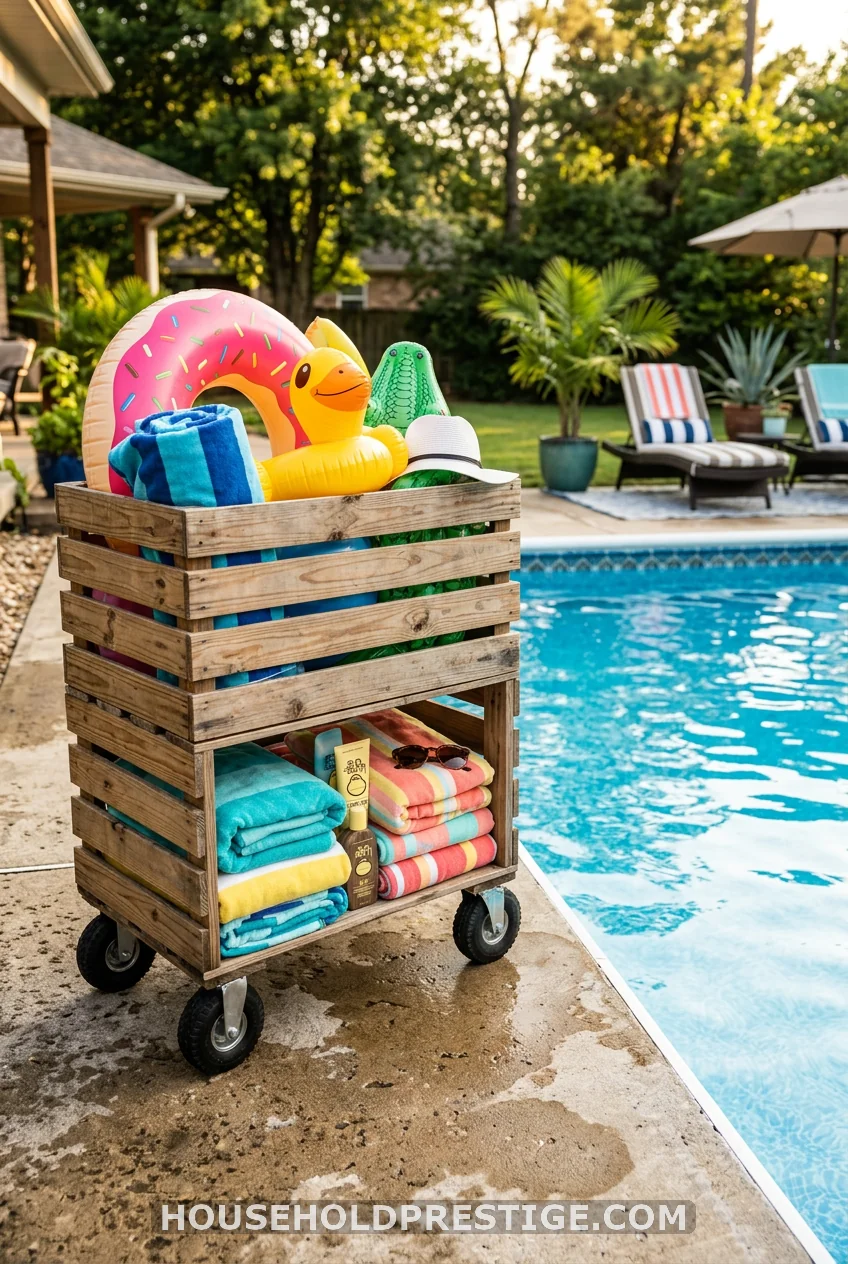
Buy two unfinished wood crates from the craft store ($10–15 each at Michaels or Hobby Lobby, or free from produce sections at some grocery stores) and attach four locking caster wheels to the bottom ($8–12 for a set of 4 at Home Depot). Stack or bolt the crates together, drill a few drainage holes in the bottom, and seal or paint them with exterior-grade paint.
The result is a rolling pool float cart you can wheel from the garage to the pool in the morning and back inside before a storm. The open slats let air circulate so nothing mildews, and the locking casters mean it won’t roll into the pool when a kid grabs a noodle too fast. Total cost: $30–35.
13. DIY Float + Towel Combo Station
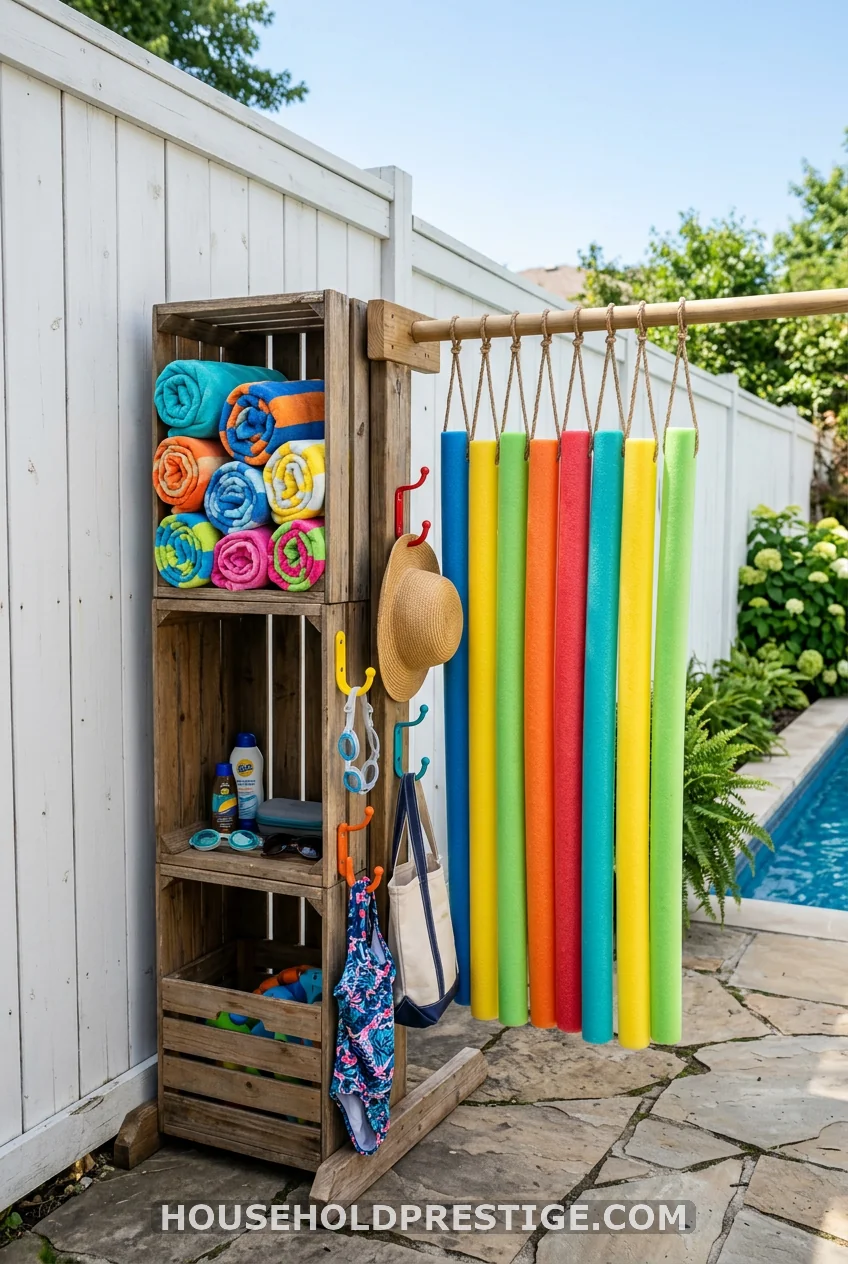
Combine two of the cheapest materials on this list — a repurposed wooden crate and a scrap 2×4 with wooden dowels — into one station that handles both towels and floats. The crate stores large inflatables and noodles upright. The dowel rail, made from a 2×4 with 1-inch wooden dowels ($1 each at the hardware store) screwed in at 4-inch spacing, acts as a towel rack above it.
Mount the 2×4 rail horizontally to your fence or garage wall at 6 feet high. Set the crate directly below it. Towels hang up top to dry; floats stand up below. Kids can reach the noodles without help. You reach the towels. The whole combo takes one afternoon and costs $20–30 in materials if you source the crate secondhand.
Your Backyard Just Got a Whole Lot Calmer
None of these 13 DIY pool float storage ideas requires you to be a master builder. The PVC rack is the most involved, and it’s a weekend afternoon — not a week-long project. The tomato cage takes four minutes. The fence hook strip takes fifteen.
The real goal here isn’t a Pinterest-perfect backyard. It’s not tripping over a noodle at 7 am on your way to make coffee. It’s ending a pool day with a 60-second cleanup instead of a 20-minute wrestling match with inflatable chaos. Pick the one that fits your space, your tools, and your Saturday, and get it done before the next heat wave hits.
Your future self — the one standing in a tidy, organized backyard with a cold drink — will thank you.
FAQ: DIY Pool Float Storage Ideas
How should pool noodles be stored so they don’t get damaged?
Always store pool noodles vertically rather than flat. When noodles lie horizontally under their own weight for extended periods, they develop permanent flat spots, and the foam compresses unevenly. Standing them upright in a PVC rack, planter box corral, or tomato cage keeps their shape intact season after season. If you must store them flat for winter, lay them on a shelf indoors rather than stacked on a concrete floor, which draws moisture into the foam.
What is the cheapest DIY pool float storage solution?
The tomato cage noodle tower costs $4–6 and takes under 5 minutes to set up. The fence hook strip costs $8 and takes 15 minutes. If free is the budget, a repurposed cat litter container with drainage holes drilled in the bottom costs nothing and holds multiple noodles or small inflatables. Any of these three solutions beats leaving floats on the deck.
How do I keep pool toys from getting moldy over the summer?
Airflow is the only real defense against mildew. Never store wet items in sealed plastic containers — moisture trapped with no ventilation creates mold within days. Rinse toys after each use, shake off excess water, and let them air dry for 20–30 minutes on the deck before putting them in storage. Choose mesh bins, slatted wood boxes, or open PVC racks over airtight deck boxes for daily-use storage.
Can I store pool floats outside year-round?
In warm climates with mild winters, yes — if the storage is weather-resistant (treated wood, PVC, or outdoor resin). In climates with freezing temperatures, foam noodles and PVC inflatables should come indoors for the winter. Freeze-thaw cycles crack the coating on inflatables and make foam noodles crumbly at the ends. Store them in a garage or basement on a shelf, not directly on concrete.
How do I store large pool floats like giant unicorns or flamingos?
Deflate them fully, rinse with the hose, and let them dry completely before storage — any moisture folded inside will mildew. Roll or fold loosely rather than tightly, which stresses the seam welds. A large mesh bin, a cedar slat box with removable slats, or a dedicated shelf in your pool shed works well. For daily summer storage, a bungee cargo net stretched between fence posts holds deflated large floats flat against the fence without taking up floor space.