

The shampoo bottle fell first. Then the hair spray, the spare toothpaste, and a can of dry shampoo that rolled under the tub like it was escaping. All of it came out of my under-sink cabinet in one avalanche, because I had shoved one more thing in there.
That was the morning I admitted my bathroom organization ideas were not working. I did not have too little storage. I had everything in the wrong place.
So I sorted the room into four zones: counter and drawers, under the sink, shower and toilet area, and walls and door. Below are 13 fixes, one zone at a time. Each has a version under $25 and a no-drill option for renters. Work top to bottom and you can finish a 5×8 bathroom in a weekend.
Before You Buy Anything: The 15-Minute Declutter
Most bathroom clutter is a placement problem. You are keeping daily items and backstock in the same spot, so everything fights for the same few inches.
Set a timer for 15 minutes. Pull everything out, toss expired products and dried-up mascara, and sort what’s left into two piles.
- Daily: things you touch every morning or night. These stay within arm’s reach.
- Backstock: spares, refills, and weekly items. These go low, high, or out of the room.
Those two rules run the whole article. Daily stays close. Backstock leaves the daily loop.
Zone One: Counter and Drawers
1. One Tray for Your Daily Countertop Essentials
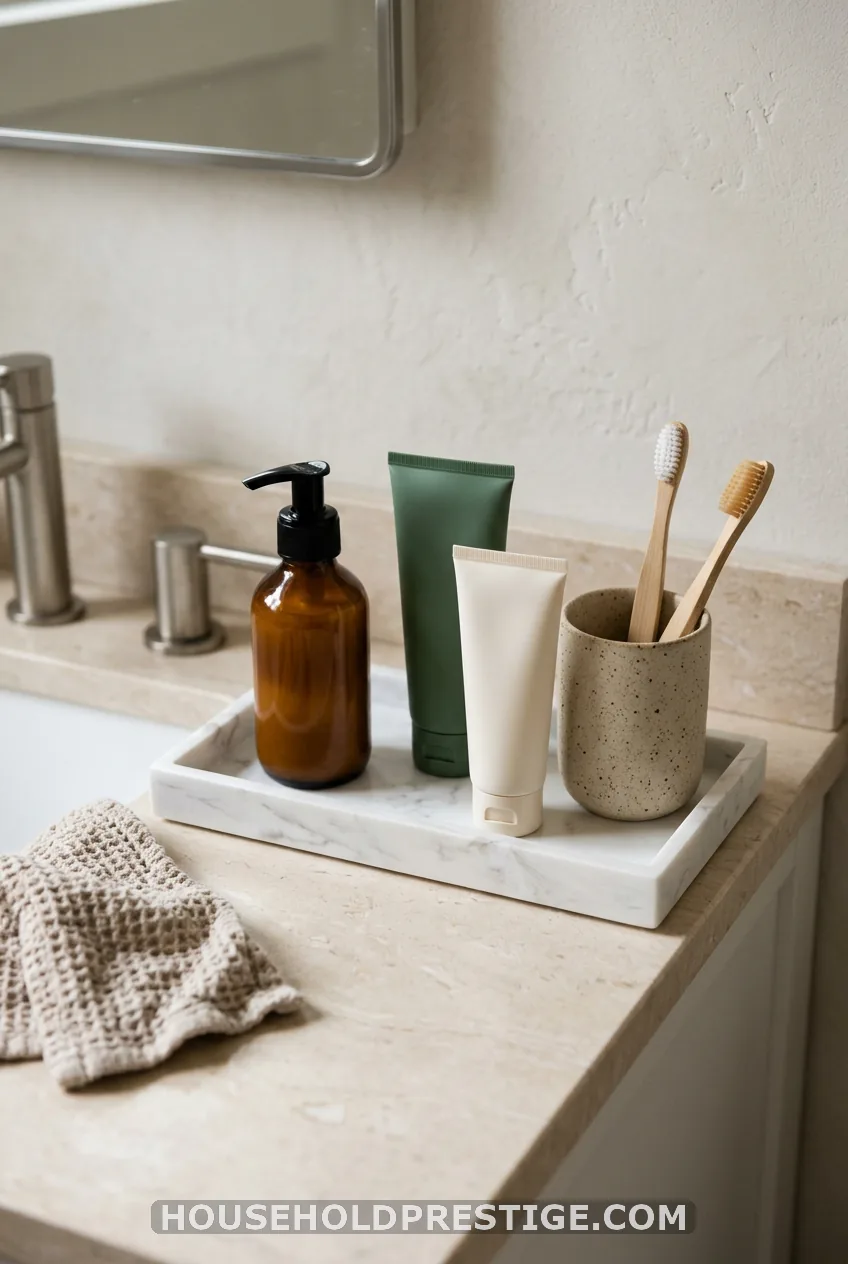
Five loose bottles look like clutter. The same five bottles on one tray look styled. The tray gives your eye a border, and that’s the whole trick.
Put only your daily items on it: toothpaste, face wash, moisturizer, SPF, and a small cup. Choose ceramic, bamboo, acrylic, or marble-look resin, because they survive splashes.
Cost reality:
A dollar-store tray or a $3 cork-backed coaster set works fine. A shot glass makes a good toothbrush cup. Renter version: nothing to install. A tray is already renter-proof.
2. Clear Acrylic Drawer Dividers for Makeup, Skincare, and Hair Accessories
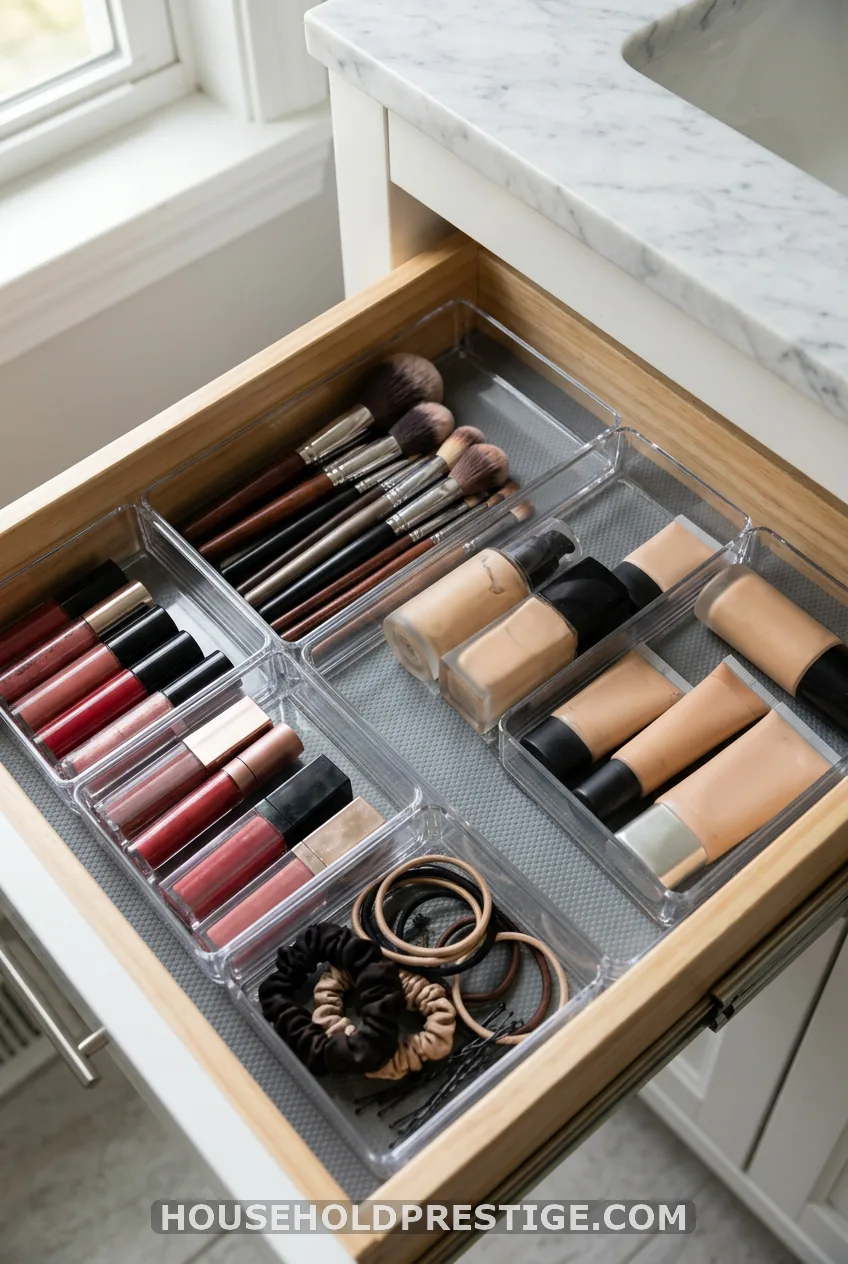
Shallow bathroom drawers hate deep bins. Dividers win because you see every item the second you open the drawer.
Sort by category, not brand: base, color, tools, hair ties. Cut a piece of non-slip shelf liner to fit the drawer floor first. Nothing slides when you yank it open.
For a deep drawer, stack two clear organizers. Add a small shelf riser at the back so the back half stops being a black hole.
Budget note:
A set of 6 adjustable dividers runs about $12-18 on Amazon. Target and The Container Store sell pricier sets. Renter version: all of this is freestanding, so nothing gets drilled.
3. A Heat-Safe Bin for Hair Tools and Cords
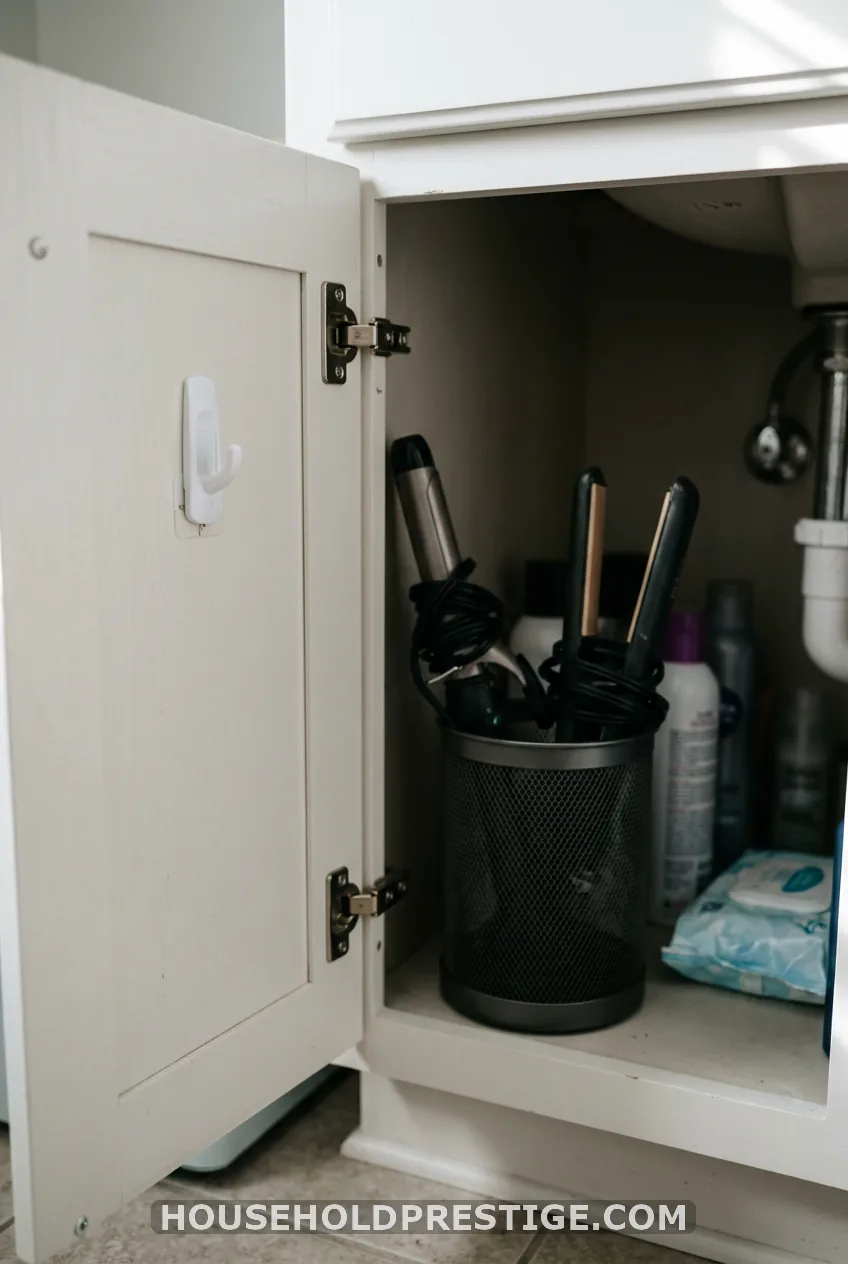
Hair tools should never live on the counter. They take up a foot of space and sit by the sink where water splashes.
Use a metal or ceramic container, and let the tools cool fully before they go in. Stick one adhesive hook on the inside of the cabinet door to hold the wrapped cords. Keep clips and bobby pins in a drawer divider so they stop colonizing the drawer.
Zone Two: Under the Sink
4. A Two-Bin System Around the Drain Pipe
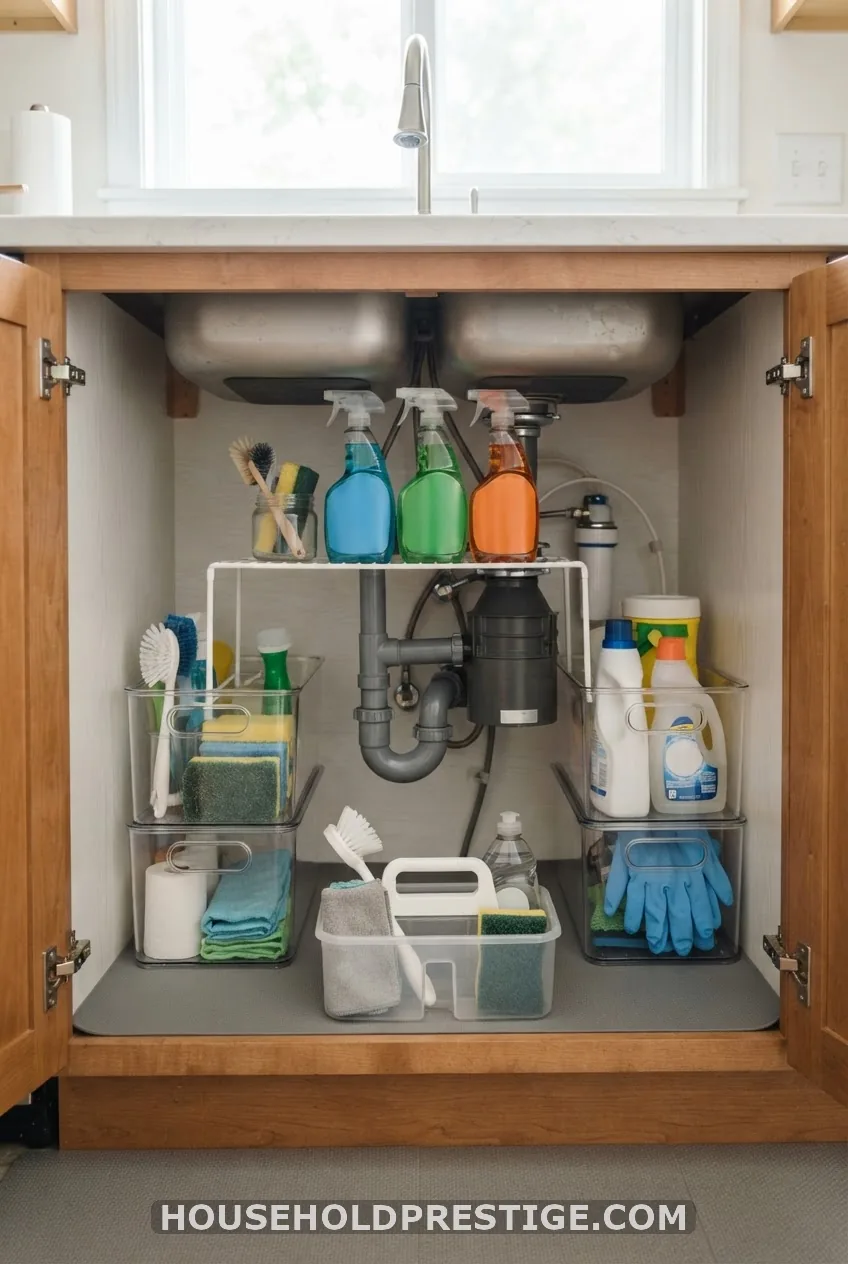
This is the biggest dead space in any bathroom. It’s also the cheapest to fix. You need about 45 minutes.
- Empty the cabinet and wipe it down.
- Measure width, height, and the pipe’s position. Write the numbers on your phone.
- Buy two narrow stackable bins, or a pair of pull-out drawers, that fit on either side of the pipe.
- Set a shelf riser over the trap so the space above the pipe is usable.
- Put backstock and refills in the bins. Keep a small carry caddy up front for daily items.
The common mistake is buying one wide bin. The pipe blocks it, and you end up with the same mess in a nicer container.
Cost reality:
Two stackable bins cost about $10-16, and a riser runs $8-12. You’ll land near $25. Renter version: hang a tension rod across the cabinet with S-hooks for spray bottles. No drilling.
5. A Cleaning Caddy That Lives Apart From Your Toiletries
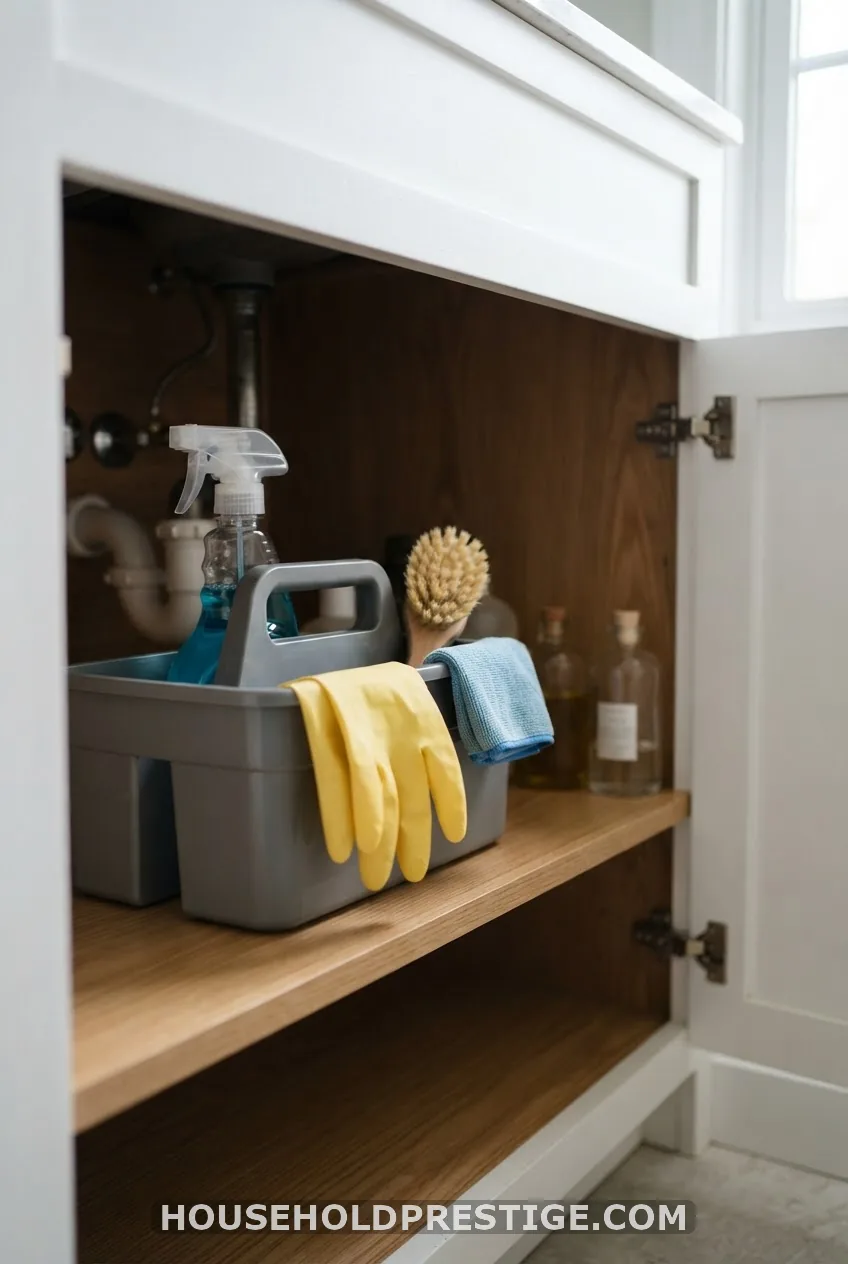
Cleaning products should not share a shelf with your toothbrush. A handled caddy carries everything to the next room, so you stop buying duplicates.
Store it on the lowest shelf. If kids or pets are in the house, use a cabinet with a child-safety latch.
6. A Backstock Bin That Ends Duplicate Buying
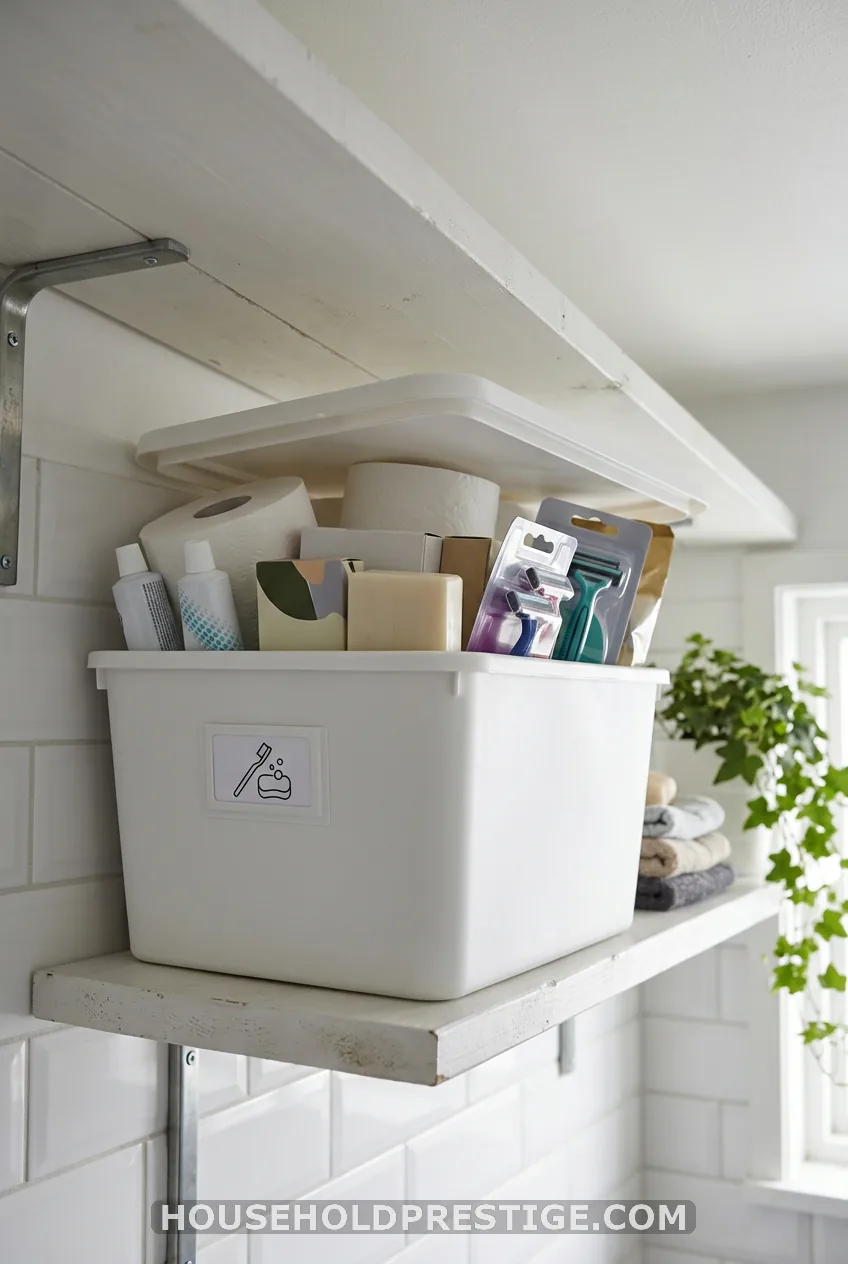
One bin for spares. Toothpaste, soap, razors, cotton rounds, toilet paper. If it’s not in the bin, you buy it. If it’s in the bin, you don’t.
Put it on the top shelf, labeled, out of the daily reach zone. A $20 label maker or handwritten tag turns a plain bin into something that looks chosen.
Zone Three: Shower, Toilet, and Towels
7. A Shower Caddy That Won’t Rust Shut
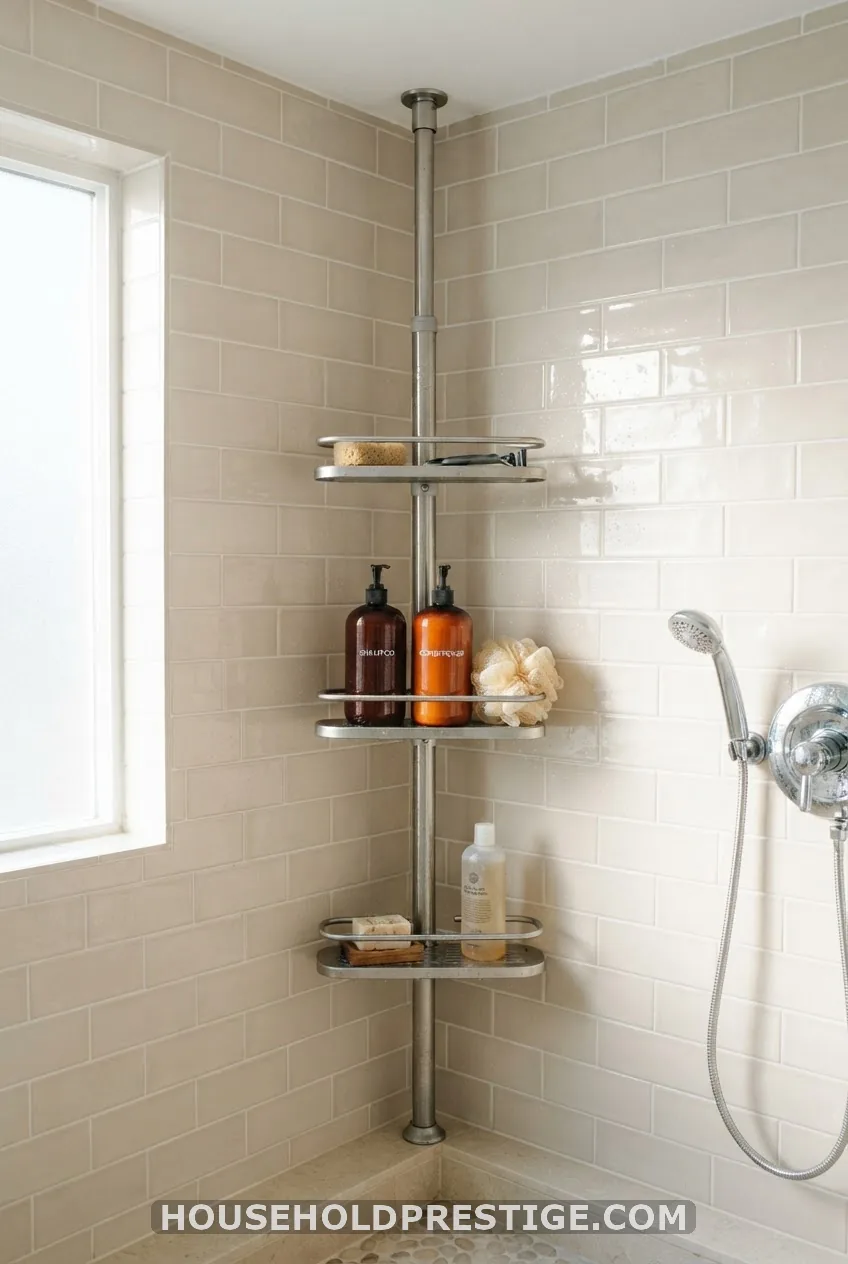
A rusty caddy leaves orange rings on your tub. Skip bare chrome-plated steel and buy stainless steel, coated aluminum, or plastic.
Pick the type by what you hold. Tension-pole caddies carry the most. Over-the-showerhead models fit small stalls but sway. Adhesive shelves suit renters but hold only light bottles.
Then decant shampoo and conditioner into matching pump bottles. The caddy suddenly looks intentional. Budget: $15-25 for a good one.
8. Over-the-Toilet Storage: The Cautionary Tale
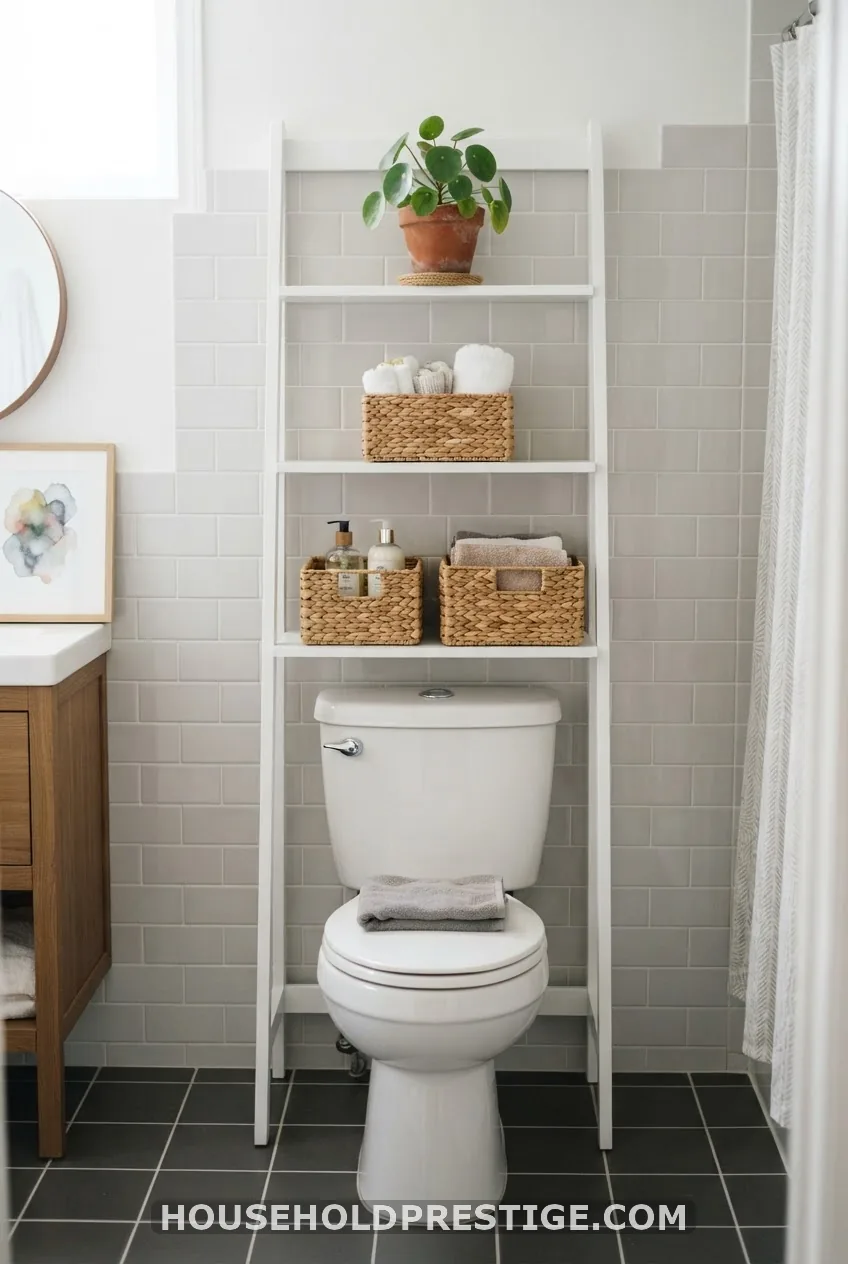
I once bought a gorgeous over-toilet unit and carried it home in the rain. It would not fit. The bottom shelf blocked the flush handle, and I paid return shipping.
Learn from me. Measure from the floor to the top of the tank, the flush handle height, and the width between the wall and any pipes before you click buy. That is the number one reason these units go back.
Then follow one style rule. Three baskets, one decorative object, nothing else.
A slim ladder shelf or a stack of baskets on the tank also works. Renter option: a tall, narrow leaning shelf beside the toilet, or adhesive wall shelves. No drilling needed.
9. Roll Daily Towels Into a Basket
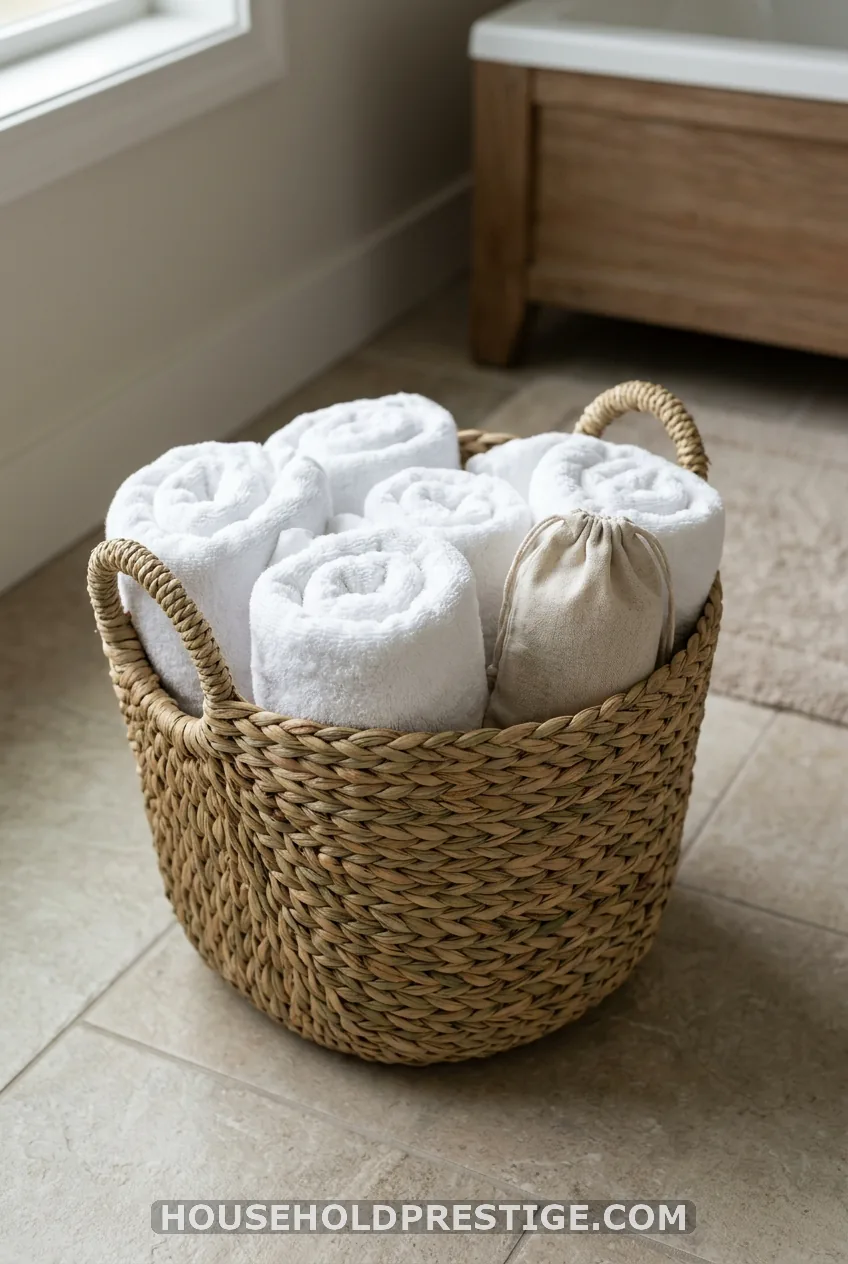
Keep only the towels you use in the bathroom. The rest belong in the linen closet.
Roll daily towels in a woven basket and fold spares flat on a top shelf. Tuck in a cedar or charcoal sachet to fight damp. Give guests a separate hook set or a small basket of their own.
Zone Four: Walls, Door, and the Floor Gap
10. Floating Shelves and Hooks
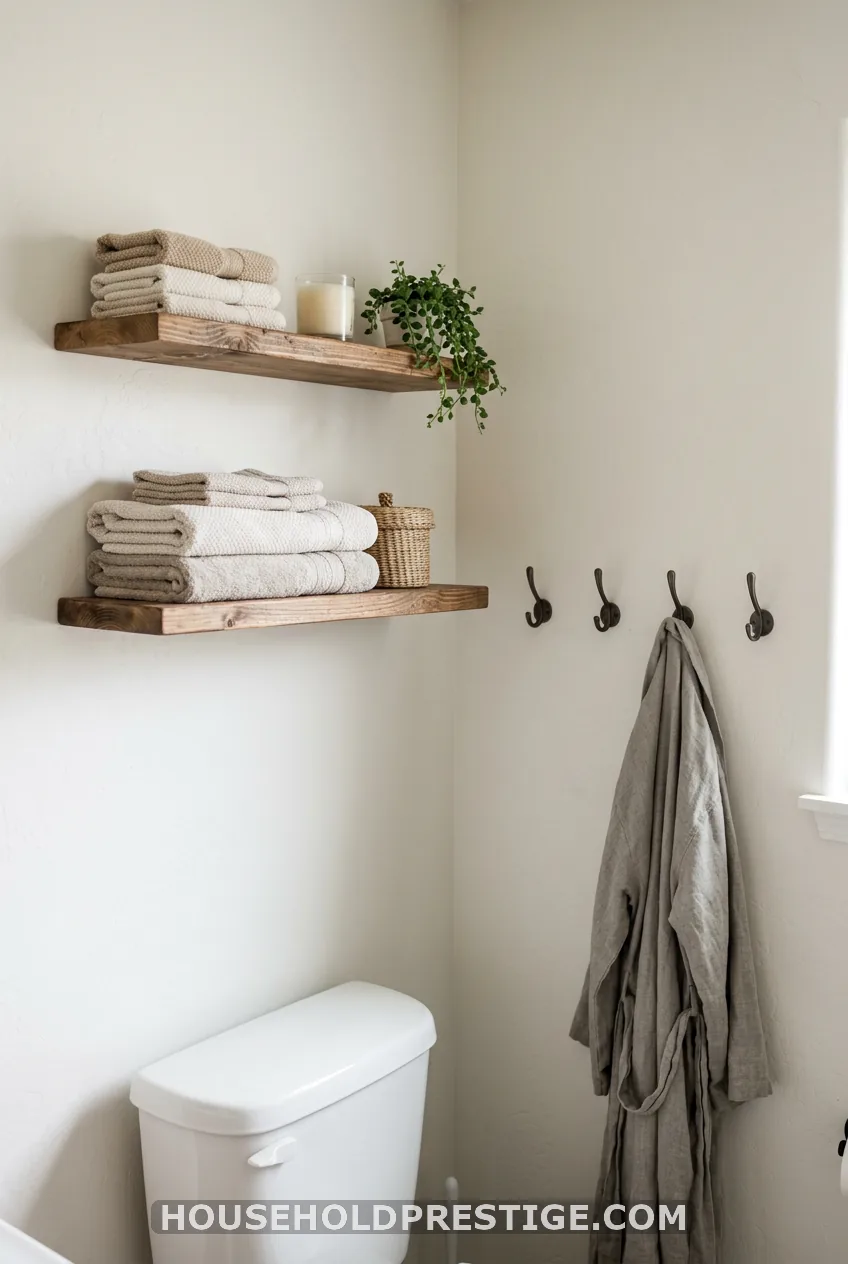
Walls are free storage. Use the space above the toilet, beside the mirror, and behind the door.
Follow a height rule. Shelves sit above the splash zone, and hooks sit below eye level. Renters can use adhesive strips and tension options. Check the weight rating on the pack before loading anything.
11. An Over-the-Door Organizer
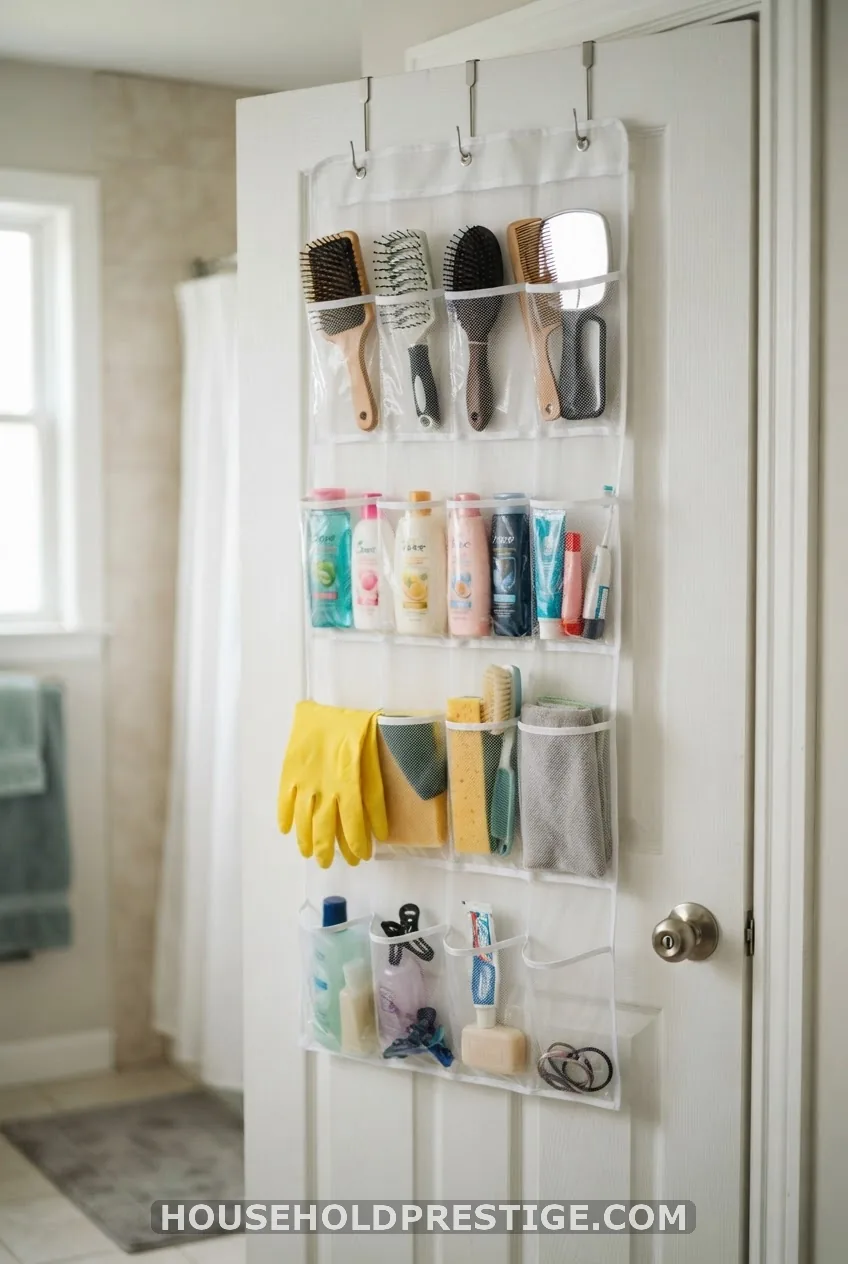
The back of the door is the most wasted spot in a small bathroom. Pockets hold brushes, hair tools, and gloves. Flat over-door hooks hold robes with no wall damage.
Skip anything heavy. It can warp a hollow-core door. Cost: $10-20.
12. A Narrow Rolling Cart for the Vanity Gap
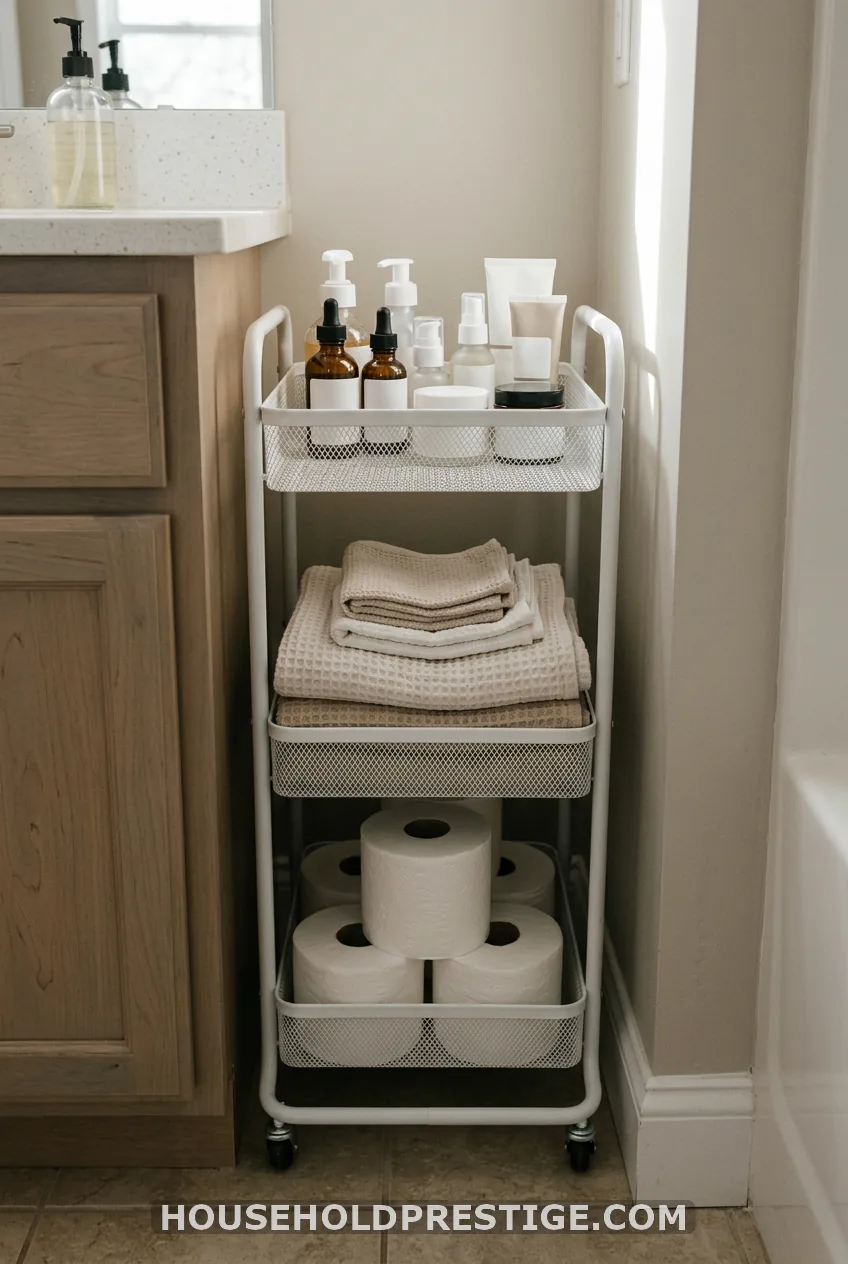
That 8-10 inch gap by the vanity is real storage. Slim carts about 7-9 inches wide exist, and they’re a great buy for tiny and guest bathrooms.
Fill the three tiers by use: daily skincare on top, towels in the middle, backstock below. The IKEA RASKOG is a popular pick, but it’s roughly 14 inches wide, so measure first. Choose locking casters so it doesn’t drift into the door swing.
Cost reality:
Expect $25-40. This one may go over the $25 mark, but it replaces a whole cabinet.
Finishing Touch
13. Decant and Label Everything You Can See
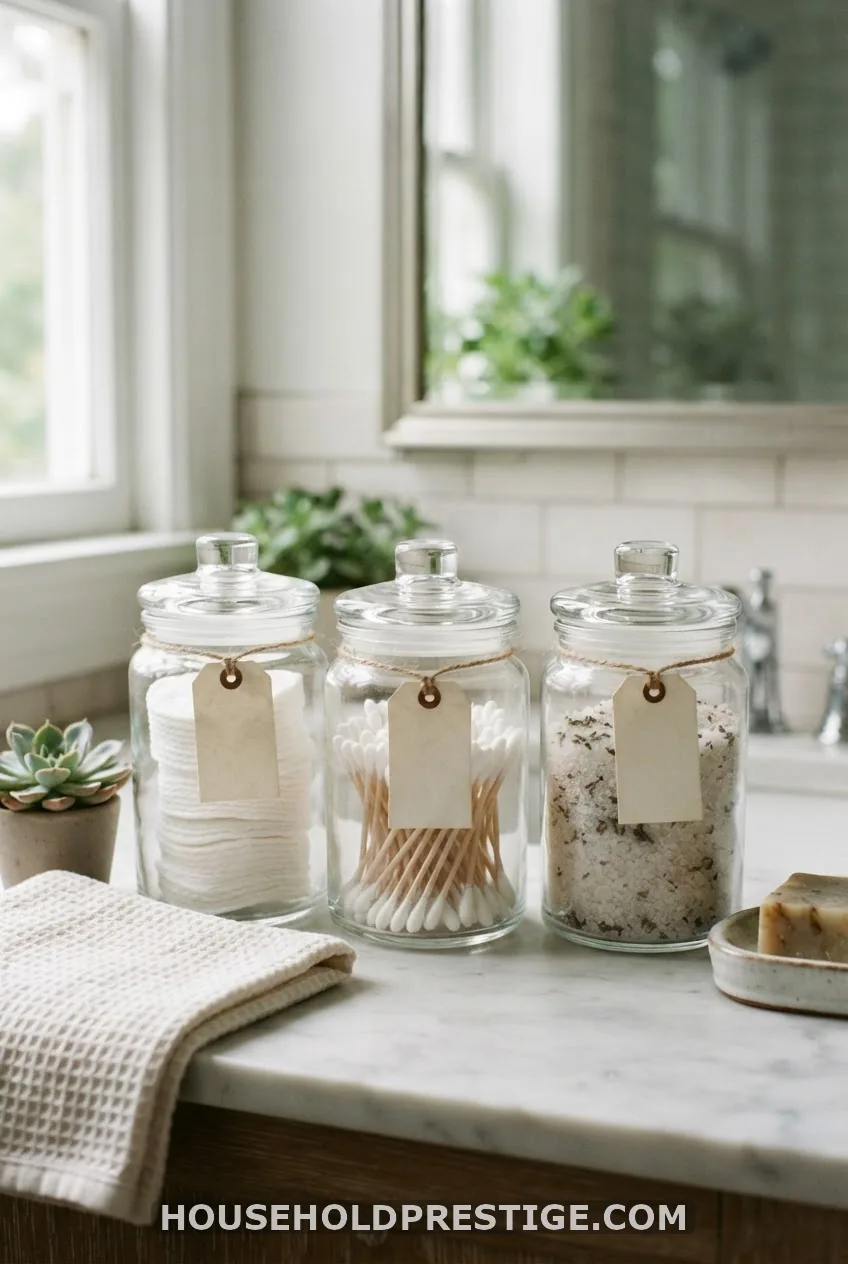
Tidy is not the same as intentional. Decanting is the step that makes the room look designed.
Pour cotton rounds and swabs into apothecary jars. Put refill soap in matching pumps. Keep the ugly packaging in your backstock bin. Add a label and you’re done in an hour.
How to Choose the Right Organizer
Measure first: drawer depth, under-sink clearance, flush height, and gap width. A tape measure saves more money than any coupon.
Pick clear over opaque in a small bathroom, since you can see your inventory. Match the finish across at least two items so the room reads as deliberate.
Buy for the bathroom you have. Not the one you wish you had.
A 7-Day Reset Plan
- Day 1: Declutter and toss expired products.
- Day 2: Measure and make your shopping list.
- Days 3-6: Install one zone per day.
- Day 7: Decant and label backstock, take a photo, and set a five-minute weekly tidy.
The Shampoo Bottle Test
Weeks later, I reached under my sink for that same shampoo bottle. It sat in its bin, in front, exactly where I’d put it. Nothing fell, nothing rolled, and the dry shampoo stayed put.
That’s the win. Your bathroom doesn’t need more storage. It needs each thing in its own zone.
FAQ
How do I organize a bathroom with no cabinets or drawers?
Go vertical. Use a tension-pole shower caddy, an over-the-door pocket organizer, adhesive shelves, and a slim rolling cart. Check the weight rating on any adhesive strip.
What should stay on the counter and what goes in a drawer?
Keep only daily items out: toothpaste, face wash, moisturizer, SPF, and one tool. Backups and weekly products go in a drawer, an under-sink bin, or the backstock bin.
Are clear acrylic organizers worth it?
Yes, in small bathrooms. You see your inventory at a glance, which stops duplicate buys and forgotten half-used bottles. They also wipe clean fast.
How do I stop under-sink clutter from coming back?
Use two bins around the drain pipe and a riser over the trap. Keep refills low and daily items in a small carry caddy up front, and run a quick tidy each week.