

You open the door. A towel slides off the shelf and lands on your foot. Behind it, a sheet set you can’t match, a heating pad you forgot you owned, and three travel bottles of shampoo. Sound about right?
Linen closet organization gets a bad reputation. People think it means matching baskets, a label maker, and a free Saturday. It doesn’t. It means deciding where things live and making that decision stick. I’ve redone mine twice, and the second time finally held. Below are the moves that worked, sorted from quick wins to one full weekend project.
Stick with me to the end. By the last idea, you’ll know exactly where every sheet, towel, and stray Q-tip belongs.
1. Empty the Whole Thing First
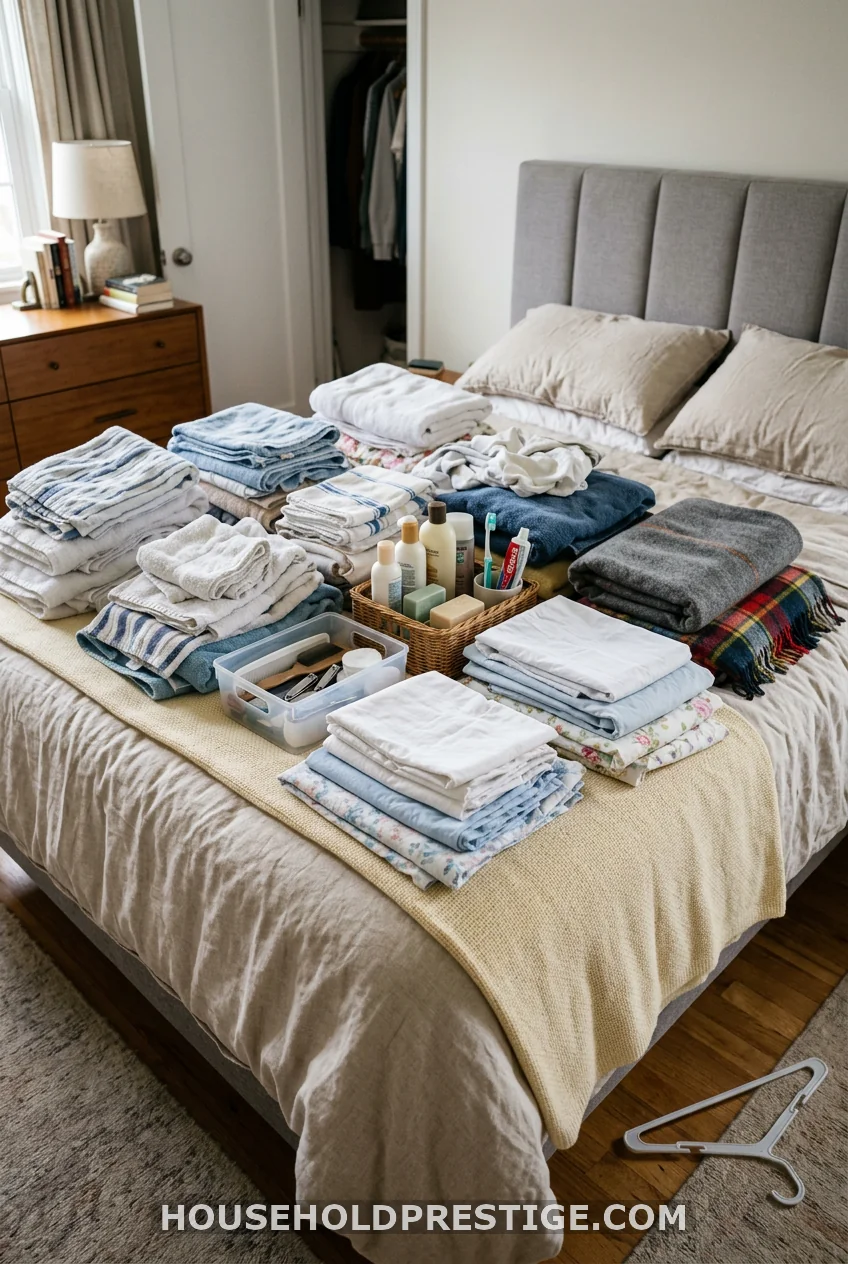
Pull everything out. Yes, everything. Stack it on your bed so you can’t quit halfway. Now you can see what you own, and most people own far too much. Keep what you use and what’s in good shape. Donate the spare sheets for the guest bed nobody sleeps in. Toss the towels that stopped drying you off two years ago. A near-empty closet is the easiest closet to organize. Start from zero.
2. Mind the Gap Above Each Shelf
Look at the air above your folded towels. Wasted space, right? Set each shelf two to three inches above the tallest item on it. Adjustable brackets let you do this in minutes. You’ll often gain a whole extra shelf.
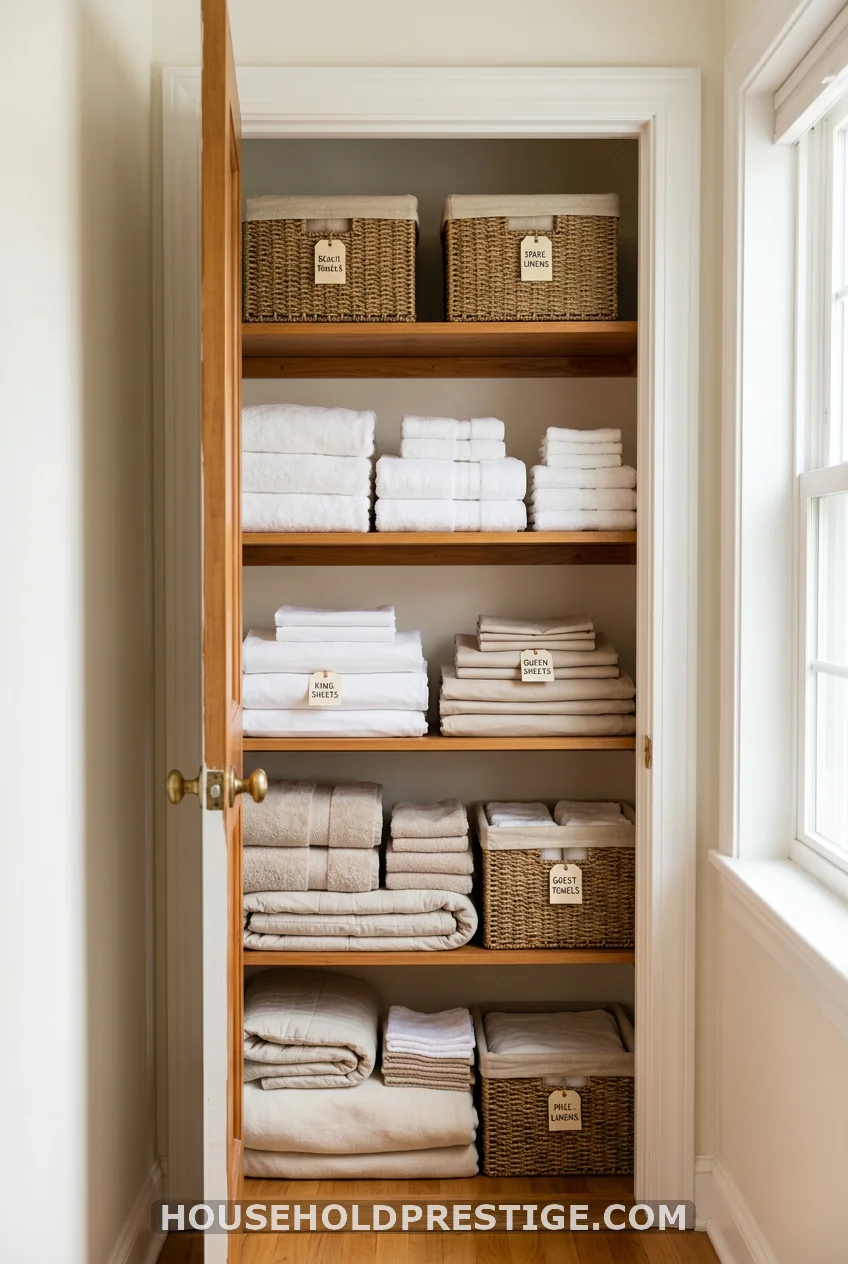
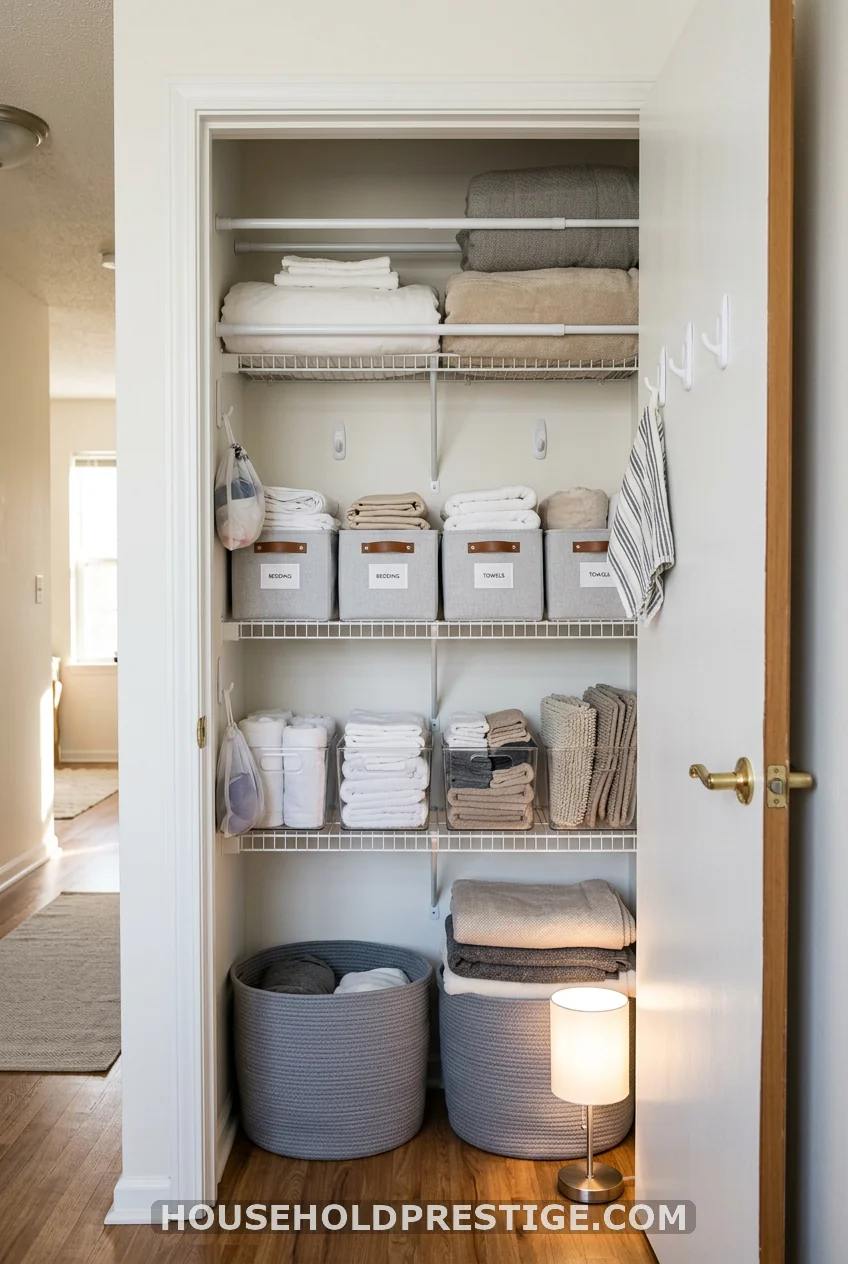
3. Build a Category System Your Family Won’t Wreck
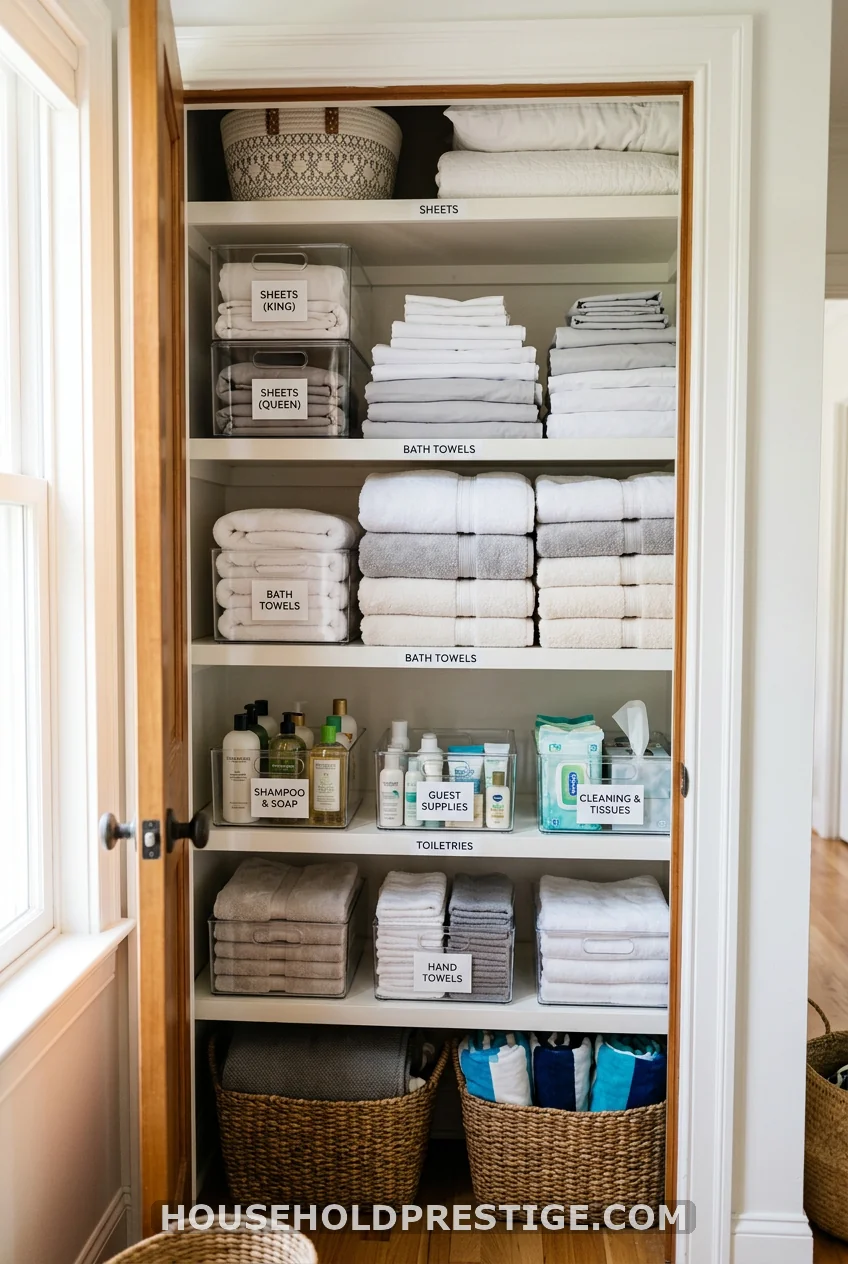
This is the idea that decides whether your closet stays tidy or slides back to chaos in a week. Most closets fall apart because items have no fixed home. So family members shove things wherever, and the system dies. A category system fixes that. Here’s how to build one that survives real life.
Why This Works
People put things back when “back” is obvious. Group by how you reach for things, not by how they look. You think “I need a bath towel,” not “I need the medium-fluffy textile.” Match your zones to your thoughts, and the closet runs itself.
Map Your Zones
Sort everything into these groups before you place a single bin:
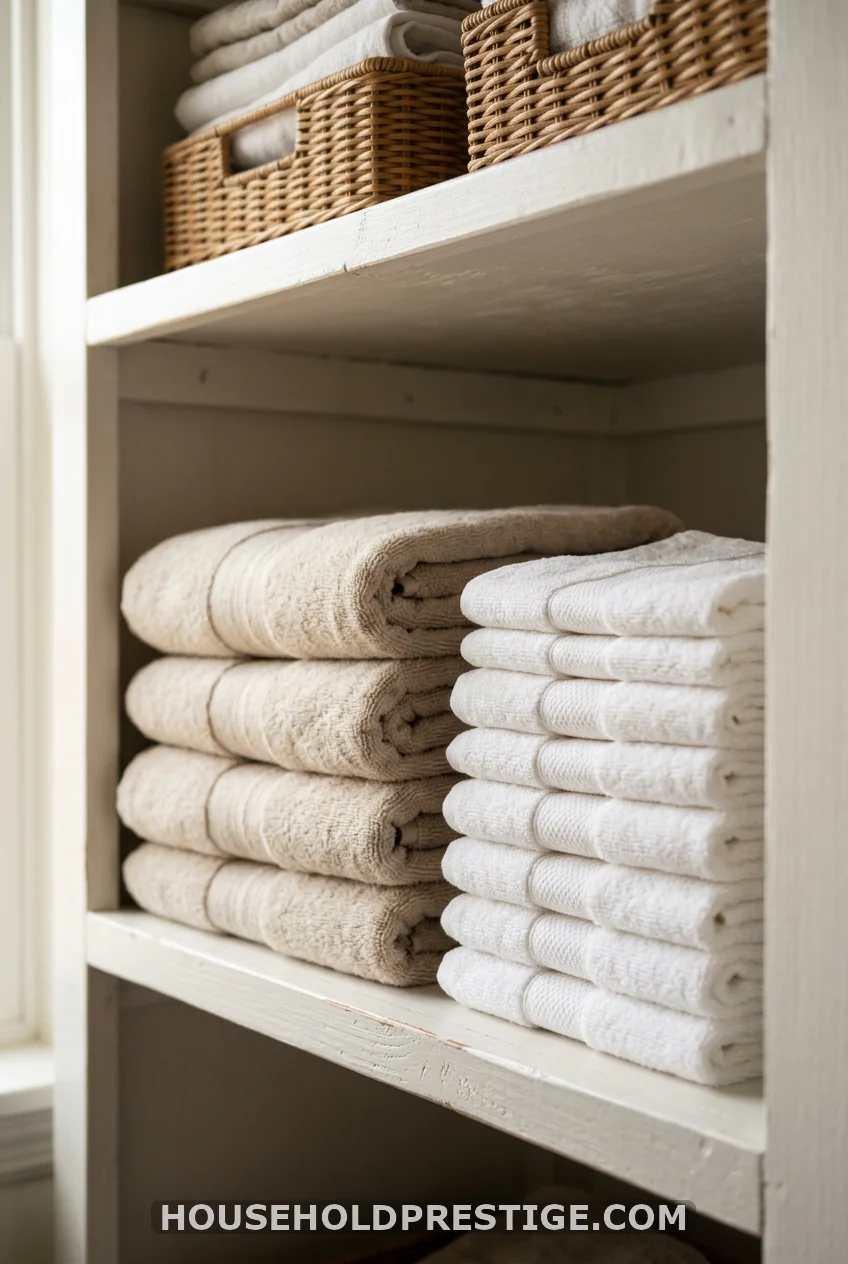
- Bath linens — bath towels, hand towels, washcloths.
- Bed linens — sheet sets grouped by bed size.
- Bulky items — comforters, spare blankets, pillows.
- Health and care — first-aid, medicine, heating pads, travel toiletries.
- Backstock — extra soap, toilet paper, anything bought in bulk.
Place Zones by Reach
Now match each zone to a shelf height:
- Put daily bath linens at eye level, between roughly 48 and 60 inches. No bending, no stretching.
- Keep bed linens on the shelf just below, since you grab them weekly, not daily.
- Send bulky comforters and pillows to the top shelf. You touch them twice a year.
- Store the small health-and-care items in a single bin at waist height so kids can reach a bandage.
- Slide backstock to the bottom shelf or floor in a deep bin.
Materials and Real Costs
You don’t need much. Here’s a starter kit with honest prices:
| Item | Where | Rough Cost |
|---|---|---|
| 4 fabric storage bins | Target Brightroom or IKEA | $24–40 |
| 1 set acrylic shelf dividers (4-pack) | Amazon | $20–28 |
| 1 over-the-door pocket organizer | Amazon | $15–22 |
| 1 label maker or printable labels | IKEA, Amazon | $0–25 |
| Total | $59–115 |
Skip the matching designer baskets for now. Plain bins do the same job for a third of the price.
Pro Move
Bundle each sheet set inside one of its own pillowcases (more on that in idea #5). Then one bin per bed size holds tidy, labeled packets instead of a slippery sheet mountain.
Common Mistakes to Avoid
- Buying bins first. Sort, then measure, then buy. Bins bought blind never fit.
- Too many tiny categories. Five zones, not fifteen. Details you won’t maintain are clutter waiting to happen.
- Labeling only the lids. You read the front of a bin, not the top. Label the side that faces you.
- Forgetting the kids. If a child can’t reach the bandages, you become the bandage delivery service forever.
Set this up once, and your closet stops being a daily fight. It becomes a place where things just go back.
4. Cover Those Wire Shelves
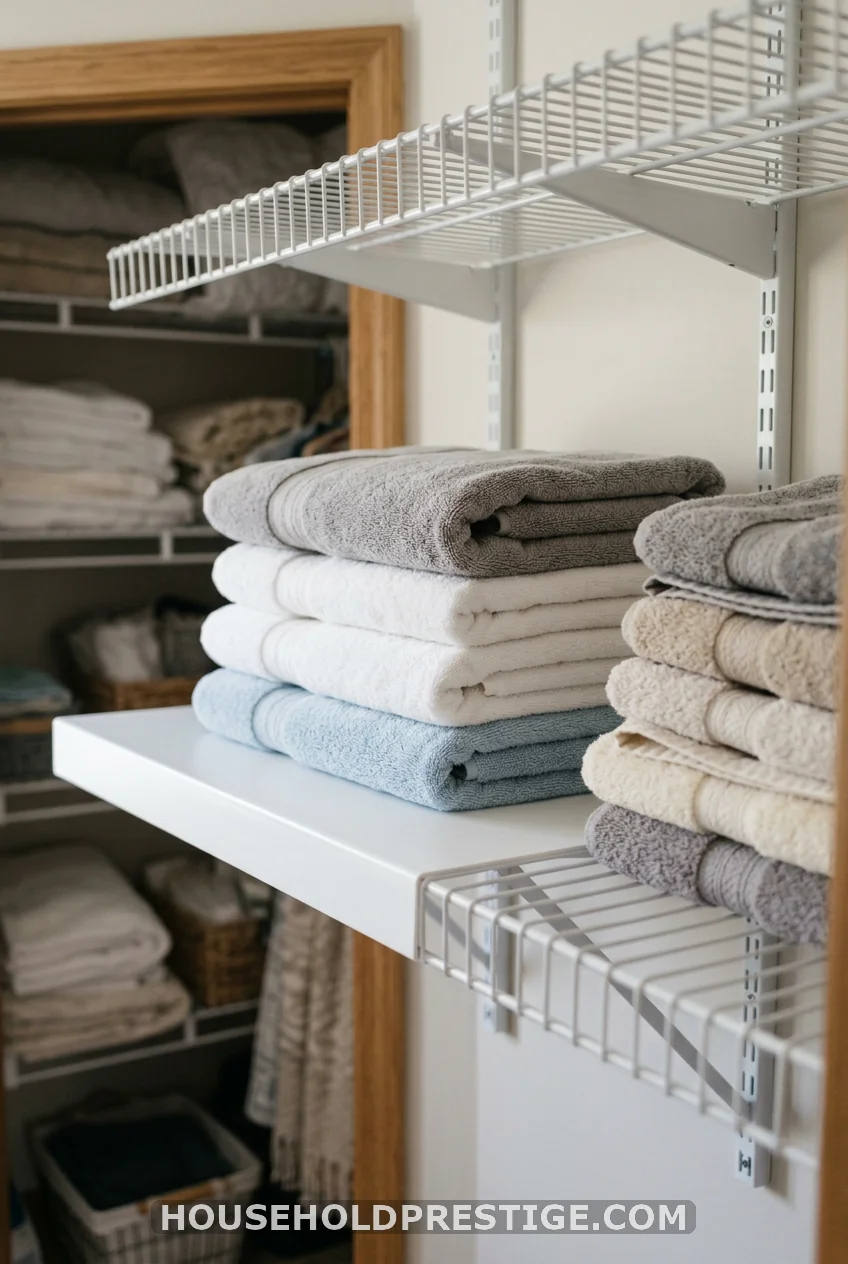
Wire shelving snags everything. Towels tip, small items fall through the gaps. Lay a cut-to-size melamine board or a firm liner on top. Suddenly, your shelves hold flat stacks and let you use slim bins. Cheap fix, big difference.
5. Wrap Each Sheet Set in Its Own Pillowcase
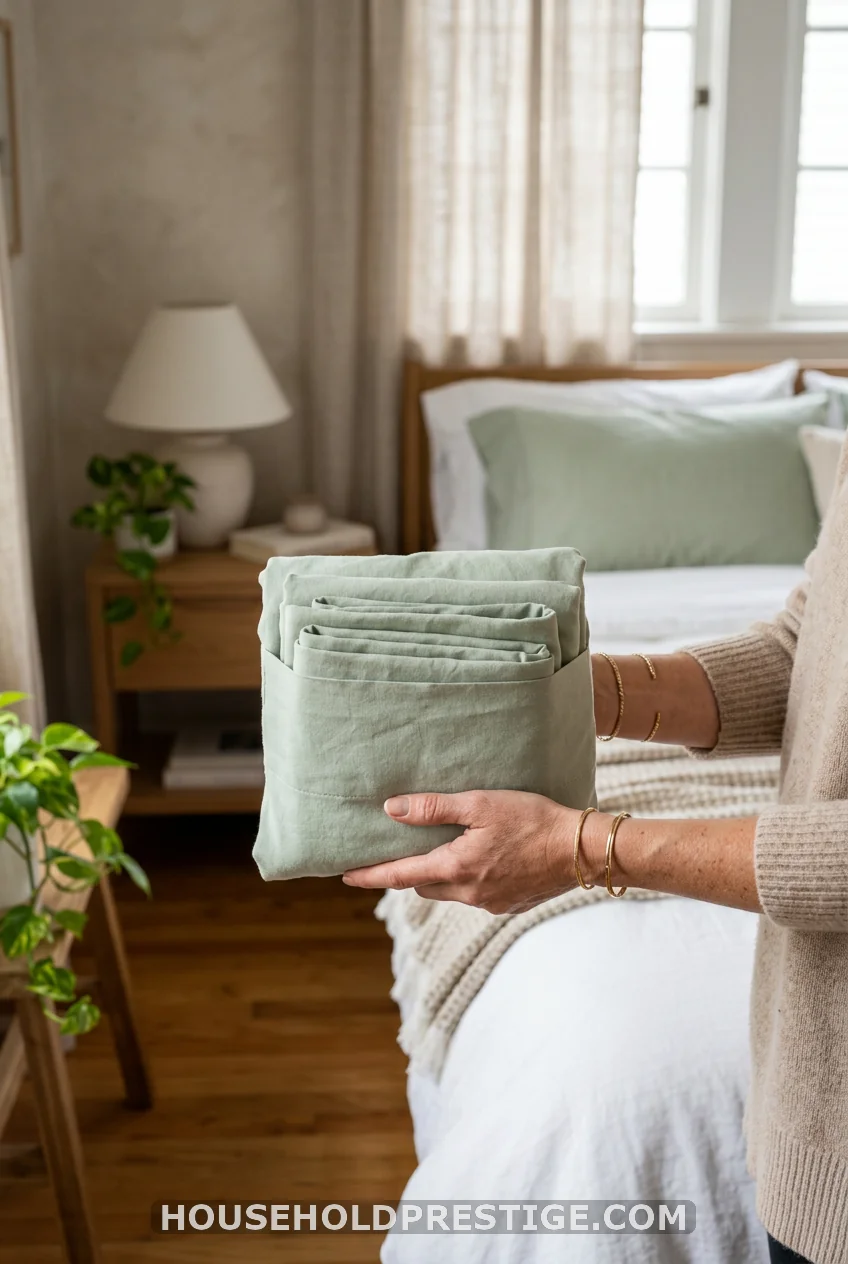
Loose sheets are why your closet looks like a laundry explosion. Fix it in one move. Fold the fitted sheet, flat sheet, and spare pillowcase, then tuck the whole set inside the last matching pillowcase. Now each set is one neat packet. No more hunting for a queen flat sheet behind the twin fitteds. Stack the packets by bed size, and you’ll grab the right one in two seconds.
6. The Over-the-Door Rack That Taught Me a Lesson
Let me save you from a mistake I made. I bought a deep over-the-door wire rack and loaded every basket to the brim. Felt brilliant for a day. Then the door wouldn’t close. The rack pressed the shelves inside, the bottom basket scraped the floor, and one hinge started pulling loose from the weight.
Here’s what I learned. Over-the-door storage works, but it has limits. Keep loads light and small: travel toiletries, washcloths, a hairdryer. Measure the gap between your door and the nearest shelf before you buy, because a deep rack eats that space fast. Check your door’s swing too. A rack that clears a shelf at rest can still jam when the door moves. Mine now holds only lightweight bits, and the door shuts like a dream.
7. Label the Front, Not the Top
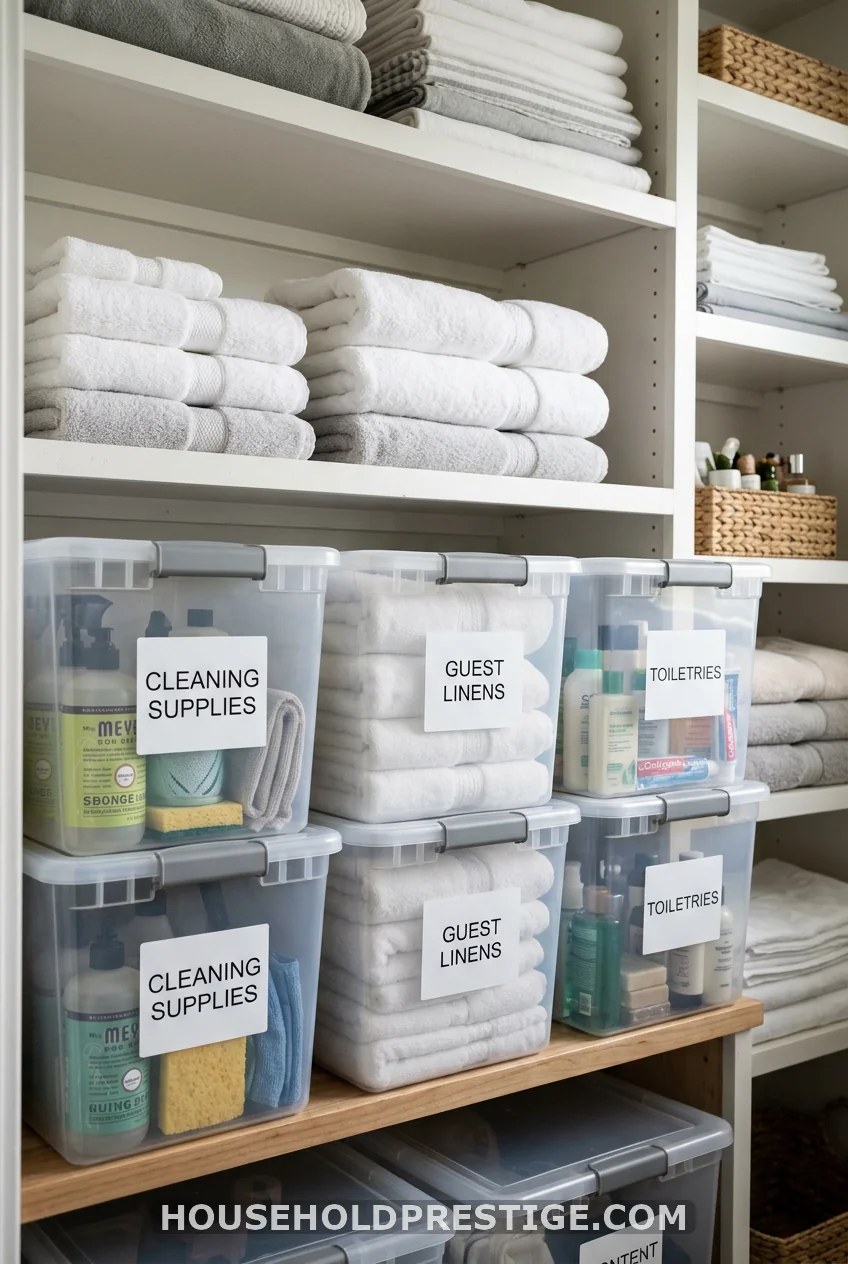
Top labels are useless once a bin sits on a high shelf. You can’t see them. Put the label on the side that faces you. Now everyone in the house can read it at a glance and put things back in the right spot.
8. Work the Inside of the Door
That door is prime real estate, and most of us ignore it. A slim pocket organizer turns it into a home for the small stuff that clutters shelves: medicine, sewing kit, spare toothbrushes, sunscreen. Add a couple of adhesive hooks for a hand vac or a duster. You’ll free a whole shelf without spending much. Keep what you hang light, though, so the door still closes easily.
9. The “Matching Baskets Equal Organized” Myth
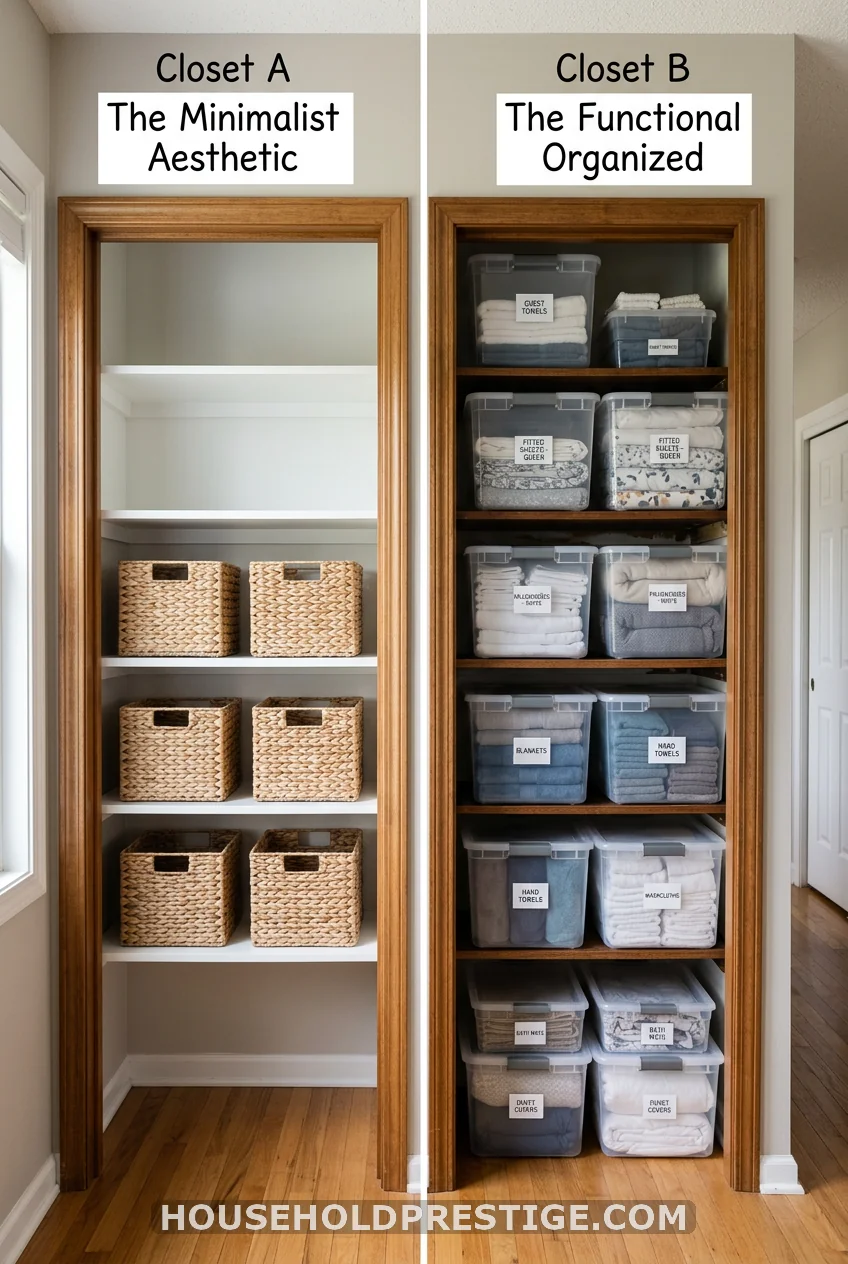
What most people think: Buy a set of beautiful matching baskets, and the closet is organized.
The reality: Baskets hide the problem; they don’t solve it. A row of pretty bins stuffed with random junk is still a junk drawer, just a photogenic one. The Pinterest photos you save show the result of decluttering and a category system. The baskets are the last five percent, not the first.
Sort and assign homes first. Buy baskets last, once you know what you’re storing and what size you need. Do it in that order, and even mismatched bins will look tidy. Do it backward, and the prettiest baskets in the world won’t save you.
10. Stand Sheets Up With Dividers
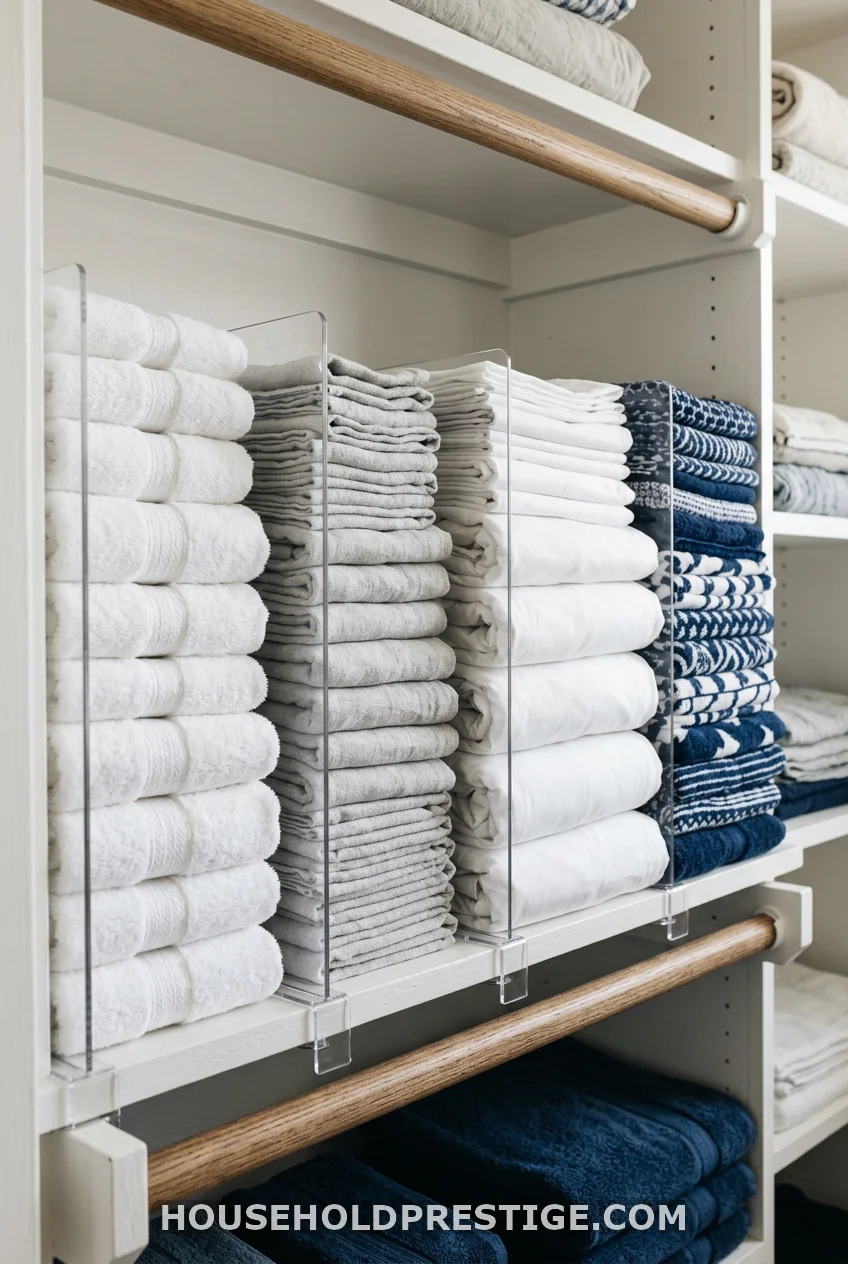
Tall stacks lean, then topple, then you’re refolding. Acrylic shelf dividers fix this for under thirty dollars. Slide them between categories, and your stacks stand in tidy columns. Bonus: You can file folded towels upright like books, which lets you pull one without wrecking the pile. Vertical storage squeezes more into a small closet, too.
11. A No-Drill Setup for Renters
Renting? You can still get every shelf working without a single hole in the wall. Tension rods wedge between side walls to create a low extra rail or to hold a roll of cleaning bags. Adhesive hooks (the kind that peel off clean) handle dusters and bags. Freestanding stackable bins add height without brackets. Slim shelf risers double a shelf’s capacity and lift right out when you move. None of it needs a drill, and none of it touches your deposit. Pack the risers and bins in the car on moving day, and your system comes with you.
12. Earn a Spot for a Step Stool
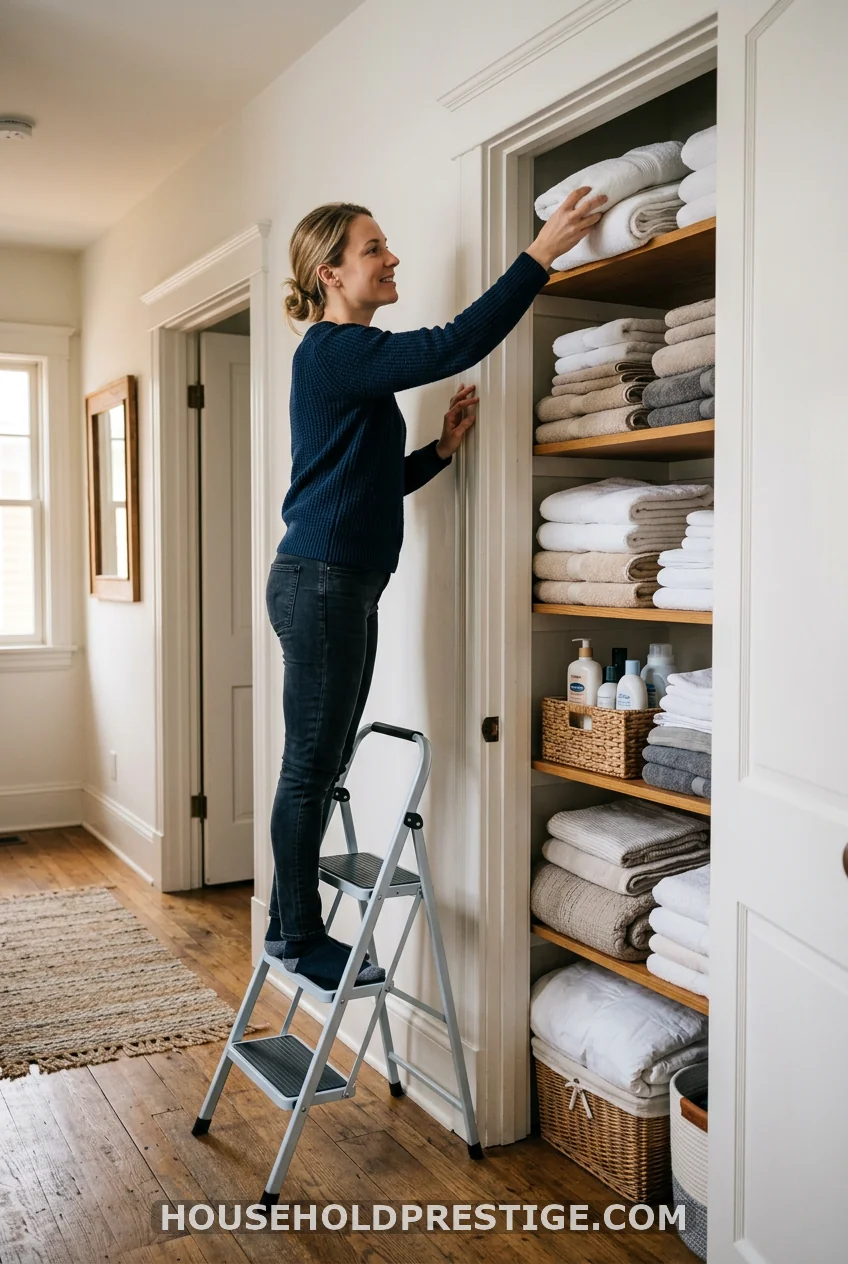
A folding stool changes everything. When the top shelf is easy to reach, you use it instead of tossing things up and creating a mess. Pick a slim one that folds flat against the wall. Small purchase, daily payoff.
13. Run a 10-Minute Reset Every Week

Here’s the part that keeps all the work from unraveling. Once a week, give the closet ten minutes. Refold the two towels someone shoved in sideways. Return the stray bottle to its bin. Toss anything that drifted in and doesn’t belong. That’s it. Ten minutes beats a four-hour rescue mission every six months. A closet stays organized because you maintain it, not because you set it up perfectly once.
You’ve Got This
A linen closet isn’t a personality test or a weekend you’ll never get back. It’s a small space that runs on two things: fewer items and fixed homes. Clear it out, give every category a spot, label the front, and reset for ten minutes a week. Start with the purge today. Even one cleared shelf feels like a small win, and small wins are how the whole closet finally comes together.
Frequently Asked Questions
How do I organize a small linen closet with limited shelves?
Go vertical and go up. Add adjustable shelves or risers to use the dead air above each stack, hang a pocket organizer on the door, and move bulky off-season items elsewhere. In a small closet, every inch of height counts more than floor space.
What’s the best way to store sheets in a linen closet?
Fold each set and tuck it inside one of its own pillowcases, so the whole set stays together as one packet. Group the packets by bed size on the same shelf. You’ll grab the right sheets in seconds and never lose a flat sheet again.
How often should I reorganize my linen closet?
A full reset twice a year is plenty, ideally as the seasons change. Between those, a quick ten-minute tidy each week keeps things in order. Maintenance beats overhauls.
What should I not keep in a linen closet?
Toss threadbare towels, sheet sets missing pieces, and expired medicine. Move rarely used bulky bedding to under-bed storage or the top of a bedroom closet. The fewer items you store, the easier the closet is to keep tidy.
Do I need matching baskets to organize a linen closet?
No. Plain labeled bins work just as well and cost far less. Sort and assign homes first, then buy bins that fit what you’re storing. Pretty baskets are the finishing touch, not the foundation.