

You open the fridge for milk and catch a whiff of something you can’t quite place. Sound familiar? A proper deep clean fridge routine fixes that smell for good, and it takes less time than you think. I used to put this chore off for months at a time, mostly because I pictured it eating my whole Saturday. It doesn’t. Grab a few pantry staples, block off less than an hour, and let’s get your fridge back to smelling like nothing at all, which is exactly how a fridge should smell.
What You’ll Need
Before you touch a single shelf, line up your supplies. You won’t need anything fancy, and most of this is probably already under your sink.
- Baking soda
- White vinegar
- A spray bottle
- Warm water and dish soap
- A few microfiber cloths or rags
- A sponge (non-scratch, for glass and plastic)
- An old toothbrush, for gasket grooves and tight corners
- A vacuum with a hose attachment
- A cooler or a couple of large bins for holding food
Skip the bleach. It’s overkill for a fridge, and the fumes can linger in a space where you store food. Vinegar and baking soda cut through grease and neutralize odors just as well, without the risk.
How Often You Really Need to Deep Clean It
A quick wipe-down happens weekly, ideally on trash night when you’re already tossing expired leftovers. The full deep clean, the one this guide walks through, only needs to happen every three to four months for a standard fridge. If yours has a built-in water or ice dispenser, bump that up to every two months. The extra moisture from the water line gives mold more chances to take hold, so it needs more frequent attention.
How to Deep Clean Your Fridge in 8 Steps
Set aside 45 to 60 minutes, and work through these in order. Each step builds on the last, so skipping around tends to create more mess than it saves.
Step 1: Unplug the Fridge
You’re about to use water near an electrical appliance, so this step isn’t optional. Unplug the fridge at the wall, not just at the breaker if you can help it, since that guarantees the compressor and any interior lights are fully off while you work.
Step 2: Empty It Out and Sort as You Go

Pull everything out, condiments, produce, the mystery container in the back, all of it. Set perishables in a cooler with ice packs so they stay cold while you clean. This is also your moment to check dates. Anything expired, unlabeled, or growing something it shouldn’t goes straight in the trash. Most fridges have at least three or four items that need to go by this point, and getting rid of them now means less clutter when you restock.
Step 3: Wash the Shelves and Drawers Separately
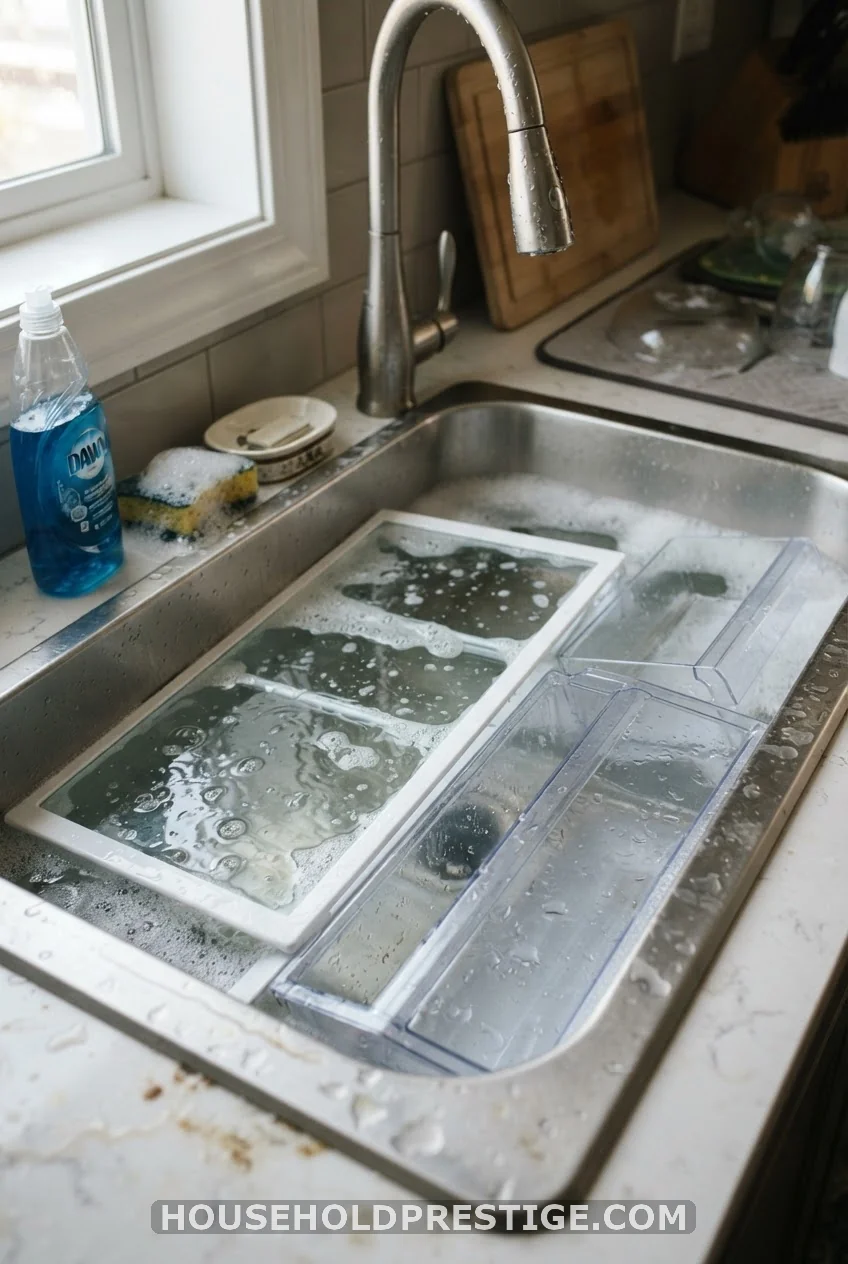
Take out every removable shelf, drawer, and bin. Let glass pieces sit out for ten to fifteen minutes before washing them. Cold glass meeting hot water can crack, and that’s a repair you don’t want. Once they’ve warmed up, wash everything in the sink with warm water and a few drops of dish soap, then dry completely before setting aside. A wet shelf going back into a “clean” fridge just invites new grime.
Step 4: Make a Baking Soda Paste for Stuck-On Messes
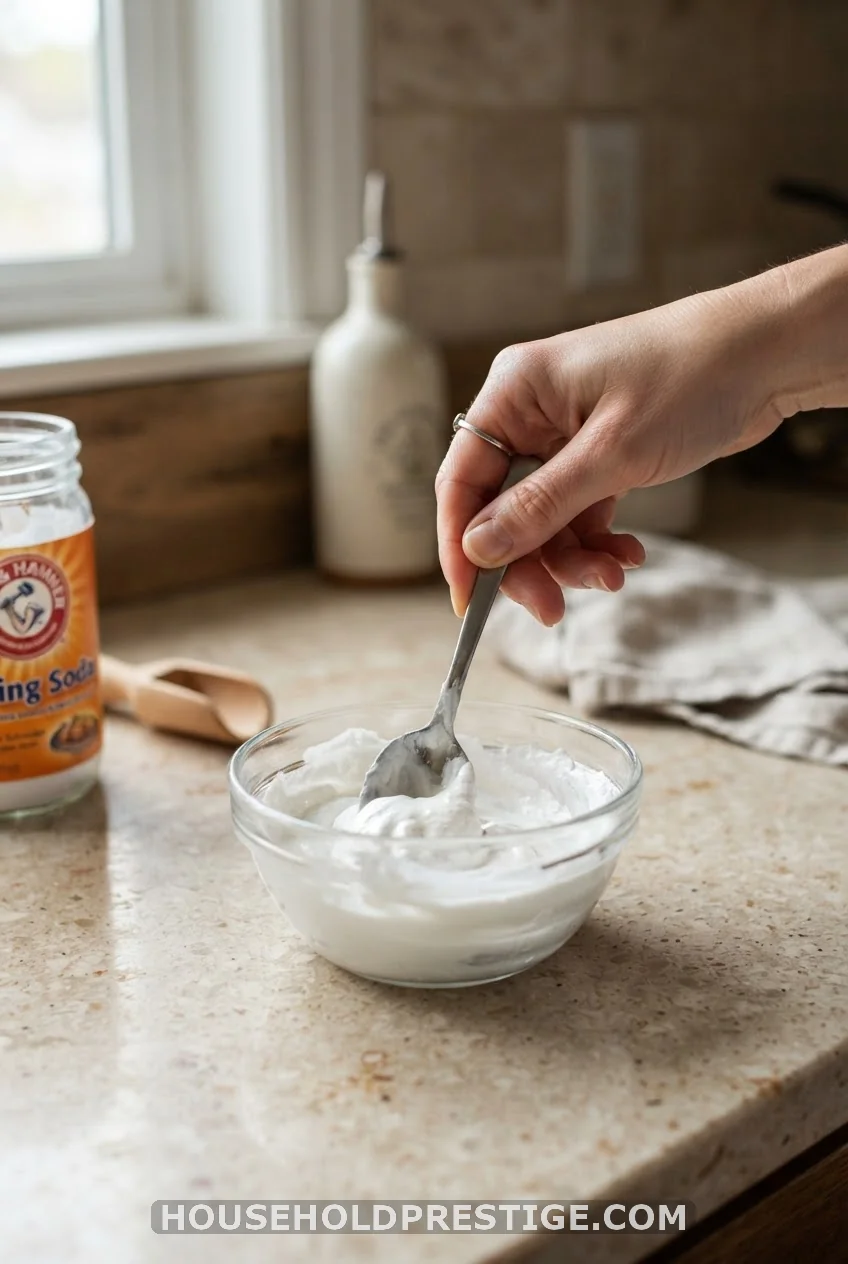
Mix three parts baking soda with one part warm water until it forms a spreadable paste, thick enough to cling to a vertical wall without sliding off. For a typical fridge interior, a cup of baking soda and about a third cup of water gets you there. Spread the paste over any dried spills or sticky residue and let it sit for ten minutes. The mild abrasive action lifts grime without scratching plastic liners the way harsher scrubbers can.
Step 5: Scrub the Interior with Vinegar and Water

Mix one part white vinegar with two parts hot water in your spray bottle. Spray down the walls, ceiling, and floor of the fridge, then wipe with a clean cloth, rinsing and re-wetting as needed. Vinegar disinfects as it cleans, cutting through the grease and bacteria that cause odors in the first place. Wipe away any leftover baking soda paste from Step 4 as you go.
Step 6: Clean the Door Gasket
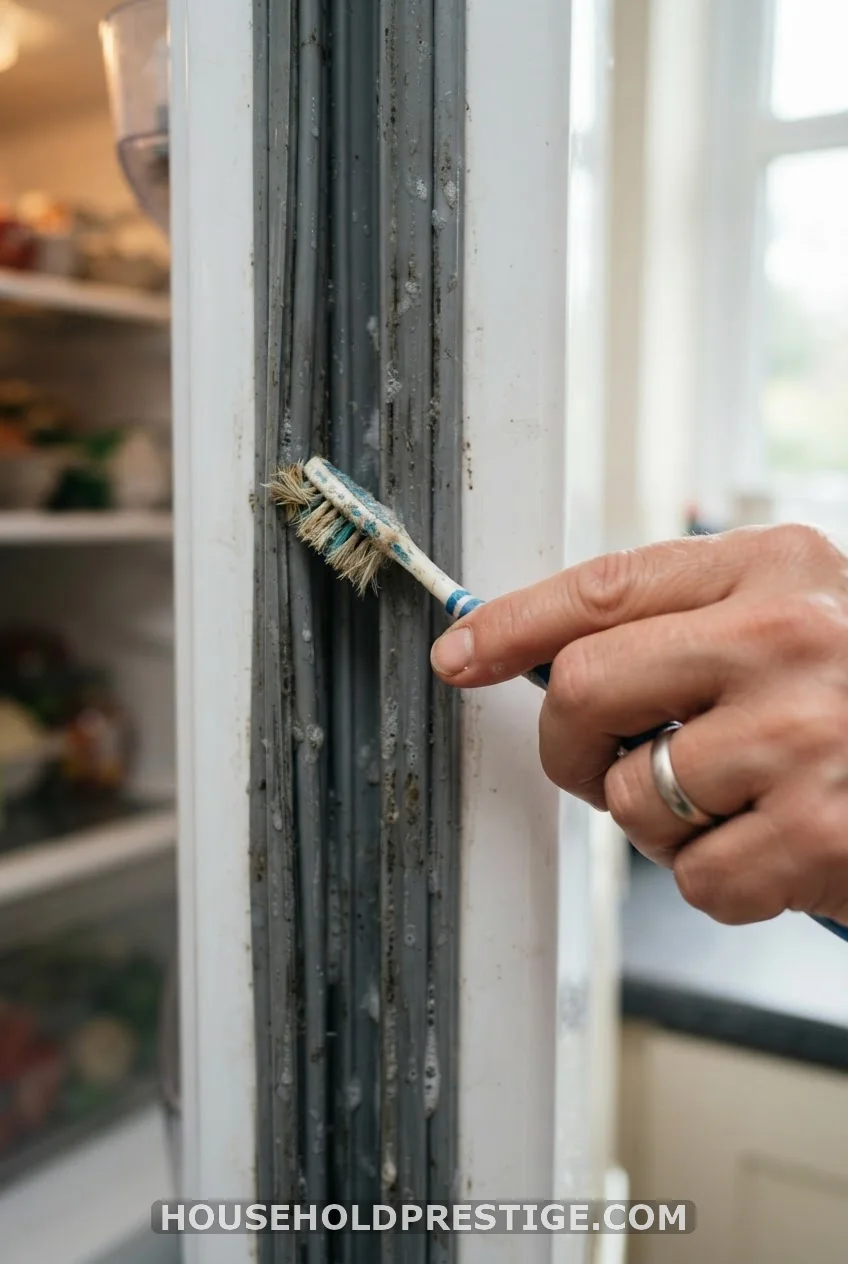
The rubber seal around the door collects crumbs and moisture in its folds, and it’s the one spot most people skip entirely. Wipe it down with a damp cloth, then use an old toothbrush to get into the grooves. Stick to plain warm water here rather than vinegar. Vinegar’s acidity can dry out and crack rubber over time, which weakens the seal and makes your fridge work harder to stay cold.
Step 7: Clean the Outside and Vacuum the Coils
For a plastic exterior, warm soapy water and a microfiber cloth handle it. For stainless steel, use a dedicated stainless cleaner so you don’t leave streaks, and always wipe in the direction of the grain. While you’re back there, vacuum the coils and the floor underneath using your hose attachment. Dusty coils force the compressor to work harder, which quietly drives up your energy bill.
Step 8: Restock and Deodorize
Plug the fridge back in, let it cool for a few minutes, then load your food back in. Place an open box of baking soda toward the back of a top shelf to keep absorbing odors between cleans, and swap it out every three months. If your model has a water or ice dispenser, disconnect the lines, run vinegar through them for thirty minutes, then flush thoroughly with water and discard the first batch of ice.
Common Fridge-Cleaning Mistakes to Avoid

A few habits quietly undo all your effort:
- Using bleach near food storage. It’s harsh enough to damage plastic liners and can leave fumes that transfer to food.
- Skipping the gasket. Mold loves that damp rubber fold, and a moldy seal is a repeat offender for odors.
- Washing cold glass shelves in hot water immediately. Let them come to room temperature first, or you risk a crack.
- Forgetting the coils. A dusty coil isn’t just a cleaning miss, it’s an energy drain that shows up on your utility bill.
- Reloading wet shelves. Trapped moisture becomes tomorrow’s mildew smell.
How to Keep It Cleaner Between Deep Cleans
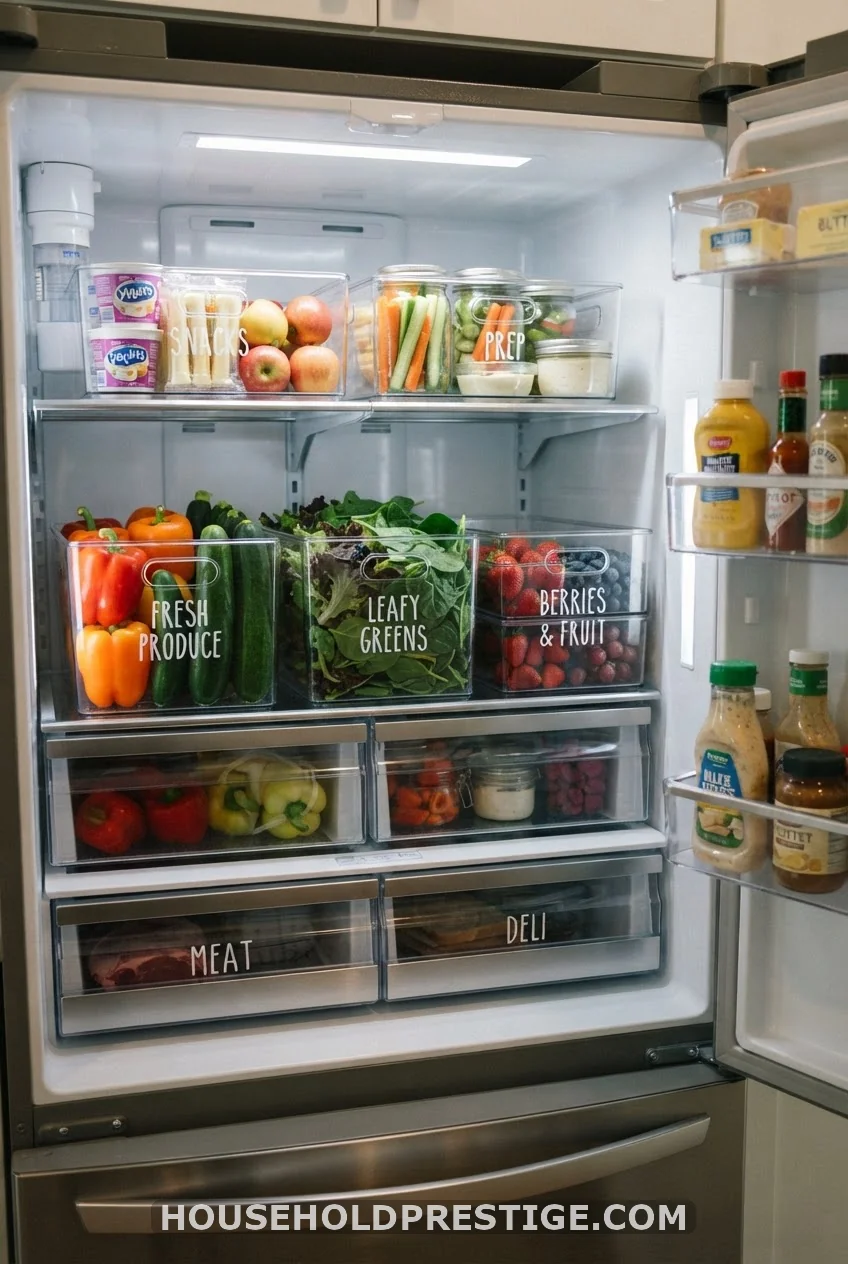
A few small habits stretch the time between deep cleans considerably.
Weekly check: Spend two minutes each week tossing anything past its prime. It’s a lot easier to do this in small batches than to face a fridge full of science experiments every few months.
Wipe as you go: A spill left overnight turns into a scrub job. A spill wiped immediately turns into nothing.
Use containers with lids: Open bowls and loose produce are the main source of both smells and drips. Clear, lidded containers solve both.
Group like with like: Bins for dairy, bins for produce, bins for leftovers. When everything has a home, you spot what’s expired faster, and you stop buying duplicates of things you already have.
With just a little upkeep, your fridge stays fresh far longer than you’d expect, and the next deep clean goes even faster.
Wrapping Up
A deep clean fridge routine doesn’t need to be the chore you dread all season. Break it into these eight steps, keep the harsh chemicals out of it, and you’ll have a fridge that looks and smells like new in under an hour. Your future self, reaching in for a midnight snack without wrinkling her nose, will thank you.
FAQ
How often should you deep clean your fridge?
Every three to four months for a standard fridge. If yours has a water or ice dispenser, clean it every two months instead, since the extra moisture gives mold more of a chance to grow.
What’s the best natural cleaner for a fridge deep clean?
A mix of white vinegar and warm water handles most of the job, with a baking soda paste for anything stuck-on. Both are food-safe and won’t leave chemical residue behind.
Can you use bleach to clean a refrigerator?
It’s best avoided. Bleach can damage plastic liners and leave behind fumes that transfer into food over time. Vinegar and baking soda do the job without that risk.
Why does my fridge still smell after cleaning?
Check the door gasket first. Crumbs and moisture collect in those rubber folds, and a dirty seal keeps producing odor even after the rest of the fridge is spotless.
How long does a fridge deep clean take?
Plan on 45 to 60 minutes for a standard fridge, longer if you’re also cleaning the water line or dealing with heavily stuck-on messes.