

You bought the pool. You filled it. And now it’s just… sitting there. A big round tub in the middle of your yard with no deck, no landscaping, no nothing. The grass is already dying in a ring around it, and every time you walk outside, it looks like a giant blue eyesore that also somehow costs $400. Sound familiar?
The good news? DIY above-ground pool ideas on a budget don’t require a contractor, a big loan, or a full summer off work. Some of the best upgrades I’ve seen — and done myself — cost under $100 and take a single Saturday. Others take a weekend and maybe $400. All of them make a real difference. Here are 17 to start with, ranked roughly from easiest to most involved.
1. Get the Ground Prep Right (Before You Do Anything Else)
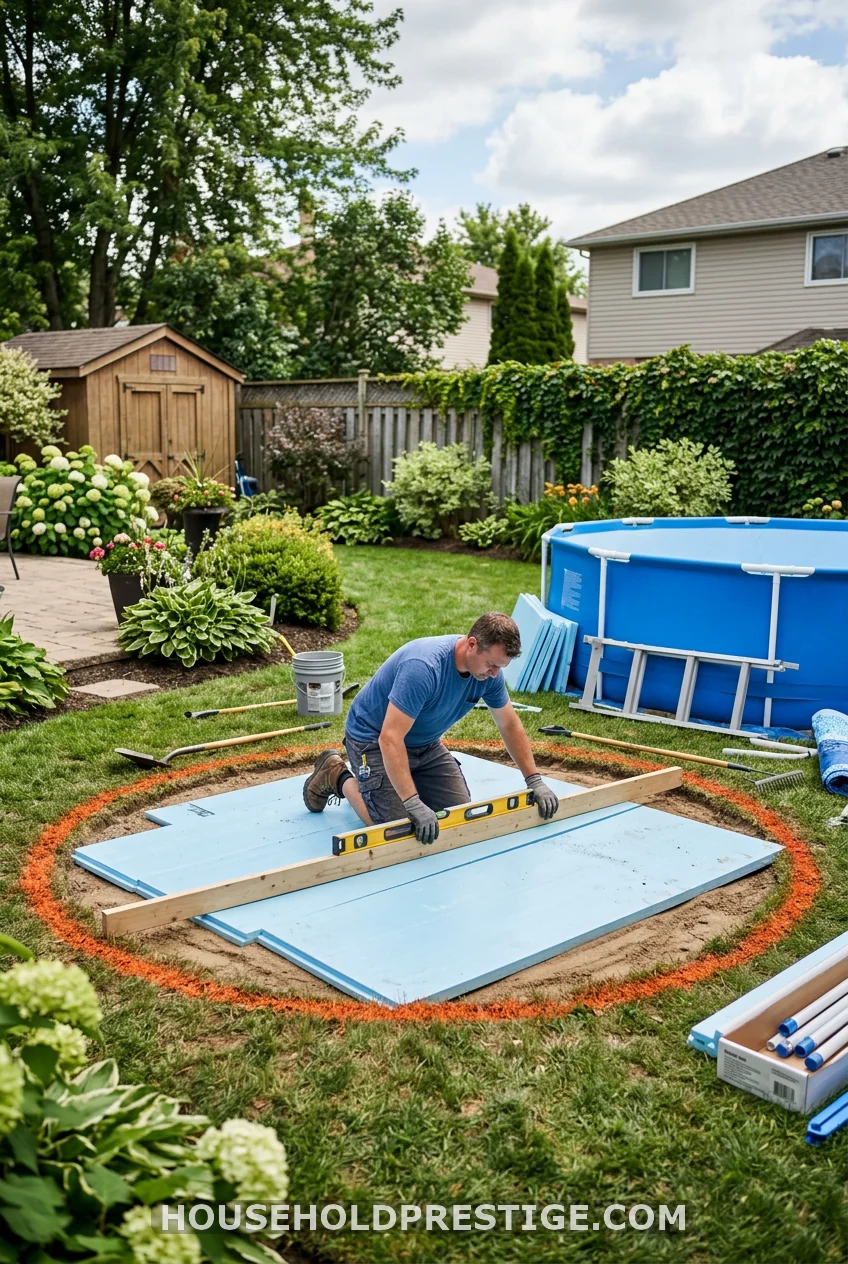
Most pool problems — liner buckling, uneven water, stressed walls — start underground. And most guides skip this entirely.
Here’s the standard approach that actually works: mark your pool footprint with marking paint (go 1 foot wider than the actual pool diameter), then use a flat shovel to knock down any high spots. Do not fill low spots with sand — it compresses unevenly over time and causes the pool walls to bow. Rent a plate compactor from Home Depot for $40-$60 a day and run it over the whole area.
Once it’s level, lay down a layer of 1.5-inch pink extruded polystyrene foam (XPS) — not fiberglass batting, not a tarp alone. Home Depot sells it in 4×8 sheets for about $25 each. A standard 15-foot round pool needs roughly 4-5 sheets. Tape seams with Gorilla tape. Cover with a heavy-duty tarp (not the thin one that came in the box), and then set up your pool on top.
For the pool legs: set each leg on a 12×12×1.5-inch concrete paver, flush with the foam layer. This stops legs from sinking into soft ground after rain.
Cost: $80-$150 total. Time: 4-6 hours.
2. DIY Pallet Deck: The Full Breakdown
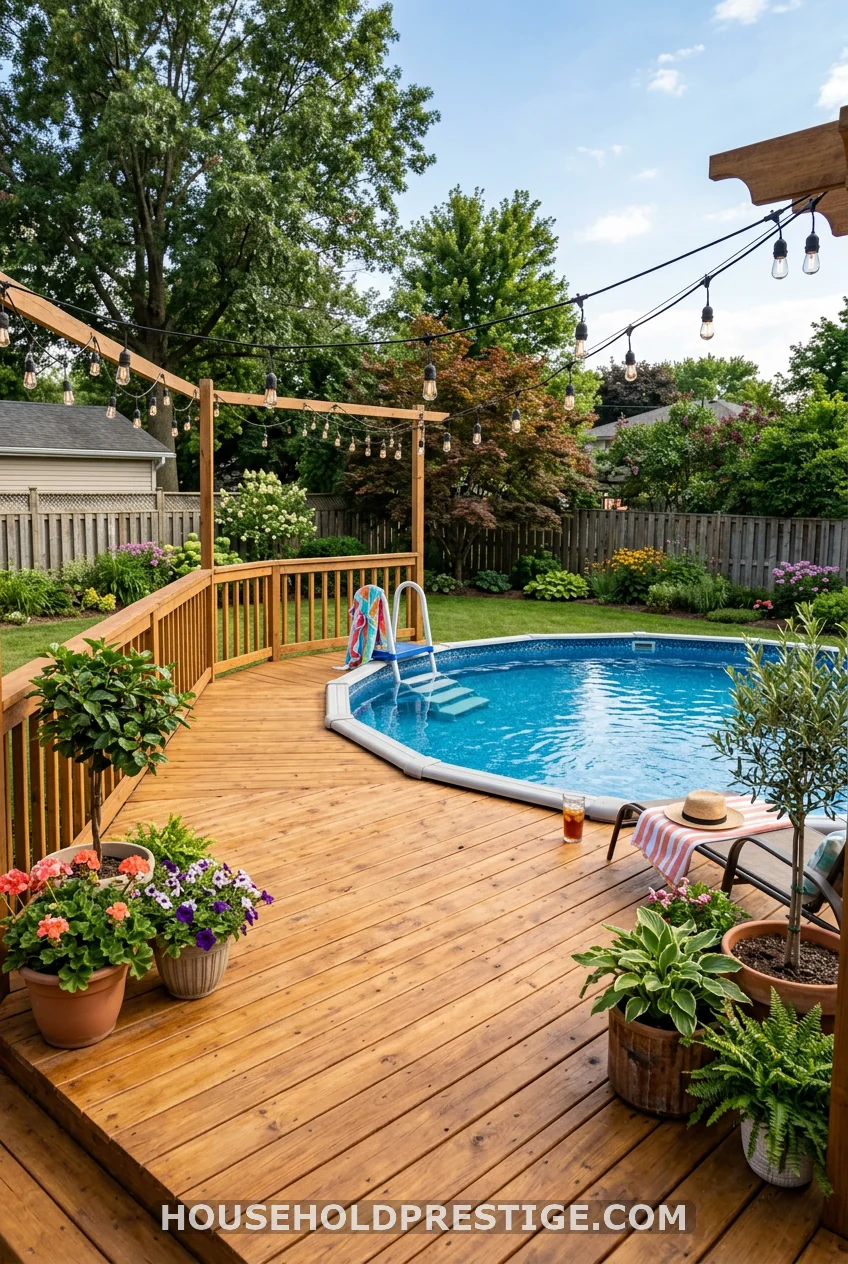
This is the project that makes the biggest visual difference for the smallest spend. Done right, a pallet deck looks deliberate and charming — not like you picked up trash from behind a furniture store (even though, technically, you did).
What You’ll Actually Need
Before you start sourcing pallets, know this: not all pallets are safe. You want heat-treated pallets only — these are marked with the letters HT on the side. Avoid pallets stamped MB (methyl bromide treated — a pesticide), and skip anything with stains, chemical spills, or damage. Check Facebook Marketplace, local hardware stores, nurseries, and grocery distribution centers. Most give them away free or charge $5-$10 each.
For a standard 15-foot round pool with a 3-foot deck border, you’ll need roughly 20-25 pallets. Plan on 2-3 weekends to source, prep, and install.
Materials list:
– 20-25 heat-treated pallets (free to $200)
– 3 gallons exterior deck stain or paint ($60-$90)
– 2 gallons exterior wood sealant/waterproofer ($40-$60)
– 80-grit sandpaper or a random orbit sander rental ($25-$30/day)
– Concrete blocks or deck blocks for leveling the base ($30-$50)
– Deck screws, 3-inch ($15)
– Jigsaw for cutting around curves ($40 rental or use one you own)
Total cost: $150-$250 depending on what you pay for pallets.
Step-by-Step Build
Step 1 — Prep the pallets.
Sand every exposed surface with 80-grit paper. You’re looking for splinter removal, not a furniture finish. Pay attention to the top boards — these touch feet. Flip the pallet and check for broken slats. Replace or skip any that are structurally weak.
Step 2 — Map the layout.
Before you build, lay the pallets out dry around the pool. Mark which ones need cutting for the curved perimeter. A round pool requires partial-length pallets near the edges; don’t skip this step or you’ll spend an afternoon redoing cuts.
Step 3 — Build a level foundation.
Lay deck blocks (sold at Home Depot for $4-6 each) at all four corners of each pallet and at the midpoint of long sides. Use a 4-foot level and adjust block height by adding or removing compacted gravel underneath each one. Get every pallet within 1/4 inch of level before you attach anything.
Step 4 — Secure pallet-to-pallet.
Use 3-inch deck screws to connect adjacent pallets along shared edges. Pre-drill to avoid splitting. At minimum, put 2 screws per joint — more at corners and high-traffic areas.
Step 5 — Cut the perimeter pallets.
Use a jigsaw to cut pallets following the pool’s curve. Trace the curve with chalk first. Cut slow — pallets split if you rush.
Step 6 — Stain and seal.
Apply one coat of exterior stain (I use a semi-transparent cedar tone — it hides imperfections and looks intentional). Let it dry 24 hours. Then apply two coats of exterior waterproof sealant. This step is what separates a deck that lasts two summers from one that lasts five.
Step 7 — Edging and finishing.
Cap any rough-cut edges with 1×4 pressure-treated boards, screwed flat. This cleans up the look significantly and protects exposed pallet ends from water intrusion.
Common Mistakes to Avoid
- Skipping the foundation leveling. Unlevel pallets flex under weight and squeak, wobble, and eventually crack.
- Using MB-treated pallets. Don’t risk it. The HT stamp is small but it’s there — look for it.
- Painting instead of staining. Paint peels in a pool environment. Penetrating stain holds far longer.
- Not pre-drilling screws. Old dry pallet wood splits instantly. Pre-drill everything.
Pro Tip
Add a 36-inch wide entry section that butts up directly to the pool ladder. Frame it slightly higher (use an extra deck block shim) so it’s flush with the pool rim. This one detail makes getting in and out feel intentional instead of accidental.
3. Pea Gravel Surround
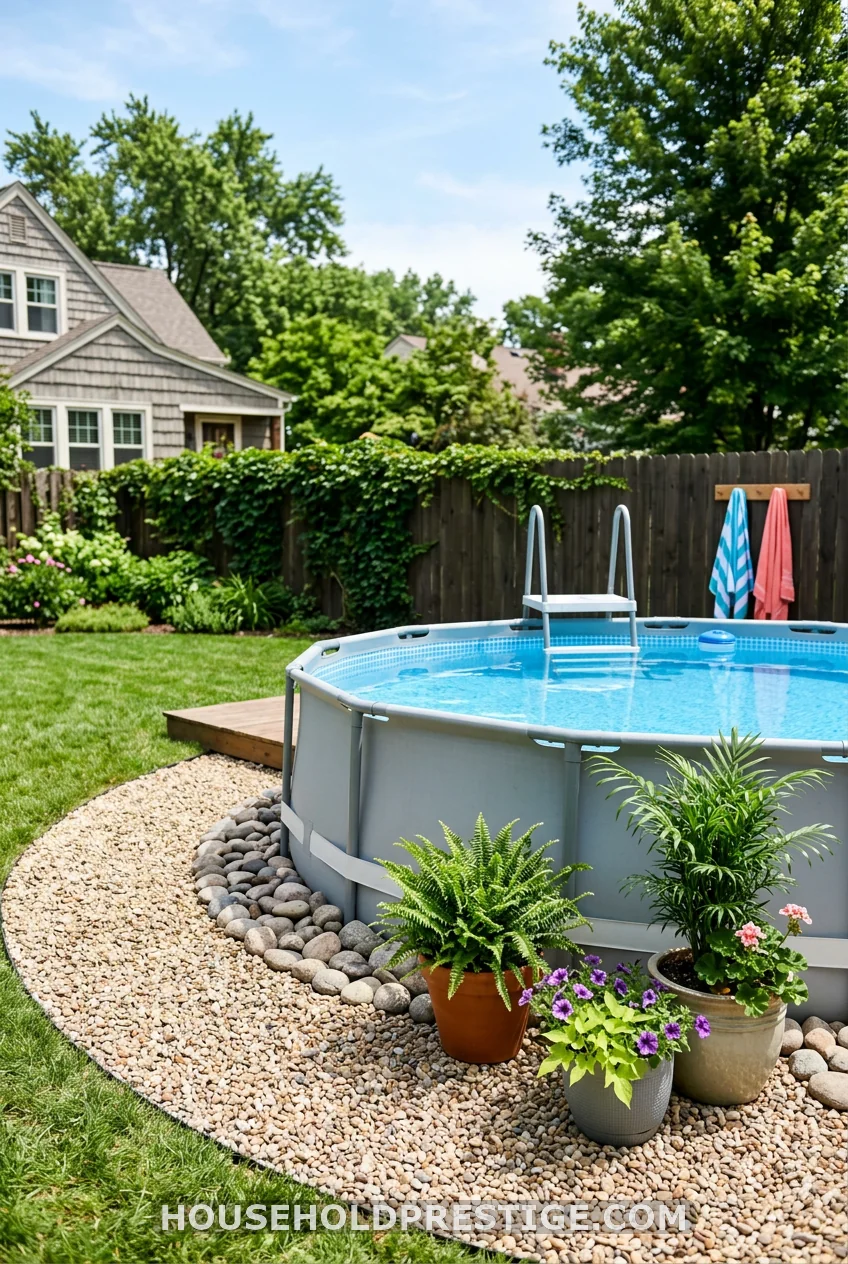
Skip the dead grass ring. Lay weed fabric around the pool’s perimeter, pin it down, and cover with 3-4 inches of pea gravel. Bags run about $5 at hardware stores; a 15-foot pool needs 12-15 bags for a 2-foot border. Mix in a few river rocks for texture. Takes 90 minutes. Costs under $80. The difference is night and day.
4. Wood Panel Pool Skirting
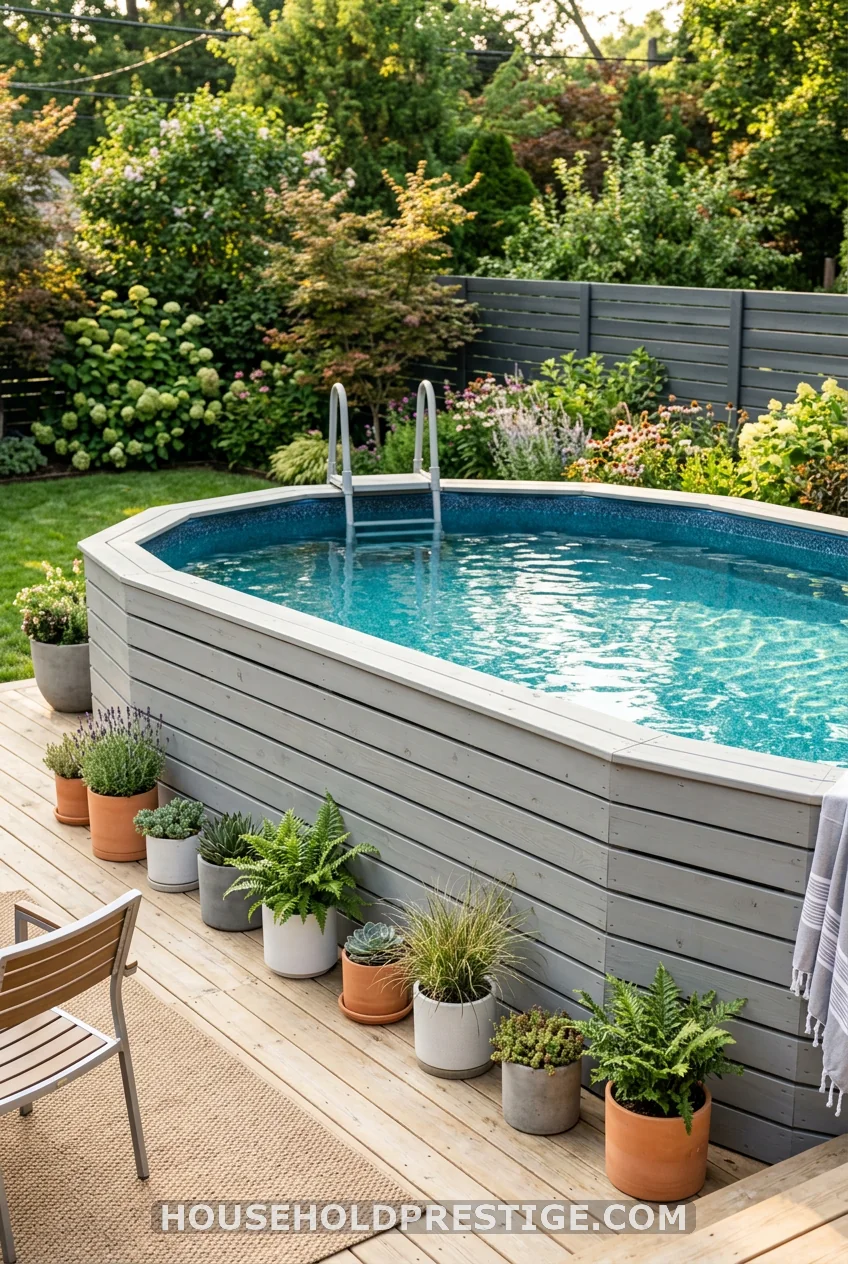
The exposed metal wall of a standard above-ground pool is the thing that makes it look cheap. Hiding it is the single fastest way to make the whole setup look intentional.
The budget method: cut 1×6 cedar fence boards to the height of your pool wall (usually 48-52 inches). Attach horizontal furring strips (1×2 boards) to the pool frame with zip ties or nylon clamps — not screws, since you don’t want permanent attachment to the pool itself. Then screw the cedar boards onto the furring strips, leaving about a 1/4-inch gap between boards for drainage and expansion.
Stain or paint the boards before attaching. A soft weathered gray or natural cedar tone looks clean against the backyard. A 15-foot round pool takes about 30-35 linear feet of boards.
Cost: $90-$150. Time: 3-4 hours.
The one thing people miss: leave a small removable access panel near the skimmer and pump connections. Screw this section with wing nuts so you can get to the equipment without dismantling the whole thing.
5. Solar String Lights
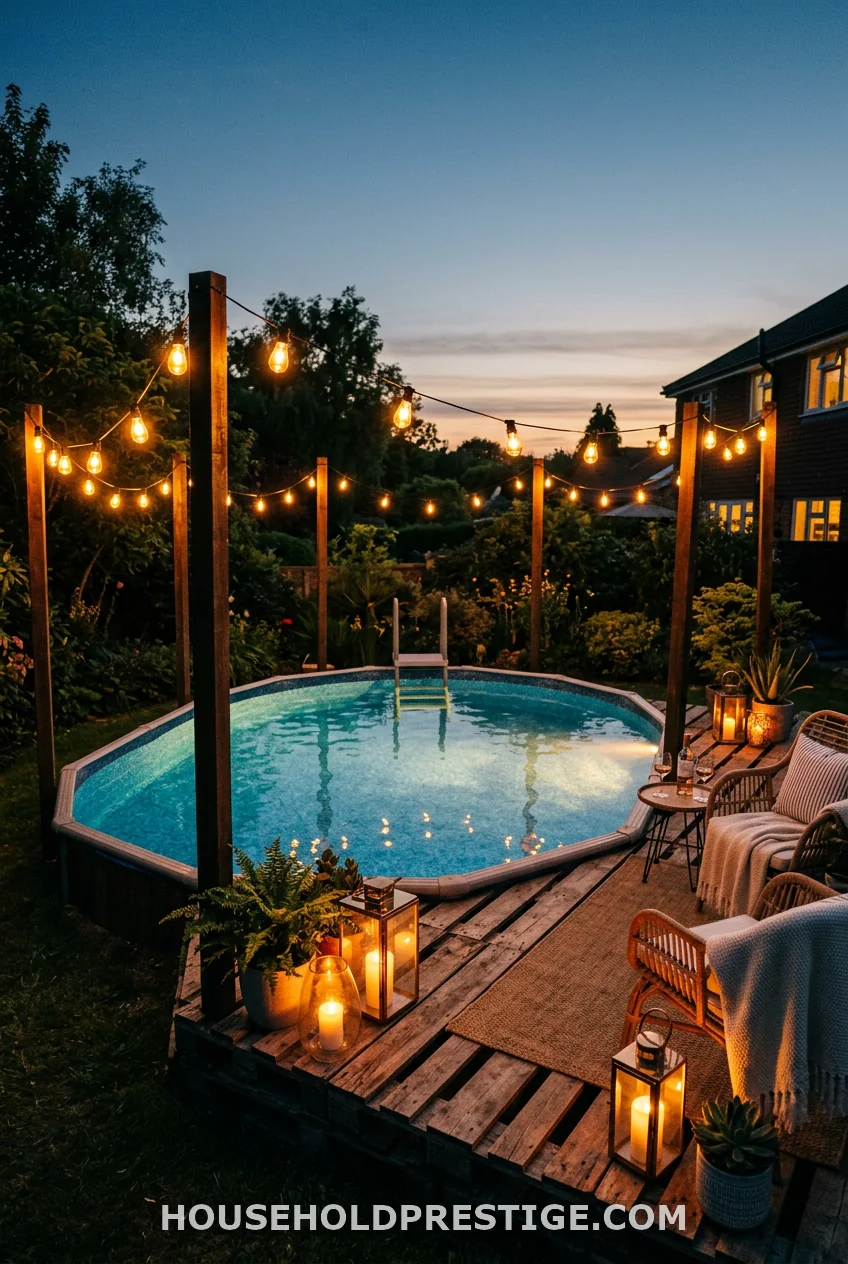
Run a perimeter of wooden stakes (4-foot garden stakes work) around the pool, about 6 feet out. String outdoor Edison bulb lights between them. Solar-powered sets run $15-$30 on Amazon and need zero wiring. The nighttime transformation is ridiculous for what you spend.
6. DIY Bamboo Privacy Screen

Neighbors, sight lines, and the general feeling that anyone walking by can see you cannonball into your pool are real problems. A privacy screen fixes all three.
Bamboo roll fencing comes in 6-foot-by-8-foot rolls for about $20-$30 each at Home Depot or Lowe’s. Drive metal fence posts (or 4×4 wooden posts) into the ground at 6-8 foot intervals around the pool area. Unroll the bamboo and zip-tie or staple it to the posts. For a 15-foot round pool with a 3-foot clearance around it, you’ll need about 6-7 rolls.
Add a few potted elephant ears, banana plants, or tall ornamental grasses in front of the bamboo for a layered look. The result feels more resort, less suburban backyard project.
Cost: $150-$200. Time: 3-4 hours.
7. Potted Tropical Plants
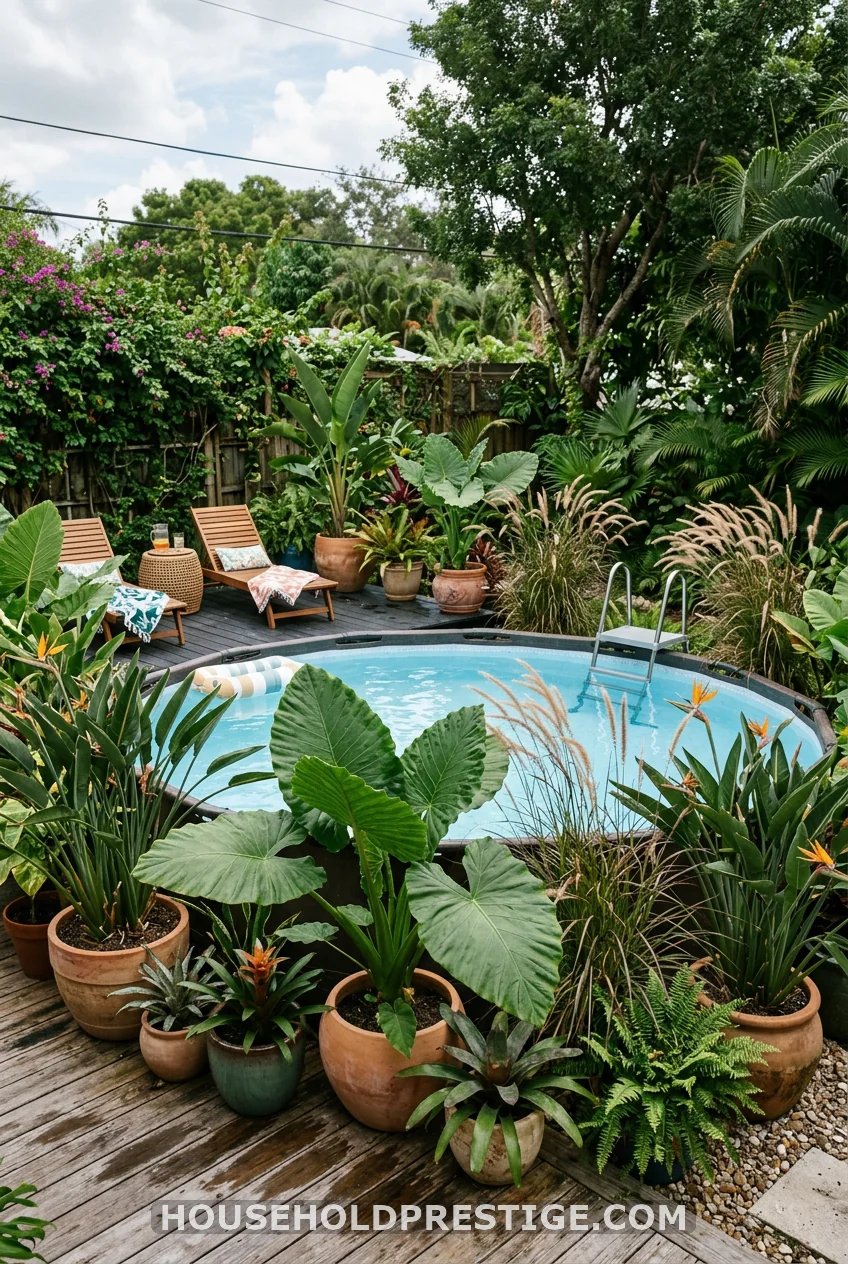
Three large pots. Elephant ears in two of them, an ornamental grass or bird of paradise in the third. Place them at evenly spaced intervals around the pool. Done. Nothing says “this was intentional” quite like a plant you can’t ignore. Pots run $15-$30 at garden centers. Plants start at $8-$20. Total: under $80 for a dramatically different look.
8. DIY Poolside Bar from Pallets
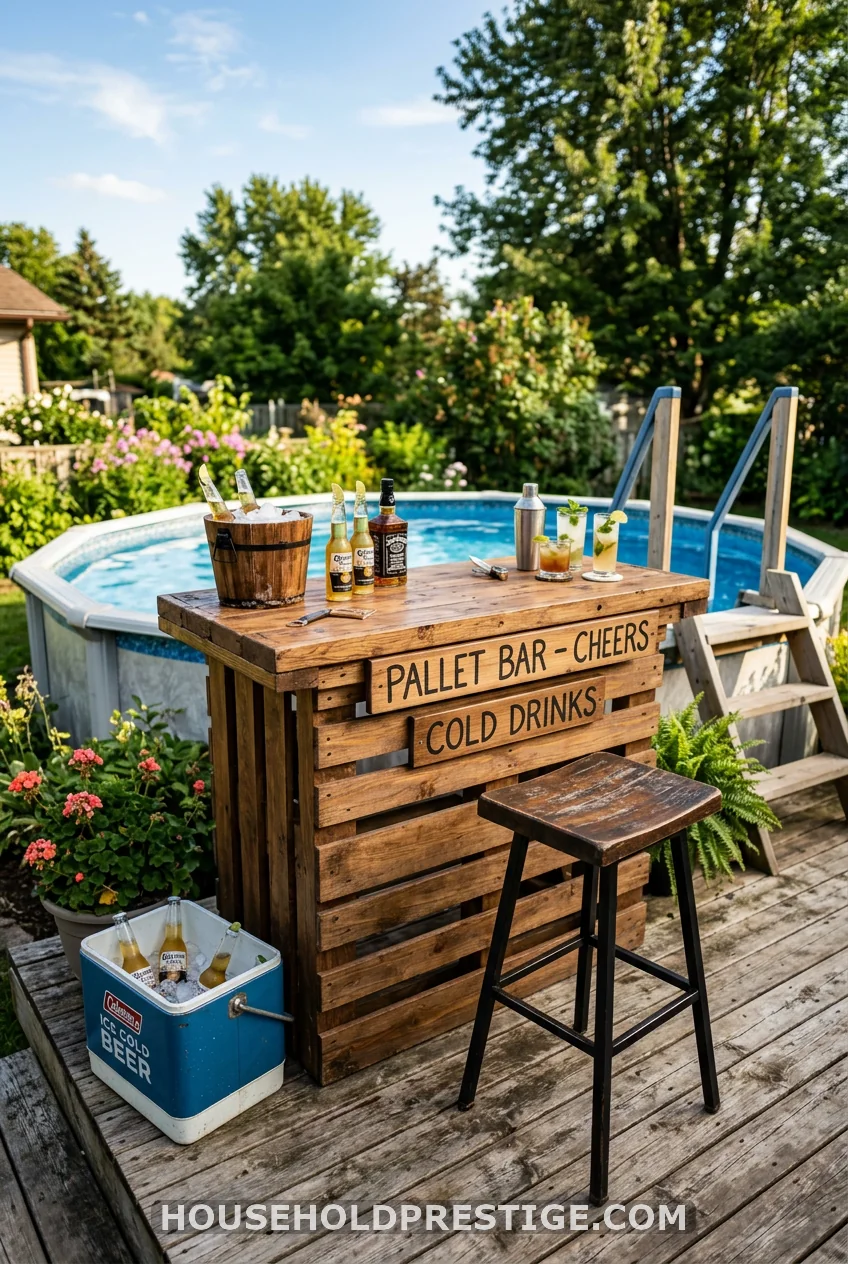
Stack two pallets horizontally, screw them together, and top with a piece of outdoor-rated plywood or a pre-cut cedar board ($15-$20 at Lowe’s). Sand everything, stain, and seal. Mount a few cup hooks under the edge for wet towels. Park a bar stool next to it.
You just made a poolside bar for under $50 in materials — and honestly, it’s one of those things that makes everyone at the cookout point at it and say, “Did you build that?”
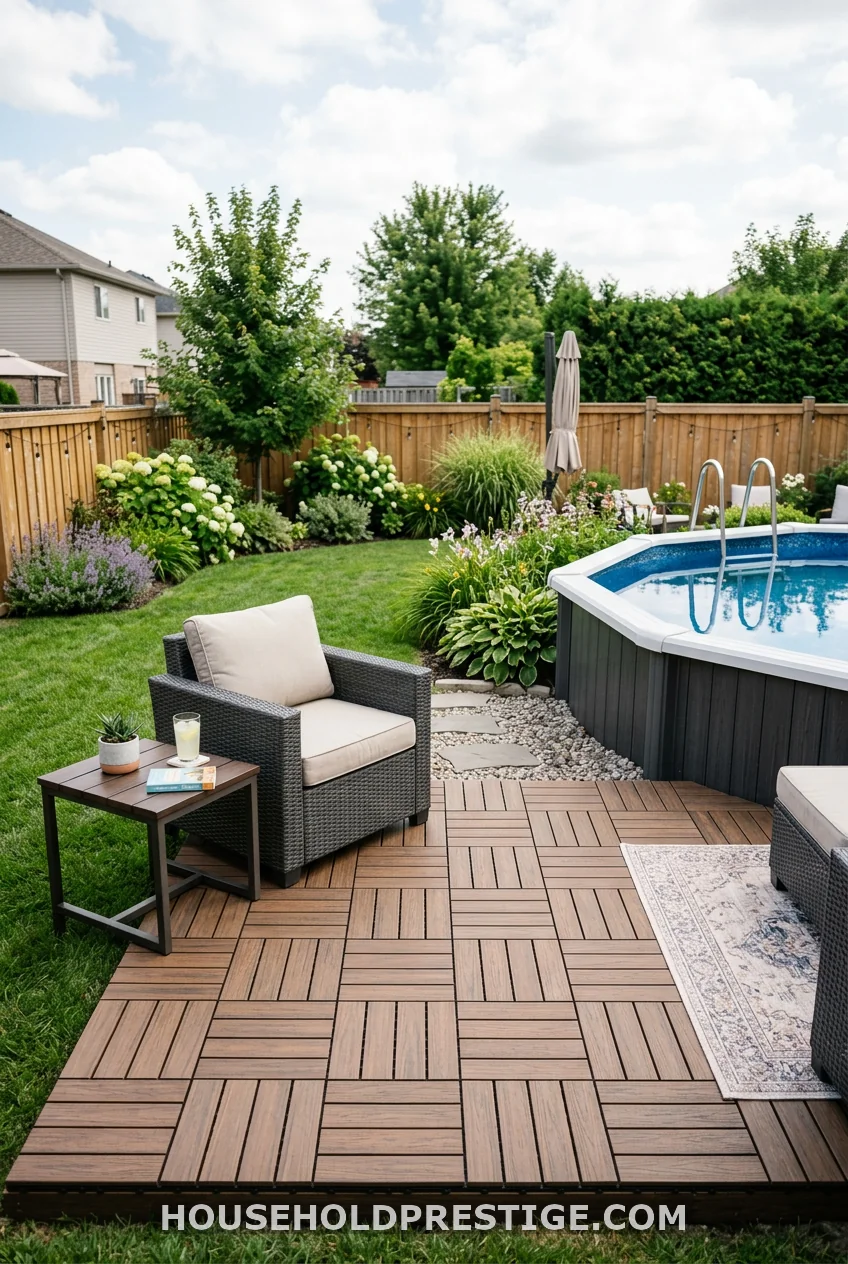
9. The No-Deck “Deck” Trick: Interlocking Deck Tiles
No permanent construction. No permits. No post holes. Just tiles.
Interlocking composite deck tiles (sold at Costco, Home Depot, and Amazon) lock together like puzzle pieces, sit on any flat surface, and cost $1.50-$3 per square foot. A 10×10 area — enough for two loungers and a small table — costs $150-$300 in materials.
They work on grass, concrete, or compacted gravel. Level the ground first (see Idea #1) or they’ll rock. They install in about two hours with zero tools. If you move, they come with you. If you want to expand, just buy more tiles.
Cost: $150-$300. Time: 2 hours.
The catch: Cheap plastic interlocking tiles get slippery when wet. Spend a little more on composite or teak-look tiles with a textured top surface rated for wet areas. Look for tiles with a slip rating of 0.6 COF (Coefficient of Friction) or higher — it’s usually listed in the product specs.
10. A Shade Sail Over the Pool
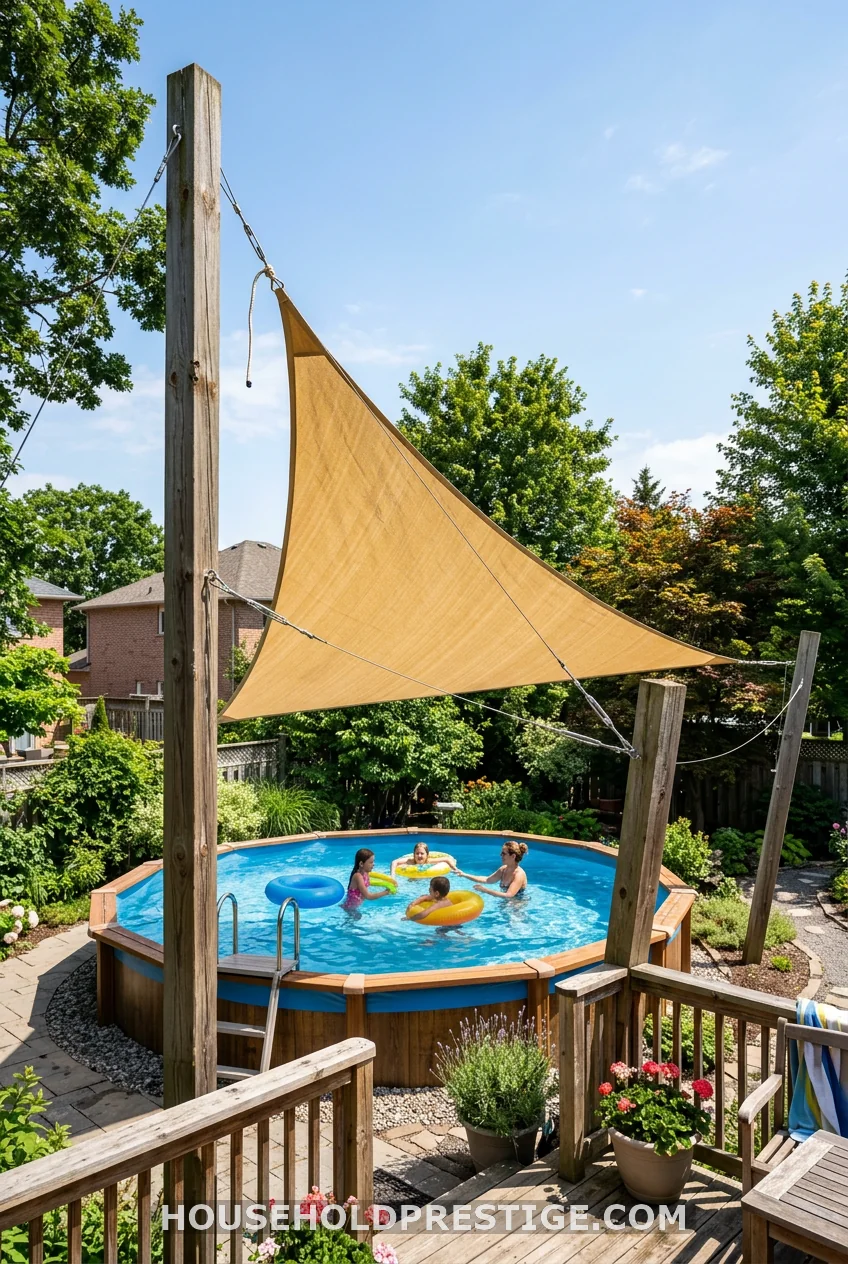
A shade sail does two things: makes the pool usable during the hottest part of the day, and makes it look like you thought about this space.
What to Buy
Triangle sail shades (12×12×12 feet or 16×16×16 feet) run $40-$80 online. Get one rated for UV block — look for a UV protection rating of 90%+. Brands like Coolaroo and ShadeME hold up well.
How to Install
You need three anchor points. Options:
– Existing structures: fence posts, a pergola corner, the side of the house. Best option if they exist in the right positions.
– New 4×4 wooden posts: set in 2-foot-deep post holes with concrete ($5-$8 a bag, use two per post). Posts should be 9-10 feet tall above grade.
– Ground stakes with tension hardware: works for lighter sails in low-wind areas, not ideal.
Attach D-ring hardware or heavy-duty eye bolts at the top of each post. Use the tension hardware that comes with the sail (or buy separate stainless turnbuckles for $5-$10 each) to create taut, consistent tension across the sail. Slack sails flap in the wind, catch more wind resistance, and fail faster.
Installation note: Set the sail at a slight angle — not perfectly flat — so rain runs off instead of pooling in the middle and collapsing it.
Cost: $80-$200 including post materials. Time: 4-6 hours.
11. River Rock Retaining Wall for Sloped Yards
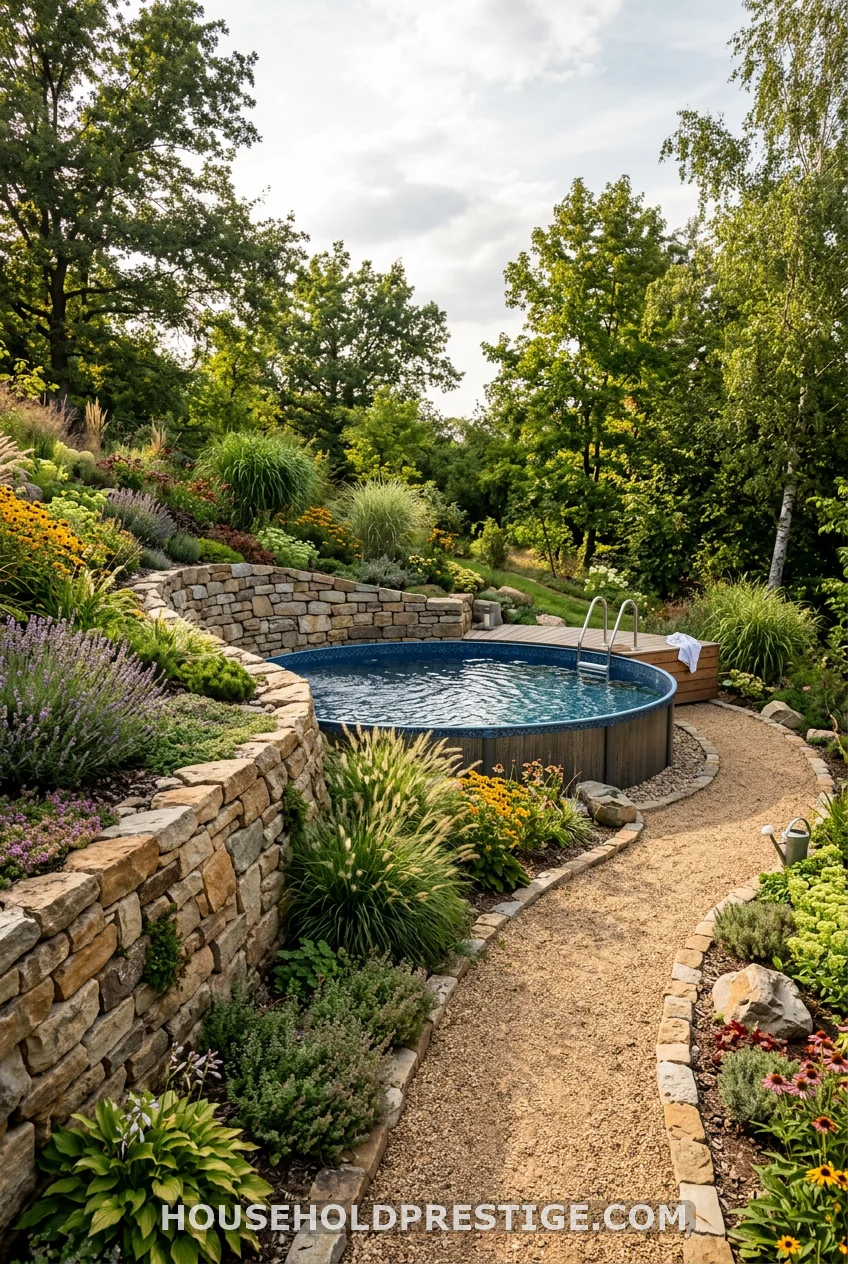
If your yard has any slope to it, this is the upgrade that makes your above ground pool look like it belongs there instead of being propped up awkwardly on uneven ground.
A simple retaining wall — even just 12-18 inches high — levels the grade on the low side of the pool, creates a natural barrier for mulch beds, and gives the whole setup an anchored, intentional look.
Before You Start
Check for underground utilities. Call 811 (US) before you dig anything deeper than 12 inches — it’s free, required by law, and takes 2-3 business days for response.
If your slope requires a wall higher than 3 feet, get a permit. Most municipalities require it for structural walls above 2-3 feet, and they check this. A non-permitted wall that falls during a rainstorm is a legal and safety mess.
The Dry-Stack River Rock Method (Under 18 Inches)
For a wall under 18 inches — which is enough for most above ground pool situations — a dry-stacked stone wall is a weekend project.
Materials:
– River rocks or wall stones (sold by the pallet at landscape supply yards — roughly $200-$400 per pallet, which covers about 20-25 linear feet at 12 inches high)
– Crushed gravel base ($30-$50 a bag)
– Landscape fabric for behind the wall ($20-$30 for 50 feet)
Step-by-step:
- Excavate the base trench. Dig down 6 inches along your planned wall line. Make it at least 12 inches wide. This base goes below frost line in cold climates — if you’re in a freeze zone, go 12-18 inches deep.
- Fill with crushed gravel. Pack 4-6 inches of crushed gravel in the trench and tamp it flat. This is your drainage base. Skimp here and the wall shifts.
- Set your first course. Use your biggest, flattest stones for the first course. Bury the bottom 2-3 inches of this course in the gravel. Make sure it’s level across the entire length before you place anything on top.
- Step each course back slightly. Each row should lean back 1 inch for every 1 foot of height (called “batter”). This is what keeps the wall from tipping forward. It doesn’t look like much while you’re building but it makes a structural difference.
- Install landscape fabric behind the wall. Pin fabric against the soil side of the wall before backfilling. This stops soil from washing through the gaps in the stones.
- Backfill behind the wall in layers. Fill 6 inches of soil or gravel, tamp, then add the next course of stones. Repeat until you reach your desired height.
- Capstones. Top the wall with flat stones of similar size for a clean, finished top edge.
Cost: $250-$500 for a 20-foot wall at 12-18 inches high. Time: One full weekend, two people.
Common Mistakes
- Setting the first course on bare soil. It sinks. Use gravel.
- Using round decorative rocks. They roll. Use angular or flat stones for structural walls.
- Building too straight up. Add that backward lean or the whole thing tips toward the pool after the first hard rain.
- Skipping the fabric. Soil presses through the gaps within 2-3 years without it.
12. Outdoor Rug at the Entry
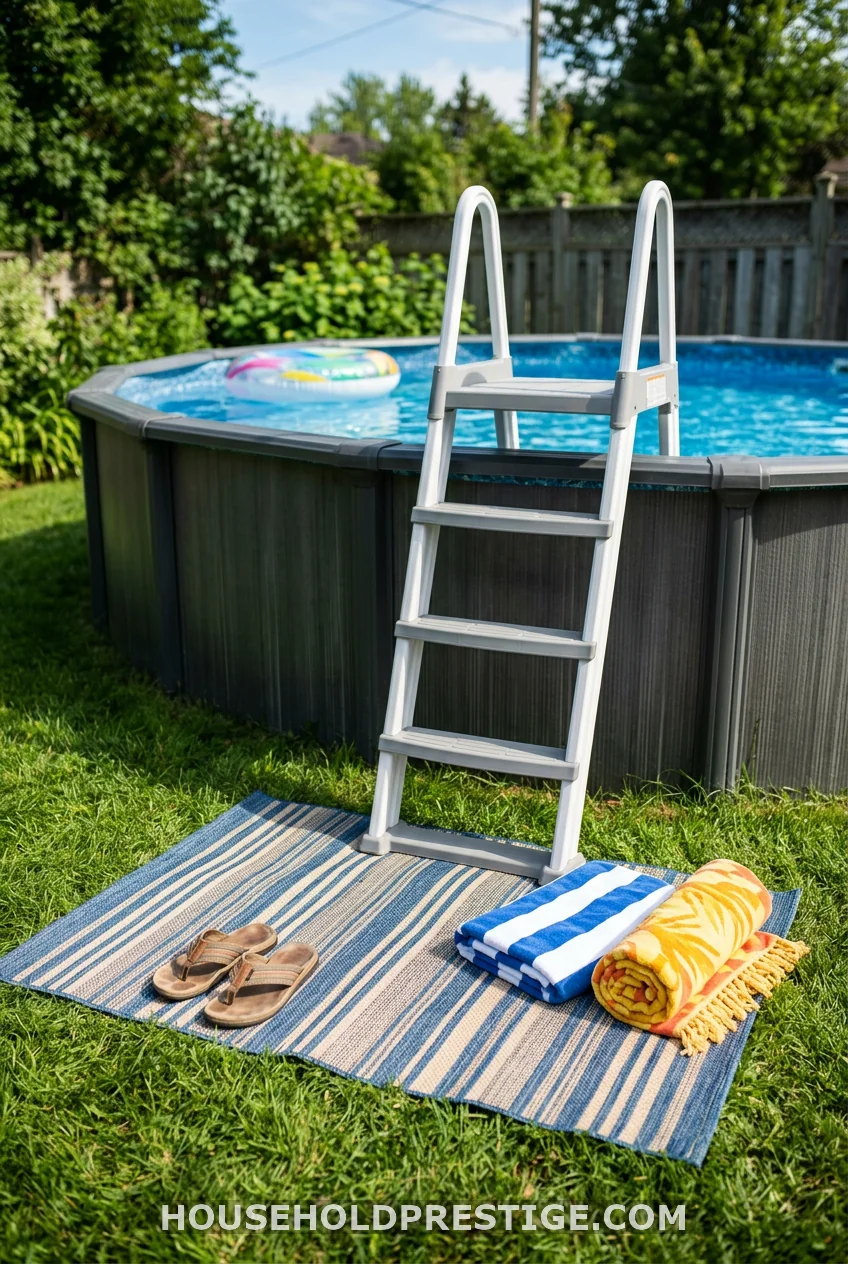
Put a water-resistant outdoor rug at the base of the pool ladder. It stops the grass from turning into a mud swamp, gives wet feet a clean place to land, and defines the pool entry. Costs $20-$40. Takes 30 seconds to place.
13. Solar Pool Lights (In the Water)
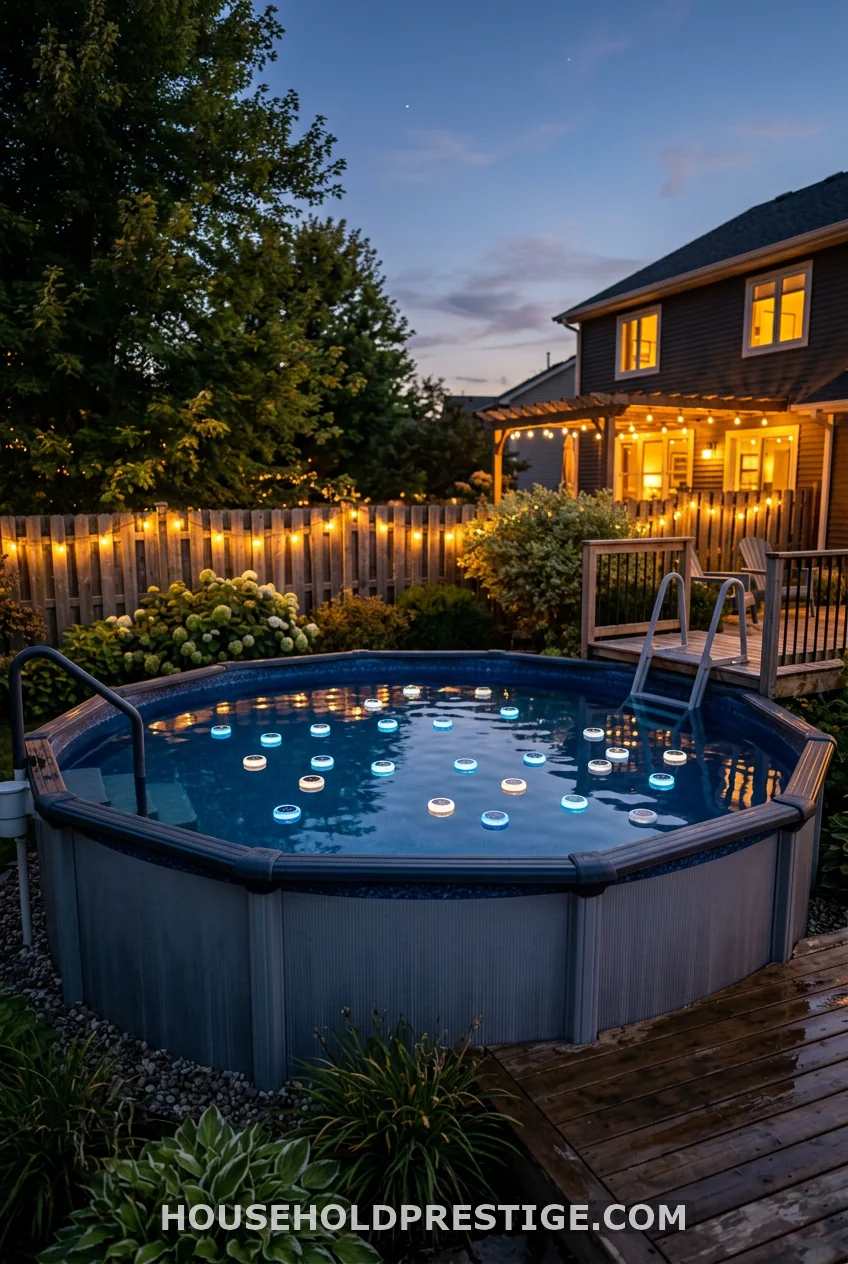
Floating solar pool lights turn even the most basic above ground pool into something that looks intentional after dark. They charge during the day, activate at dusk automatically, and cost $15-$35 for a set of four. No wiring. No installation. Drop them in.
Get lights rated IP67 waterproof or higher — that rating means they survive full submersion. Cheaper ones with lower ratings die within a season.
Add a set of solar-powered stake lights along the perimeter (see Idea #5) at the same time. The layered lighting effect — in the water, at the edge — is what makes it look like a resort setup versus a backyard pool.
14. DIY Entry Platform and Steps
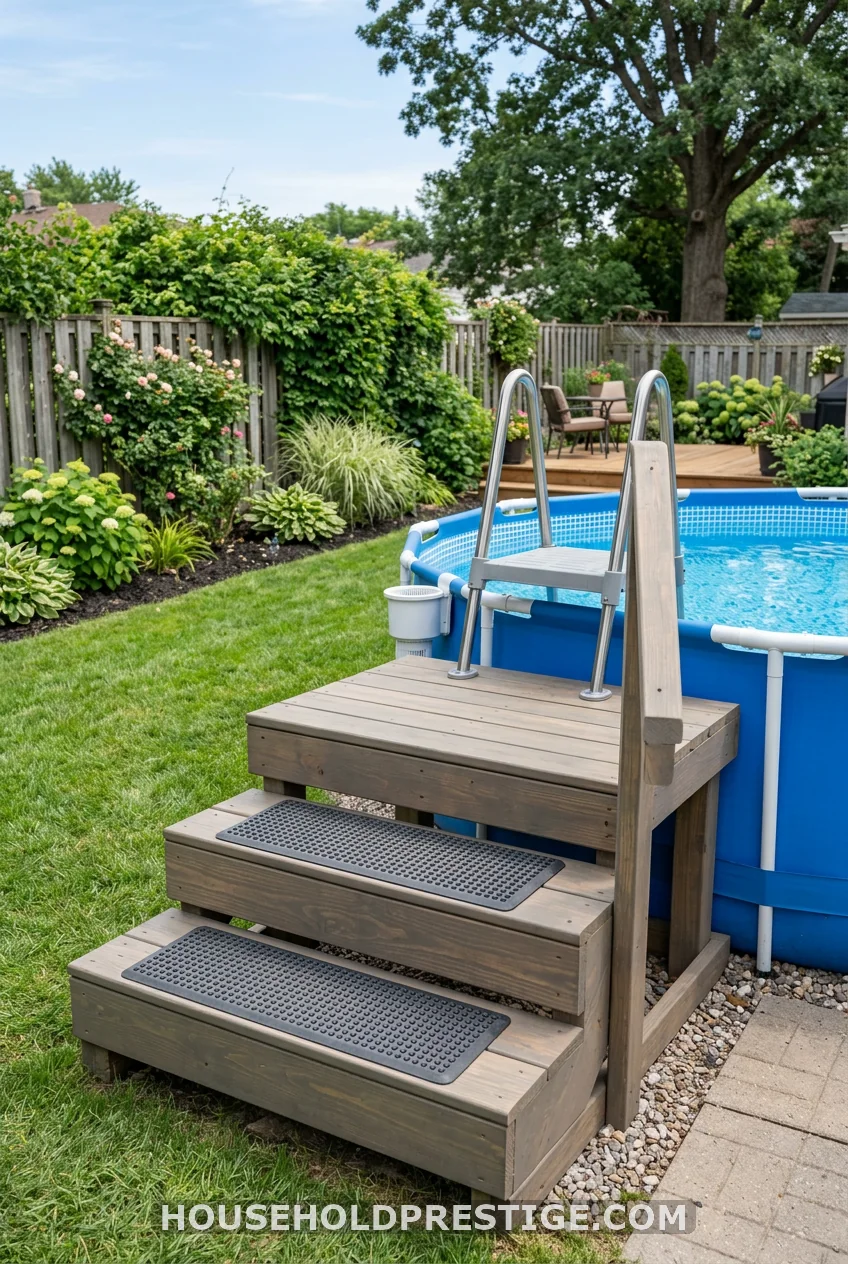
The ladder that comes with most above ground pools is functional. It’s also the thing that makes the whole setup look like a temporary inflatable. Building a proper entry platform fixes that instantly and improves safety while you’re at it.
A simple entry platform: a 4×4-foot pressure-treated deck, built 12-18 inches off the ground, with two steps leading up. This is a beginner-level build — it’s basically a small raised box with stairs.
Key measurements:
– Platform deck height: should sit within 2-3 inches of the pool rim top rail
– Stair rise (each step height): 7-8 inches max
– Stair run (each step depth): at least 10 inches — give feet room to land safely
– Platform width: at least 36 inches across to feel stable and uncrowded
Use 2×6 pressure-treated joists for the frame, 5/4×6 decking boards for the surface, and 4×4 posts for the legs. Post bases set in concrete for permanence, or heavy-duty deck blocks for a semi-permanent option you can adjust.
Cost: $120-$180 in materials. Time: 4-6 hours with basic carpentry skills.
Add rubber grip stair nosing on each step tread — it costs $5-$10 and dramatically reduces the chance of a wet-foot slip.
15. The Myth: You Need a Deck Before Anything Else
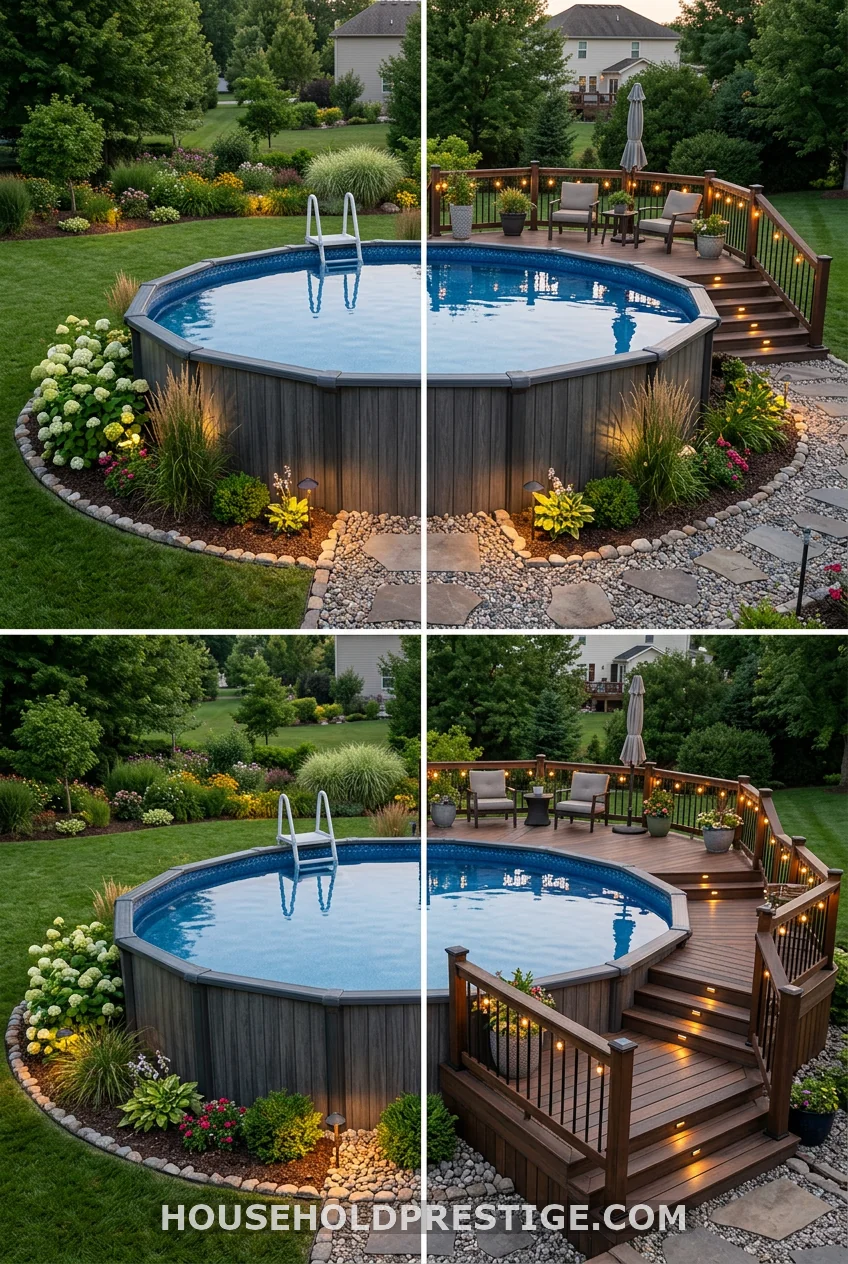
Every above-ground pool article online leads with decks. Everyone. And while decks are great, here’s what that advice is actually costing people: paralysis.
The average full wraparound deck around a 15-foot pool runs $3,000-$6,000 if you hire it out, or a solid $800-$1,500 in materials and a full weekend if you DIY. That’s a real commitment. And while you’re waiting to save for it — or waiting until you have time — your pool just sits in the yard looking terrible, and you use it less because it feels unfinished.
The reality is that an above ground pool without a deck can still look completely intentional and put-together. Ground prep + skirting + gravel perimeter + string lights + potted plants + an outdoor rug at the entry = a polished, resort-adjacent setup for under $400. No deck required.
Build toward the deck if that’s your goal. But don’t let it block you from making improvements right now. Start with what you can afford this weekend. The pool looks better immediately. Your enjoyment goes up. The motivation to keep improving it follows.
16. Swap the Pool Liner

If your liner is faded, patched, or just that generic blue-stripe pattern, replacing it changes the entire personality of the pool. Replacement liners for standard 15-foot round above ground pools run $60-$150 online (search for your pool’s specific dimensions — it needs to match exactly).
Printed liner options — mosaic tile patterns, stone effects, tropical prints — cost $80-$200 and make the pool look like it belongs somewhere significantly more expensive than your backyard.
Replacing a liner is a full-day project and requires draining the pool completely. Do it at the start of the season to avoid wasting a pool-full of already-treated water.
17. Fire Pit Corner
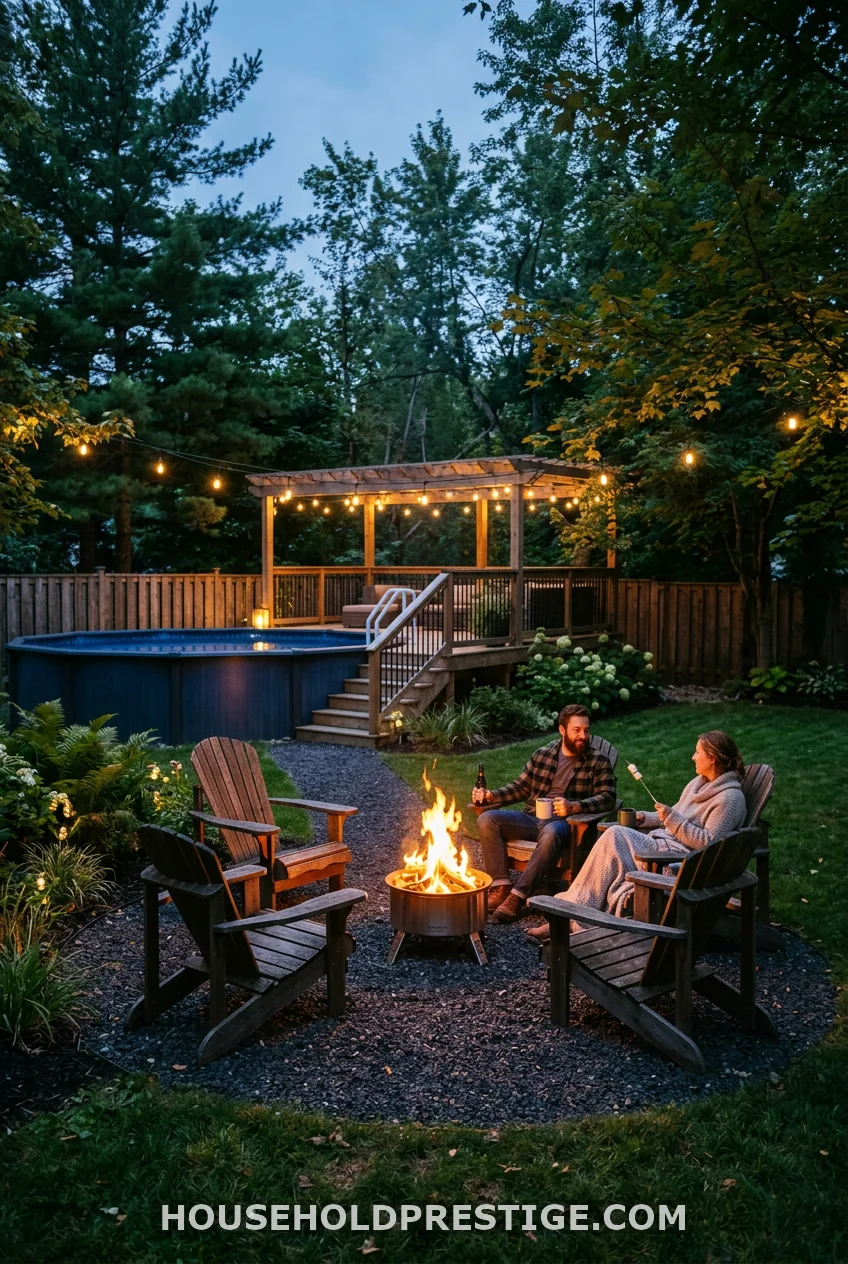
Set up a small fire pit area about 10-15 feet from the pool — far enough to be safe, close enough to use both spaces in the same evening. A portable propane fire pit costs $80-$150 at Target or Home Depot and needs zero installation. Drop it on a gravel pad (see Idea #3 for materials) and add two or three Adirondack chairs.
This doubles the use of your pool area: swim in the afternoon, sit by the fire in the evening. It also gives the whole backyard a defined zone layout that makes even a simple setup look thought-through.
The Plan to Pull It Together
Start with ground prep (Idea #1) if your pool isn’t set yet. If it is, hit the quick wins first: pea gravel perimeter, outdoor rug at the entry, string lights, and one or two potted plants. That’s under $150 and takes a few hours. The difference is immediate.
From there, skirting and the shade sail are the next level. Then build toward the deck when time and budget allow.
Every DIY above-ground pool idea on this list compounds. Each one makes the next upgrade look better. You don’t need to do all 17 — pick three, start Saturday, and watch your backyard go from “oh, you have a pool” to “wait, can I come over?”
Frequently Asked Questions
How much does it cost to set up an above-ground pool on a budget with DIY upgrades?
Most of the improvements on this list run $50-$200 each. A full setup — ground prep, skirting, gravel perimeter, string lights, plants, and a simple entry platform — comes in around $400-$700 in materials if you DIY everything. That’s a complete, polished pool area for a fraction of what a contractor charges.
Do I need a permit for an above-ground pool or deck?
The pool itself usually requires a permit in most US municipalities — check your local building department before you fill it. A deck attached to the pool or house almost always requires a permit if it’s elevated or over a certain square footage (often 200 square feet). Freestanding floating decks and pallet platforms typically don’t. When in doubt, call your city’s building department — they’ll tell you in two minutes for free.
What’s the cheapest way to make an above-ground pool look good?
Skirting the metal wall ($90-$150), adding a pea gravel perimeter ($60-$80), and stringing solar lights ($20-$30) give the biggest visual upgrade for the least money. Do all three for under $250, and the pool looks like it belongs in a magazine.
How do I keep an above-ground pool clean on a budget?
A sand filter pump is far cheaper to run than a cartridge filter in the long term — sand costs $10-$15 to replace versus $40-$60 for replacement cartridges every few weeks. Pair it with a solar cover ($30-$50) to reduce evaporation and keep debris out. Run the pump 8-10 hours a day, not the 5 hours Intex recommends for their baseline models — especially if your pool holds more than 8,000 gallons.
Can I build a pallet deck without any carpentry experience?
Yes, but plan for it to take twice as long as you think. The trickiest parts are leveling the foundation and cutting the curved edge. Take your time on both. The actual assembly — screwing pallets together — is straightforward even for first-timers. Watch a few YouTube videos on deck block leveling before you start, and you’ll be fine.