

Every time you open that laundry room door, you know exactly what you’re about to face. Laundry room cabinet ideas exist for a reason — because a room without real storage isn’t a laundry room, it’s a dumping ground. Bottles on top of machines. A rogue single sock on the floor. Dryer sheets wedged behind the lint trap.
The good news? You don’t need a contractor or a renovation budget to fix it. Whether you own your space or rent it, whether your laundry room is a closet or an actual room, there’s a cabinet setup in this list for you. You’ll get specific measurements, real product costs, and a few honest warnings about what not to do.
1. Floor-to-Ceiling Cabinet Towers: The Biggest Storage Win in Any Laundry Room
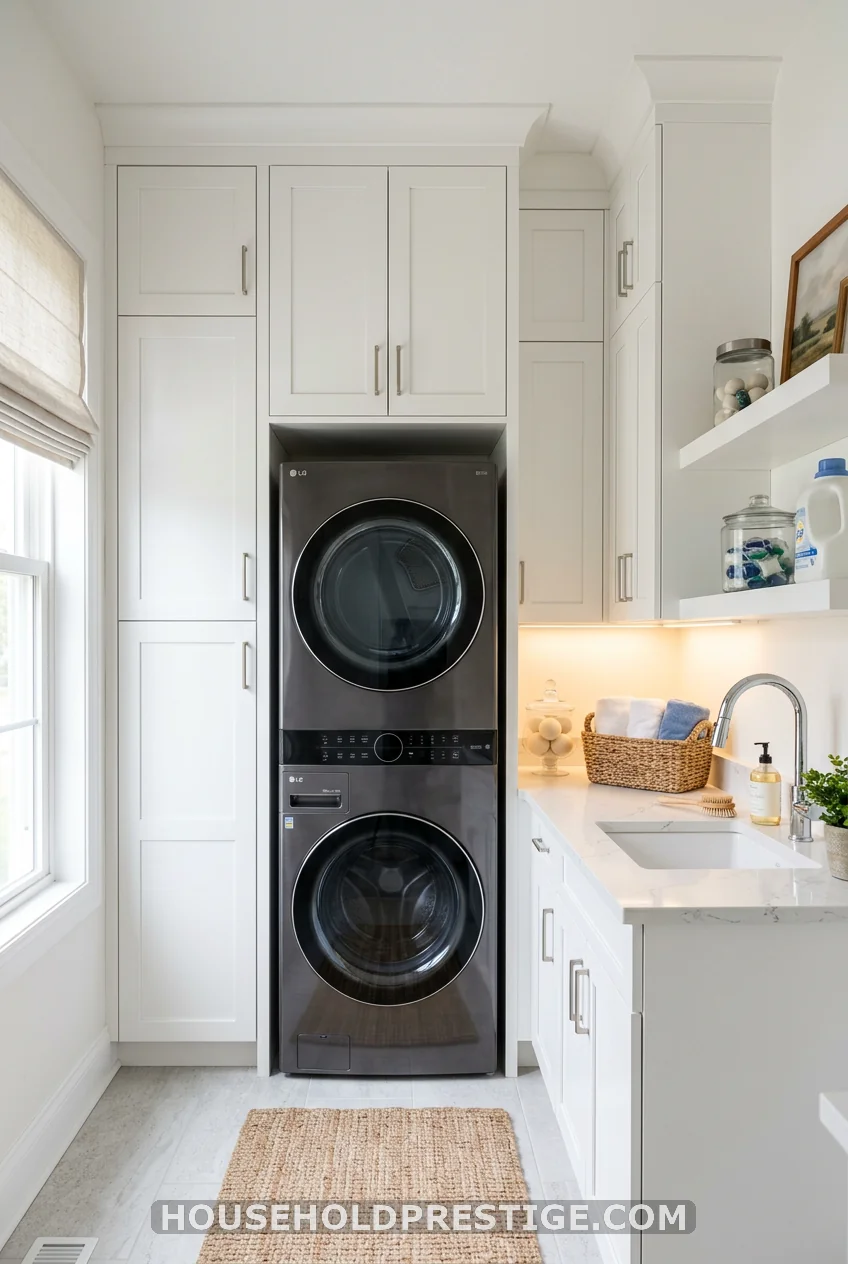
If you do one thing to your laundry room, make it this. A floor-to-ceiling cabinet tower converts dead vertical space — the 30+ inches above your appliances that currently hold nothing but air and ambition — into serious, functional storage.
Why It Works
The average laundry room ceiling sits at 8 feet. Standard base cabinets land at 34 inches. That leaves roughly 62 inches above them untouched. A tower cabinet (also called a tall cabinet or pantry cabinet) fills that entire run from floor to ceiling in a single column. No awkward gap. No dust-collecting shelf tops.
The vertical run also works optically. A tall, narrow cabinet makes ceilings feel higher and rooms feel less claustrophobic — a genuine gift in the rooms under 50 square feet that most of us are working with.
Dimensions to Know Before You Buy
- Standard depth: 12–14 inches for wall-mounted, 24 inches for full pantry-style
- Standard width: 9, 12, 15, 18, or 24 inches
- Standard height: 84 or 90 inches (84″ is the most widely available)
- Best width for beside the appliances: 12 or 15 inches — wide enough to store tall bottles, narrow enough not to block machine access
For a laundry room, err toward 12–14-inch depth unless you have floor space to spare. A 24-inch-deep tower in a 5×7 room will clip your elbow every single wash cycle.
Step-by-Step: Installing a Freestanding Tower Cabinet
- Measure your space. Floor to ceiling, then wall to appliance edge. Note any baseboards, pipes, or electrical outlets on the wall.
- Choose your cabinet. Stock options at Home Depot or IKEA are 90% as good as custom at 20% of the price.
- Level the floor. Use a 4-foot level. If your floor isn’t level (most laundry rooms aren’t), shim the base before securing anything.
- Mark your stud locations. Use a stud finder and mark all studs in your install zone with painter’s tape.
- Assemble per manufacturer instructions. Most flat-pack towers need 45–90 minutes with a power drill.
- Secure to the wall. Drive 3-inch screws through the cabinet’s back rail into at least two wall studs. Non-negotiable — a tall, loaded cabinet that isn’t wall-anchored is a falling hazard.
- Add interior shelving. Adjust shelf heights based on what you store. Tall shelves (12+ inches) for detergent jugs. Short shelves (6–8 inches) for dryer sheets, stain sticks, and pods.
- Add the finishing trim. If there’s a gap between cabinet top and ceiling, a filler strip or crown molding piece closes it cleanly for under $15.
Materials & Costs
| Option | Cost per Tower | Best For |
|---|---|---|
| IKEA SEKTION Tall Cabinet (25″×80″) | $165–$220 | Budget, customizable |
| Hampton Bay 12″×84″ from Home Depot | $189–$240 | Quick install, pre-finished |
| KraftMaid Semi-Custom Tower | $450–$700 | Better finish, custom sizing |
| Fully Custom Built-In | $800–$2,000+ | Perfect fit, premium look |
Pro Move: Order two identical towers and place one on each side of your stacked appliances. The machines disappear into what looks like built-in cabinetry — without the custom price tag.
Common Mistakes to Avoid
- Buying too deep. A 24-inch tower in a narrow room creates a bottleneck. Measure, then measure again.
- Skipping wall anchoring. A full tower loaded with detergent and cleaning supplies can tip. Secure it. Always.
- Forgetting the door swing. In a tiny room, bifold or soft-close push-to-open doors clear less space than standard hinged ones. Check your clearance before buying hinged.
- Ignoring the baseboard. Most towers don’t account for a 3–4-inch baseboard. Either notch the back of the cabinet base or mount the cabinet slightly forward with a filler strip behind.
2. Upper Cabinets Over the Washer and Dryer
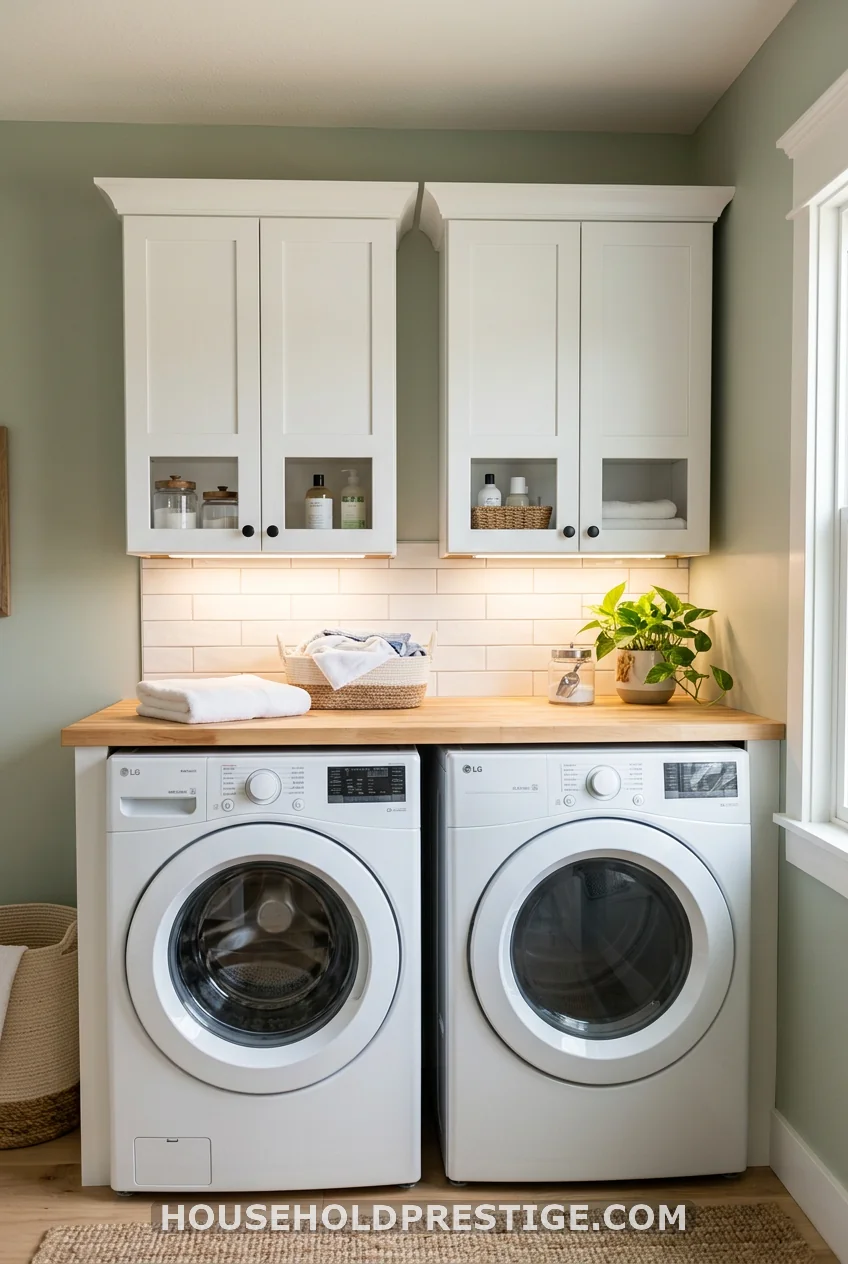
Upper cabinets above your machines are the most common laundry room cabinet ideas for one reason: they work. Mount them 18 inches above the appliance top — that’s the standard, and it exists so you can actually open your top-loader lid or reach the back of a front-loader without crouching. Go higher than 18 inches, and the shelf becomes unusable for frequent-use items. Lower and you’re bonking your head on cabinet corners.
The depth matters here, too. Standard wall cabinet depth is 12 inches. That’s enough for a detergent jug on its side, a box of pods, or a stack of dryer sheets — which is exactly what you need above machines. Anything deeper starts to feel like a wall bearing down on you.
Best option for renters: Command mounting strips rated for 16+ lbs per pair can hold lightweight floating shelves in the same zone if you can’t drill. Not as sturdy as real cabinets, but workable for pods, sheets, and small bottles.
3. Pull-Out Hamper Cabinets
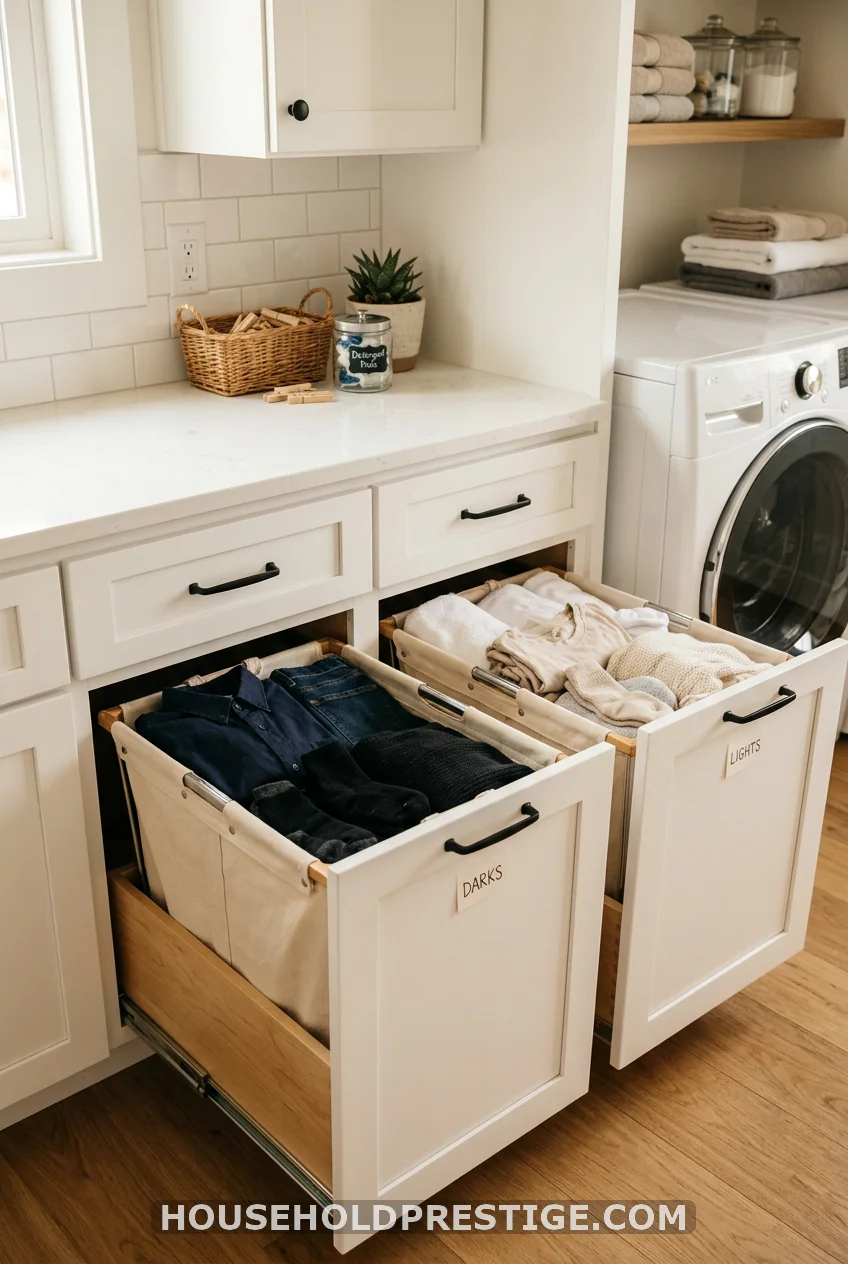
Three wire baskets on the floor sort lights, darks, and delicates. Three wire baskets falling over at the slightest bump. A pull-out hamper cabinet solves this immediately — a base cabinet with two or three canvas or mesh drawers that slide out, hold a full load each, and disappear behind closed doors when you’re done. Rev-A-Shelf’s two-bin pull-out starts around $85 and fits a 15-inch cabinet opening. Your laundry piles become someone else’s problem.
4. Base Cabinets with a Folding Counter on Top
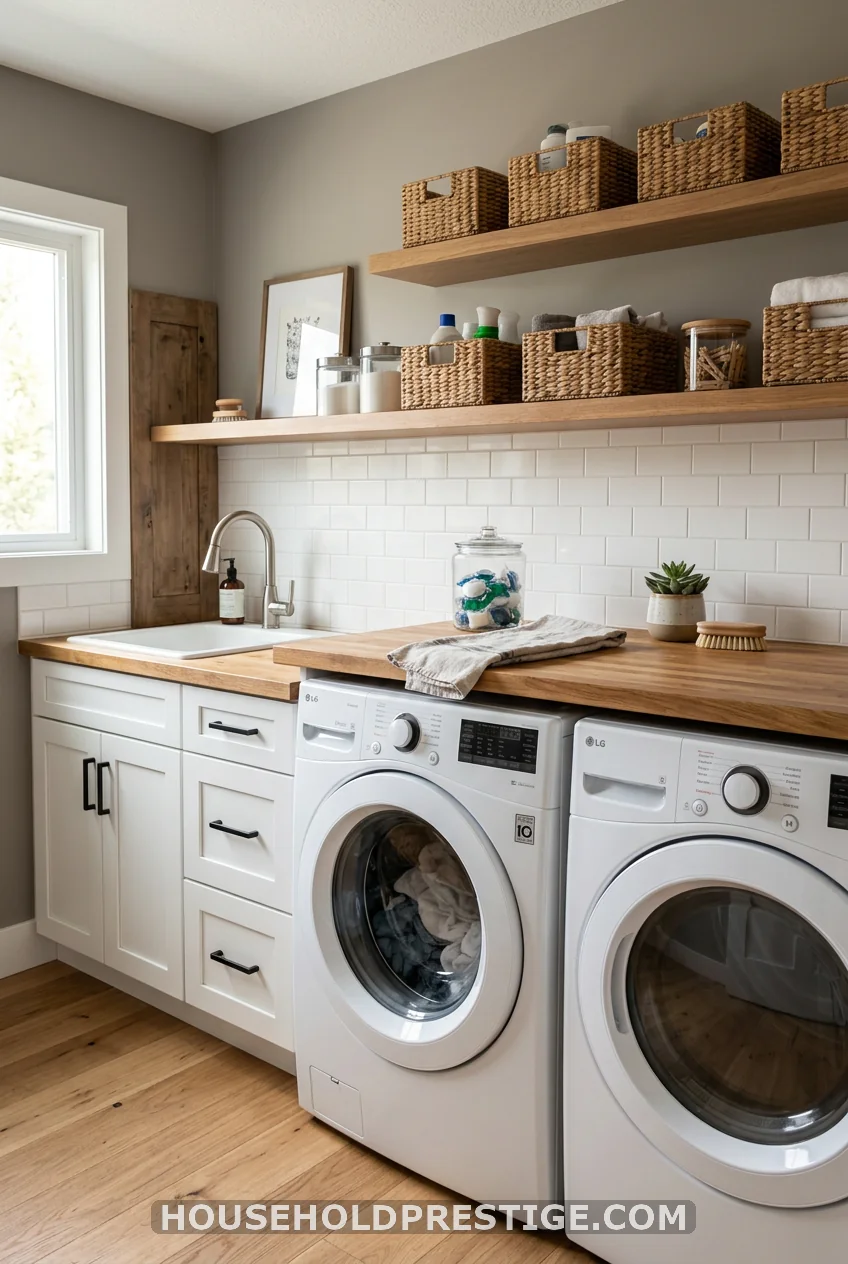
Most people fold laundry on their bed, their couch, or directly on top of the machines. None of those are great. Base cabinets running flush with your appliances — at the standard 34-inch counter height — create a proper folding station and add cabinet storage below simultaneously.
The key is continuity: the countertop should run across the cabinet tops AND the machine tops in one level line. That means your washer and dryer need to sit at cabinet height. Front-loaders on pedestals typically hit 34 inches — perfect. A top-loader rarely gets this configuration, which is one practical reason front-loaders with base cabinets dominate laundry room design photos.
Best countertop choices for laundry rooms: Butcher block ($30–$60/linear foot) adds warmth but needs sealing on all four edges plus the underside to survive humidity. Laminate ($15–$30/linear foot) is moisture-proof and underrated. Quartz ($50–$90/linear foot) is gorgeous and bulletproof but overkill if your room sees heavy use.
5. The Slim Rolling Cabinet for the Machine Gap
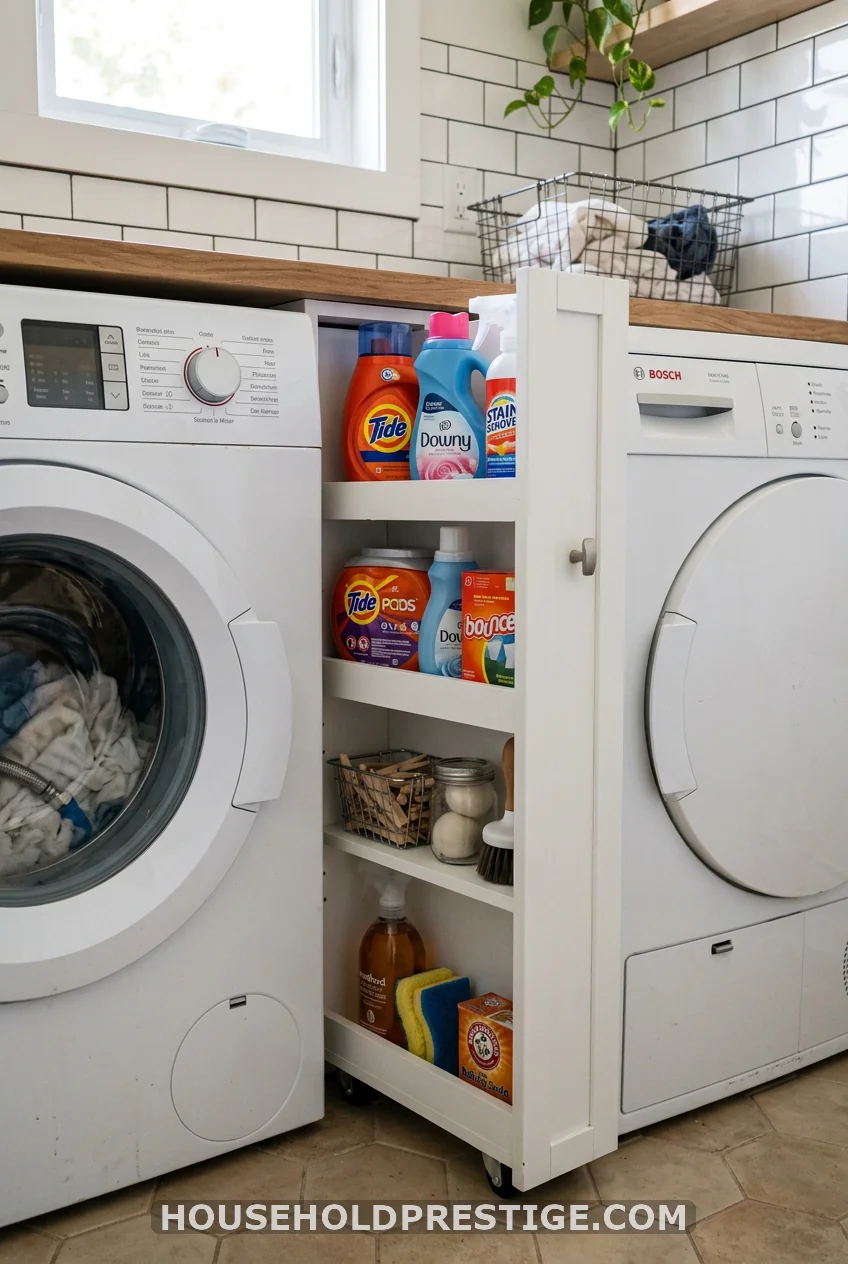
That 6-to-9-inch gap between your washer and dryer has been collecting dryer sheets and lost socks for years. A slim rolling utility cabinet turns it into shelf space. Measure the gap first — most are 6–10 inches. The SONGMICS 5-tier rolling cart fits gaps as narrow as 6 inches and runs about $35–$45 on Amazon. It slides out when you need it, tucks in when you don’t. Takes two minutes to set up. No drill required. Renters love it.
6. Beadboard Cabinet Doors
No installation skill required for this one. Beadboard cabinet door inserts — the kind with vertical planks and small ridges — add visual texture that plain flat-panel doors just can’t match. They read as farmhouse, cottage, or coastal, depending on the paint color. White beadboard with black hardware feels crisp. Sage green beadboard with brushed nickel feels collected. The texture also hides minor dings and scratches better than a flat surface does.
7. The Cabinet Mistake That Made My Laundry Room Worse (And What I’d Do Differently)
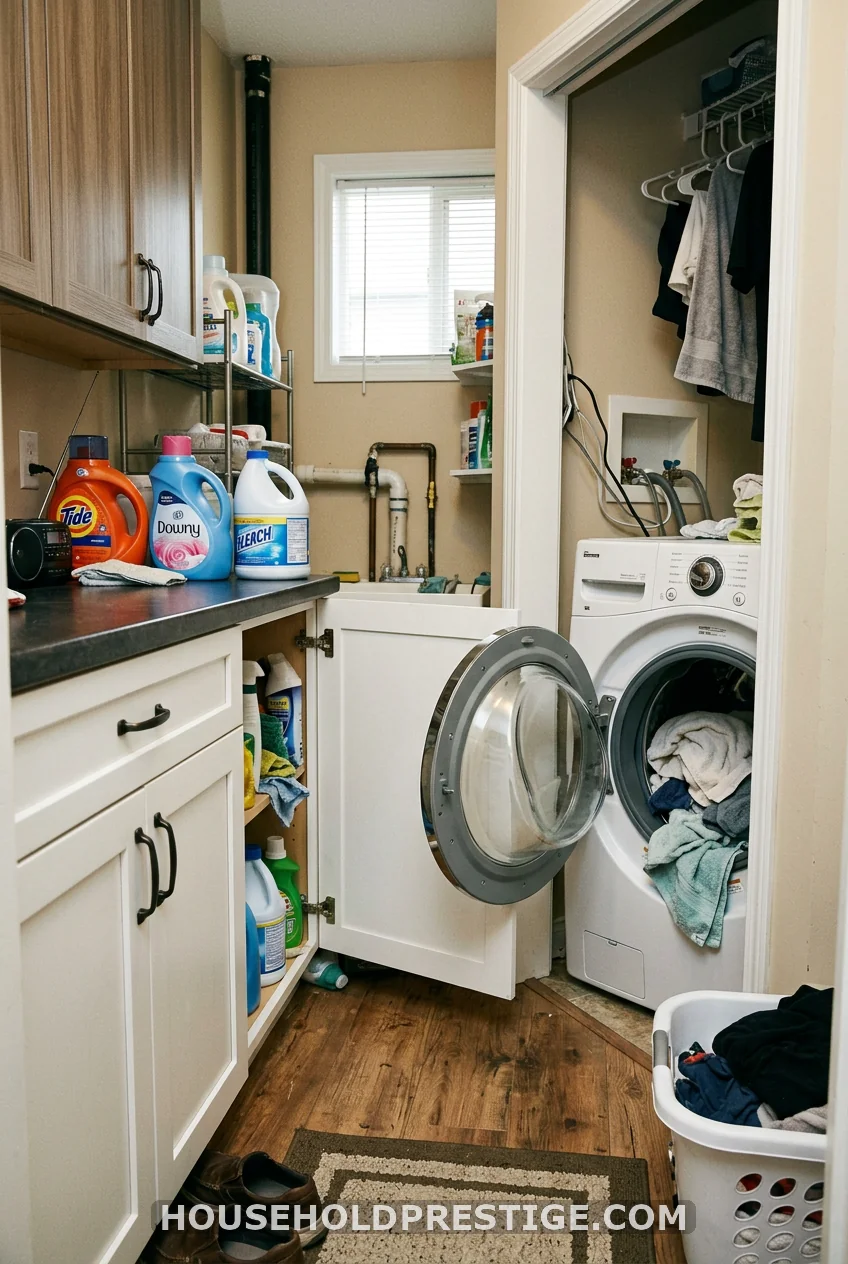
Two years ago, I renovated our laundry room with stock cabinets from a big box store. I was proud of myself. I had a plan, a budget, and exactly four hours on a Saturday to get it done. What I didn’t have was a measuring tape I’d actually used.
I bought 24-inch-deep base cabinets. The laundry room is 6 feet wide. The appliances sit against the back wall. The cabinets went against the side wall. You see where this is going.
With 24 inches of cabinet sticking out plus 27 inches of machine depth, I was left with a walkway of roughly 17 inches. Technically passable. Practically infuriating. Every time I leaned over to transfer laundry, I scraped my shoulder on the cabinet corner. The washer door opened right into the cabinet face.
I lived with it for eight months before ripping the base cabinets out and replacing them with wall-mounted upper cabinets and a single floor-to-ceiling tower. Same storage capacity. Zero floor clearance issue.
What I should have done: For any laundry room under 8 feet wide, stick to 12–15-inch cabinet depth unless the cabinets are on the same wall as the machines. Depth kills walkability faster than anything else in a small room. Measure the clearance you’ll have with the cabinet doors open — not just closed — before you buy a single piece.
8. Choosing Cabinet Materials That Actually Survive a Laundry Room
Not all cabinet materials are equal once you factor in humidity, detergent splatter, and the occasional overflowing sink. Here’s the honest breakdown:
| Material | Cost | Humidity Resistance | Best For |
|---|---|---|---|
| MDF (painted) | $ | Fair — swells at edges if unsealed | Budget builds with good ventilation |
| Plywood (painted or veneered) | $$ | Good — stable with moisture | Mid-range builds |
| Solid Wood | $$$ | Fair — expands/contracts seasonally | Accent pieces, not full installations |
| Thermofoil | $–$$ | Very good — sealed surface | High-humidity zones, near sinks |
| PVC / Rigid Laminate | $ | Excellent | Rental renovations, utility spaces |
The honest answer for most laundry rooms: Plywood cabinet boxes with thermofoil or high-gloss laminate doors outperform both MDF and solid wood in a space where the air stays damp. If you’re going MDF, seal every raw edge — cut, routed, or sanded — with at least two coats of shellac-based primer before painting. Skip this step, and you’ll see swelling at the door bottoms within 18 months.
9. Glass-Front Cabinet Doors
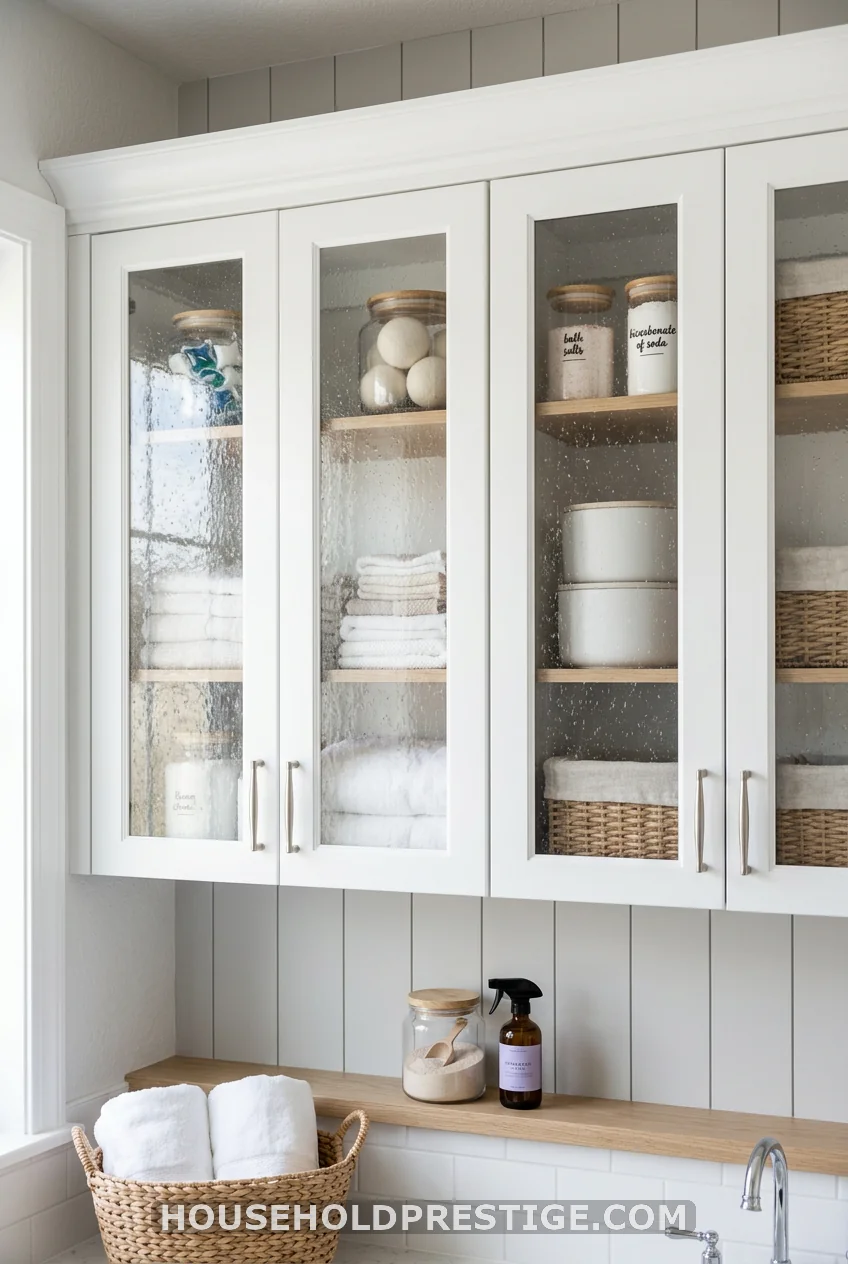
Solid cabinet doors in a small room read as a wall of boxes. Glass-front doors read as a room. The glass doesn’t have to be clear — seeded, reeded, or frosted glass gives you the visual lightness without demanding perfectly organized shelves. Use glass-front doors in the upper row and solid doors in the lower cabinets (where you store less photogenic supplies), and the room immediately feels more considered. Replacement glass-front doors for standard cabinet openings run $40–$120, depending on style.
10. Tall Utility Cabinets for the Items Everyone Forgets
The mop. The broom. The ironing board. The handheld vacuum. Four items with zero natural home in most laundry rooms. A tall utility cabinet — typically 18 inches wide, 24 inches deep, and 84 inches tall — solves all four at once. The interior usually includes a hanging rod near the top (ironing board clips here), adjustable shelves in the middle, and open floor space at the bottom for the vacuum or a hamper.
Specific product: The ClosetMaid Pantry Cabinet at Home Depot ($129) works well in laundry rooms if you add a secondary hinge or two — the stock hinges aren’t rated for a loaded ironing board on a hanging rod. Reinforce before you load it.
Why most people skip this: They assume a full-depth utility cabinet won’t fit. But a 24-inch-deep utility cabinet against a wall is no deeper than a standard base cabinet. If you have room for one, you have room for the other.
11. Open Shelving + Closed Cabinet Hybrid
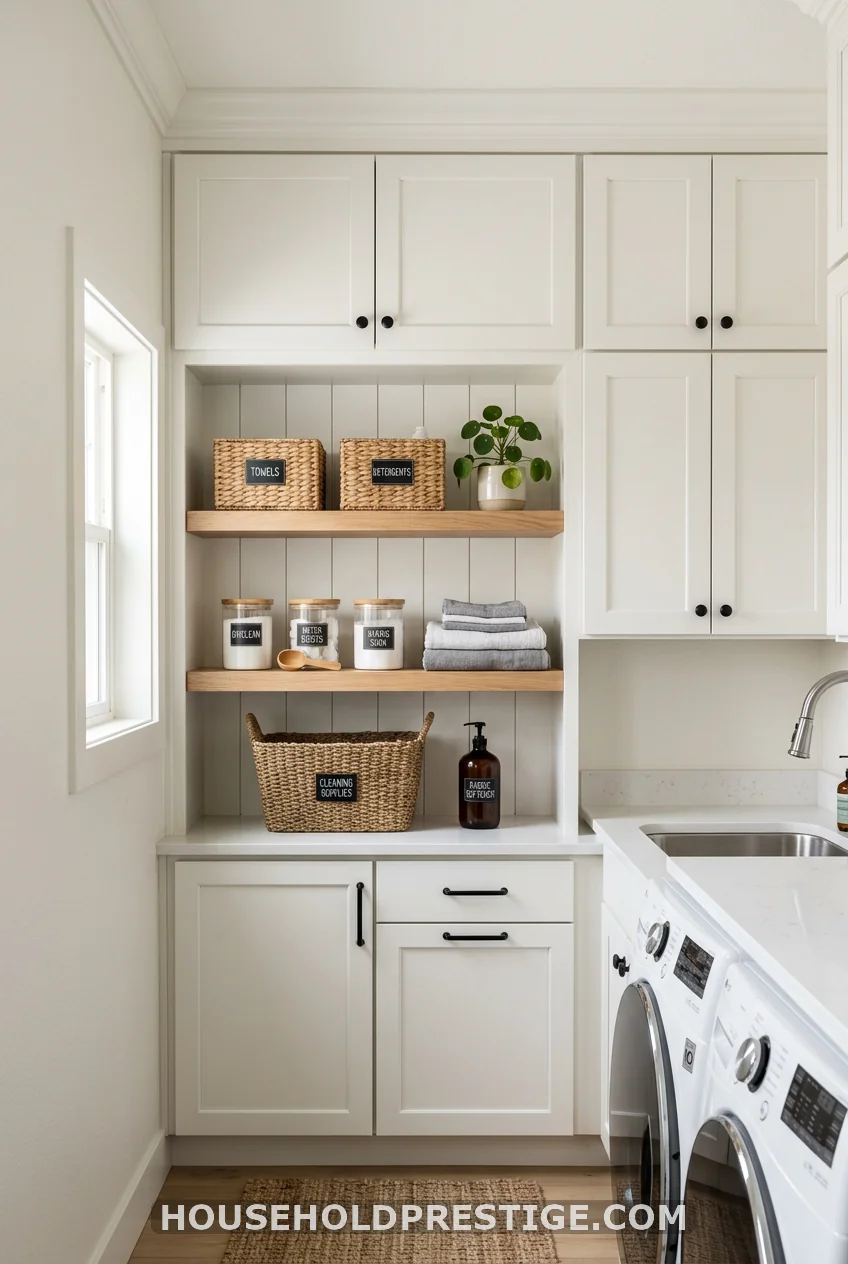
Open shelving alone in a laundry room is a dust magnet. All-closed cabinetry in a small room can feel suffocating. The hybrid approach — closed upper and lower cabinets with open shelving in the middle tier — gives you the best of both. Closed cabinets hide the chaos (detergent, cleaning products, backup supplies). The open middle shelves hold things you actually want to see and access quickly: baskets for incoming laundry, a jar of pods, a small plant, and a labeled bin for stain removers.
The visual break that open shelving creates also prevents the “wall of cabinet doors” effect that makes small rooms feel compressed. One honest detail: the items on the open shelves need to stay reasonably neat. If your laundry supplies live in mismatched bottles and partial boxes, put them behind a door.
12. Cabinet Door Interior Organizers
The inside face of a cabinet door is 11–14 inches of vertical real estate that most people leave completely empty. A door-mounted organizer — either a wire rack or a plastic over-the-door panel — turns that face into a home for dryer sheets, stain sticks, a lint roller, and small spray bottles. Works on both upper and lower cabinet doors. Best product in this category: the SimpleHouseware door organizer ($22) mounts with screws or command strips, holds 8+ lbs, and fits doors as narrow as 11 inches.
13. Corner Cabinet with Lazy Susan
For laundry rooms with an L-shaped or corner layout, the inside corner is dead storage unless you address it deliberately. A corner base cabinet with a pull-out lazy Susan turns an inaccessible triangle into usable rotating shelf space. Standard corner cabinet openings run 36×36 inches. The lazy Susan hardware itself costs $25–$60. If that’s out of budget, a simple diagonal shelf at the corner — angled to face the room — costs almost nothing and does 80% of the same job.
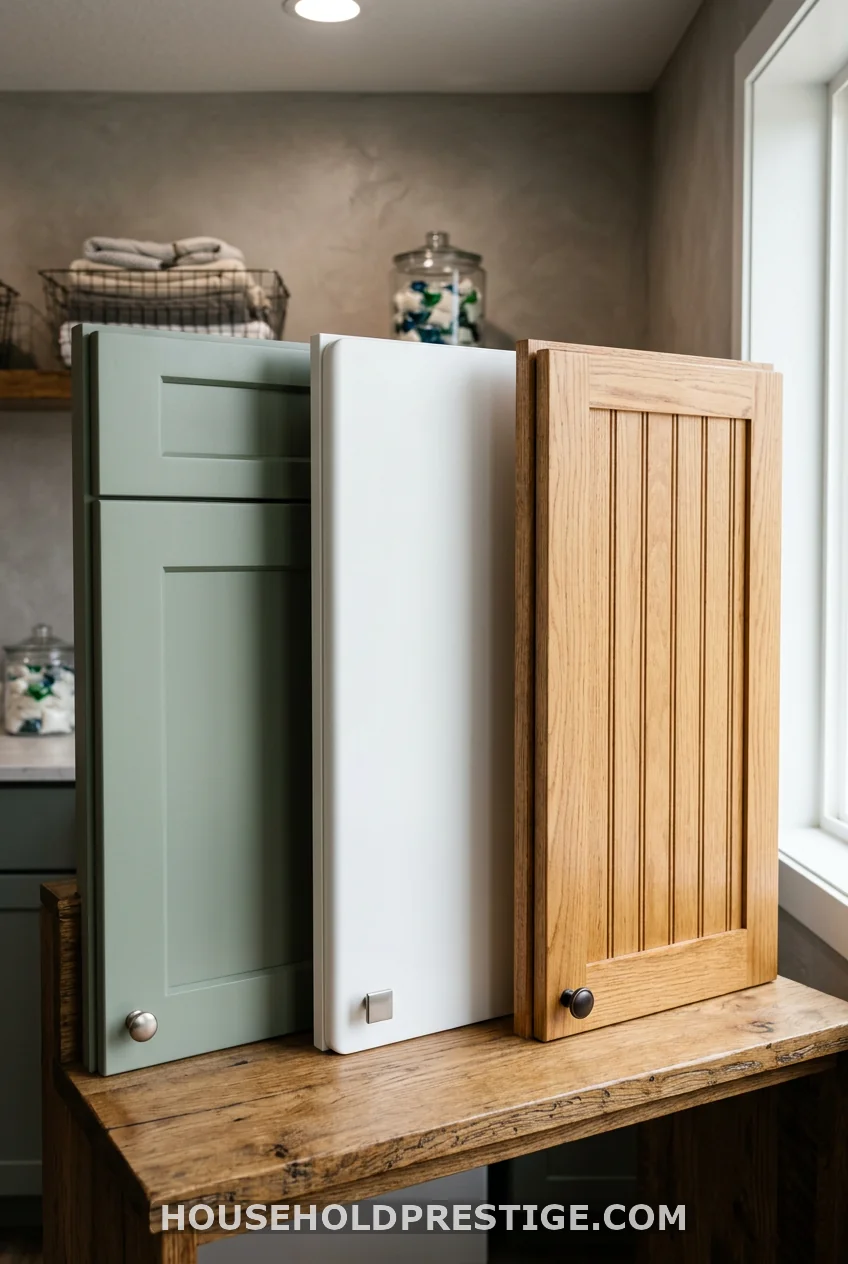
14. Flat-Front vs. Shaker Doors: What Actually Holds Up in a Humid Room
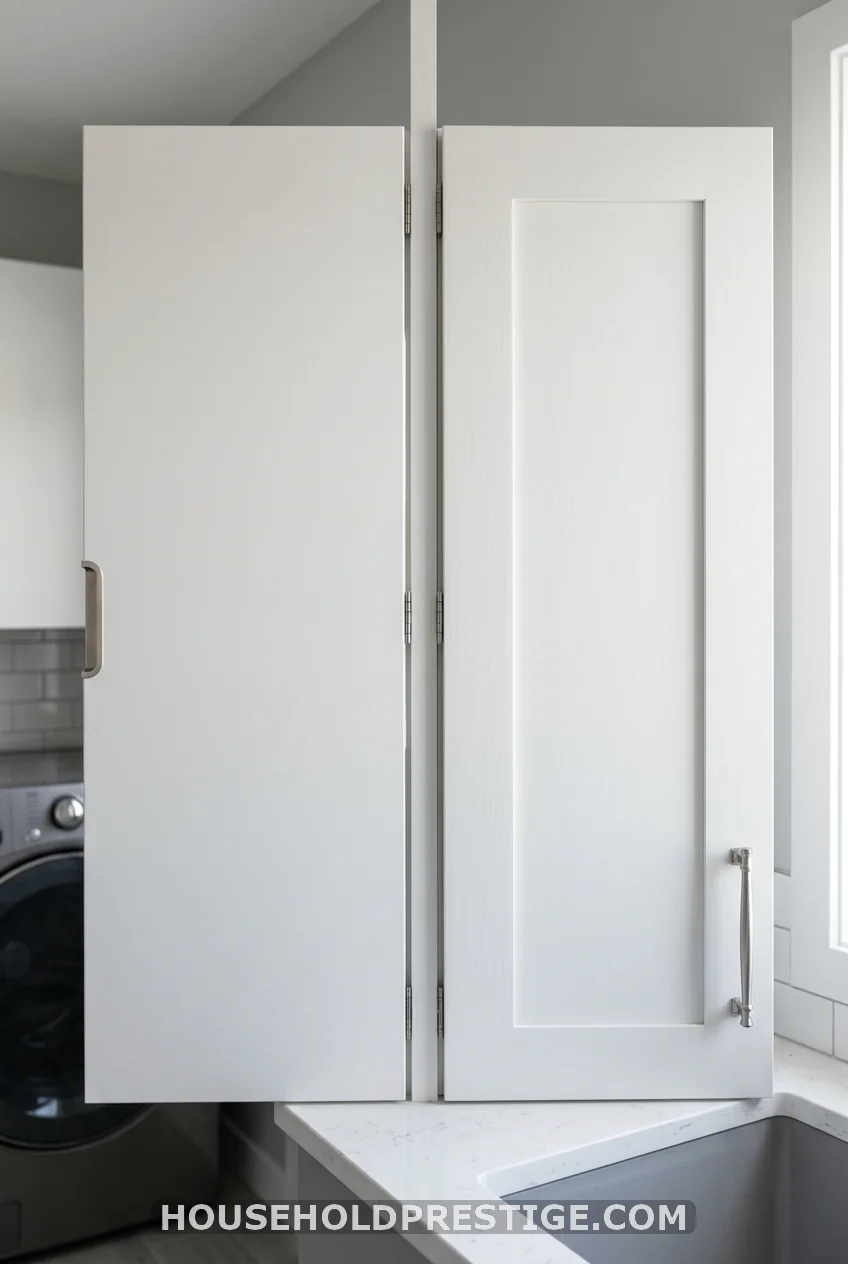
Here’s what most people get wrong: they choose their cabinet door style based on aesthetics and ignore how the style performs in moisture.
What most people think: Shaker doors are classically beautiful. Flat-panel looks modern and easy to clean.
The reality: Shaker doors have an inside corner where the center panel meets the frame. In a humid laundry room, that joint traps moisture, and on MDF shakers, that’s where you see the first swelling and paint cracking — often within 2–3 years. Flat-front doors have no inside joints to trap moisture. They’re easier to wipe down and hold up better in high-humidity rooms.
The better call for laundry rooms: If you love the shaker look, use it on upper cabinets where humidity is lower and splatter is rare. Use flat-front on base cabinets that sit closest to the machines, the sink, and the floor. Or choose thermofoil shakers, which seal the joint completely.
15. Built-In Fold-Down Ironing Board Cabinet
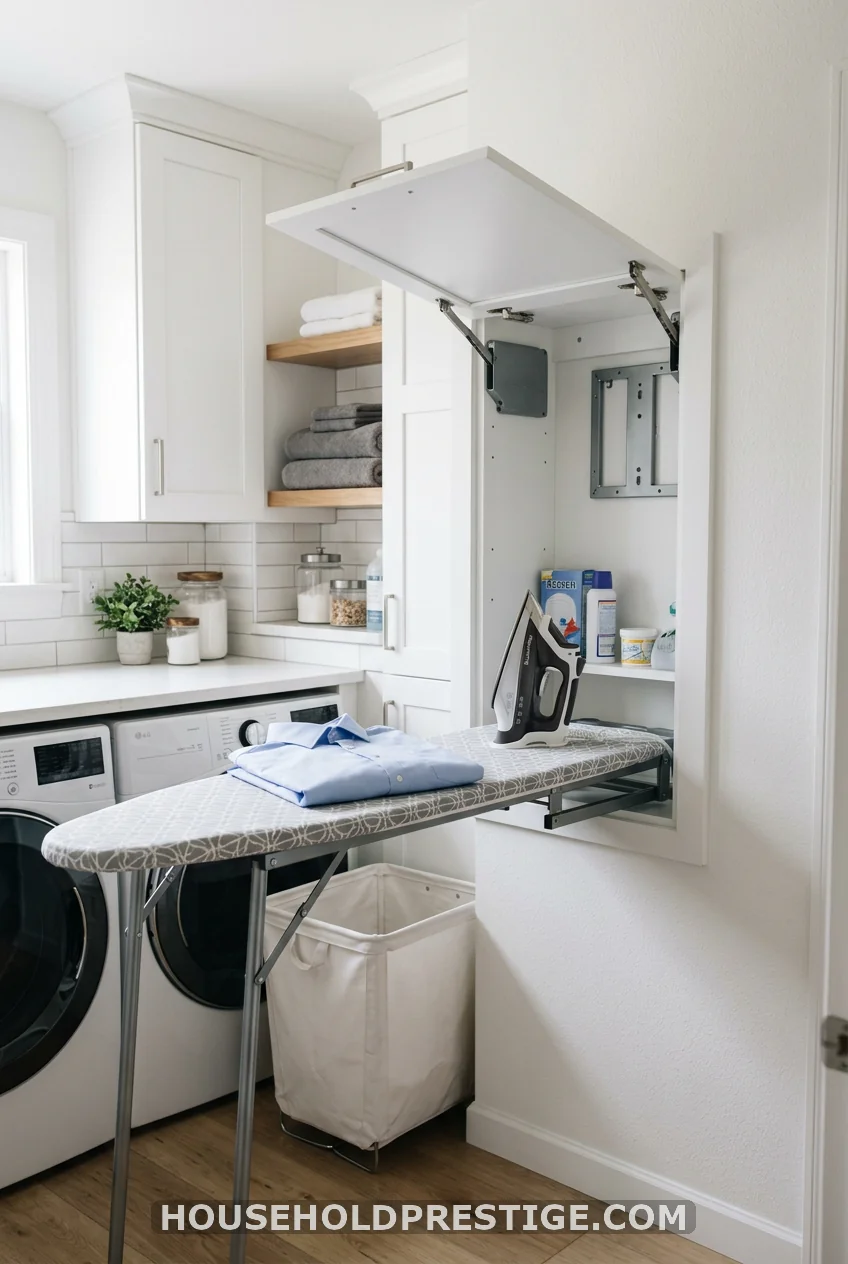
A freestanding ironing board takes up 6 square feet of floor space when standing, and another 6 square feet of awkward leaning space when you’re trying to store it. A built-in fold-down ironing board cabinet solves this completely — the board mounts inside a wall cabinet and pulls down on a pivot hinge. When you’re done, it folds back up and disappears behind a door.
Best product: The Stowaway wall-mounted ironing center from Household Essentials runs $130–$180 at most retailers. Cabinet dimensions: approximately 14″ wide x 47″ tall x 5.5″ deep. Board size: 42×14 inches — narrower than a standard board but adequate for shirts, pants, and pillowcases. Requires wall stud mounting (or a French cleat into two studs). One person with a drill can install it in about 45 minutes.
Worth knowing: The board is narrower than a standard ironing board. If you iron tailored jackets or full king-size duvet covers regularly, you may find the width limiting. For everyday shirt and trouser ironing, it’s ideal.
16. Two-Tone Cabinets: Upper and Lower in Different Colors
Painting upper and lower cabinets different colors is one of the easiest ways to make a laundry room feel designed rather than functional. The visual formula that works: lighter color on top (which keeps the ceiling zone feeling open) and a slightly deeper or warmer color on the bottom (which grounds the space and hides floor-level scuffs). Sage green lowers with warm white uppers. Navy lowers with soft off-white uppers. Warm greige on both but one in matte finish, one in satin.
17. Under-Cabinet LED Strip Lighting
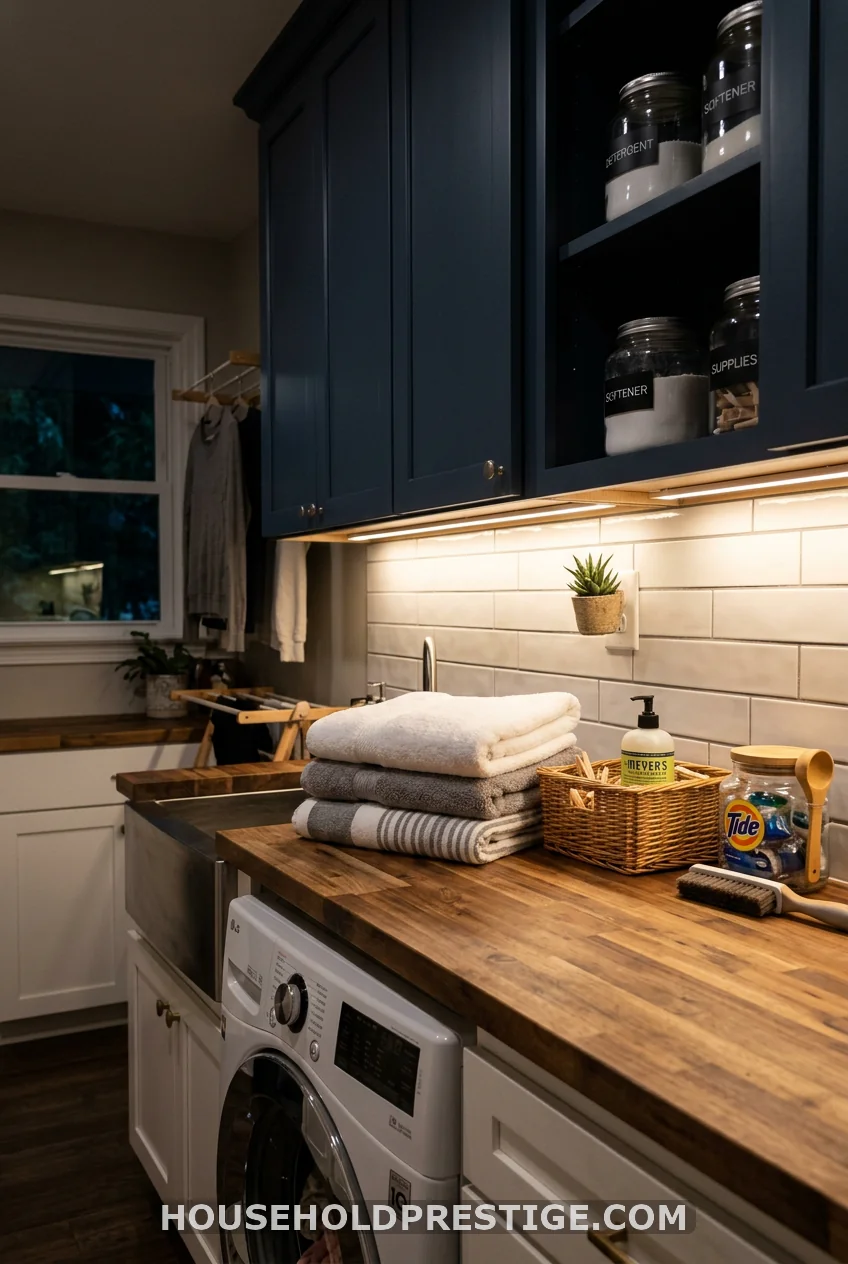
This is one of those changes that costs $25 and makes the room feel like you spent $2,500 on it. A warm LED strip (2700K, not cool white — you’re not operating a dentist’s office) mounted under upper cabinets floods the folding counter with task lighting and adds a glow that makes the entire room feel intentional. The Govee or Lepro LED strips run $18–$30 for 16 feet and can be cut to fit any cabinet length. Stick them to the underside of the cabinet, plug them in, and adjust brightness with a remote. Renters can remove them without damage.
The color temperature detail matters: 2700K is warm, yellow-ish, and feels residential. 4000K and above is cool white — fine for garages and workshops, wrong for a space you want to feel like part of your home.
18. DIY Painted Cabinets: The Renter and Budget Option
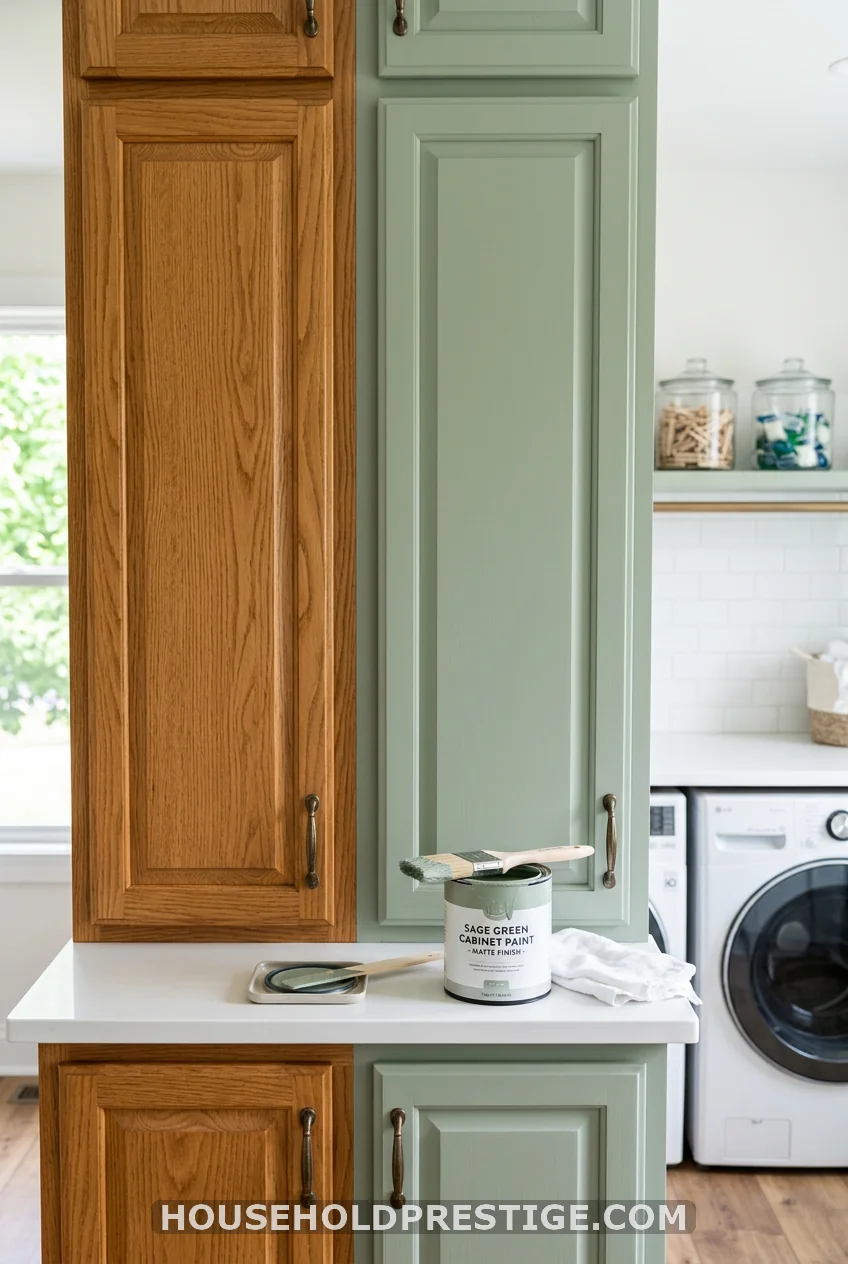
You don’t have to buy new cabinets to get a new-cabinet result. If your laundry room has existing but dated or builder-grade cabinets — the oak-finished boxes from 2003, the scratched white laminate from 2010 — a proper paint job transforms them for $60–$100 in materials.
What actually works: Cabinet paint, not wall paint. Benjamin Moore Advance ($65/quart) or Sherwin-Williams Emerald Urethane Trim Enamel ($75/quart) are the two gold standards. They dry to a hard, wipeable finish that resists moisture and cleaning products. Regular wall paint on cabinet surfaces peels within months.
The correct process: Clean with TSP substitute, scuff sand with 220-grit, prime with a bonding primer, apply two coats of cabinet enamel with a foam roller, finish edges with a small brush. Skip any step and the finish won’t hold. Take your time on the prep — 80% of a good paint job is what happens before the first coat of color goes on.
19. Cabinet Hardware: The Detail That Changes Everything
The handles and knobs you choose on laundry room cabinets do more visual work than most people expect. Brushed nickel hardware on white cabinets reads as fresh and clean. Matte black on white reads as sharp and modern. Aged brass on navy or green reads as warm and collected. The gap between a laundry room that looks “done” and one that looks like an afterthought is often just the hardware.
Sizing: Bar pulls work better than knobs on wider cabinet doors — easier to grip with a full laundry basket in your other hand. Standard bar pull lengths are 3-inch, 5-inch, or 8-inch center-to-center. Buy one to test before ordering a full set.
20. Pedestal Drawer Storage Under Front-Loaders
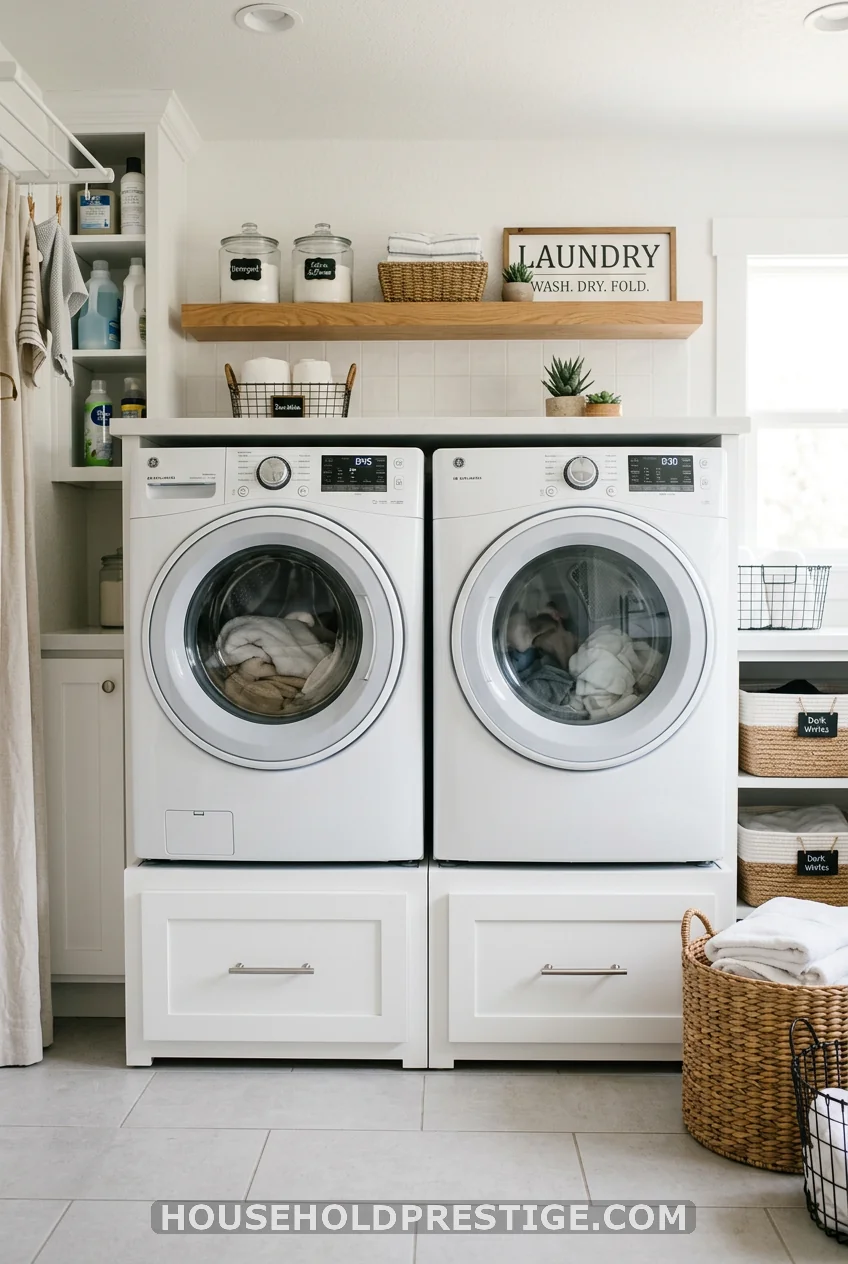
If your front-loaders sit on the floor, you’re bending at a 45-degree angle every time you transfer a load. Washer and dryer pedestals ($250–$350 per machine from LG, Samsung, or GE) raise the machines 14–16 inches and add a pull-out drawer underneath each unit — perfect for laundry bags, extra detergent, or cleaning supplies. Your back notices the height difference immediately.
DIY version: Build a platform base from 2×4 lumber and 3/4-inch plywood for $30–$50 in materials. No drawer, but same ergonomic benefit. Finish with paint or contact paper if the utility look bothers you.
21. The Cabinet That Earns Its Square Footage: Over-the-Door Storage
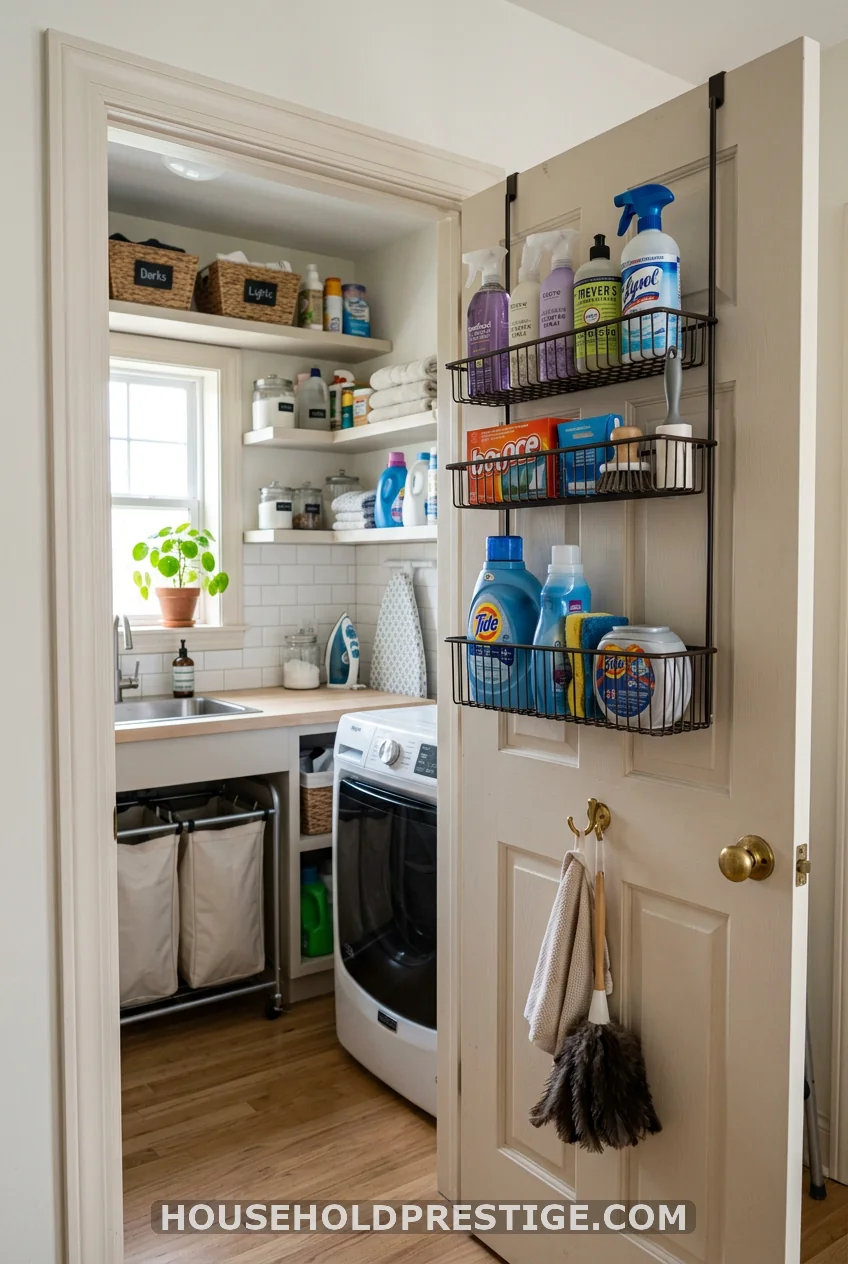
No drilling, no cabinet purchase, no commitment. An over-the-door organizer turns the back face of your laundry room door into instant shelf space. Wire models hold 15–30 lbs. The SimpleHouseware 3-tier steel organizer ($28) fits doors up to 1.75 inches thick and holds full-size spray bottles upright. This is the renter’s first move, the small-room solution, and the 15-minute fix that makes a real difference when every other wall is already taken.
The Bigger Picture
A laundry room that works isn’t about buying everything on this list. It’s about picking two or three ideas that solve your specific problems and doing them well. Most laundry rooms need the same three things: somewhere to store detergent and supplies out of the way, a surface for folding, and a place for dirty laundry that isn’t the floor. The laundry room cabinet ideas in this list cover every version of those three problems — at every budget, for every space, whether you own or rent.
Pick what fits. Measure first. And anchor your tall cabinets to the wall.
FAQ: Laundry Room Cabinet Ideas
What height should cabinets be above a washer and dryer?
The standard is 18 inches above the top of the appliance. This leaves enough clearance to open a top-loader lid fully and reach the back of front-loaders without hunching. Going below 18 inches creates a clearance problem; going much above it makes shelves impractical for everyday items.
What is the best cabinet material for a laundry room?
Plywood cabinet boxes with thermofoil or high-gloss laminate doors offer the best balance of durability and moisture resistance at a mid-range price. MDF works if every raw edge is sealed before painting, but it swells at the door bottoms in high-humidity rooms. Avoid raw particleboard in any space that sees regular moisture.
Can you install laundry room cabinets without drilling?
For light-duty storage (pods, dryer sheets, small spray bottles), yes — adhesive-mounted floating shelves and over-the-door organizers work well. For full upper or lower cabinets, you need wall screws into studs. A cabinet loaded with heavy cleaning supplies and appliances on an adhesive mount is a safety hazard, not a storage solution.
How deep should laundry room base cabinets be?
12–15 inches is the sweet spot for most laundry rooms. Standard kitchen base cabinets at 24 inches deep work well if your room is wide enough (8+ feet), but in a 5×7 or 6×8 room, 24-inch depth often kills your walkway clearance. Measure the path from the cabinet front to the farthest point you need to reach — machine door open, laundry basket in hand.
What are the best laundry room cabinet colors?
White, warm white, and soft off-white are the most popular because they reflect light and read as clean in a utilitarian space. Sage green, navy, and warm greige have grown significantly as cabinet colors for laundry rooms — they add personality without requiring the rest of the room to change. Avoid very dark colors unless your room has excellent natural light; dark cabinets in a windowless laundry closet make the space feel like a cave.